Page 2 of 3
Posted: Sun Dec 19, 2010 8:57 pm
by mdmax72
Yes it's the garage floor, l always wanted a giant chess board. If you look at the bottom right of picture you'll see a radiator too. Lucky me....
New front end fitted and bolted up, just need to alter the steering column aswell as front hubs. The Red9 comes with Vw beetle disk brake hubs, but mine has drum brake hubs with Csp disk conversion. So need to alter my hubs to fit. If you are using Vw beetle brakes then it will be a straight swap over.

Posted: Mon Jan 10, 2011 9:49 pm
by mdmax72
Been a while so though I'd update you on the latest.
Steering column needed to be shortened due to the rack and pinion. My column was 130cm long before being chopped up. Basilcally the crumple zone section needed to be removed to reduce the length.
Crumple zone

Next job, re-install steering column and connect it all up.
New column length is 100cm

The crumple zone get replaced by a universal joint. This is supplied with the Red9 front end. This is neccesary due to the new angle and position of rack.

Posted: Tue Feb 08, 2011 7:21 pm
by mdmax72
Up date
Steering finally, got some time to finish it. Here's a picture showing it all connected up to the rack pinion. Just for those interested the Rose (universal )joint is Iva compatable as it's still collapsable.
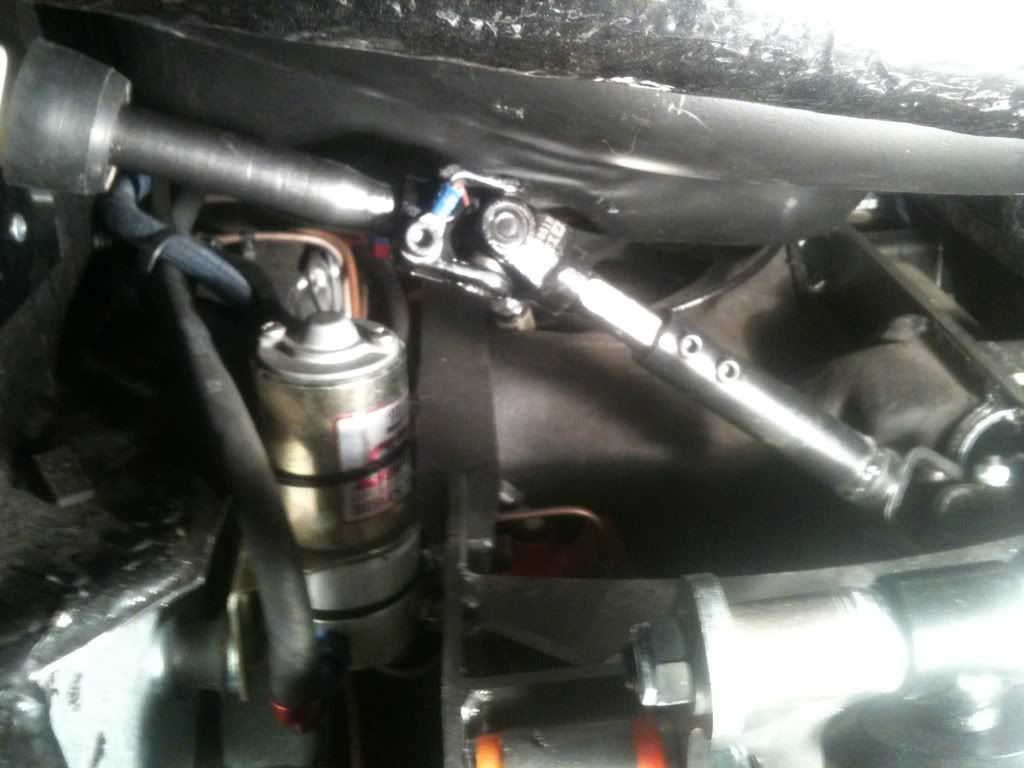
Next was to fabricate a new body mounting

This would fit on top of the front Vw beetle beam, on the Red 9 it sits alittle lower hence the need to fabricate a new one. This holds up the front nose of the car, when set right it closes or open the bonnet and door gaps. So getting it right makes a difference. Notice the rubber buffers needed.

Next up is to fit some drum skins
Posted: Wed Feb 09, 2011 5:48 pm
by mdmax72
Here's the drum skins, they needed to have 20mm cut of in my case as they completely covered the disks making them look like drums. So shaved some to let the air at the disks for cooling.

Here's the front fitted before and after


Next up wheels, sent them to the powder coaters and then can put it back on the ground, its been up on axle stands nearly 3 months now

The rear needed the same taken of. The centre hole was to small as i've got the CSP rear disks and the hub is bigger, so needs enlarging. Before and after


Posted: Wed Feb 09, 2011 6:11 pm
by ims101
Looking even better!! I love the look of the Red 9 beam I will seriously consider getting one for mine!! I just concerned that there is a lot of work to fitting it I thought it was a straight forward swap! Whip off the hubs, unbolt the old one, bolt on the new, back on with the hubs and the jobs a good en??
Posted: Wed Feb 09, 2011 7:13 pm
by mdmax72
Ian
it is more or less a bolt off and bolt on part, l just ran into problems with the front hubs not being the disk type. Only fabrication really was front body mount and the steering column, which if you do it the RED 9 way they supply a bolt on steering adapter part, me being me had to improve it. The steering column slowed me down alot as l wasnt happy with the poly bush for the bottom of the steering shaft housing, had to go one better a use a roller bearing. Things like that really is why it held me up. All my own doing really.
Like l said a good day would swap them over if you used the parts supplied.
Posted: Wed Feb 09, 2011 8:04 pm
by sladey
Also if you needed any welding doing Ian you'd be welcome to use my welder. Or let me weld stuff for you (still learning though)
Posted: Wed Feb 09, 2011 11:44 pm
by ims101
Cheers Mark, that's very kind of you. I hope your better that me at it someone once commented my welding looked like pidgin sh!t

Posted: Fri Feb 11, 2011 10:16 am
by mdmax72
Ian we all have to start somewhere

l think it was more like the welder not being set up for the application from my experience.
Posted: Fri Feb 11, 2011 10:23 am
by mdmax72
Anyway I'm cracking on whilst having a few days spare. Got the wheels back from Powder coating, really chuffed with the outcome. Here they are. Anyone spot the differance??


Posted: Fri Feb 11, 2011 11:48 am
by adam356
I did notice the 10 bolt fixing on the one wheel!!
wheels
Posted: Fri Feb 11, 2011 10:16 pm
by 356
The one pair are vw 66 bug rims or T34 Razor and the other are Porsche 356
Posted: Sat Feb 12, 2011 10:44 pm
by mdmax72
Adam there not ten bolt fixing, don't ask me why, it's just how the 356 wheels are.
356 your right on the mark they are Vw wheels, funny thing is never even noticed until l put the picture up. So will need x2 356 4.5j's wheels to put on the list. What a boo boo I've made...
Posted: Thu Feb 24, 2011 9:19 pm
by mdmax72
Update road test
finally got it back onto its boots, now just need to go and get the suspension set up at Centre Gravity.
Fired it up first time this year and started after a few turns, was impressed by that. Took her out for a spin round the block just to see if the mods are noticable. Just from reversing of the drive straight away the steering is so sharp,

Went for a 5 mile run again the front end so much softer with the coil-overs and the steering is so much lighter and responsive even without it set up yet. The main reason l changed the suspension was the front end was a hard ride, even with a few leafs taken out of the torsion tubes to lighten it and the steering always had play in it. Even with all new track rods and steering box. Really impressed so far.
The rear is also a much softer ride, defo think my exhaust is hanging a little low as it kept catching a few speed bumps which it don't normally catch. This is next on my list Exhaust. Also the suspension is lower than before and needs to be level up so need to take this into account really. Maybe the springs could do with a harder set, but will wait till the suspension is set up before l go in that direction. A bonus is that RED9 will exchange the springs for free if i'm not happy with them. Can't do any better than that.
First impression of the coil-overs is it is the quality of the ride is much better and the steering is greatly improved. Once l get it set up properly l will do a final report to see if the mods are worth the money as its to early to judge at the moment.
Here's how it sits without any adjustments, dropped straight from the jack, slightly lean's to the driver's side.


Posted: Fri Feb 25, 2011 8:29 am
by adam356
Looks good rich, i have heard that the red9 stuff was excellent hence why i planned to fit one on mine!!
Must come for a visit soon rich as i need some pointers once i start my build...very soon!!!
Cheers
Adam