Wot, not another '79 Targa resto thread

Ongoing and archived Porsche (and other marques) restoration threads from DDK members

Moderator: Bootsy

Post Reply
Phill

Re: Wot, not another '79 Targa resto thread

Post by Phill »

The Garage Bitch wrote:Honest, I didn't laugh at the mental image of your shitty ditch water rooster tail :lol: :lol: :lol:

I now need to think about whether to "oops, sorry mate. I forgot my waders" when I come on my next visit :lol:
:lol: definitely a funny visual. If you had recorded it it could have earned you £250 on YBF. Perhaps you should take the brush cutter sailing with you, save some time for automotive restoration.
Gary71
Nurse, I think I need some assistance
Posts: 10730
Joined: Wed Mar 31, 2004 1:27 pm
Location: Cheshire
Contact:

Re: Wot, not another '79 Targa resto thread

Post by Gary71 »

These ‘little’ jobs just take forever don’t they? Especially if you are modifying stuff along the way. Soon it will be a car again!
User avatar
PeterK
DDK rules my life!
Posts: 1274
Joined: Mon Sep 01, 2014 3:04 pm
Location: GU51 - Fleet, Hampshire, UK

Re: Wot, not another '79 Targa resto thread

Post by PeterK »

I fancied something quick, plus it would get rid of another box of bits, so I fitted the various lid and flap pulls. Starting with the easiest first, in went the fuel flap knob
Image

Followed by the engine lid knob and cable
Image
By the way, I haven’t tackled the slightly more complex bolting on of the latches, but watch this space …..

Finally, the froot lid knob and cable.
Image
Except that it wasn’t quite that easy. Firstly I had built up too much seam sealer under the dash and it prevented the tube behind the knob from pushing fully home. A quick chisel soon had that sorted. Next was fitting the retaining bolts – these fellas
Image
These of course, required the removal of the glove box, well the box part of it anyway. Some perseverance (and maybe a little swearing), and jobs a good’un.


Decided to tackle the door mirror wiring some more. Rebuilt a harness for the driver’s door mirror, starting with this
Image

Looking at where I could / should make joints and where I needed to leave apart until all fitted, I decided to fit the loom (it went through this hole here)
Image

When I say that it went through ‘this hole here’, ‘this hole here’ was of course already taken by the door speaker and central locking looms. So, the speaker had to come out, followed by the wiring looms, all of which then needed to be routed through the smaller hole below, back into the door and get reconnected. I do so love doing things twice :oops: .

While I was rerouting aforementioned looms, I ditched the scanky connector that come with the door poppers and added more substantial connectors.
Image

Then the mirror loom could be threaded through and connected to my home built cross car loom. I decided that the best ‘leave it until last’ connection would be the loom to the mirror cut, which I can splice just before I refit the mirrors for the final time. However, the temptation was too great not to try, so I connected the mirrors and turned the key. They went up and they went out. Unfortunately they didn’t go in or down. The clutch on my original passenger mirror was burnt out and the wires cut off. Getting ahead of myself for a moment, of the other three, (my driver’s mirror plus a pair I had been lent to scavenge a replacement for my passenger), one of the ‘pair’ would go up and out, whether I called for up / down or in / out. Nonetheless, I could make a working pair.
I of course didn’t know this at the time, so there followed a lot of wire tracing and head scratching, finally resolved when I realised that I had wired the change-over switch incorrectly. Once fixed, all was well (and that’s when I discovered which mirrors worked and the one that didn’t). We now have working mirrors (except that they still need repainting after the ‘reshaping’ needed to the passenger casing, the loom for the passenger side is attached to the mirror and all are currently sitting in a box on the bench. But they do work when connected, so that’s all fine.


While I had the wiring tools out, I decided to do a bit more on the alarm, but I’m not going to give you any clues. Well other than it, of course, involved pulling some cables back out of the sleeving I had run them in and running new wires in other sleeving that I hadn’t done before. Some of this was due to change of mind and the rest due to not thinking things through earlier in proceedings.

While I was searching for ‘important stuff’ in the loft, I decided to refit (very loosely) the front wings. I was hoping that they would be less likely to get damaged there rather than lying on the loft floor and always in the way. I hunted high and low for the pack of hardware that I purchased a year or two ago, without success. I've now purchased another set and they arrived with a replacement windscreen wiper nut, having given up searching for the lost one. Naturally, as soon as the new nut was delivered, I found the original. I also found the clay bars that I bought a while back and then ‘mis-placed’, so maybe I need to clean SWMBO’s car now. I haven’t told her that I’ve found them, so maybe I can leave it a bit longer.

While searching in the loft, I decided that the cill lines should probably go on, so they are expectantly sitting alongside the car, and the driver’s wing is now back in the loft.

'79 Targa - restoration now mainly complete & being driven
http://www.ddk-online.com/phpBB2/viewto ... 28&t=59756

and now CIS to EFI
viewtopic.php?t=72921
User avatar
PeterK
DDK rules my life!
Posts: 1274
Joined: Mon Sep 01, 2014 3:04 pm
Location: GU51 - Fleet, Hampshire, UK

Re: Wot, not another '79 Targa resto thread

Post by PeterK »

Spoiling you now with another update - feast or famine here. Anyway, It was raining today, so I was allowed a wet playtime in the garage. Oil lines today.

Firstly I loosely bolted them together and raised them into place on a jack (the only time I hope a jack goes anywhere near them).
Image

They’re replacement pipes, and I think they’re off a slightly later 911, maybe a 3.2. Anyway, they’re subtly different at the top of the inner wing.
Image
Mine were originally retained with a bolt placed at the base of one of the stiffening ribs. Googling a bit, I see that later ones have a clamp bolted to the top somewhere, so I fitted a rivnut and called it good.

At the front, I had rebuilt the inner wings, so no bolting locations. Checking for wheel clearance, I pulled the bottom of the oil cooler as far forward as I could, and drilly, drilly, pully, pully a rivnut and a through bolt secure the cooler.
Image


I have collected a few type of oil line retainers, but the saddle type seemed least wrong. I didn’t have a 6.3x32 long self tap bolts, so instead I used an M6 captive nut and cut some long M6 bolts down to suit. I only have 2 oil pipe protector sleeves on the pipes, and so need a further 6. However, at 5.33 each, plus VAT, I’ve ordered £5 worth of 22mm ID rubber hose and will make my own. I do need to order a support bracket for the lines behind the rear wheel though.
I’ve bolted the saddle brackets into place, pending the arrival of the rubber hose (soon to be known as pipe protector sleeves).

Image
The side view is not too bad, but the front section does look rather high. I’m sure it’s OK from looking at other pictures, but maybe the front wing needs a trial fit to satisfy my uncertainty.
'79 Targa - restoration now mainly complete & being driven
http://www.ddk-online.com/phpBB2/viewto ... 28&t=59756

and now CIS to EFI
viewtopic.php?t=72921
User avatar
PeterK
DDK rules my life!
Posts: 1274
Joined: Mon Sep 01, 2014 3:04 pm
Location: GU51 - Fleet, Hampshire, UK

Re: Wot, not another '79 Targa resto thread

Post by PeterK »

Well, some good news and then some not so good news that gets better.

First the wing fits fine
Image

The less good news was that I couldn’t find several bits, such as the nuts and washers that fix the rear winglet bits (the longer struts that mount through the rear chassis legs), and the washers that go on the end of the bumper shox. Three lots of searching and I found them though, so a quick coat of paint on the shox washers
Image
… and they’re now ready to go on. I’m not fitting them just yet, as they jut out and I kept tripping over them, so they’re now in a box ready for when the bumper goes on.


Continuing with the lots of little jobs, I fixed the horns. The horn push didn’t sound the horns, so a little fault tracing was required. Firstly I realised that the ‘ring’ that provides the earth connection to the steering wheel was actually part of the cowling, so I found the two parts and refitted them. The next issue with them not ‘parping’, was that they were still in the loft :oops: . They were more likely to work when wired, so I tried that. Still no sound, so out with the wiring diagram – nothing special here, so a continuity check from the horn push to the relay was good. Unfortunately the relay was less good. Swapped it out and full ‘parping’ was enjoyed.
Next was the various lid latches, which were quite disgustingly dirty. I filled the ultrasonic cleaner with water, added the last of my degreaser to small plastic bags, each with a latch in them, and dropped the bags into the U/S bath.
Image

This saves messing the full bath of water and uses a lot less degreaser. 30 minutes later, and they’re done
Image


I need to make a start on the engine, but full of procrastination, I tackled the gearshift instead. I cleaned up all the residual mess from shot blasting, changed the bushes and added a Seine gate kit
Image
Image

Need to try it in anger, but if all good, I can then weld on the new gate clip thingy and remove the clamp. But for now, that’s good and ready to refit to the car.
'79 Targa - restoration now mainly complete & being driven
http://www.ddk-online.com/phpBB2/viewto ... 28&t=59756

and now CIS to EFI
viewtopic.php?t=72921
911hillclimber
Nurse, I think I need some assistance
Posts: 20690
Joined: Mon Mar 10, 2008 6:26 pm
Location: West Midlands

Re: Wot, not another '79 Targa resto thread

Post by 911hillclimber »

I had one of those, but found it ok, but the Rennshift much more precise, but both better than stock!
73T 911 Coupe, road/hillclimber 3.2L
Lola t 492 / 3.2 hillclimb racer
Boxster 987 Gen II 2.9
Phill

Re: Wot, not another '79 Targa resto thread

Post by Phill »

Good stuff Peter. Interesting tip on the plastic bags in the UsC.
User avatar
PeterK
DDK rules my life!
Posts: 1274
Joined: Mon Sep 01, 2014 3:04 pm
Location: GU51 - Fleet, Hampshire, UK

Re: Wot, not another '79 Targa resto thread

Post by PeterK »

So, with further procrastination regarding making a start on the engine, I fitted the gearshift
Image
Yes, I know the wiring needs a tidy. It’s almost complete, then I can wrap the loom and make it vanish.

So, without further ado, in my own version of mystery parts – what is this and where does it go ?
Image


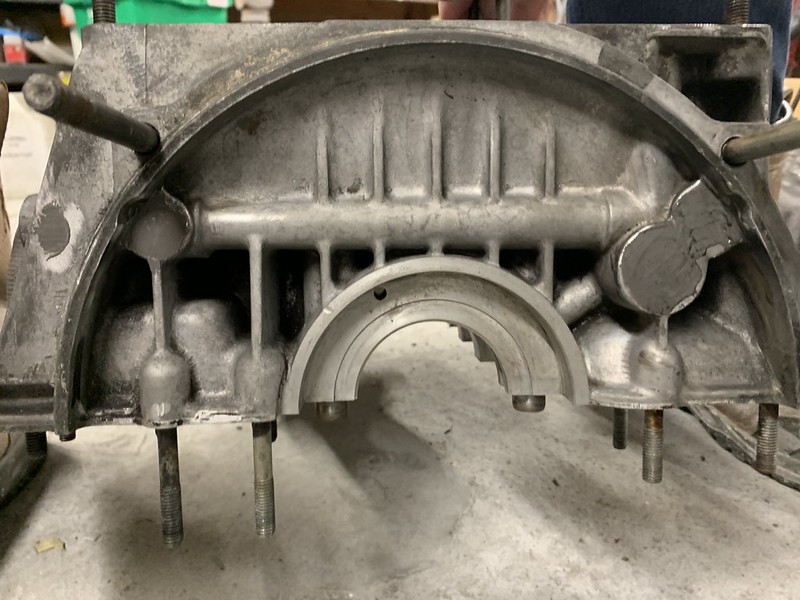
After much faffing around, I finally got the gallery plugs out.
Image
I tried drilling a hole and screwing in a bolt to extract it, but the aluminium is not thick enough, and the screws/bolts just pulled out. In the end, having tried a multitude of different (but failed) attempts to extract the bungs, I drilled out most of the centres, knocked them in slightly and they deformed enough to be dragged out.

So, by the end of playtime, we had the RHS crankcase with clean 2 completed (clean 1 was a rinse in a degrease tank at the machine shop)
Image

Today, after my first tip run (with trailer) since lockdown started, and with SWMBO out, I headed into the mancave again. First job was to remove the RHS pressure relief valve.
Image

My oh my, that took some belting with an impact screwdriver to get out. Then, joy of joys, the LHS. Starting with this
Image

I set to with (many) razor blades (they don’t last long before they start to mark the aluminium surface), followed by some grey Scotchbrite and degreaser and then plenty of brake cleaner and rags.

Then I removed the PRV from this side
Image

And finally, clean 2 complete
Image


My final (just before reassembly) clean will be more lint free rags and copious amounts of brake cleaner, but what I really need now, is someone recently divorced who kept the house and wouldn’t object to me putting my crankcase halves in their dishwasher. Failing that, any suggestions for a good clean, other than the jet wash ?
'79 Targa - restoration now mainly complete & being driven
http://www.ddk-online.com/phpBB2/viewto ... 28&t=59756

and now CIS to EFI
viewtopic.php?t=72921
rhd racer
Me and DDK sitting in a tree! KISSING
Posts: 2545
Joined: Wed Jun 23, 2004 9:47 pm
Location: Nottinghamshire

Re: Wot, not another '79 Targa resto thread

Post by rhd racer »

I would suggest a garage doing regular rebuild work Peter, and see if you can rent their parts washer for an hour. You could try Grant at Beetlelink near you;

https://www.beetlelink.co.uk/

I haven’t seen him for years, but he is a good guy and worked on my Beetle doing bits and bobs I couldn’t do nearly 30 years ago. He looks after my friend’s Ghia now, and still does a good job. No idea if they have one, but worth a call...

HTH. Good progress, keep it up

Cheers
Wayne
93 964 C2
99 Boxster 2.5 > 3.4 hill climber

71 914/6 3.0 - gone

'You see Paul, hill climbing is like making love to a beautiful woman. You get your motor running, check your fluids, hang on tight and WHOA..30 seconds later it's all over!' Swiss Tony
User avatar
PeterK
DDK rules my life!
Posts: 1274
Joined: Mon Sep 01, 2014 3:04 pm
Location: GU51 - Fleet, Hampshire, UK

Re: Wot, not another '79 Targa resto thread

Post by PeterK »

Thanks Wayne. I’ll try to call hm in the morning


Sent from my iPhone using Tapatalk
'79 Targa - restoration now mainly complete & being driven
http://www.ddk-online.com/phpBB2/viewto ... 28&t=59756

and now CIS to EFI
viewtopic.php?t=72921
User avatar
PeterK
DDK rules my life!
Posts: 1274
Joined: Mon Sep 01, 2014 3:04 pm
Location: GU51 - Fleet, Hampshire, UK

Re: Wot, not another '79 Targa resto thread

Post by PeterK »

No joy with mega-dishwashing machines, so lots of brake cleaner and my rifle bore sticks will have to do.

I suppose cleaning can be considered as starting the engine rebuild, but certainly fitting oil gallery plugs and sealing stuff up must be starting :bounce: .
Image

The block will need another clean though after I used a rotary wire brush to clean the surfaces before adding JB Weld (not that the factory appeared to have used it anywhere other than the back of the timing case) :( .

My ‘accurate to 0.1g’ kitchen scales have arrived, so weighing rod nuts & bolts next on the list.
'79 Targa - restoration now mainly complete & being driven
http://www.ddk-online.com/phpBB2/viewto ... 28&t=59756

and now CIS to EFI
viewtopic.php?t=72921
User avatar
PeterK
DDK rules my life!
Posts: 1274
Joined: Mon Sep 01, 2014 3:04 pm
Location: GU51 - Fleet, Hampshire, UK

Re: Wot, not another '79 Targa resto thread

Post by PeterK »

Bit of a damp and dismal day, so took a quick break from preparing Purchase Orders and snuck in to the garage.

First job was to make more mess – running a tap down the threads of the head stud holes in the crankcases to remove any residual Loctite, etc..
Image

Then nuts & bolts time.
Image

Originally, after balancing, all the rods were the same weight.
I weighted each nut and each bolt, noted their weights on the paper, then weighed and sorted the new nuts and bolts. After much comparing and juggling, I ended up just needing to shave a smidgen off the ends of the bolts of 2 rods and now the rods are now all spot on the same weight (well, as far as my 0.1g kitchen scales can differentiate, anyway). Jubbly.

Then, just for a change, more cleaning
Image.

The rod bolts need tapping into the rods to have enough thread showing to fit the nuts on, and as they will all need cleaning again, I just poked them through the caps and added the nuts. That way the nuts and bolts stay with the correct 'hole' and as the rods and caps are all numbered (differently thankfully), there is no drama if someone tidies them up while I'm not looking (not much chance of that though).


The crankshaft is getting lonely
Image

But other than a further clean for it and the rods, I’m running out of excuses not to re-introduce them.

Time was pressing, so as light entertainment, I tried my new terminal extractors
Image
I had a nice pair of terminal extractors, but of course, they didn’t have the right sized round extractor. These new ones are pretty cheap (£5 or so from fleabay), but they did the trick and I extracted the pins from the mirror plugs.

I could then repair the cut loom (sorry about the lack of lightness – the flash liked the white of the car door)
Image
and thread the terminal ends out of the door.

Image
It does look pretty much the same as when I started, but instead of needing to join and solder wires with only a couple of inches hanging out of the door, I had the luxury of plenty of room and wire and no risk of dropping solder on my new paintwork. The loom hanging out of the door now has all of the proper terminals and is long enough to thread through the mirror and I just need to plug the ends back into the round terminal block. I did look to do the near side, but the door won’t open enough and I couldn’t be 4r$ed to take the wing off this evening, so a job for another day.
'79 Targa - restoration now mainly complete & being driven
http://www.ddk-online.com/phpBB2/viewto ... 28&t=59756

and now CIS to EFI
viewtopic.php?t=72921
User avatar
PeterK
DDK rules my life!
Posts: 1274
Joined: Mon Sep 01, 2014 3:04 pm
Location: GU51 - Fleet, Hampshire, UK

Re: Wot, not another '79 Targa resto thread

Post by PeterK »

No more sailing booked until the middle of November, it’s raining so SWMBO isn’t making me go for a walk, I’ve spent a morning doing Purchase Order planning, so what do I do now ………

Let’s start with more cleaning, just for a change
Image
Although maybe the assembly lube, opened bearing set and tools are a bit of a clue as to what is coming next.

Add a few bearings
Image

Add a few rods to the big sticky up piece
Image

Add the rest of the rods, torque to suit, turn nuts a further 90’ et voila
Image

…. We have something ready for adding to something else.


Found this big lump lying on the floor, and it seemed to fit quite nicely on here
Image

Needs cleaning again, of course. But before that, let’s clean the old sealant off these
Image

… this hole isn’t in Wayne’s build yourself a 911 engine book …
Image

But let’s JB Weld it along with the other bits of the timing cases that need resealing
Image

I’m such a tease :lol: , but that’s as far as I got today, so to be continued ……
'79 Targa - restoration now mainly complete & being driven
http://www.ddk-online.com/phpBB2/viewto ... 28&t=59756

and now CIS to EFI
viewtopic.php?t=72921
User avatar
PeterK
DDK rules my life!
Posts: 1274
Joined: Mon Sep 01, 2014 3:04 pm
Location: GU51 - Fleet, Hampshire, UK

Re: Wot, not another '79 Targa resto thread

Post by PeterK »

Well, that progress didn’t last long ! It’s definitely not deliberately engineered jeopardy, sh1t really does happen, although in the overall scheme of things, maybe more like a good f4rt, rather than actual sh1t happened.

So, to the start of the afternoon - back into the garage and more cleaning, and counting all the various bits, seals and bolts. All parts present and correct (even if I’m not sure where a few of the seals go just yet, but I’m sure all will become clearer in due course). Counted out all my new Nyloc full height nuts, plain nuts, and the new washers from my gasket set - lovely jubbly. Some more cleaning, and maybe I have time to ‘chuck’ the crankshaft in.

First step, check the oil pump, intermediate shaft, etc. All good. Clean chains, add to the intermediate shaft so that I don’t close up the crankcase without fitting them, lubricate and place on the bench.

Remove o-ring and seal from No.8 bearing, take to the crankcase and lay in. The plan is to locate No.8 on the dowel and mark the bearing so that I can be sure that it is in the correct orientation. Wouldn’t be the first person to locate the dowel into the oil feed hole rather than the dowel hole.


And this is where it went all pete tong. No bl00dy dowel pin. Not in the crankcase, not in my bag of bits and not on the floor. :( So, hopefully my delivery of Porky parts has not been despatched. A replacement dowel is about a mahoosive 75p plus VAT, so if I can add it to my order all is well. If not, paying a shed load of postage is in my immediate future.

So, ended the day here
Image
'79 Targa - restoration now mainly complete & being driven
http://www.ddk-online.com/phpBB2/viewto ... 28&t=59756

and now CIS to EFI
viewtopic.php?t=72921
User avatar
PeterK
DDK rules my life!
Posts: 1274
Joined: Mon Sep 01, 2014 3:04 pm
Location: GU51 - Fleet, Hampshire, UK

Re: Wot, not another '79 Targa resto thread

Post by PeterK »

Well the good news is that my dowel for the No.8 bearing is here. The less good news …….

I’m using Wayne's engine book & the Bentley manual as my guiding lights during the engine rebuild. Wayne’s book advocates putting Loctite 574 on the main bearing webs, whereas Nick (in his Redtek videos) doesn’t use it there. While searching, my friend Google then dropped a bombshell.
Based on Wayne & Bentley, I have torqued my new rod bolts to 20Nm, then turned them through a further 90'. Now while looking for that sealant info, I read that that 20Nm+90' is wrong (could result in a torque maybe as high as 75Nm, and therefore too close to the yield point of the 10mm bolts) and I should have just used 50Nm.
A new set of nuts & bolts from Porsche is just over £325 (ouch).

So my options appear to be:
1. just carry on with my rebuild - many people will have used the 20Nm + 90', so it can't be that bad (can it ?), the 75Nm is just scare mongering.
2. pay Porsche £325 and suck it up
3. buy a cheaper set of bolts from one of the well know vendors (about £125, but provenance unclear)
4. buy ARP bolts & nuts (no idea on price, but would need to buy / make / borrow a stretch gauge)
5. something else.

Rebuild on stop (again) while I ponder. If I’m buying more bolts, then I need to order Monday at the earliest, so please discuss my dilemma.
'79 Targa - restoration now mainly complete & being driven
http://www.ddk-online.com/phpBB2/viewto ... 28&t=59756

and now CIS to EFI
viewtopic.php?t=72921
Post Reply