

E Type 888330
Moderator: Bootsy
-
sladey
- Nurse, I think I need some assistance
- Posts: 8817
- Joined: Sat Apr 23, 2005 9:08 pm
- Location: Nottingham, UK
Re: E Type 888330
I saw this yesterday on the phone and coudn’t Understand the bit around the mouth. I thought Barry was bridging the gap with a new piece. Just managed to look at it afresh on the iPad and it’s brilliant - to get that perfect curve into top and bottom by splitting one part - genius and ingenious
The simple things you see are all complicated
I look pretty young but I'm just backdated yeah
I look pretty young but I'm just backdated yeah
-
911hillclimber
- Nurse, I think I need some assistance
- Posts: 19025
- Joined: Mon Mar 10, 2008 6:26 pm
- Location: West Midlands
Re: E Type 888330
Yes, and with returned edges I think top and bottom.
Magic.
Magic.
73T 911 Coupe, road/hillclimber 3.2L
Lola t 492 / 3.2 hillclimb racer
Boxster 987 Gen II 2.9
Lola t 492 / 3.2 hillclimb racer
Boxster 987 Gen II 2.9
Re: E Type 888330
Yeah. It’s alright. ....
1971 2.2 S Targa viewtopic.php?f=28&t=37364
1978 3.0 SC Coupe
1970 VW Type 2 viewtopic.php?f=43&t=62339&p
1978 3.0 SC Coupe
1970 VW Type 2 viewtopic.php?f=43&t=62339&p
-
Jonny Hart

- Put a fork in me, I'm done!
- Posts: 1551
- Joined: Mon Feb 01, 2010 2:28 pm
Re: E Type 888330
Saw the car at the paint shop last week sitting next to my SC. Looks great! Don’t worry, no spoiler pics from me!
-
jtparr
- DDK 1st, 2nd and 3rd for me!
- Posts: 2248
- Joined: Mon May 24, 2004 10:54 pm
- Location: london/surrey
Re: E Type 888330
so....to paint....
Steve at DC Coachworks was my preferred choice for 2 reasons; being local to Barry the two of them had collaborated on many a restoration project ibn the past....including a number of cars from within this parish, so any hiccups and additional tweaks would be simple to arrange....and Steve painted my 911....which after 13 years on the road shows no signs of deterioration
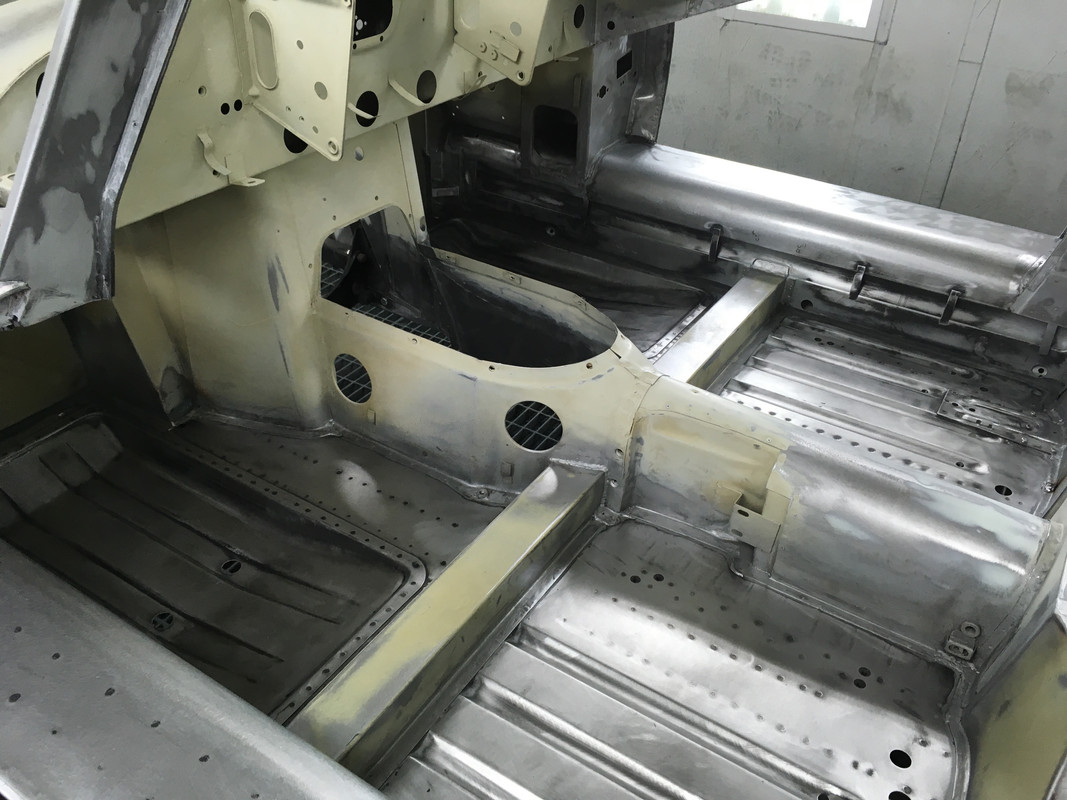
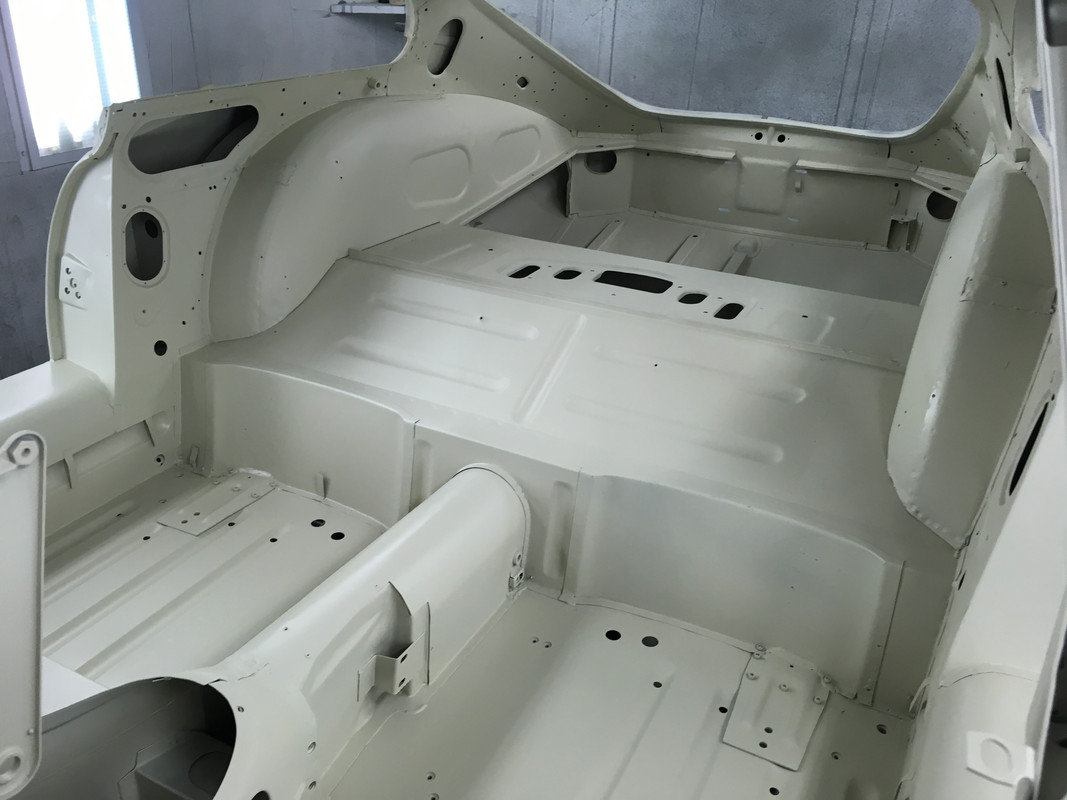
first order of the proceedings was to clean of all the old black primer from the replacement angels and clean back all of the bare exposed metalwork remaining on the inside and underside of the car, and blend in the epoxy primer I had applied almost 2 years ago
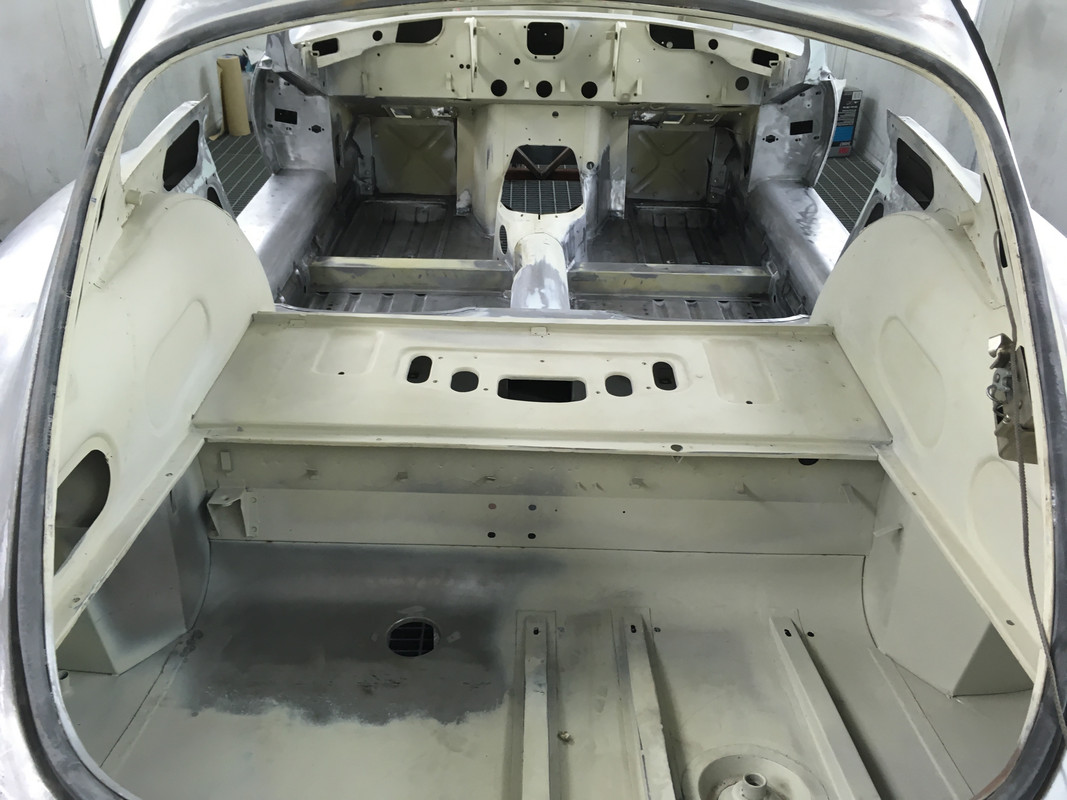
at least this way all of the remaining bare metalwork was to be limited to the outer panels, which were the ones which would receive the greatest amount of attention on the ensuing months


this wasn't to say that filler wasn't needed for a few tidying moments....all in the interests of a professional job
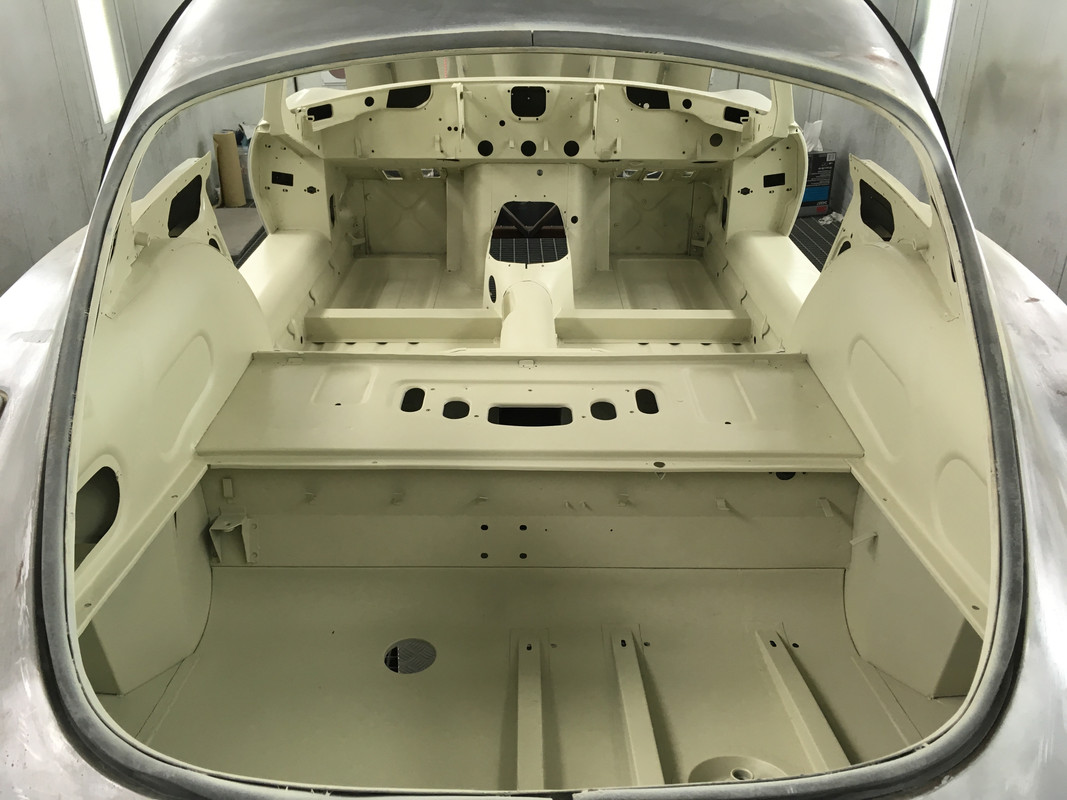
even in the inner faces of the wheel arches.....
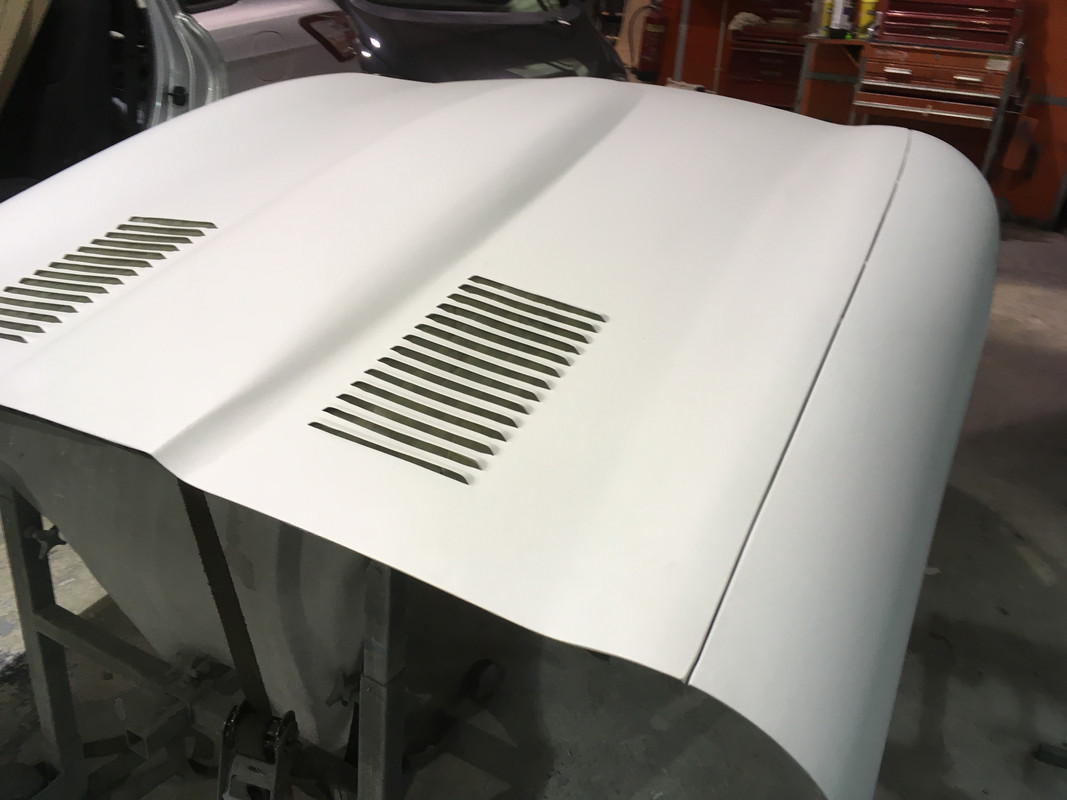
so lovely to begin to see the car emerging as a single colour finally....


thanks for looking
Jp
Steve at DC Coachworks was my preferred choice for 2 reasons; being local to Barry the two of them had collaborated on many a restoration project ibn the past....including a number of cars from within this parish, so any hiccups and additional tweaks would be simple to arrange....and Steve painted my 911....which after 13 years on the road shows no signs of deterioration
first order of the proceedings was to clean of all the old black primer from the replacement angels and clean back all of the bare exposed metalwork remaining on the inside and underside of the car, and blend in the epoxy primer I had applied almost 2 years ago
at least this way all of the remaining bare metalwork was to be limited to the outer panels, which were the ones which would receive the greatest amount of attention on the ensuing months
this wasn't to say that filler wasn't needed for a few tidying moments....all in the interests of a professional job
even in the inner faces of the wheel arches.....
so lovely to begin to see the car emerging as a single colour finally....
thanks for looking
Jp
1974 2.7 Carrera
(full restoration. now as an RS Touring)
1963 3.8 E Type
( 11 years in the making…………………….)
1952. XK120…the next one ……….……..)
(full restoration. now as an RS Touring)
1963 3.8 E Type
( 11 years in the making…………………….)
1952. XK120…the next one ……….……..)
-
911hillclimber
- Nurse, I think I need some assistance
- Posts: 19025
- Joined: Mon Mar 10, 2008 6:26 pm
- Location: West Midlands
Re: E Type 888330
Just fabulous, lots of details please as it progresses. 
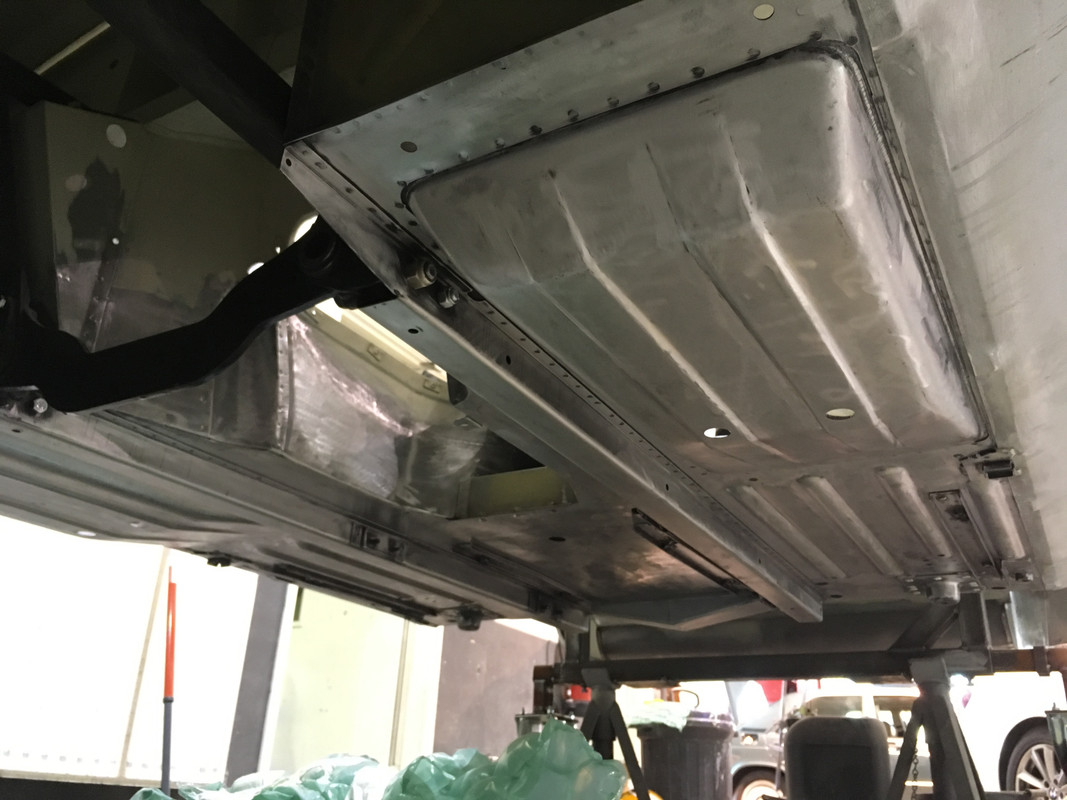
Even the underside of an E Type looks great from any angle...
Graham.
Even the underside of an E Type looks great from any angle...
Graham.
73T 911 Coupe, road/hillclimber 3.2L
Lola t 492 / 3.2 hillclimb racer
Boxster 987 Gen II 2.9
Lola t 492 / 3.2 hillclimb racer
Boxster 987 Gen II 2.9
-
defianty
- Put a fork in me, I'm done!
- Posts: 1717
- Joined: Sat Aug 05, 2006 7:02 pm
- Location: Rochford, Essex
Re: E Type 888330
Top drawer Jp. I think the favourite part of my build so far was seeing it in a single colour again. Everything started to become one again.
-
jtparr
- DDK 1st, 2nd and 3rd for me!
- Posts: 2248
- Joined: Mon May 24, 2004 10:54 pm
- Location: london/surrey
Re: E Type 888330
Patience is definitely a virtue during the painting process, and in truth there is no point in it being rushed
Steve has always wanted to leave the car for days or weeks after application of filler or build up in primers to monitor any possible sinkage and reactions....and given my 911 has shown absolutely no signs of deterioration in the quality of the painted surface after some 13 years I am more than happy to take his advice
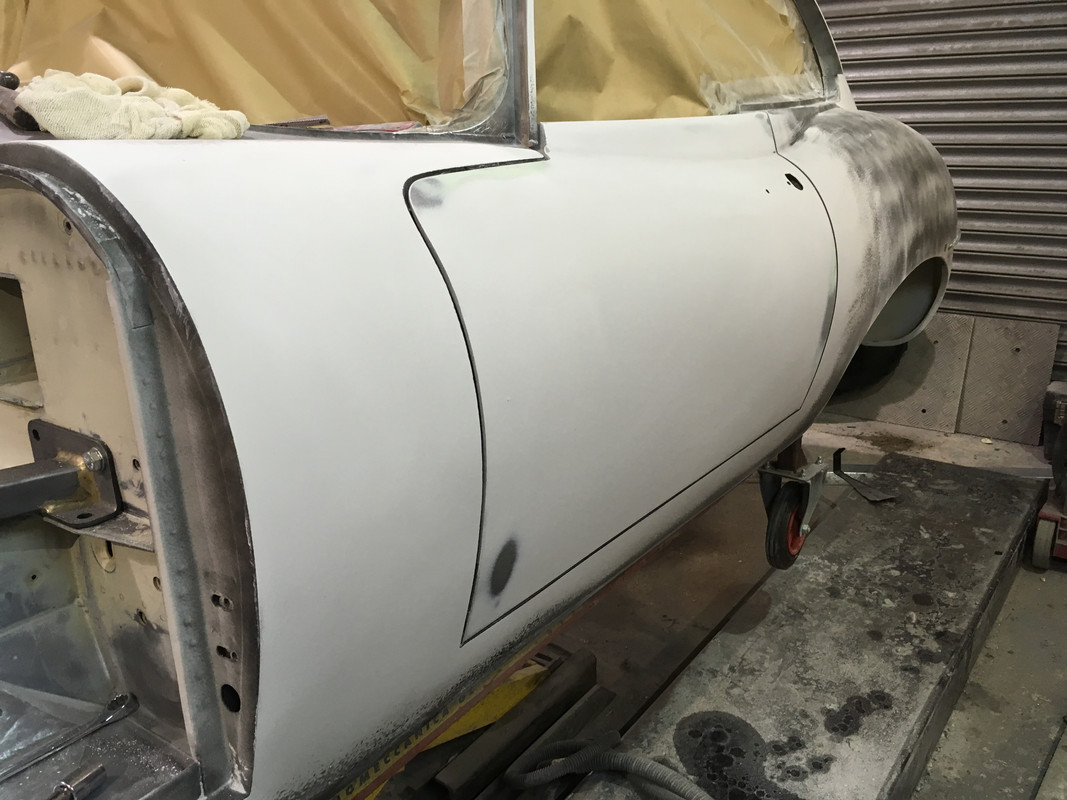
once the interior was coated attention turned to the outer shell, and smoothing out the last millimetres of alignment between fixed panels, doors, hatch, bonnet and external fixtures...with all panels in place and held other catches filler was applied across panels and then joints re-scribed


Ask anyone restoring a car and they will always advocate restoration of original parts if at all possible as the build quality of reproduction items is not so good
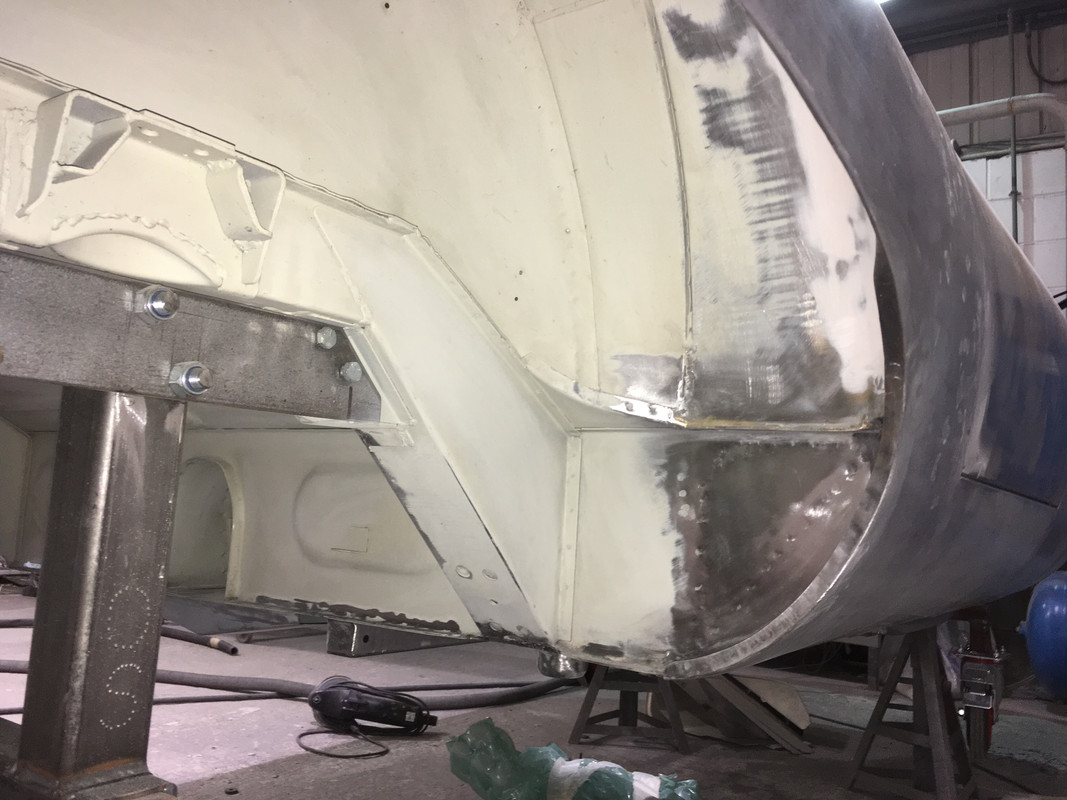
The rear light housings for series 1 cars are such an instance, and my original were too badly pitted and a replacement second hand set was bought.....however to get that last final shaping of the rear arches required hours of trial and error and then blending those new shapes in to the whole arch


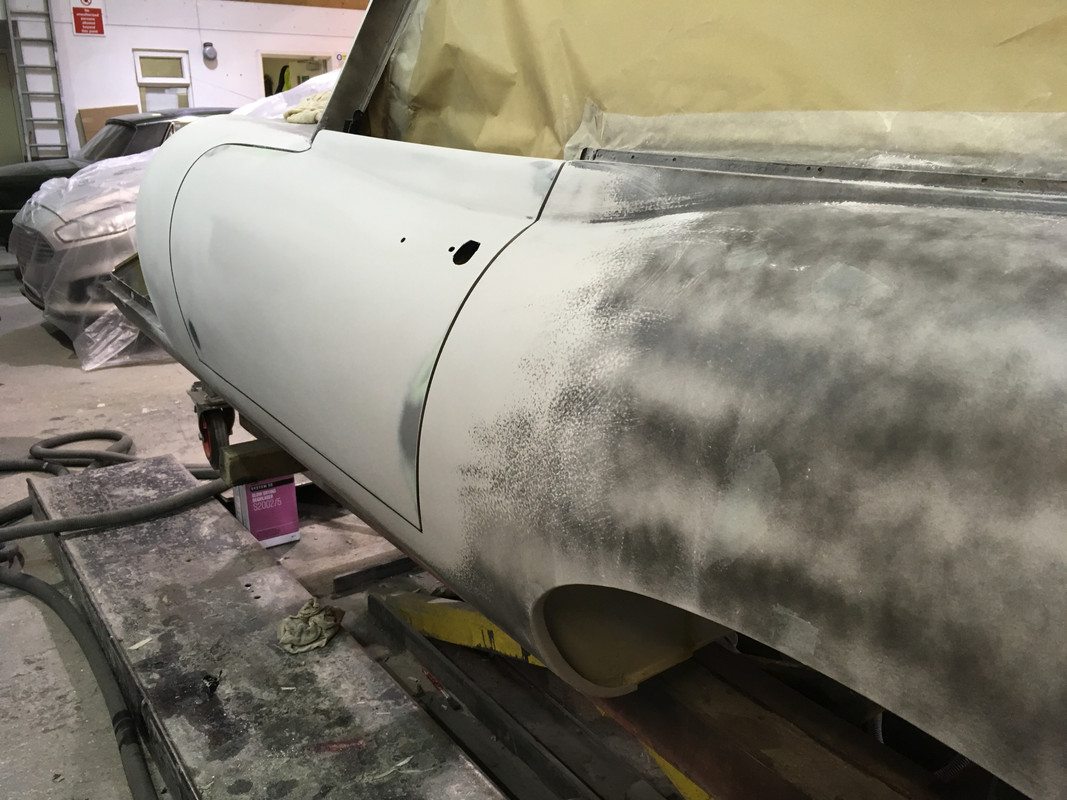
and to ensure the concept of the perfect oval mouth was achieved Steve and Stuart spent hours on those flowing curves

It is vital to get the body to appear as a single for with constant reflections....especially on dark colours....so block sanding with doors inn and bonnet on are essential....


and checking headlamp units and front indicators .... small adjustments being easily possible on the chrome lamp surrounds as being brass they are quite malleable


and a final amount of attention to the bumpers front and rear....for a particular modification


to ease production tolerances there are stories of backing cars into walls to "persuade" bodywork to fit bumpers....and ultimately there was always the use of gaskets to mask the joint
in my case I wanted perfection in fitting and no gaskets....just a clean open joint between the chrome and the paint, so bumpers and bodywork have both been shaped and ground to match one another
I have never seen anyone do this....which is perhaps understandable...but if you're going to do anything in life....why not do it properly....?
thanks for looking
Jp
Steve has always wanted to leave the car for days or weeks after application of filler or build up in primers to monitor any possible sinkage and reactions....and given my 911 has shown absolutely no signs of deterioration in the quality of the painted surface after some 13 years I am more than happy to take his advice
once the interior was coated attention turned to the outer shell, and smoothing out the last millimetres of alignment between fixed panels, doors, hatch, bonnet and external fixtures...with all panels in place and held other catches filler was applied across panels and then joints re-scribed
Ask anyone restoring a car and they will always advocate restoration of original parts if at all possible as the build quality of reproduction items is not so good
The rear light housings for series 1 cars are such an instance, and my original were too badly pitted and a replacement second hand set was bought.....however to get that last final shaping of the rear arches required hours of trial and error and then blending those new shapes in to the whole arch
and to ensure the concept of the perfect oval mouth was achieved Steve and Stuart spent hours on those flowing curves
It is vital to get the body to appear as a single for with constant reflections....especially on dark colours....so block sanding with doors inn and bonnet on are essential....
and checking headlamp units and front indicators .... small adjustments being easily possible on the chrome lamp surrounds as being brass they are quite malleable
and a final amount of attention to the bumpers front and rear....for a particular modification
to ease production tolerances there are stories of backing cars into walls to "persuade" bodywork to fit bumpers....and ultimately there was always the use of gaskets to mask the joint
in my case I wanted perfection in fitting and no gaskets....just a clean open joint between the chrome and the paint, so bumpers and bodywork have both been shaped and ground to match one another
I have never seen anyone do this....which is perhaps understandable...but if you're going to do anything in life....why not do it properly....?
thanks for looking
Jp
1974 2.7 Carrera
(full restoration. now as an RS Touring)
1963 3.8 E Type
( 11 years in the making…………………….)
1952. XK120…the next one ……….……..)
(full restoration. now as an RS Touring)
1963 3.8 E Type
( 11 years in the making…………………….)
1952. XK120…the next one ……….……..)
-
inaglasshouse

- DDK 1st, 2nd and 3rd for me!
- Posts: 2427
- Joined: Fri Mar 28, 2014 9:35 pm
- Location: Surrey, UK
Re: E Type 888330
Great to see Steve at work on the E. Can't wait to see how that sculpted shape turns out.
And, since I also took Steve's advice on this, happy to hear:
And, since I also took Steve's advice on this, happy to hear:
Cheers, Richard.jtparr wrote:Steve has always wanted to leave the car for days or weeks after application of filler or build up in primers to monitor any possible sinkage and reactions....and given my 911 has shown absolutely no signs of deterioration in the quality of the painted surface after some 13 years I am more than happy to take his advice
-
Gary71
- Nurse, I think I need some assistance
- Posts: 10323
- Joined: Wed Mar 31, 2004 1:27 pm
- Location: Cheshire
- Contact:
Re: E Type 888330
Fantastic stuff Jonathon. Long board sanding the whole car, that’s commitment to the cause!

Re: E Type 888330
Wow .. really starting to look amazing
James
1973 911 2.4S
1993 964 C2
2010 987 Spyder
1973 MGB Roadster
Its not how fast you go, but how you go fast
1973 911 2.4S
1993 964 C2
2010 987 Spyder
1973 MGB Roadster
Its not how fast you go, but how you go fast
-
964RS
- Nurse, I think I need some assistance
- Posts: 6495
- Joined: Sun Sep 02, 2007 9:53 pm
- Location: Midlands
- Contact:
Re: E Type 888330
Looks great Jonathan. I’m sure the cost will be justified by the finished product! 
----------------------------------------------------
Jason
https://www.SweepingHand.co.uk
Rolex & Omega Watch Purchases & Sales

Jason
https://www.SweepingHand.co.uk
Rolex & Omega Watch Purchases & Sales

Re: E Type 888330
JP - that looks amazing.... going to be so cool when it's done, but this stage is fascinating to watch and see emerge too. Great team you've assembled around you for this, with Barry on the shell and these guys on paint, it's going to be world class is this....
1971 2.2 S Targa viewtopic.php?f=28&t=37364
1978 3.0 SC Coupe
1970 VW Type 2 viewtopic.php?f=43&t=62339&p
1978 3.0 SC Coupe
1970 VW Type 2 viewtopic.php?f=43&t=62339&p
Re: E Type 888330
This is going to be so awesome......so special; the details you have developed are exquisite. The air intake alone is amazing.
-
sladey
- Nurse, I think I need some assistance
- Posts: 8817
- Joined: Sat Apr 23, 2005 9:08 pm
- Location: Nottingham, UK
Re: E Type 888330
Fantastic stuff Jonathan - you can see why the hours are required for a perfect finish
The simple things you see are all complicated
I look pretty young but I'm just backdated yeah
I look pretty young but I'm just backdated yeah