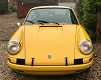
21st Century Outlaw 997 Project

Ongoing and archived Porsche (and other marques) restoration threads from DDK members

Moderator: Bootsy

911hillclimber
Nurse, I think I need some assistance
Posts: 20690
Joined: Mon Mar 10, 2008 6:26 pm
Location: West Midlands

Re: 21st Century Outlaw 997 Project

Post by 911hillclimber »

Whew!
Mammoth work with mammoth results Darren. :)

Unique and must be very satisfying to see it all finally. :)

73T 911 Coupe, road/hillclimber 3.2L
Lola t 492 / 3.2 hillclimb racer
Boxster 987 Gen II 2.9
User avatar
Bootsy
Site admin and the Boss
Posts: 25729
Joined: Sat Nov 08, 2003 6:09 pm
Location: Norwich
Contact:

Re: 21st Century Outlaw 997 Project

Post by Bootsy »

Like that
1972 911T | 1994 993 Carrera | 1999 986 Boxster |

Vintage Heuer, Omega, Zenith and other vintage watches - http://www.heuerheritage.co.uk
LMR
DDK slapper chatter
Posts: 456
Joined: Tue May 05, 2015 10:05 pm
Location: Solihull

Re: 21st Century Outlaw 997 Project

Post by LMR »

Stunning!!
Porsche 964 1993
Porsche 944 1986 - sold
Porsche 914 1972
Berny
Put a fork in me, I'm done!
Posts: 1647
Joined: Fri Nov 21, 2003 9:58 pm
Location: Suffolk
Contact:

Re: 21st Century Outlaw 997 Project

Post by Berny »

Lovely finish and so much attention to detail .
1971 Targa Sportomatic in Green 1972 2.4e sunroof coupe 1990 964 C2 Member no 82
Darren C
DDK rules my life!
Posts: 1398
Joined: Sat Dec 27, 2014 9:43 am
Location: Chichester UK

Re: 21st Century Outlaw 997 Project

Post by Darren C »

Thanks for the kind comments :)

So to continue, I started to make up my own rear exhaust section to join onto the Eurocup Full Flow Stainless system installed during engine rebuild. Starting with the link plate made previously & some pipe fittings
ex1.JPG
ex2.JPG
Next I got hold of some 108mm diameter stainless pipe to make the tailpipes, cut to length and squared off the ends precariously in the lathe :wink:
ex3.JPG
You do not have the required permissions to view the files attached to this post.
@classiccarguru1
Darren C
DDK rules my life!
Posts: 1398
Joined: Sat Dec 27, 2014 9:43 am
Location: Chichester UK

Re: 21st Century Outlaw 997 Project

Post by Darren C »

Next I marked out the relief so that it could sit flush in the link bracket
ex4.JPG
Then cut them out
ex5.JPG
So it all fit snug
ex6.JPG
You do not have the required permissions to view the files attached to this post.
@classiccarguru1
Darren C
DDK rules my life!
Posts: 1398
Joined: Sat Dec 27, 2014 9:43 am
Location: Chichester UK

Re: 21st Century Outlaw 997 Project

Post by Darren C »

The tip rims were then set up, paying attention to the position of the split rim holes (so the petal centres would be vertical & matching) and marked out for condensate drain semi circular holes. In this way the tips wouldn't collect water on start up.
ex7.JPG
Repeat for both
ex8.JPG
Then carefully machine out a relief in the rear of the "rim" to match the 108mm tube
ex9.JPG
You do not have the required permissions to view the files attached to this post.
@classiccarguru1
Darren C
DDK rules my life!
Posts: 1398
Joined: Sat Dec 27, 2014 9:43 am
Location: Chichester UK

Re: 21st Century Outlaw 997 Project

Post by Darren C »

The rims were the micro tig welded to the tube from the inside. A bit like wallpapering your hall through the letterbox :wink:
ex10.JPG
Then after a polish to remove blueing the centres were fitted using the M1.6mm nuts & bolts. Fiddly a fook, ended up using a sticky caulking to hold the nuts as they're too small to pick up by hand :roll:
ex11.JPG
ex13.JPG
You do not have the required permissions to view the files attached to this post.
@classiccarguru1
Darren C
DDK rules my life!
Posts: 1398
Joined: Sat Dec 27, 2014 9:43 am
Location: Chichester UK

Re: 21st Century Outlaw 997 Project

Post by Darren C »

Every M1.6 nut & bolt was fitted with locktite & tightened with a homemade spanner.
ex12.JPG
ex14.JPG
Then just when my eyes & patience had gone complete, I had the second one to do :roll:
ex17.JPG
You do not have the required permissions to view the files attached to this post.
@classiccarguru1
Darren C
DDK rules my life!
Posts: 1398
Joined: Sat Dec 27, 2014 9:43 am
Location: Chichester UK

Re: 21st Century Outlaw 997 Project

Post by Darren C »

Out with the welder again, set up pipe & fittings, then tack in place.
ex16.JPG
ex18.JPG
Once this was tacked up I found that the two rear lower 997 bumper supports fouled the new pipe & wouldn't let it sit far enough to the rear to clear the CATs' :roll:
So make two new ones :wink:
To be fair the old ones were a bit scabby, so I used some 6mm stainless for the new brackets, shaped concave (as opposed to the original convex, to follow the contour, just behind the bumper for maximum space. :)
ex19.JPG
You do not have the required permissions to view the files attached to this post.
@classiccarguru1
Darren C
DDK rules my life!
Posts: 1398
Joined: Sat Dec 27, 2014 9:43 am
Location: Chichester UK

Re: 21st Century Outlaw 997 Project

Post by Darren C »

The big day arrived when it was time to do a dry run on the car, which involved cutting back the Eurocup pipes just before the original 997 tips.
So with brave pills at hand I cut them with an angle grinder, then tube cutter on my new assembly to suit.

Measure 26 times, cut once :wink:
ex20.JPG
The bumper brackets were swapped over, then with the aid of a pair of swaged 90 stainless bends, chocks & lots of measuring, I tacked it in position.
ex21.JPG
ex22.JPG
You do not have the required permissions to view the files attached to this post.
@classiccarguru1
mycar
Nurse, I think I need some assistance
Posts: 7490
Joined: Sat Aug 04, 2007 3:05 pm
Location: Harrow Gate.
Contact:

Re: 21st Century Outlaw 997 Project

Post by mycar »

That is a lot of work.
Darren C
DDK rules my life!
Posts: 1398
Joined: Sat Dec 27, 2014 9:43 am
Location: Chichester UK

Re: 21st Century Outlaw 997 Project

Post by Darren C »

The whole assembly was then removed for fully welding up.

With its proximity close to the inside of the rear valance & CATs I decided to heat wrap it in these positions after welding.
ex23.JPG
Being a paranoid engineer, I thought it prudent to make a spring hanger to support the section by the tailpipes. Not that they're heavy, more peace of mind, as there's an additional overhang weight that wasn't there before. :)
ex24.JPG
Just by chance the 997 has heat shield threaded fixings dead centre above where I wanted to put the hanger, so these were used in combination with some extra ones.
ex25.JPG
You do not have the required permissions to view the files attached to this post.
@classiccarguru1
Darren C
DDK rules my life!
Posts: 1398
Joined: Sat Dec 27, 2014 9:43 am
Location: Chichester UK

Re: 21st Century Outlaw 997 Project

Post by Darren C »

All that was left to do was make up a bracket on my exhaust to join with the spring hanger. Using a "spare" link & tubes I'd made if it all went Pete Tong, I took some more measurements.
ex26.JPG
Then imagineered a bracket in Stainless
ex27.JPG
And welded it in place
ex28.JPG
You do not have the required permissions to view the files attached to this post.
@classiccarguru1
Darren C
DDK rules my life!
Posts: 1398
Joined: Sat Dec 27, 2014 9:43 am
Location: Chichester UK

Re: 21st Century Outlaw 997 Project

Post by Darren C »

Finally the assembly was Polished to remove all weld blueing & refitted back on the car with some new pipe clamps, and the spring hanger tension set :)
ex29.JPG
ex30.JPG
The last job was then to swap out the 991 lower valance insert that I'd cut for the original wide spaced 997 tailpipes, with a new one. This is in two parts with a separate insert around the centre tailpipes. I decided in the end to cut about 2" off the bottom to reveal the 21st Century Outlaw script for all to see :)
You do not have the required permissions to view the files attached to this post.
Last edited by Darren C on Mon Sep 17, 2018 11:27 am, edited 1 time in total.
@classiccarguru1
Post Reply