

I'll assume you can get it out of the car, have drained the oil, and have new gaskets!
Special Tools - Other than the usual stuff.
36mm deep socket, http://www.tooled-up.com/Product.asp?PID=28506
41mm spanner http://www.tooled-up.com/Product.asp?PID=25521
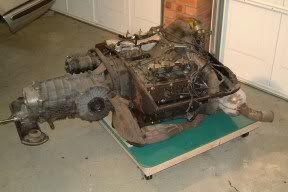
I left the gearbox attached to the engine for most of the stripdown. It is a highly effective stand and you need it solid to be able to undo / do up the shaft nuts.
Remove the end cover to reveal 5th and reverse. Remove the roll pin from the nut on the end of the input shaft, lock the box in two gears (by moving the main selector rod and then engaging 5th or reverse) and loosen. This is a 24mm nut if I remember correctly.

Reverse gear, note the bits missing...always stop, then wait before engaging reverse!
 No synchros here, it just crashes the gears into each other!
Then undo the large 36mm nut on the pinion shaft with the same technique. You will need a long and substantial breaker bar! I managed to partially lift the engine off the trolley onto one side before the nut came undone...
Put the gearbox back in neutral (both shift rods protruding slightly from the case) and remove the lower cover plate from the bottom of the box which carries a support for the selector forks.
The remove all the gears and needle bearings to give bare shafts sticking out of the front case. Clearly everything should be diligently bagged and labelled to avoid chaos when rebuilding. I also took loads of photos to assist. If the gearbox is not in neutral you will not be able to remove the 5th / reverse shift fork as the detent will hold it in. Take the shift fork out complete with rod and don't touch the adjustment.
Undo all the nuts that hold the front case to the diff case. You can then pull the front case off taking the main shift rod with it.
All is revealed....Now you can find the reasons you took it apart in the first place!


A worn synchro, not a disaster but bad enough for the odd graunch! Unfortunately the 'odd graunch' wore the dog teeth off the slider making shifting very difficult. Yet more expense...
Unscrew the two shift rod detent plugs and remove the springs. Undo the collection of M8 nuts that hold the two bearing retainers to the diff case. Don't touch the shift fork connections to the rods.
Hold the whole lot, shafts, forks and rods, and pull. You should now have two shafts and two forks/rods on the floor.
If you want to remove the diff case from the engine now is the time. You can remove a 915 from the engine without making up spacers or anything else that the Haynes suggests. Just unbolt and remove much like any other gearbox! The clutch release lever will rotate as you pull the box back so make sure you have enough clearance underneath to allow this.
You can pull the diff out to clean and inspect, just undo output flange bolts and the ring of nuts and pull!
Stripping the shafts is fairly straightforward. If you've trawled Pelican forum as I did for advice you will have heard the horrors of the undoing the 41mm nut on the input shaft and how you need to weld bits of scaffold to a socket etc etc
Well the other method is to refit 5th gear on the splines, hold this firmly in a large vice with soft jaws and undo the nut with the 41mm ring spanner you bought earlier... Yes it's tight, yes you will swear, yes it will fall out of the vice several times before it gives, but it's just a nut!
Haynes and others recommend smacking the end of the input shaft on the floor and using the weight of the gears to press the bearings off. After attempting this with no success and fearful of damaging the shaft I removed the bearing with a splitter. It sacrificed an otherwise serviceable bearing but it was much cheaper than a new input shaft! In hindsight I should have heated the bearing inner race with a blowtorch then used the shaft smacking method (but not as hard!). This is how I fitted the new bearing, bit of heat and it dropped straight on. The same heat is needed on the inner races for the needle rollers under the gears, warm them gently and they slide on/off much easier.
The pinion shaft comes apart in much the same way. Make sure you lay all the parts out in the order they came off.
Synchros, sliders etc can then by replaced as desired (or budget will allow!). You will need a substantial pair of circlip pliers to take the synchro assembly apart. Then you can have many hours of pleasure refereeing the fight between the new synchro ring and getting the circlip back on...Enjoy, I know I did!
And now the magical quote "reassembly is the reverse of removal"
 It is pretty much, heat the inner bearing races gently and everything will just slide back together. Doing up the 41mm nut is just the same. You are supposed to torque it to some obscene figure, so basically crank it up till your arm comes off and then knock over the lock tab. The bearing outer races in the front case are held in with circlips and can be replaced very easily, no presses required. The ones in the diff case need to be knocked out, but they come out with very little effort. Don't replace the pinion bearing unless you really know what you are doing and have the kit to reset the mesh depth with the crownwheel. You wouldn't need to read this if you do!
Use the input shaft to align your clutch whilst it's off. Then refit the diff case to the engine. Make sure the release arm is engaged in the release bearing and guide in into position as you push the case over the studs.
Now the fiddly bit....
You need to assemble both shafts and the shift forks in your hands, in mesh and fit the whole assembly as one onto the diff case. Sliding both shift rods into their holes whilst getting the bearings into the diff case and meshing the pinion at the same time. One thing I found was that the rollers in the input shaft bearing moved slightly out of alignment whilst doing this, and so wouldn't slide into the outer race in the diff case. A gentle prod with a small screwdriver re-seated the offending rollers. Suddenly the whole assembly just clicks and falls in place. Easy peasy...

Front case and main shift rod can now go back on. I found it difficult to align both shafts with their bearings. To fix this I removed the input shaft outer race from the front case, they refitted the case and slid the outer race back in once the case was on. As these bearings are only held in with circlips this was the easiest method. Hold the lever from the shift rod up into the box to engage with the shift forks and refit the lower cover plate.
Select neutral then you can rebuild the 5th / reverse assembly. Once the 5th/ reverse shift fork is in you can select two gears, locking the box and torque the nuts to specification. Again you'll lift the engine off the trolley on the 36mm nut....
End cover back on, make sure the reverse gear plunger hasn't fallen out. And you are done! Oh yes, put some oil in it.
Any questions just post and I'll try to help. I'm no expert on gearboxes, this was my first rebuild, but just approach it in a methodical manner and record everything you do, it will not be a problem!
Type911 are best for Porsche OE bearings at half price. You can also get them from a friendly bearing stockist by quoting the number on the outer race (don't mention Porsche or the pound signs start flashing!)
Mittelmotor also provide Porsche OE parts for less than retail and came up best for the synchros, sliders and shaft nuts.
I sourced a new (ish) third gear pair from Powerhaus in the US.
Before:
and after:


