66 LHD 'Doctors Car' restoration begins

Ongoing and archived Porsche (and other marques) restoration threads from DDK members

Moderator: Bootsy

Post Reply
MT
DDK rules my life!
Posts: 1247
Joined: Wed Nov 10, 2010 5:42 pm
Location: Gatwick

Re: 66 LHD 'Doctors Car' restoration begins

Post by MT »

Thanks - I do occassionally have to take a look through the early photos to remind how much has been done, otherwise it is too easy to get purely focused on how much s still to do.

Anyway I have booked the shell in the local bodyshop (where I have had all my other restoration done, and where I help out now and again to get some experience.) for w/c 6 Nov, so I need to make sure I can finish up the few remaining body repairs, and complete my panel treatment by then. I hope to be able to assist in the bodyshop a bit so I will get and post a few photos of the intermediate steps as well as the end result.

So I have been repairing the bottom corners of the rear screen. LH side before:

Image

and after:

Image

Ditto for the other side.

The demister tubes (currently burning off the plastic coating with my well used propane torch to be recoated) are located in the hole you can see with a large grommet (both survived in good order), but were also originally packed around with what looks like upholstery packing. Now this seems like another Porsche 'rustawayquick' feature, given any condensation will be absorbed by the packing and warmed up nicely by the demister to achieve the end result we seem to see on all these cars. Hence I do not plan to replace the packing. Anyone see a problem with this approach, or got a more 'cunning plan'?

Also the orange demister tubes in the engine bay were largely destroyed in getting the tie-wraps off (didn't know we had tie-wraps in 1966!), and replacements seem both non-OEM and v. expensive if you can find them, so I have sourced some high-temp (150degC) insulation tube of the right size and that can be painted, so I plan to paint it orange and see what it turns out like. Results to follow.

Also been refurbishing the original wooden dash

Image

To be fair it wasn't in bad shape, so a light sand and wipe with meths, and then 5 coats of Rustin's Plastic Coating (same as I used on the steering wheel) with a light sand in between coats. Refit the badge. Getting the badge off was a PITA and I did damage the wood veneer. Was a trifle annoyed ...... Glued it all back together, and sanded it down and it seems ok as most is covered by the badge, but you can see a small mark if you look closely. There are a few stains where the switches go, but these will not be visible.

And rebuilding the master cylinder. The bore was as smooth as a very smooth thing, much to my surprise, so all I needed was to swallow at the price of a rebuild kit and fit it together.

Mick
'Creativity is the product of time wasted' Albert Einstein

1972 RHD 2.4E (ex Bob Watson racer - now in original Tangerine)
1966 LHD swb (Doctors car - now with Mrs. Ferrari in Madrid)
1966 TR4A (now sold and replaced by 1990 944 turbo)
1966 S2a Landrover
MT
DDK rules my life!
Posts: 1247
Joined: Wed Nov 10, 2010 5:42 pm
Location: Gatwick

Re: 66 LHD 'Doctors Car' restoration begins

Post by MT »

Well after a day of "Oh sh*t, I need to do that ...." I think I'm ready for the trip to the bodyshop for final prime, prep and paint.
I had spent a day last week sorting out a repair to one of the s/h swb wings I got with the car. It looked great when I got it but it came back from Cleaning Consultants looking like this:

Image

So after a while with the snips I managed to do a bit of surgery

Image

Decided to repair the inner layer first, then the top layer. Worked out ok.

Image
Image
Image

Then I finally got the RH rear wing repair section I needed to finish the section that was damaged and I removed to get access to the kidney bowl area. So a repeat of the other side. I recommend the bit of wood technique to maintain the alignment. Worked a treat - 9.25" at the top torsion bar mount, just like the other side. Door gap isn't as good as the other side. It wasn't to start with so I can hardly expect it to have fixed itself. Still pretty good. In truth if you run your hand over the repaired area you can still feel some v slight undulations, but I have learned with my other restos I need to leave this to Charlie at my local bodyshop.

Image


Then I'd forgotten (amongst a few other things) to add those two small finishing pieces that fit at the front end of the front wings, so it was a full trial fit of the front end - for the third time.

Image

The gaps between the front wings and the door, and the wings and the bonnet looked OK, although I only had the bonnet seal to fit.

Just got to get it to the shop in one piece tomorrow - won't rain will it???
'Creativity is the product of time wasted' Albert Einstein

1972 RHD 2.4E (ex Bob Watson racer - now in original Tangerine)
1966 LHD swb (Doctors car - now with Mrs. Ferrari in Madrid)
1966 TR4A (now sold and replaced by 1990 944 turbo)
1966 S2a Landrover
911hillclimber
Nurse, I think I need some assistance
Posts: 20690
Joined: Mon Mar 10, 2008 6:26 pm
Location: West Midlands

Re: 66 LHD 'Doctors Car' restoration begins

Post by 911hillclimber »

Good going.
I've done that repair to the awkward double skinn at the lower area of the front wings, and a pig to get it right.

Interesting thread!
73T 911 Coupe, road/hillclimber 3.2L
Lola t 492 / 3.2 hillclimb racer
Boxster 987 Gen II 2.9
MT
DDK rules my life!
Posts: 1247
Joined: Wed Nov 10, 2010 5:42 pm
Location: Gatwick

Re: 66 LHD 'Doctors Car' restoration begins

Post by MT »

A week of elapsed time in the bodyshop - not a full man-week of work as Charlie and Simon (Newdigate Bodyshop) were on other things as well, but still some good progress to report.

Got the shell (on it's little trolley) loaded on my trailer, there, and off loaded (only 4 miles) after a nerve-wracking journey - no reason other than watching all that work bouncing gently along windy and bumpy country lanes with idiots in lorries, tractors and Audis (sorry Garry) hurtling round blind bends in the opposite direction.

It was promptly masked off and given a coat of high build primer and 'flatting-off' has started.

Image

Got some of the pricey 3M seam sealer and the special applicator gun. It's about £10 a bag, and one covered the bottom half of the petrol tank if you want a feel for how far it goes.

Image
Image
Image

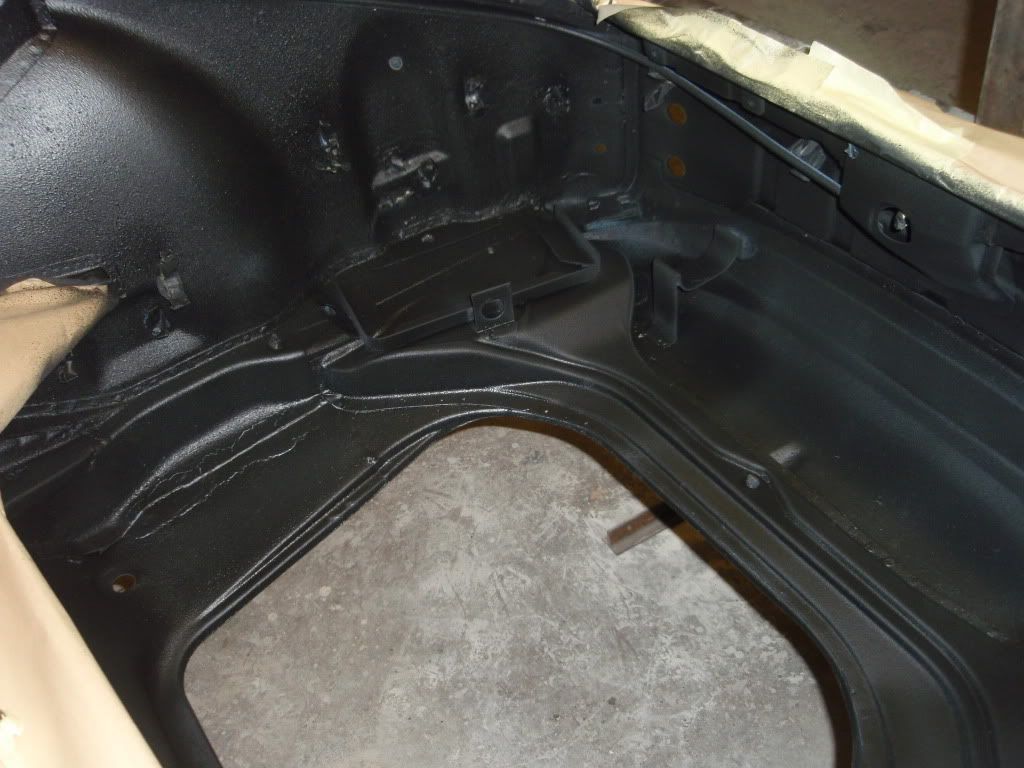
What I have decided (and done) on the rest of the body is seam sealer the main seams, esp under the rear wing/light boxes, along the bottom of the sills and the front latch panel (where there are lots of seams and lots of water spray impact) - and 2 coats of stoneguard elsewhere. Will then overcoat the lot with satin black to ensure a good even colour as the stoneguard dries to a dark grey, despite saying black on the tin.

Image
Image

And a few views of the (almost) finished undersealing - there are a couple of areas to touch up as you might see in one of the photos.

Image
Image
Image

I have to say personally that I prefer the finish created by the Stoneguard rather than the 3M sealer.

I have also used the time (and space in my workshop) to do a few other things. I have cleaned and checked the loom - if anyone has any tips or advice on the best method to refit it I would be most grateful. I can see it will be lots of fun, but I suspect there are a few tricks and tips worth having in advance.

I have also dismantled the rear heater control units and the Webasto 'patio' heater - which seems to be in surprisingly good order (apart from the exhaust system - for which I have another 'cunning plan'). Had the outer bits blasted and repainted as close to the original colour as I could get. Don't they look nice? So nice I now can't possibly use the original somewhat tatty screws and bolts so I'll be searching for new ones at the NEC on sunday.

Image

Body should be done by mid next week, so after an even more tense return trip, then I'll take the front wings, bonnet, bumpers for the same treatment.

Just realised yesterday was my first anniversary as a DDK'er. Been a good year.
'Creativity is the product of time wasted' Albert Einstein

1972 RHD 2.4E (ex Bob Watson racer - now in original Tangerine)
1966 LHD swb (Doctors car - now with Mrs. Ferrari in Madrid)
1966 TR4A (now sold and replaced by 1990 944 turbo)
1966 S2a Landrover
MT
DDK rules my life!
Posts: 1247
Joined: Wed Nov 10, 2010 5:42 pm
Location: Gatwick

Re: 66 LHD 'Doctors Car' restoration begins

Post by MT »

Back to the bodyshop tomorrow, but today I rebuilt my heater control vents.

They started like this on the car

Image

which after a bit of cleaning up looked like this

Image

Actually surprisingly solid under all that shi...stuff. Dismantling wasn't too bad, apart from removing the flaps inside. Two small (very small -6mm nuts) slot-head bolts go through the flaps and the shaft and it's very difficult to get any tools into the vent tube. In the end I rotated the nut with some long nosed pliers (the bolt rotating as well of course) until I could wedge a large carving knife into the groove on the slot head and the casing of the vent - like so

Image

then used the long nosed pliers to slowly remove the nut - I hadn't a 6mm spanner at the time, but bought one for the rebuild.

Image

The flaps themselves are quite interesting - they are made up of two halves curved into a wave-shape, with two plastic inserts rivetted in between. On dismantling they look like this

Image

As you can see the lip of the plastic that protrudes out from between the metal is worn on most of the inserts, so I crafted some replacements from a margarine tub.( As an aside these tubs are brilliant for the home restorer - lots of bits can be stored, labelled and they stack beautifully - so I had plenty spare!)

A bit of paint and some new rivets

Image

Put the rest back together - versus the second photo, not bad I thought.

Image
Image


And with his mate from the other side, ready to refit

Image
'Creativity is the product of time wasted' Albert Einstein

1972 RHD 2.4E (ex Bob Watson racer - now in original Tangerine)
1966 LHD swb (Doctors car - now with Mrs. Ferrari in Madrid)
1966 TR4A (now sold and replaced by 1990 944 turbo)
1966 S2a Landrover
Gary71
Nurse, I think I need some assistance
Posts: 10719
Joined: Wed Mar 31, 2004 1:27 pm
Location: Cheshire
Contact:

Re: 66 LHD 'Doctors Car' restoration begins

Post by Gary71 »

Nicely rebuilt, but are you sure a marg tub is up to the temperature? You could find your car stinking of melting plastic a few minutes in! :)

Bet you can't wait to get it on the road now! :cheers:
MT
DDK rules my life!
Posts: 1247
Joined: Wed Nov 10, 2010 5:42 pm
Location: Gatwick

Re: 66 LHD 'Doctors Car' restoration begins

Post by MT »

Hmmm, good point. Well the original material (which also disappeared, to be fair) was much the same. I will try a little empirical test tomorrow to see if the marg tub plastic is more or less resilient to heat than the original and report back.

At least I know how to dismantle them!
'Creativity is the product of time wasted' Albert Einstein

1972 RHD 2.4E (ex Bob Watson racer - now in original Tangerine)
1966 LHD swb (Doctors car - now with Mrs. Ferrari in Madrid)
1966 TR4A (now sold and replaced by 1990 944 turbo)
1966 S2a Landrover
MT
DDK rules my life!
Posts: 1247
Joined: Wed Nov 10, 2010 5:42 pm
Location: Gatwick

Re: 66 LHD 'Doctors Car' restoration begins

Post by MT »

Margarine tub flaps passed the heat gun test today - they are at least as good as the original Porsche design.

Phew!
'Creativity is the product of time wasted' Albert Einstein

1972 RHD 2.4E (ex Bob Watson racer - now in original Tangerine)
1966 LHD swb (Doctors car - now with Mrs. Ferrari in Madrid)
1966 TR4A (now sold and replaced by 1990 944 turbo)
1966 S2a Landrover
MT
DDK rules my life!
Posts: 1247
Joined: Wed Nov 10, 2010 5:42 pm
Location: Gatwick

Re: 66 LHD 'Doctors Car' restoration begins

Post by MT »

Rebuilt the 'patio heater' today. Not sure if I will ever fire it up in anger, but all the bits are there and the internals seem to function to the extent I can check them. Not sure how to check the spark/glow plug, so if anyone has any ideas....

Image

Also dismantled the rear light units (with advice from Garry - thanks) and cleaned them up. Chrome around the lenses is superb, although the rear and innards show their age in places. Readily re-useable though. Garry has also sourced some new lenses so I'll try my hand at fitting them next week.

One of the US spec original Bosch lenses was in very good condition so I have listed it on Early 911s registry. If for any reason anyone in the UK wants a RH US spec lens then pm me. I have listed it for $100/£60 plus p&p, or swap for a RH front unit (with or w/o lens) as mine was missing. (if you think I'm asking a bit much please say so!)

Image

Paint job is going slowly as Charlie has had to go into hospital for an op (a 'gentleman's issue'!), but the paint has arrived (thanks for those who responded to my question in the 911 forum). All the under bonnet and underside, and the tank are now finished. So it's just final preparation and 2 pack body colour - end of next week and she should be home with luck.
'Creativity is the product of time wasted' Albert Einstein

1972 RHD 2.4E (ex Bob Watson racer - now in original Tangerine)
1966 LHD swb (Doctors car - now with Mrs. Ferrari in Madrid)
1966 TR4A (now sold and replaced by 1990 944 turbo)
1966 S2a Landrover
visualfx
I luv DDK!
Posts: 756
Joined: Sun Mar 07, 2010 6:59 pm
Location: Newdigate Surrey
Contact:

Re: 66 LHD 'Doctors Car' restoration begins

Post by visualfx »

If I see a small mushroom cloud in your direction from my window I’ll know you’ve tried a to fire it up :shock:

Still it looks bloody good assembled :wink:
MT
DDK rules my life!
Posts: 1247
Joined: Wed Nov 10, 2010 5:42 pm
Location: Gatwick

Re: 66 LHD 'Doctors Car' restoration begins

Post by MT »

Slooooow going at the bodyshop as poor old Charlie has had to have a week off to recover from his op - not surprising if you knew what he has had to have done poor bloke. He's now half Russian is all I can say..... Sets all this car restoration business into perspective.

Anyway a bit of experience to pass on.

As you can see from the early photos my car had chromed steel wheels with hubcaps. Hubcaps are now in A1 condition after rechroming, refitting the Porsche caps (a couple needed renewing but I got a couple of NOS from Max at Revival), but what to do about the wheels - chrome in totally crappy condition. I recall reading on some thread that you have to cut the wheels in half, chrome and reweld for it to be a half decent job - which sounded very costly and would suffer the same problem as the original design - 'rustawayquick' unless lots and lots of tlc.

I saw another thread (might have been on here, might not) suggesting a company called Aerocoat near Great Yarmouth, and their product Aeromax - a shiney chrome-like finish that is applied like a powder coat, so much more robust to damage and decay.


http://www.aerocoat.net/Aeromaxtm.htm

Talked to them and decided to go that way. Had the wheels stripped of chrome (£20 a wheel), and coated (£50 + vat a wheel). Collected them last week - very pleased indeed. They coat the whole wheel, and the finish looks as good as chrome in my view - certainly I doubt anyone (apart from all who read this!) will ever know. Not sure of the cut, chrome, reweld costs but I doubt they are less than £80 a wheel.

Only other bit of news is that I have traced the US intermediary who acquired the car from the Davies estate after the good doctor passed on, and we have exchanged e-mails. He is keen to know what happened to the car, and I hope he can follow the restoration on here. I also hope he can fill in some of the gaps in the cars history. Seems like I will only be the second driver after the good Doctor.

Image
Image
Image
'Creativity is the product of time wasted' Albert Einstein

1972 RHD 2.4E (ex Bob Watson racer - now in original Tangerine)
1966 LHD swb (Doctors car - now with Mrs. Ferrari in Madrid)
1966 TR4A (now sold and replaced by 1990 944 turbo)
1966 S2a Landrover
User avatar
Darren65
Nurse, I think I need some assistance
Posts: 8161
Joined: Mon Dec 13, 2010 10:55 pm
Location: North Wiltshire
Contact:

Re: 66 LHD 'Doctors Car' restoration begins

Post by Darren65 »

Looking good 8)
MT
DDK rules my life!
Posts: 1247
Joined: Wed Nov 10, 2010 5:42 pm
Location: Gatwick

Re: 66 LHD 'Doctors Car' restoration begins

Post by MT »

After a slow start, a great end to the week.

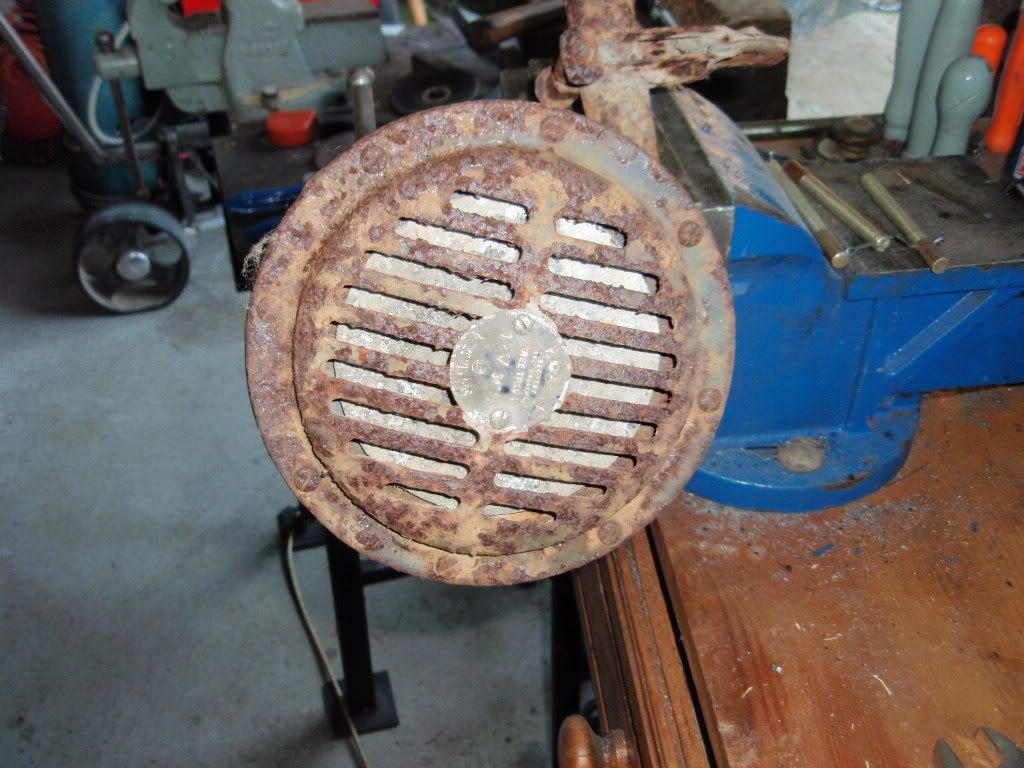
Spent early part of the week turning these - that didn't work, and had broken connectors on the rear - (reconstructed out of 5mm black plastic)

Image
Image

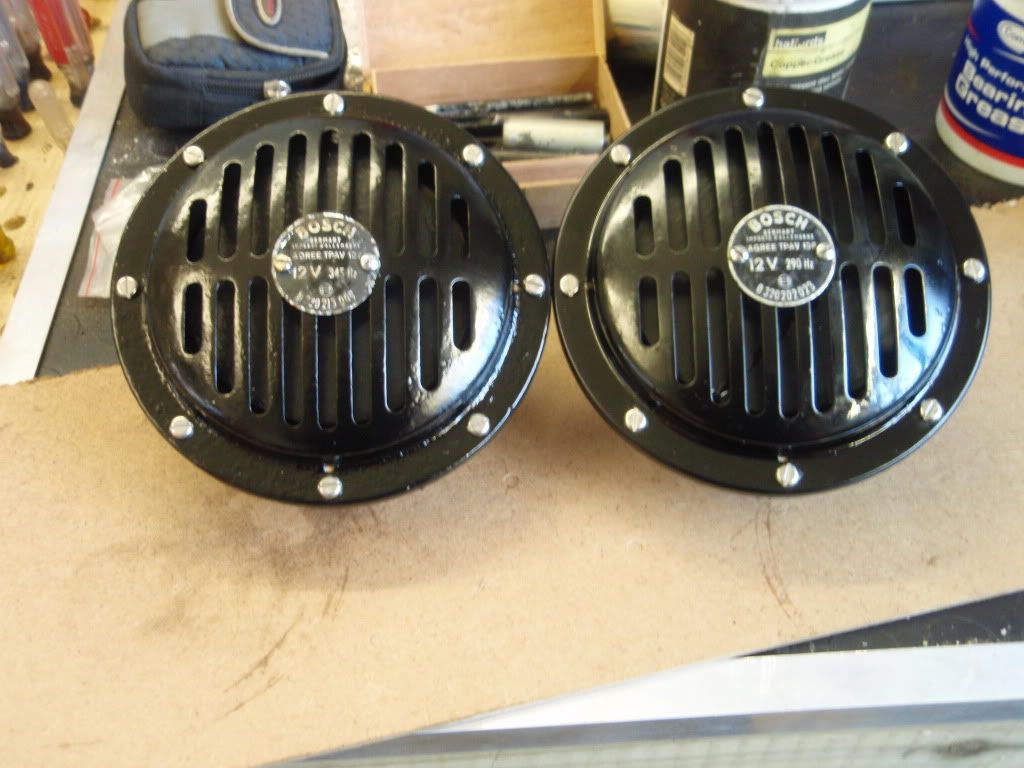
into these - that do work - and what a sound!

Image

I have detailed my refurbishment of these horns in a pdf document if anyone wants one. I did so because I couldn't find anywhere details of how to dismantle, repair and refurbish them. They're not perfect as the back was really rusty, but they look good enough to stick under the wing!

Then a bit more turning this

Image

into this - the original coil has the correct primary and secondary resistance, and will get cleaned up later, as will the fuel pump. Whether the latter will work or not we'll see. I have a replacement plan.

Image

After a very helpful e-mail 'conversation' with a chap on the US 911s Registry I am planning to have two separate ignition control set ups for the car. Because so much of the car's ignition system is as it came from the factory (all the components are correct and dated commensurate with a 66 build date) and quite rare, but not the most reliable I want to keep that option available. However, as I hope to use the car for some quite long distance trips, I also want a second set-up using more modern reliable components. The current plan is therefore to build another distributor with Pertronix 1866 ignitor installed (so I'm looking for a second Bosch JFDR6 distributor - part number ending 001 or 006), with an unballasted coil and solid state voltage regulator. Whether or not to add a CDI unit as well is one outstanding question (and where to get one from - again if anyone has one they'd like to part with let me know - I'll be trying the 'Wanted' section on here at some point). Does anyone have any views or opinions? From what I've read no one seems to regret making this addition to an early swb. Is a CDI necessary with Pertronix installed?

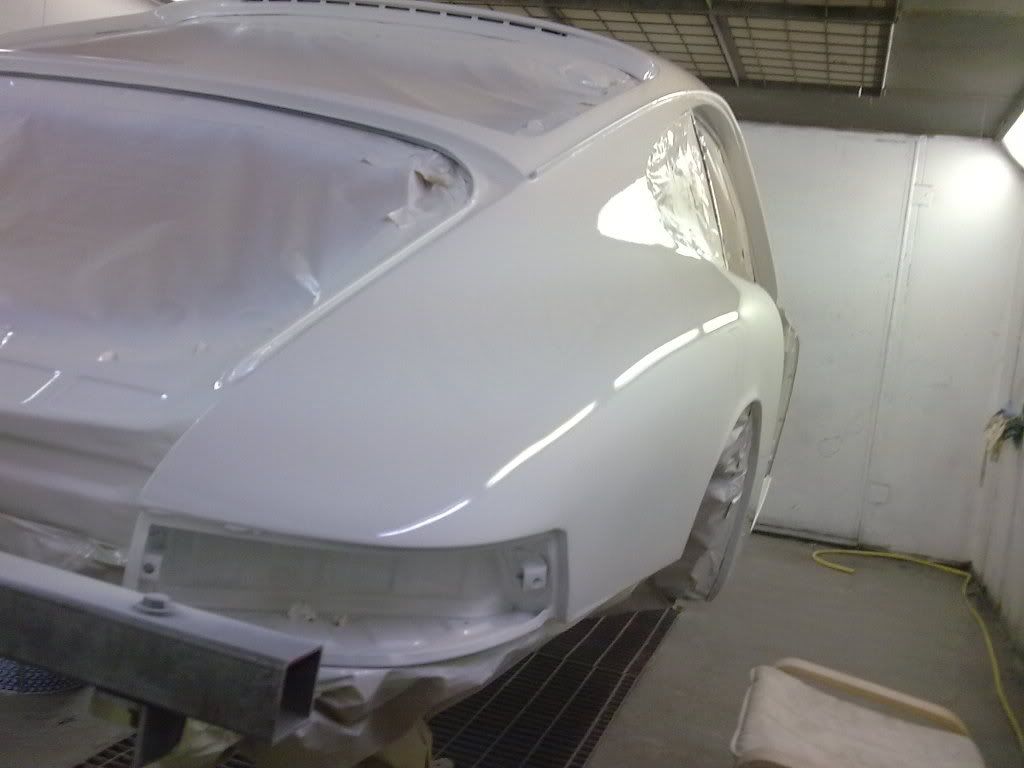
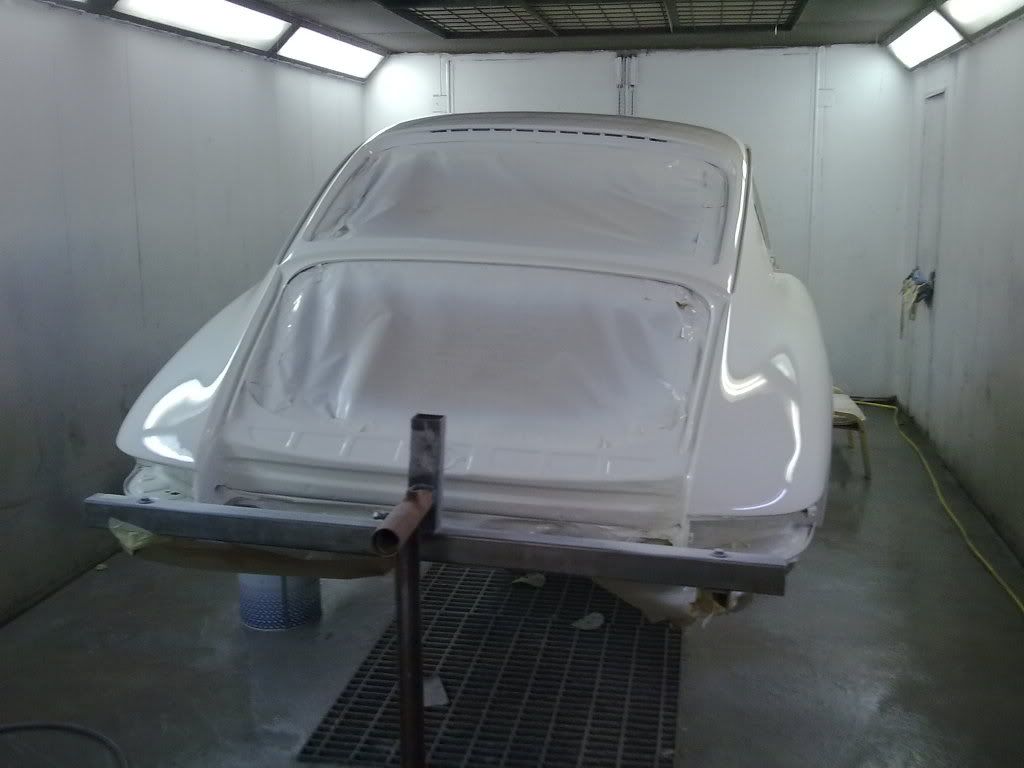
And so to the grand finale of the week. Charlie is on the mend, Simon was drafted in as well and after much flatting off and DA-ing (DA = Dual Action sanding so I found) by me and Simon

Image

A lot of 'blowing off' by Charlie DemiRusski!!!

Image

After lots of remasking, degreasing, tack-clothing, blowing off again, two coats of Light Ivory and one 'wet' topcoat of the same we have

Image
Image
Image
Image

Difficult to get a really good shot in the constrained booth, but I think you get the idea. Left it there to harden over the weekend, then back Monday to prep and mask the dash, and then home Tuesday if all goes to plan. Then I'll deliver the other panels to be done the same.

Coming along .....
'Creativity is the product of time wasted' Albert Einstein

1972 RHD 2.4E (ex Bob Watson racer - now in original Tangerine)
1966 LHD swb (Doctors car - now with Mrs. Ferrari in Madrid)
1966 TR4A (now sold and replaced by 1990 944 turbo)
1966 S2a Landrover
DeRRis
DDK slapper chatter
Posts: 478
Joined: Mon Nov 22, 2010 9:48 pm
Location: Uddel The Netherlands

Re: 66 LHD 'Doctors Car' restoration begins

Post by DeRRis »

..... nicely I'd say
Dennis

1972 Porsche 911 T/E
1986 Porsche 911 Carrera
1976 Lancia Beta Monte Carlo
1973 Benelli 650 Tornado S2
MT
DDK rules my life!
Posts: 1247
Joined: Wed Nov 10, 2010 5:42 pm
Location: Gatwick

Re: 66 LHD 'Doctors Car' restoration begins

Post by MT »

I suspect my sigh of relief could be heard all over the country, even with the wind and rain (well in part BECAUSE of the wind and rain) - but the fully painted shell is now back home locked up in my workshop. The weather here was sunny but windy early on , with rain forecast later, so I took the opportunity ...

This is what it looked like just before loading

Image
Image
Image

Phew.....!
The rebuild starts in earnest now. My plan of attack is as follows, but if anyone who's been down this road has any advice or experience it would be appreciated. ( I know the basic idea is 'reassembly is the reverse of the removal process', but bu**ered if I can remember exactly in what order I dismantled it!)

1) While it's still on the cradle and I can un-restricted access to front and rear underneath - get all the links that go through the central tunnel in place - loom, the fuel and brake lines, accelerator and clutch linkage, gear shifter, handbrake + cables, speedo cable, heater cables. Loom first.
2) Pedal box and m/c. Fabricate and connect up the brake lines for front end. Fit front end fuel pipe, but not tank (nice to be able to stand in the hole!
3) Front arb
4) Front suspension + shocks
5) Rear heater vents and cables
5) Rear radius arms, trailing arms and shocks
6) Complete rear fuel and brake pipe fabrication and installation
7) Front and rear brake systems
8) Back on wheels

that's enough for now! Any views?

Mick
'Creativity is the product of time wasted' Albert Einstein

1972 RHD 2.4E (ex Bob Watson racer - now in original Tangerine)
1966 LHD swb (Doctors car - now with Mrs. Ferrari in Madrid)
1966 TR4A (now sold and replaced by 1990 944 turbo)
1966 S2a Landrover
Post Reply