

Something a bit tasty
Moderator: Bootsy
-
356_outlaw
- DDK addict
- Posts: 140
- Joined: Sat Aug 15, 2009 8:32 pm
- Location: a part of london usually on fire
-
mango-smoothie
- DDK Newbie
- Posts: 16
- Joined: Tue Feb 09, 2010 6:27 pm
the regular DTM doesn't fit the 356 replica. the hinge squishes the oil cooler hose when you close the rear hood/trunk. it sort of works, but goes from a $800 part to looking like you shoe-horned a cheapo part in there. it also squishes the hose ~50% (can't be good for cooling).
that plus i run a massive oil cooler/fan w/thermostat outside of my engine bay (by the tranny) to keep things cold in there.
that plus i run a massive oil cooler/fan w/thermostat outside of my engine bay (by the tranny) to keep things cold in there.
-
356_outlaw
- DDK addict
- Posts: 140
- Joined: Sat Aug 15, 2009 8:32 pm
- Location: a part of london usually on fire
-
mango-smoothie
- DDK Newbie
- Posts: 16
- Joined: Tue Feb 09, 2010 6:27 pm
made some progress on my valve train setup
chromoly pushrods - uncut - weight 15% less i still have to cut off probably 2-4 more grams worth of material on each.
also managed to get more lift on my cam (more than i expected and is advertised) when i was doing the adjustments. fiddle here, adjust there, move this, shim that.
using shims (0.050"), 911 adjusters, and had to modify the rocker arms 0.060" (and bevel them) to work with the adjusters.
hopefully everything works


chromoly pushrods - uncut - weight 15% less
i still have to cut off probably 2-4 more grams worth of material on each. also managed to get more lift on my cam (more than i expected and is advertised) when i was doing the adjustments. fiddle here, adjust there, move this, shim that.
using shims (0.050"), 911 adjusters, and had to modify the rocker arms 0.060" (and bevel them) to work with the adjusters.
hopefully everything works
-
mango-smoothie
- DDK Newbie
- Posts: 16
- Joined: Tue Feb 09, 2010 6:27 pm

-
mango-smoothie
- DDK Newbie
- Posts: 16
- Joined: Tue Feb 09, 2010 6:27 pm
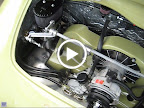
found an hour of garage time today and made an EDIS bracket and new all metal MAP sensor reservoir. my old one was PVC and worked, but was on it's last legs from the heat. this one's built for the long haul now...
bracket goes nicely behind the shroud (below the fan inlet and beside throttle cable). It's sooo easy with the engine out
also detailed my IDF filters / misc plates. wanted gloss black instead of semi polished aluminum


bracket goes nicely behind the shroud (below the fan inlet and beside throttle cable). It's sooo easy with the engine out
also detailed my IDF filters / misc plates. wanted gloss black instead of semi polished aluminum
-
mango-smoothie
- DDK Newbie
- Posts: 16
- Joined: Tue Feb 09, 2010 6:27 pm
-
threefiftysix
- DDK addict
- Posts: 110
- Joined: Thu May 06, 2010 11:05 am

-
mango-smoothie
- DDK Newbie
- Posts: 16
- Joined: Tue Feb 09, 2010 6:27 pm
-
White Van Man
- DDK addict
- Posts: 115
- Joined: Wed May 21, 2008 9:17 am
- Location: lincolnshire
-
mango-smoothie
- DDK Newbie
- Posts: 16
- Joined: Tue Feb 09, 2010 6:27 pm
a company in california called A-1. There is a dude who works there named Tiger. no i am not yankin your chain.
it's a very expensive unit, but top quality. i think i paid $700 for just the header and stub pipes. i then bought a magna flow muffler 2.25" inlet/outlet on same side and fabbed up my own dual center exit (bought a few extra flanges from tiger with mandrel pipes came to ~$80. muffler sourced locally for ~$200
all and all an expensive exhaust, but sounds nice and has crazy clearance
it's a very expensive unit, but top quality. i think i paid $700 for just the header and stub pipes. i then bought a magna flow muffler 2.25" inlet/outlet on same side and fabbed up my own dual center exit (bought a few extra flanges from tiger with mandrel pipes came to ~$80. muffler sourced locally for ~$200
all and all an expensive exhaust, but sounds nice and has crazy clearance
-
threefiftysix
- DDK addict
- Posts: 110
- Joined: Thu May 06, 2010 11:05 am
-
mango-smoothie
- DDK Newbie
- Posts: 16
- Joined: Tue Feb 09, 2010 6:27 pm
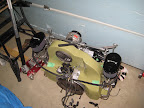
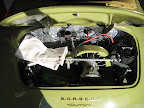
i did have the valva /rocker covers drilled and vented, but on this build, i decided to vent the head itself.
here is a shot of the placement:
http://picasaweb.google.com/lh/photo/iU ... directlink
i decided to do the heads and not the covers because of the angle of the vent hose, with the current placement, it's a much better fit to the breather box.
http://picasaweb.google.com/lh/photo/kV ... directlink
here is a shot of the placement:
http://picasaweb.google.com/lh/photo/iU ... directlink
i decided to do the heads and not the covers because of the angle of the vent hose, with the current placement, it's a much better fit to the breather box.
http://picasaweb.google.com/lh/photo/kV ... directlink