How To - Bilstein Suspension Upgrade / Boge struts
Posted: Tue Jan 01, 2008 10:03 pm
I am slowly working my way through the suspension on my 1973 2.4S. So far I have replaced the front & rear torsion bushes with Elephant Racing Polybronzes ( www.elephantracing.com ) and replaced all my sway bar bushes with polybushes from Nick Moss (early911.com). The Elephant racing bushes really made a difference & tightened things up, especially at the rear. Following this I had a 4 wheel alignment done by a Porsche specialist in Leeds.
Since then the car has handled OK, but I’ve still not been 100% happy, the front end has felt far too hard ( wheels left the ground at speed on bumpy roads) & the rear a bit soft. I decided to check the corner weights using the ‘triangulation method’ and discovered the car was WAY OFF !! . This prompted me to look at the suspension again.
First thing was to discover what front struts I had fitted to the car … this took a bit of time and was detailed on this thread:
http://www.ddk-online.com/phpBB2/viewtopic.php?t=17717
As my car is pretty much stock, I didn’t really want to go ahead with major suspension upgrades so decided just to tackle the shocks (depending on the outcome I might upgrade the rear torsion bars to 26mm). On advice from rally specialists, Francis Tuthills, I ordered Bilstein ‘HD’ front inserts ( 150/110) for BOGE struts which are meant to be really well suited to a road going early 911 with stock 19mm torsion bars, At the rear I opted to stick with my original 23mm torsion bars but chose Bilstein Sprint ( 310/155 ) yellow shocks. I was advised these are a really nice shock for road use & suited to both 23mm & 26mm torsion bars.
Over the Xmas period I managed to get away & spend a bit of time in the garage replacing the front strut inserts and the rear shocks, so I thought I might as well try & document what I did for future DDK reference. There are lots of similar threads on Pelican etc to cross reference with , and I believe our own Sladey did a similar thread when he replaced his.
Anyway ….
Rear Shocks:
Might as well start with the easiest end of the car. Removing the old rear shocks is pretty straight forward, so straight forward I forgot to take any photos.
First remove the air box in the engine bay to give access to the top shock mounts. With the car still on the ground I loosened off the top nuts of the old shocks. My old shocks had flats on the thread which I used an adjustable wrench to hold & prevent the shock from turning, then using a ring spanner loosened the nut off.
Next I jacked up the car, put it on axle stands & removed the rear wheels so I could see what I was doing. Using a ring spanner & a socket I loosened off the lower shock bolt / nut.
I then placed the trolley jack under the rear wheel bearing housing ( the trailing arm of the rear suspension) and slowly ‘lifted’ the rear suspension & thus compressing the rear shock. With it compressed an amount, I removed the top mounting nut from the old shock.
Now when lowering the trailing arm down again the shock will drop through from the upper housing so make sure you are holding on to it, then remove the lower mounting bolt.
Replacment of the new shock is pretty much the reversal of above , except the new Bilstein used an allen key to prevent it spinning whilst tightening up the upper mount.
UPDATE :
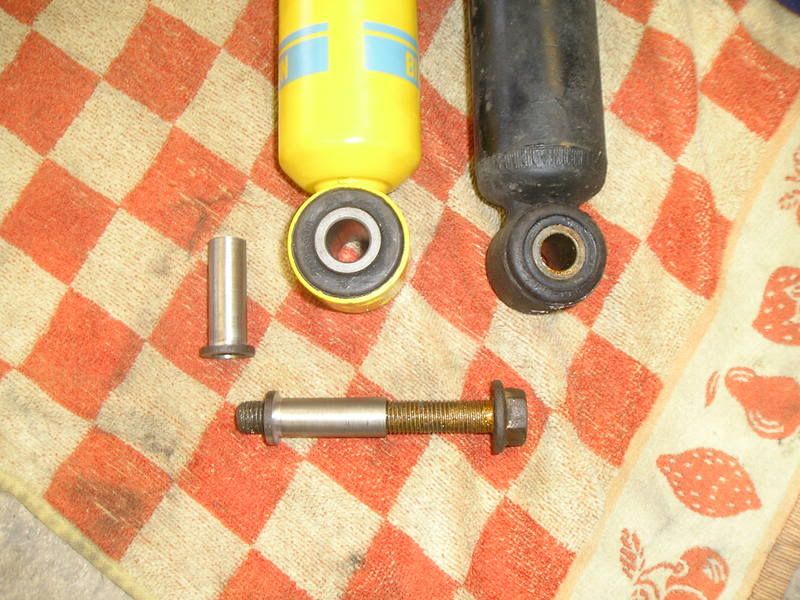
The rear shocks (sprints) do not fit out of the box for pre 72 cars, they modified the bottom shock mount bolt.
Pre 72 bolts are 12mm by 85mm long. If you look at pet they reference a different sized bolt 900 082 018 02 12mm -71
Post 72 bolts are 14mm by 95mm long. If you look at pet they reference a different sized bolt 900 082 049 02 14mm 72-
There appear to be 2 options for pre-72 cars :
make a sleeve 14mm O/D and 12mm I/D and reuse the original bolt
or
drill out the lower shock mount on my banana arms to 14mm and buy new 14mm bolts, BUT the 14mm bolts are no longer available from Porsche.
Front Struts:
As with all the other threads you read on this, the front end is a bit more involved. I decided to try & do this job without removing the front struts or disconnecting the brake lines.
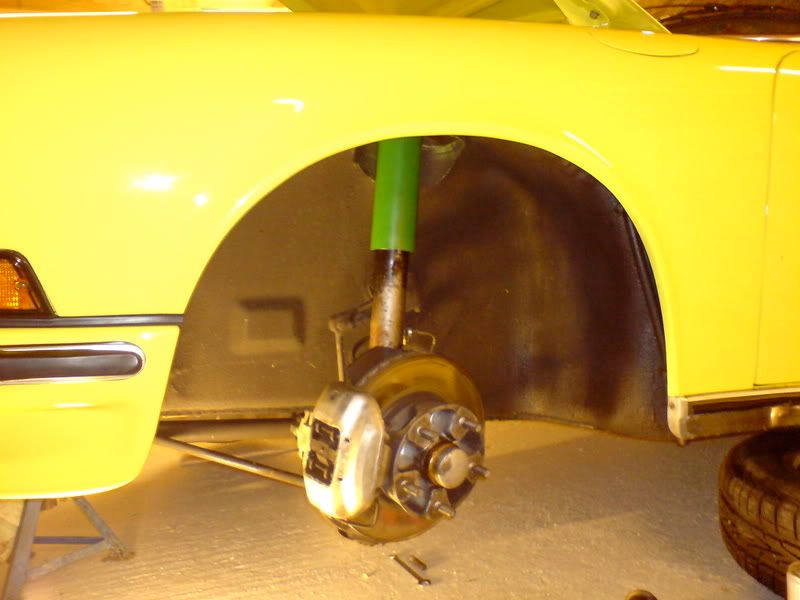
With the car jacked up & on an axle stand ( I place a single axle stand in the centre of the front ‘tank support’ ), I remove both wheels & place them on the floor under the car.
Tackling the nearside first, I place the trolley jack under the ball joint on the A-arm and slowly lift the suspension up thus taking the ‘weight’ off the upper strut mounting nut. Using a socket & breaker bar I remove the top nut and washers.
I lift the suspension a bit more to compress the strut further , then lower it down. At this point you need to make sure you are holding the strut with one hand because it should now drop away from its top mounting and if not held it will swing out & stretch the brake hoses !!
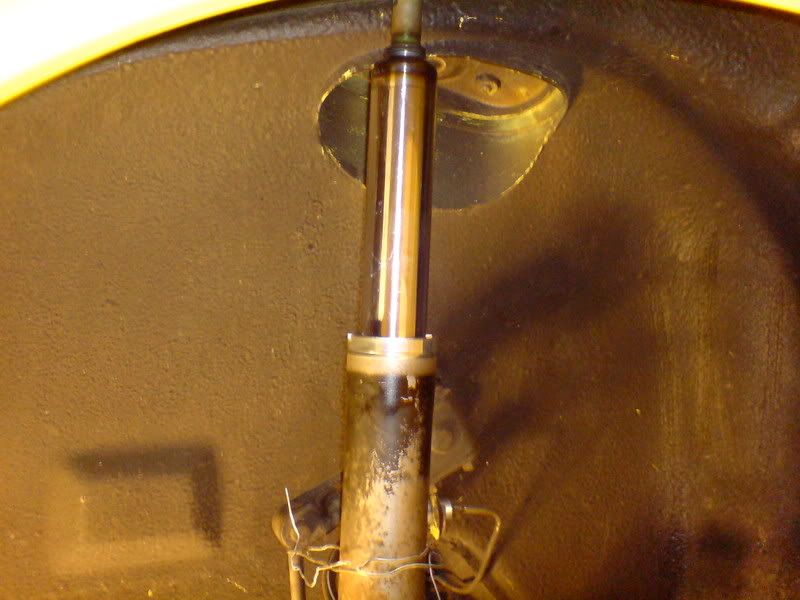
At this point I use some wire to tie the strut in an upright position ( picture below is showing a dismantled strut, but you can see my retaining wire)
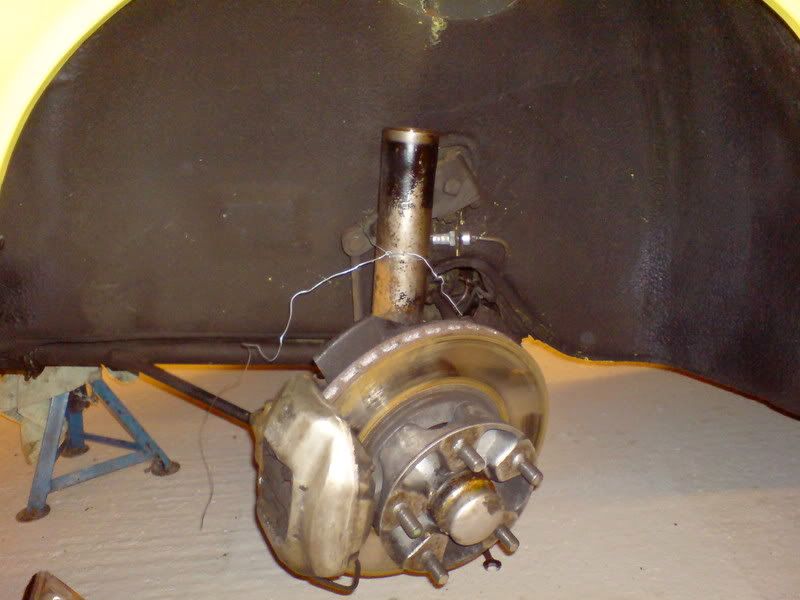
Now, to enable the insert to be removed later, I put the steering on full left lock ( full right lock when doing the offside) this gives a bit more movement of the strut without stretching the brake hose.
Next job is to remove the top part of the strut, the ‘dust cover’. I undo my support wire, angle the strut out to wards the wheel arch lip & slide off the cover. I then tied the strut back in the upright position and slid a carrier bag over the brake disc to protect it from any oil that might be within the strut.
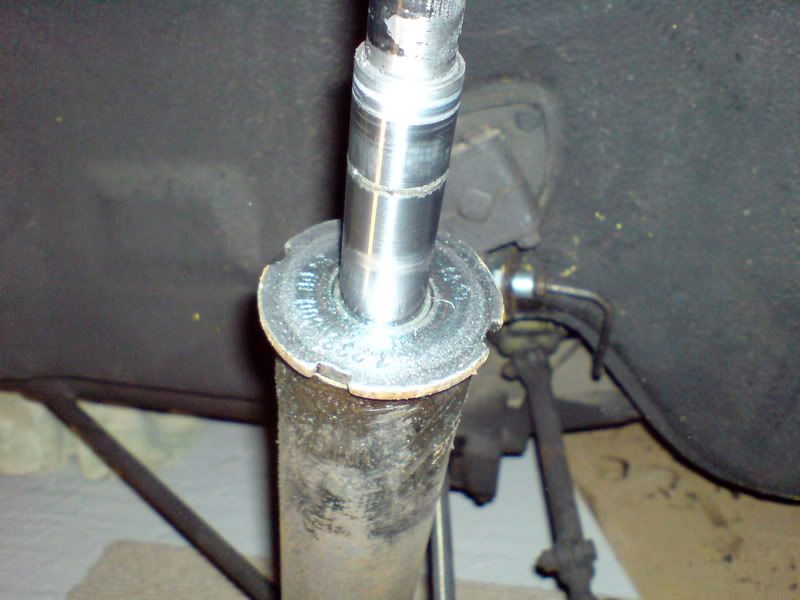
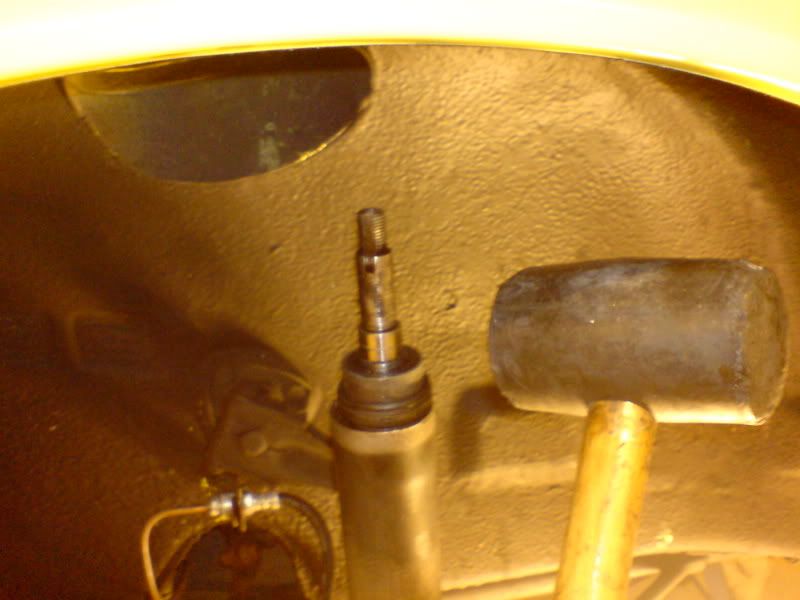
You should now be looking at the top of the strut body with a retaining nut holding in the strut internals ( see above). This retaining nut is pretty tight & looks like it needs a specialist tool to remove. I used a hammer & punch to give it a couple of ‘shocks’ & then used a pipe wrench to unscrew it.
Once this retaining nut is removed, I again undid my wire and angled the strut to enable me to remove the internals from the strut. I had to give them a blow with my rubber hammer & then the assemble just pulled out NOTE: ORIGINAL BOGE STRUTS ARE FULL OF OIL ….. TRY NOT TO SPILL ANY ON YOUR BRAKES1.
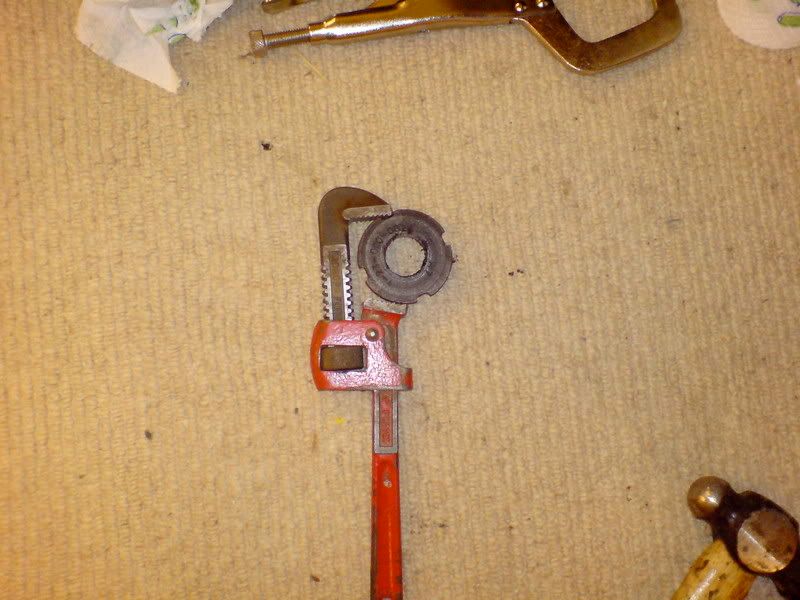
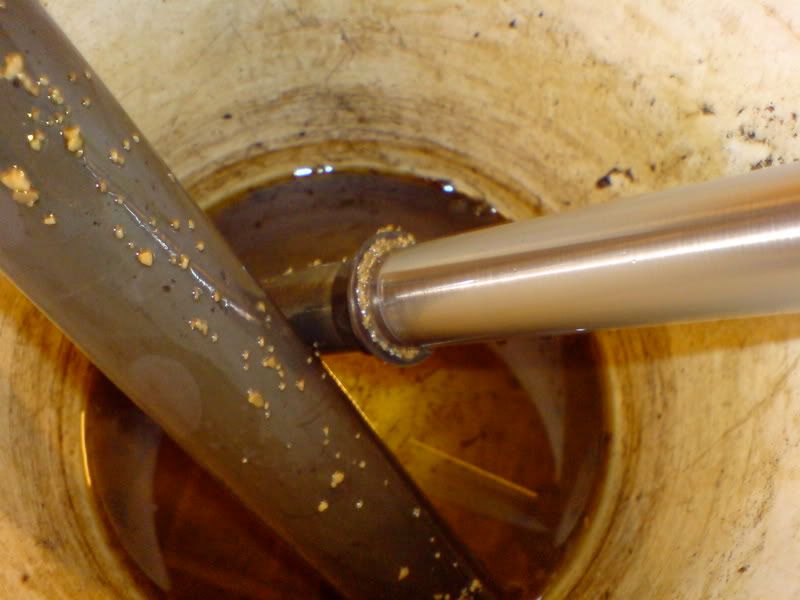
Here are what the internals of an original Boge strut looks like:

Mine appeared to be full of stone or remnants of a damaged spacer?
With the internals removed I tied the strut upright again.
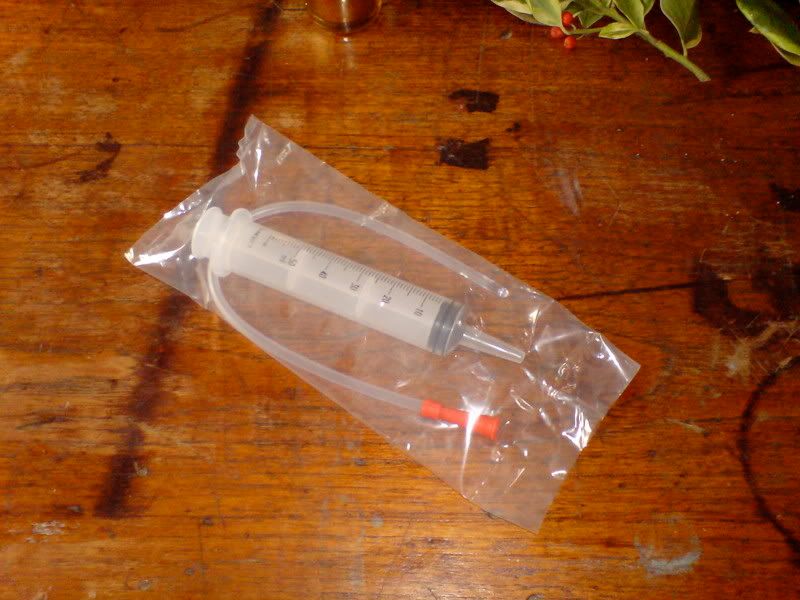
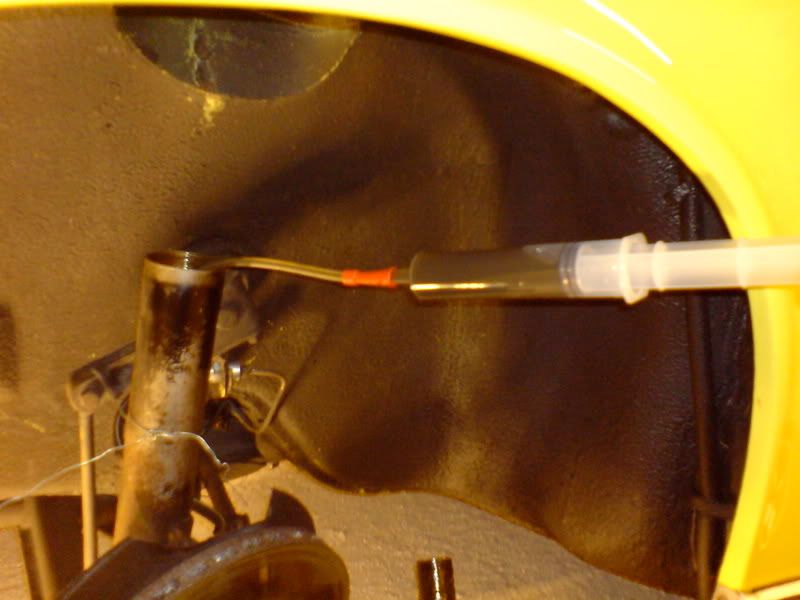
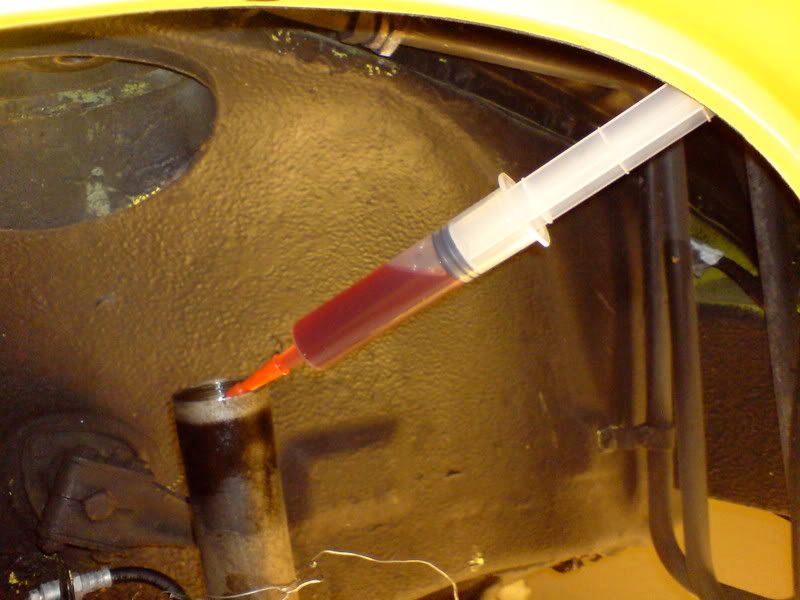
At this point the strut is still full of oil. If this oil is not removed as soon as the new insert is slid into the strut this oil will erupt out of the top of your strut all over the brakes etc ….
I found a nice solution by using a syringe and pipe ( normally used by Vets on sheep !! ) to suck out the oil.
Interestingly my struts had different oils in each of them !!
nearside:
offside:
With the oil removed from the struts I again angled them to a position where I could slide the new Bilstein inserts into them. This is not quite as easy as it sounds as in my case the inserts just managed to clear the wheel arch lip. Once the insert is in, the new retaining nut can be fitted.
Just a note here, there seems to be mixed opinion on wether the strut should be filled with oil again with the Bilstein insert. It seems Bilstein don’t recommend this so I have opted not to add oil.
As I didn’t have the specialist tool to enable me to tighten up the new retaining nut, I took the advice of Sladey & used a pipe wrench to tighten it up. A couple of bangs with the hammer on the pipe wrench handle & I’m happy these are tight ☺
Next it is simply a matter of fitting the new dust cover, which in my case meant I had to compress the insert to enable me to slip it over, & then fit the insert into the strut tower / upper mount on the car.
Using the trolley jack I again lift the suspension up to allow all the thread on the top of the insert to show at the upper mount.
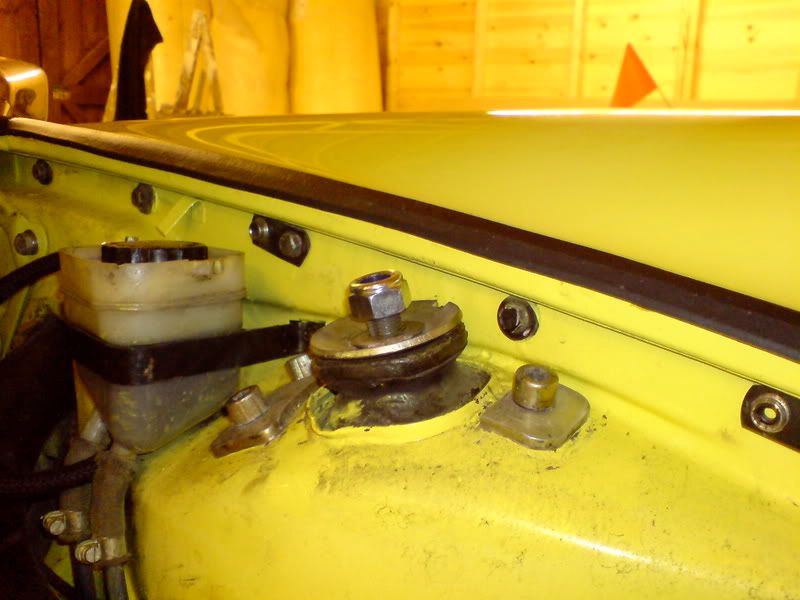
Then it is simply a matter of refitting the original top mount washers & the new nyloc nut as supplied with the inserts ( NOTE: THE INSETS COME WITH A RUBBER SPACER ON THE THREADS … THIS IS FOR PACKAGING ONLY & SHOULD NOT BE FITTED).
In my case I held the larger washer with one hand & tightened the nut with a socket wrench which prevented the insert from rotating. I finally torqued up to the recommended figure.
Job done:

So wheels back on, car back on the floor … simple
Well now of course the suspension heights have changed. The rear has lifted by an 1” !! . So next port of call is a full suspension set up including this time accurate corner weights .
I have not driven the car yet so can’t comment on the Bilsteins. I’ll report back after my suspension set up.
Hope I havn’t rambled too much
Since then the car has handled OK, but I’ve still not been 100% happy, the front end has felt far too hard ( wheels left the ground at speed on bumpy roads) & the rear a bit soft. I decided to check the corner weights using the ‘triangulation method’ and discovered the car was WAY OFF !! . This prompted me to look at the suspension again.
First thing was to discover what front struts I had fitted to the car … this took a bit of time and was detailed on this thread:
http://www.ddk-online.com/phpBB2/viewtopic.php?t=17717
As my car is pretty much stock, I didn’t really want to go ahead with major suspension upgrades so decided just to tackle the shocks (depending on the outcome I might upgrade the rear torsion bars to 26mm). On advice from rally specialists, Francis Tuthills, I ordered Bilstein ‘HD’ front inserts ( 150/110) for BOGE struts which are meant to be really well suited to a road going early 911 with stock 19mm torsion bars, At the rear I opted to stick with my original 23mm torsion bars but chose Bilstein Sprint ( 310/155 ) yellow shocks. I was advised these are a really nice shock for road use & suited to both 23mm & 26mm torsion bars.
Over the Xmas period I managed to get away & spend a bit of time in the garage replacing the front strut inserts and the rear shocks, so I thought I might as well try & document what I did for future DDK reference. There are lots of similar threads on Pelican etc to cross reference with , and I believe our own Sladey did a similar thread when he replaced his.
Anyway ….
Rear Shocks:
Might as well start with the easiest end of the car. Removing the old rear shocks is pretty straight forward, so straight forward I forgot to take any photos.
First remove the air box in the engine bay to give access to the top shock mounts. With the car still on the ground I loosened off the top nuts of the old shocks. My old shocks had flats on the thread which I used an adjustable wrench to hold & prevent the shock from turning, then using a ring spanner loosened the nut off.
Next I jacked up the car, put it on axle stands & removed the rear wheels so I could see what I was doing. Using a ring spanner & a socket I loosened off the lower shock bolt / nut.
I then placed the trolley jack under the rear wheel bearing housing ( the trailing arm of the rear suspension) and slowly ‘lifted’ the rear suspension & thus compressing the rear shock. With it compressed an amount, I removed the top mounting nut from the old shock.
Now when lowering the trailing arm down again the shock will drop through from the upper housing so make sure you are holding on to it, then remove the lower mounting bolt.
Replacment of the new shock is pretty much the reversal of above , except the new Bilstein used an allen key to prevent it spinning whilst tightening up the upper mount.
UPDATE :
The rear shocks (sprints) do not fit out of the box for pre 72 cars, they modified the bottom shock mount bolt.
Pre 72 bolts are 12mm by 85mm long. If you look at pet they reference a different sized bolt 900 082 018 02 12mm -71
Post 72 bolts are 14mm by 95mm long. If you look at pet they reference a different sized bolt 900 082 049 02 14mm 72-
There appear to be 2 options for pre-72 cars :
make a sleeve 14mm O/D and 12mm I/D and reuse the original bolt
or
drill out the lower shock mount on my banana arms to 14mm and buy new 14mm bolts, BUT the 14mm bolts are no longer available from Porsche.
Front Struts:
As with all the other threads you read on this, the front end is a bit more involved. I decided to try & do this job without removing the front struts or disconnecting the brake lines.
With the car jacked up & on an axle stand ( I place a single axle stand in the centre of the front ‘tank support’ ), I remove both wheels & place them on the floor under the car.
Tackling the nearside first, I place the trolley jack under the ball joint on the A-arm and slowly lift the suspension up thus taking the ‘weight’ off the upper strut mounting nut. Using a socket & breaker bar I remove the top nut and washers.
I lift the suspension a bit more to compress the strut further , then lower it down. At this point you need to make sure you are holding the strut with one hand because it should now drop away from its top mounting and if not held it will swing out & stretch the brake hoses !!
At this point I use some wire to tie the strut in an upright position ( picture below is showing a dismantled strut, but you can see my retaining wire)
Now, to enable the insert to be removed later, I put the steering on full left lock ( full right lock when doing the offside) this gives a bit more movement of the strut without stretching the brake hose.
Next job is to remove the top part of the strut, the ‘dust cover’. I undo my support wire, angle the strut out to wards the wheel arch lip & slide off the cover. I then tied the strut back in the upright position and slid a carrier bag over the brake disc to protect it from any oil that might be within the strut.
You should now be looking at the top of the strut body with a retaining nut holding in the strut internals ( see above). This retaining nut is pretty tight & looks like it needs a specialist tool to remove. I used a hammer & punch to give it a couple of ‘shocks’ & then used a pipe wrench to unscrew it.
Once this retaining nut is removed, I again undid my wire and angled the strut to enable me to remove the internals from the strut. I had to give them a blow with my rubber hammer & then the assemble just pulled out NOTE: ORIGINAL BOGE STRUTS ARE FULL OF OIL ….. TRY NOT TO SPILL ANY ON YOUR BRAKES1.
Here are what the internals of an original Boge strut looks like:
Mine appeared to be full of stone or remnants of a damaged spacer?
With the internals removed I tied the strut upright again.
At this point the strut is still full of oil. If this oil is not removed as soon as the new insert is slid into the strut this oil will erupt out of the top of your strut all over the brakes etc ….
I found a nice solution by using a syringe and pipe ( normally used by Vets on sheep !! ) to suck out the oil.
Interestingly my struts had different oils in each of them !!
nearside:
offside:
With the oil removed from the struts I again angled them to a position where I could slide the new Bilstein inserts into them. This is not quite as easy as it sounds as in my case the inserts just managed to clear the wheel arch lip. Once the insert is in, the new retaining nut can be fitted.
Just a note here, there seems to be mixed opinion on wether the strut should be filled with oil again with the Bilstein insert. It seems Bilstein don’t recommend this so I have opted not to add oil.
As I didn’t have the specialist tool to enable me to tighten up the new retaining nut, I took the advice of Sladey & used a pipe wrench to tighten it up. A couple of bangs with the hammer on the pipe wrench handle & I’m happy these are tight ☺
Next it is simply a matter of fitting the new dust cover, which in my case meant I had to compress the insert to enable me to slip it over, & then fit the insert into the strut tower / upper mount on the car.
Using the trolley jack I again lift the suspension up to allow all the thread on the top of the insert to show at the upper mount.
Then it is simply a matter of refitting the original top mount washers & the new nyloc nut as supplied with the inserts ( NOTE: THE INSETS COME WITH A RUBBER SPACER ON THE THREADS … THIS IS FOR PACKAGING ONLY & SHOULD NOT BE FITTED).
In my case I held the larger washer with one hand & tightened the nut with a socket wrench which prevented the insert from rotating. I finally torqued up to the recommended figure.
Job done:
So wheels back on, car back on the floor … simple
Well now of course the suspension heights have changed. The rear has lifted by an 1” !! . So next port of call is a full suspension set up including this time accurate corner weights .
I have not driven the car yet so can’t comment on the Bilsteins. I’ll report back after my suspension set up.
Hope I havn’t rambled too much