

1969 912
Moderator: Bootsy
-
911hillclimber
- Nurse, I think I need some assistance
- Posts: 18973
- Joined: Mon Mar 10, 2008 6:26 pm
- Location: West Midlands
Re: 1969 912
That's new on me! Thanks for the details.
73T 911 Coupe, road/hillclimber 3.2L
Lola t 492 / 3.2 hillclimb racer
Boxster 987 Gen II 2.9
Lola t 492 / 3.2 hillclimb racer
Boxster 987 Gen II 2.9
Re: 1969 912
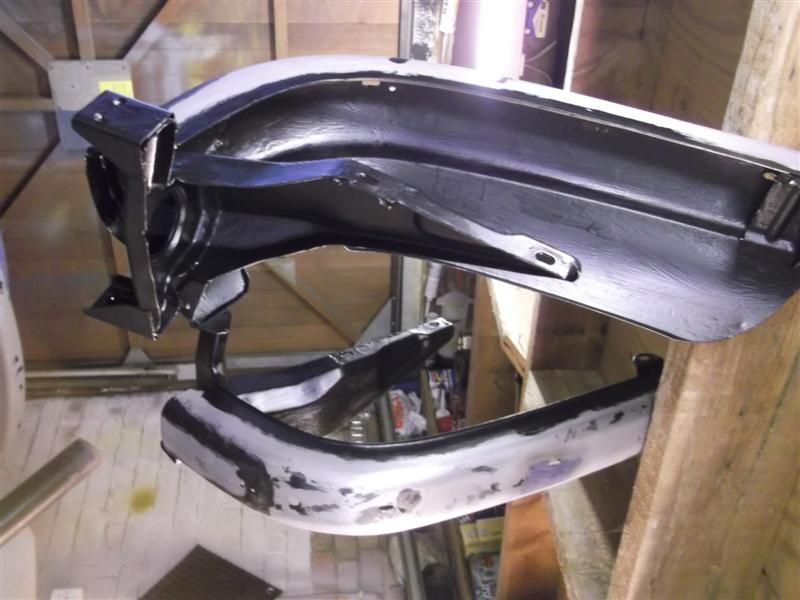
making the repair pieces is not that difficult, but getting them in the right place is!
Adrian Rendle
Re: 1969 912
painted the loose items and backs of bumpers in Epoxy Mastic, that way I got full coverage
next painted the vulnerable areas of the front wings in same stuff....wheelarch lips, flanges inside and out, headlamp bowl areas, petrol fill housing etc
I treated the double skinned areas with rust converter (fe 123), no point in trickling epoxy paint in there, it won't adhere to rust....neither wing needs any filler at all apart from my joint at bottom
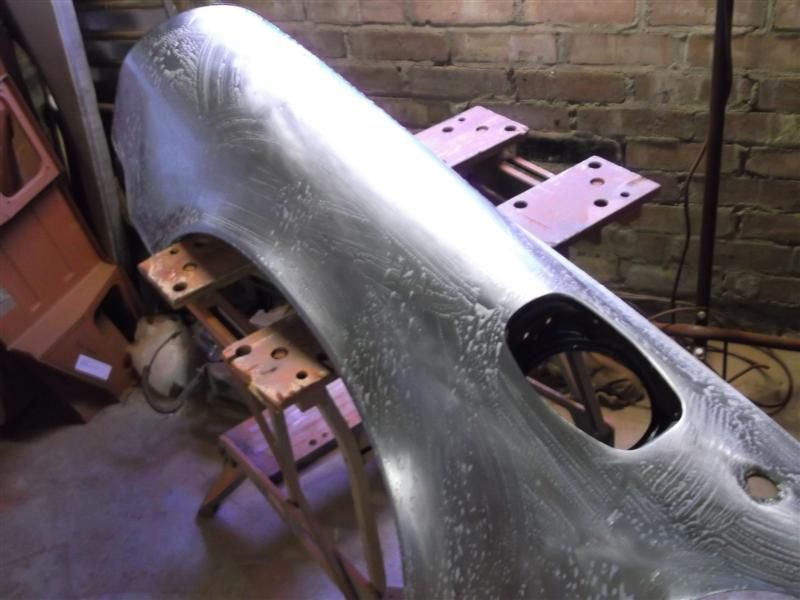
that's the wing pickling in phosphoric acid prior to epoxy primer
next painted the vulnerable areas of the front wings in same stuff....wheelarch lips, flanges inside and out, headlamp bowl areas, petrol fill housing etc
I treated the double skinned areas with rust converter (fe 123), no point in trickling epoxy paint in there, it won't adhere to rust....neither wing needs any filler at all apart from my joint at bottom
that's the wing pickling in phosphoric acid prior to epoxy primer
Adrian Rendle
Re: 1969 912
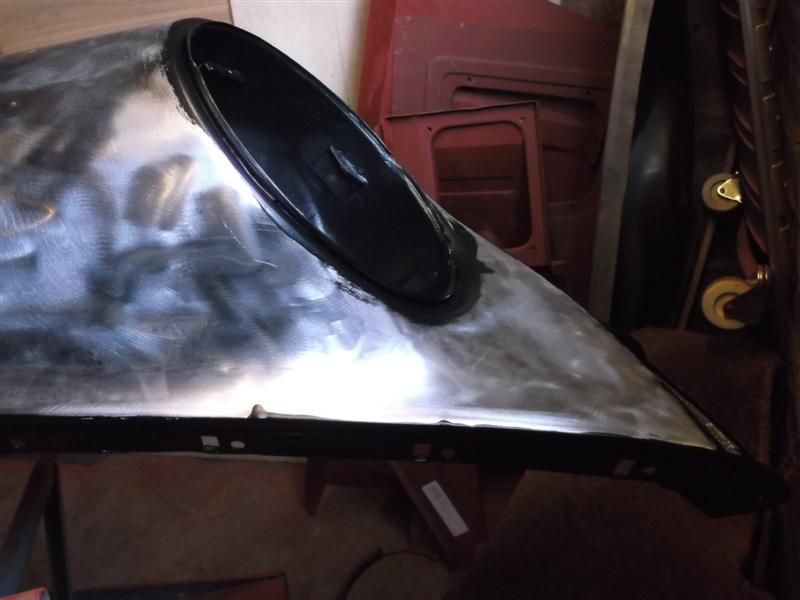
meanwhile painted all doors bonnet, engine lid etc

I seem to have been painting this thing for weeks and weeks
now I have to trial fit the wings
I seem to have been painting this thing for weeks and weeks
now I have to trial fit the wings
Adrian Rendle
Re: 1969 912
bit of an update, had to repaint the doors again as coverage around the edges wasn't good enough.....decided to go for a painted dash, had to spray it 3 times before i got it (nearly) right...so many tight curves causing runs etc
[URL=http://s255.photobucket.com/user/a ... .jpg[/img][/url]
also got my dash top repaired and recovered in black leather by my local trimmer for £200
[URL=http://s255.photobucket.com/user/a ... .jpg[/img][/url]
there is a seam around the gauges, but that looks fine
[URL=http://s255.photobucket.com/user/a ... .jpg[/img][/url]
![[URL=http://s255.photobucket.com/user/a ... .jpg[/img]](%5BURL=http%3A//s255.photobucket.com/user/ade55/media/912/interior/variousA%20004%20Medium_zpsskpupqsj.jpg.html%5D%5Bimg%5Dhttp://i255.photobucket.com/albums/hh129/ade55/912/interior/variousA%20004%20Medium_zpsskpupqsj.jpg%5B/img%5D)
also got my dash top repaired and recovered in black leather by my local trimmer for £200
[URL=http://s255.photobucket.com/user/a ... .jpg[/img][/url]
![[URL=http://s255.photobucket.com/user/a ... .jpg[/img]](%5BURL=http%3A//s255.photobucket.com/user/ade55/media/912/interior/mar17%20007_zps84n4esmm.jpg.html%5D%5Bimg%5Dhttp://i255.photobucket.com/albums/hh129/ade55/912/interior/mar17%20007_zps84n4esmm.jpg%5B/img%5D)
there is a seam around the gauges, but that looks fine
Adrian Rendle
Re: 1969 912
then sound proofed the inside, using a combination of heavy vinyl and light acoustic foam
[URL=http://s255.photobucket.com/user/a ... .jpg[/img][/url]
in the meantime i had got the gauge bezels back from chroming and put all the instruments and switches back in, all with new LED lights, apart from charge lamp
[URL=http://s255.photobucket.com/user/a ... .jpg[/img][/url]
sorry about the crap pictures
then i made a new carpet set using Boxweave carpet from BAS in Biscuit to match the rear seats i had retrimmed in Jaguar Barley vinyl
[URL=http://s255.photobucket.com/user/a ... .jpg[/img][/url]
i've gone for a carpeted rear shelf and also painted the metal trims body colour ,as you can see (it looks better in real life!).... i like it, anyway
[URL=http://s255.photobucket.com/user/a ... .jpg[/img][/url]
![[URL=http://s255.photobucket.com/user/a ... .jpg[/img]](%5BURL=http%3A//s255.photobucket.com/user/ade55/media/912/interior/mar17%20004_zps20zomcbk.jpg.html%5D%5Bimg%5Dhttp://i255.photobucket.com/albums/hh129/ade55/912/interior/mar17%20004_zps20zomcbk.jpg%5B/img%5D)
in the meantime i had got the gauge bezels back from chroming and put all the instruments and switches back in, all with new LED lights, apart from charge lamp
[URL=http://s255.photobucket.com/user/a ... .jpg[/img][/url]
![[URL=http://s255.photobucket.com/user/a ... .jpg[/img]](%5BURL=http%3A//s255.photobucket.com/user/ade55/media/912/interior/mar17%20002_zps2njxau6j.jpg.html%5D%5Bimg%5Dhttp://i255.photobucket.com/albums/hh129/ade55/912/interior/mar17%20002_zps2njxau6j.jpg%5B/img%5D)
sorry about the crap pictures
then i made a new carpet set using Boxweave carpet from BAS in Biscuit to match the rear seats i had retrimmed in Jaguar Barley vinyl
[URL=http://s255.photobucket.com/user/a ... .jpg[/img][/url]
![[URL=http://s255.photobucket.com/user/a ... .jpg[/img]](%5BURL=http%3A//s255.photobucket.com/user/ade55/media/912/interior/DSCF4111_zpsbzkke3hm.jpg.html%5D%5Bimg%5Dhttp://i255.photobucket.com/albums/hh129/ade55/912/interior/DSCF4111_zpsbzkke3hm.jpg%5B/img%5D)
i've gone for a carpeted rear shelf and also painted the metal trims body colour ,as you can see (it looks better in real life!).... i like it, anyway
Adrian Rendle
Re: 1969 912
carpets are all removeable via press studs
front and rear screens also went in (not by me!) with new rubbers....i thought i had stuck the heated rear window connection back on well enough with some of that special glue (Permatex) but it came away as the guy was installing the screen...i'm gonna have to let that one go
[URL=http://s255.photobucket.com/user/a ... .jpg[/img][/url]
then i installed the pop-outs with new outer rubbers, which were a real struggle to fit,
i rebuilt pedal assy with bronze bushes and installed my throttle pedal complete with Screwfix brass hinge to replace the original rusted one
[URL=http://s255.photobucket.com/user/a ... .jpg[/img][/url]
meanwhile, my massively expensive Elephant Racing bushes arrived for front and rear suspension refurb....its fast becoming uneconomic to import stuff from the States, various otther bits arrived from Germany....new tank, as mine was holed
front and rear screens also went in (not by me!) with new rubbers....i thought i had stuck the heated rear window connection back on well enough with some of that special glue (Permatex) but it came away as the guy was installing the screen...i'm gonna have to let that one go
[URL=http://s255.photobucket.com/user/a ... .jpg[/img][/url]
![[URL=http://s255.photobucket.com/user/a ... .jpg[/img]](%5BURL=http%3A//s255.photobucket.com/user/ade55/media/912/interior/mar17%20001_zpsl7u23bsi.jpg.html%5D%5Bimg%5Dhttp://i255.photobucket.com/albums/hh129/ade55/912/interior/mar17%20001_zpsl7u23bsi.jpg%5B/img%5D)
then i installed the pop-outs with new outer rubbers, which were a real struggle to fit,
i rebuilt pedal assy with bronze bushes and installed my throttle pedal complete with Screwfix brass hinge to replace the original rusted one
[URL=http://s255.photobucket.com/user/a ... .jpg[/img][/url]
![[URL=http://s255.photobucket.com/user/a ... .jpg[/img]](%5BURL=http%3A//s255.photobucket.com/user/ade55/media/912/interior/mar17%20005_zpsdpnirq0v.jpg.html%5D%5Bimg%5Dhttp://i255.photobucket.com/albums/hh129/ade55/912/interior/mar17%20005_zpsdpnirq0v.jpg%5B/img%5D)
meanwhile, my massively expensive Elephant Racing bushes arrived for front and rear suspension refurb....its fast becoming uneconomic to import stuff from the States, various otther bits arrived from Germany....new tank, as mine was holed
Adrian Rendle
Re: 1969 912
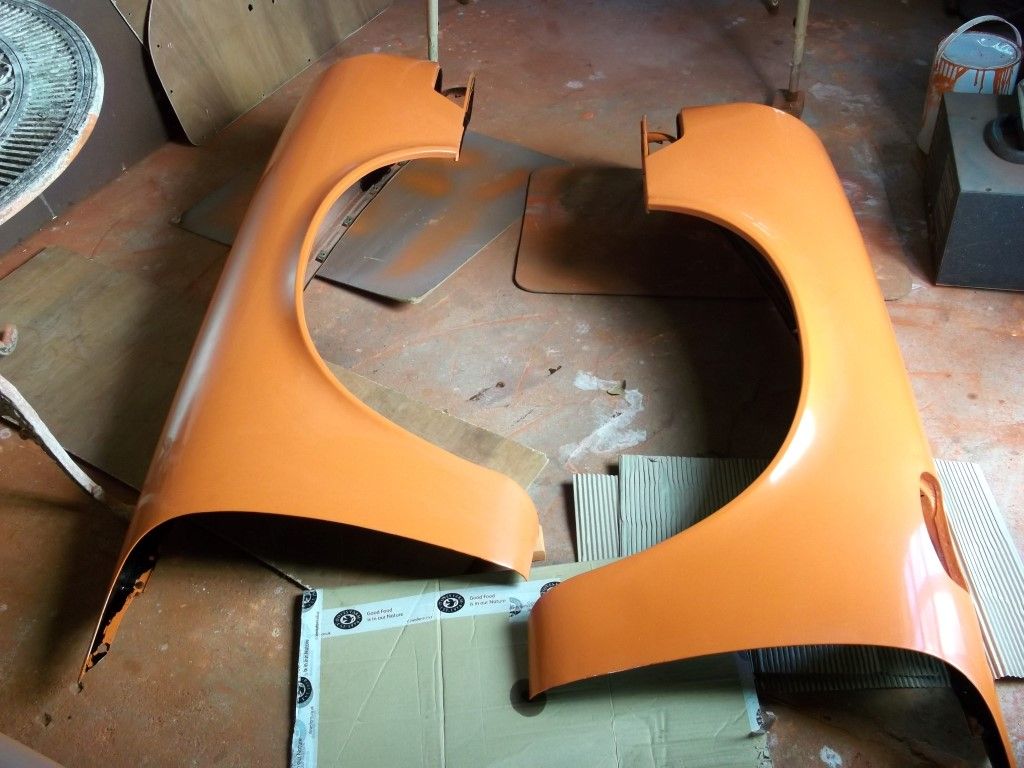
painted wings after trial fitting them, fit is reasonable
then fitted wings to body, didn't use any sealing strips between wing and body, as it would have made the gap to the bonnet too large....i will Tiger seal the joint, which will give a better seal anyway
drilled an extra hole near the petrol filler flap hinge so i can poke a rod through to release the flap, should the cable break
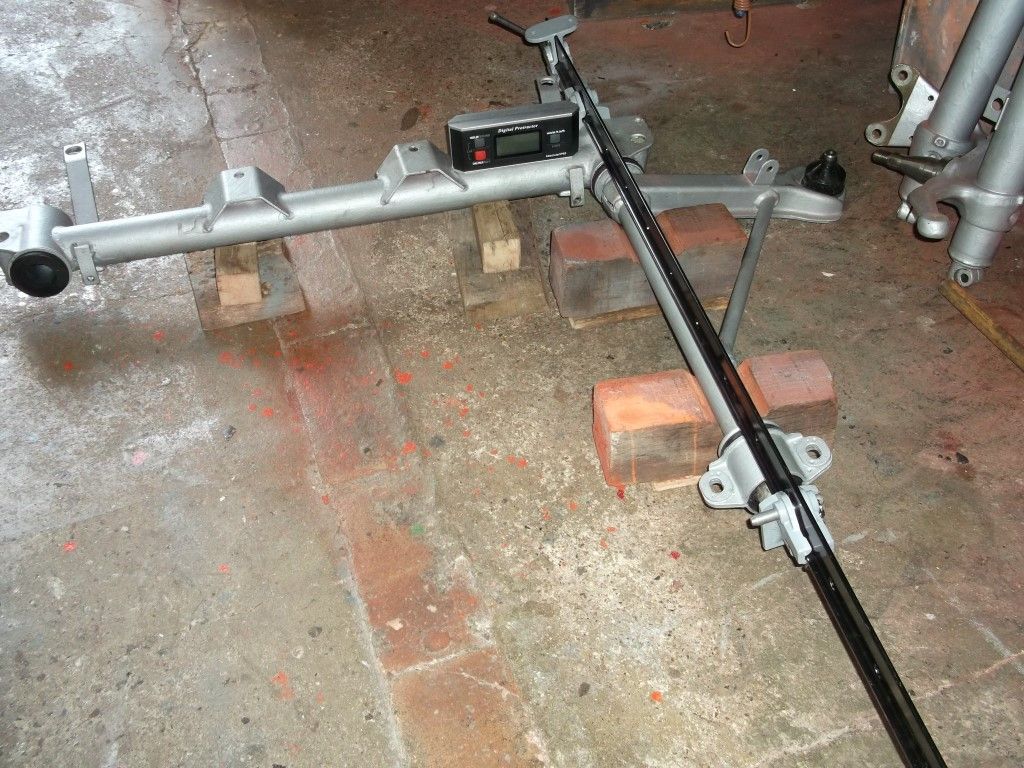
then onto mechanicals....installed my ER front buhes....why don't they tell you that their tools and instuctions dont really apply to early cars?....bought a really stout sash cramp and inclinometer to do the job, pretty straight forward, installed the turbo tie rods , installed the ball joints after making sure that i removed the paint where the b/j sits on the control arm, then installed the complete suspension onto the car.... that was the easiest job i've done on this car
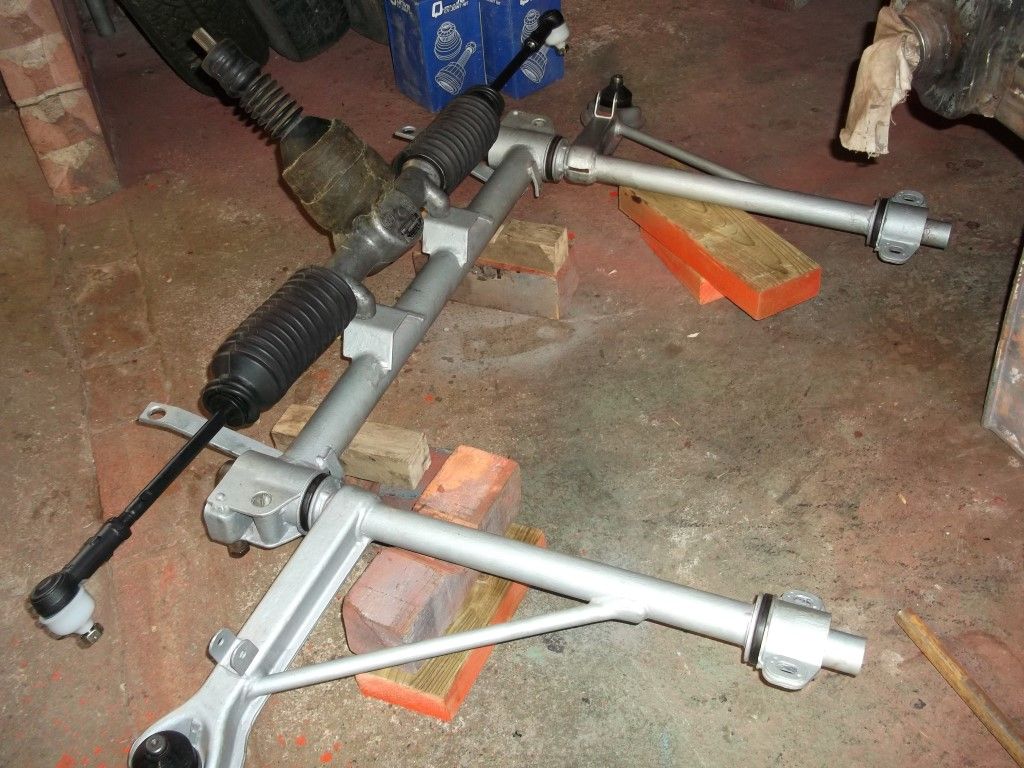
i wrapped the large convoluted steering rack cover with Denso tape to stop water getting into top of rack....then connected up steering shaft to column...it can just be done without disturbing the upper column shaft, if all the u/j's are loosened and the rack shaft is in exactly the right orientation
fitted uprights onto b/j's....i used an extra locking nut on the b/j lock screw, as mine is the early (less safe) arrangement
then fitted wings to body, didn't use any sealing strips between wing and body, as it would have made the gap to the bonnet too large....i will Tiger seal the joint, which will give a better seal anyway
drilled an extra hole near the petrol filler flap hinge so i can poke a rod through to release the flap, should the cable break
then onto mechanicals....installed my ER front buhes....why don't they tell you that their tools and instuctions dont really apply to early cars?....bought a really stout sash cramp and inclinometer to do the job, pretty straight forward, installed the turbo tie rods , installed the ball joints after making sure that i removed the paint where the b/j sits on the control arm, then installed the complete suspension onto the car.... that was the easiest job i've done on this car
i wrapped the large convoluted steering rack cover with Denso tape to stop water getting into top of rack....then connected up steering shaft to column...it can just be done without disturbing the upper column shaft, if all the u/j's are loosened and the rack shaft is in exactly the right orientation
fitted uprights onto b/j's....i used an extra locking nut on the b/j lock screw, as mine is the early (less safe) arrangement
Adrian Rendle