Meet Ralph - 1970 ST project
Moderator: Bootsy
-
stretch
- Me and DDK sitting in a tree! KISSING
- Posts: 2688
- Joined: Thu May 21, 2009 2:54 pm
- Location: Kent
Re: Meet Ralph - 1970 ST project
Good progress, enjoyable thread.
70T barn find...... to ST.
1998 C2 996 Kettle
1998 C2 996 Kettle
Re: Meet Ralph - 1970 ST project
rich73 wrote: Managed to make it from 2 pieces, wasn't in the mood for TIG so just MIG welded in both sides and cleaned up with a flap disk.
Rich
- Attachments
-
Dean
1973T Targa MFI 334 met blu- under restoration https://www.ddk-online.com/phpBB2/viewt ... 28&t=67060
1980 924 Turbo, blu/grn tartan - restored
1973T Targa MFI 334 met blu- under restoration https://www.ddk-online.com/phpBB2/viewt ... 28&t=67060
1980 924 Turbo, blu/grn tartan - restored
Re: Meet Ralph - 1970 ST project
Amazing that looks like a remarkably familiar scene. I was thrown for a while as my RHS is different from the LHS due to oil line clearance. I do enjoy TIG and it's great for detailed work but I do think MIG is incredible for its speed and versatility.
-
BILLY BEAN
- DDK 1st, 2nd and 3rd for me!
- Posts: 2112
- Joined: Sat Oct 26, 2013 12:42 am
- Location: Oxfordshire
Re: Meet Ralph - 1970 ST project
Great thread. Admirable speed and quality of metalwork.
Rust Never Sleeps
-
jtparr
- DDK 1st, 2nd and 3rd for me!
- Posts: 2238
- Joined: Mon May 24, 2004 10:54 pm
- Location: london/surrey
Re: Meet Ralph - 1970 ST project
Excellent...cracking pace...well done 
1974 2.7 Carrera
(full restoration. now as an RS Touring)
1963 3.8 E Type
( 11 years in the making…………………….)
1952. XK120…the next one ……….……..)
(full restoration. now as an RS Touring)
1963 3.8 E Type
( 11 years in the making…………………….)
1952. XK120…the next one ……….……..)
Re: Meet Ralph - 1970 ST project
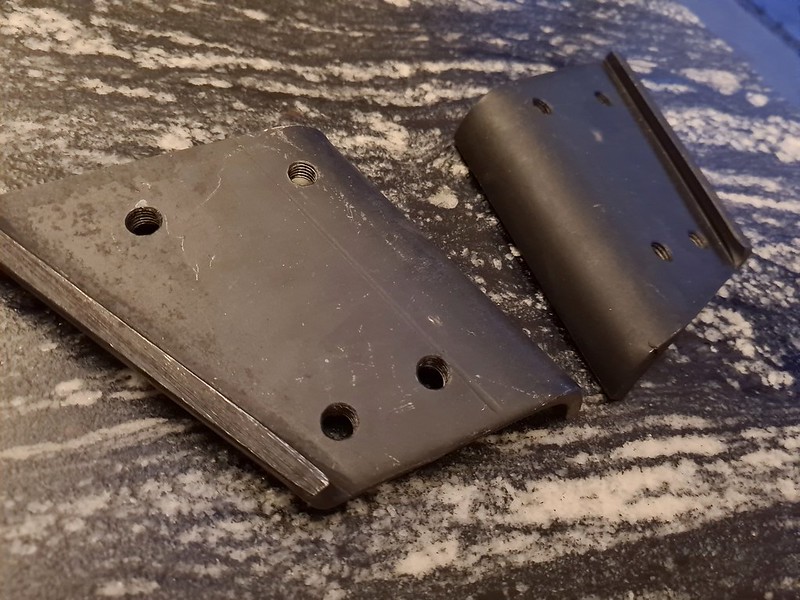
Thanks for the comments, no actual work on the car this week but made some great progress. Met Kirk and his cars this week which was real morale booster, thanks so much for all the great advice as well as supply of these roll bar mounting plates, really happy with them thanks.
 2021-05-02_08-59-49 by richard cannings, on Flickr
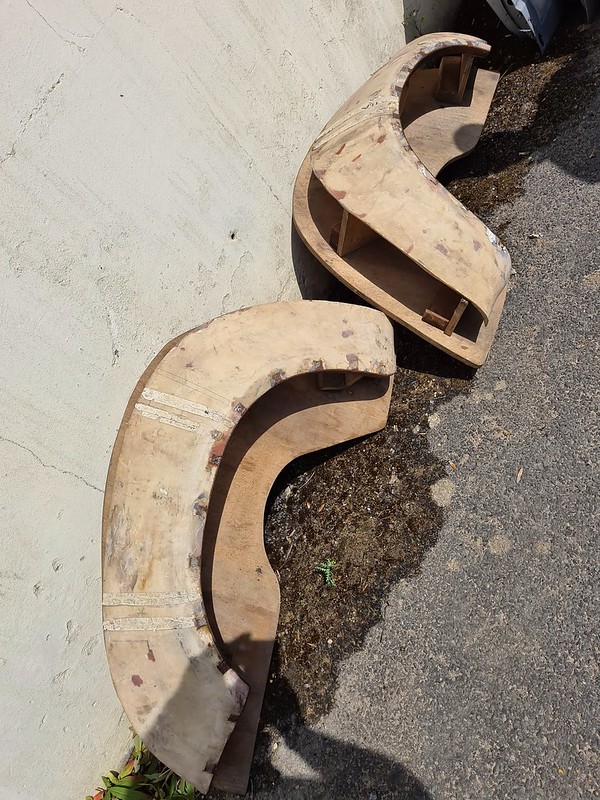
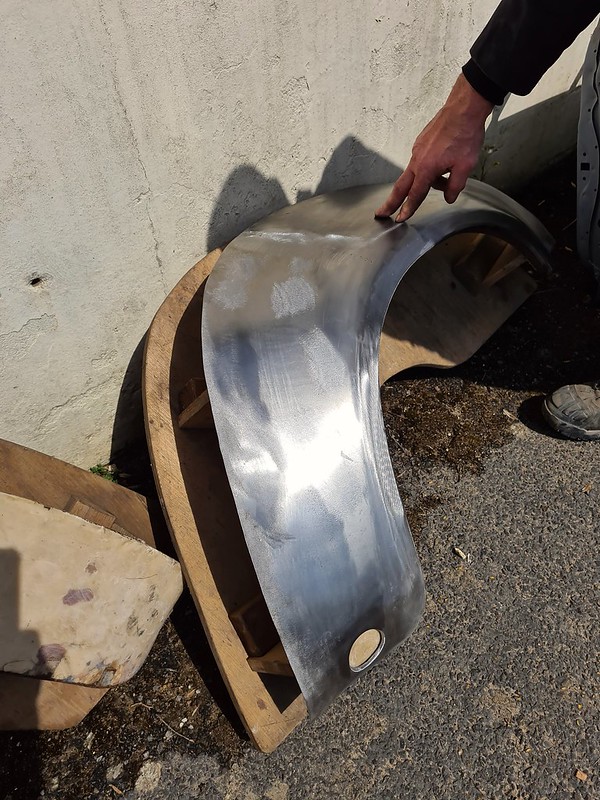
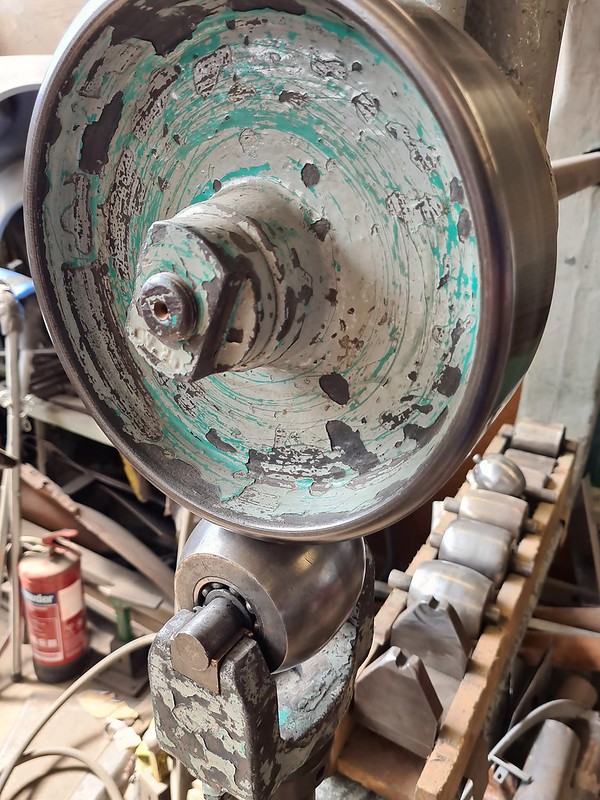
I now have a full set of hand made ST arches too. There were made using moulds from an original ST as reference and hand formed on an English wheel.
 2021-05-02_08-59-01 by richard cannings, on Flickr
 2021-05-02_08-58-34 by richard cannings, on Flickr
 2021-05-02_08-57-10 by richard cannings, on Flickr
 2021-05-02_08-59-35 by richard cannings, on Flickr
Couldn’t resist a mockup.
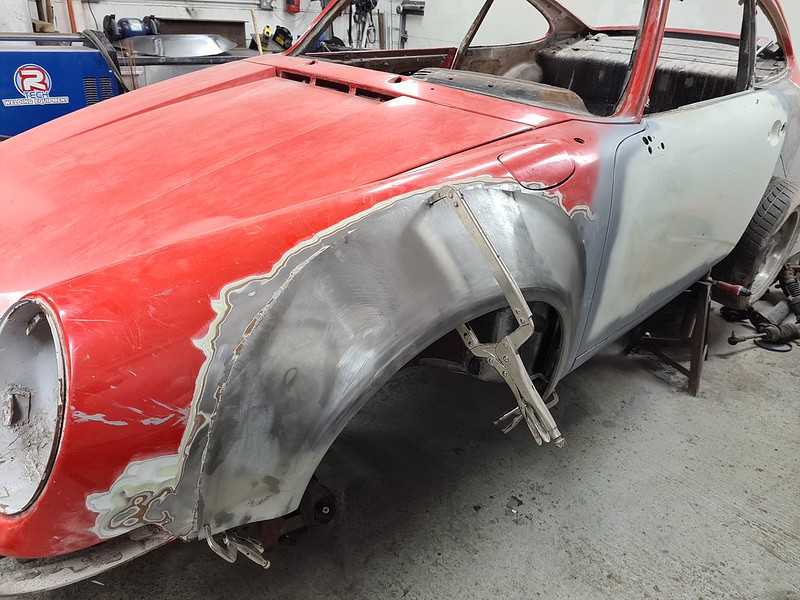 2021-05-02_09-00-05 by richard cannings, on Flickr
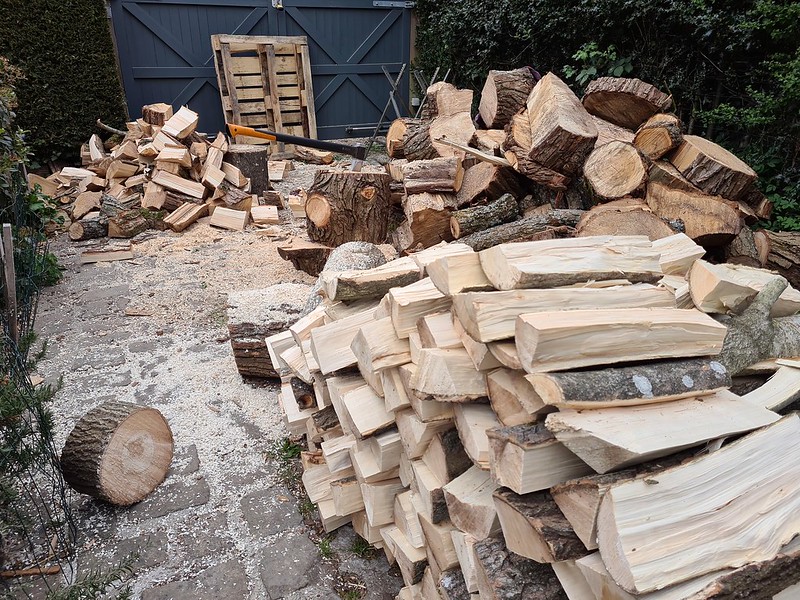
To date I’ve put 260 hrs into the car, this includes planning, strip down and selling parts. I’m going to have a few weeks off now to catch up with some admin such a holiday and prepping for the impending Surrey winter .
 2021-05-02_09-06-30 by richard cannings, on Flickr
I’ll keep updating the thread with my thoughts as well parts I’m looking for. I’ll start by asking if anyone has a set of worn out TB15’s in the corner of their garage that they are struggling to throw out. Would be great to have wheels and tyres fitted when I weld on the arches. Just priced a set and struggling with the idea of spending £1700 on a set of tyres at the moment.
Thanks
Rich
2021-05-02_08-59-49 by richard cannings, on FlickrI now have a full set of hand made ST arches too. There were made using moulds from an original ST as reference and hand formed on an English wheel.
2021-05-02_08-59-01 by richard cannings, on Flickr2021-05-02_08-58-34 by richard cannings, on Flickr2021-05-02_08-57-10 by richard cannings, on Flickr2021-05-02_08-59-35 by richard cannings, on FlickrCouldn’t resist a mockup.
2021-05-02_09-00-05 by richard cannings, on FlickrTo date I’ve put 260 hrs into the car, this includes planning, strip down and selling parts. I’m going to have a few weeks off now to catch up with some admin such a holiday and prepping for the impending Surrey winter .
2021-05-02_09-06-30 by richard cannings, on FlickrI’ll keep updating the thread with my thoughts as well parts I’m looking for. I’ll start by asking if anyone has a set of worn out TB15’s in the corner of their garage that they are struggling to throw out. Would be great to have wheels and tyres fitted when I weld on the arches. Just priced a set and struggling with the idea of spending £1700 on a set of tyres at the moment.
Thanks
Rich
Re: Meet Ralph - 1970 ST project
Hi There,
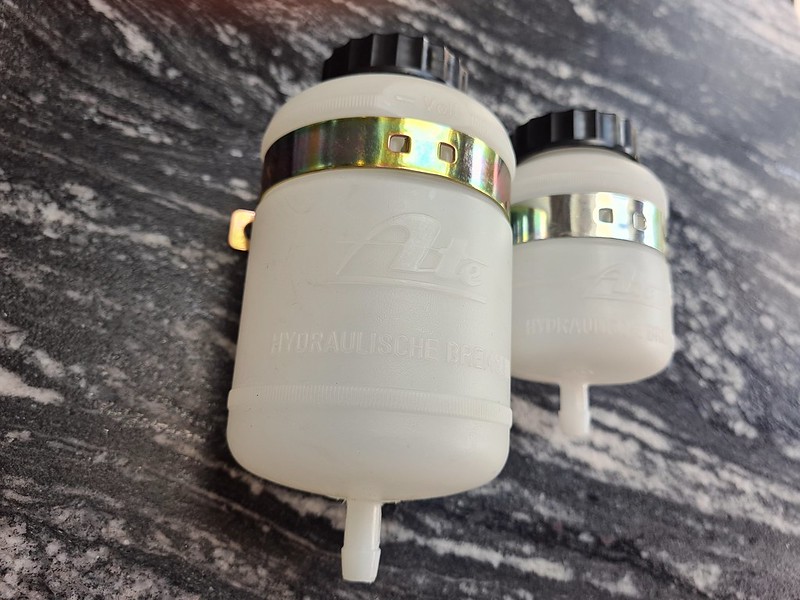
Bit of a break but back to it today. Collected a few more parts, really pleased to get a brake fluid reservoir set.
 2021-06-09_05-50-01 by richard cannings, on Flickr
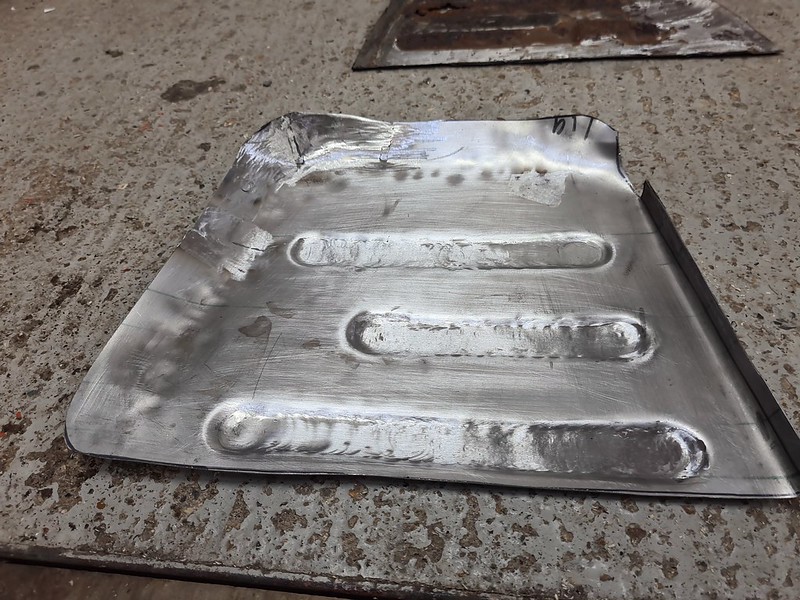
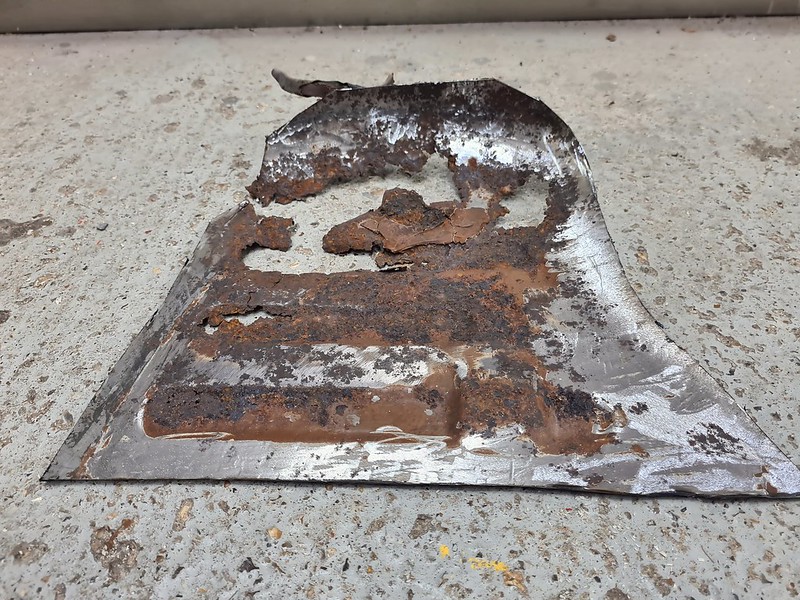
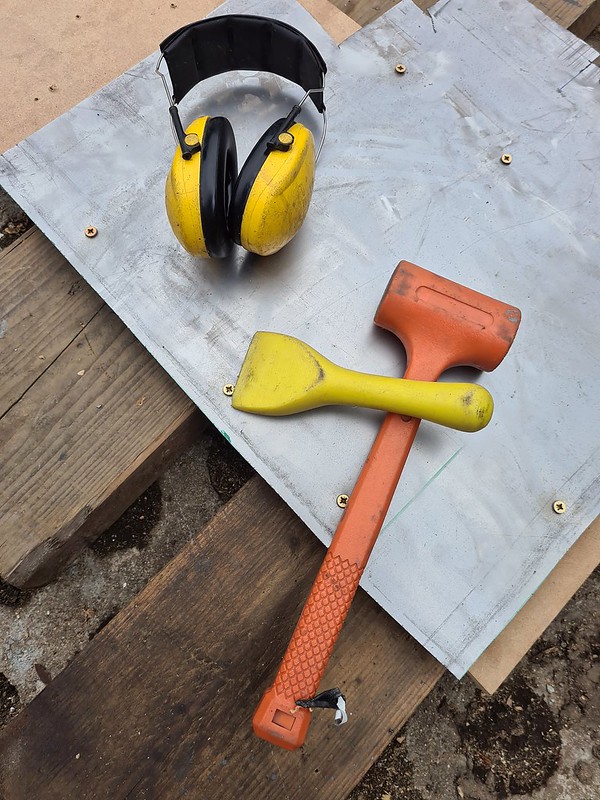
Thought I'd have a go at the rear seat bases. Attempt number one was to route out the pattern on MDF and hammer into shape, results weren't terrible but I wasn't really happy with it. I think I'd had a nylon rod to punch into the slots it may have been better but I was just hitting a Pein hammer with a rubber mallet.
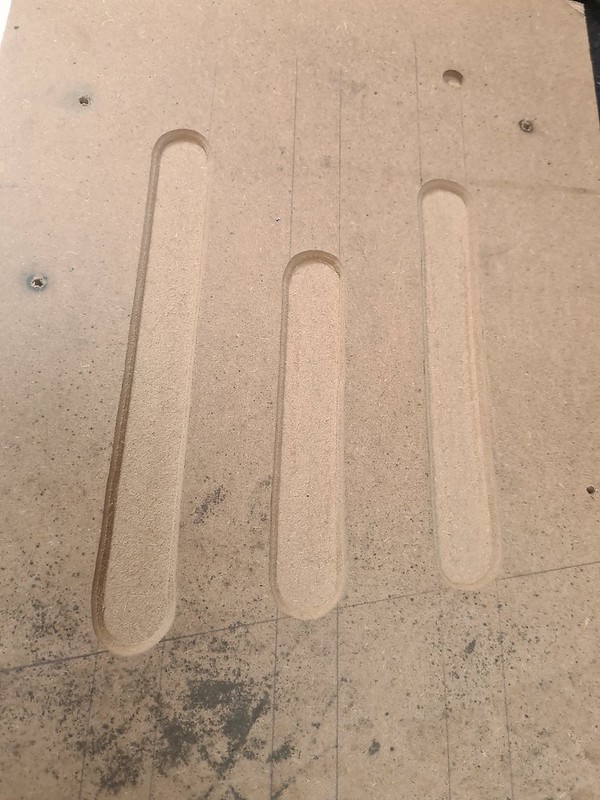 2021-06-09_05-43-57 by richard cannings, on Flickr
 2021-06-09_05-44-12 by richard cannings, on Flickr
Decided to make some formers out of flat bar and screw them to the MDF, added benefit the this method was that that I could rearrange the bars to make the former for the other side.
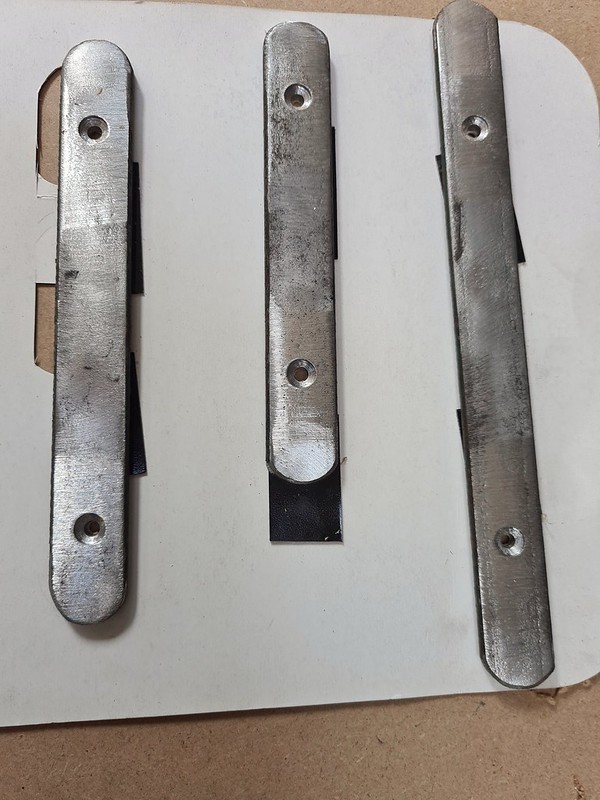 2021-06-09_05-45-16 by richard cannings, on Flickr
Steel screwed to the MDF.
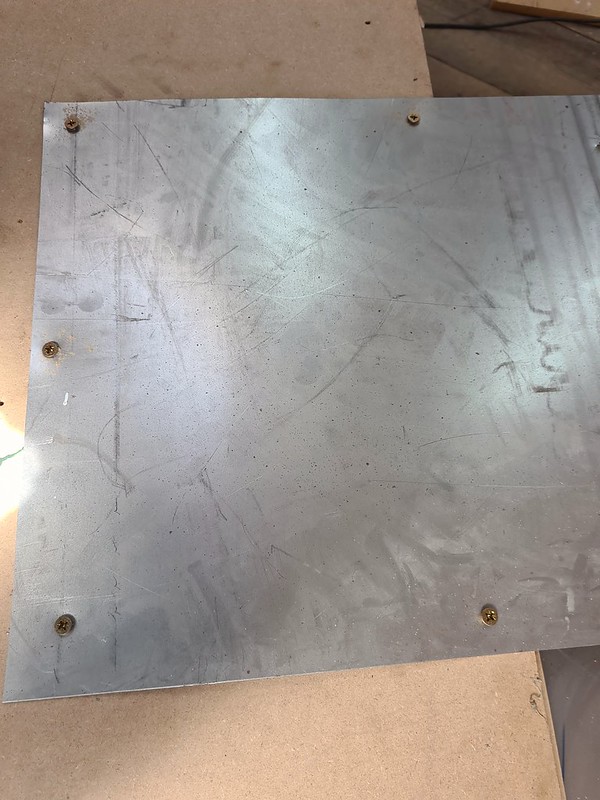 2021-06-09_05-45-34 by richard cannings, on Flickr
Much happier with this, defiantly going to remake the other one.
 2021-06-09_05-46-15 by richard cannings, on Flickr
 2021-06-09_05-46-31 by richard cannings, on Flickr
Might try get it welded in tomorrow.
Bit of a break but back to it today. Collected a few more parts, really pleased to get a brake fluid reservoir set.
2021-06-09_05-50-01 by richard cannings, on FlickrThought I'd have a go at the rear seat bases. Attempt number one was to route out the pattern on MDF and hammer into shape, results weren't terrible but I wasn't really happy with it. I think I'd had a nylon rod to punch into the slots it may have been better but I was just hitting a Pein hammer with a rubber mallet.
2021-06-09_05-43-57 by richard cannings, on Flickr2021-06-09_05-44-12 by richard cannings, on FlickrDecided to make some formers out of flat bar and screw them to the MDF, added benefit the this method was that that I could rearrange the bars to make the former for the other side.
2021-06-09_05-45-16 by richard cannings, on FlickrSteel screwed to the MDF.
2021-06-09_05-45-34 by richard cannings, on FlickrMuch happier with this, defiantly going to remake the other one.
2021-06-09_05-46-15 by richard cannings, on Flickr2021-06-09_05-46-31 by richard cannings, on FlickrMight try get it welded in tomorrow.
-
Ian Comerford
- I luv DDK!
- Posts: 784
- Joined: Fri Apr 01, 2005 8:51 am
- Location: Harston, Leics
Re: Meet Ralph - 1970 ST project
Great skills.
-
rhd racer
- DDK 1st, 2nd and 3rd for me!
- Posts: 2060
- Joined: Wed Jun 23, 2004 9:47 pm
- Location: Nottinghamshire
Re: Meet Ralph - 1970 ST project
That really is great work
93 964 C2
99 Boxster 2.5 > 2.7 hill climber
71 914/6 3.0 - gone
'You see Paul, hill climbing is like making love to a beautiful woman. You get your motor running, check your fluids, hang on tight and WHOA..30 seconds later it's all over!' Swiss Tony
99 Boxster 2.5 > 2.7 hill climber
71 914/6 3.0 - gone
'You see Paul, hill climbing is like making love to a beautiful woman. You get your motor running, check your fluids, hang on tight and WHOA..30 seconds later it's all over!' Swiss Tony
Re: Meet Ralph - 1970 ST project
Thanks for the comments,
Slight change of plan as hadn't really appreciated that with the seat base panels removed I had a really good opportunity to clean and paint the torsion bar tube from the top.
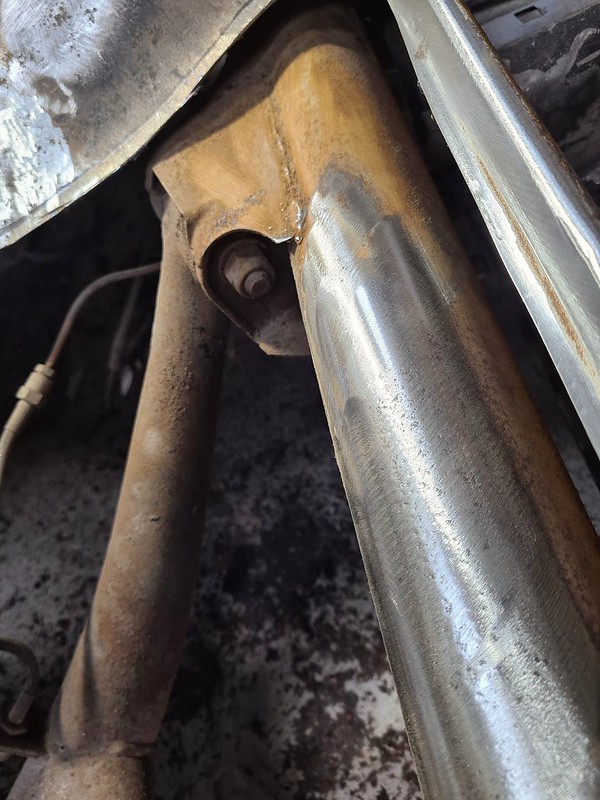 2021-06-14_11-10-06 by richard cannings, on Flickr
Seems to be on good condition with just surface rust. Looks like it hasn't really seen much protection on the top surface from new, underside is still well protected.
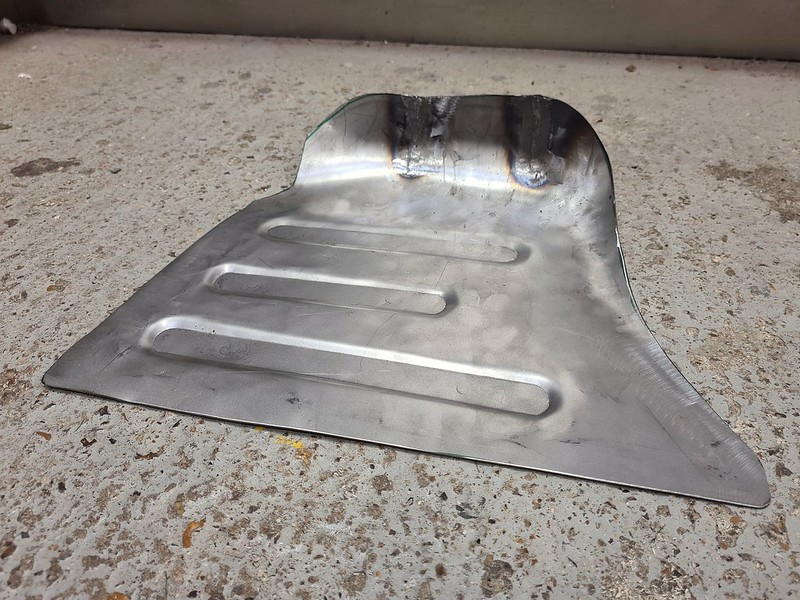
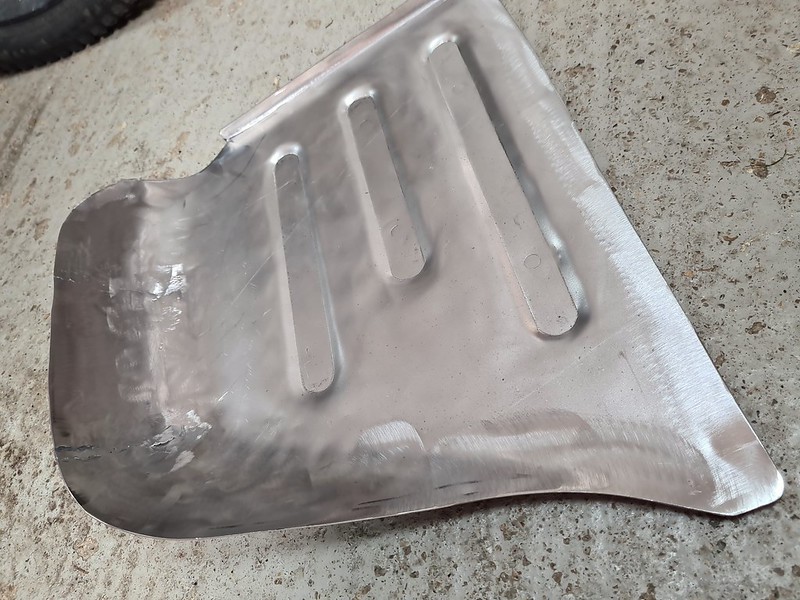
Was a bit limited for time so decided to make the other seat repair panel.
 2021-06-14_11-08-36 by richard cannings, on Flickr
 2021-06-14_11-08-48 by richard cannings, on Flickr
20 mins later.....
 2021-06-14_11-09-06 by richard cannings, on Flickr
Then cut, shaped and TIG welded the seams.
 2021-06-14_11-09-46 by richard cannings, on Flickr
I was really interested now long this took to make so timed it, 2 hours included a tool tidy afterwards. This includes everything apart from making the bars which were reused from the other side.
Just been looking at Darren's thread(thanks for posting so much detail) and seen that the strengthening at rear of the tunnel ties into the tube, hadn't realised this from all the other images I'd seen. Looks like adding this is probably the next step after I've had a clean up.
I'd welcome any comments on the strengthening and how effective it is although think I will do it just for completeness.
Thanks
Rich
Slight change of plan as hadn't really appreciated that with the seat base panels removed I had a really good opportunity to clean and paint the torsion bar tube from the top.
2021-06-14_11-10-06 by richard cannings, on FlickrSeems to be on good condition with just surface rust. Looks like it hasn't really seen much protection on the top surface from new, underside is still well protected.
Was a bit limited for time so decided to make the other seat repair panel.
2021-06-14_11-08-36 by richard cannings, on Flickr2021-06-14_11-08-48 by richard cannings, on Flickr20 mins later.....
2021-06-14_11-09-06 by richard cannings, on FlickrThen cut, shaped and TIG welded the seams.
2021-06-14_11-09-46 by richard cannings, on FlickrI was really interested now long this took to make so timed it, 2 hours included a tool tidy afterwards. This includes everything apart from making the bars which were reused from the other side.
Just been looking at Darren's thread(thanks for posting so much detail) and seen that the strengthening at rear of the tunnel ties into the tube, hadn't realised this from all the other images I'd seen. Looks like adding this is probably the next step after I've had a clean up.
I'd welcome any comments on the strengthening and how effective it is although think I will do it just for completeness.
Thanks
Rich

Re: Meet Ralph - 1970 ST project
Looking good, I'm always amazed by peoples metalwork skills!
All the best
Ian F.
All the best
Ian F.
________________
Gone but not forgotten
72 2.4 T in Sepia (Charlie)
60s, 70s, 80s, 90s & 00s Alfas
Caterhams (one fast & one very Fast!)
and a few old Lotus.
Still with us
997 C2S (Alice) & M&W 550 Spyder (Lil Caesar)
Gone but not forgotten
72 2.4 T in Sepia (Charlie)
60s, 70s, 80s, 90s & 00s Alfas
Caterhams (one fast & one very Fast!)
and a few old Lotus.
Still with us
997 C2S (Alice) & M&W 550 Spyder (Lil Caesar)
-
911hillclimber
- Nurse, I think I need some assistance
- Posts: 18970
- Joined: Mon Mar 10, 2008 6:26 pm
- Location: West Midlands
Re: Meet Ralph - 1970 ST project
IIRC the strengthening of the lower vertical bulk head to the tube was a factory racing mod to stop the tube flexing under hard acceleration and braking. I would add them if I was in the same position as you are now unless you are originality driven.
Car will be fine without them too!
Car will be fine without them too!
73T 911 Coupe, road/hillclimber 3.2L
Lola t 492 / 3.2 hillclimb racer
Boxster 987 Gen II 2.9
Lola t 492 / 3.2 hillclimb racer
Boxster 987 Gen II 2.9
Re: Meet Ralph - 1970 ST project
Certainly very dedicated and skilled work here.
1972 2.4S, since 1988
993 RSR Cup
73 RS Rep Race
2018 GT3RS Lizard
993 RSR Cup
73 RS Rep Race
2018 GT3RS Lizard
Re: Meet Ralph - 1970 ST project
Hi all,
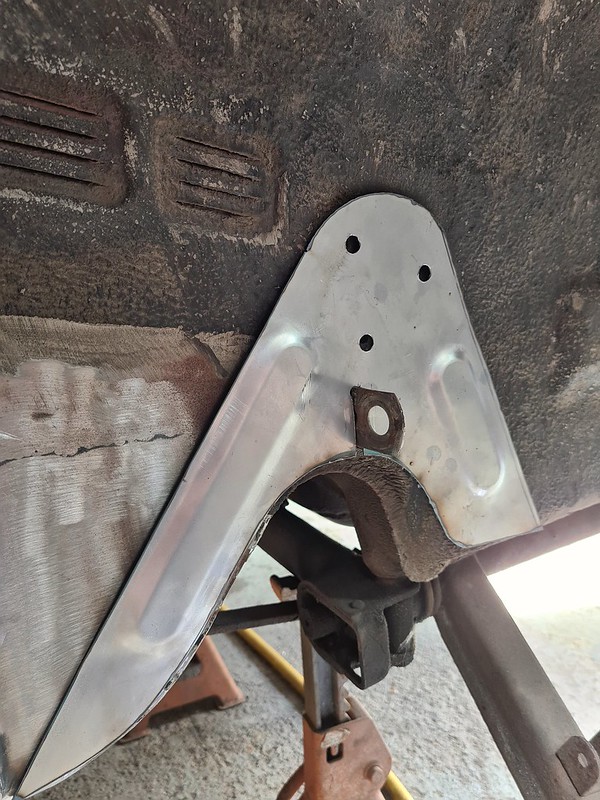
Thanks for the comments. Struggling to get much time on the car at the moment but hoping the that will change next week. I've decide that I'll basically do all the body strengthening modifications I can find. I know that once its painted I wont go back. I did some research and couldn't justify the price of the plates available online. I was thinking about drawing them up on CAD and getting them laser/water cut but as I only need one set this didn't really make sense. Thought I'd start with the front strut tops. Cardboard template then cut out with plasma.
Did some free hand cutting and must admit I was amazed by how clean the RTech could cut. I've had it for years but always just used it for hacking out rusty steel or fixing tractors. Set on 50% power with a template seemed to work well.
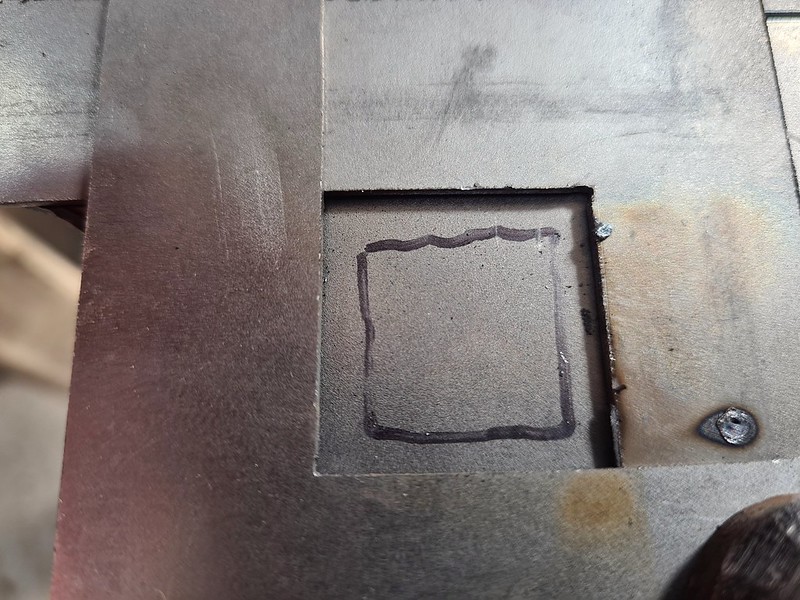 2021-06-23_04-47-08 by richard cannings, on Flickr
 2021-06-23_04-46-45 by richard cannings, on Flickr
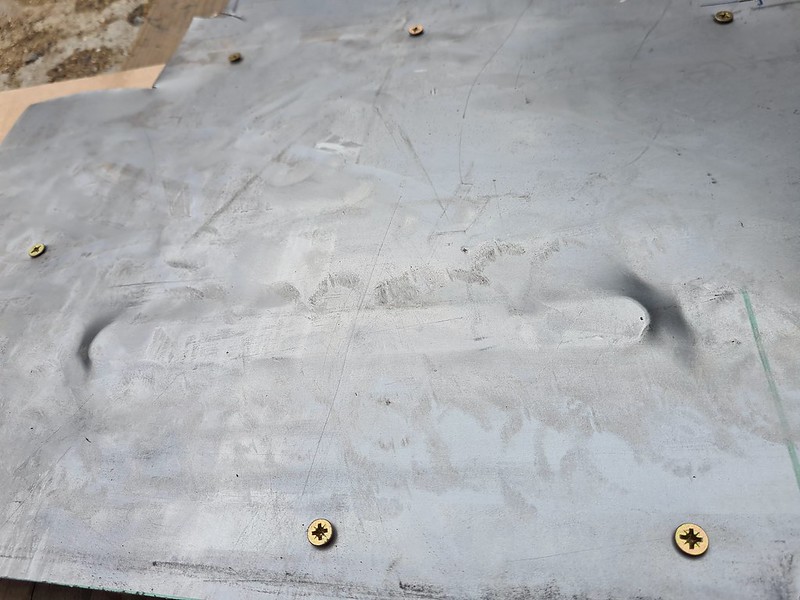
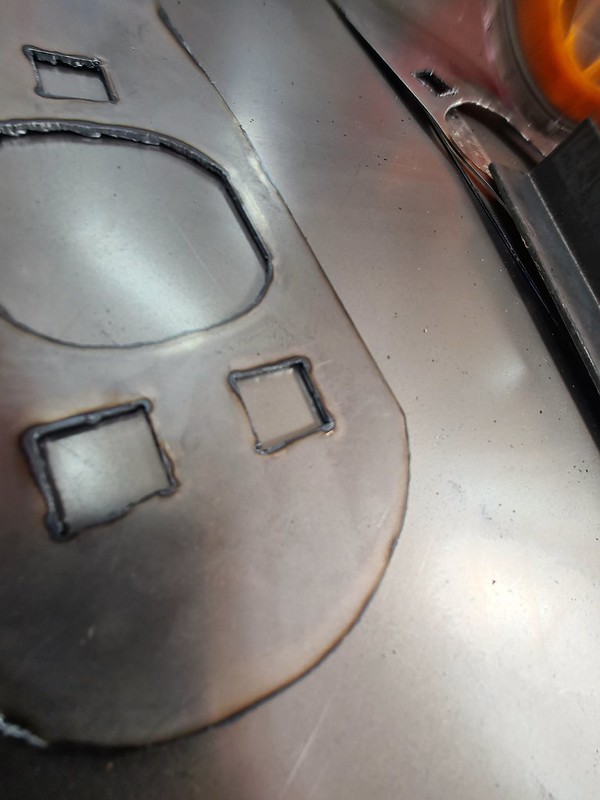
Front ARB mount strengthening was next on the list, checked out the price for the elephant racing panels and felt suitably motivated. Came up with the idea of MIG welding a rod to the panel to create a guide for the curves.
 2021-06-23_04-47-27 by richard cannings, on Flickr
Worked amazingly well.
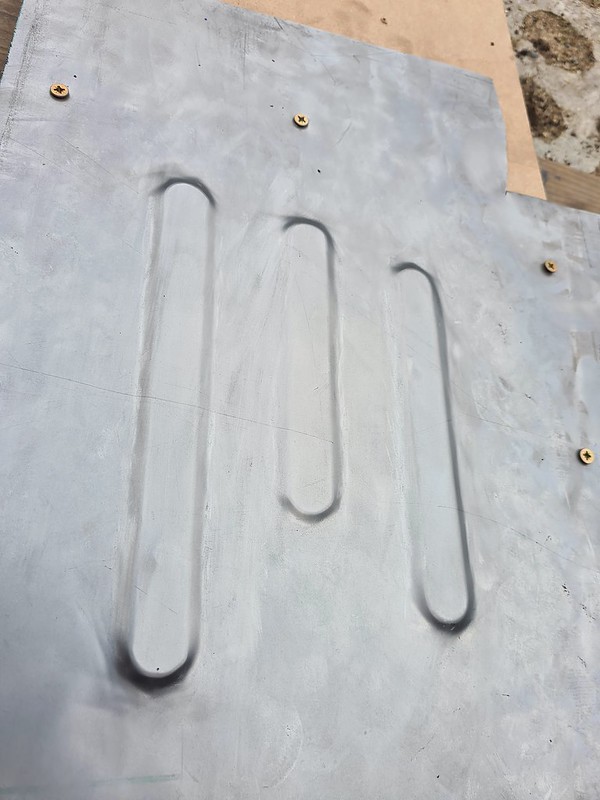
 2021-06-23_04-47-42 by richard cannings, on Flickr
Bit more tweaking needed but really happy with it, other side shouldn't take long as I can just flip the template.
 2021-06-23_04-47-55 by richard cannings, on Flickr
Had a play with using Foamex as a template too, thought it would just melt but seemed to work well.
Hoping to spend next week on the rear seat bases and torsion tube strengthening. Think in going make my own rear ARB mounts, not sure if need to get and ARB to make sure they are in the right place or just put them in the same place as they are on my 3.2, any thoughts welcome?
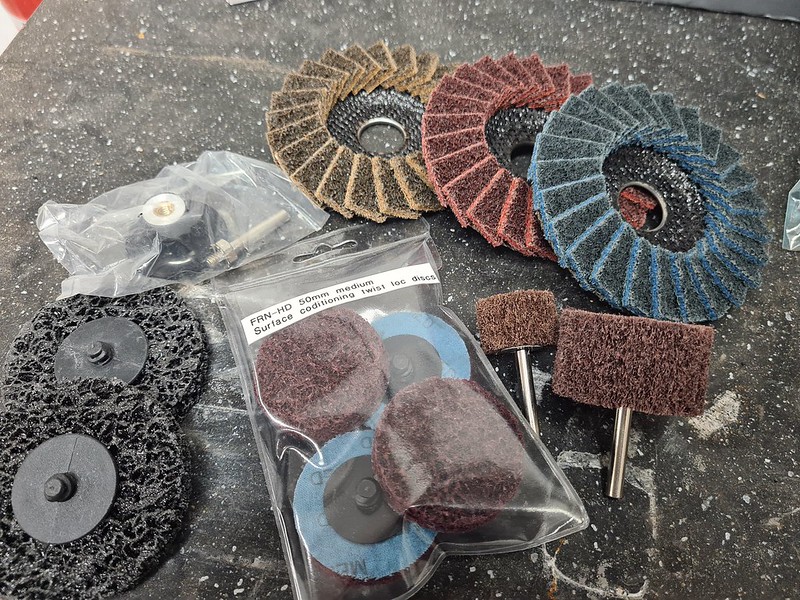
Also had a trip to Pyramid Steel In Aldershot to replace my Oxy/Acetylene Bottles, they've just opened a new shop with loads of lengths of steel all on display and ready to go, loads of abrasives too.
Rich
Thanks for the comments. Struggling to get much time on the car at the moment but hoping the that will change next week. I've decide that I'll basically do all the body strengthening modifications I can find. I know that once its painted I wont go back. I did some research and couldn't justify the price of the plates available online. I was thinking about drawing them up on CAD and getting them laser/water cut but as I only need one set this didn't really make sense. Thought I'd start with the front strut tops. Cardboard template then cut out with plasma.
Did some free hand cutting and must admit I was amazed by how clean the RTech could cut. I've had it for years but always just used it for hacking out rusty steel or fixing tractors. Set on 50% power with a template seemed to work well.
2021-06-23_04-47-08 by richard cannings, on Flickr2021-06-23_04-46-45 by richard cannings, on FlickrFront ARB mount strengthening was next on the list, checked out the price for the elephant racing panels and felt suitably motivated. Came up with the idea of MIG welding a rod to the panel to create a guide for the curves.
2021-06-23_04-47-27 by richard cannings, on FlickrWorked amazingly well.
2021-06-23_04-47-42 by richard cannings, on FlickrBit more tweaking needed but really happy with it, other side shouldn't take long as I can just flip the template.
2021-06-23_04-47-55 by richard cannings, on FlickrHad a play with using Foamex as a template too, thought it would just melt but seemed to work well.
Hoping to spend next week on the rear seat bases and torsion tube strengthening. Think in going make my own rear ARB mounts, not sure if need to get and ARB to make sure they are in the right place or just put them in the same place as they are on my 3.2, any thoughts welcome?
Also had a trip to Pyramid Steel In Aldershot to replace my Oxy/Acetylene Bottles, they've just opened a new shop with loads of lengths of steel all on display and ready to go, loads of abrasives too.
Rich