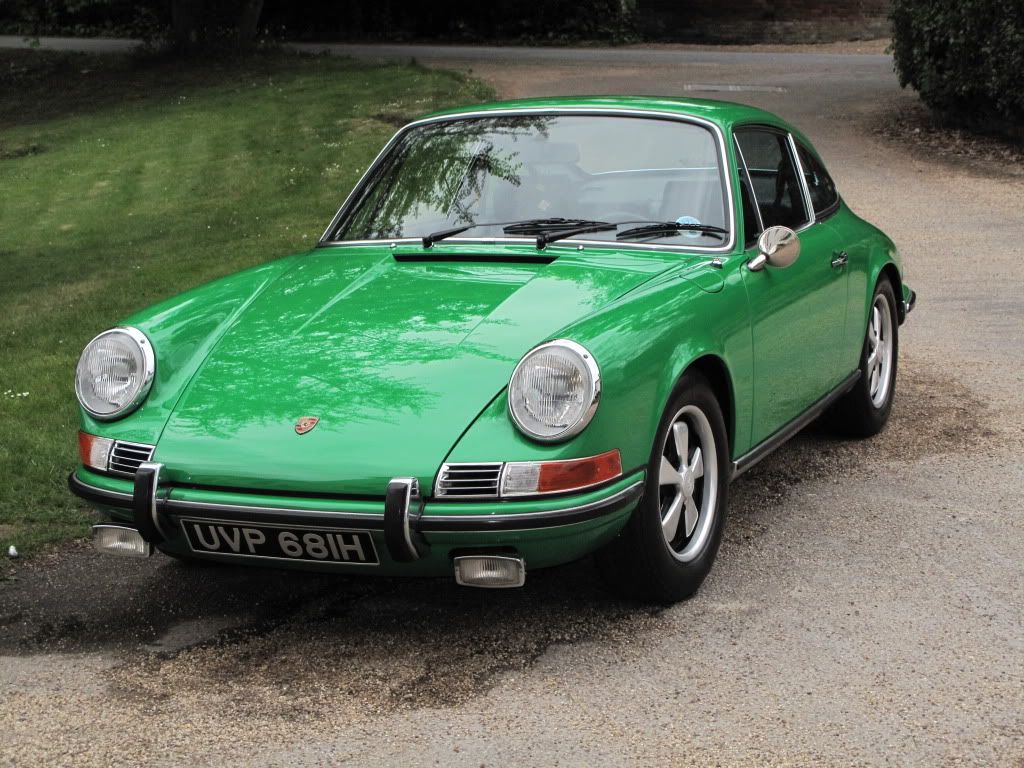
My 2.2 resto, the story so far.......
Posted: Wed Jan 05, 2011 8:29 pm
Hi All,
Let me start by saying I am rubbish at the computer bit!
I have been on the forum for a while now, but not really had anything to contribute, or so I thought! I was looking at JohnM's thread on his car, added a comment and was pleased that others have an interest in what I am doing, so here goes.
I bought the car from veryporky, as a resto project. I have wanted a 911 since I was 10, when I watched the 500mile race at Snetterton with my dad, saw all sorts of glorious things racing, GT40's, Ferraris, Alfas, Matras, Chevrons etc but was taken by the funny looking things that made a nice noise. Many years later, my darling wife asked what I would like for Christmas, to which I replied (in my boring way) 'nothing, got everything I want'. Bless her, she called me a liar and told me to go and find my 911, and how much I could spend! It took me 2 years to find it!
On the day I collected the car, it looked like this!
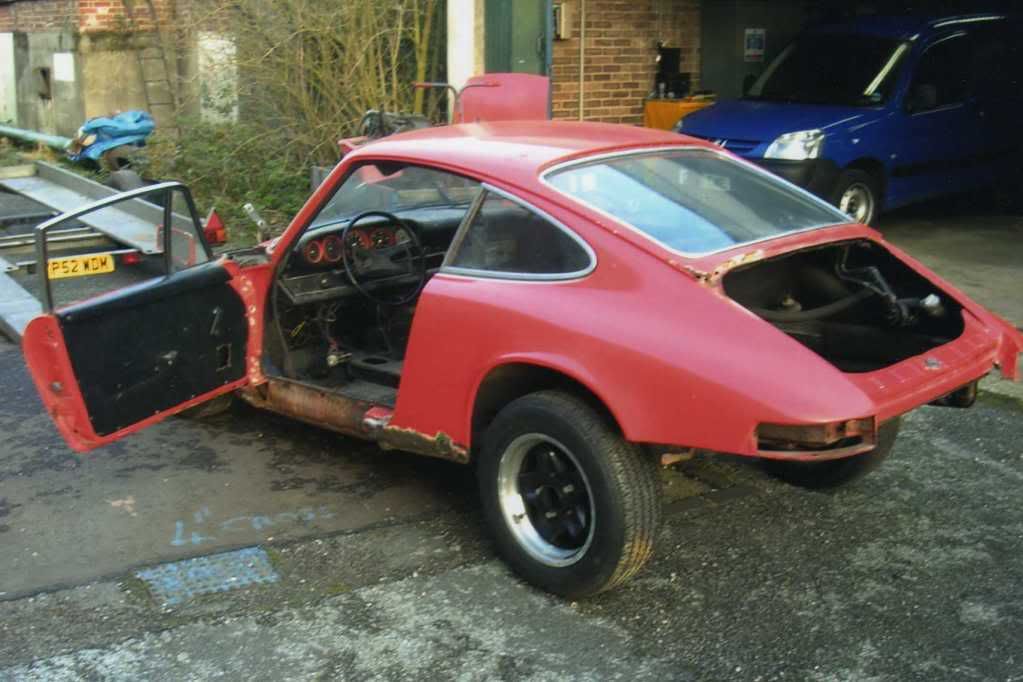
Not a pretty sight, with the odd (known about ) issue, like this....

Anyway, it came with a load of bits, some useful, some less so.
The work on the car is down to me, supported by a few very good mates, James, Tim and Brian. Thanks guys.
The mission was to get it as good as possible, within the budget. This means it will never be a concours car, or a matching numbers car and so on. It will however be a driver, and used as often as possible! The work soon unveiled the known problems, parcel shelf, inner and outer sills, bottoms of chassis rails, front pan etc. It had been updated at sometime in its life, probably in Italy, where it was sold originally, and had a 'tasty' grp set of bumpers and front lid. The front wall had been chopped to accomodate this and needed replacing.
Check the front bumper!

As work progressed, we came to start cleaning the floor pan. This has to be the darkest day so far, under the 'not bad' appearance, it was like expensive lace knickers, full of holes and pointless! After a memorable visit to the pub, I decided the floor had to be replaced. Step to the fore again, Mrs R. Has anyone else had a floor pan for their car as a Valentines day gift?
The car was turned on its side on a homemade jig, with some suitable support and bracing.

I reckon it took nearly 2 years to do both sides, with the edge of the centre tunnel and base of the smugglers box being rebuilt. As time progressed, my mates and my own skills improved, egged on by looking at other threads, seeing the beautiful work Barry produces ans so on. We actually removed some of the earlier repairs we had done and redid them to a much better standard. Thanks Barry, for the inspiration. The best example I show of this is on the bonnet.


This shows the original rotten metal and the repairs made to the rubber buffer areas. I have not got the skills or the equipment to get the shape in one piece ( I tried) so fabricated the flat section and used an egg cup to give the mound area! A little filling to happen, but the repair functions really well and looks neat! The bonnet needs other work as well.
All in all, I am very pleased with the work so far, the undrside and floor pan has been covered with POR15, all the cavities injected with dinitrol rust eater. After paint, it will all get wax injected etc.
The result looks like this at present, over the next week or so, it goes to the paintshop, a local chap that turns out fantastic work. It is going back to its original colour Conda Green, will have GRP RS style bumpers, and hopefully Minilites in due course! While he is doing his bit, I will be doing the engine etc, getting the plating and powdercoating done and generally building units for assembly.


By way of closing, what do you think I should do with the clocks, answers on a postcard!

The whole job has been a voyage of discovery, at the bad times, I am lucky enough to have a few 'other jobs' to sooth the soul. My favourite....

which is a real one and I get to drive it!
Thanks to everyone for posting their work and providing inspiration.
Cheers
[/img]
Let me start by saying I am rubbish at the computer bit!
I have been on the forum for a while now, but not really had anything to contribute, or so I thought! I was looking at JohnM's thread on his car, added a comment and was pleased that others have an interest in what I am doing, so here goes.
I bought the car from veryporky, as a resto project. I have wanted a 911 since I was 10, when I watched the 500mile race at Snetterton with my dad, saw all sorts of glorious things racing, GT40's, Ferraris, Alfas, Matras, Chevrons etc but was taken by the funny looking things that made a nice noise. Many years later, my darling wife asked what I would like for Christmas, to which I replied (in my boring way) 'nothing, got everything I want'. Bless her, she called me a liar and told me to go and find my 911, and how much I could spend! It took me 2 years to find it!
On the day I collected the car, it looked like this!
Not a pretty sight, with the odd (known about ) issue, like this....
Anyway, it came with a load of bits, some useful, some less so.
The work on the car is down to me, supported by a few very good mates, James, Tim and Brian. Thanks guys.
The mission was to get it as good as possible, within the budget. This means it will never be a concours car, or a matching numbers car and so on. It will however be a driver, and used as often as possible! The work soon unveiled the known problems, parcel shelf, inner and outer sills, bottoms of chassis rails, front pan etc. It had been updated at sometime in its life, probably in Italy, where it was sold originally, and had a 'tasty' grp set of bumpers and front lid. The front wall had been chopped to accomodate this and needed replacing.
Check the front bumper!
As work progressed, we came to start cleaning the floor pan. This has to be the darkest day so far, under the 'not bad' appearance, it was like expensive lace knickers, full of holes and pointless! After a memorable visit to the pub, I decided the floor had to be replaced. Step to the fore again, Mrs R. Has anyone else had a floor pan for their car as a Valentines day gift?
The car was turned on its side on a homemade jig, with some suitable support and bracing.
I reckon it took nearly 2 years to do both sides, with the edge of the centre tunnel and base of the smugglers box being rebuilt. As time progressed, my mates and my own skills improved, egged on by looking at other threads, seeing the beautiful work Barry produces ans so on. We actually removed some of the earlier repairs we had done and redid them to a much better standard. Thanks Barry, for the inspiration. The best example I show of this is on the bonnet.
This shows the original rotten metal and the repairs made to the rubber buffer areas. I have not got the skills or the equipment to get the shape in one piece ( I tried) so fabricated the flat section and used an egg cup to give the mound area! A little filling to happen, but the repair functions really well and looks neat! The bonnet needs other work as well.
All in all, I am very pleased with the work so far, the undrside and floor pan has been covered with POR15, all the cavities injected with dinitrol rust eater. After paint, it will all get wax injected etc.
The result looks like this at present, over the next week or so, it goes to the paintshop, a local chap that turns out fantastic work. It is going back to its original colour Conda Green, will have GRP RS style bumpers, and hopefully Minilites in due course! While he is doing his bit, I will be doing the engine etc, getting the plating and powdercoating done and generally building units for assembly.
By way of closing, what do you think I should do with the clocks, answers on a postcard!
The whole job has been a voyage of discovery, at the bad times, I am lucky enough to have a few 'other jobs' to sooth the soul. My favourite....
which is a real one and I get to drive it!
Thanks to everyone for posting their work and providing inspiration.
Cheers
[/img]
 Look forward to seeing it in paint