Page 1 of 2

How to Repair Your Clock

Posted: Tue Jul 13, 2010 2:57 pm
by johnM
My clock like so many others had stopped working, so I set about trying to find out what was wrong with it.

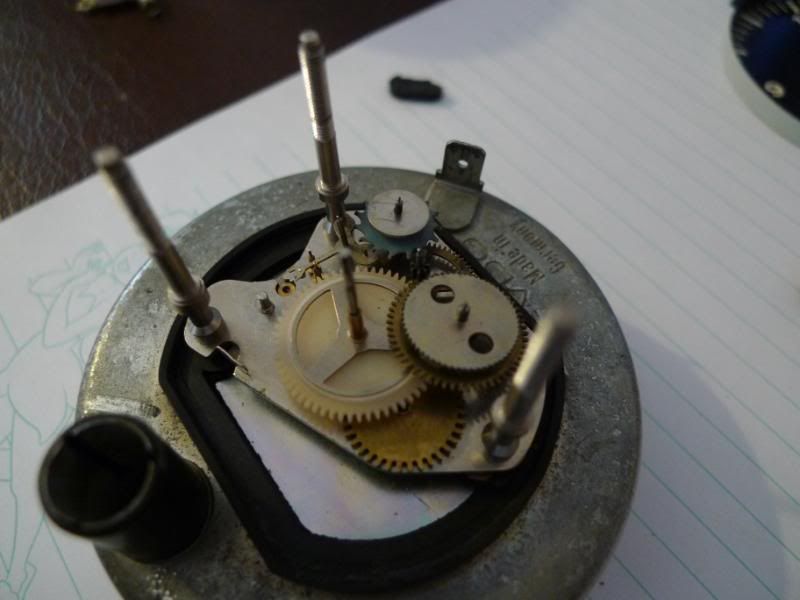
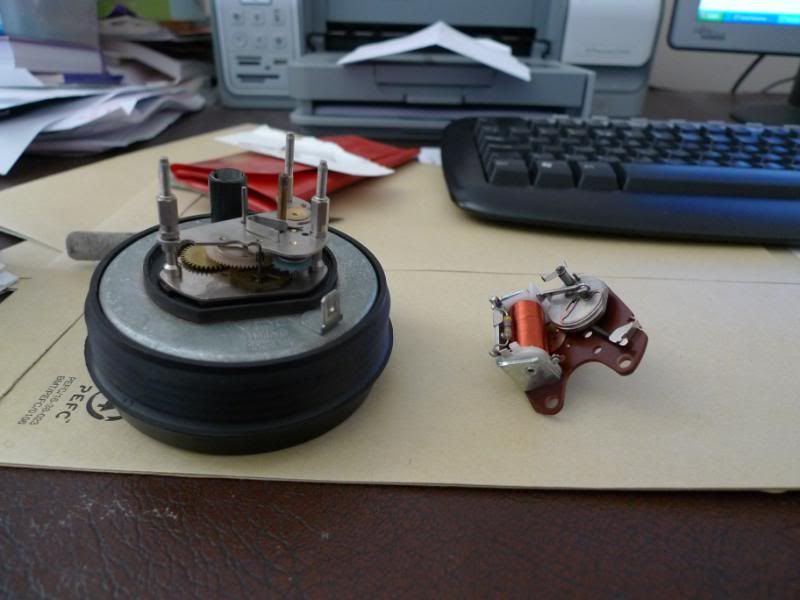
To remove from the car you just pull the clock out from the dashboard. remove the 12volt black wire and the brown earth wire. Once out of the car you can remove the white plastic from the rear of the clock with a 5mm spanner. This exposes the workings. You need to remove the upper most electro magnetic winder board. This is simply done by removing the three 5mm nuts, when lifting this off be careful not to damage the ratchet on the winder.

Image

Image

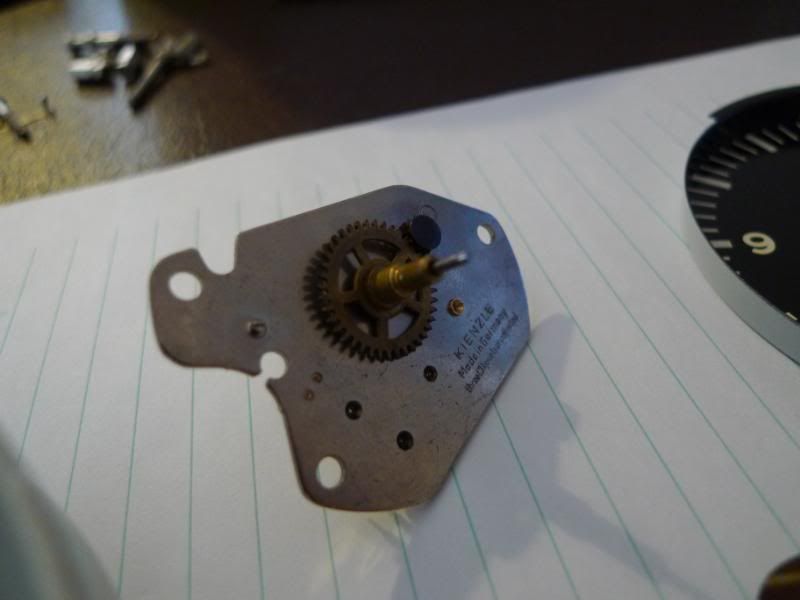
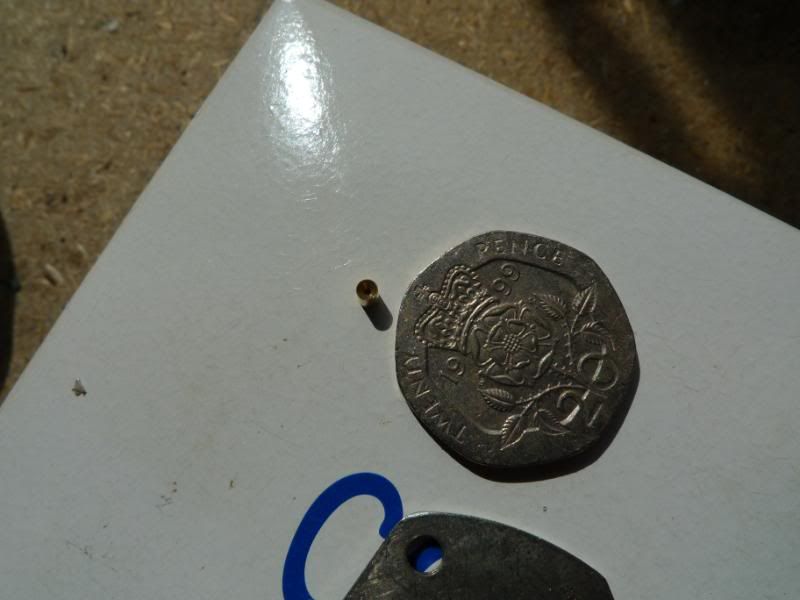
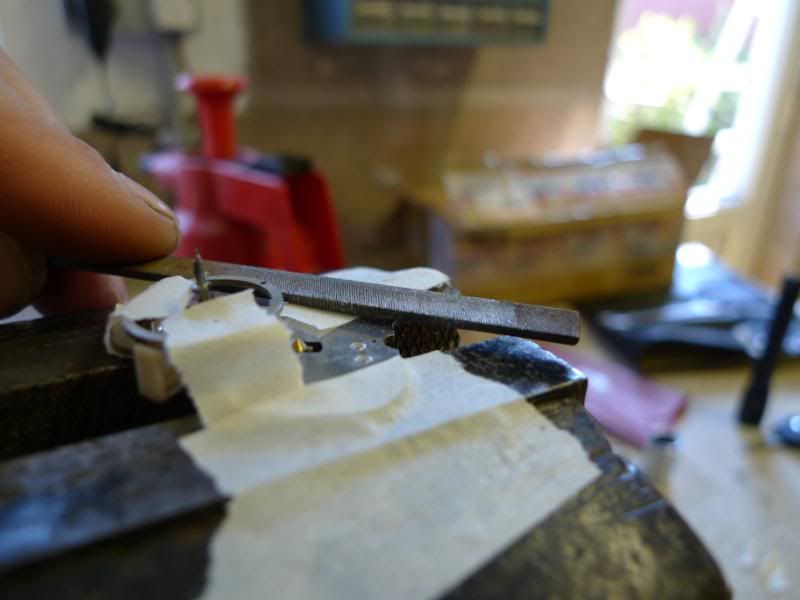
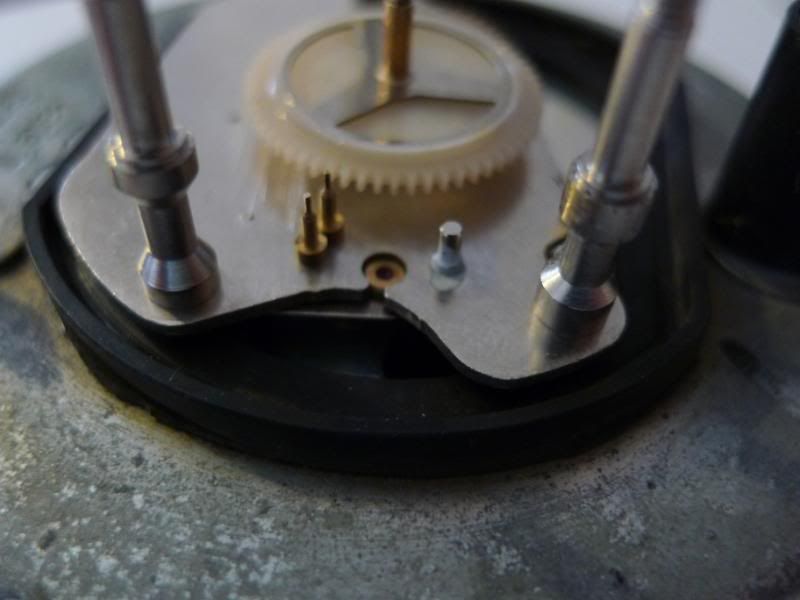
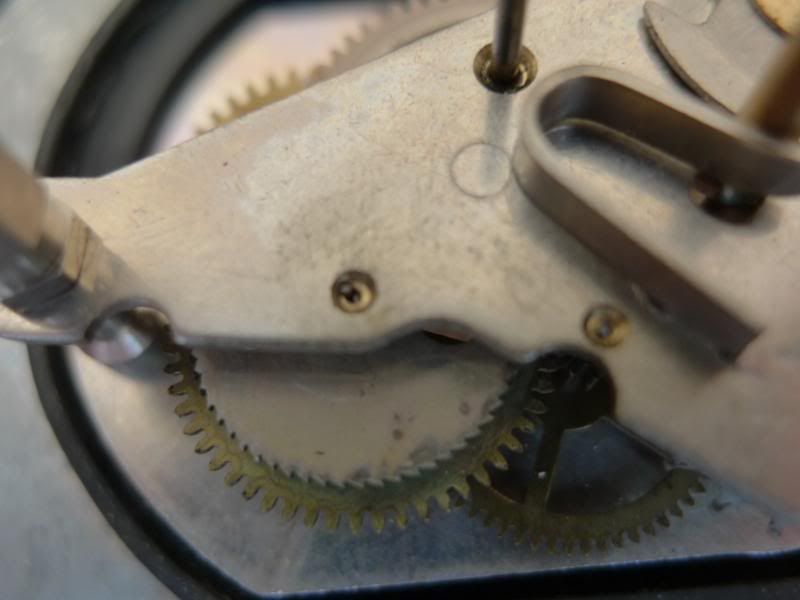
Once this was removed I was able to see why the clock had stopped working, the bearing for the winding gear was worn out, it was elongated and about three time the size of the shaft.

Image

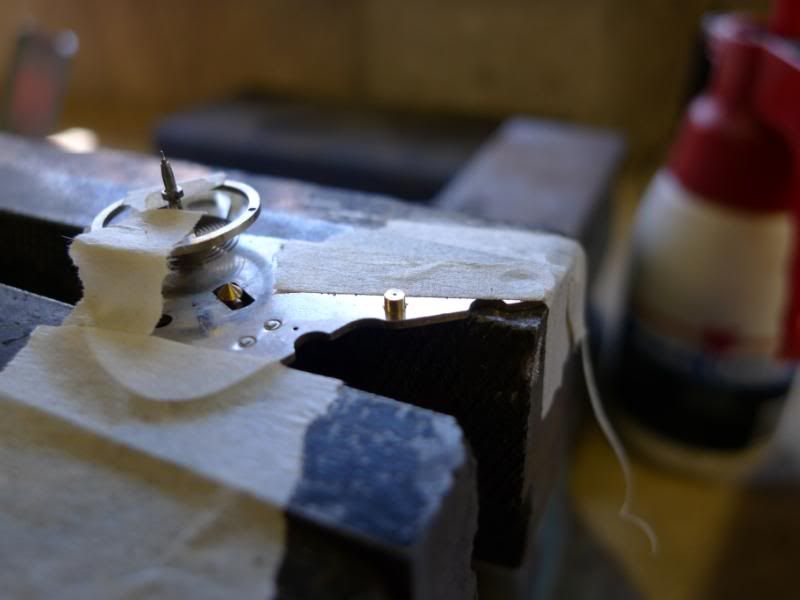
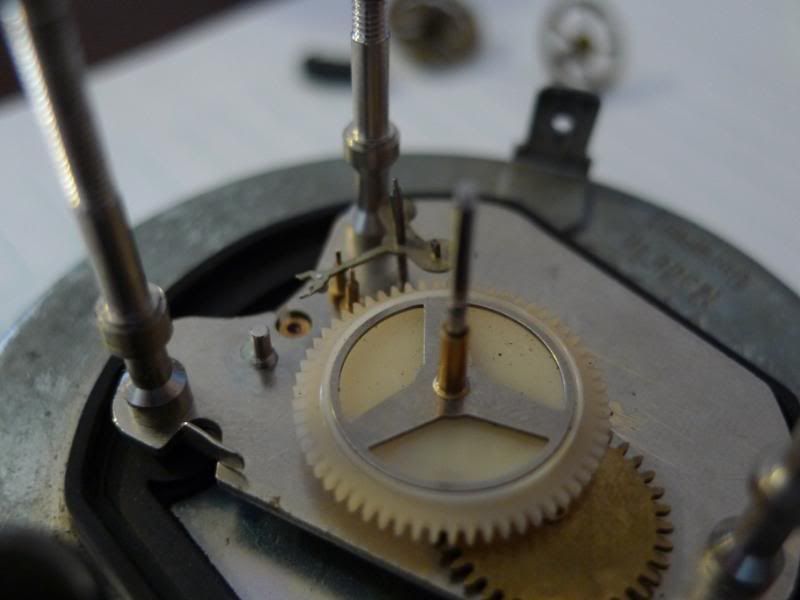
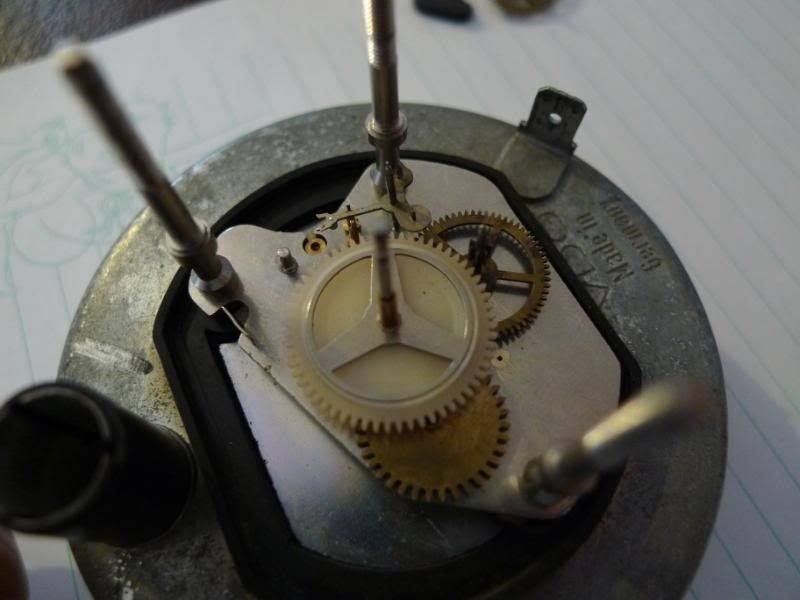
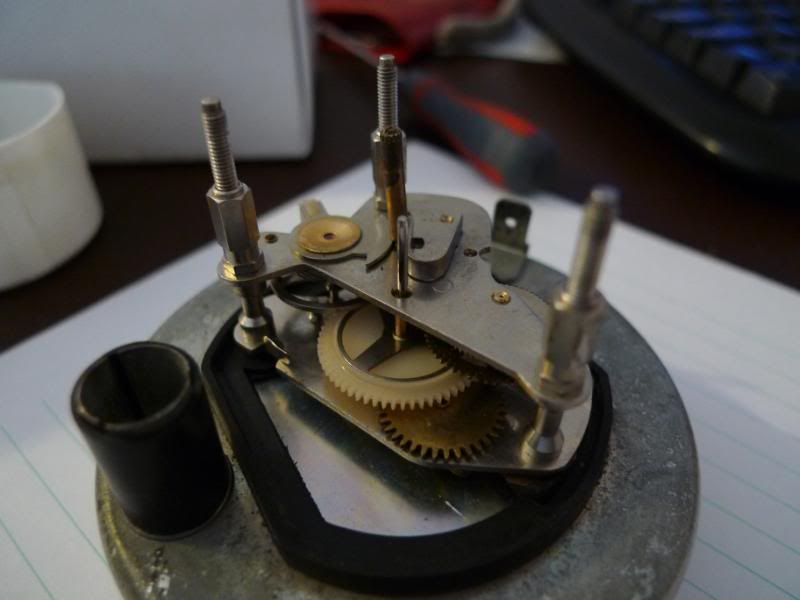
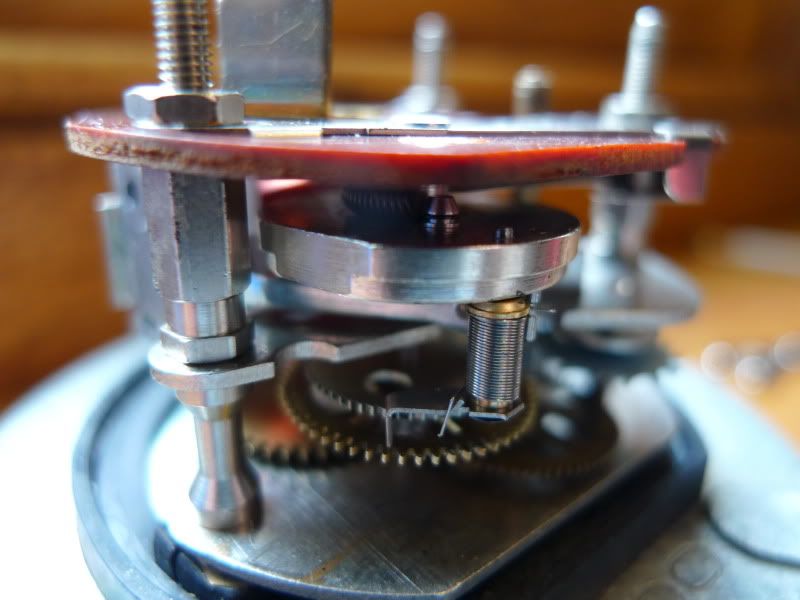
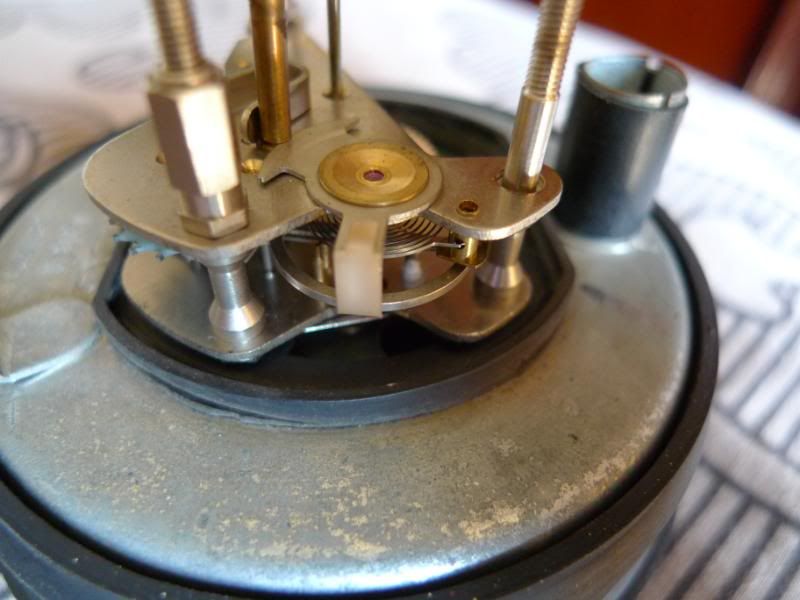
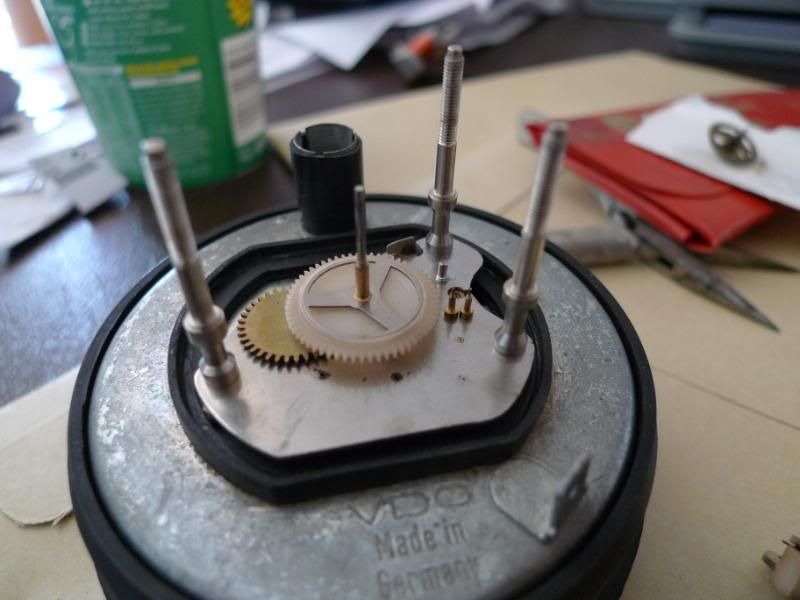
You can remove the upper bearing plate by removing the three 4.5mm spacer nuts. Before you pull the top bearing plate off be aware that the balance wheel is attached to the plate by its wound spring, if you do not support this you will damage it.

Image

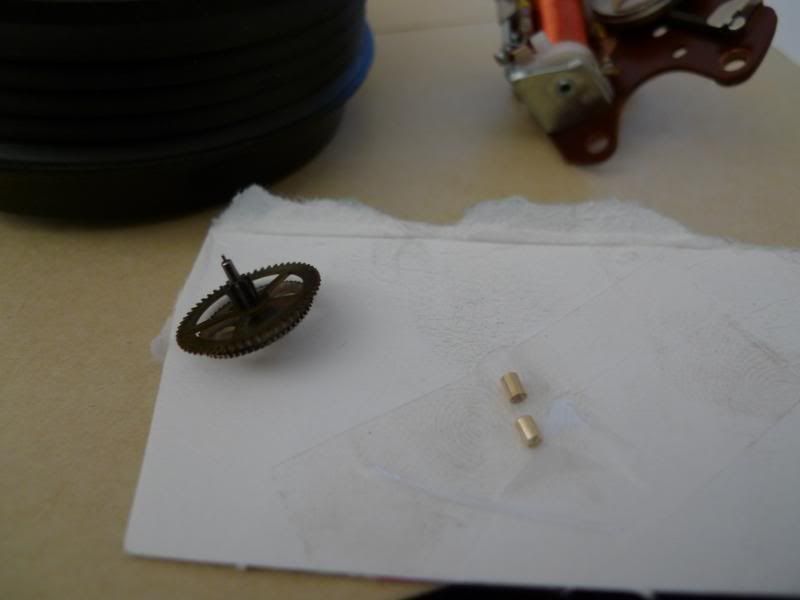
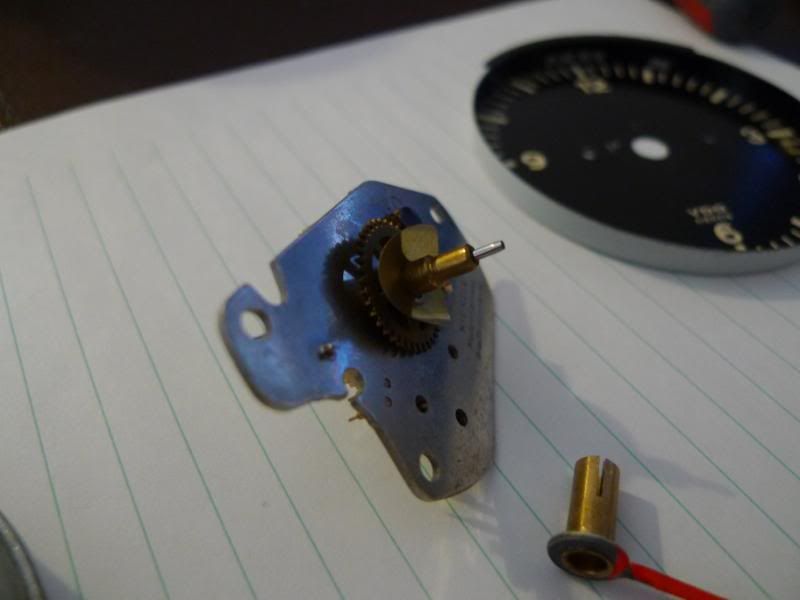
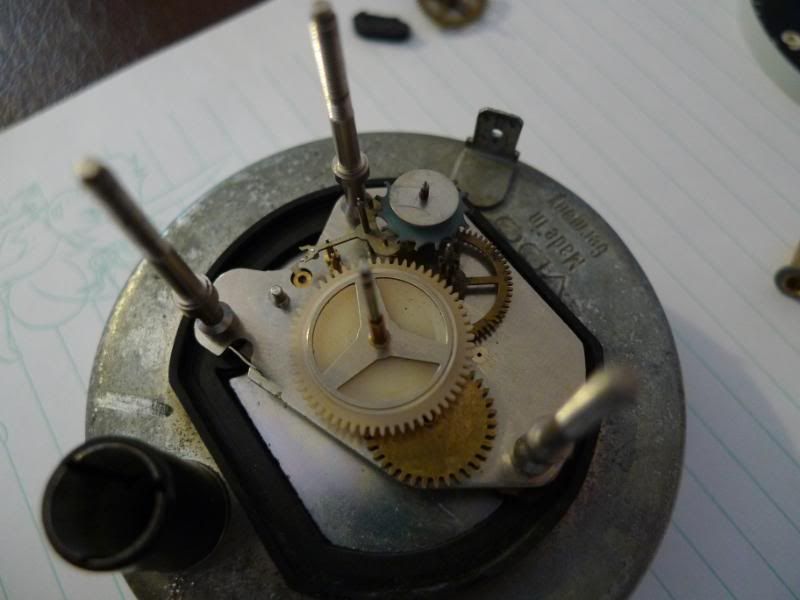
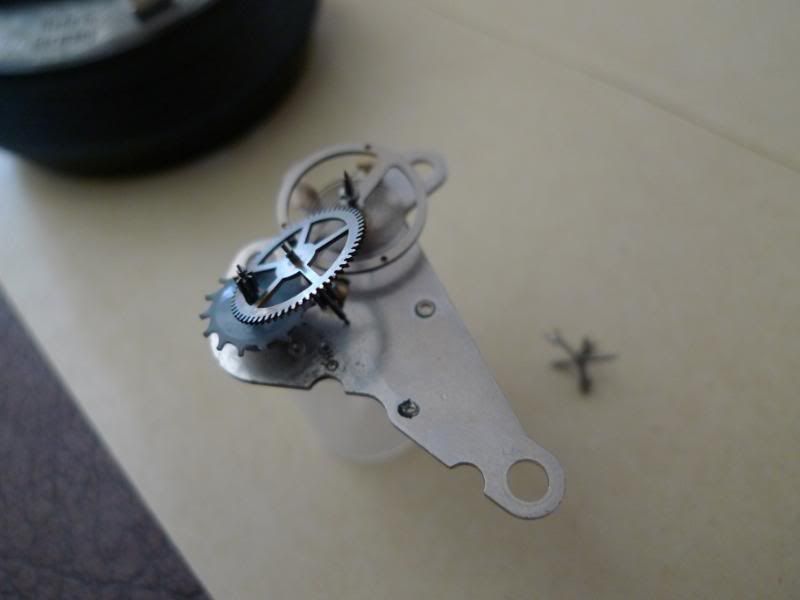
Once the plate is removed you can remove all of the gear wheels.

Image

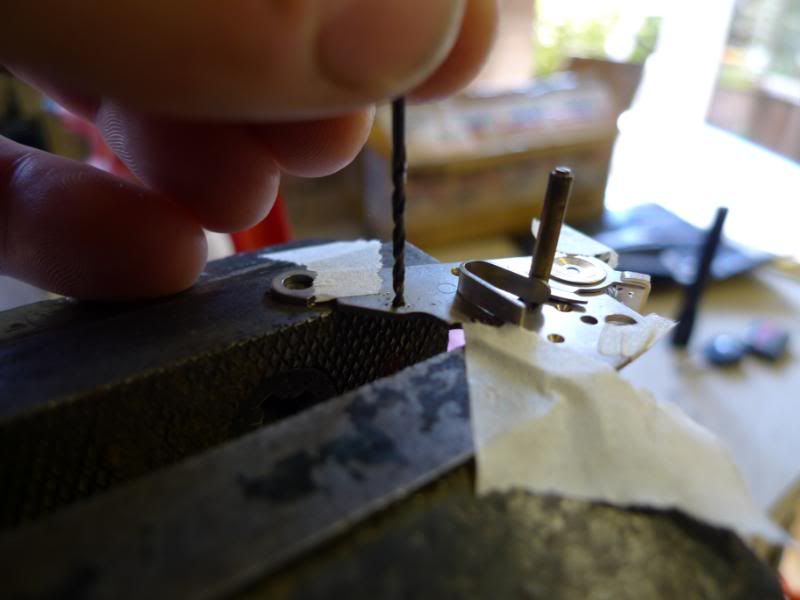
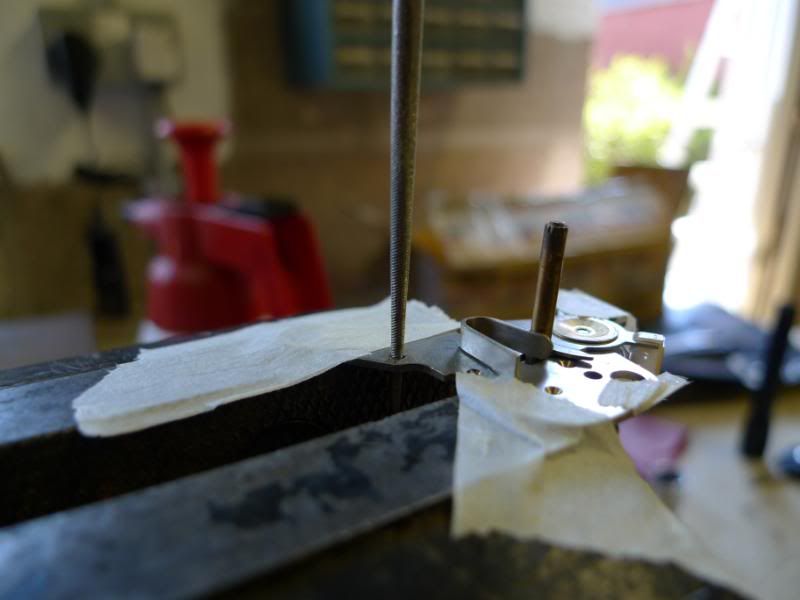
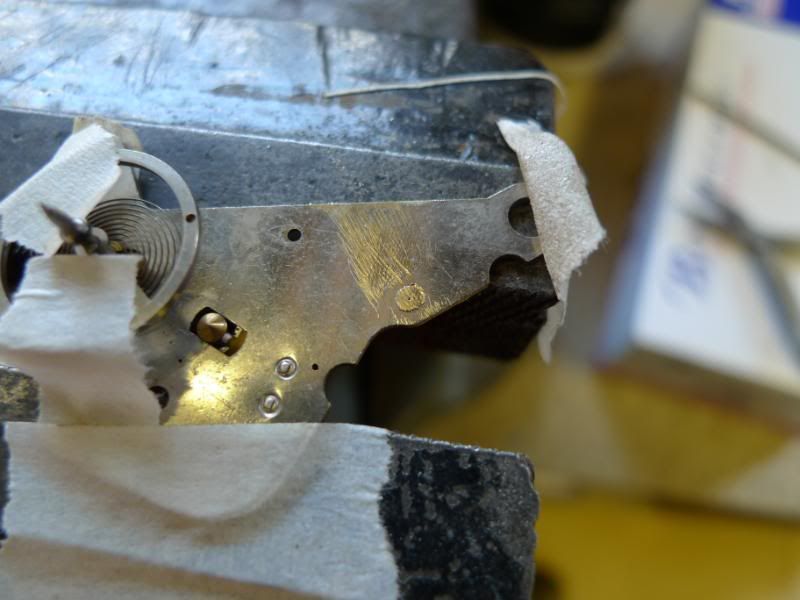
Once all the gear wheels are removed you can inspect the bottom bearing plate on inspection the bottom bearing on the winding gear was again worn out, and elongated.

Image

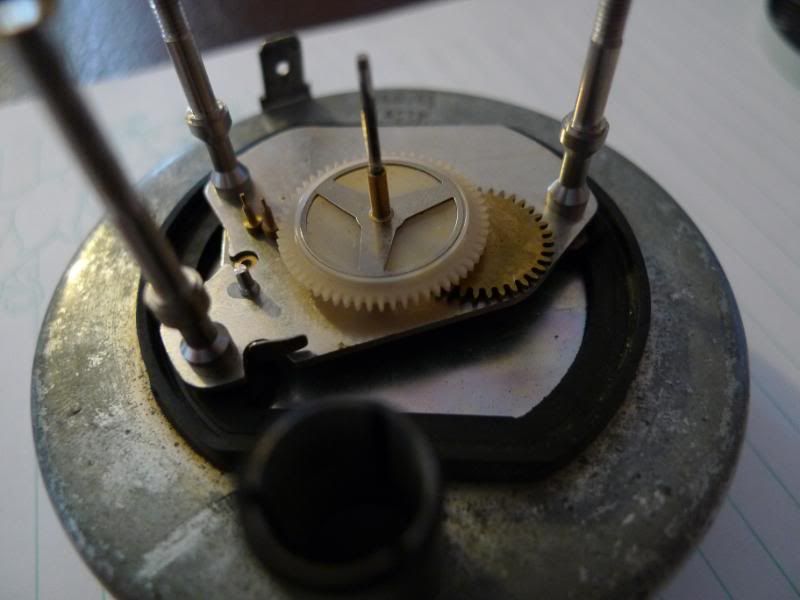
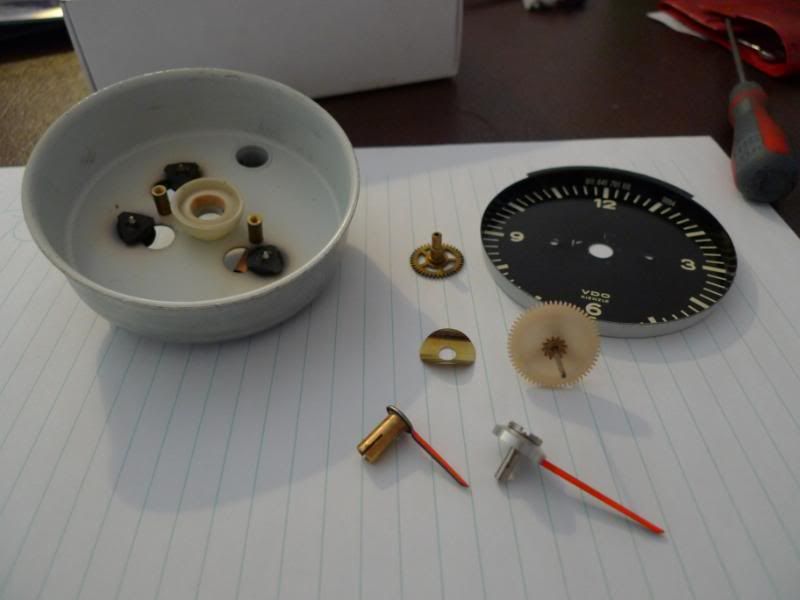
To gain access to this you need to remove the front bezel, you have to use a small screw driver to bend the back up so you can remove the glass and bezel. You need to remove the hands of the clock, to do this I had to use a pointer puller with a modified point, I did this at work and did not have a camera but you need to pull the minuet hand off first then the hour hand. Once the hands are off you can remove the two black screws holding the face on. Hopefully you can work out what I mean by this photo.

Image

Posted: Tue Jul 13, 2010 3:10 pm
by johnM
You can now remove the bottom spacers from the rear of the clock, so you can remove the worn out bottom bearing plate.

Image

Now that you have the two bearing plates out you can set about replacing the bearings. A friend of mine is a clock repair man, he gave me 2 bearings that were the correct size.

Image

Image

When replacing the bearing in the top plate make sure you support the balance spring, I used a little tape.

Image

Use a drill that is just a little smaller than the outside diameter of the new bearing.

Image

I used my fingers to spin the drill bit, as the old hole is elongated it is very important that the new hole is in the centre otherwise the gear will be in the wrong place. I then very carefully used a round file to open out the hole so I could press the new bearing into the plate. If you make the hole too big the bearing will be loose, you would have to use a small ball hammer to peen the metal.

Image

Posted: Tue Jul 13, 2010 3:17 pm
by johnM
You can now press in your bearing, the bearings have a little well for oil so make sure this goes the same side as the original ones.

Image

Image

You need to remove the excess as the bearing was too long, I used a needle file to do this.

Image

You will need to clean the bearing up and make sure no swarf is left in the hole.

Image

You replace the bottom bearing in the same manner.

Posted: Tue Jul 13, 2010 3:18 pm
by impmad2000
Fab John, did you over hear myself and Emily talking about re-bushing clocks on sunday night ?? Turns out we both have Horology in the blood !!
Good job, though a 5 sided broach ( if you have one) is probably a better way to prepare the hole !!
Cheers
Tim

Posted: Tue Jul 13, 2010 3:30 pm
by johnM
You can build up the bottom plate.

Image

Image

Then fit the plate back onto the clock.

Image

Image

I put a drop of sewing machine oil on each of the bearings, its important not to put 3 in 1 oil on them as its too heavy. All the gears I cleaned with a soft brush. No oil on the gear teeth as this will stop it working.

Image

Image

Image

Image

You can then put the top plate onto the clock, again be careful with the spring balance. I rested the plate on top of the wheels and moved the gears with a jewellers screw driver to locate them into the upper bearings, its a bit tricky this but if you take your time you will get there.

Image

Posted: Tue Jul 13, 2010 3:36 pm
by Gary71
Excellent information John :)

impmad2000 wrote: Turns out we both have Horology in the blood !!
As do I, but seeing as it's from the late 18th century it may have been thinned out a little!

Posted: Tue Jul 13, 2010 3:37 pm
by johnM
The actuating ratchet can now go on, be careful not to damage the little lever that acts on the ratchet. It will need spinning a turn so its spring makes it act on the ratchet.

Image

Now you can give it a go. 12 volts onto the terminals and!!!!

Click the photo below and see it work.

Image

I have to put the hands back on and the glass and bezel but its been working for the last couple of hours or so. :lol:

Kind Regards

Posted: Tue Jul 13, 2010 3:48 pm
by johnM
impmad2000 wrote:Fab John, did you over hear myself and Emily talking about re-bushing clocks on sunday night ?? Turns out we both have Horology in the blood !!
Good job, though a 5 sided broach ( if you have one) is probably a better way to prepare the hole !!
Cheers
Tim
Thanks Tim, Not sure what a 5 sided broach is , do you have a photo.

Kind Regards

PS Still Ticking 8)

Posted: Tue Jul 13, 2010 3:53 pm
by Nige

Posted: Tue Jul 13, 2010 3:55 pm
by johnM
Well they are not too expensive.

kind Regards

Posted: Tue Jul 13, 2010 4:21 pm
by Matt black70
Hi John
It was great to share a beer on Sunday night, though only because you were buying :wink: Say high to Steve for me.
Regarding the clock, do you know if there is a way of speeding it up? mine is running 5min slow every 24hrs which I would like to try and correct.
Regards
Matt

Posted: Tue Jul 13, 2010 5:03 pm
by johnM
Matt black70 wrote:Hi John
It was great to share a beer on Sunday night, though only because you were buying :wink: Say high to Steve for me.
Regarding the clock, do you know if there is a way of speeding it up? mine is running 5min slow every 24hrs which I would like to try and correct.
Regards
Matt
Hi Matt enjoyed the beer too :drunken:

On the back of the clock you can slow down or speed up the clock, it has a + and a - sign in the white plastic.

Kind Regards

Posted: Tue Feb 01, 2011 8:35 pm
by kitesurfer2
This kind of post is what warms the cockles of every DKers heart, well done that man!

Re: How to Repair Your Clock

Posted: Mon Apr 09, 2012 11:49 pm
by Chopperman
Mine has stopped working on my 72 911. On taking it apart I found it works if I move the mechanism that winds it up.

I believe its the solenoid thats not working. Would you have any ideas where I might obtain another solenoid?

Re: How to Repair Your Clock

Posted: Tue Apr 10, 2012 8:38 am
by Lightweight_911
I have an old clock that you're welcome to cannibalise for spares - no idea if it works but it's free if you want it !

It's the one dated 11/'68 in this thread:

http://www.ddk-online.com/phpBB2/viewto ... ilit=clock