Page 1 of 7
Ground up resto 1973 2.4S
Posted: Fri Nov 16, 2007 10:34 am
by Thomas L
Hi Guys
Here is my project :
Porsche 911 2.4S Targa 1973
Matching numbers
Farbe 8310 grünmetallicc
Interieur 12 Kunstleder schwarz mit Sitzmittelbahn Perloncord
Optionen
258=Kopfstützen li,re
409=Sportsitze li,re
419=3-Punktautomatikgurte
425=Heckwischer
426=Zierleisten an den Radausschnitten
568=getönte verglasung
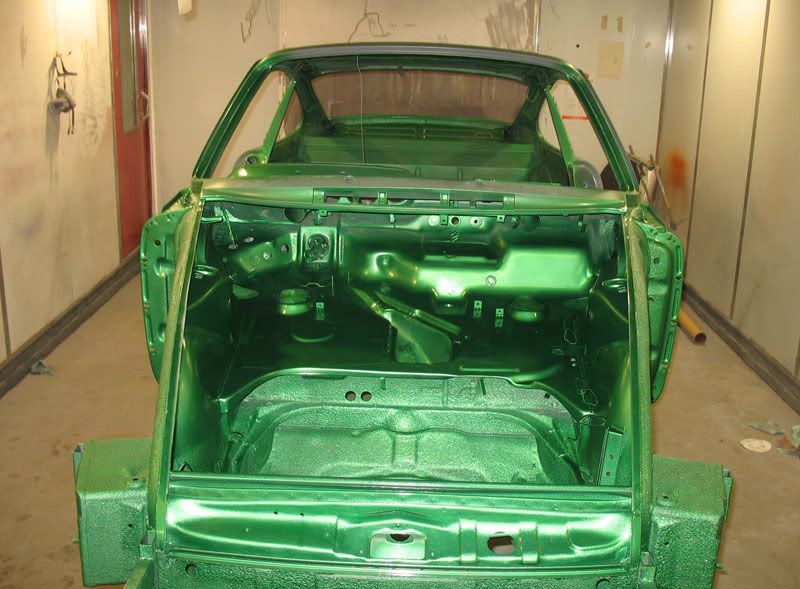
The plan is strip down sand blasted and complety rebuild to factory specs in the rare original green metallic.
I started this in september 2007
Here as I bought it :


Starting to strip it :


I am going to replace inner and outer panels, front wall, front wings, rear fenders and the inside targa reinforcement. Also the tank support in the front need replacing.
Im hoping to get finished by christmas............next year

More pics to follow
Thomas
Posted: Fri Nov 16, 2007 11:22 am
by willbrown
Cool

Good luck with the resto. You should speak to Paul (Ferry Man) or Nick Moss about the colour choice as I believe I'm right in saying he has the only correct colour green metallic '72 2.4S in the country.
Keep us posted

Posted: Fri Nov 16, 2007 6:44 pm
by 40 scout
Good luck -
ps Fancy a little side bet on your completion date????

Posted: Fri Nov 16, 2007 8:01 pm
by Ferry Man
Cool colour Thomas.
I see you've already got some shots of my car on your Danish forum.
'It's great to see another Metallic Green car being restored to the correct colour.
Good luck with the rebuild.
Nice Corvette too.

Posted: Fri Nov 16, 2007 11:07 pm
by Gilbert '71 T
I see you have been having some fun already with the heat gun and putty knife

youre absolutely doing the right thing, the car will look fabulous back in metalic green
Posted: Sun Nov 18, 2007 10:56 am
by Thomas L
Hi Ferryman.
Your car is a big inspiration, its keeping me going in hard times. Hope mine is going to be as nice as Yours. Your car is also wallpaper on my computer
Im most likely going to ask You for additional phots in my progress if You dont mind.
Regards Thomas
Posted: Sun Nov 18, 2007 11:16 am
by Ferry Man
No problem at all Thomas. Use any shots you wish.
If you need higher resolution files just PM me.
I hope your restoration goes well.
Posted: Mon Nov 26, 2007 11:55 am
by Thomas L
Posted: Mon Nov 26, 2007 12:01 pm
by 912uk
heat removes the tar nicely , horrid job takes a while but can be done..
warm up the tar and remove with a scraper the heat makes the tar brittle..
Posted: Mon Nov 26, 2007 12:55 pm
by steve911944
looking great thomas I look forward to seeing more pics as it goes along great colour
Posted: Tue Nov 27, 2007 8:17 am
by Thomas L
This is a hard job, the bottom is nearly halfway cleared.........


Regard Thomas
Posted: Tue Nov 27, 2007 11:14 am
by Helen

great job.
Posted: Wed Nov 28, 2007 8:53 pm
by jtparr
nice job thomas
so much better to be able to do that on the car when its on its side
brings back memories of mine........ which was horrible
worth it in the end though
regards
Jp
Posted: Thu Nov 29, 2007 2:18 pm
by Thomas L
Now all the sealing is off the floorpans............


Its gonna be great when all these little bumps are done properly

Posted: Tue Dec 04, 2007 8:17 am
by Thomas L
So finally the front is completed a few holes discovered in the floor, but no bigger surprises......


This is how the panels are done, the "American way"


Next step is to cut of the old fenders and remove all the sealing inside the rear wheel housing.

Regards Thomas


