Page 7 of 30
Re: Meet Ralph - 1970 ST project
Posted: Tue Sep 21, 2021 5:24 am
by RobFrost
I need that age of engine lid including the holes and lettering. Dm me a price if you want and mabe it could pay for your fibreglass one.
As for value of letters, a genuine new set is £166.80:
https://www.design911.com/parts/90155930123/
I need the letters too.
I'll assume you don't want the fibreglass 1974 RS whale tail currently on my 911T.
Sent from my SM-G988B using Tapatalk
Re: Meet Ralph - 1970 ST project
Posted: Tue Sep 21, 2021 5:26 am
by RobFrost
P.s. i think you need to see the other side of the lid to learn the year. Given the lettering, I expect it has the number plate lights in. Later ones didn't.
What's the bottom edge like?
Sent from my SM-G988B using Tapatalk
Re: Meet Ralph - 1970 ST project
Posted: Sat Sep 25, 2021 11:03 am
by SeanP
rich73 wrote:Thanks for the comments
, Continuing with underseal and paint removal at the moment. Decided that I really want to try find anything needing repairs now rather than going back later. I've decided go with my current steel bonnet and engine lid, I can always replace with fiberglass later if I change my mind.
Does anyone know what year my engine lid is from and if the lettering is worth much? Haven't decided yet but may remove the lettering and weld up the holes.
 2021-09-17_11-45-41
 by
richard cannings, on Flickr
Thanks
Richard
1970 on has the additional tabs for the 5 bar grill
Re: Meet Ralph - 1970 ST project
Posted: Sat Sep 25, 2021 8:58 pm
by RobFrost
Lettering costs around £160 new for the porsche and I can't remember the 911t but it's about the same again.
Sent from my SM-G988B using Tapatalk
Re: Meet Ralph - 1970 ST project
Posted: Thu Oct 07, 2021 8:27 pm
by rich73
Thanks for the engine lid info,
After a bit of a holiday I'm back on the car, aiming for four days a week between now and Christmas so hopefully some progress to report.
Had the aim of getting all the repairs done before starting on the more interesting bits but was getting a bit bogged down so have moved to a from to back approach...….for now. Progress so far this week.
 2021-10-07_07-55-21
 by
richard cannings, on Flickr
 2021-10-07_07-56-02
 by
richard cannings, on Flickr
 2021-10-07_07-56-17
 by
richard cannings, on Flickr
 2021-10-07_07-56-41
 by
richard cannings, on Flickr
Probably not period correct but Couldn't resist capping the ends of the strut brace.
 2021-10-07_07-56-52
 by
richard cannings, on Flickr
Will aim for daily updates for the next few weeks.
Rich
Re: Meet Ralph - 1970 ST project
Posted: Thu Oct 07, 2021 8:55 pm
by RobFrost
I assume you're aware of the propensity of the anti roll bar holes to tear? Elephant racing I think it is do a reinforcement patch or you can add something yourself, that links it up to the nearby vertical support. Is that what we're looking at in picture 3? And you've added a strut brace?
Re: Meet Ralph - 1970 ST project
Posted: Fri Oct 08, 2021 2:45 pm
by RobFrost
rich73 wrote:Hi There,
...about 5 years ago I finally finished restoring a 1275GT

Rich
My first car was a 1275 GT. That car was so much fun, and cornered like it was on rails. Same colour, too.
Also, your welding is a lot tidier than mine!
Re: Meet Ralph - 1970 ST project
Posted: Mon Oct 11, 2021 10:05 am
by rich73
Hi Rob,
Yes I've done all the common chassis strengthening modifications I could find apart from one for the engine mounts which I'll do when I move to the back of the car. I made all the plates myself as they were really quite expensive for what they were and quite liked being a bit creative with them.
I do miss the Mini but it just wasn't that practical enough to be that usable, prices seem to have got silly but may buy a Honda VTEC one in the future and use it as the base to recreate the orange one.
Still learning with the welding, last week I was struggling to let a long weld without spluttering so tried increasing the flow rate and this really helped. Also learnt that if you -don't clean all the slag from anything that you cut with plasma you get massive stalagmites growing from the weld.
New tool Day!
 2021-10-11_09-57-02
 by
richard cannings, on Flickr
Bought a couple as only £12 each, I tend to drill out the tip to 2.0mm and they work great for spraying thick primer.
Back to underseal scraping

.
Rich
Rich
Re: Meet Ralph - 1970 ST project
Posted: Mon Oct 11, 2021 12:33 pm
by RobFrost
rich73 wrote:
I made all the plates myself as they were really quite expensive for what they were and quite liked being a bit creative with them.
I thought the same - I would probably make the reinforcements myself. I understand the high price because it's a low volume product but the economics make it a no brainer if you have the skills to make your own.
Re: Meet Ralph - 1970 ST project
Posted: Mon Oct 11, 2021 5:04 pm
by rich73
Front end starting to look better, underseal removal seems to be taking forever.
 2021-10-11_04-59-43
 by
richard cannings, on Flickr
Brush painted epoxy, will spray under bonnet.
 2021-10-11_05-00-08
 by
richard cannings, on Flickr
Re: Meet Ralph - 1970 ST project
Posted: Mon Oct 11, 2021 6:59 pm
by RobFrost
rich73 wrote:Hi Rob,
New tool Day!
When showing tools or parts on a kitchen worktop you have to incorporate food or utensils for authenticity.
Re: Meet Ralph - 1970 ST project
Posted: Mon Oct 11, 2021 7:22 pm
by coomo
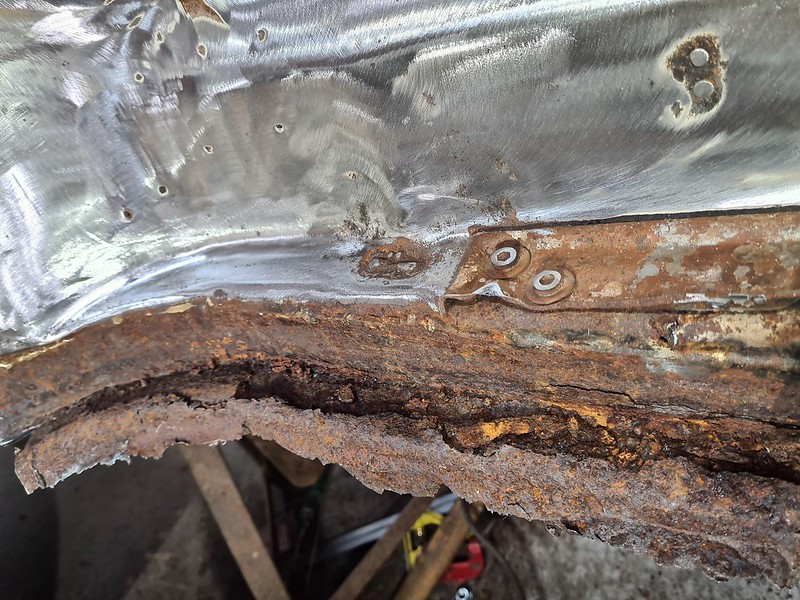
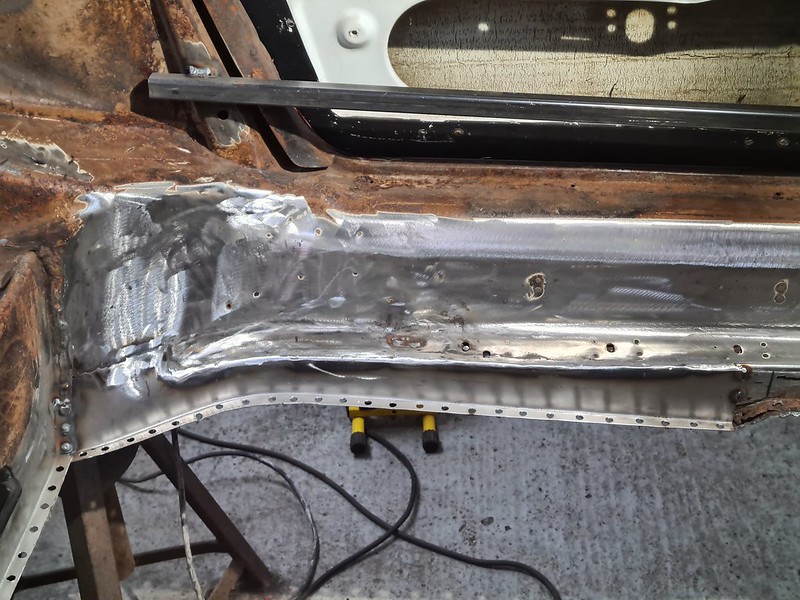
rich73 wrote:Few days off and back to it, made a start on the Left side. Looks worse than the right but don't think it will take that much longer, just slightly bigger panels.
Plasma to get the floor out.
 B
B by
richard cannings, on Flickr
Looks a bit grim but having done the other side first was feeling confident.
 H
H by
richard cannings, on Flickr
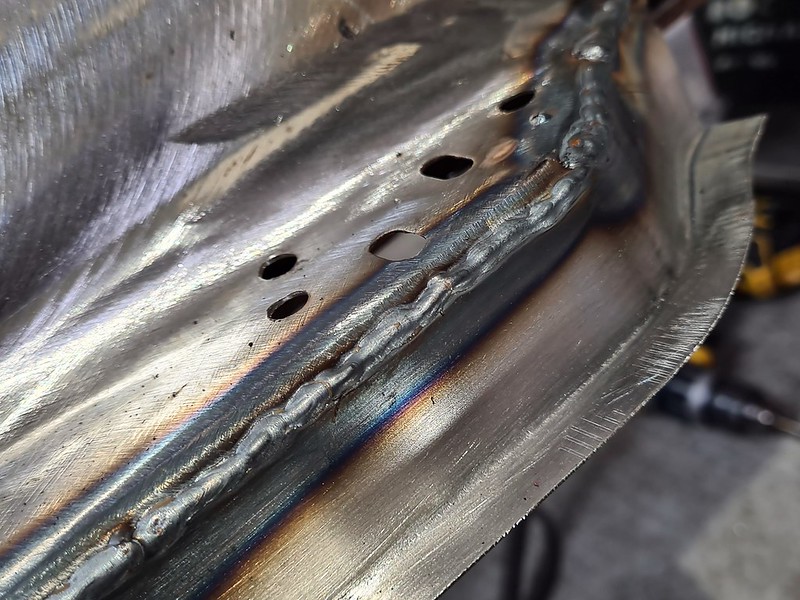
Forgot just how quick the MIG is.
 V
V by
richard cannings, on Flickr
 H
H by
richard cannings, on Flickr
Also started to get hold of parts for the next stage. Managed to get a 100l fuel tank at a sensible price, looking on eBay prices seem to be going up so glad to get hold of that. Really pleased to get a strut brace on ebay for £80 delivered, looks like the CarPoint one that someone didn't get round to fitting.
Also starting to think about the roll bar, I've been looking at the CarPoint one but been putting off buying as at seemed a bit expensive for what it was by the time it was shipped. Looked at it again the other day and they've stopped shipping to the UK. Decision made there then, started to think about getting the tubes bent and making my own.
From what I've found online the centreline bend for the main hoop should be about 270mm, this seems to be the main issue. Place on ebay can do max 150mm and will deliver all the tubing and do the bends for around £150 which sounds reasonable. Manged to find a place in Woking that can do the correct radius but want £250 +vat supply only for a bent tube!
Anyone used one of these?
https://www.frost.co.uk/metal-fabricati ... ng-roller/
Hoping to start welding the floor panel in tomorrow.
Just re reading this.Nice fab work in indeed.The company in woking is T+T Tubecraft i presume? They bent my replacement stainless oil lines.Yes they are a bit spendy.However, its all top tech.They scan the shape so you get the copy exact.Ive got a genuine alloy "Matter" rollcage,from a 1973 racecar.I will be making a titanium copy of the rear.T+T will be doing the bending.I will supply the tube, which is on order.May have some tube leftover?
Re: Meet Ralph - 1970 ST project
Posted: Mon Oct 11, 2021 9:22 pm
by RobFrost
What wire are you using? If I try and weld seams at any speed with 0.8mm wire I'm blowing holes. I've ordered some 0.6mm to try.
Re: Meet Ralph - 1970 ST project
Posted: Tue Oct 12, 2021 5:33 pm
by rich73
Hi There,
Yes it was Tubecraft, good to hear that they are worth the money. Would be really interested in hearing more about your Stainless oil lines, are end fittings readily available and how did you get the flares on the ends of the tubes?
Let me know about the tube please, although I’m not sure if titanium may be a bit out of my league!
Hi Rob,
I’m using 0.8mm , I found that 0.8mm ran smoother in my welder than 0.6mm and I couldn’t really tell the difference. One of the key factors in controlling the current for welding is wire speed. I think there’s an explanation on Trev’s Blog Youtube. At the moment even for thin stuff I use the second from lowest setting(1/Max) but the wire speed is only set to between 2 and 3 (max is 10).
I would spend some time just welding beads on some sheet on a workbench just to dial in your settings. I would then move to a butt joint on the bench and basically build things up a step at a time.
One technique that I use if I’m struggling with blow through is to use a series of spot welds, letting thongs cool for a second or two between welds, this is useful when you have a bit of a gap in a butt weld. Let me know how you get on.
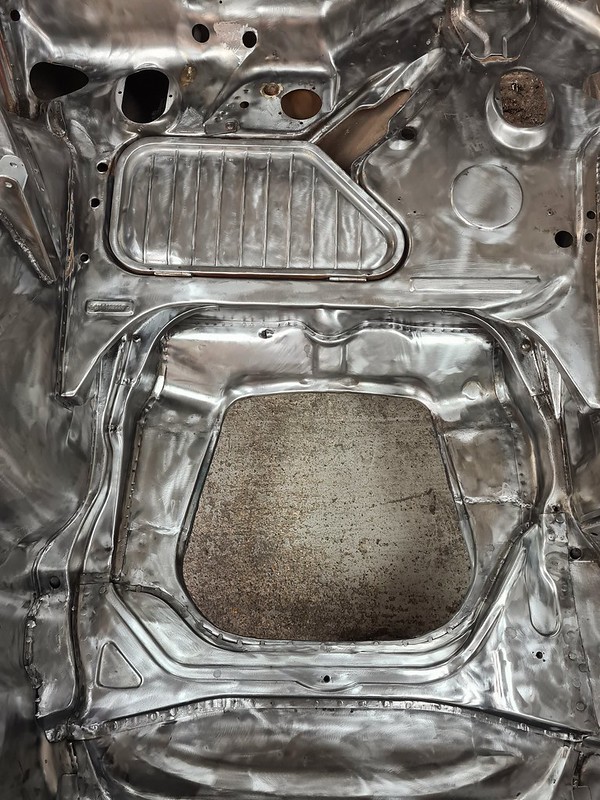
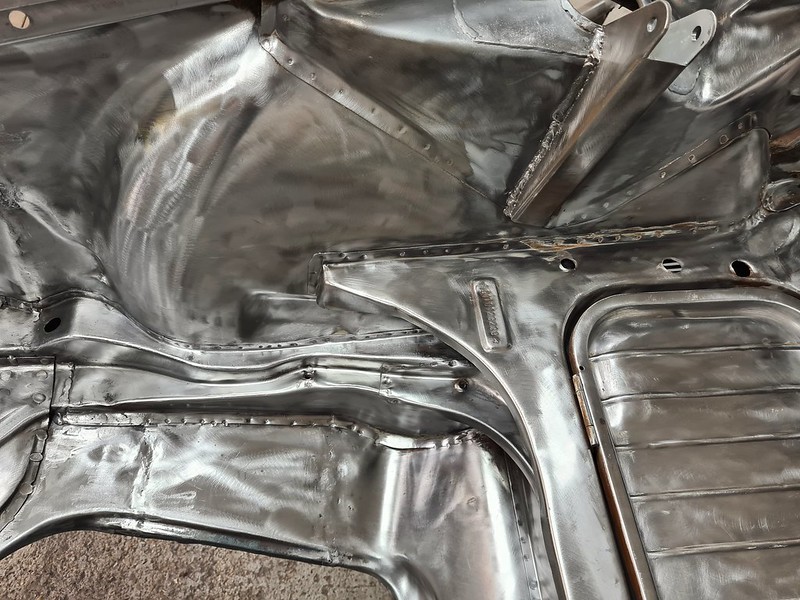
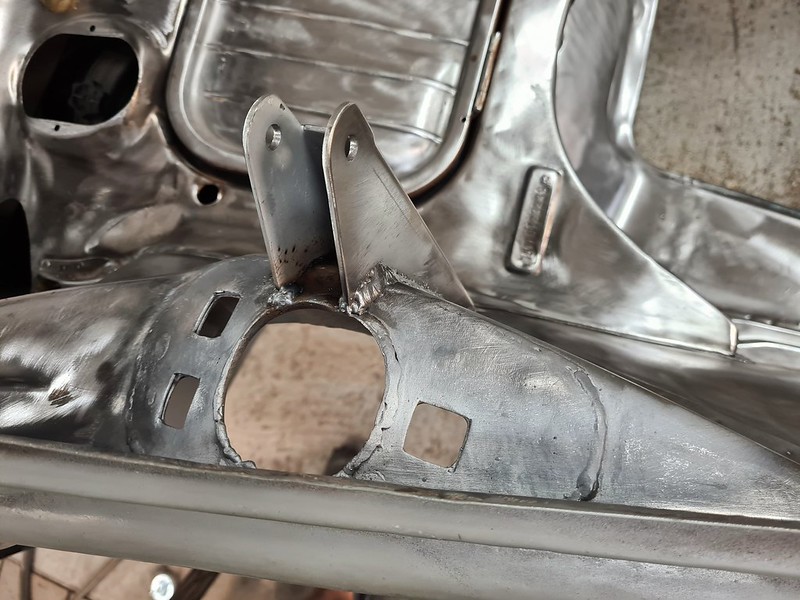
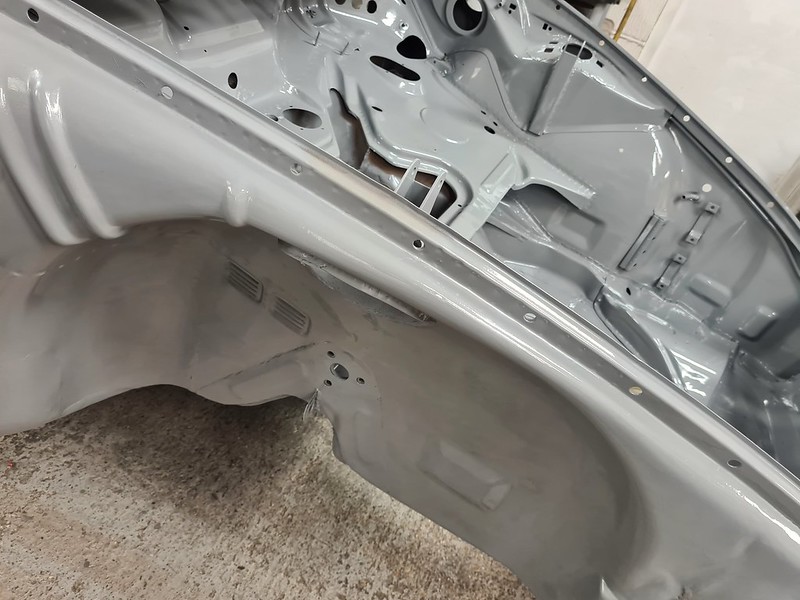
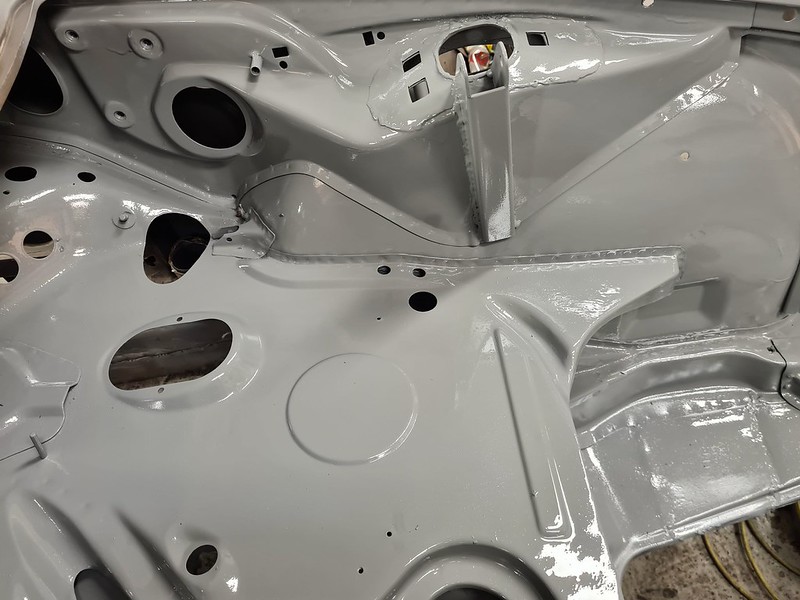
Busy day today...
 2021-10-12_05-29-10
 by
richard cannings, on Flickr
 2021-10-12_05-29-23
 by
richard cannings, on Flickr
 2021-10-12_05-29-57
 by
richard cannings, on Flickr
 2021-10-12_05-30-11
 by
richard cannings, on Flickr
 2021-10-12_05-30-21
 by
richard cannings, on Flickr
Re: Meet Ralph - 1970 ST project
Posted: Tue Oct 12, 2021 5:35 pm
by Gary71
Been there Richard, I feel your pain! End result looks great
