Page 6 of 34
Re: The Manhattan Project
Posted: Tue Jan 12, 2016 6:09 pm
by 911hillclimber
"Tick-Tock", remember that feeling well.
Whatever you do, do not let those chains come free of the Int shaft cogs. One of mine did and I had a terrible time getting I all back together with the guide ramps in place. One jumped a row and I nearly had to split the lot again to re-locate it, but after sleeping on it I beat the bugga!
Take your time.

Re: The Manhattan Project
Posted: Tue Jan 12, 2016 10:03 pm
by Gary71
Looking good. Mines still in bits on the floor!
How did you clean up the cases?
Re: The Manhattan Project
Posted: Wed Jan 13, 2016 4:50 pm
by AndrewSlater
911hillclimber wrote:Whatever you do, do not let those chains come free of the Int shaft cogs.
Thanks for the advice - will definitely be taking it slowly and double checking as much as I can.
Re: The Manhattan Project
Posted: Mon Jan 18, 2016 7:44 pm
by AndrewSlater
As I wasn't happy with the way the case bolts had gone I decided to pull one of the bolts where the o-ring had broken out.
On inspection the core of the o-ring was OK but some of the o-ring had broken away.

Not happy with the result I refit each of the bolts taking as much time as I needed to get it right.
I fitted new O-rings, swapping out the bevelled washers with some of the new ones I had ordered. Time gave me the luxury to prepare the bolts, and O-rings to the best of my ability and then to ensure that the washers were held in place so they didn't rotate whilst each bolt was torqued back up.
I took my time and spent an afternoon on this but one by one all the bolts were redone and this time I fitted them the correct way round as per the PET manuals.
All in all happy with the result and more confident that it is less likely to leak in future.

I then decided to move on to the cylinder heads.
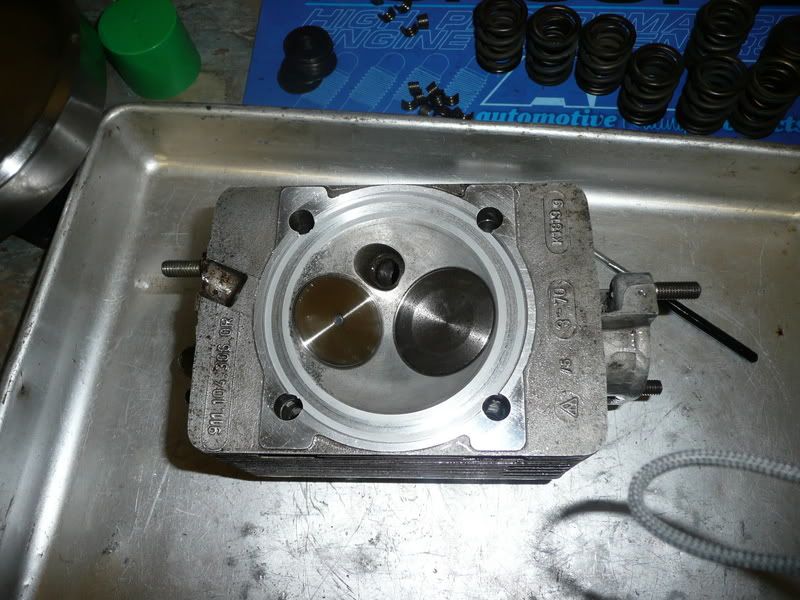
First job was to the lap my new valves into the newly refreshed cylinder heads. The heads have been cleaned up and new valve guides fitted. I have also got new springs ready for fitment.

So after what seemed like an eternity of hand lapping the first head passed the 'holding brake cleaner' test.

Decided to buy a Gunson Eezilap to speed up the next 5 heads - but that is one for another day!
On a different note I visited my bodyshop today and the shell work is really gathering pace. My bodyshop guru is starting to ask questions about paint materials - which is a good sign. It has raised a few questions which I will need answers to but I will try to ask in the technical forum.
Re: The Manhattan Project
Posted: Mon Jan 18, 2016 9:50 pm
by johnM
Make sure the outer valve spring is fitted the correct way, tighter coils to the base. They are progressive springs. The valve shims also need setting up correctly using the special porsche tool or a modified home made tool. I think there is a photo on here somewhere of the home made one.
Re: The Manhattan Project
Posted: Mon Jan 18, 2016 9:54 pm
by johnM
niels wrote:johnM wrote:niels wrote:I've just rebuild my 2.4e. Got good 2nd hand e cams, used new mahle s pistons and barrels. This is an easy fix, otherwise you also need to get larger valves intake etc to get to use the s cam. Beside that i couldn't find new e pistons and barrels and new e cams. I'm driving with mfi by the way. Pump is also restored and had a little upgrade to cope properly with the slightly higher compression.
Will let you now the outcome after i'm able to drive. Currently the rest of the car is under extensively restauration.
All inlet valves and all exhaust valves are the same size in T, E and S heads for 2.2 and 2.4 cars.
Kind Regards
I was of the understanding that inletvalve needs adjustment in the head. I'm not an expeet, sorry. It is my first porsche engine. Also i understood that the throttlevalves and inlettubes have a sligthly different size. Thereby one needs a differnt cam for the mfi.
Hi
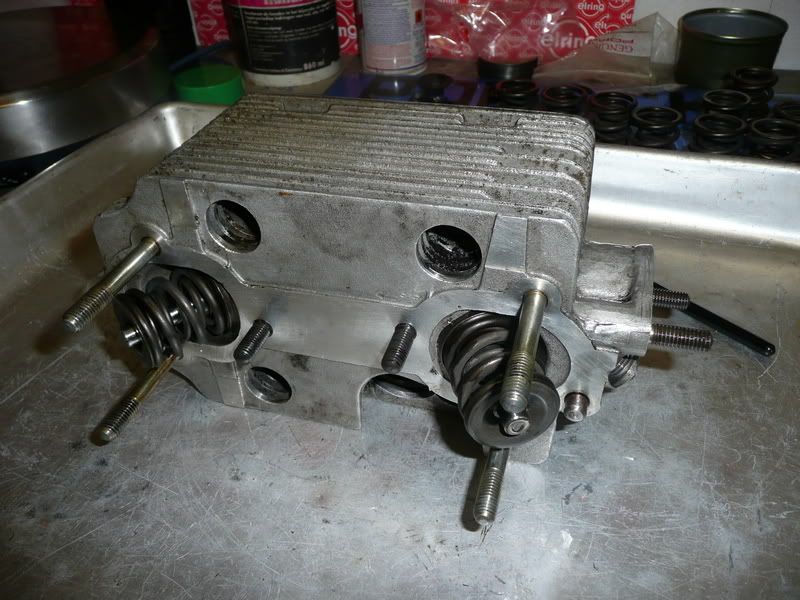
2.2 and 2.4 heads use the same sized inlet valves and the same sized exhaust valves. Each valve needs to have the double spring shimmed and the amount of shimming depends on the cam used and the amount of wear on the valve and seat. The little spec book gives you the specs. You use a porsche tool to set the shim, see photo below.
The outer spring is also progressive and the tighter coils need to be fitter nearest to the head.
The exhaust port is the same size on the T E and S but the inlet port size is differant, 30mm T, 32mm E, and 36mm S.
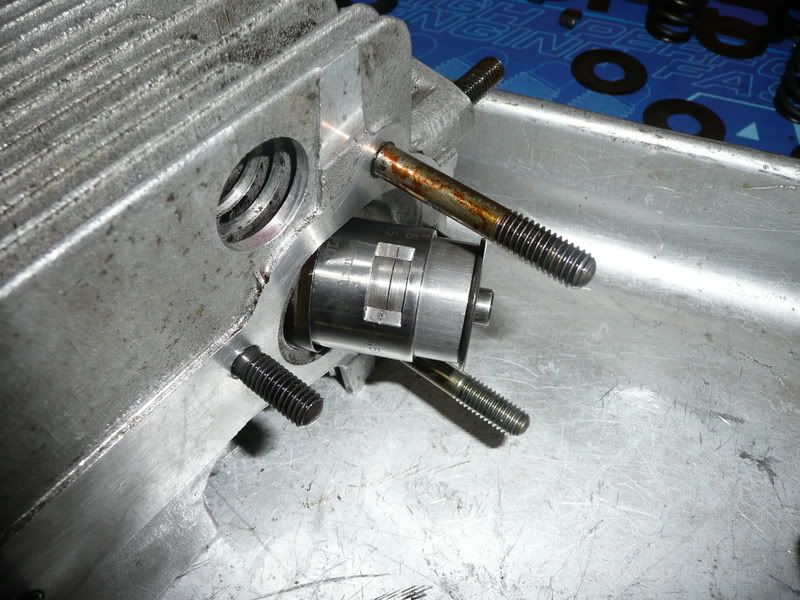
A head all shimmed and ready to be installed. The outer spring is progressive and needs to be installed the right way round with the tighter coils at the base.
[/quote]
Re: The Manhattan Project
Posted: Tue Jan 19, 2016 9:37 am
by AndrewSlater
Thanks for the info John.
In the back of my head I was aware the springs had a correct orientation so was going to research that.
It doesn't seem to be mentioned in my little Porsche spec book.
As for the spring height I don't have a tool so was wondering what was the best thing to improvise. I've tried measuring using my calipers which can be done but is a bit of a pain. I think all of my original shims are 0.5mm, so may need to track down a few 0.25mm ones depending upon how close to the nominal measurement I want to get.
Re: The Manhattan Project
Posted: Thu Jan 21, 2016 12:09 pm
by AndrewSlater
Having checked my new springs I would say they are marginally progressive but not so that you can tell be eye, only by vernier.
Does anyone know where the valve spring orientation is documented just as a double check?
Re: The Manhattan Project
Posted: Thu Jan 21, 2016 4:06 pm
by 911hillclimber
Dare I say Dempsey's book?
I think he mentions it.
Re: The Manhattan Project
Posted: Thu Jan 21, 2016 5:03 pm
by AndrewSlater
How dare you say that !!

Maybe that is where I read it - I will have another look in Waynes book tonight to confirm - although I haven't forgiven him for telling me to put my through case bolts on the wrong way the other day.

It seems odd there is no note in the little Porsche spec book if it is important.
I also watched a video of one of the specialists putting a cylinder head back together and there was no mention of orientation and they didn't seem to check.
Re: The Manhattan Project
Posted: Thu Jan 21, 2016 5:24 pm
by 911hillclimber
I doubt it matters anyway, the spring rising rate will be the same one way or the other as the spring compresses, but for me if all the spring orientations are the same that is right rather than a mix.
Having said that I was not aware the case bolts had to go in a particular side!
Maybe I just got it right and being left-handed many things go back in the wrong way round..

Re: The Manhattan Project
Posted: Thu Jan 21, 2016 8:50 pm
by AndrewSlater
Re-read Waynes book but can't see any mention of spring orientation.
So started to refit everything following Johns advice - two heads done tonight, went together pretty easily.
Re: The Manhattan Project
Posted: Mon Jan 25, 2016 9:33 pm
by AndrewSlater
Finally finished putting all the cylinder heads back together.


They all look pretty good - almost like new !!
I have bought new standard inlet studs and new stainless exhaust studs but will probably fit them after the heads are on the engine.
One of the next jobs is to fit the new steel head studs into the new case savers.
Re: The Manhattan Project
Posted: Mon Jan 25, 2016 10:46 pm
by 911hillclimber
Those heads look v nice, great job done.
Gary's re-build has gone silent!
Re: The Manhattan Project
Posted: Tue Jan 26, 2016 6:48 am
by Gary71
They look excellent. I'd fit the studs first just in case you have any problems with threads as access will be easier off the engine.
My rebuild is quiet as its stopped! Not even opened the garage for weeks....