As I said, no reason not to fit the front wings now, so …..
The new flag crimping tool arrived, so I could complete the battery cut out switch. The pull cable also arrived and was fitted. It takes a bit of a pull to trip the switch, but I guess that if the car’s on fire, I may well find additional strength.
Anyway, the wings. First, take them off, fit the requisite number of clips and apply sticky sealant stuff to the inner wings.

I left the outer paper on while I ensured it was fully pressed home.

Then I made holes for the wing retaining screws to pass through. This prevents the screw ‘picking up’ sealant and generally corkscrewing a huge trail of the sealant. Worked mainly, with a fail on just a couple of screws.
Liberally washing the strip of sticky stuff with white spirits allowed a little bit of slipping and sliding to fit the wings, without the ‘$h1t to a blanket’ suction effect. Anyway, they’re now fitted and seem to line up surprisingly well., all thigs considered.
The fuel filler arrangement was added (everything as far as the tank itself – that’s still uncleaned in the loft).

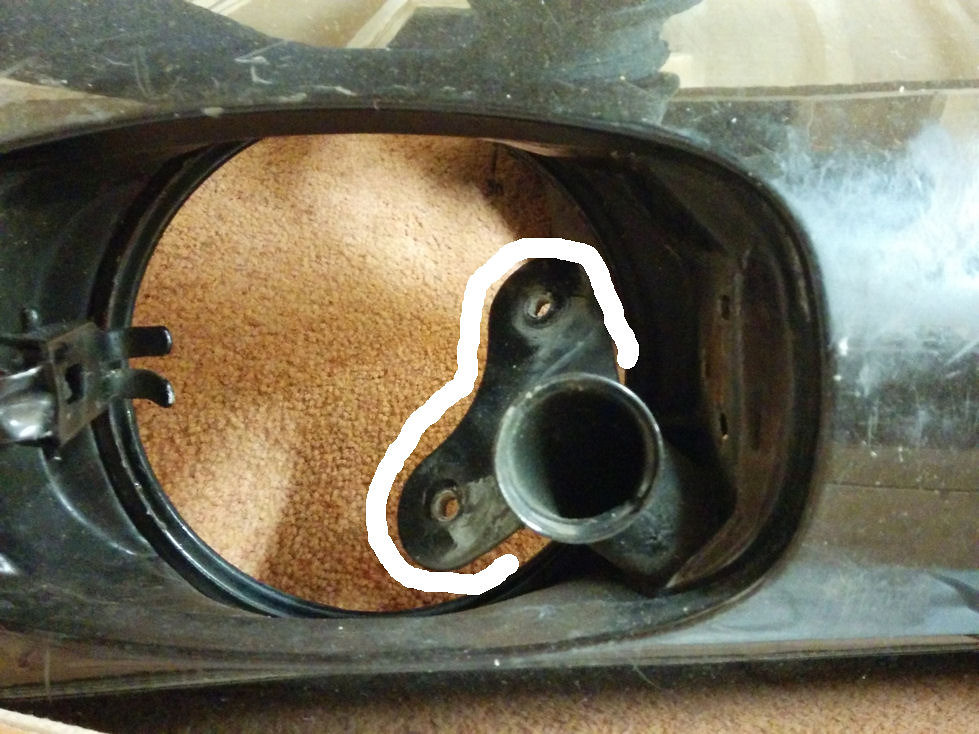
The front wings are from a ’76 I believe (they were in better condition than the ones that I repaired). On my original wing, there was a plate welded to the washer fill tube, that the fuel pipe bolted to. This bracket looks like it was never on the ’76 wing. As everything is now painted, I might just leave it as it is.
Then one of Jonny’s Boxster washer bottle kits was fitted for the (almost) last time.

It was supposed to be the last time, but …..
Jonny recommends replacing the pump, but mine worked fine. As did the level switch. Honest, they did when I bought the second-hand unit ages ago.
Having fully fitted the water tank, neither the pump, nor the level switch worked any longer. Bu$$er. Tank had to come out again and new pump and level switch fitted. Tank refitted - hopefully for the last time.
Although the photo above showed the fuel filler area without flap, it was fitted and aligned and the flap release connected. I then had to take it off, as it needs final spraying (no way that I could find it when I painted the wings). Unfortunately some silly b@$t@rd had fitted a Boxster washer bottle in the way of the bolts. With a few extensions, a little cursing and a lot of luck, I did eventually manage to reach them without removing the washer tank (again).
Time for the front bumper. The car came to me with low profile, not the correct for ’79 periscope, headlamp washer jets. I had bought new jets, but they were slightly different to those that came off, requiring 4 slots to be made to receive the (I assume) orienting/locating bumps. This is the time that I realised that I needed some 10mm diameter tubing. I had just bought 0.5m for the drain tubes on the hi-power aircon blower – now I needed a further metre (and a 10-6mm reducer). More delay (and more shopping).
There was nothing preventing it, so I fitted the front valance and the aircon condenser.

This was a mistake – see later.
I had a replacement seal for the gearbox – to go on the selector rod.

It fought me, but it is definitely a case of ‘I’ve started, so I’ll finish’. Having mullered the existing one, I had no choice but to persevere (and maybe utter a few naughty words). I finally won in extra time. Was starting to get worried about going to penalties.
I’ve got a replacement seal for the spigot shaft seal. Having removed the 2 counter-sunk screws I couldn’t remove the outer sleeve, so refitted the screws and put the seal in my spares box.
New 10mm tube arrived, so washer jets were connected and front bumper fitted. Next were the indicators. One had a broken fixing screw, so I drifted them all out and replaced with new set screws.

On went the front bumper strip and the end pieces and the front end is starting to look proper.

This is the point that I realised that it was a mistake to have fitted the front valance earlier. Whilst the driver’s side was fine, with the condenser and drier in place, there was no way to get my hand in to fit and tighten the nuts holding the rubber end pieces. It’s now sitting on the side again, this time awaiting the rubber lip being fitted.
I fitted the pump and small water tank for the headlight washers, but nothing happened when I pulled the wiper/washer switch. The pump ran when I powered it directly, the relay worked when I powered that (well, earthed it actually), but it turned out that the wiper/washer switch wasn't playing ball. Off came the steering wheel, the covering and the switch, then after much pondering and fiddling, it now works.
I’ve wired the headlights using ceramic connectors, they all work, but I’ll probably delay fitting the lights until after final colour sanding.
I’ve been into the garage on several occasions, intending to make new spreader / clamps / thingies to fix the rubber lip to the front valance. Every time I managed to find something more interesting to do, but they need making.
So what did I do this time - I got distracted and made some brackets to hold the horns. Then I did make a start. I cut some metal strips but they just laughed at my bender, so as punishment, I beat them in the vice. I drilled a hole and welded a bolt into each of them.

They’re currently half painted, so should be good to go by the end of tomorrow.