Page 26 of 30

Re: 964 C2 - Rolling Resto

Posted: Mon Apr 26, 2021 9:46 pm
by rhd racer
Or is that the answer?

The alarm company have been helpful and the fitter happy to talk through by phone or come back out. But being the impatient type, I took the uncovered the alarm box from it's secret location and all is as expected - no connector blocks evident that I could have knocked, all hard wired and wrapped in cloth tape. I highly doubt that I have knocked something on reassembly. That is not to say there is not a fault, but my research led me to conclude it could be something else.

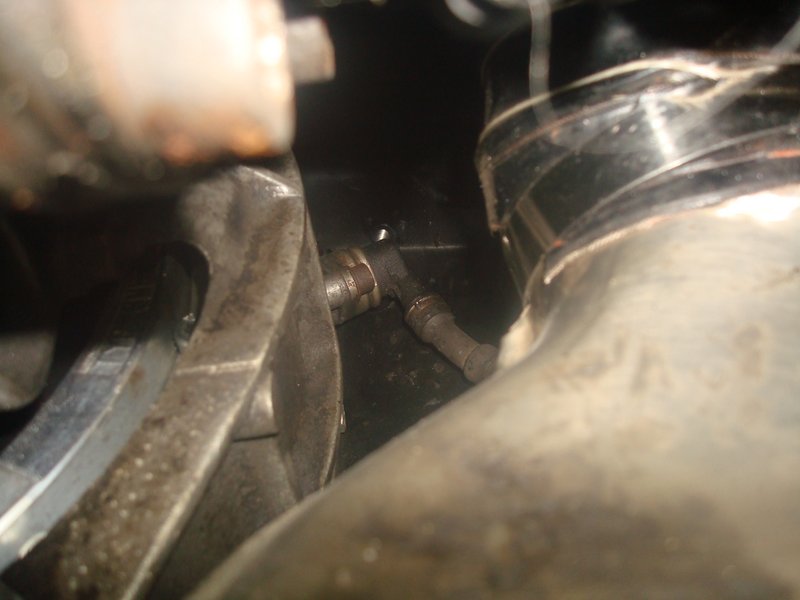
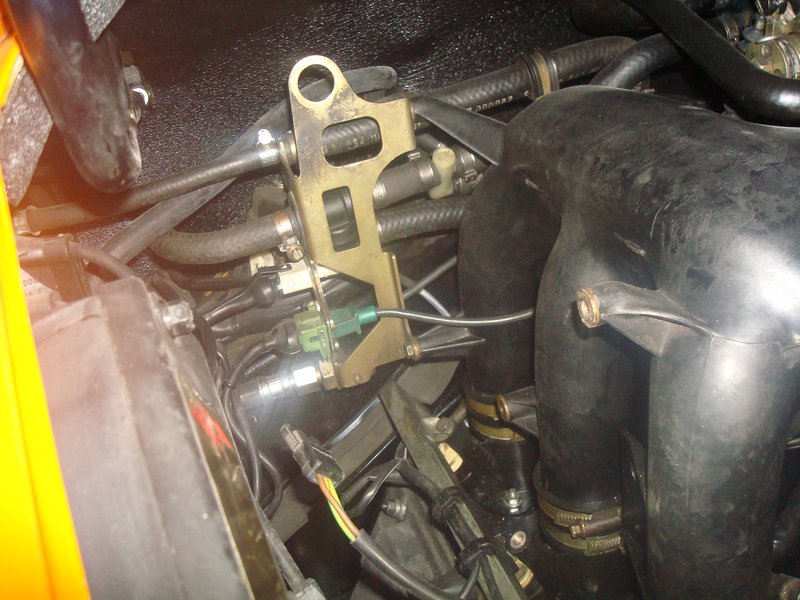
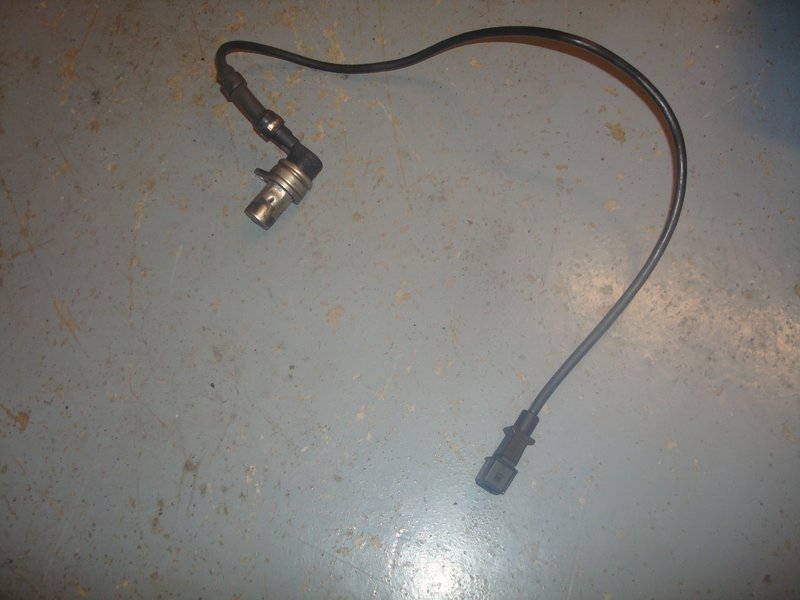
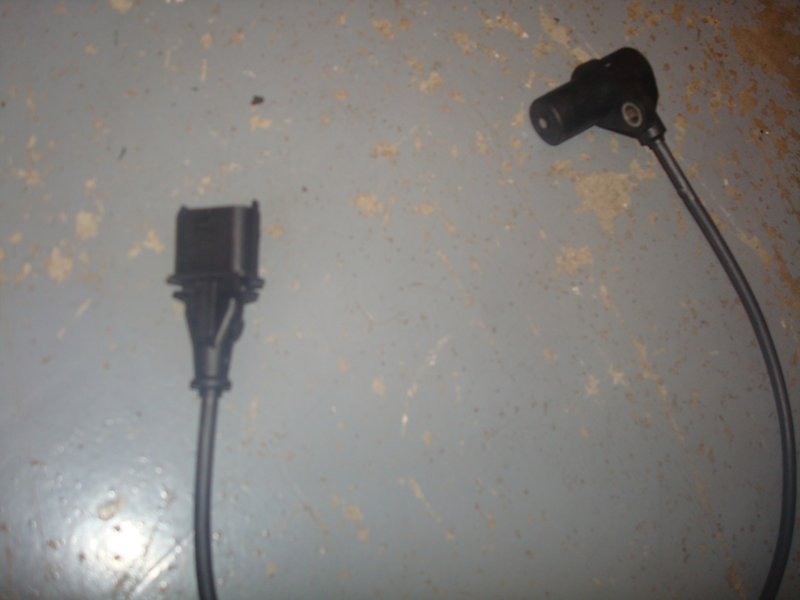
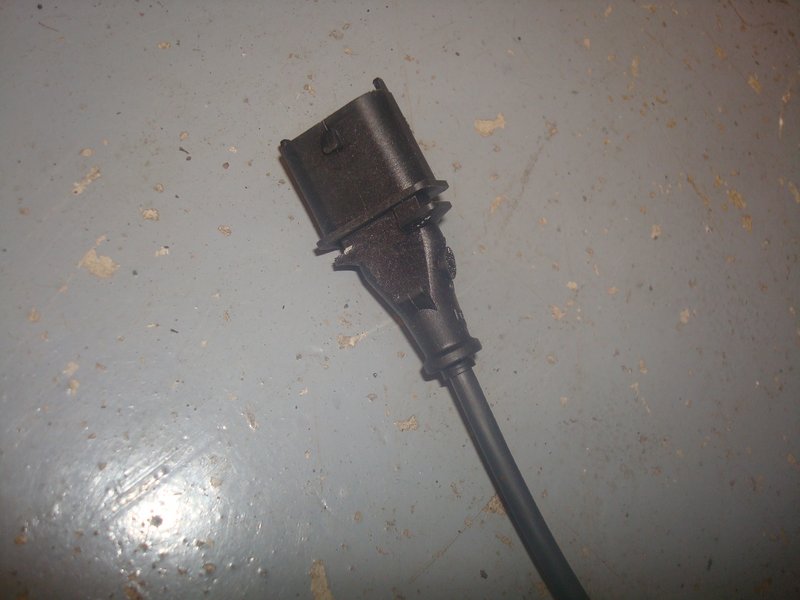
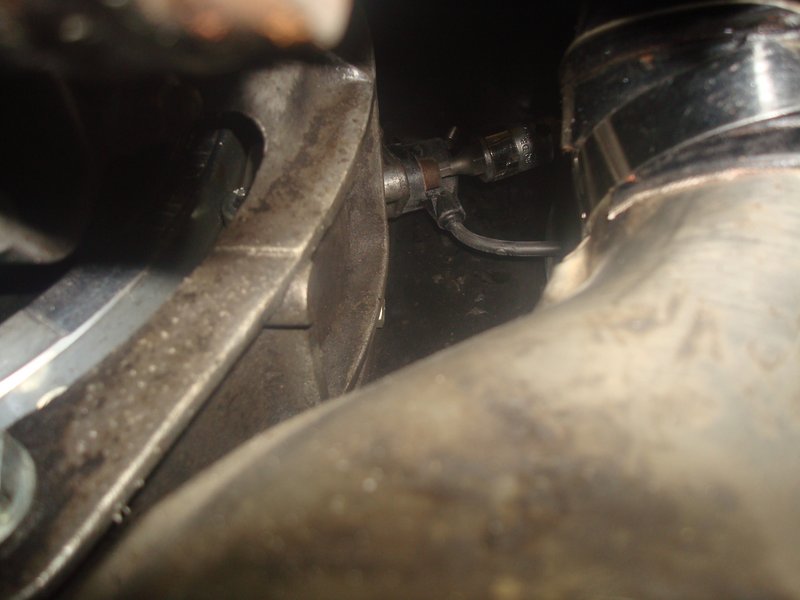
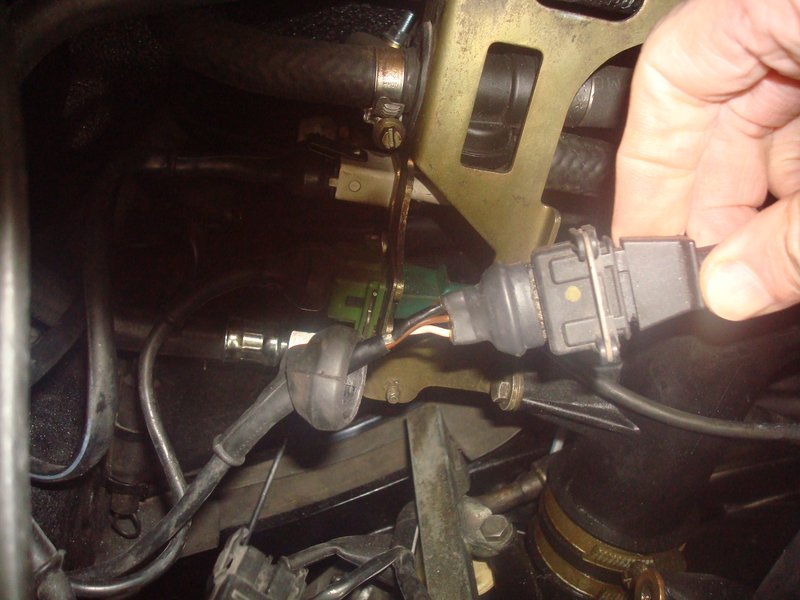
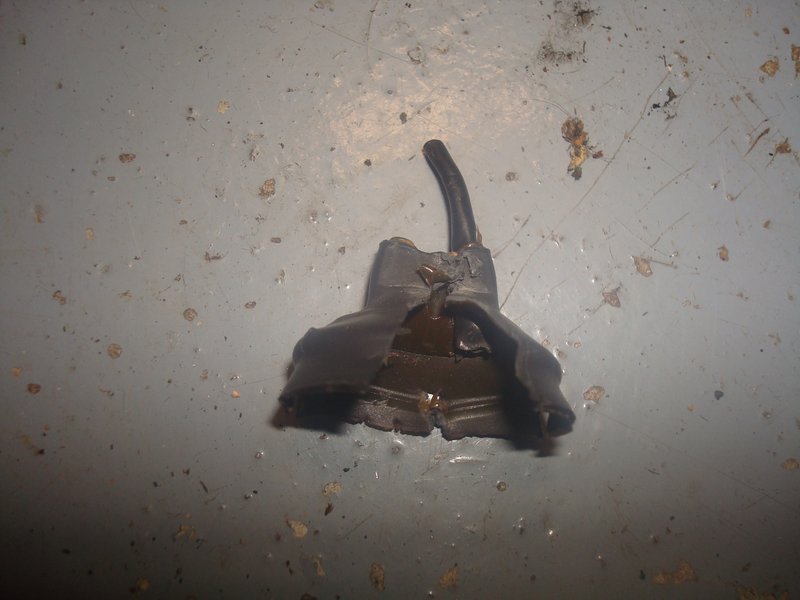
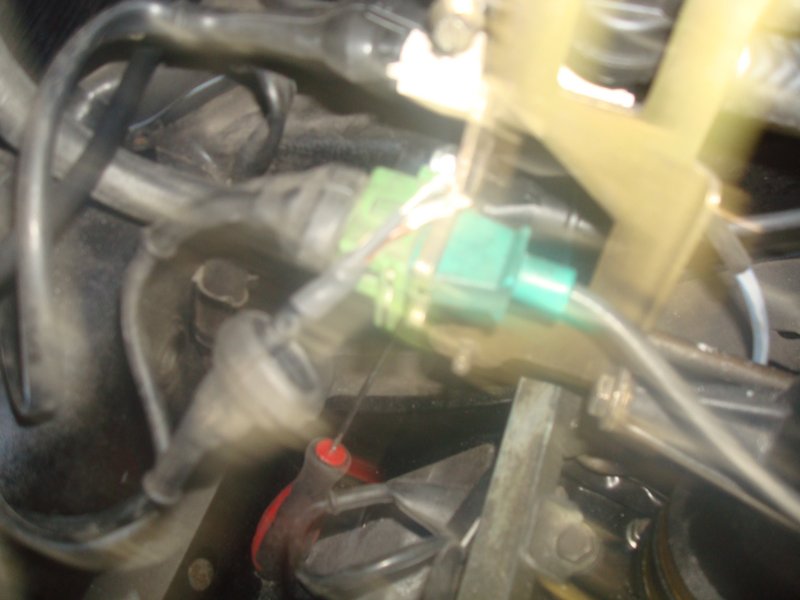
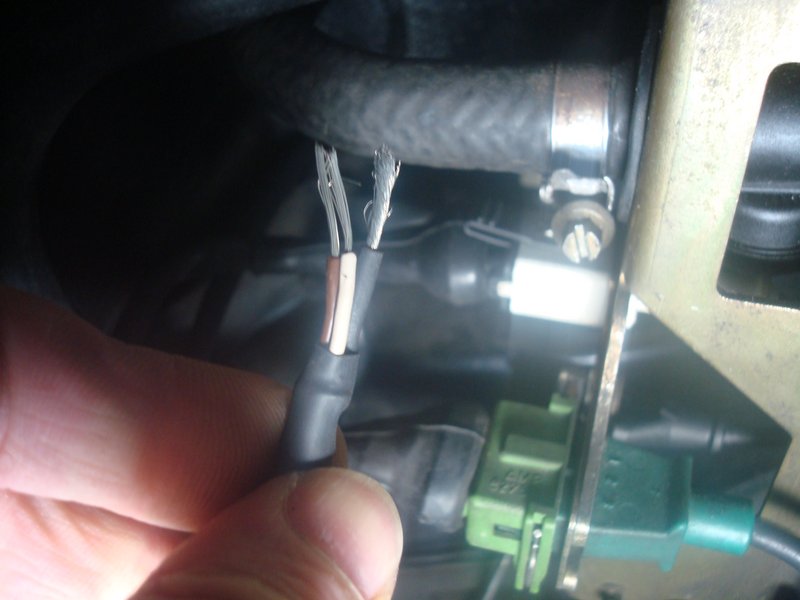
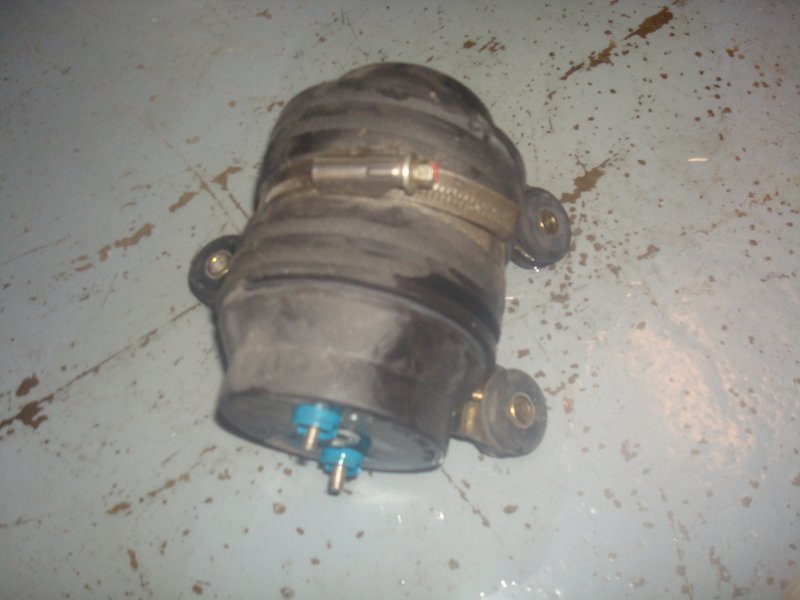
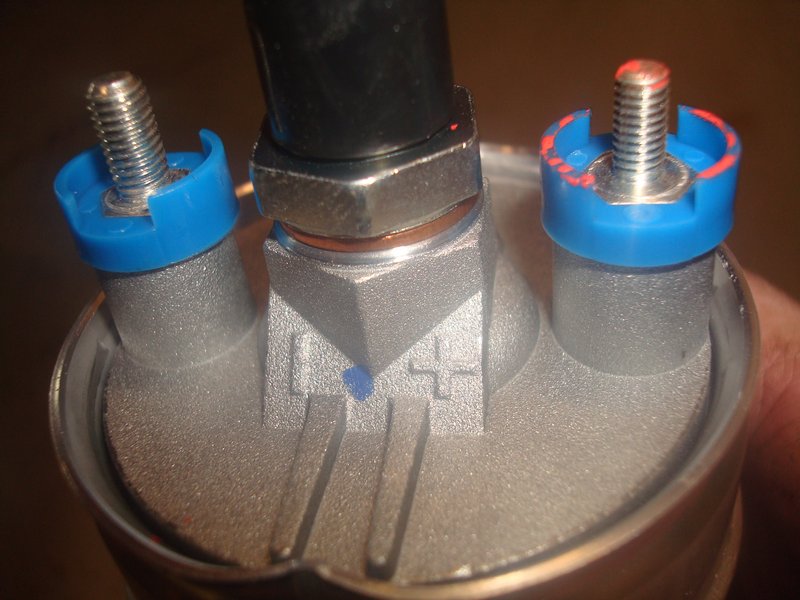
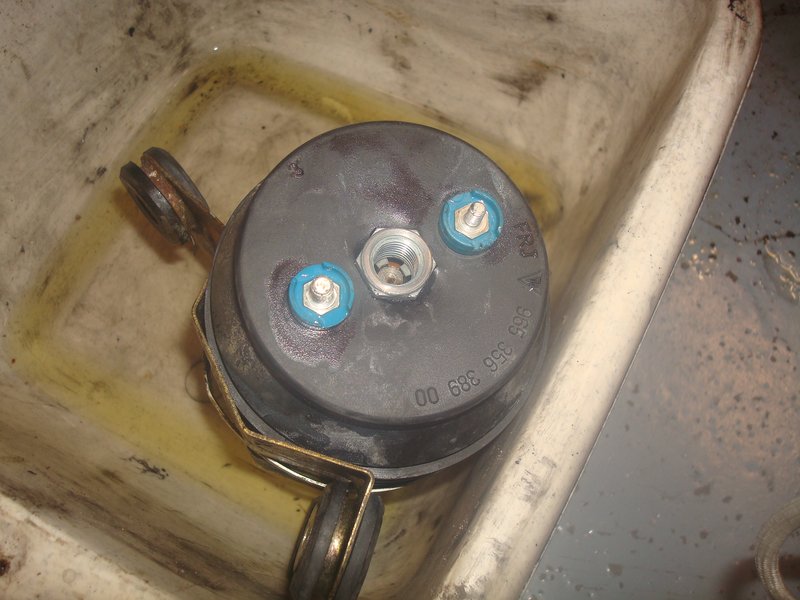
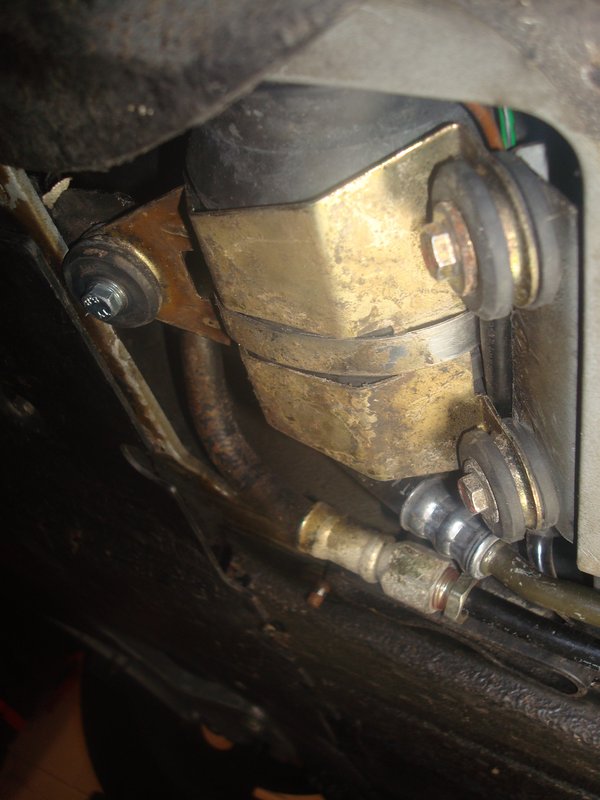
What I have concluded is no spark and no fuel - both are controlled by the DME. These do fail, but they are also fed by a crank position sensor - effectively telling the DME where the engine is and whether it is moving. I gather that a rotating engine sends a message to the DME to activate the DME relay to pump fuel and Bob's is your favourite aunty's husband. This, for the sake of a £100 sensor which is commonly known to fail (don't they all seem to be!), feels like it would get picked out of a line up ahead of a fault on a brand new alarm / immobiliser. It is fitted to the same 3 sensor fitting bracket behind the engine fan, and goes through the same oval grommet in the rear tinware that the previous point of failure does - the cold start sensor. Hopefully, am onto something, so have the car up in the air for access and the parts on order.

In the meantime, I have fixed the oddest and most annoying of faults. After the refit, the stereo did not work properly; swtched on ok, all functions worked, output to sub worked so plenty of base but no sound at all. I manage to get a bit of clicking from the speakers when connecting and disconnecting the ISO loom, and occasional split seconds of music, but as soon as the connectors were pushed together properly, nothing. Convinced it must be the stereo loom where it had been in and out som many times, I replaced it. No joy. Then, I concluded it had to be the other side of the connector, so ordered a standard ISO loom, chopped the old one off and resoldered all the speaker connections, losing about 6" in the process and therefore making it easier to tie the cables out of the way. Still nothing.

Slightly perplexed, I hit the internet over and over trying to fathom out what the heck it could be. After all, nothing had changed apart from refitting the interior, and the loom was in one piece from front to rear. After a lot of searching, I found a statement deep in a thread on a car audio forum that I had never come across; 'one bad speaker line, on some stereos, will cancel all output'. This was complete news to me....

So, looking for a bad speaker connection I started at the front. My logic was that the crossovers are there, so the wiring more complex, more to earth against etc. The connections were ok, but I redid them anyway and reconnected the speaker - everything burst into life again! Result I thought, so refitted again, and when fitting the grill it cut out again. A tap on the door did not revive the sound, so I removed the speaker again and once more it fired into life. After about an hour of pratting about, I worked it out....

The one thing that is different, is the fitting of RS door cards, and although everything is in the same place, they are a little thinner, much better fitted, and the speaker position relative to the aperture in the door is different......

Re: 964 C2 - Rolling Resto

Posted: Mon Apr 26, 2021 10:00 pm
by rhd racer
Basically the speaker connection tabs were grounding on the aperture, so a bit of foam self adhesive tape fixed it in a jiffy

Image

Image

I know it is an academic fix if the car doesn’t move, but hey, got to fill the time with something and it was driving me nuts because I just could not fathom it...


Sent from my iPhone using Tapatalk

Re: 964 C2 - Rolling Resto

Posted: Tue May 04, 2021 10:34 pm
by rhd racer
So we can call this update 'A tale of two fuel pumps', or perhaps 'You plonker Rodney', or worse.

But before we get to that, some sleuthing. Having worked out that the spark and fuel pump trigger feed are fed by the DME, and the relay is ok, the crank position sensor was the most likely culprit. So, I ventured underneath to see where it is, and despite there being internet talk of removing wheels, catalysts and tinware, I managed to do it without even disconnecting the heater hose. It goes through the same grommet in the rear tin as the cold start valve I have already replaced, and mounts high up on a small bracket.

Image

And mounts on the same bracket in the engine bay behind the duct - the black one behind the green sensor

Image

Removal is very straight forward

Image

the difference with the new upgraded part (from a 996) being the connector on the end, so a replacement end for the engine loom is supplied with it.

Image

I had to cut off the plastic spring clip that secures it, because it would not slide home in the housing (much like the last upgraded sensor). This is academic anyway, as the metal securing ring holds everything in place after fitting anyway.

Image

The new one goes in from underneath, passing though the grommet, before fastening. No shimming / adjustment necessary. The new one is shielded, with a protective coating on the sides of the sensor, and the pick up only being metallic - unlike the old one. Access is interesting for doing it up

Image

then it is a case of chopping off the old connector, soldering the new ends on to the loom and connecting. The problem is that the loom is towards the back of the engine, so not exactly in easy reach, and that part of the loom is also not very long, making it much more difficult. There are two actual wires, and the third is a shielding cable. Nothnig especially difficult, just care to be taken stripping back the rubber waterproof cover, the heat shrunk damp shield and then stripping the wires - all keeping the loom as long as possible. I had a connector fail (the sypplied ones are not as good as some I had in stock, and would not go into the connector properly, and the solder connector broke as I tried to force it in with some long nose pliers. So this needed a repair wire solder and heat shrunk in place.

Image

Image

Image

Image

It was a good lunchtime's work. Well, it would have been if it had worked, there being no change at all to the outcome when turning the key.....

I tried to speak to the alarm fitter, but he was on holiday for a week, so rather than do nothing I thought I might as well fit one of the fuel pumps. My logic being that whilst it was unlikely to change anything, the old one could be making the right noises when jumped but not actually pumping. So, off with the inspection cover under the passenger footwell, and then I remembers what as sod it is to remove, soon wishing I hadn't started a job with only the slimmest chance of success....

Image

Image

With the pump wrestled out of the void, thoughts turned to the order of events. My plan was to clamp the inlet, remove the wires (with the DME removed for safety, although I had already proved there was no feed there anyway) and then undo the exit line. Now this last one is basically fitted to a union with two male threads - one screws into the pump (18mm) then a banjo connector with brass sealing washers either side, and then a 19mm nut on the end. It was evident that this nut was quite tight, and I couldn't undo it, despite claimping the pump in some vice grips. Plan B was to bolt it back in and try and get on the nut with a cranked spanner.

This didn't work either, in fact I made things worse.

I got a spanner on it at a jaúnty angle, because the nut is effectively above the floor when in situ, not over the opening. I got a quarter turn - result - but then it stopped and would turn no more. So I removed the pump (again) and tried to do it where I could see what was going on. You may have already guessed that the union had started unscrewing from the pump end, so the 19mm and the banjo where still stuck fast, and I was leaking petrol from the cracked union. Brilliant.

Whatever I did, the banjo was in the way, and I could not get a spanner on the 18 and the 19 at once - I certainly couldn't do it in situ. What to do?

Image

Image

Image

I kicked the answer with my foot - the impact gun! Whizzed it off in a jiffy....

Image

So, then to wrestle with the rubber cover it sits in, which needed to be performed in the vice. I marked the carrier so I reassembled with everything in the right position so the pipes and loom were all located correctly

Image

I also marked the +ve terminal, because with the cover on you cannot see the markings on the case of the pump!

Image

Image

Image

Image

I must confess, that despite my efforts I ended up with the jubilee clip in the wrong place. I intentionally left it at the bottom, so I could adjust the orientation if necessary. This meant that I couldn't put the cover on, so it all had to come out again to redo.... :roll:

Obviously at this point the 19mm nut was only hand tight, so I always knew it would need a gentle tighten in the car. This image shows just how tight it is for getting a spanner on it.

Then came my next problem. I primed the pump using my jumper lead, and there was a drip. So I nipped up the union and the drip became a pour. My wife came out to the garage to a stink of fuel saying tea was ready. Oh dear. I clamped the pipe and went in, tail between my legs. Why did I start this?

I had failed to buy new copper washers, so disassembled the old pump and removed the one between pump and union, which obviously is a fit once and leave item, rather than the one that gets tightened when the pump goes in and out, or in my case the fuel lines replace. This time, a gentle nip and all was dry.

But it still didn't start.

Today I called the alarm fitter, and talked him through the diagnostic checks I had done, the parts replaced etc. He doubted it was the immobiliser, but very generously said he would come out as soon as he had some downtime, and between the two of us was confident we would get it running. Upon thanking him, I said in passing that unless the ECU itself had taken a dump, it surely must be the alarm.

He asked where the ECU is, and whether I had checked the connections. Under the seat I said, and yes, I think so. I had 10 minutes between video calls and thought I had better check, so nipped outside and with my small inspection light peered under the passenger seat. There was the ECU, connector attached but the metal clamp which not only secures it, but also pulls the connector tight to the ECU was probably no more than 5mm away from home. Pushing it home drew in the connector by the same amount to the connector on the ECU......

A flick of the key and it fired first time!

So I called the fitter back, and thanked him for asking the right questions and cutting through hours of research, testing, replacing bits etc etc. Reflecting on it this afternoon I am sort of kicking myself for missing something so obvious, and incurring the aggravation and expense of replacing the sensor and the pump, but being positive I have at least replaced two weak spots that would inevitably fail at some point, and the cost wasn't huge.

The main thing, with a huge sigh of relief, is hearing it run again, and the prospect of getting behind my lovely new dash and driving it again once the seats are back in!

What a plonker.....

Re: 964 C2 - Rolling Resto

Posted: Wed May 05, 2021 6:27 am
by PeterK
It’s (nearly) always the simple things :lol:

Congratulations on your tenacity / persistence - oh yes, and getting it running.

Re: 964 C2 - Rolling Resto

Posted: Wed May 05, 2021 9:05 pm
by rhd racer
Thanks Peter.

The beauty of doing a thread is outing yourself in public for being a plum!

I should also point out the Porsche had thought about the old fuel pump in a rubber sock thing, as the terminal posts are M6 and M5 so if you have good eyes can tell the difference!

Tonight I replaced all the jubilees on the oil system with Mikalor clamps to stop the oil leaks I had found whilst doing the crank position sensor.

Image

Then I took it for the first pootle around the lanes for 6 months and all felt good in the world....


Sent from my iPhone using Tapatalk

Re: 964 C2 - Rolling Resto

Posted: Thu May 06, 2021 7:28 pm
by hot66
Looks like it’s all coming on well 8)

Re: 964 C2 - Rolling Resto

Posted: Fri May 07, 2021 5:19 pm
by BILLY BEAN
Very frustrating. A real testament to your perseverance and tenacity. Surprised you did not kick anything!"

Re: 964 C2 - Rolling Resto

Posted: Fri May 07, 2021 6:14 pm
by rhd racer
Thanks both.

Seems you and I have about the same level of car luck eh Kirk?! They used to say of F1 that you create you own luck, and I sometimes wonder whether it applies to repairing old cars, and perhaps I should look for a less frustrating hobby!

Still, got there for now....

Re: 964 C2 - Rolling Resto

Posted: Tue Jul 30, 2024 10:35 pm
by rhd racer
Thought it was about time to resurrect this and bring things up to date. The truth is, life has got in the way and we have been building at home, so I have been focused on that and the car has been on the lift taxed and insured for over 6 months with the oil drained. I started servicing it and never got any further, and then the racing started so that created another barrier.

Anyhow, the new lines did not stop the case pressurising, so as a last ditch attempt before pulling the engine and investigating further, I decided to take Sam’s advice and change the pressure relief valve. He was right that it is in a pig of a place…

I saw a tank for sale for no money, but it was an old ad so a dead trail. Then Angus mentioned he had one from a car that he broke, so he donated it and I collected it when dropping off my extinguisher for a service. I gave it a good flush out, and dried it thoroughly before starting to strip. It seems to be made of different materials - steel parts had rusted a little so needed treating, some stainless, and the dipstick flange is brass. The latter was seized and looked as if it would shear, so I cut the old it off by very carefully grinding down the bit until so could free it off. I then collected a new dipstick tube, gasket and some pressure valve (a 924 part number) from my local OPC on the way to Anglesey for the season opener. That was Feb - May progress!

Image

Then whilst getting the trailer out of the garage to release our new front door for fitting, I found the tank and quickly masked it up. Over the course of the day I primed and painted it in satin black
MImage
Image
Image

Nothing like as fancy as Darren’s tank, but hopefully a worthwhile change given you cannot get to the valve without removing the tank anyway.

Now fast forward to tonight, I thought some garage time was overdue so started removing the old tank - what a pig! The pipes have all come off ok because they have only been on a year or 18 months, but the rubber mounts are gnackered and ceased onto the body, so need to be cut off. Access is also very poor, so I had to remove the rear part of the cill cover. Better access revealed the thermostat is held by a cable tie….

Image
Image
Image

I need to make a call on what I do next, because this quarter has seen some action and you might be able to see what looks like a seam in the middle of the black stripe, and then another vertical one. It has plenty of filler in it and I have a complete quarter panel for it, but can’t decide whether to put back together and enjoy the car for the rest of the year or a) do the whole quarter or b) do a localised repair to the quarter whilst the oil tank is out. I am not sure whether either of those repairs are really viable with the tank in place, so stripping out and ping all this again seems like a bad idea…


Sent from my iPhone using Tapatalk

Re: 964 C2 - Rolling Resto

Posted: Tue Jul 30, 2024 10:36 pm
by rhd racer
More ramblings tomorrow - or in another year!


Sent from my iPhone using Tapatalk

Re: 964 C2 - Rolling Resto

Posted: Wed Jul 31, 2024 8:50 am
by 911hillclimber
If you feel you have a 'light' winter coming in then leave it all until you can see your breath and have something on the go in the cold months.
At least the car can get some exercise in the summer that is left.

Re: 964 C2 - Rolling Resto

Posted: Wed Jul 31, 2024 10:46 am
by hot66
if you're like me , you get pleasure from driving and enjoying the experiences you have with the car .. put it back together and drive it is my thoughts

Re: 964 C2 - Rolling Resto

Posted: Wed Jul 31, 2024 12:56 pm
by misteralz
Agreed. Took mine for its APK last week and ended up just razzing around in it for the rest of the day.

Re: 964 C2 - Rolling Resto

Posted: Wed Jul 31, 2024 1:07 pm
by rhd racer
Thanks gents / probably where I will land just hate doing stuff twice, and it is not a nice job!


Sent from my iPhone using Tapatalk

Re: 964 C2 - Rolling Resto

Posted: Tue Aug 06, 2024 9:31 pm
by rhd racer
So ‘tomorrow night’ turned into a week by virtue of the house and racing at Gurston Down on Saturday. Tonight I managed to get out and get the tank out;
- the mounting bobbin I could access was dispatched with a 1mm cutting disc on the grinder
Image

- having bought a new dipstick tube I cut it with a Stanley knife to save risking the threads on the tank
- this allowed enough wiggle room to get the tank out of it’s locating lugs, and luckily the inaccessible bobbin was already broken
Image
- this left only the sender to remove to save cutting the cable, but the threads are all totally knackered (some have pulled out, some are spinning but won’t come out) so I have left it hanging under the car for the next time
Image


The garage floor is a right state- a mix of oil and clumps of silt and crap. Can’t wait to go back out there…

The positive news though is there is no rot in the inner wing or door shut. I need to block off the pipes that are exposed and give it a really good clean, but it is super solid (probably helped by the most of oil over everything)

The other good need is that despite the outside of the quarter looking like it is hiding some real stories, the inner seems perfect and factory. I need to really check carefully when I clean it out, but it looks like there is a smear of filler on the outside that has just cracked - little more. Looking at the shape of the inner wing, it is not immediately obvious why there is any filler in the panel at all
Image

If that proves to be the case, it saves me the aggravation and effort of a complete quarter replacement, and perhaps I will make a repair panel to the rear section with what I have. Either way, means the tank can go back in and not come out again…


Sent from my iPhone using Tapatalk