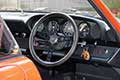
70 S, RHD, Signal Orange, UK->Australia->UK

Ongoing and archived Porsche (and other marques) restoration threads from DDK members

Moderator: Bootsy

Post Reply
User avatar
inaglasshouse
DDK 1st, 2nd and 3rd for me!
Posts: 2450
Joined: Fri Mar 28, 2014 9:35 pm
Location: Surrey, UK

Re: 70 S, RHD, Signal Orange, UK->Australia->UK

Post by inaglasshouse »

8bit-ash wrote:If its any use I used to work at a VW dealer a long while ago and I still occasionally call in for a cup of tea. I could call in with one of mine and have a shifty through their bolts bins and eye some up
Very kind offer. I'm all ears if you find some. No worries if not convenient though!
Cheers, Richard.
User avatar
inaglasshouse
DDK 1st, 2nd and 3rd for me!
Posts: 2450
Joined: Fri Mar 28, 2014 9:35 pm
Location: Surrey, UK

Re: 70 S, RHD, Signal Orange, UK->Australia->UK

Post by inaglasshouse »

Hey dudes, we're talking about correctness or not of bolt heads. Bolt heads that, unless you have the door open, can't be seen.
Didn't you know that my resto thread would, at some point, descend to this level?
Next up: previously glamorous and devil-may-care members of the forum will be asking about the correct engine bay stickers.
Place has gone to the dogs.
911hillclimber
Nurse, I think I need some assistance
Posts: 20690
Joined: Mon Mar 10, 2008 6:26 pm
Location: West Midlands

Re: 70 S, RHD, Signal Orange, UK->Australia->UK

Post by 911hillclimber »

Sorry, Andy is more observant than me, thought you were after the hinge pins. :oops:
Are these bolts the same as the shallow headed flywheel bolts? (which are M8 I think, but it was a long time ago I did an early engine.)
I threw all mine away years ago as they were chewed-up by a previous 'careful' owner, but I just used 8 grade hex bolts to do the job..

You are operating at a non-hot rod level obviously. :)
73T 911 Coupe, road/hillclimber 3.2L
Lola t 492 / 3.2 hillclimb racer
Boxster 987 Gen II 2.9
User avatar
Darren65
Nurse, I think I need some assistance
Posts: 8161
Joined: Mon Dec 13, 2010 10:55 pm
Location: North Wiltshire
Contact:

Re: 70 S, RHD, Signal Orange, UK->Australia->UK

Post by Darren65 »

I just hope you have the correct 'K' bolts for your inner front wings.......the restoration will be deemed pants if you don't! :?
User avatar
inaglasshouse
DDK 1st, 2nd and 3rd for me!
Posts: 2450
Joined: Fri Mar 28, 2014 9:35 pm
Location: Surrey, UK

Re: 70 S, RHD, Signal Orange, UK->Australia->UK

Post by inaglasshouse »

Darren65 wrote:I just hope you have the correct 'K' bolts for your inner front wings.......the restoration will be deemed pants if you don't! :?
:lol:
Yep, will just have to take it all apart and start again. After the therapy, obviously.
User avatar
inaglasshouse
DDK 1st, 2nd and 3rd for me!
Posts: 2450
Joined: Fri Mar 28, 2014 9:35 pm
Location: Surrey, UK

Re: 70 S, RHD, Signal Orange, UK->Australia->UK

Post by inaglasshouse »

Right, that's enough about bolts. Although I do still need some of those door hinge bolts if anyone has a stash.
Back to the house of fine welding.

Oil Tank Area

A small repair to deal with the pitting we see in the first picture. This little repair piece was hand-formed using a lump of round bar and then rounded off to blend in with the original.

Image

Image

Image

Image
User avatar
inaglasshouse
DDK 1st, 2nd and 3rd for me!
Posts: 2450
Joined: Fri Mar 28, 2014 9:35 pm
Location: Surrey, UK

Re: 70 S, RHD, Signal Orange, UK->Australia->UK

Post by inaglasshouse »

Rear End

Making a start on the rear end.

Bit nippy in the workshop. Apparently there's not much point heating it - the extractor works quite well at immediately sucking out the warm air.

Image

The rear end had suffered accident damage. The repairs at the time had seemingly got the car pretty straight (had not needed large corrections on the jig). But the bent areas had been pulled out fairly roughly by modern standards. These areas don't look that bad in pictures until you either put a straight-edge across or get some lighting right down low across the surface.

Image

Image

Image

There were some nasty pulling gashes in the (original) rear slam panel. So unfortunately, apart from an end bit used to backdate the new part, the panel went in the bin.

Image

Revealing other grottiness:

Image

Image

Image

So the back end repairs consist of backdating and fitting the new slam panel, plus various making good of the dodgy parts of the "chassis legs" etc. For example:

Image

Image
Bigfoot
DDK slapper chatter
Posts: 398
Joined: Sun Nov 03, 2013 8:40 pm

Re: 70 S, RHD, Signal Orange, UK->Australia->UK

Post by Bigfoot »

Love the oil tank repair 8) quality!!!
Adam

1973 911 2.4E
1974 911 2.7 Ratrod
User avatar
inaglasshouse
DDK 1st, 2nd and 3rd for me!
Posts: 2450
Joined: Fri Mar 28, 2014 9:35 pm
Location: Surrey, UK

Re: 70 S, RHD, Signal Orange, UK->Australia->UK

Post by inaglasshouse »

Rear End

Various further repairs to the rear end.

Image

Image

Image

Image

Image
User avatar
inaglasshouse
DDK 1st, 2nd and 3rd for me!
Posts: 2450
Joined: Fri Mar 28, 2014 9:35 pm
Location: Surrey, UK

Re: 70 S, RHD, Signal Orange, UK->Australia->UK

Post by inaglasshouse »

Rear Slam Backdate

As literally everyone :wink: knows by now, the rear slam panel available from Porsche needs some backdating to become correct for earlier cars.
This sequence of photos shows what needs to be done to the two corners to re-introduce the correct curve, and various bits and pieces to indentations and drain holes.
My original LH end part is resurrected here - other end is made from scratch.

Image

Image

Image

Image

Image

Image

Image

Image

Image

Image

Image
User avatar
inaglasshouse
DDK 1st, 2nd and 3rd for me!
Posts: 2450
Joined: Fri Mar 28, 2014 9:35 pm
Location: Surrey, UK

Re: 70 S, RHD, Signal Orange, UK->Australia->UK

Post by inaglasshouse »

Rear End

Barry had removed a large chunk of the offside rear inner wing base for three reasons:
1) beat out the various dents etc,
2) sort the missing bumper mounting captive nut, and
3) allow for complete welding of the rear slam panel

This was now mirrored on the other side, albeit to a smaller section suffering less dent-damage.
Both cavities were primed, and both removed sections were blasted, repaired and primed. Then closed up, with the backdated slam panel now in place.

Back end was now looking quite nice. Time to move round to the front.

Image

Image

Image

Image

Image

Image

Image

Image

Image

Image
User avatar
inaglasshouse
DDK 1st, 2nd and 3rd for me!
Posts: 2450
Joined: Fri Mar 28, 2014 9:35 pm
Location: Surrey, UK

Re: 70 S, RHD, Signal Orange, UK->Australia->UK

Post by inaglasshouse »

Front End - Preparation

In this case, preparation meant cutting out the previous repairs. (As shown in earlier pictures) they were pretty agricultural.
After that, the front end looked like this:

Image

Image
User avatar
inaglasshouse
DDK 1st, 2nd and 3rd for me!
Posts: 2450
Joined: Fri Mar 28, 2014 9:35 pm
Location: Surrey, UK

Re: 70 S, RHD, Signal Orange, UK->Australia->UK

Post by inaglasshouse »

Front End - Battery Boxes and Inner Wing Repair Sections

As part of the preparation, Barry fitted the new Porsche battery boxes into the new Restoration Design inner wing repair sections.

Initial fit was absolute rubbish:

Image

Image

Hmmm, what could have happened there? Barry says:
Surely it wouldn't be the horrifically expensive, genuine part at fault? Yes, your lovely new battery box was miles out, so the welds were drilled out, the side moved, the drilled holes plug welded. Then the area linished smooth, and some authentic looking spot welds run down the seam. All sorted.

Thanks Porsche, for another quality repair panel...

Image

Image

Image

Not that the Restoration Design panel was perfect either.
Barry again:
The dividers show how you've got to be careful with new panels. The front inner wing repair parts are very impressive, and are a lovely pressing. I had thought that I would use a combination of wing top holes together with this large wiring loom hole to match old to new, to help me scribe in the replacement. Good job I checked, the wing-top holes seem to be perfect, but the large hole is in a pretty arbitrary position. Probably fine for fitting up later, but no good to me.

Image

BTW I'm sorry to moan about the repair panels. It's one area of their business where I think Porsche are really taking the p*ss, and the pattern parts makers are following their business model. Unlike most things I've bought along the way, including a few bonkers-priced NOS bits and a set of original-paint 7Rs, I do feel properly ripped off with the panels.
In total I've spent the price of an entire cheap new car (like a VW Up exclamation mark) on panels. I realise that fitting and fettling will always be required, but still I think that the level of rework and number of fundamental faults is poor, especially bearing in mind the pricing.

Right, that's enough moaning.
Onwards!

User avatar
inaglasshouse
DDK 1st, 2nd and 3rd for me!
Posts: 2450
Joined: Fri Mar 28, 2014 9:35 pm
Location: Surrey, UK

Re: 70 S, RHD, Signal Orange, UK->Australia->UK

Post by inaglasshouse »

Front Pan Backdate

You'll have seen this one before. Barry says:
One of the photo sequences that I send on every job. The front pan is an impact bumper style one, so the top ends at the front are different. I blank these ends with new metal, and later n once the slam panel is finally positioned, scoop out the semi-circular cut-outs that should be in these areas.
Whilst here, the half-moon drain is beaten flat and welded up. Later on I'll use a jig to drill the correct pre-impact front pan drain holes.


Image

Image

Image

Image

Image

Image

Image
User avatar
inaglasshouse
DDK 1st, 2nd and 3rd for me!
Posts: 2450
Joined: Fri Mar 28, 2014 9:35 pm
Location: Surrey, UK

Re: 70 S, RHD, Signal Orange, UK->Australia->UK

Post by inaglasshouse »

Front RH

I like this little sequence of the car getting part of its nose, and the front pan, back. Obviously completely illusory in terms of true progress, but I always feel better when it looks more like a car (and less like scrap metal).

Barry says:
This is the one time I need the jig to be truly level, so I use my lovely old engineer's level to set the jig fore and aft. I always jack one corner of the jig when I'm doing anything structural that could build a twist into the shell, but it doesn't need to be level. I also took a moment to retry the strut tower brackets and the front screen aperture jig, just to make sure everything was still straight and true before risking locking in any problems.

For the front end though, I like to have the plumb-line available as an extra measure to counter building the front off to one side or the other.

I did a rough build of the front end with the new front pan bolted in, together with the recovered front slam panel and both front inner wing repairs.

With that done, the offside repair could be scribed in, double checked and tacked. This was followed by a small repair to the base of the offside front inner wing.


Image

Image

Image

Image

Image

Image

Image

Image

Image

Image

Image

Image
Post Reply