Posted: Tue Aug 16, 2011 10:00 am
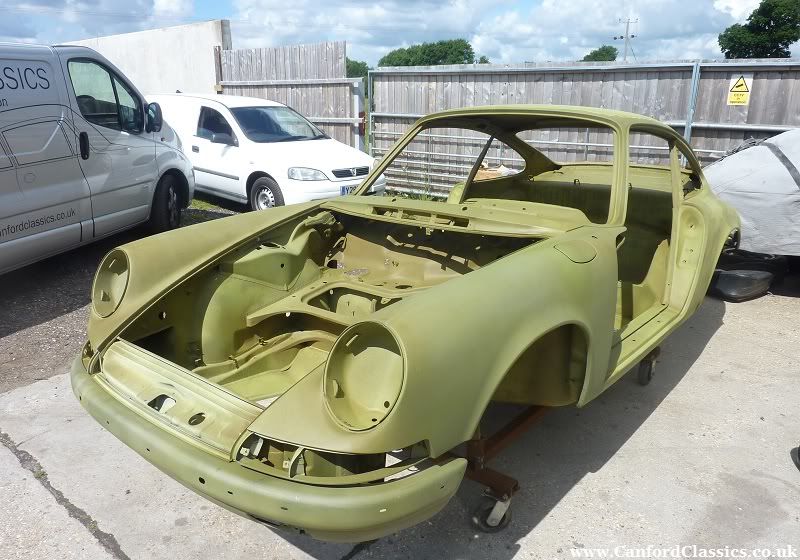
John it looks like you are doing a fantastic job and Light Ivory is one of my favourite colour. But why bother with paint when you could have a cool outlawed/NATO look? .... 
The 'Maverick' Classic Porsche Forum and Classic Porsche Club for Porsche 356, Aircooled Porsche 911, Porsche 912, Porsche 914 & Porsche Replicas. 'We join for the cars but stay for the people'
https://www.ddk-online.com/phpBB2/
Thanks very much David, Phil the painter said it was very useful. Hope your car survived.Landie wrote:John
Great to meet up and see the shell in the flesh last week the day before the first paint went on. Truly stunning job. Give me a shout when more paint is on and I will come over again.
David
ps my car "seems" complete after you and the paintshop did some industrial espionage
Hi Brendan, I must admit it does kind of look cool.bjmullan wrote:John it looks like you are doing a fantastic job and Light Ivory is one of my favourite colour. But why bother with paint when you could have a cool outlawed/NATO look? ....


 Ready for top coats soon ?
Yes I think so, should be getting close by the time I come back from work in a couple of weeks.hot66 wrote:looks great
No problem Tim thats all sorted.impmad2000 wrote:Note:
When checking the fits on the bonnet, make sure the catches are fitted. It adds a few mm to the shut. I didn't do this and consequently when I fitted the latches I couldn't get the bonnet to look shut !!
Now sorted thanks to Barry
Oh, and looks great BTW
Cheers
Tim

Hi matt. Welcome back. Yes the tub was a little sad might explain why the car was soft to drive compared to yours. Should be a big difference once sorted.Matt black70 wrote:Hi John
I've just been catching up on your rebuild having not been on DDK for 6 months, yes I know I should be ashamed but been sooo busy.
Cars looking great, I can't believe how much work has been done on what was a sad looking tub when stripped.
Well done, keep up the good work and can't wait to see it when finished.
Take care
Matt
Make sure you fit a bonnet seal as well, not an aftermarket one, use genuine Porsche only, they are softer and allow the the bonnet to sit flush rather than being forced up in the centre.Note:
When checking the fits on the bonnet, make sure the catches are fitted. It adds a few mm to the shut. I didn't do this and consequently when I fitted the latches I couldn't get the bonnet to look shut !!
Now sorted thanks to Barry Smile
Oh, and looks great BTW
Cheers
Tim
Thanks for that Nick will do.nick-moss wrote: Make sure you fit a bonnet seal as well, not an aftermarket one, use genuine Porsche only, they are softer and allow the the bonnet to sit flush rather than being forced up in the centre.

Hi Darren I must have missed your postDarren65 wrote:John / Alan,
Can you tell me what process was used for the etch priming, was it just a conventional process or it was it dipped/charged in any way?
Many thanks,
Darren

