Page 17 of 34
Re: The Manhattan Project
Posted: Tue Sep 12, 2017 8:10 pm
by gtBen
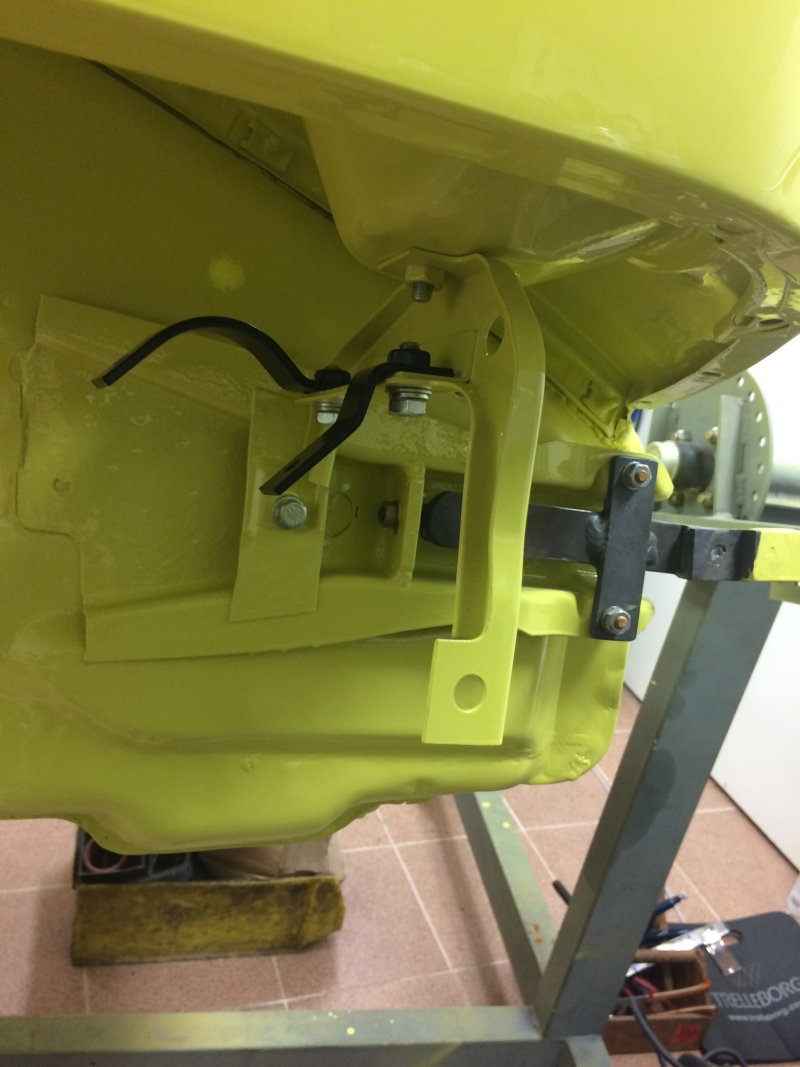
I found the arms
Bengt
Re: The Manhattan Project
Posted: Wed Sep 13, 2017 6:54 pm
by AndrewSlater
Thanks Ben, the horns are now fitted with the two smaller brackets.

Next step is to fit the front bumper.
I have been waxing all the areas that won't be visible with some more Dynax S50 for protection.
Re: The Manhattan Project
Posted: Sat Sep 23, 2017 10:35 pm
by AndrewSlater
So as usual - nothing quite goes to plan.
I had fitted my original Bilstein front bumper shocks only to find that one of the M8 studs that holds the bumper on was slightly stripped.
If I didn't fit a washer I could start the thread but with a washer the thread wouldn't start.
I thought long and hard and decided that even though the offending stud would be hidden by the front bumper trim - it wasn't right.
The solution was to fit another pair I had bought a couple of years back. The problem was these were the later style with the M12 stud at the back and M10 studs at the front. I'm guessing Porsche beefed them up after a year or so as I suspect the M8 studs weren't up to the job.
So after re-drilling my bumper mounts to fit the 15mm fitting it was time to fit the front bumper again.

I decided to lose the USA style side markers and have fitted a pair of the European side rubbers instead.
However I have currently kept the sugarscoop headlights ( I realise at this point the number of thread followers will plummet

).
In other news I am wondering what is stopping me from filling the engine with oil, the tank with fuel and trying to run the engine.
Currently the only problem I am aware of is one of the oil pipes on the engine. It's the one from the oil tank to the oil cooler. When I fitted it I noticed the pipe was under a small amount of compression causing it to kink ever so slightly. I thought it might settle with time, but it hasn't.

Any thoughts on whether it will relax once some hot oil has passed through it or do I need to fix it.
If so how? - any thoughts? Do I buy another in the hope it is fractionally shorter?
Re: The Manhattan Project
Posted: Sun Sep 24, 2017 6:59 am
by 911hillclimber
Personally, I would not use it, oil flow is critical of course.
Try relaxing the union and see if that eases things?
Re: The Manhattan Project
Posted: Sun Sep 24, 2017 10:02 pm
by AndrewSlater
911hillclimber wrote:Personally, I would not use it, oil flow is critical of course.
Try relaxing the union and see if that eases things?
If anything relaxing the union makes things fractionally worse.
The pipe is 10mm or 20mm too long in my view, and the tension causes the pipe to buckle.
I've dropped the pipe off to measure it.

I'm wondering if the one I bought from Rosepassion is the wrong dimension. Does anyone have one at hand to measure?
Re: The Manhattan Project
Posted: Tue Sep 26, 2017 8:34 pm
by AndrewSlater
Still undecided what to do with regards to the oil pipe.
I could try moving the fitting it mates to from the engine, which is the solid oil pipe with the U shape to take it around the flywheel. However I don't think there is much room for adjustment as it runs tight up to the heat exchanger. Again I don't think there is much room for movement at the oil tank end.
I've been looking at images of other pipes and I could be persuaded that they all look fractionally shorter than the one I have.
Does anyone have a measurement at all?
In the meantime I thought I would choose a simple job to at least make some progress. So I dusted off the new headlining that I had bought off someone who's plan had changed. I thought I had saved myself some money as it was manufactured by a reputable trimming company.
After a good while trying to trial fit it and scratching my head it dawned on me that it had been manufactured incorrectly. The material for the 'C' pillars had been sewn on the wrong way round. Now if I had bought it direct from the manufacturer a quick phone call would have been in order. As I bought it new unused elsewhere then it's off to sewing school for me to make some corrections!
At the moment no job is proving particularly straight forward which is frustrating.
Oh well needles at dawn!

Re: The Manhattan Project
Posted: Wed Sep 27, 2017 8:36 pm
by gtBen
AndrewSlater wrote:Still undecided what to do with regards to the oil pipe.
I've been looking at images of other pipes and I could be persuaded that they all look fractionally shorter than the one I have.
Does anyone have a measurement at all?
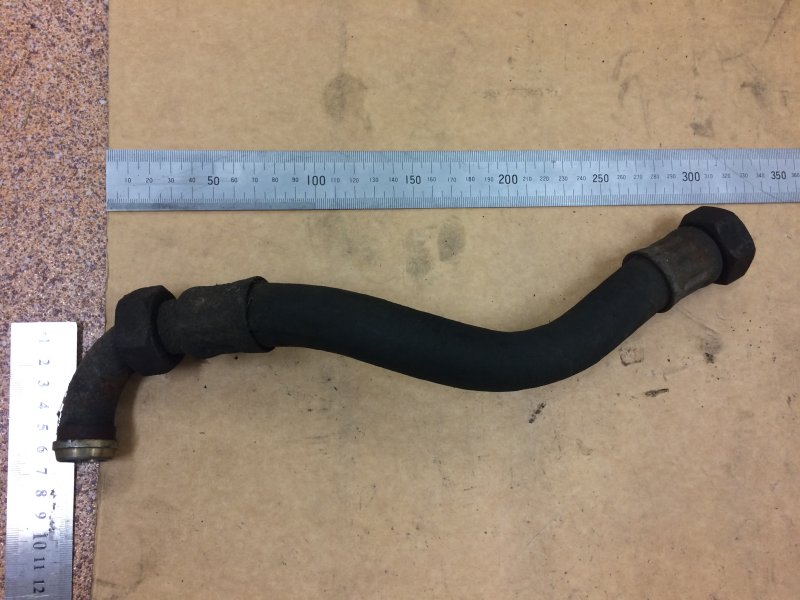
I tried to take measurements on my old and bent oil line, but it was too brittle to straighten. Let's say it is just under 340mm.
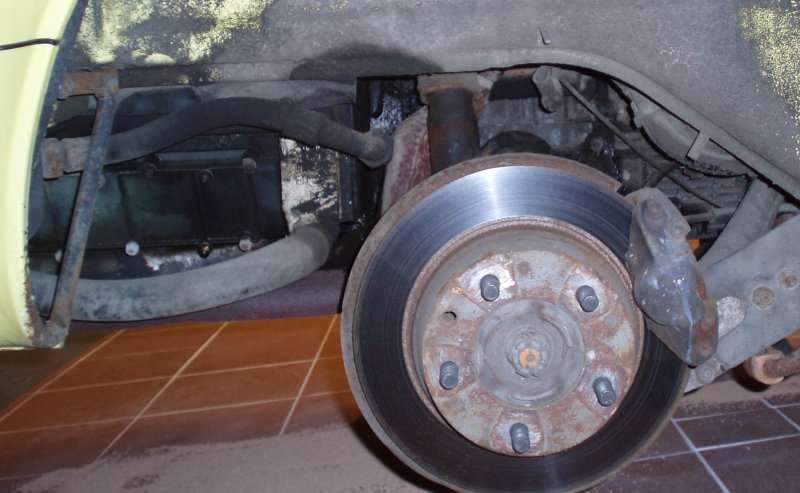
Here is how it looked before it was removed,
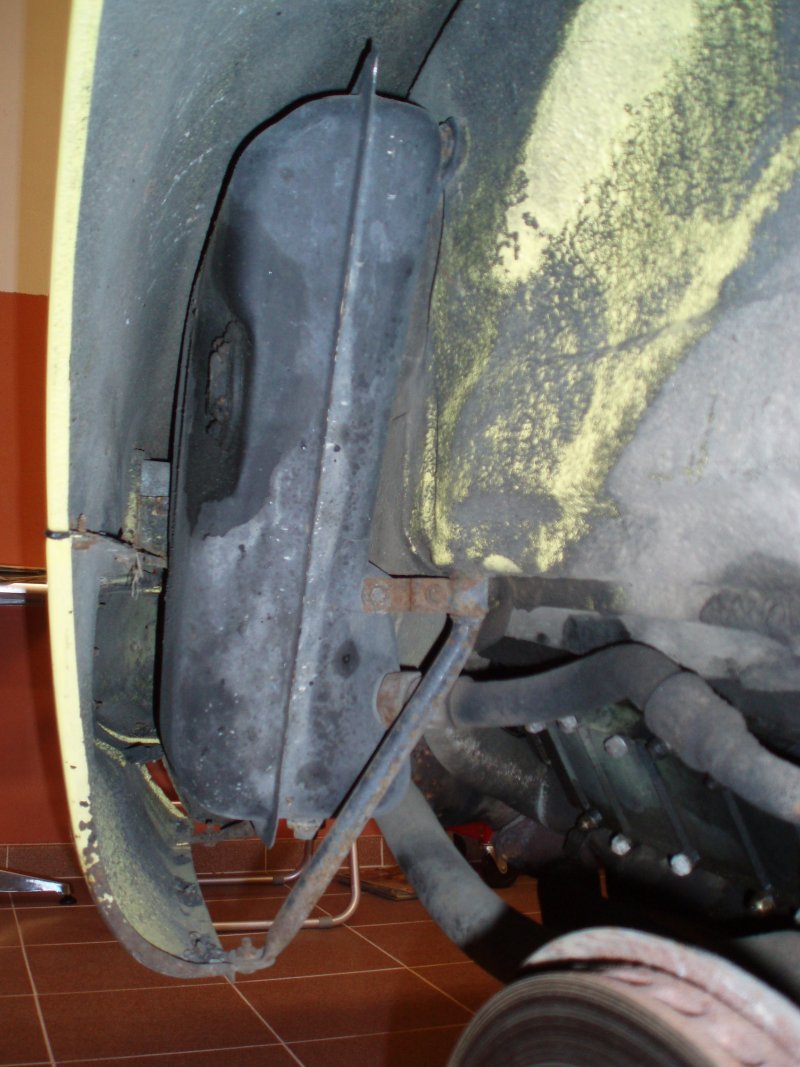
and this one also.
Can't you just tilt and bend your a bit like this? it will make the distance between the ends shorter.
AndrewSlater wrote:So I dusted off the new headlining that I had bought off someone who's plan had changed. I thought I had saved myself some money as it was manufactured by a reputable trimming company.
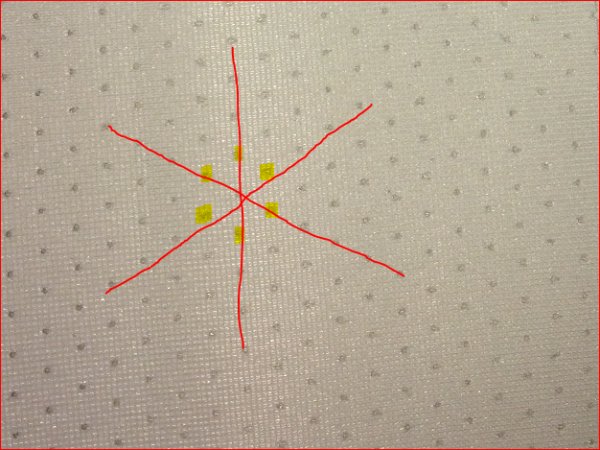
My old headliner had this diamond pattern. Diamonds, not squares.
Bengt
Re: The Manhattan Project
Posted: Thu Sep 28, 2017 12:46 pm
by AndrewSlater
Thanks for the suggestions Ben, I did try re-routing the pipe as Graham had hinted at but it didn't seem to help as the pipe seems to kink too easily. I have ordered a replacement pipe and will see what I can do with that.
As for the headlining there was a long discussion in a thread a while ago, about hexagon patterns etc, but the one I removed was square so square it is ( and I've already started to fit it
).
Re: The Manhattan Project
Posted: Sun Oct 01, 2017 9:54 pm
by AndrewSlater
I continue to buy new rubber seals for the car, and bought seals for the rear quarter windows.
I finally got the first one to fit, before realising I needed to fit the chrome trim before fitting.

Second time lucky and it is looking pretty sharp.

Now the headliner is in, I have started trimming the 'a' and 'b' pillars.
Annoyingly by the time I got to the last 'b' pillar trim piece, I noticed that the final piece was missing a chunk of material - grrr!

Does anyone know a source where I can get of a small piece of matching material - or even an original piece of black trim?
Re: The Manhattan Project
Posted: Fri Oct 06, 2017 7:34 pm
by AndrewSlater
Garry at ClassicFX has kindly sent me material for my 'b' posts in return for a small donation to the DDK charity.
Many thanks Garry - hopefully I can make some more progress this weekend!

Re: The Manhattan Project
Posted: Sat Oct 07, 2017 1:45 am
by 210bhp
AndrewSlater wrote:
Sorry didn't mean to sound dismissive about the toothpaste ( I was hinting that Mike [210bhp] might suggest best cleaning practise ).
Sorry Andrew, only just caught up with this.
Car is looking great by the way.
Verdigris (the green stuff) is difficult to remove (without damaging the badge enamel further) but patience is the name of the game.
To localise things I usually use a metal toothpick very carefully on the affected area with various chemicals. The main thing about any chemical (acid based) is that it will eat into the enamel surface too. Once you have that area shiny bright it looks different to the rest of the badge so bit by bit is the answer. You might end up doing the whole of the pebbled ares to make it look uniform. You can try Jizer first to remove contaminants and surface crud then progress to weak acid solutions, could be vinegar, lemon juice, hydrogen peroxide etc. HP sauce and the like are harder to use because you can't see how you are progressing. A clear liquid is best. Start with diluted solution and work up to more concentrated solution for the stubborn bits with your toothpick.
Verdigris needs air and water to form so once you are happy with the finish you could seal with WD40 or Gibbs.
The badge looks great to me too. If you can just remove the verdigris I think it will look perfect.
Let us know how you get on
Regards
Mike
Re: The Manhattan Project
Posted: Sat Oct 07, 2017 10:56 am
by AndrewSlater
Thanks for the input Mike with regards the badge.
To recap a few DDKers thought the badge was near perfect and I had said "If I go any further I will only bugger it up (I'm good at that)."
So that was that....
...except that I then stumbled upon my Ultrasonic cleaner and remembered Grahams advice "a small US clean might do a good job too?".
Now I have used my ultrasonic cleaner on a number of parts across the restoration, injectors, nuts and bolts etc.
Every time I use it, the parts normally look no different from when they go in to when they come out, so it gives a subtle and light clean at best (some would say it was useless and broken ).
So I unpacked it , put a little sea clean solution into the warm water, switched it on and turned my back for 15 minutes...

Bugger!
I hope my posting of these tribulations is at least making you all smile
So my advice to DDKers is to keep your badge well away from your ultrasonic cleaner.
Re: The Manhattan Project
Posted: Sat Oct 07, 2017 2:33 pm
by 210bhp
That's me, usually too late for everything!
Sorry I didn't see your previous post sooner.
The enamel on the horse and the stags antlers is still intact so it's not a disaster.
Regards
Mike
Re: The Manhattan Project
Posted: Sun Oct 15, 2017 7:11 pm
by AndrewSlater
210bhp wrote:That's me, usually too late for everything!
Sorry I didn't see your previous post sooner.
The enamel on the horse and the stags antlers is still intact so it's not a disaster.
Regards
Mike
Thanks Mike, if you have any suggestions on how to recover the badge I am open to suggestions.
So in other news I decided to fit the rear window.
Now I know that the professional fitter took 4 attempts to fit my 912 rear window - so I thought I would take the challenge.
Just to add to the fun I had bought a new aftermarket seal - so I was expecting a bit of a struggle.
I spent quite some time making sure the seal sat on the screen nicely before fitting a new set of trims.
I then spent more time trying to get the trims to sit in the seal properly especially at the corners.
A combination of heatgun and patience and eventually all the trim was sitting nicely.
I then used the old string fitting technique and it went in first time - I wasn't expecting that!

I have also refit the original sound proofing around the rear seat area.

Now I purchased a new carpet set a while back which at the time I was hoping would tie in well with the orange bodywork and beige trim.
I have now tried it in the car and I don't think the colour combination works.

When I bought it I thought it was more brown than it is - and I was hoping for a darker carpet than the original beige so as not to show dirt so easily.
So now my dilemma is what to do next.
Options include buying a new carpet or maybe I could dye this one.
Anyone had any luck with dyeing a carpet set?
Re: The Manhattan Project
Posted: Sun Oct 15, 2017 8:46 pm
by Gary71
Just send the badge to Mike. That's the best option!
The carpet doesn't look like it fits anyway irrespective of colour. It looks a bit like you've put my mum's velour lounge curtains in there...
Not sure what is standard for your year but something like Black/salt & pepper is the only way to go.
Sent from my iPhone using Tapatalk