Page 17 of 141
Re: My '72 911T
Posted: Tue Aug 16, 2016 6:14 pm
by Gary71
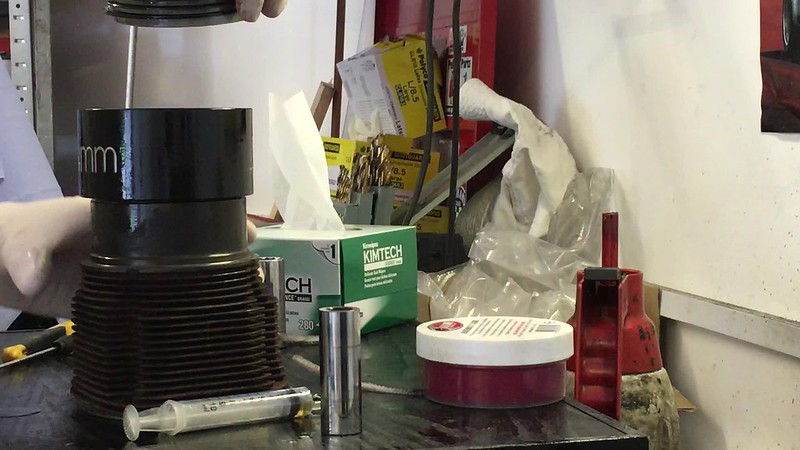
The bores all measured OK (using proper tools at work, not verniers!) so I bought a hone:
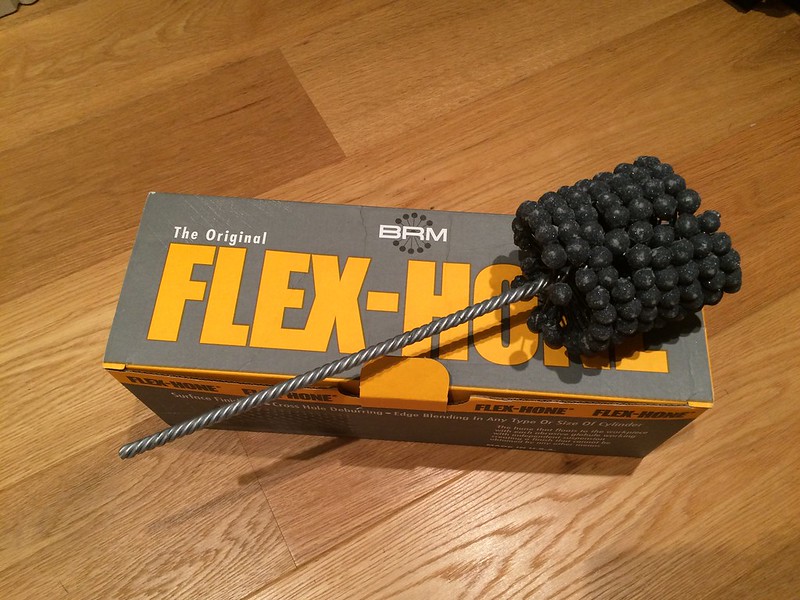
..and did some smoothing and blending:
+0.01hp...but it makes you feel like you tried anyway!
Re: My '72 911T
Posted: Tue Aug 16, 2016 6:15 pm
by Gary71
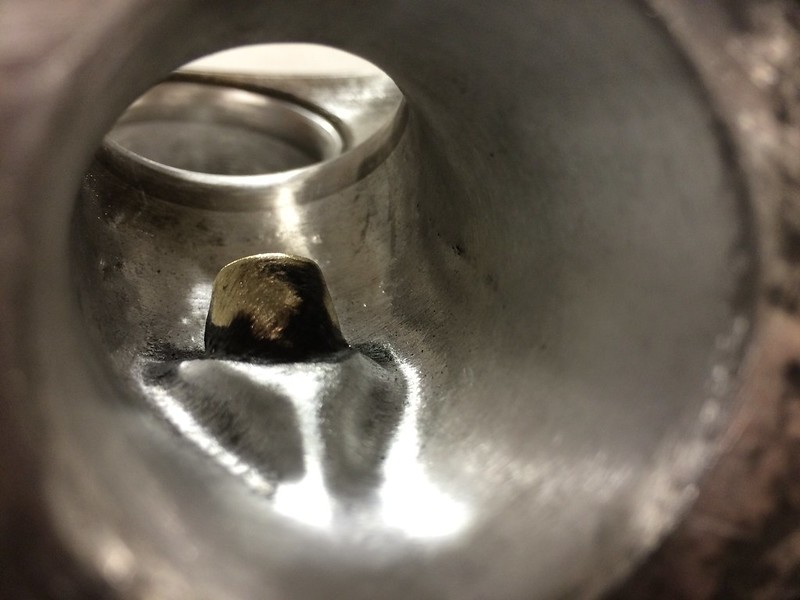
Honing the cylinders was A very quick job for a change, probably no more than 10 seconds for each cylinder of actual honing. A couple of very shallow score marks were still visible so I'm happy not to have removed too much material
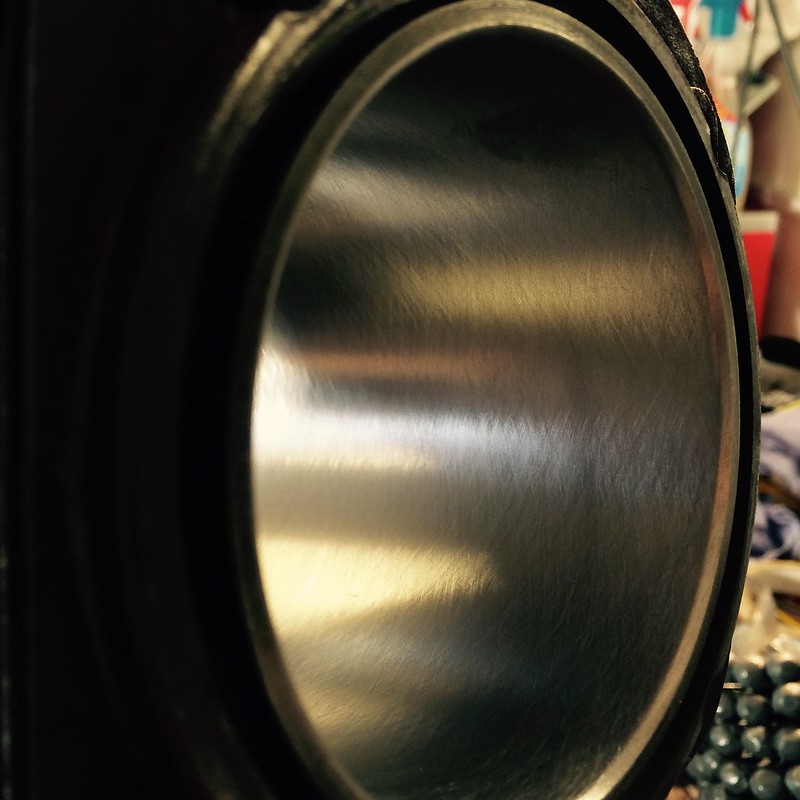
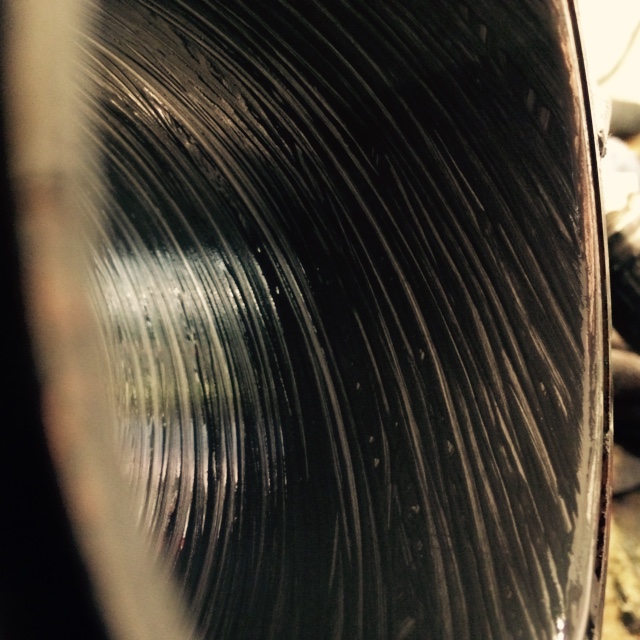
End result:
Whilst pumping the hone tool in and out you can see the traces left behind in the oil which gives you a good clue if you are getting the crosshatching about right.
Downside is having a big egg wisk covered in wet abrasive grey muck spinning at 1000 rpm took the edge off the clean garage.

Re: My '72 911T
Posted: Tue Aug 16, 2016 6:18 pm
by Gary71
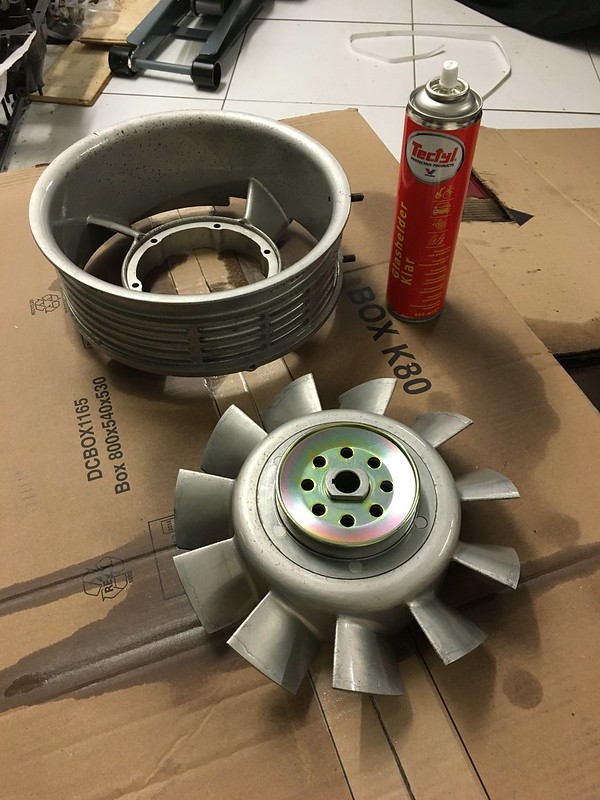
Cleaning time:

Fan vapour blasted and sprayed with clear Tectyl:
Unfortunately the blasting neatly revealed all the pitting from corrosion that had been hiding under thick paint, but it's very authentic now!
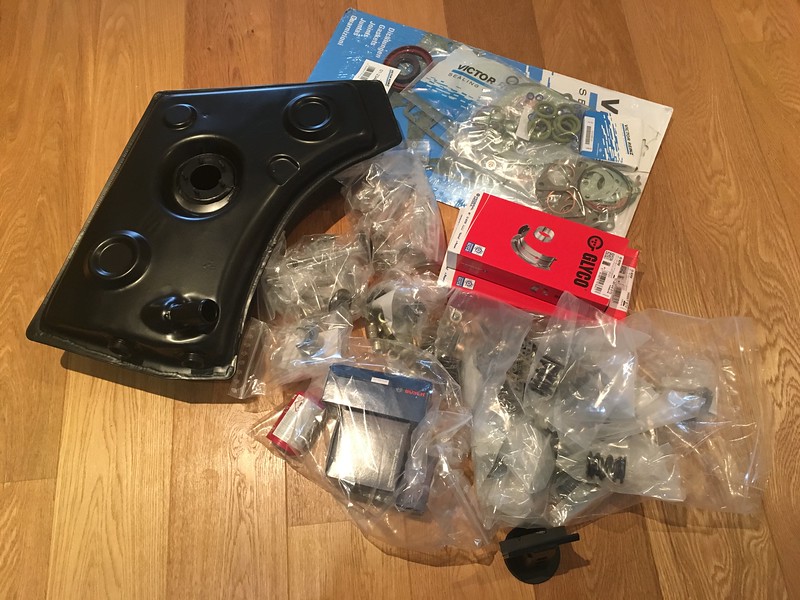
Big pile of parts turned up from the continent:
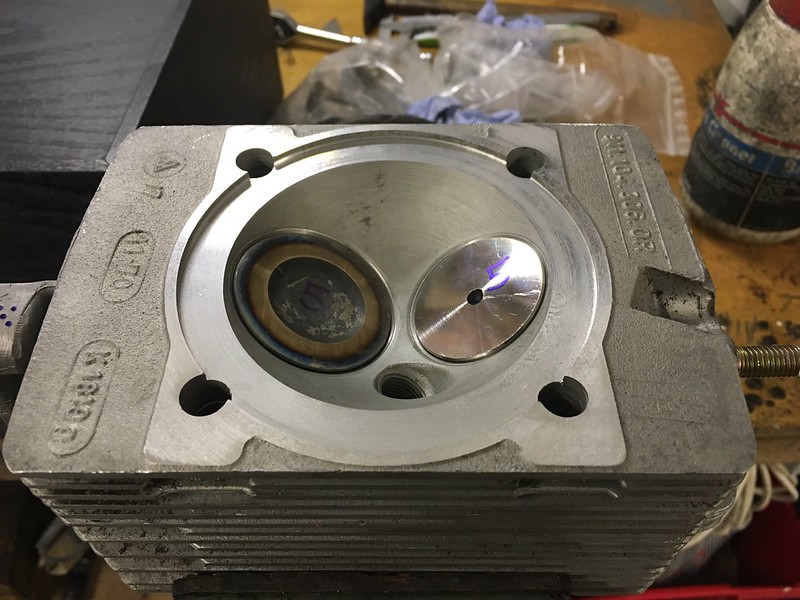
Re: My '72 911T
Posted: Tue Aug 16, 2016 6:20 pm
by Gary71
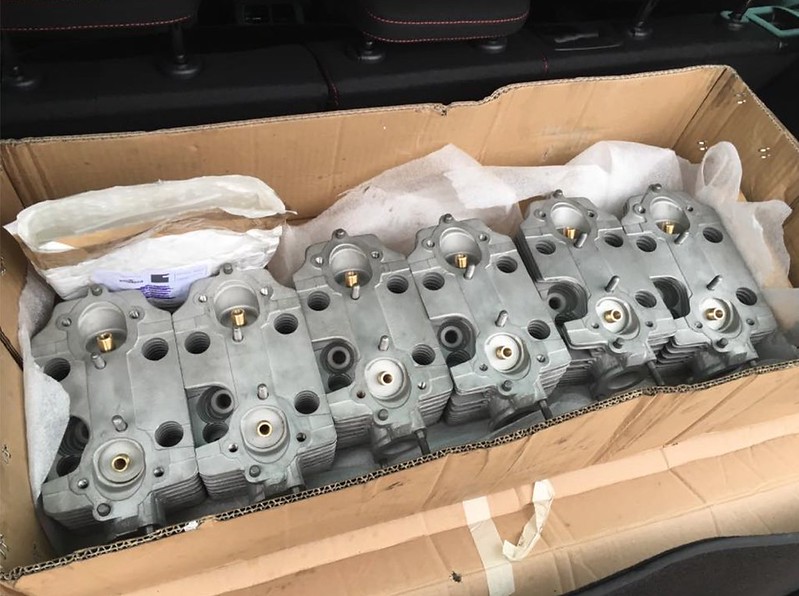
I had the machining done at Rob Walker Engineering down near Witney in Oxfordshire. Fantastic job, on time and to budget. Rare you can say that these days.
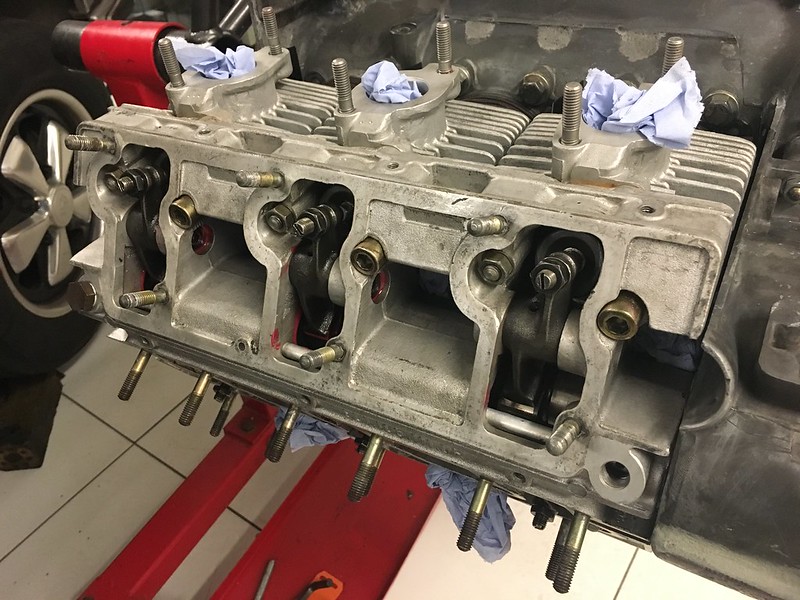
Heads - All shiny ready to be rebuilt
Ported (by me), bead blasted, new valve guides, recut seats, refaced gasket surface, and thread inserts for the exhaust studs replacing my dodgy efforts with helicoils.
Re: My '72 911T
Posted: Tue Aug 16, 2016 6:22 pm
by Gary71
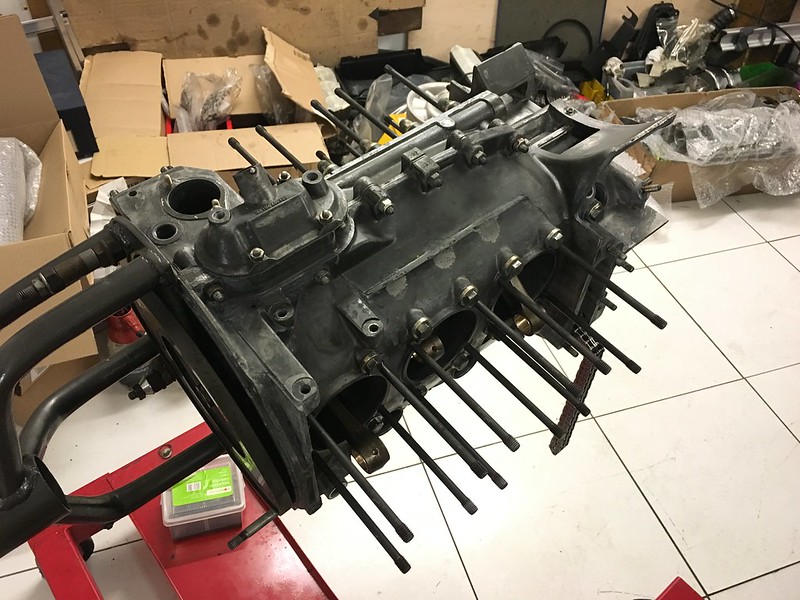
I spent an hour on what is for me the most nerve wracking part of the build: Dry build of case, crank and new bearings. Particularly when the consequences of the case being distorted are quite expensive to put it mildly...
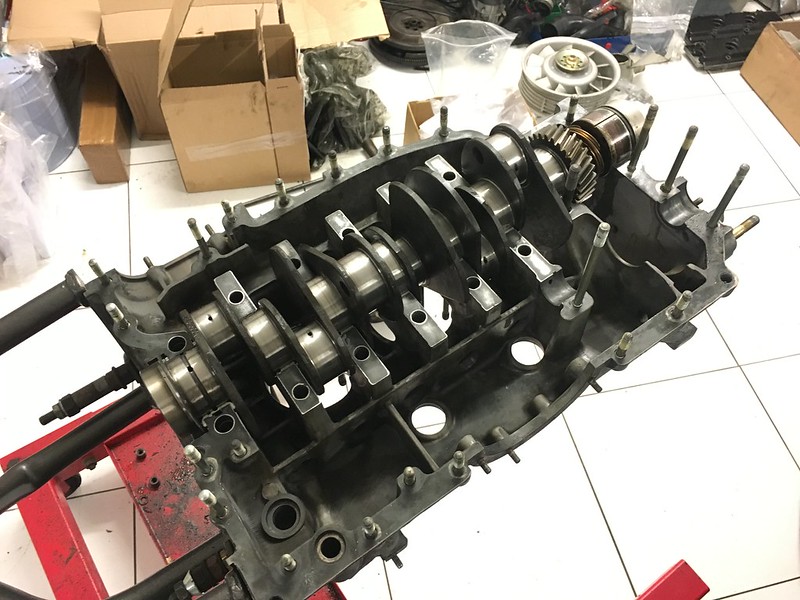
Luckily the crank still rotated freely by hand
Now onto the head rebuild, rod balance etc and of course endless cleaning before it goes back together properly!
Re: My '72 911T
Posted: Tue Aug 16, 2016 6:26 pm
by Gary71
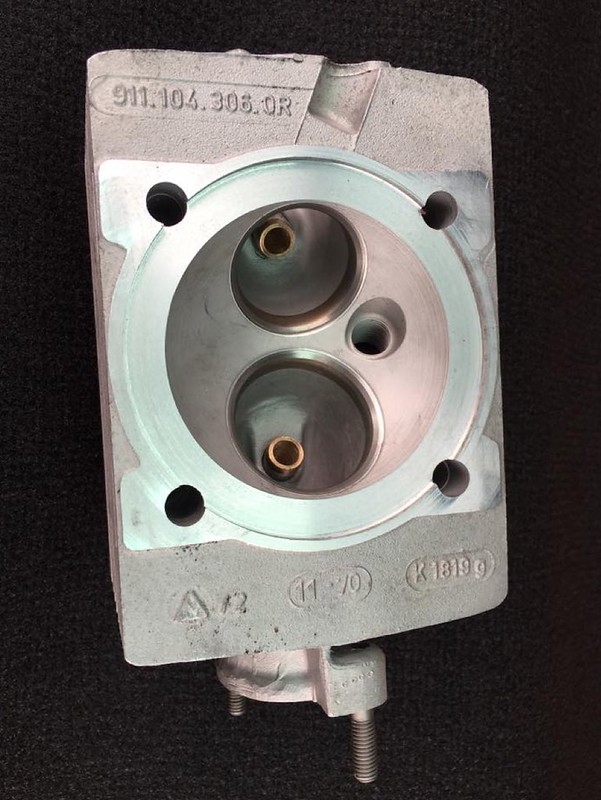
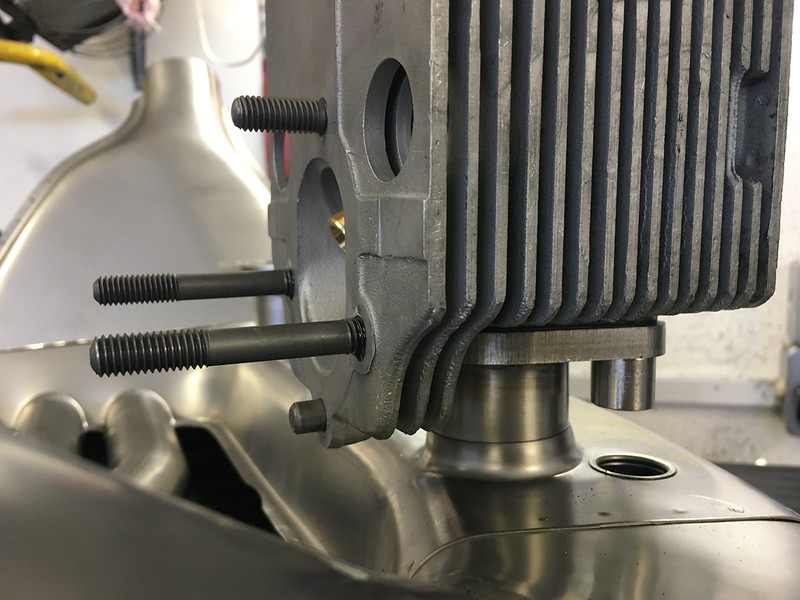
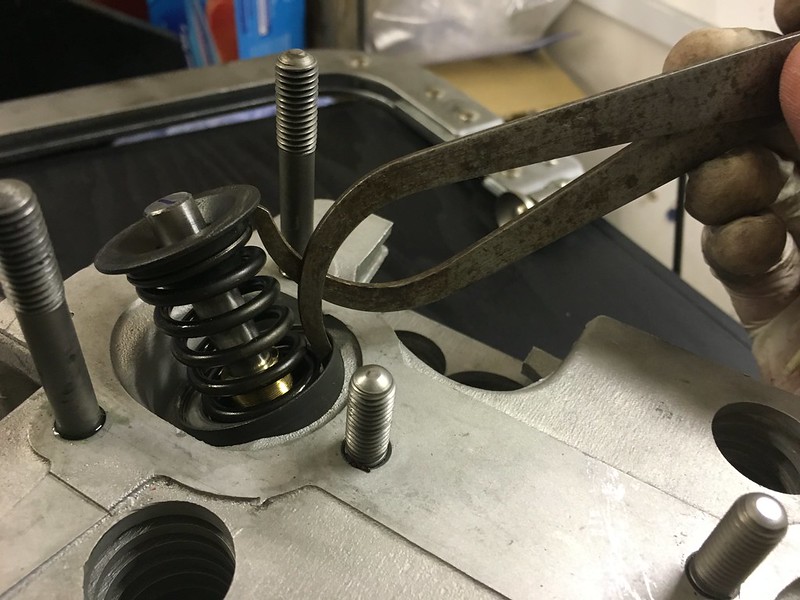
I fitted all the studs back to the heads double checking (and adjusting!) the length of the exhaust studs by dry building with the exhaust so they don't stick out too far into the hex nut and stop me getting the tool in properly.
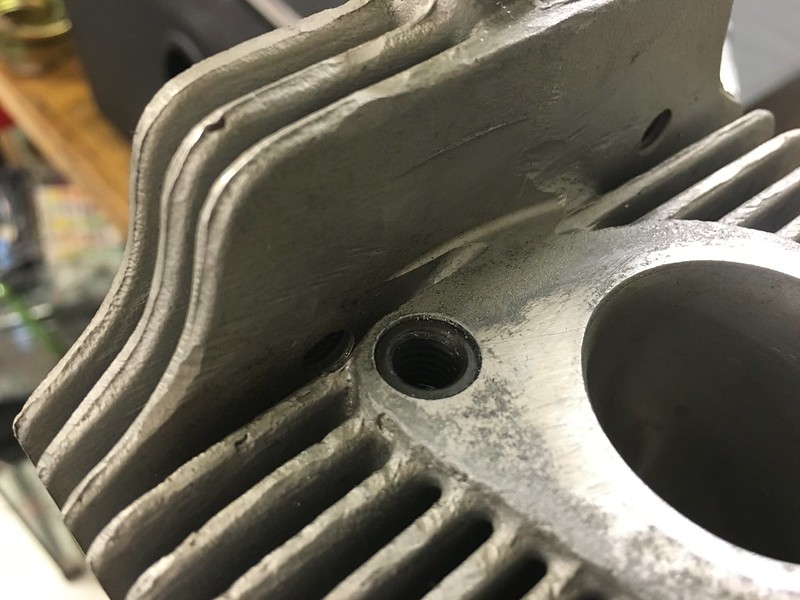
The machine shop fitted Timeserts to replace my dodgy helicoils for the exhaust studs
I've lapped all the valves in with a fine paste just to make sure.
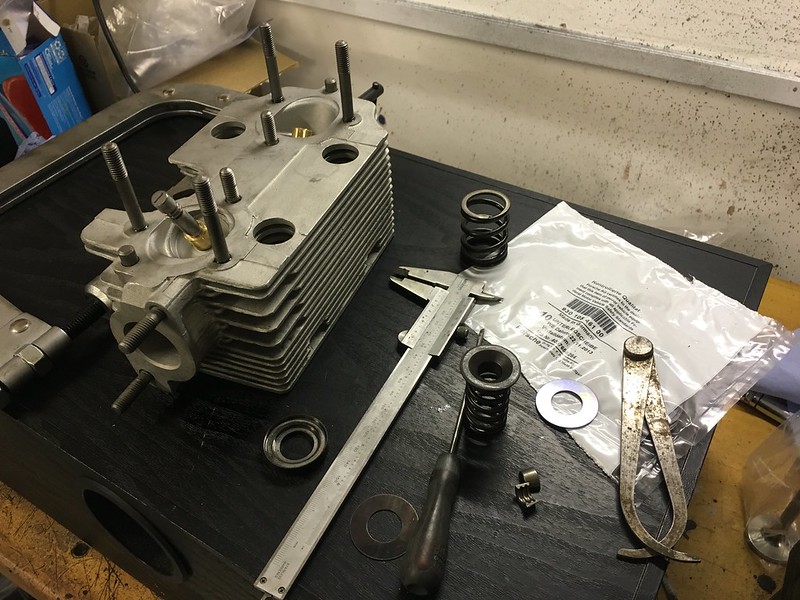
I set the preload on the valve with shims under the valve spring. As I had the seats recut and have new valves chances are it will have changed, the first one required one additional shim.
Re: My '72 911T
Posted: Tue Aug 16, 2016 6:31 pm
by Gary71
After an aborted attempt to balance the rods myself I sent them down to Rob Walker and had new small ends fitted and the big end resized at the same time:
My scales put the overall weight difference to be within half a gramme so I can't complain at that!
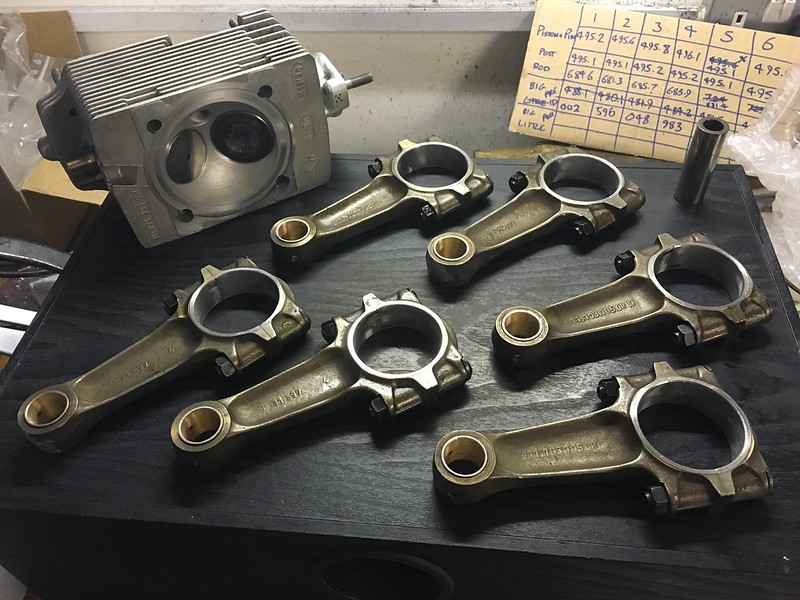
Rods then went back on the crank, using a super funky torque and angle wrench. Beeps once at the preset torque, then beeps again when you reach the angle. The beeping helps when you are fighting the whole assembly on the bench trying to stop it exiting stage left, particularly on the upper rods, as you don't have to look at the display.
A major advantage of working for a car manufacturer is you can borrow really good calibrated tools!
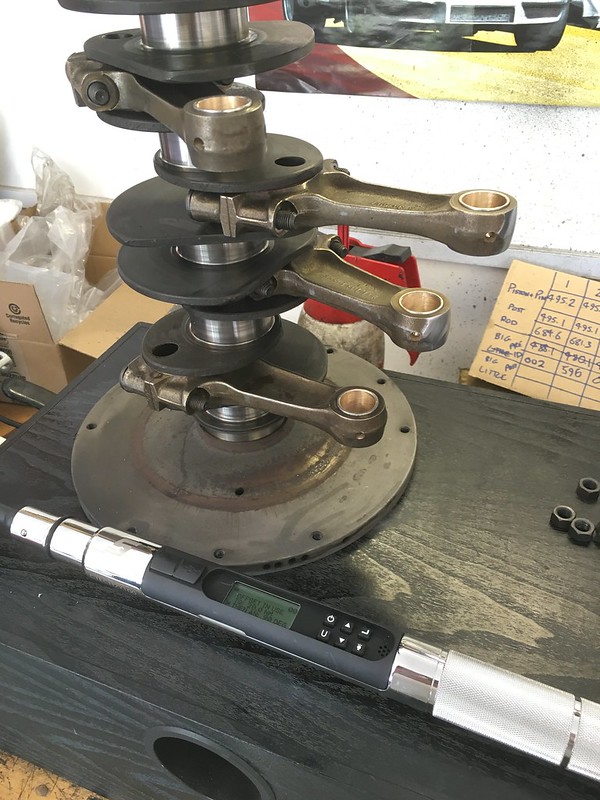
It also logs the final torque for interest and this was between 75 and 85nm.
I've made a set of rod/chain supports using some strip material from B&Q. It's all aluminium, the black stuff is quite a bit springier than the raw part, but it's all they had in. 15 minutes to make and it saved a lot of grief during those tense moments putting the case back together.
Re: My '72 911T
Posted: Tue Aug 16, 2016 6:33 pm
by Gary71
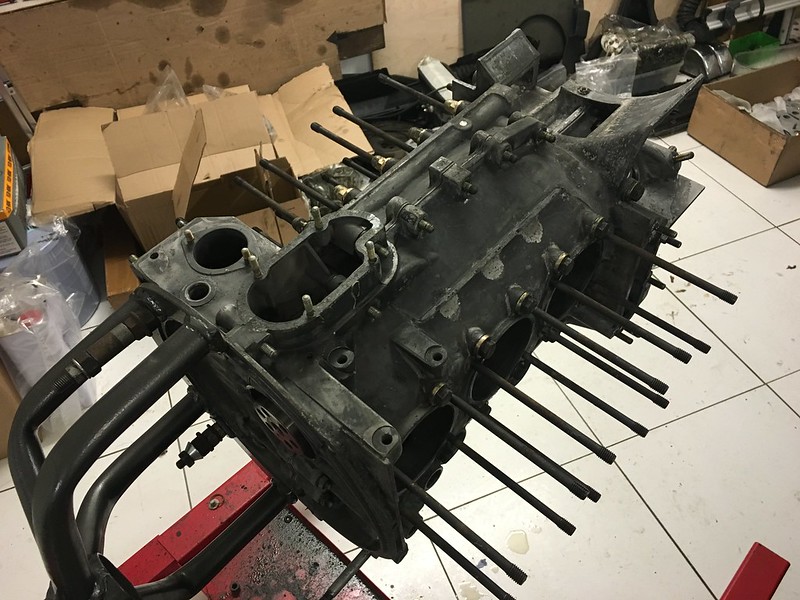
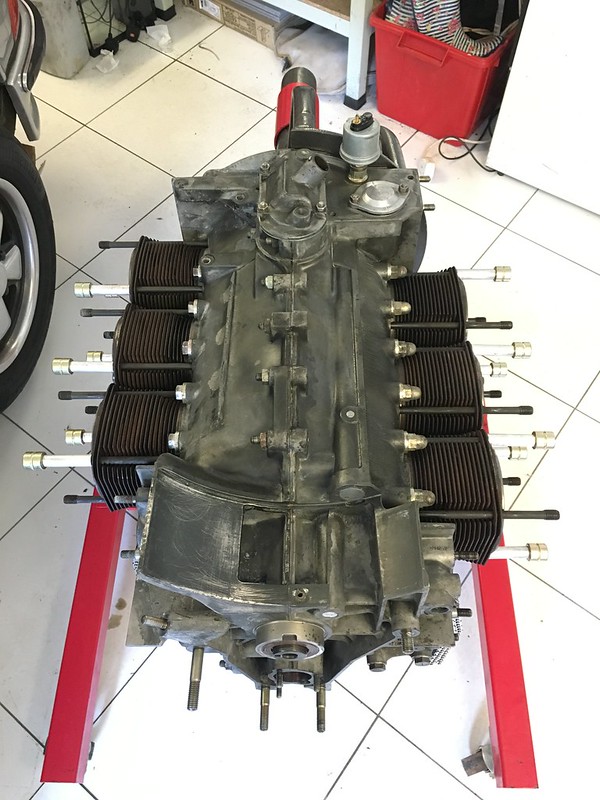
1st case half together:
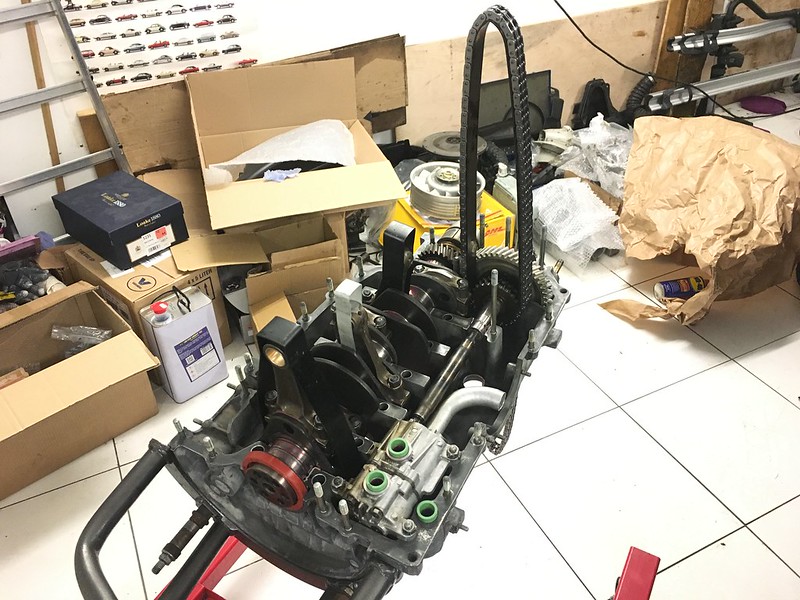
A very stressfull 30 minutes the next day had the cases back together and torqued up.
Other non visible jobs were fitting a few external parts to the case, the timing chain ramps inside and the oil pressure relief pistons.
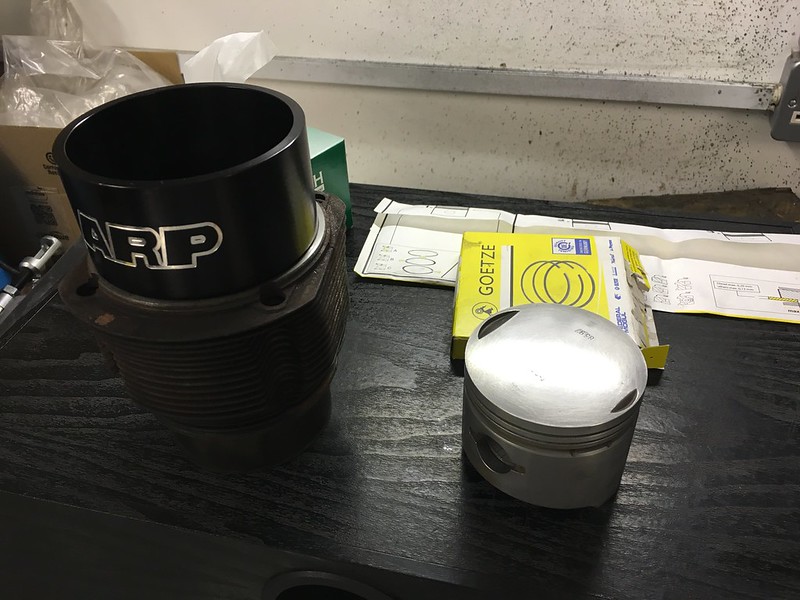
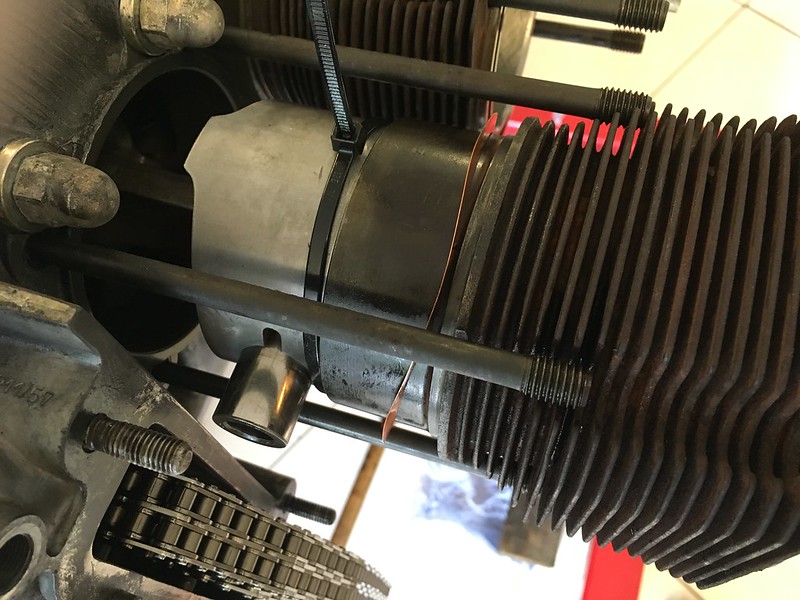
I replaced the spigot bearing on the flywheel and assembled the pistons/barrel assemblies. The ARP tapered ring compressor is wonderful, a bit expensive for a one time use dedicated tool, but it's so easy to use and zero risk of ring damage. (The rings I bought from Hot66 about 6 years ago!)
Re: My '72 911T
Posted: Tue Aug 16, 2016 6:34 pm
by Gary71
Some 10 hours later:
Almost without a hitch other than improvising a ring compressor when the oil scraper decides to exit the bottom of the final cylinder whilst tapping home the gudgeon pin emergency measures are required!
20 minutes of fiddling but it's back in. The other option would have been to strip the complete side of the engine I'd just built. So motivation was high!
I also took a little video of the proper ring compressor in action. Awesome!
 Untitled
 by
Gary Suggate, on Flickr
Re: My '72 911T
Posted: Tue Aug 16, 2016 6:37 pm
by Gary71
Weeks pass and a new set of rocker shafts turn up to replaced the cracked ones I found and I'm now back to where I started, trying to time the cams.
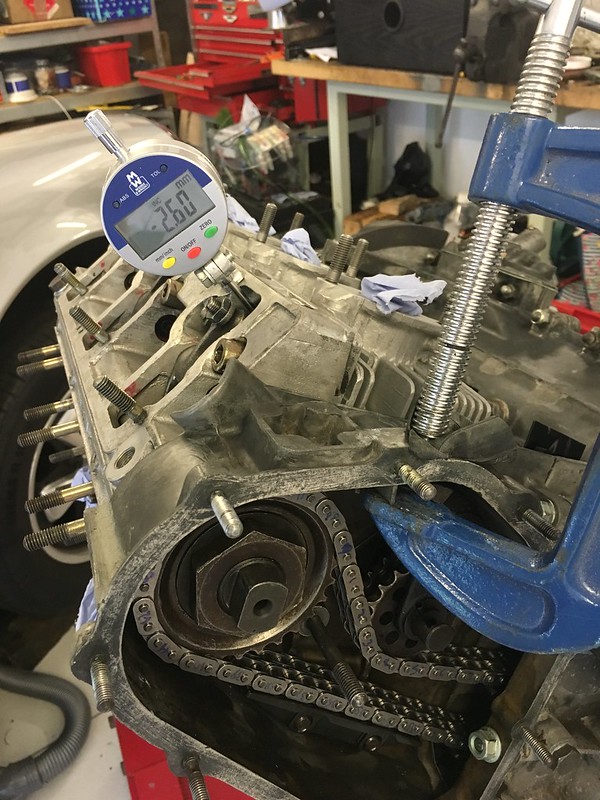
Detail inspection of the shim that controls camshaft end float on the RH cam showed a groove was worn into it.
I measured the clearance between the camshaft shoulder and the plate that fits on the end of the cam box and it all looks good, just need to replace the worn shim and it will be spot on.
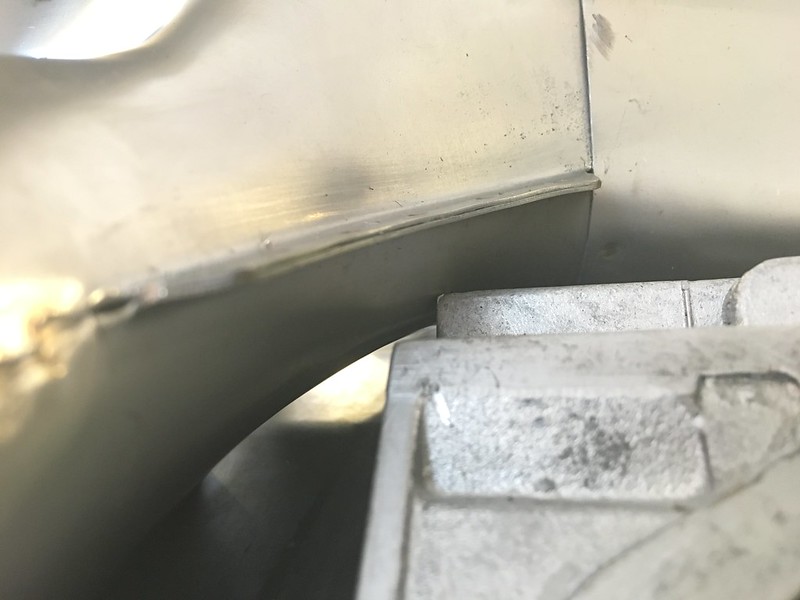
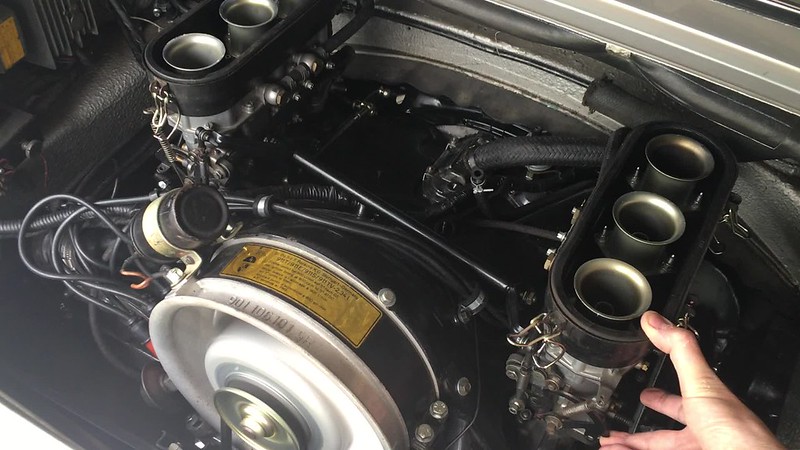
I stripped it all back down in readiness and thought that dry fitting the exhaust might be a good plan.
It almost fitted, what to you expect for that much cash? Perfection? A small clash to the RH cambox needed relieving, and the locating tab is upside down as it's lifting the exhaust up. It's a shame, but nothing that couldn't be overcome.
Re: My '72 911T
Posted: Tue Aug 16, 2016 6:40 pm
by Gary71
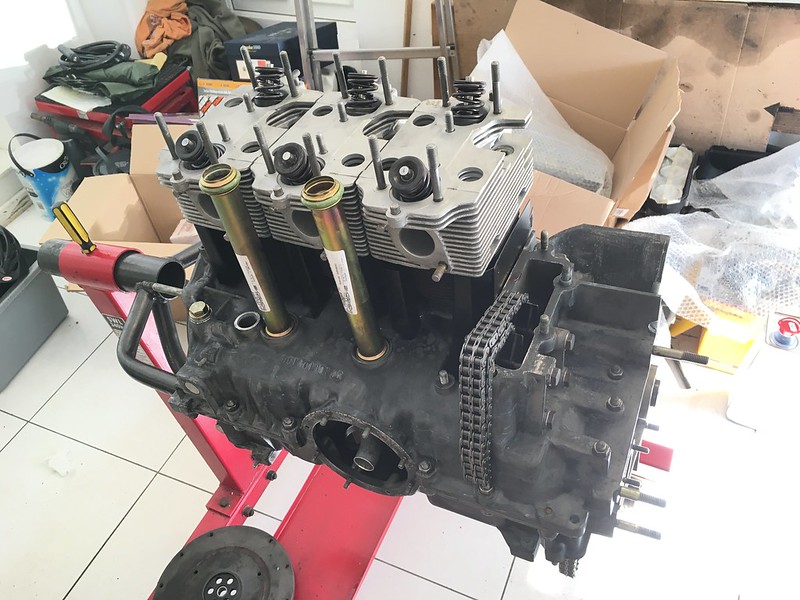
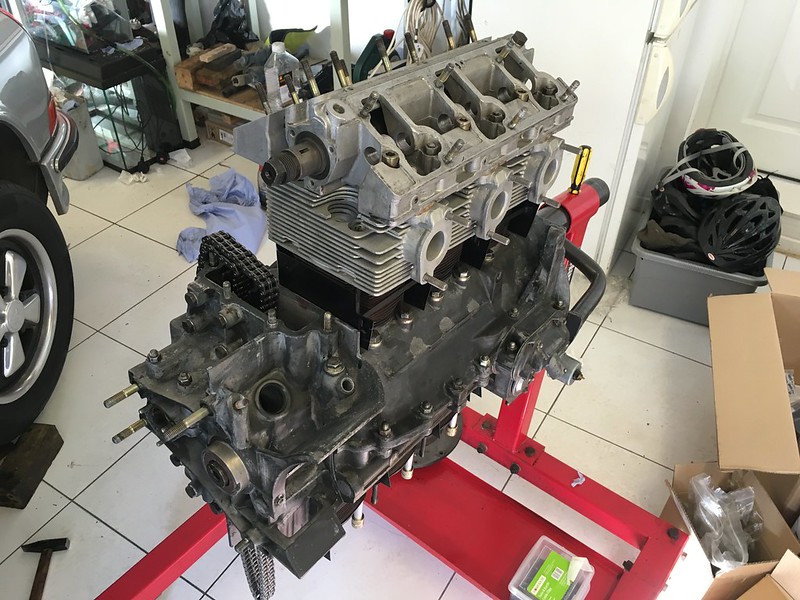
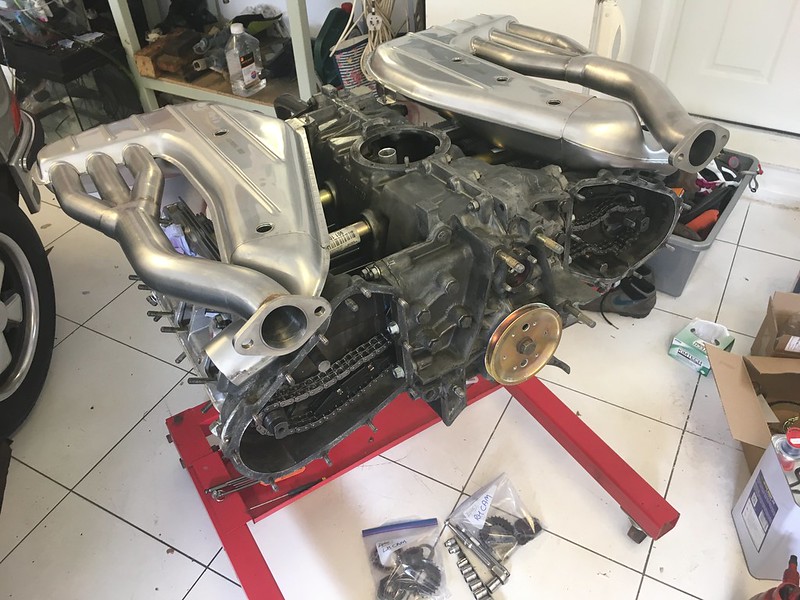
Missing out a couple of frustrating steps cam timing was next:
Then basic reassembly:
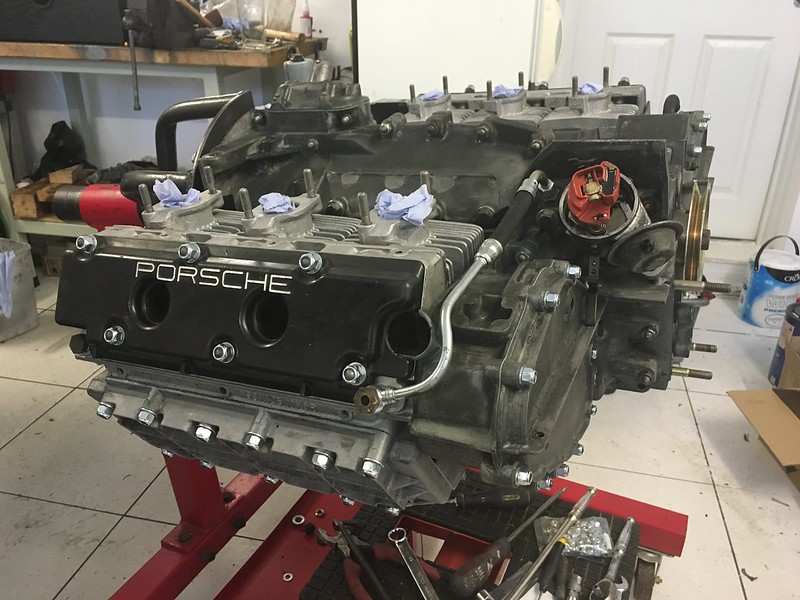
Leading to this point:

Helps to be wearing the right T-Shirt for the occasion
Re: My '72 911T
Posted: Tue Aug 16, 2016 6:40 pm
by Gary71
Re: My '72 911T
Posted: Tue Aug 16, 2016 6:41 pm
by Gary71
These pictures are links to short videos on Flickr:
This is literally a few seconds after I started it. I couldn't bring myself to film the actual moment as it tempts fate!
Re: My '72 911T
Posted: Tue Aug 16, 2016 6:45 pm
by Gary71
And the final bill?
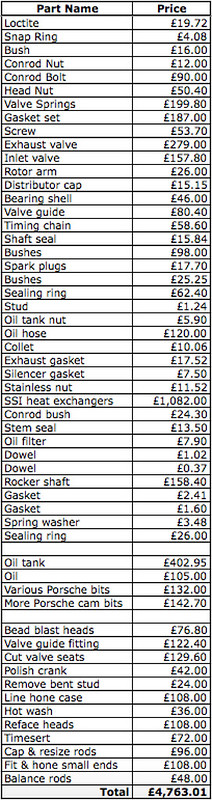
You could consider the oil tank and posh heat exchangers as luxuries and the oil pipe and rocker shafts as bad luck, so let's call it £3000 between friends.
Not too bad I guess, don't think you could do it cheaper and still be a credible rebuild.
Next was a fresh MOT, a few hundred local miles then off to Spa:

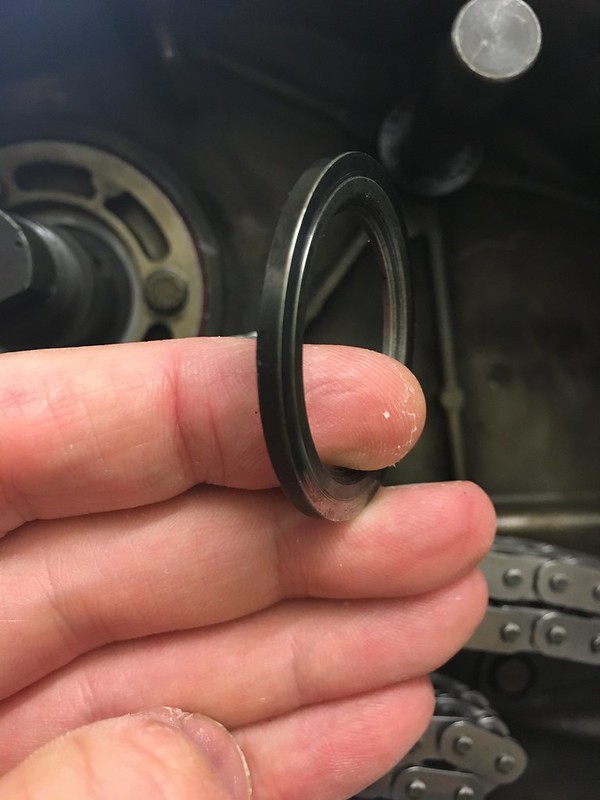
The crank seal leaks so that's a job for the winter
Cheers to all those that have loaned tools, experience and encouragement
Re: My '72 911T
Posted: Tue Aug 16, 2016 8:25 pm
by Darren65
One word.....
....
FANTASTIC! 
Well done Gary
