Page 14 of 43
Posted: Sat Apr 16, 2011 7:41 pm
by johnM
Posted: Sat Apr 16, 2011 7:59 pm
by johnM
Posted: Sat Apr 16, 2011 11:28 pm
by Barry

Hopefully get the new shelf into place on monday.
BTW, I had hoped to 'fit' some ribs onto the new shelf by forming a pair up on the folder, scribing in each front-to-rear rib, grinding out for each one, weld the new ribs in place, before finally grinding out the base leaving a fully formed rib when viewed from top or bottom.
Didn't work though: looked a real mess, and was distorting the parcelshelf, despite my best efforts to avoid this. Luckily I had tackled the rearmost rib first, so I was able to ditch the whole area, knowing the orginal (on the car) was still usable.
If I had to do, say ten or twenty of these shelves, I'd have milled up a couple of steel forms to clamp over the SWB shelf, so that I could have chased in the addtional ribs, keeping the parcelshelf fully supported and distorsion-free.
In the end I formed just the front half of the front rib: luckily being a rubber-pressed part, the steel is incredibily soft (more like aluminium) which is no problem strength-wise on this application, but very helpful in this instance.
You can just make out in the bottom pics where the new front rib has been formed into the parcelshelf.
Hopefully once it's all welded into place (rather than a couple of self-tappers and overlapping the old one as above), it'll all look something like the orginal.
And no, I'm not feeling much love for this area, so there will be few tears when it's time to move onto the next bit

. Hopefully will be on something that shows obvious 'big progress' in a few days ....
Posted: Sat Apr 16, 2011 11:35 pm
by brembo
Barry,work of the highest quality,great to follow the progress.
John,did you realize the shell needed so much work

Well worth it when it's finished.
Regards,
Posted: Sat Apr 16, 2011 11:39 pm
by Nige
Didn't think your car would be this bad John!
Posted: Sat Apr 16, 2011 11:55 pm
by 72911E
Surprised also.
Is the mileage really only 40k km? or are u starting to doubt this as the work goes on?
Posted: Sun Apr 17, 2011 6:24 am
by 911hillclimber
Water must have been getting in everywhere.
I would think these local patches are very tedious to do, but essential to allow thelarger panels to snugly fit and align to each other.
I now think I was very lucky on my car all those years ago!
Great thread!
Posted: Sun Apr 17, 2011 9:23 am
by johnM
72911E wrote:Surprised also.
Is the mileage really only 40k km? or are u starting to doubt this as the work goes on?
I have just realised how missleading my signature is, the speedo has about 40000kms on it but I have never thought that it was the first time around. After talking to quite a number of the previous owners I have a rough idea of the sort of mileage the car had, under there ownership, I would think that the actual milage is 140,000kms I will update my signature as it is misleading.
Thanks Barry for explaining, I was hoping you would comment as I have made a poor job of describing it

Kind regards
Posted: Sun Apr 17, 2011 11:28 am
by Barry
Funny about the mileage (kilometerage?), I'd not really registered it until the other day, and meant to ask about it.
Of course mileage has little relationship to corrosion: it's all about climate, storage and protection. You may have a coastal car that's just sat outside, un-used for months at a time, perhaps on a damp gravel drive, under some trees and always in shadow. Throw in a lack of polishing to seal the paint up, and you've got the perfect combo for some cracking corrosion. Chuck the thing into a well ventilated (or de-humidified) building, and the whole senario is completely reversed.
Going back to the mileage, the shell itself probably isn't a good guide, but it is to the
type of mileage. If no spot welds have popped on the inner sills, and there are no stress cracks around the rear bulkhead, it's more likely to have had a slightly easier ride than others.
Anyway, looking forwards to working out of that parcelshelf area and onto some areas that show more obvious progress-per-hour
.
Posted: Sun Apr 17, 2011 11:35 am
by Barry
Just a quick comment, it's not obvious why I chopped off the very rearward edge of the rear bulkhead (where it joins the parcelshelf): as can be seen below, most of it had already been chopped away, and a patch put over the same area. Therefore most of the lap-joint detail had been lost, hence making up the replacement bits seen above.
BTW, you'll note on those repair pieces in the picture above (on the cardboard) that the small ribs don't go all the way back: this is so the flat area of the panel retains the shape of the metal. Had I taken each rib right to the edge, the panel would have shrunk all the way along, probably curving it by 3/4in or so. By using the flat area as a retainer, it kept the metal flat, and once the ribs were formed (with the panel stress-free) the excess could be cut off.
Here's a dodgy shot of the area before work started, you can see the covering patch about four inches behind the brackets:

Ironic to think this whole area is completely covered top and bottom: perhaps we could have got away with it as it was
.
Posted: Fri May 13, 2011 9:01 am
by johnM
Posted: Fri May 13, 2011 9:16 am
by johnM
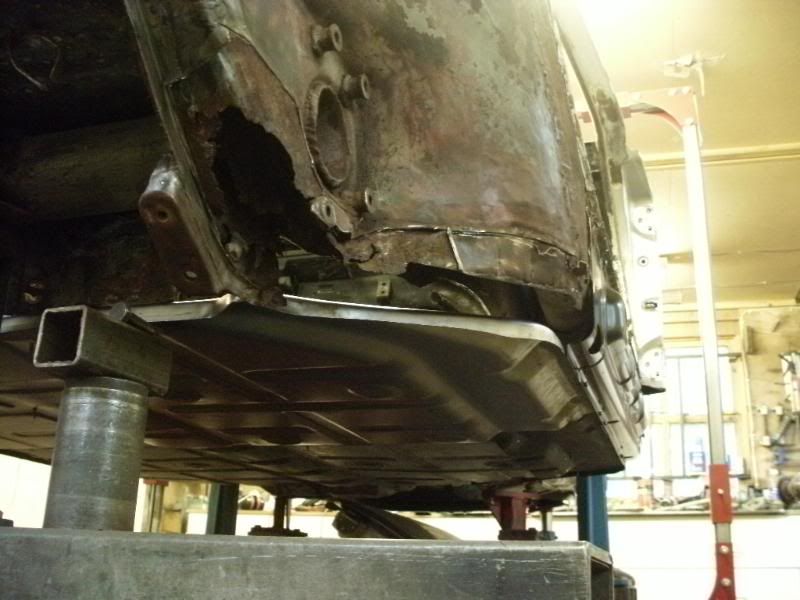
The offside torsion tube area has been finished off. This area has had a great deal of work but the end product looks great.

Hard to beleive it looked like..
The near side chassis leg has been cleaned up and prepared for the new inner wing.
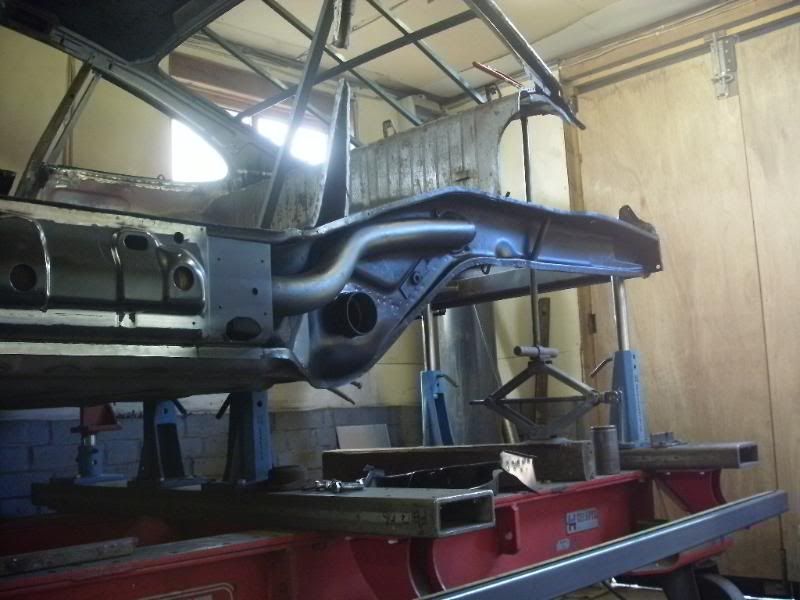
The correct near side inner wing is not available anymore so a later one has to be back dated. This requires quite a bit of work to back date. The seat belt mount area had to be back dated.


The bumper mount on the inner wing had to be removed and the mounts for the pre 73 car had to be fitted. Also the inner wing had the wrong mounts for the MFI fuel filter so these were let in.

So all in all the shell is looking much better. The end may be in sight.
Posted: Fri May 13, 2011 9:24 am
by Nige
When is Barry allowed a holiday? Between this and the Oksara his hands must be worn to the bone. Barry, I suggest you contact your nearest Union Offical!
Posted: Fri May 13, 2011 9:25 am
by johnM
The bottom of the rear nearside windscreen corner was filled with lead. This was removed.

It was quite thick!!

Once removed a hole was revealed. The repair in this area should be reasonably straight forward.

Kind Regards
Posted: Fri May 13, 2011 11:27 am
by murph2309
Starting to look really solid John - great work - been looking forward to this update!
See you soon,
R


