Page 13 of 66
Posted: Fri Jun 10, 2011 10:26 pm
by johnM
Hi Chris
Car looking great. Can you remove the fuel cap with the bonnet down, it looks very flush.
Kind Regards
Posted: Sat Jun 11, 2011 6:07 am
by Mick Cliff
I would guess that Chris will be adding a 'fin' to the cap at some stage
Cibie Biodes or Marchals
Posted: Sat Jun 11, 2011 1:21 pm
by michel
Chris what about a et of cibie biodes or marchals?
Like the blackout in the bowl
Posted: Sat Jun 11, 2011 5:07 pm
by jury
johnM wrote: Can you remove the fuel cap with the bonnet down, it looks very flush.
Kind Regards
There was abit of logic in that John. I thought that with it sitting flush, it provided abit of security against any chancer dropping anything into the tank (mild paranoia I know!). I don't mind opening the bonnet to fill up, even though it kind of defeats the purpose of the centre fill tank.
I have cut the metal to weld on a fin as Mick suggests and also sketched a drawing to make a mesh insert half way down the pipe to relieve that paranoia...so some options

Cheers
Chris
Posted: Sat Jun 11, 2011 6:47 pm
by johnM
jury wrote:johnM wrote: Can you remove the fuel cap with the bonnet down, it looks very flush.
Kind Regards
There was abit of logic in that John. I thought that with it sitting flush, it provided abit of security against any chancer dropping anything into the tank (mild paranoia I know!). I don't mind opening the bonnet to fill up, even though it kind of defeats the purpose of the centre fill tank.
I have cut the metal to weld on a fin as Mick suggests and also sketched a drawing to make a mesh insert half way down the pipe to relieve that paranoia...so some options
Cheers
Chris

I think I was having a senior moment, I never even considered their may be a fin going on........like on all the other centre fill tanks

but I am on nights that’s my excuse and I am sticking to it!
Posted: Tue Jun 21, 2011 12:31 pm
by jury
I am about to fit the Rear ARB to the car, but beforehand I have afew questions I want to ask...
From what I can work out the round recess in the chassis....

matches up with the raised flange on the backside of ARB plate...??

After that, any ideas on the angle it should be set at
Is it parallel to the chassis....

OR
Rotated slightly so that the plate butts tight up against the chassis/floor flange?


Any thoughts or pictures to illustrate would be greatly appreciated
Cheers
Chris
Posted: Tue Jun 21, 2011 1:01 pm
by Gary71
I can't see the last two pictures, but here is a shot of the rear ARB bracket on my car during my repairs made earlier in the year:
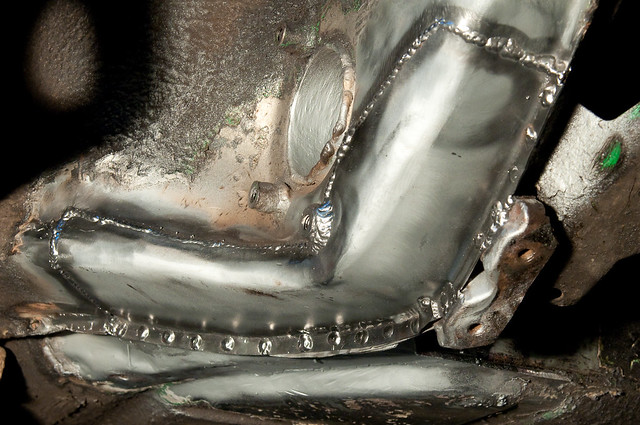 Welding. Done.
 by
Suggs, on Flickr
Although I replaced the flange past the ARB bracket it is in the same place as the original.
I'm not sure if the hole lines up with the depression, but it would be logical.
Posted: Tue Jun 21, 2011 1:20 pm
by jury
Thanks for that Gary, yours look like they are rotated abit as in the 4th pic I posted.
I updated the post to show the last 2 photos again.
(it always happens when I try to get creative and add drawings and dimensions on the original photographs

)
Cheers
Chris
Posted: Tue Jun 21, 2011 2:45 pm
by Nige
I wouldn't have thought it wouldn't matter too much if at all as the ARB rotates within in so isn't fixed. But it looks to be rotated away from parallel on mine.

BTW it's quite abit cleaner than this now.
Posted: Tue Jun 21, 2011 3:54 pm
by johnM
As Gary says at an angle.
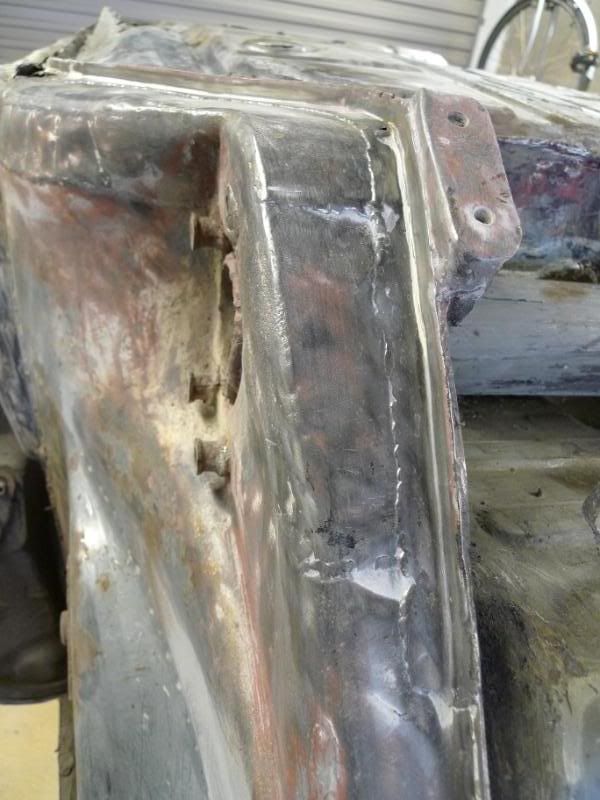
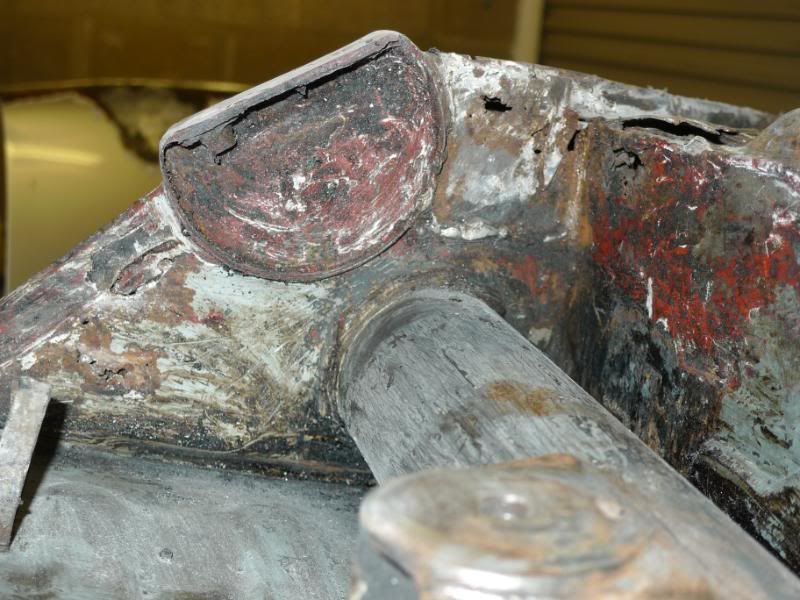
Kind Regards
Posted: Tue Jun 21, 2011 4:02 pm
by jury
That'll do for me.....I love this place
Thanks guys!
Chris
Posted: Tue Jun 21, 2011 4:26 pm
by 911hillclimber
I've done this mod to my 73T 2 decades ago and got it slightly wrong!
Check the actual 'rotated' position with the bar in place, in bushes AND the gearbox crossmember in place all bolted up. My rear bar 'just' touched the gbox cross member and it took ages to find the 'buzzzzing' noise while driving the car!
Had to grind the member to give clearance. i seem to recall I set the flat mounting lip parallel to the body welded flange not at the angle others have.
There was no DDK then, there was no Internet then!
You are all v lucky today!!
Posted: Sun Aug 14, 2011 7:09 pm
by jury
So I found a local sandblasters (wish I found him earlier!) and got afew bits done...including the gearbox but I'll save that for another day...
Engine fan and case came back ok but needed abit of additional wire wool sanding...
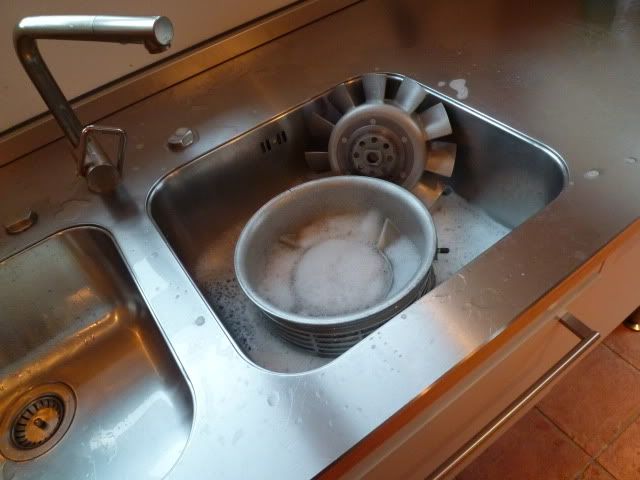
I was going to leave it natural finish but I like the prototype racer matt black look.

After some research (and my new shed spray booth) I decided to use BBQ paint...after reading the instructions Mrs jury wasn't too keen on my suggestion of putting the fan in the oven to cure the paint after spraying.....so.....'throw a fan on the barbie'
Worked a treat...and being a typical brit, its started peeing down soon after this
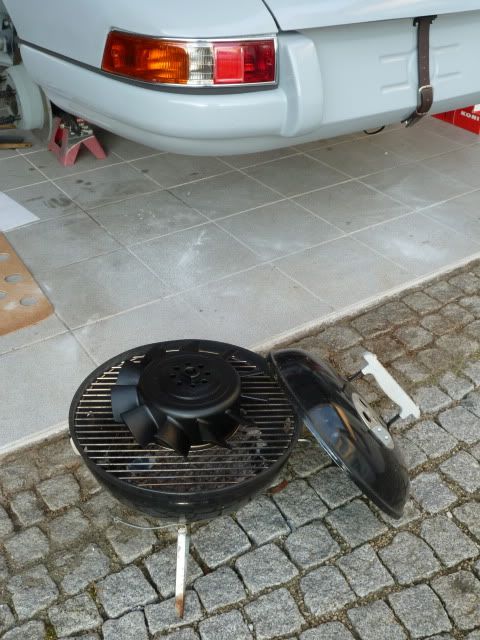
Chris
Posted: Sun Aug 14, 2011 8:53 pm
by Ian 2.2S
After some research (and my new shed spray booth) I decided to use BBQ paint...after reading the instructions Mrs jury wasn't too keen on my suggestion of putting the fan in the oven to cure the paint after spraying.....so.....'throw a fan on the barbie'
Worked a treat...and being a typical brit, its started peeing down soon after this
Chris[/quote]
You did the right thing. I cured my throttle bodies painted with VHT matt black in the oven. It stank for a week afterwards and I had to completely clean it to shiny new to get rid of it. I was not popular as Sally was trying to bake a load of cakes for a stall at a local fete.

Posted: Sun Aug 14, 2011 9:05 pm
by 58A - 71E
Chris, I absolutely love this build, cool as
