Page 11 of 16
Posted: Mon Apr 19, 2010 10:21 pm
by 911hillclimber
That detail level almost seems Italian/Alfa, but looks superb on the car.
A real treat.
I look forward to seeing it down on the ground.
After a long rebuild with the car on tall stands, that time you drop it to the ground I think is one of the best 'impacts' you get on a build.
Posted: Tue Apr 20, 2010 8:52 pm
by petric
hi james does look fantasic you are doing a great job there, i think you will have to fit some better seat belts than them for youg william though! i can always send down my old tub next just to keep your hand in ha ha all the best peter
Posted: Sat May 01, 2010 9:48 pm
by 58A - 71E
Thanks Peter - after his behaviour this week William is lucky he didnt end up in those "seatbelts"


Posted: Sat May 01, 2010 9:49 pm
by 58A - 71E
Managed to do a bit more in the last couple of days – next task was the front suspension.
First job was to remove the old phenolic bushes which were the only bits left in the car from strip down.
The replacement ones are white nylon and go into the torsion bar housing and support the end of each control arm. It is not neccessary to ream this bushing (compared to having to ream the orginal) thankfully.
Here they are and with the new ones


Posted: Sat May 01, 2010 9:51 pm
by 58A - 71E
Then replace the needle bearings – here’s the old ones that haven’t been available for 30+ years (apparently) with the replacements from Porsche

Only one set of needles comes in the replacement set along with the inner race and pictured also are the white plastic outer flanges – so I sourced another set of needle bearings from NLA across the pond to give the original number of 8

Posted: Sat May 01, 2010 9:52 pm
by 58A - 71E
These could go in once the torsion tubes and bars were cleaned

Here’s the bar with the adjuster just going back on (it sits in the middle of the bar in the tube when in place)
Then the bars can be measured using the gauge referenced in the workshop manual
Then the arms (and steering arms) go in

Posted: Sat May 01, 2010 9:56 pm
by 58A - 71E
Meanwhile new king pin bushes were pressed in and reamed out

Then assembled to the stub axles with new link pins measured and shimmed,
its all then knocked together to include shock absorbers and finally the brake backing plates (to which I’d already assembled the brakes can be bolted on)

And finally the drum could go on with the new front wheel bearings

I also adjusted the steering arms as best I could before having them properly aligned.
Posted: Sat May 01, 2010 9:57 pm
by 58A - 71E
I’ve also been cracking on with some other bits –
Fuel pump rebuild, from this

To this
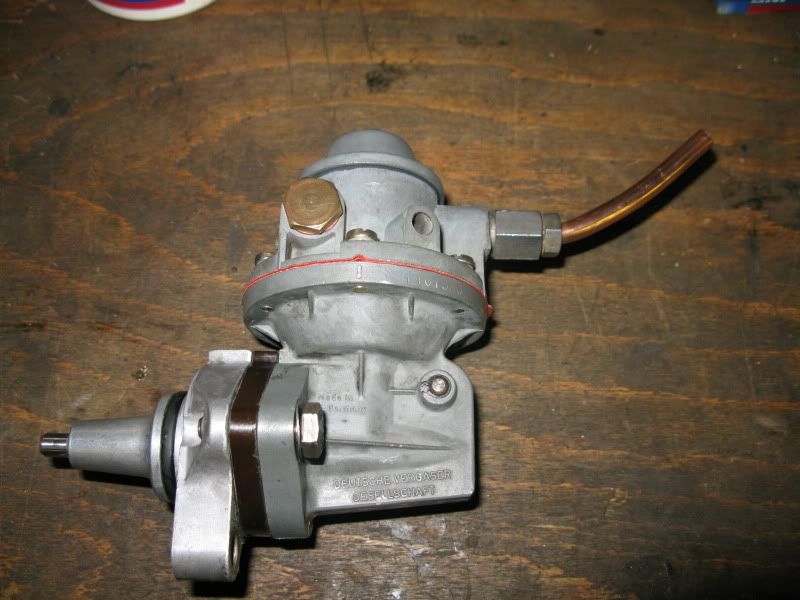
kit from PRServices
Posted: Sat May 01, 2010 9:58 pm
by 58A - 71E
Posted: Sun May 02, 2010 6:37 pm
by roy mawbey
Nice work James, did you have the special tool to get the old needle brgs and back plain bushes out? Also did you have the use of a press for the king pin work?
I recently changed my front wheel brake cylinders and bought the cheaper repro ones. They seem to work very well apart from also looking nicely manufactured. Yours look new?
It doesn't seem to take you a long time to do these jobs, it take me forever half the time.
Well done indeed.
Roy
Posted: Sun May 02, 2010 10:49 pm
by 58A - 71E
Hi Roy, thanks for continuing to follow the thread

No special Porsche (VW) tools, three of the four needle bearing assemblies came out with a slide hammer as there was just enough on the outer flange to get them moving. The fourth was, err, less willing, and needed some more creativity

The phenolic ones as easy in comparison - I used a drift, a broom handle and a gert big hammer
Installing tthe new ones was for once the reverse of disassembly
Thankfully yes, I have a 10ton press in the garage and it has more than paid for itself in the last few years - one of the best tools I have in fact
Here's a pic when I was rebuilding the gearbox
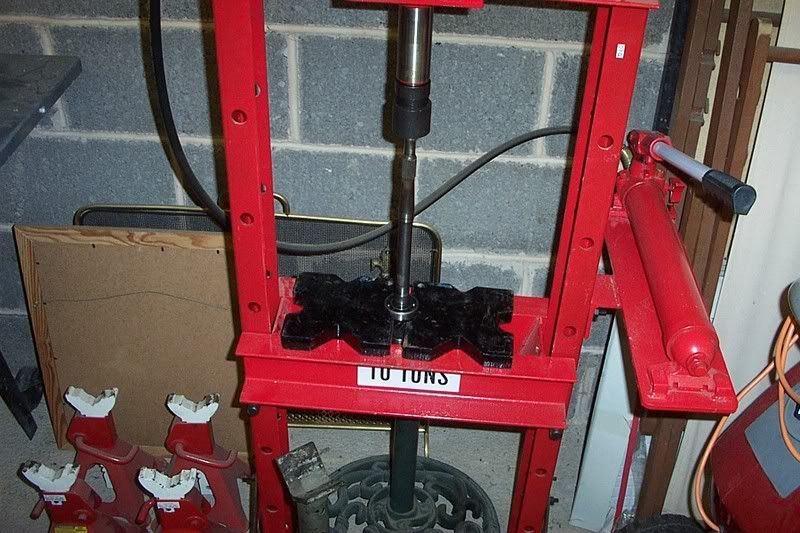
All the brake components are new, cylinders as well, and trust me there have been many shifts spent in the garage in the last few months
Posted: Tue May 04, 2010 8:53 am
by roy mawbey
James,
Nice accessory the press
A question, did you have the opportunity to check with an internal micrometer the bore size of the original plain bushes as against the size of the new "phenolic"ones you bought. I presume the old ones were 50 years old and I really would like to know how much wear there was on the old ones. They say in some books if up and down forces are applied to the road wheel if play is apparent in these bushes it will show the same as applies to king pin wear.
I saw an mot tester apply a long lever under the tyre of my front wheel on the ramp and then rock it up and down to see the play. I can find no play doing it manually by hand but he said there was some slight play with the force he applied. Does this come from the king pin or from the plain bush. I would be interested to know.
Good idea to replace with new as your car will not need stripping as soon as you have done it
Roy
Posted: Sat May 08, 2010 11:04 pm
by 58A - 71E
Sorry for the delay in posting Roy - yes I did measure them both, there was about 0.1mm difference between new and old - b*gger all really

When the car failed its MOT 4 years ago, one of the many things was the front suspension, including king pins. There was play as you describe evident with a lever under the wheel - that said I really don't know what was at fault i.e. king pins or bushes on the ends of the arm. The new nylon bushes were still slack on the end of the arms and tbh there really was b*gger all slop in the old king pins - maybe it doesnt take much but I will retest these once the wheels go on - which hopefully wont be long now
Posted: Sun May 09, 2010 9:29 pm
by 58A - 71E
Posted: Sun May 09, 2010 9:31 pm
by 58A - 71E


