I did fairly well and managed to get planning permission resolved and the shell of the house built before I did anything on the car, but as I did so much of the fitting out myself inevitably I got bored with plumbing, electrics and joinery that by the summer of 2011 I began to blur the boundaries and started to strip the car, as it was more fun……..and I doing so creating a series of mini projects that kept up my faith in the car as a long term restoration, but ensured I spent a minimal amount of money on it
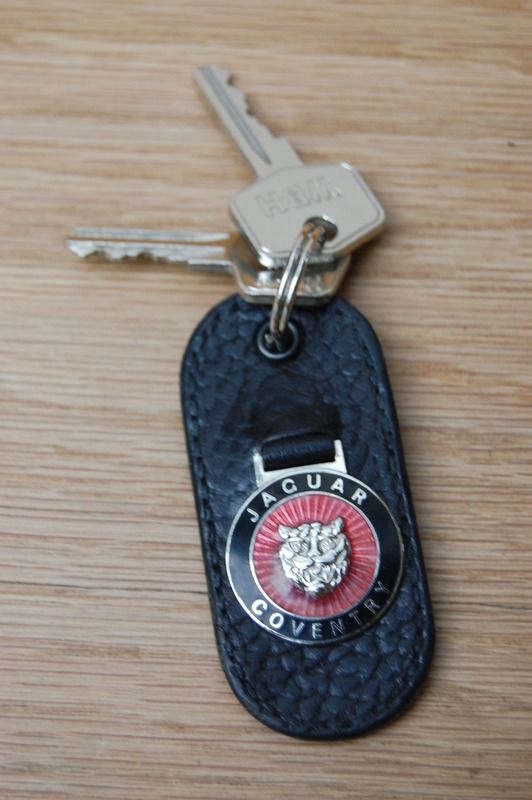
It was also the 50th anniversary of the E Type launch so a visit to the Silverstone Classic in July and the immense parade of E Type cars and racing perked up my enthusiasm. I also located an original set (minus the radio panel) of the rare cross hatch alloy dash panels so I picked them up at Silverstone…and I bought a key fob
The dash panels were slightly scratched but a level of patina is what I am striving for and moreover though I have subsequently kept a look out for an original radio panel, in 5 years of looking I have seen none for sale….the more common polka dot style used from launch in March 1961 to November 1962 is more often spotted on certain auction sites but my style lasted only 10 months until September 1963 when it changed to vinyl, and remained so for the rest of the series 1 production
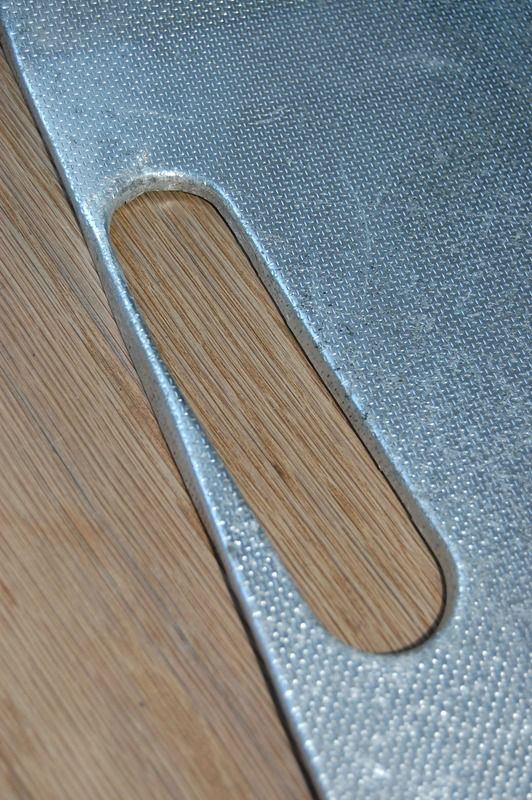
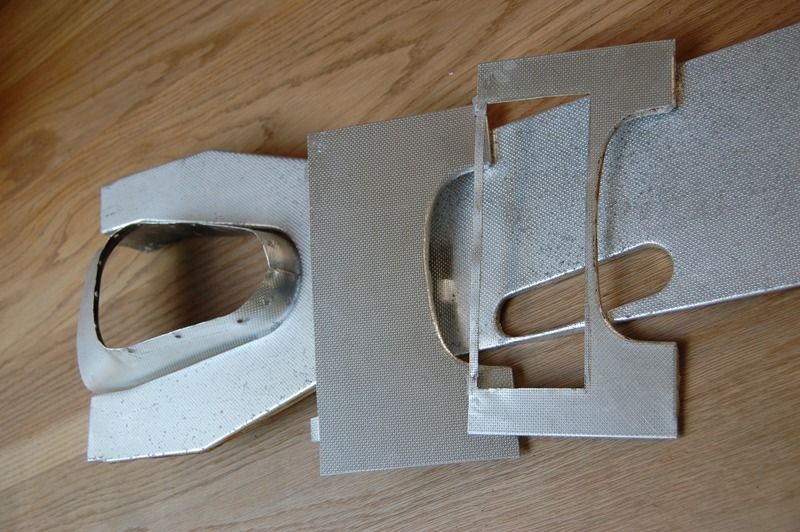
note the reason why there is an additional radio panel without the cut-out is I made myself a new one from the back part of my original console....the radio panel had been butchered in the past with a much larger and none standard opening...
The big ticket items of metalwork and paint had to be by others, an E Type is a complicated construction and very much hand built, so it was not the car to start my metalwork career on, and being black would have to be as perfect as Barry made the 911 and similarly would have to be perfect paintwork (although when the time comes and I get quotes, I will see if me prepping and painting the inside of the cabin, even the inside of the bonnet potentially, the underside of the car and the engine frames will be cost effective).
Gearbox….well….being an American model it comes with a higher ratio rear differential, and with a 4 speed box (the infamous Moss box) perhaps a 5 speed conversion is on the cards, it is a common enough upgrade, and depending on the condition of the Moss box getting replacement parts is either way too expensive and/or impossible…so I would just buy another modern substitute, and make whatever modifications are necessary (not much…usually grinding and rounding off corners from the box and easing some of the metal work in the transmission tunnel) and re-fit
At this time the jury is still out on this, no rush, will probably come to some conclusion in a year or so
Engine, well Barry popped over one Autumn morning, must have been late 2011 and we spent a whole day getting her to start….which with multiple batteries, a new high torque starter motor and plenty of perseverance (and smoke) it did…no exhaust just the manifolds on the engine was a hell of a laugh….and man what a noise…;)….I have never built an engine I my life…but I can read a book…(so long as it has pictures naturally…..) so once parts have been outsourced for machining, I will follow the manual and put it back together, which will also allow me to detail it carefully
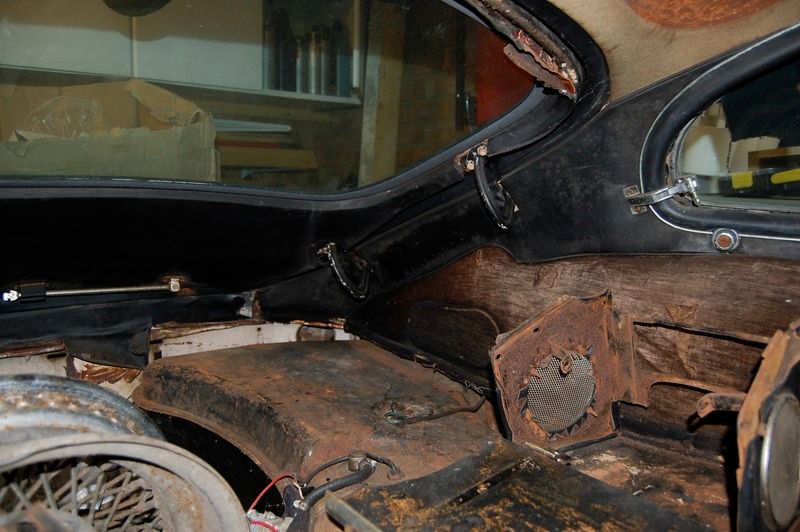
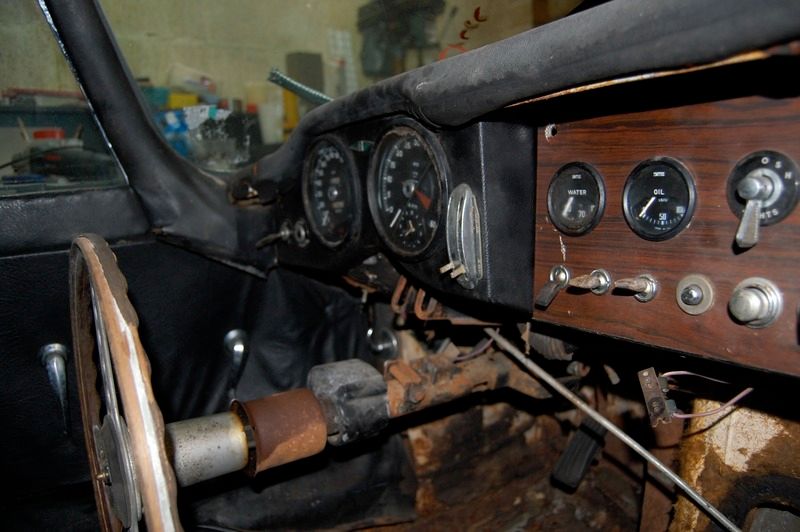
So this was the inside of the car, I had binned the after-market air con unit, then carefully removed centre console and gearbox cover before moving on to the seats, remaining carpet, dash and fuel tank
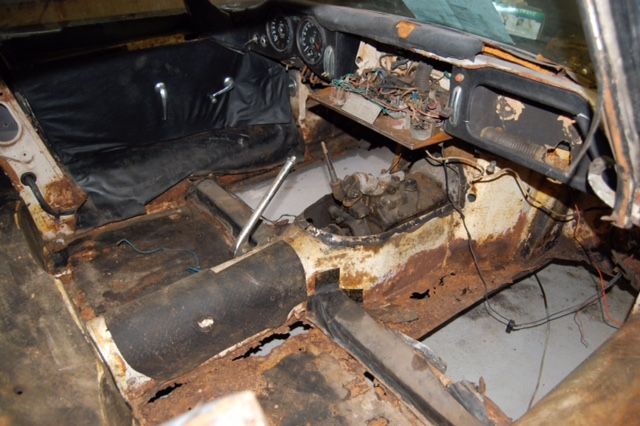
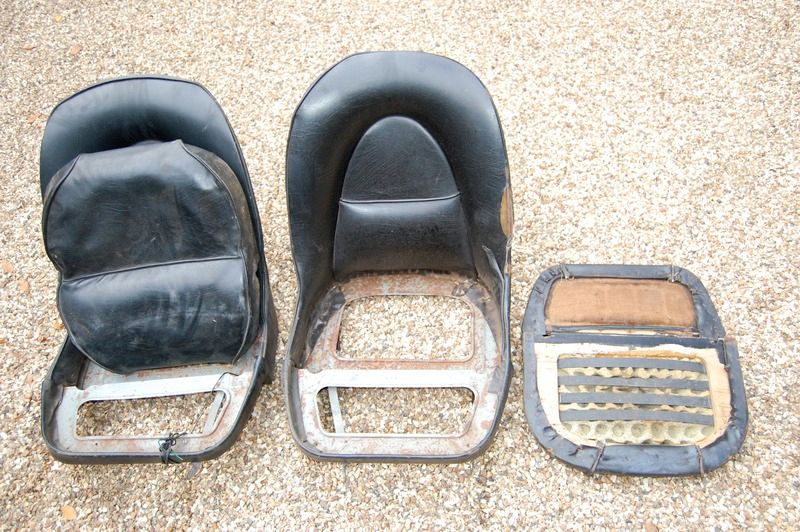
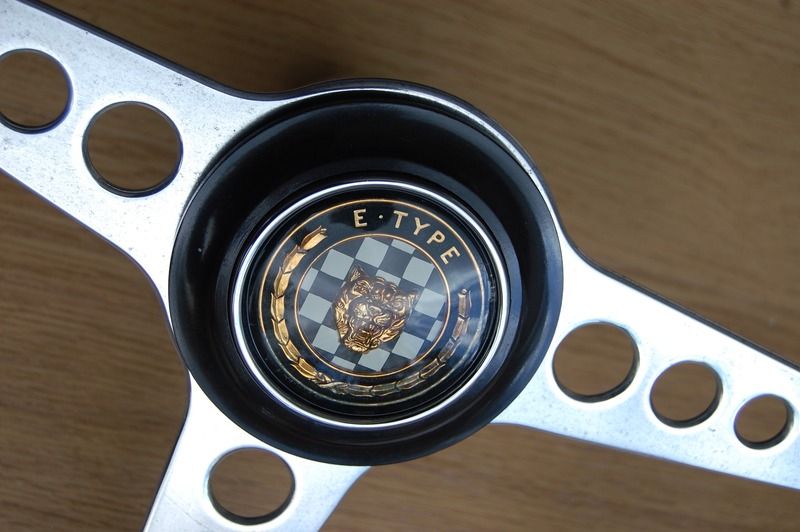
In the process I happily discovered the original horn centre push under the driver’s seat which was a lovely find, the repro ones are too pale and with incorrect graphics on the chequered flag, and I also found these….
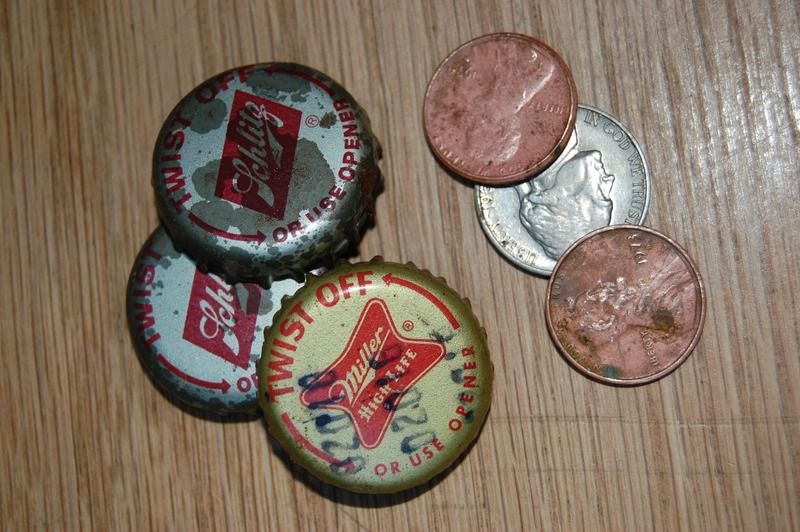
Clearly one passenger, or perhaps owner was a good old boy and enjoyed the social side of the car…
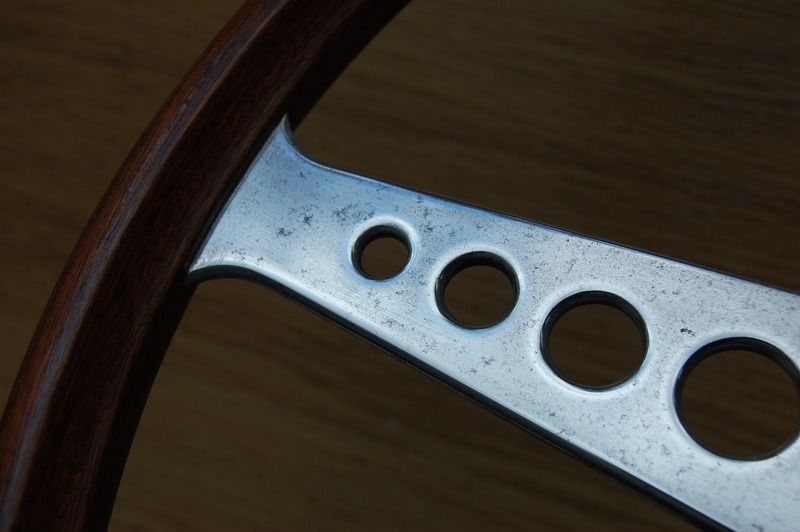
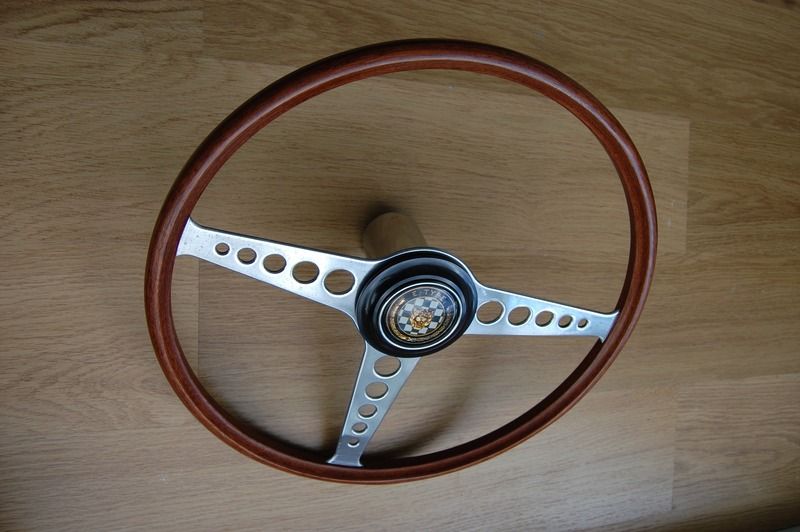
With these elements removed I started the first restoration …. steering wheel and column plus fuel system
The aluminium frame of the steering wheel was straight, dull and dirty, but with successive grades of wet and dry prior to machine polishing it produced a lovely finish, just showing some of the aging and patina, which is all part of the look I want. The timber surround was split and unsafe, so a new kit was purchased, bonded, sanded and then given 3 coats of clear lacquer, wet and dry sanded between each coat, finished off with a rub down with 1200 grade and finally hand buffed it has a lovely sheen, not a brash gloss
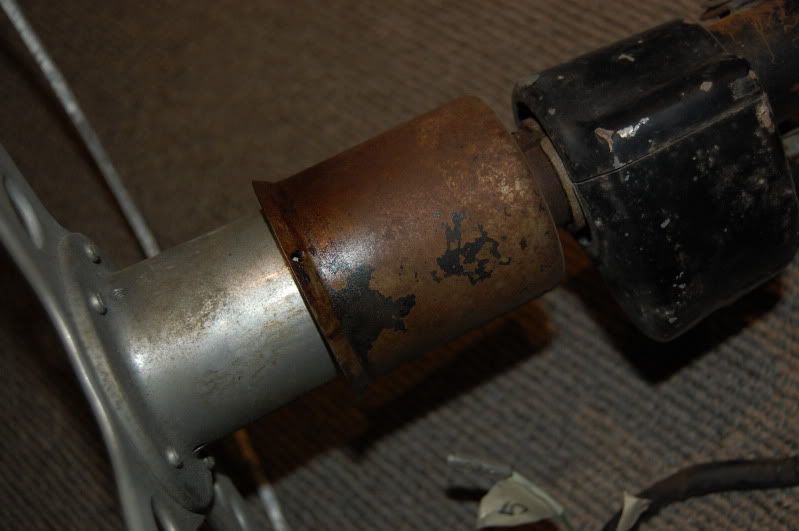
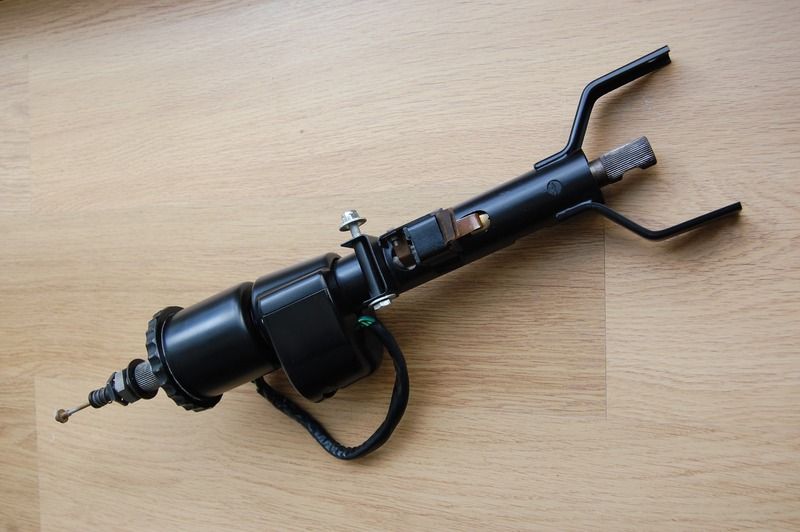
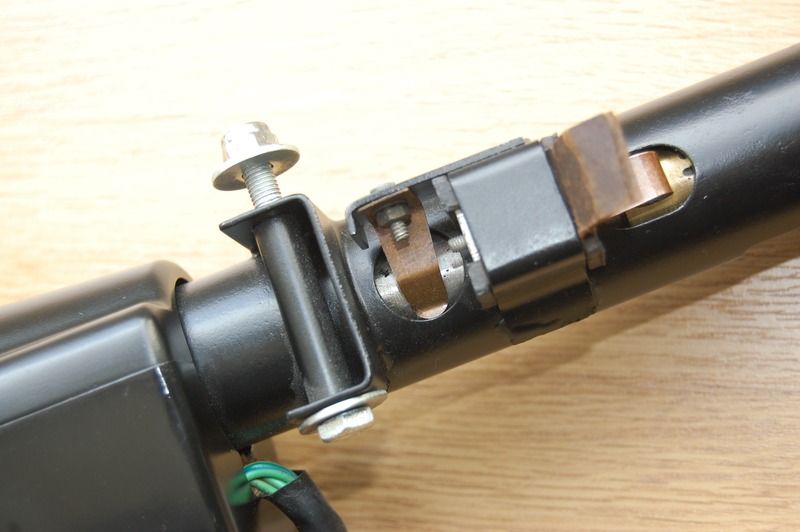
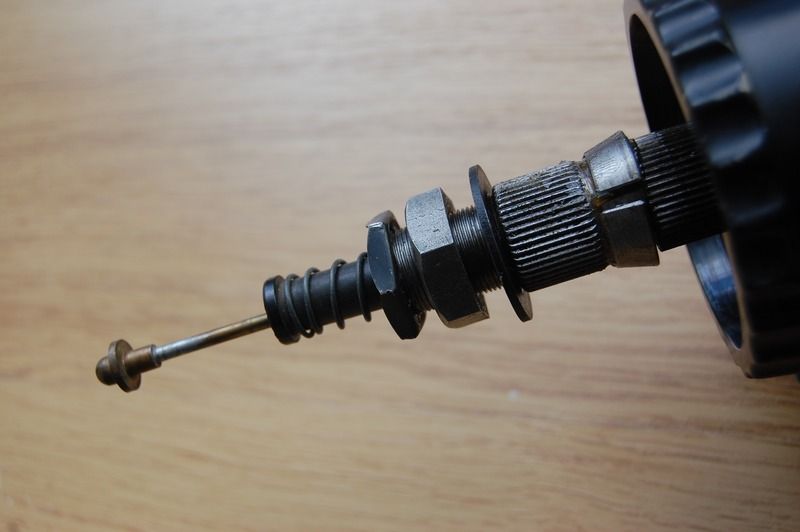
Next it was the steering column, which had the knurled rim of the adjusting/locking collar missing, so I hunted down an original example, stripped the column, replacing both upper and lower rubber sleeve bushes, cleaned and repainted then re-assembled, together with the mounting brackets and associated bolts which were all stripped, painted and re-plated
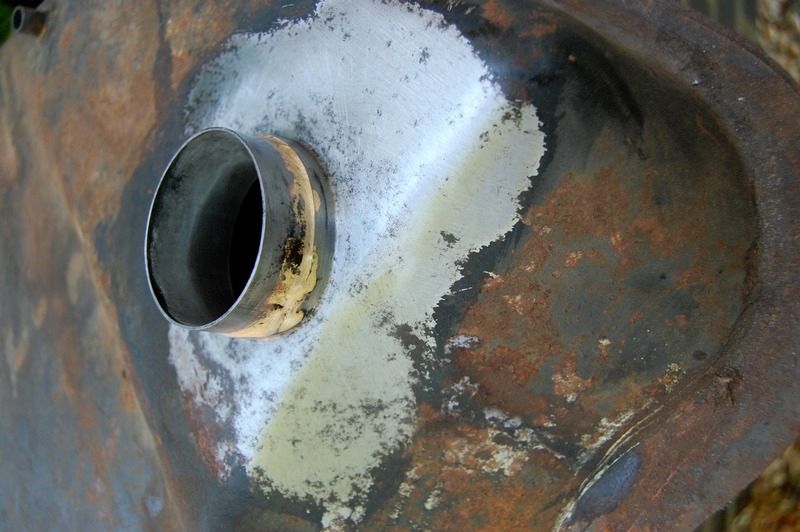
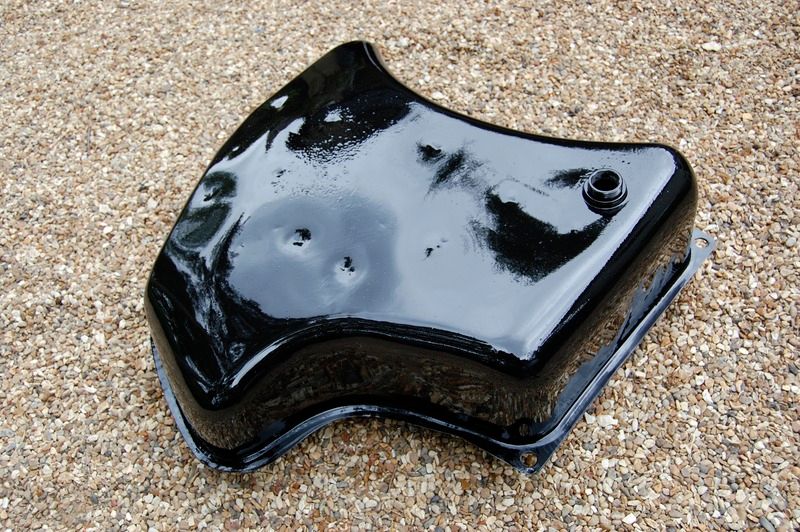
The fuel tank is one of the early style with a flatter profile, and after using the POR renovation kit which de-greases, removes corrosion and is finally sealed prior to externally painting with 2 coats of their POR-15 paint system, gloss black
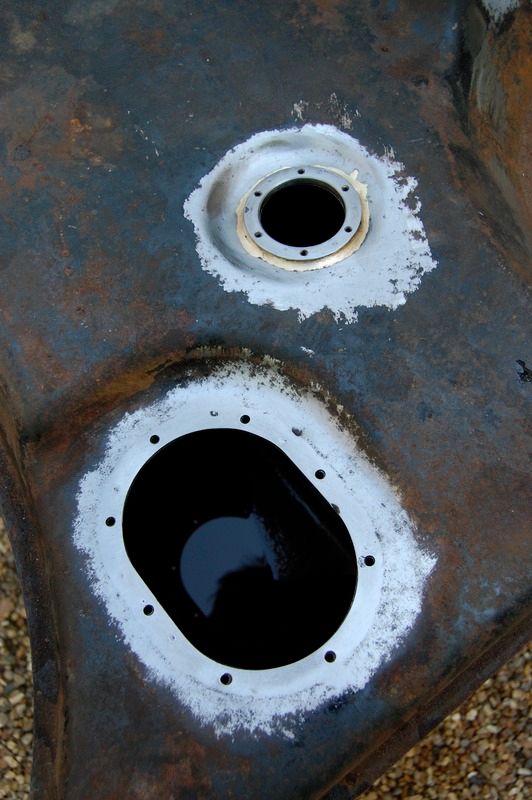
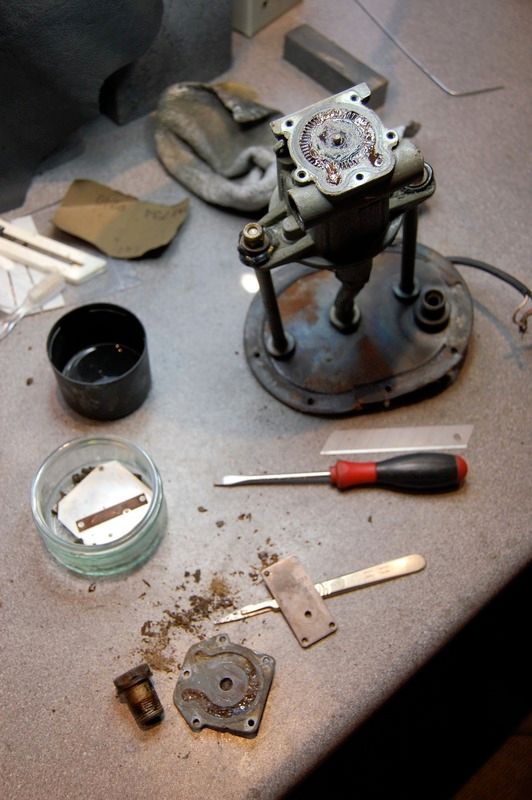
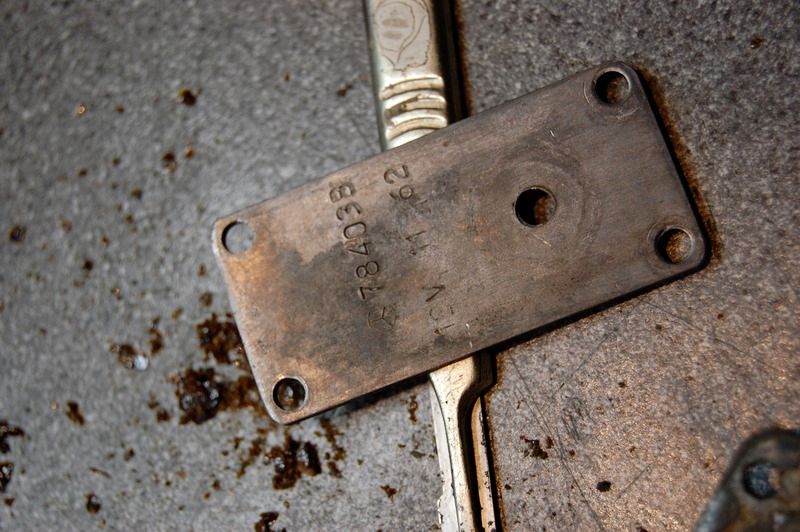
Once this was done I could investigate the condition of the original submersible fuel pump, which I contemplated re-using, but have subsequently decided against, as it needs some new parts, and given its fundamental importance will be best replaced with the modern submersible type easily available
It may well be sentimental but so what, I had wanted a car made on my birthdate, and although there is one manufactured on that date (a roadster, also black, that I have located in Germany) this is pretty close, and if a fuel pump , just like a heart is central to a car functioning, then this was at the core of my car…a nice surprise, but only the first of two further items that linked me to the car
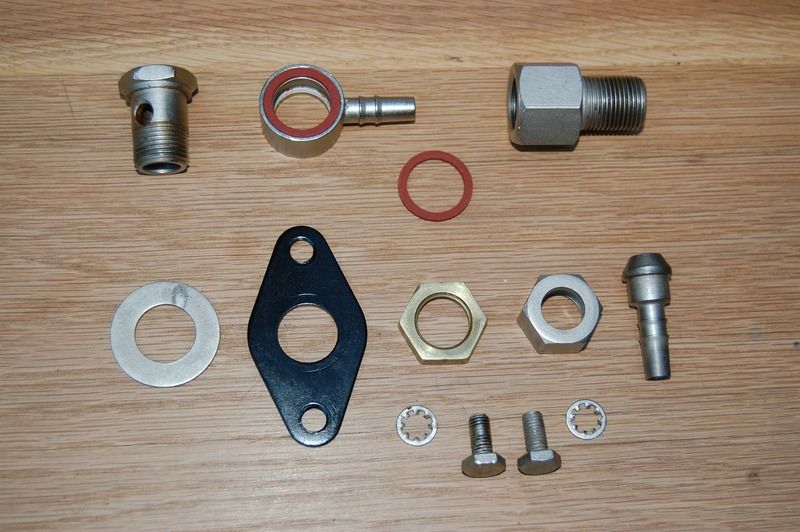
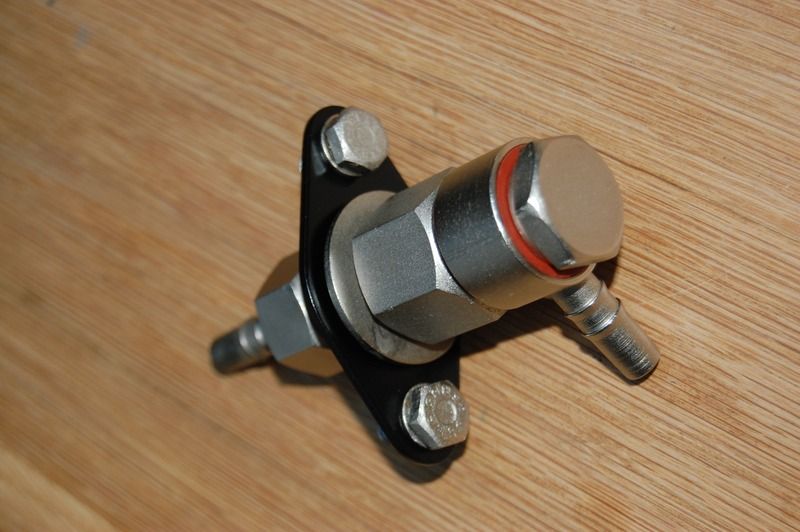
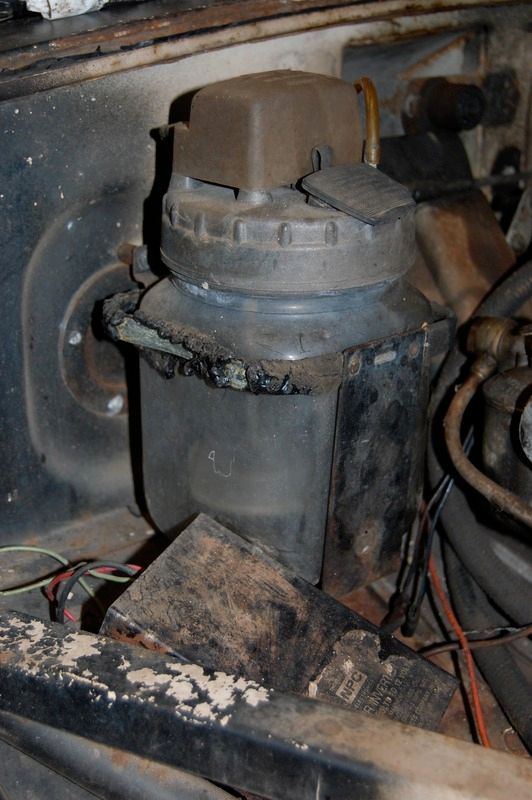
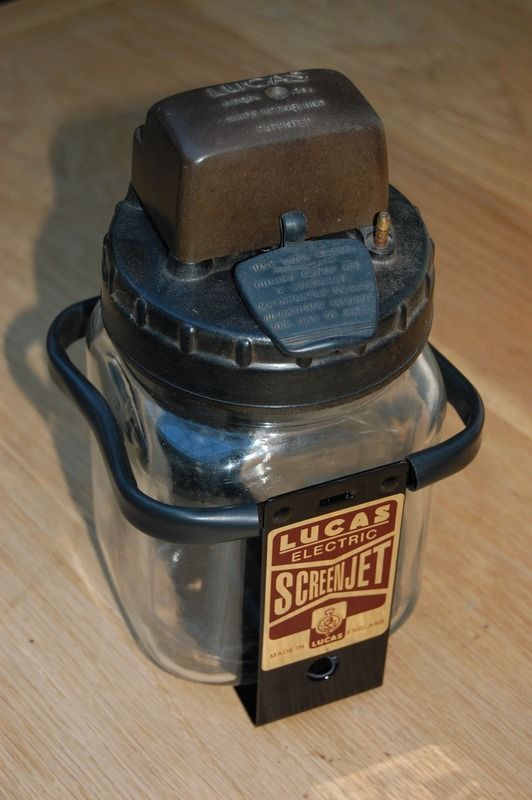
The last 2 components of the fuel system is the fuel line connector located in the rear trunk and the fuel filter in the engine bay. Media blasting the top cap, emery paper and metal polish for the brass bolts, plate the fixing bolts, new fibre washers, rubber O ring and a new brass filter, scrubbing the original glass jar and painting the fixing bracket the correct period colour and its ready to use
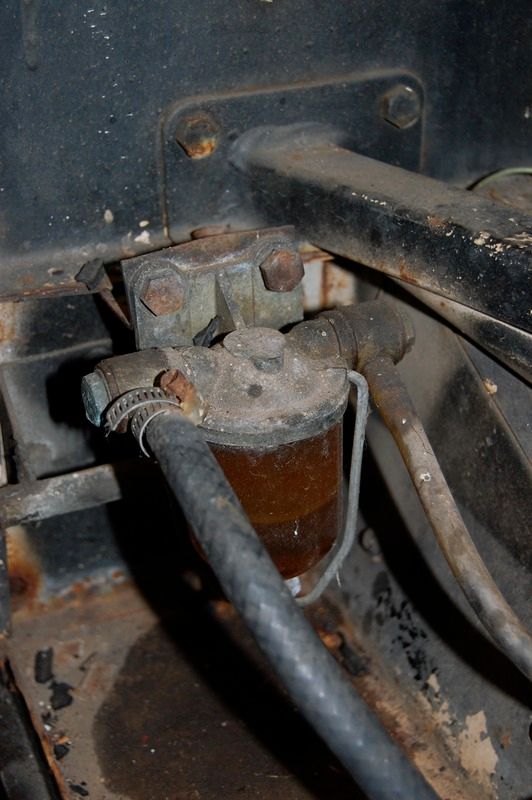


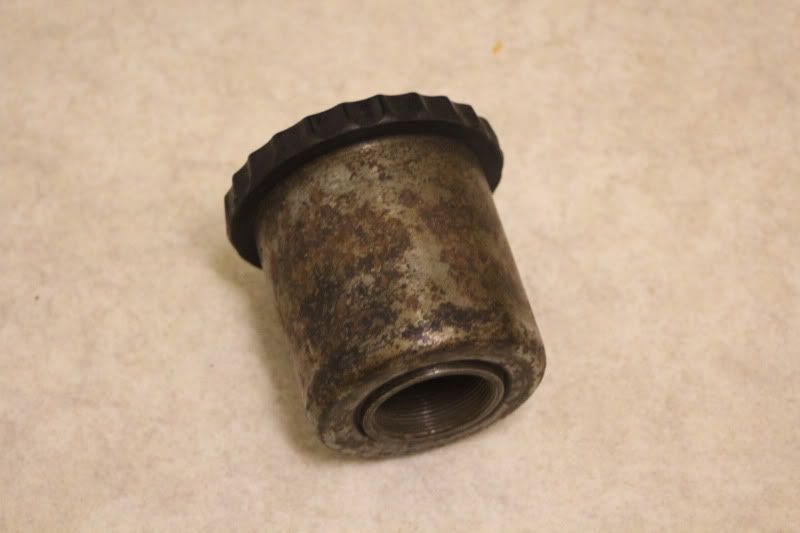
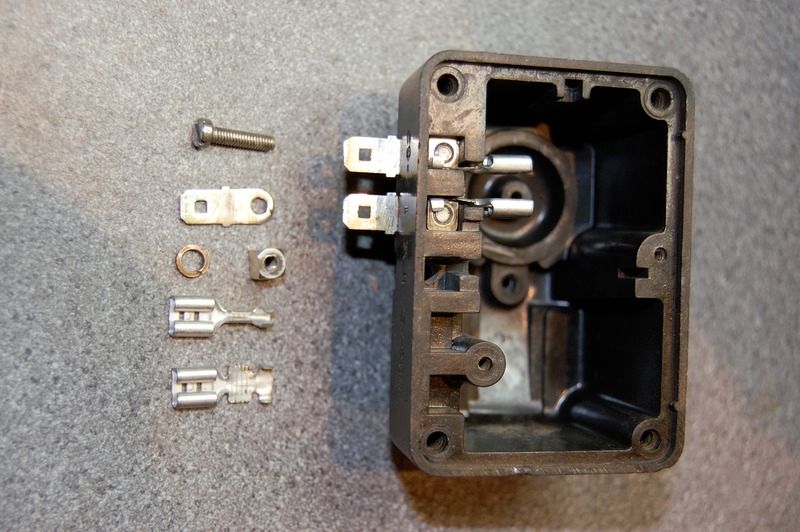
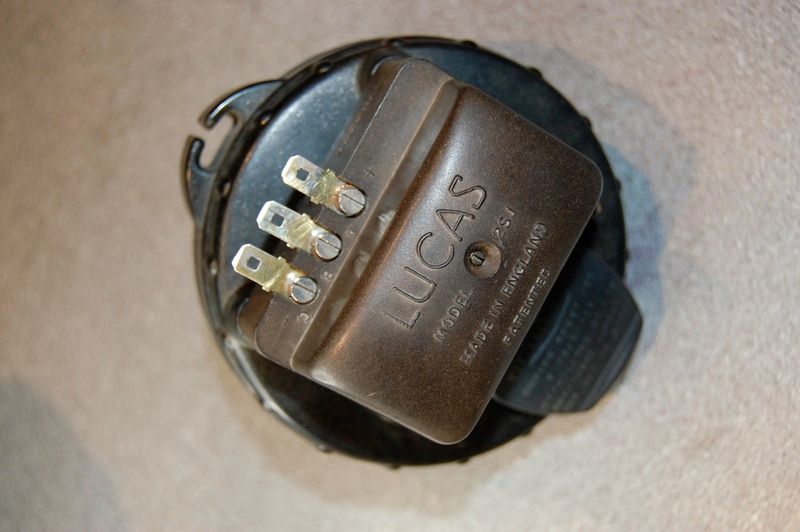
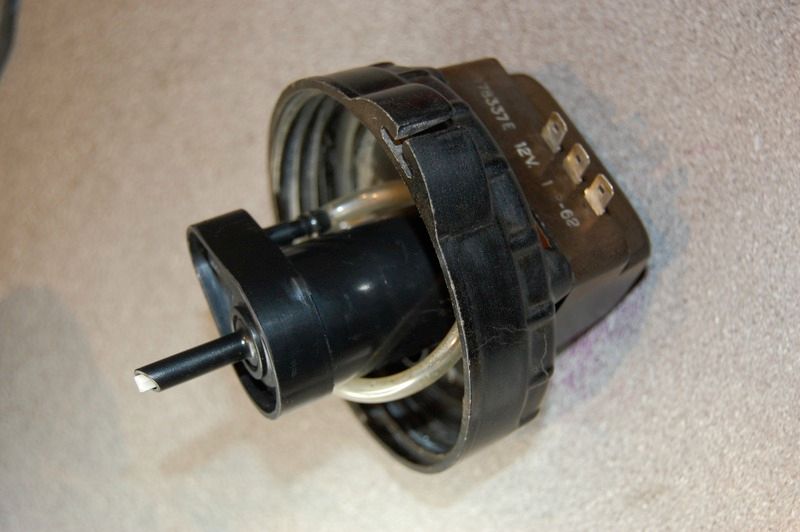
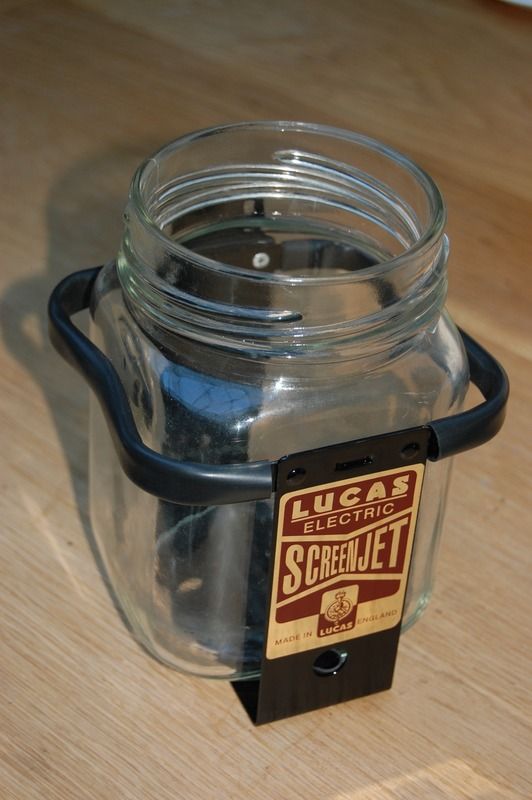
Whilst at it in the engine compartment, the washer bottle, being adjacent to the fuel filter seemed like another contained project so that was similarly stripped, scrubbed and re-assembled…..except the washer motor was shot and new ones not available. A common upgrade is to fit a new unit within the moulded Bakelite top housing, and amend the wiring within it so all appears standard but has new plumbing. I also had to disassemble the cage for the glass bottle as it was originally made with pre-moulded rubber integral to it, which has perished, so I had to replicate that process with a rubber sleeve profile
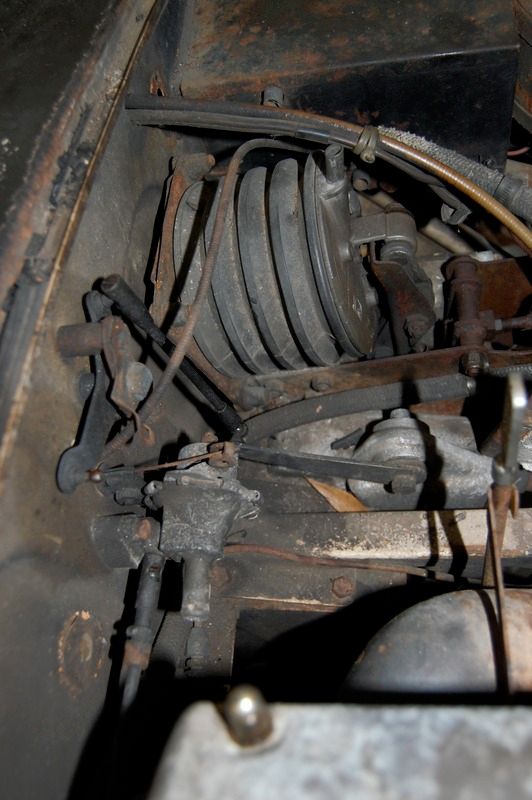
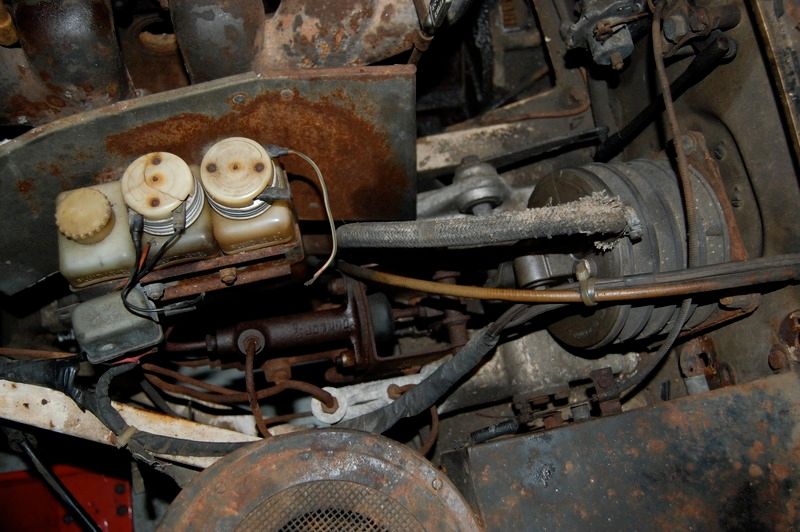
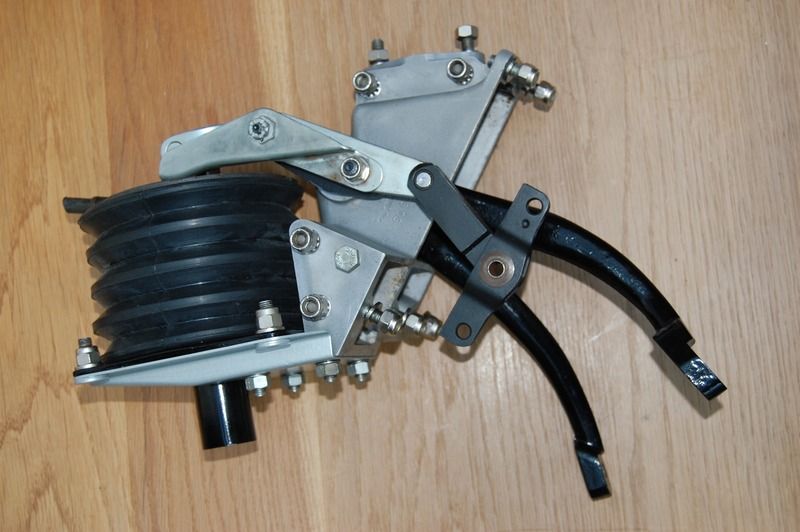
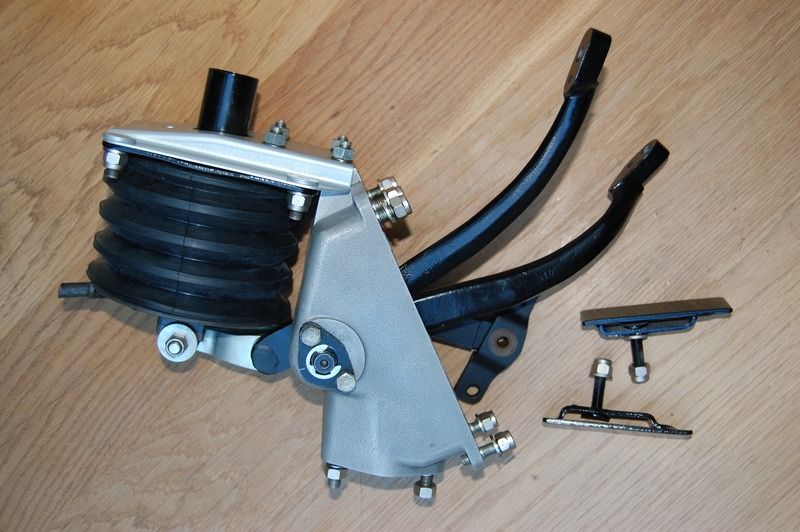
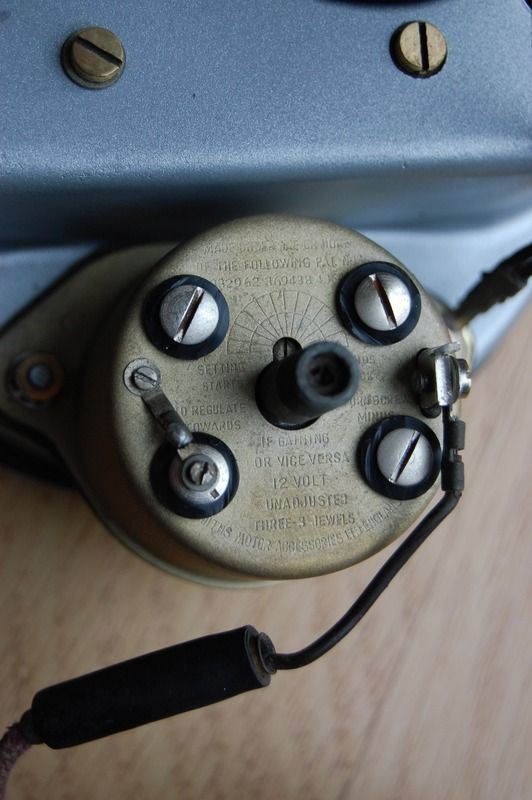
The Kelsey Hayes servo system for the brake on an early E Type has a varied reputation, but I wanted to make all efforts to retain it, which also means I needed to get someone to restore the 2 master cylinders. They were both early units, but one was not original, and they don’t come up for sale often
Similar to DDK there is a superb forum for the E Type at
http://forum.etypeuk.com/ and through this forum I located a specialist who had the cylinders bored out and sleeved in stainless to the original diameter then re-built with new OE specification components
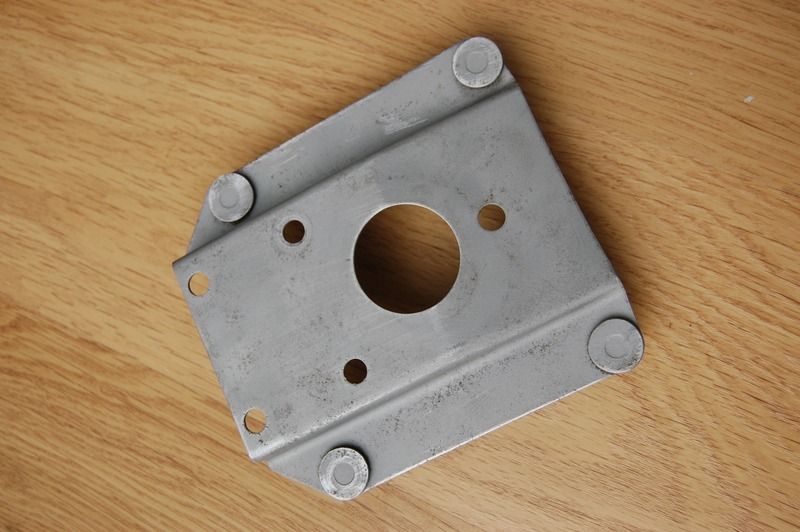
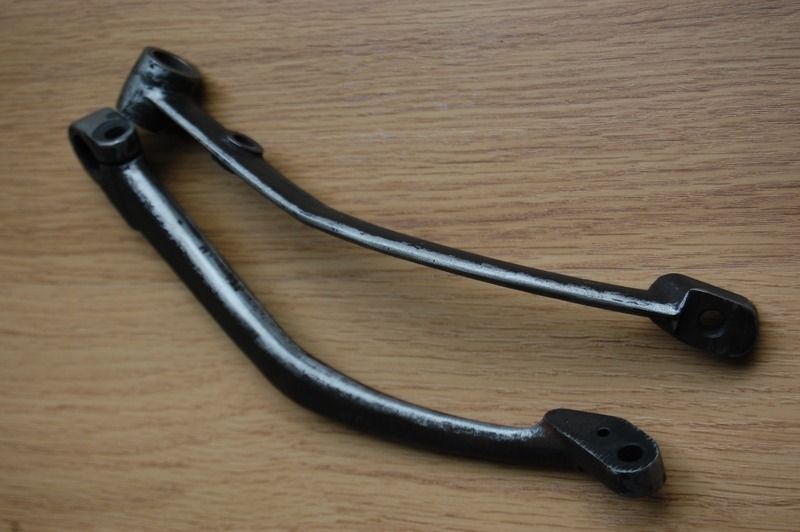
The master cylinders are part of a multi component assembly including the pedals and various linkages and because I was changing the car from LHD to RHD I had to heat and then bend both clutch and brake pedal arms to a new configuration
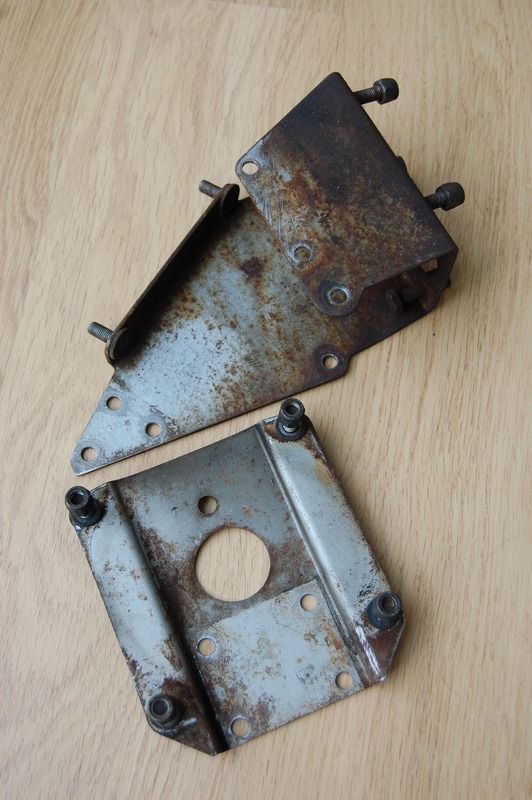

This took me through to mid/late 2012, by which time the house was completely finished so the family could enjoy that and I could then spend all free time on the car (except I knew we would probably move within 18 months so there wasn’t much point in stripping major items like suspension and engines as the car would be a nightmare to move), so I kept to small scale projects, of which there are many
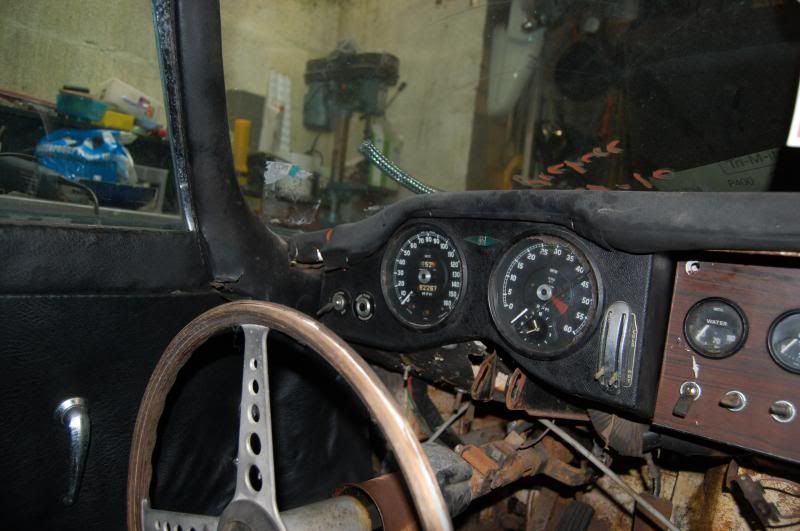
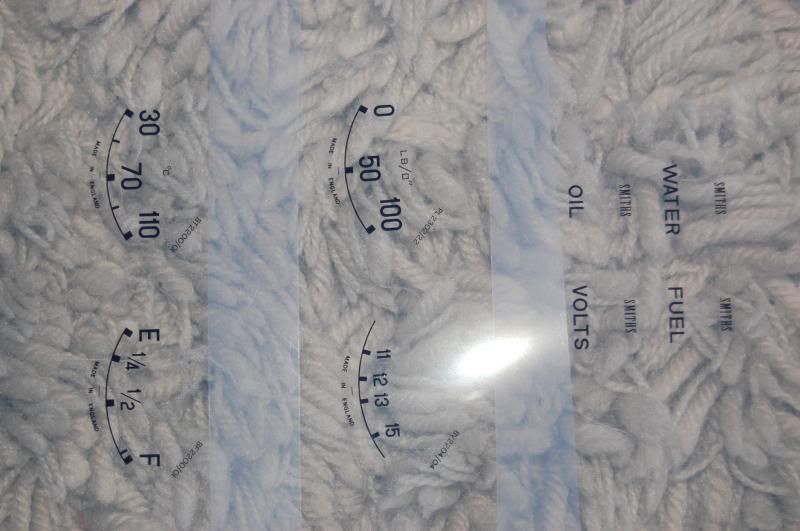
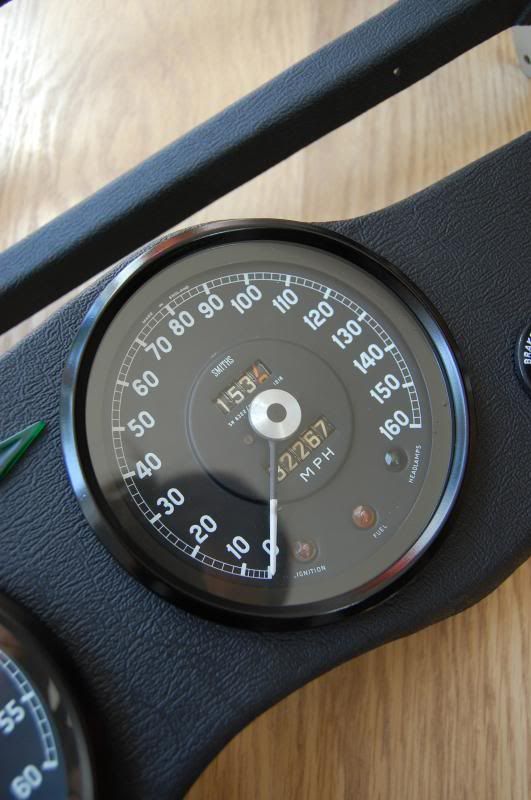
The Smiths dials on an E Type, especially the early ones are such a part of the character of the car, their classic MADE IN ENGLAND script setting them apart from the later 1960’s models and subsequent eras
The dials on my car were all original with one exception, a common upgrade in period of a later mechanical gauge for the oil pressure, but not with the same font.
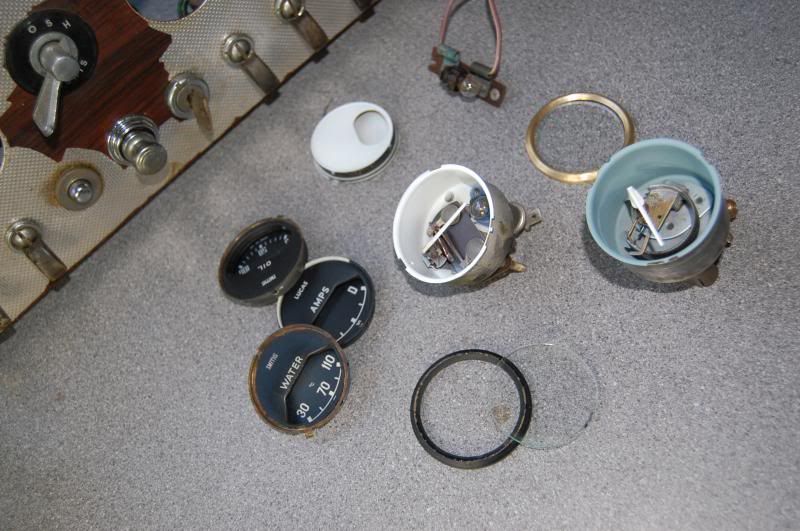
Generally the dials were definitely perished with moisture having seeped behind the glass and once disassembled became clearly not something that could be just cleaned as the old paint finish was damaged and would have to be re-done, as to the white lettering which had yellowed and aged too much.
I also wanted to replace the amps gauge with a volts one for safety and relativity…. So began a full on OCD project to redraw all the fonts myself.
Original dials would have been hand drawn back in the day at multiple times bigger than full size, and then photographically reduced to make a screen or pad print, so that basically means that the font used is not exactly any of the commercially available types. With a lot of searching I established that the dials had around 3 fonts each, but that the odd letter was not exactly as it should have been…….so naturally I drew the whole lot in CAD, to create a set of graphics, 4 times real size out of lines, pure radii and compound curves or ovals. These could then be made into a set of pdf files and having found an old school printer in Mitcham he printed the images on acetate, and then using a light sensitive process creates the master plates on which the ink is placed to pad print them directly onto the faces of the freshly prepared dials (nitromors as blasting too powerful, etch prime and top coat, all with my modellers spray brush so as to get just the right amount of paint)
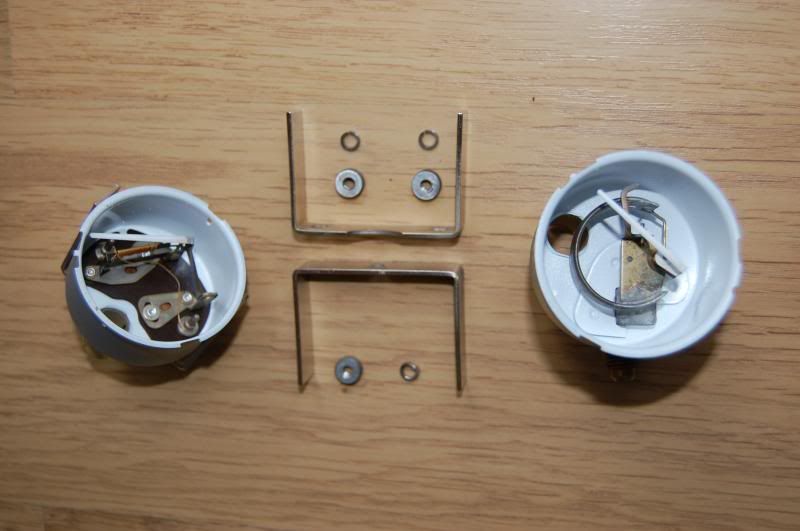
individual cases….
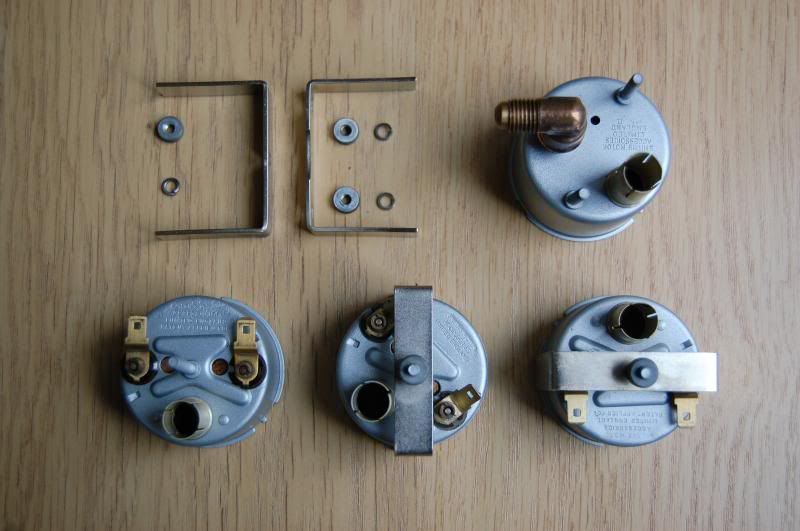
cases blast cleaned then plated and painted…
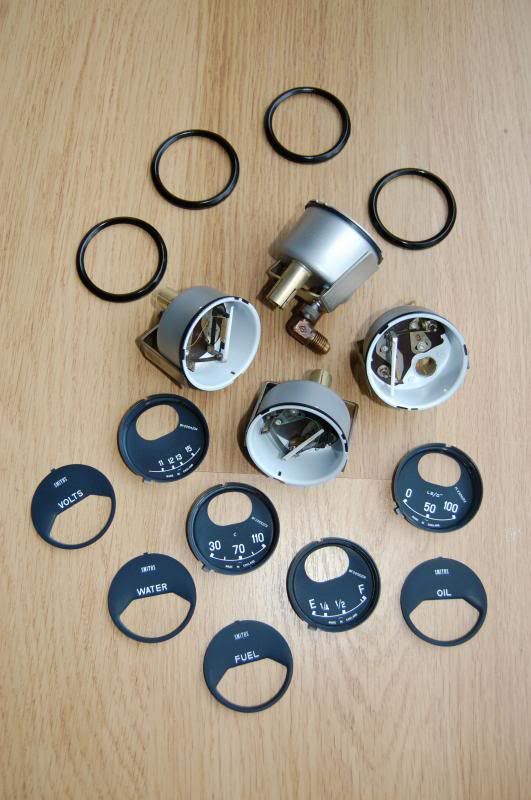
and the new set of dials
they all now say Smiths, which I realise is incorrect…but now all the fonts are matching….and importantly to me the volts graphics are all white, as opposed to the partial white and red from the donor dial…..so it looks period correct even if slightly tweaked….
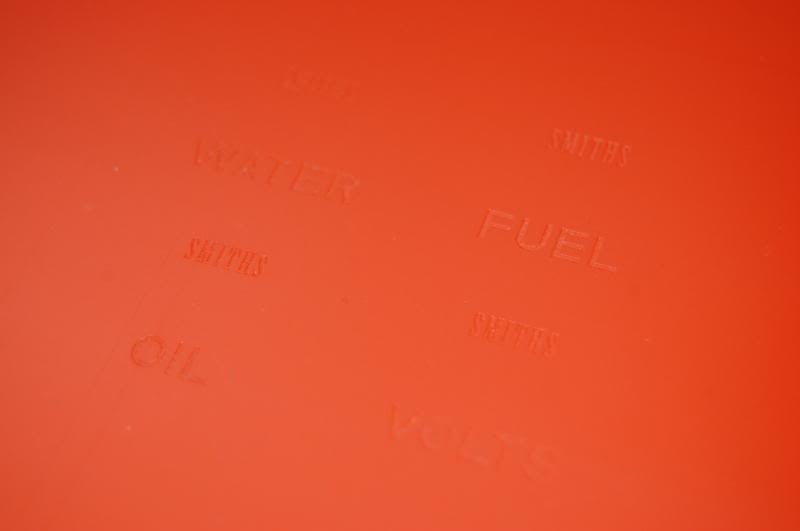
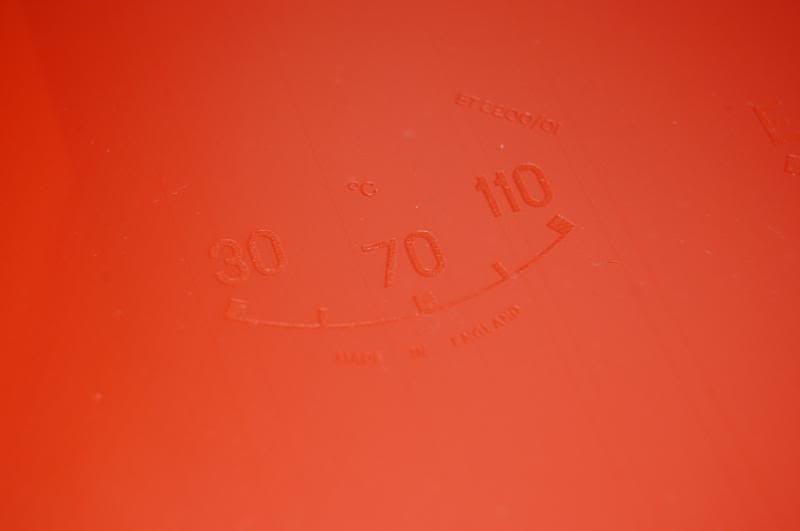
just to complete this tale, images of the artwork
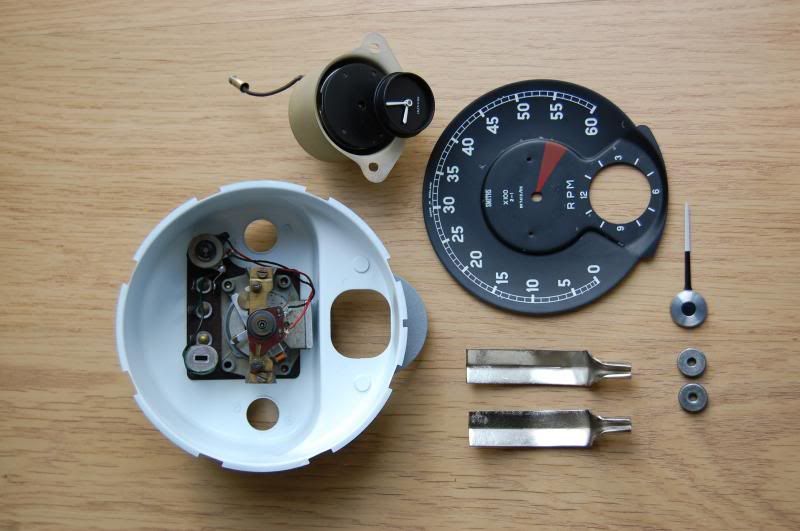
The main dials had fared much better and once disassembled the inner faces were just gently cleaned, the bezels stripped and painted with new O ring gaskets and the fixings stripped and re-plated. The glass on the tachometer was cracked and the fingers of the original clock damaged and rusty, plus the silver inner disc holding the needle was damaged so another period tacho was sourced which provided a good glass and disc plus new clock innards, which were transferred into the lovely early style brass case
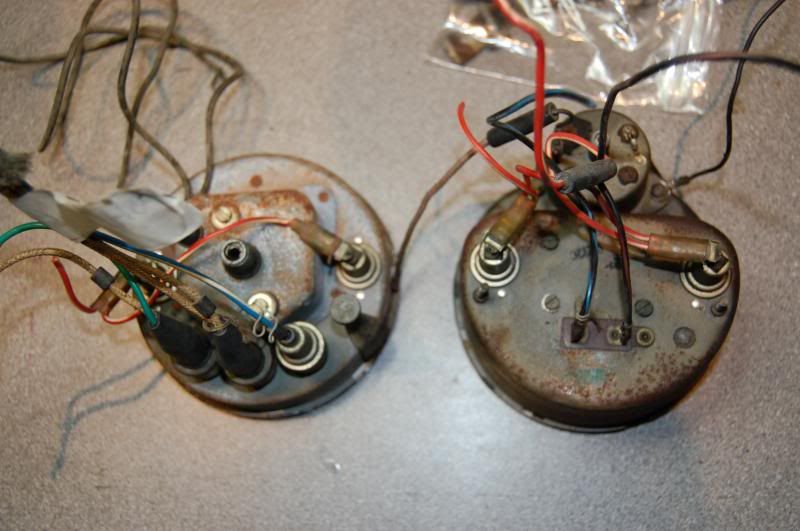
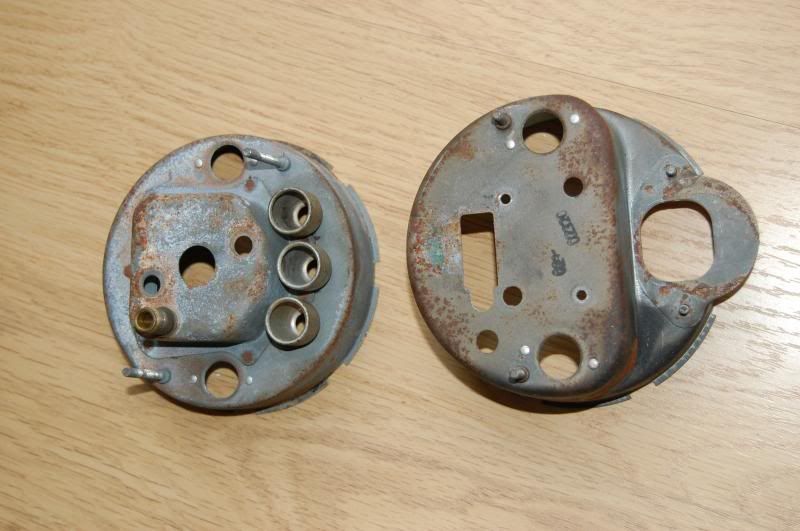
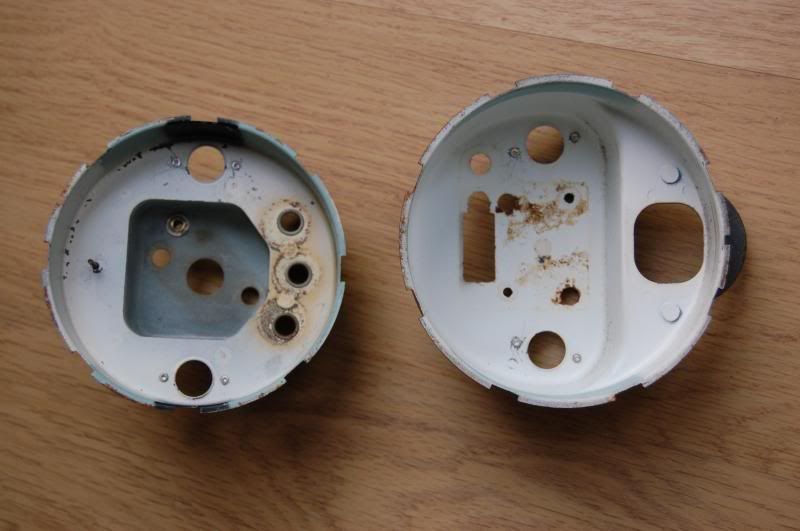
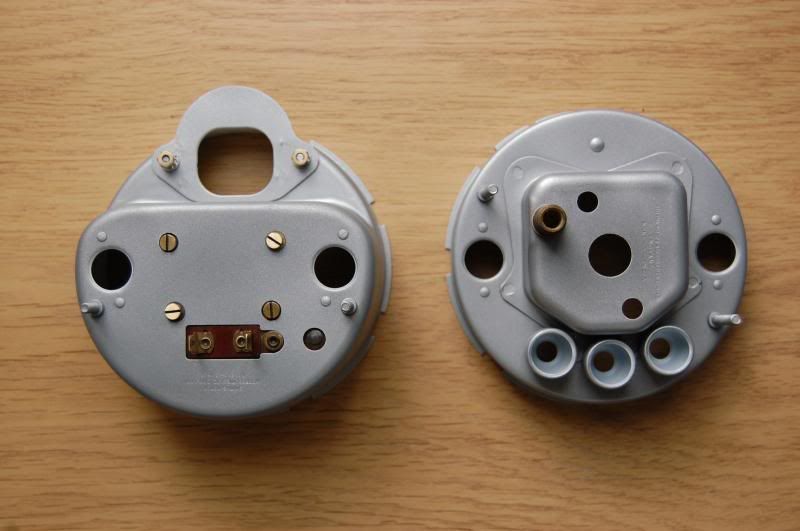

To improve the night time illumination, with all the dials, I chose to media blast the entire cases, painting the inside with 2 full coats of gloss white and the outsides silver
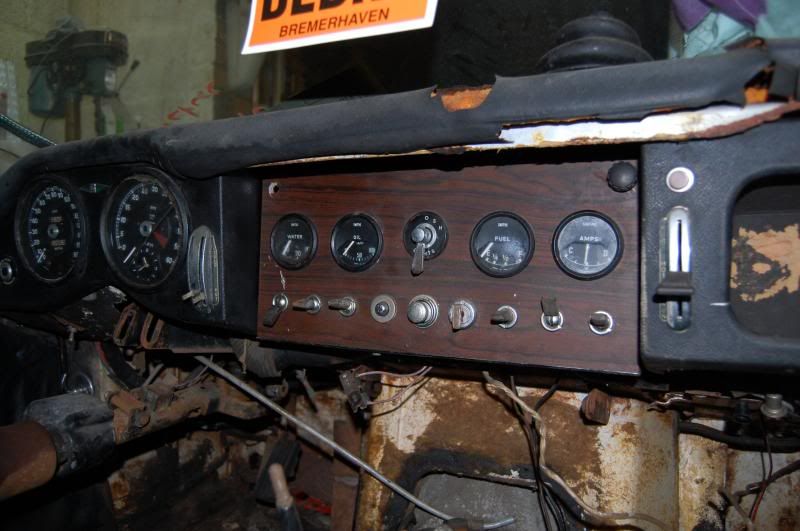
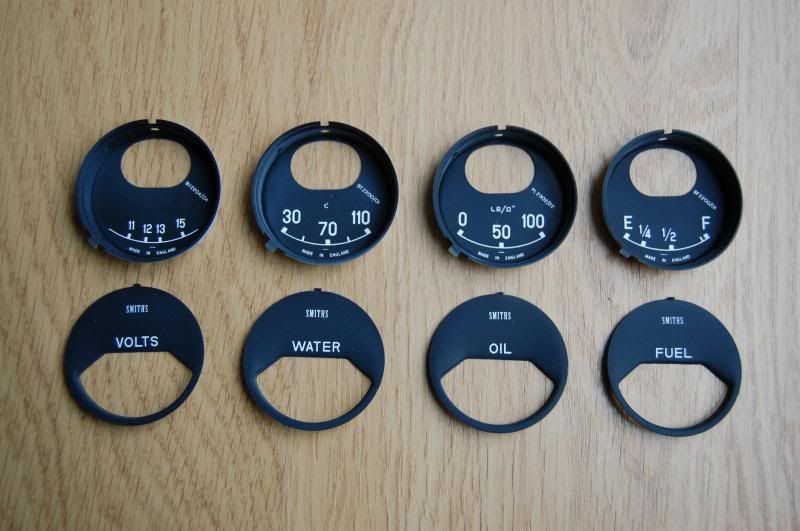
and the last shot is the dials in the dash surrounds….the old surrounds were actually in great condition, showing the pencil markings on the rear confirming interior colour and body number, these I will keep in case the car has to revert to LHD at any time. Unlike a 911 it is incredibly straightforward to hand the cars….they ran down the production line reverting from left hand to right hand so it had to be
With new metal fascia’s and correct period textured vinyl they were soon transformed and together with the original cross hatched aluminium fascia cleaned, including some markings, which maintains a certain patina completed that task


since these photographs were taken I finally restored some of the individual toggle switches, (use those fat indelible black magic markers, 2 layers of that, hand polished on a soft cloth and it has the look of old plastic and reinstated supplementary switches and controls which had to be re chromed
the last elements in this initial burst of enthusiasm were the steering rack and heater box.
Finding a genuine early RHD rack is not easy, and if available go for crazy money….certainly due to the demand for exchanging LHD to RHD I this country outstripping supply. In the end
I located a later 4.2 model probably from the last few months of production in 1971, the benefit of this being it had one less tooth on the main spindle (7 not

so assuming I put slightly wider tyres on the car )205 section compared to 185) it will handle the heavier steering better as it is a slower rack so less force needed
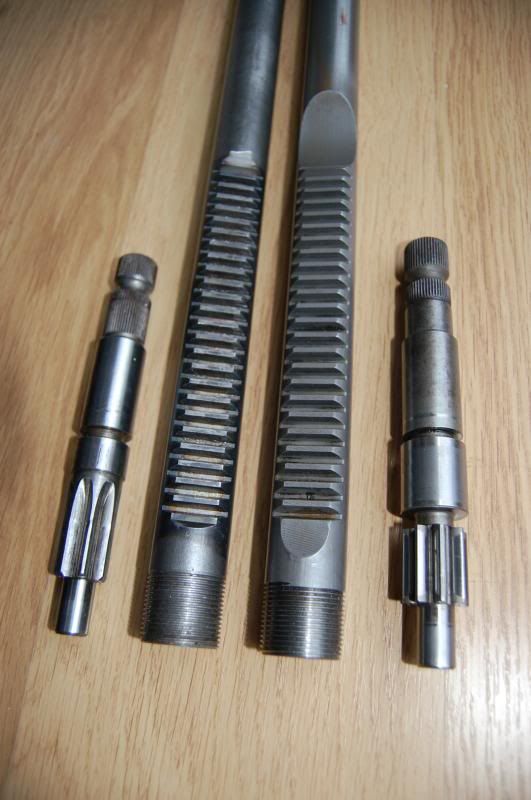
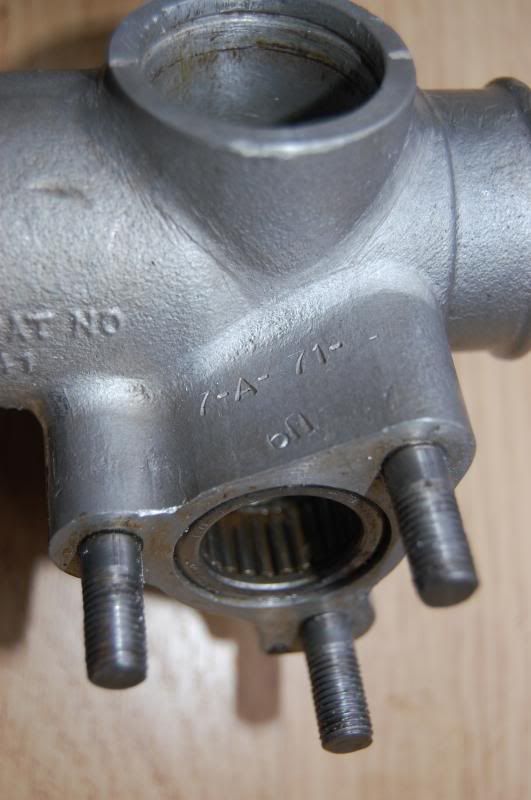
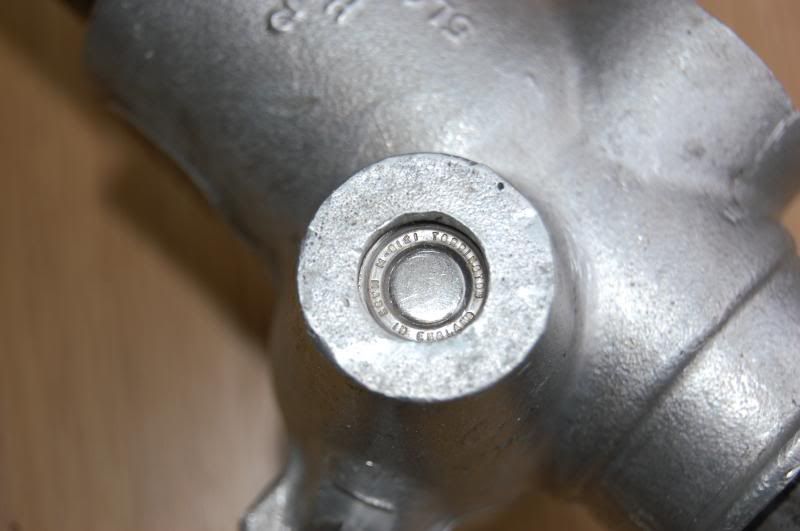
note these lovely little details with stamped names of companies, a long lost art, which began to peter out during the early 1960's....
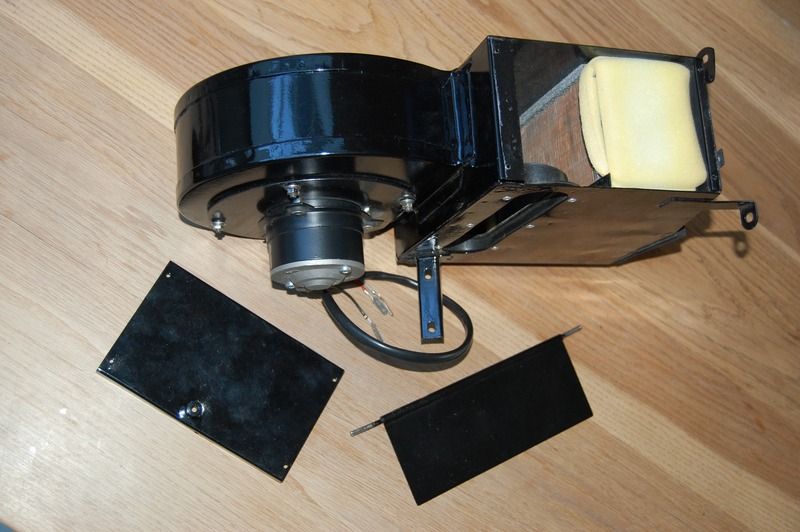
The heater is a straightforward process, but one which included another upgrade, primarily as the old motor was damaged and the drum bladed fan known to be poor in design. The MGB forum has been offering these upgraded motors for a few years, and luckily for us E Type owners it is built for our heater too, probably the only thing I will ever procure at a reasonable cost for this car, thank you MG !
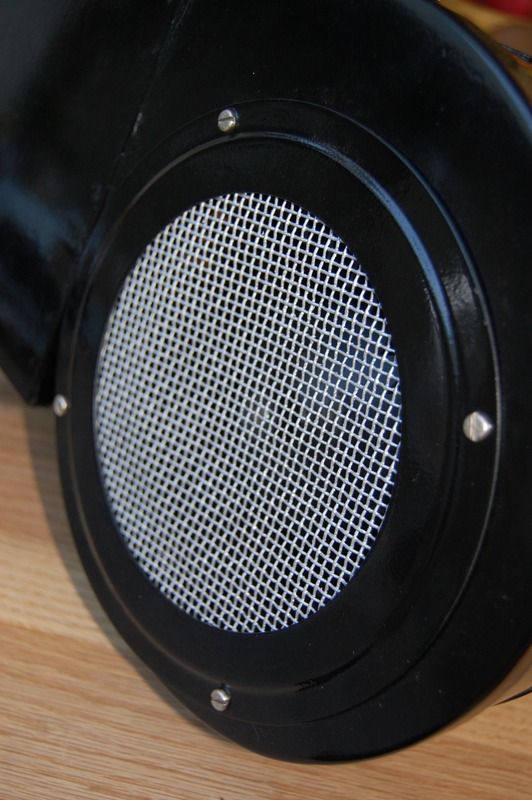
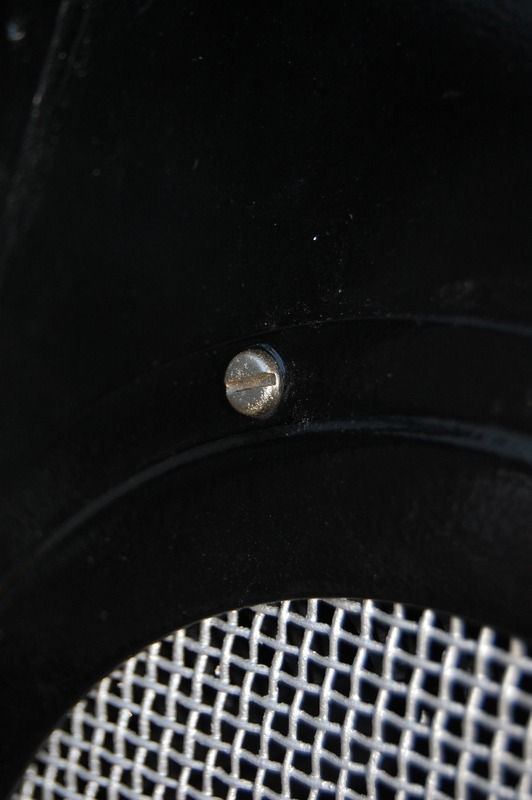
note correct silver colour to upper intake mesh, and correct radial alignment of newly nickel plated screws....standards must be maintained....

thanks for looking…more soon….


