Page 2 of 9
Posted: Wed Apr 20, 2011 12:16 pm
by pht9
dragonfly wrote:Great project, I look forward to following your development of the car.
Another vote for posting on IB too. There was a discussion about your donor when it was for sale some time ago, so they'd be v interested to see the next chapter of its story
Edit: The thread with some history of the car is here:
http://www.impactbumpers.com/forum/inde ... topic=2296
Thank you for the heads up on the car, yes it was the green car that Bertroex described
The lack of official RUF paperwork, and early history was a factor in my decision to use it as a base for a rally car, rather than a RUF restoration, as truly the investment to have restored it would not have been worthwhile unless it was mothballed for many years, and I like to enjoy my cars

Definately provides impetus to post this build also on IB, just need some spare hours !!
Posted: Wed Apr 20, 2011 12:22 pm
by pht9
Bruce M wrote:Perhaps as a nod to its history you could keep the Ruf badge on the bonnet.
I have thought about this, but it is no longer a RUF car, its a Tech 9 car !, had it been an original RUF chassis number, fully documented, then maybe I would agree to keep the RUF heritage, but the only parts carried over from the original RUF conversion, will be the brakes and LSD, which were OE Porsche parts anyway....
I will incorporate though some detail items in RUF 'Irish Green' just for a bit of provenance, not sure what yet, was thinking wheel centres and some detail striping on the body..... bit of a way to go yet though !

Posted: Thu Apr 21, 2011 11:18 pm
by pht9
some further updates
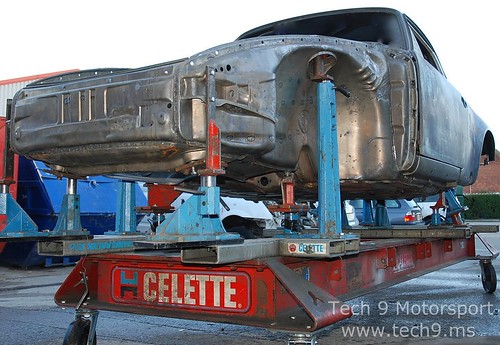
it is vitally important to ensure that 33 years of service has not affected the factory dimensions of the chassis, as any further work from this point will be wasted if there are any variances on the suspension mounting points
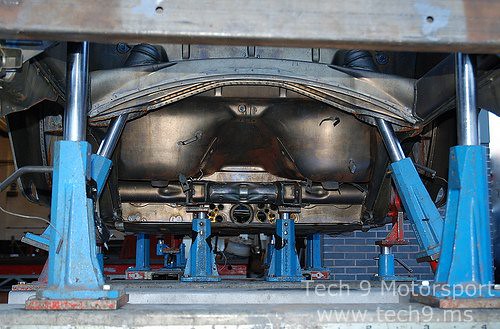
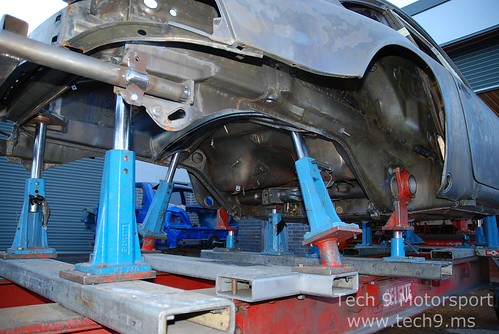
the chassis was placed onto a celette chassis jig, and fortunately it sat perfectly with no deviation in any of the points.
the jig also acts as a very stable platform to then conduct the strengthening and other modifications that are made to the chassis for its future motorsport use
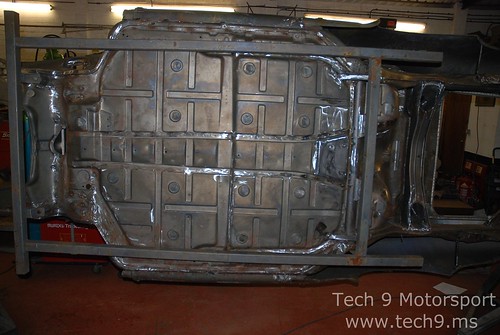
all seams have been welded, to improve the structural strength and torsional rigidity. The surface preparation with the acid dip has given us the perfect surface to enable correct weld penetration, here are some pictures that show the process involved.
Posted: Mon Apr 25, 2011 9:22 pm
by murph2309
Hi Phil - Is this the car that my old MFI is going into? Looking forward to seeing this take shape.
All the best.
R
Posted: Thu Apr 28, 2011 3:35 pm
by pht9
Richard,
Yes, it certainly is !
The '005' pump that you supplied, was the perfect donor for my 3.0 RSR spec pump, it looks a bit different now !
The engine build section will be updated, once we get all the chassis detail completed


Posted: Thu Apr 28, 2011 5:37 pm
by murph2309
A bit different! Nice job, it looks great, what spec changes did they make from its former guise?

Posted: Thu Apr 28, 2011 11:17 pm
by pht9
Apart from the visual changes, it has been recalibrated to RSR specification, to suit a 3.0 engine
Lots to do yet in terms of the engine build, but will post more about this when it starts to come together
Posted: Fri Apr 29, 2011 12:54 pm
by pht9
some further pictures of the chassis strengthening and rollcage installation.
a Custom Cages (kit of parts supplied) T45 rollcage was used, 45mm main hoops with 40mm diagonals, braces and door bars.
Built to FIA appendix K regulations for the period, it was allowed to install some extra bracing bars, but I opted to keep to a minimal design to keep the weight as low as possible, plus with all the chassis strengthening and seam welding that we have done, I am sure that we have very good torsional stiffness
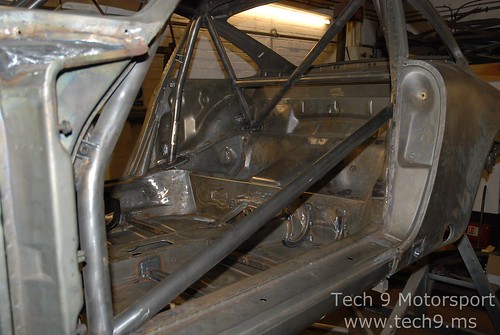
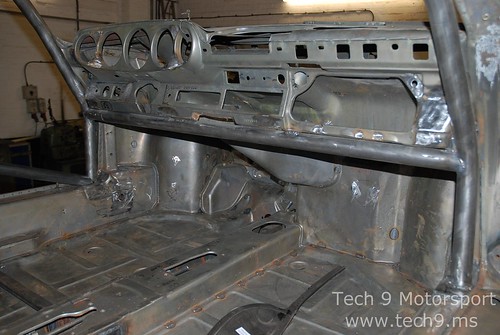
A good shot that shows the front inner wing strengthening around the area where the steering arm exits the chassis, and also plating to the upper suspension mounting

Posted: Fri Apr 29, 2011 1:00 pm
by pht9
working on the chassis on a rotisserie certainly makes easy access for all the work, I hope this is the only time I get this view !

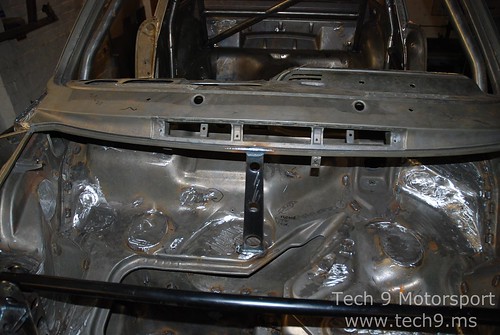
the scuttle area proved very time consuming, I want the bulkhead area to be free from all the standard holes used for the heating system and loom routing. As we will use a bespoke wiring harness and no heating system, the area can be cleaned up.
We also fabricated a scuttle brace which is fully welded, as this area can flex, it replaces the factory bolt-in version.
Posted: Fri Apr 29, 2011 1:45 pm
by 911hillclimber
Truely ace job.
Can't get over the condition of this shell, just look at the floor.
Have you done ANY repairs to the usual areas?
Great pics, keep them coming please.
Graham
Posted: Fri Apr 29, 2011 4:52 pm
by pht9
911hillclimber wrote:Truely ace job.
Can't get over the condition of this shell, just look at the floor.
Have you done ANY repairs to the usual areas?
Great pics, keep them coming please.
Graham
I guess that most of the restoration and rebuilds on here are pre '76 which means that they are non-galvanised chassis.
This was one of the factors that lead me to build a pre '81 car, as the strength of a galvanised chassis should be superior to an early chassis, unless a comprehensive rebuild was undertaken.
I agree the shell is in immaculate condition, the only areas of corrosion were the door lock jamb sections, at the upper and lower edges, see here

but this corrosion is easily rectified with new panels available from Porsche.
Posted: Sun May 01, 2011 9:34 am
by pht9
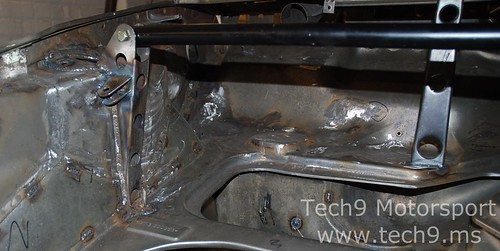
This picture shows the mounting brackets for the plumbed-in fire extinguisher that will be fitted.
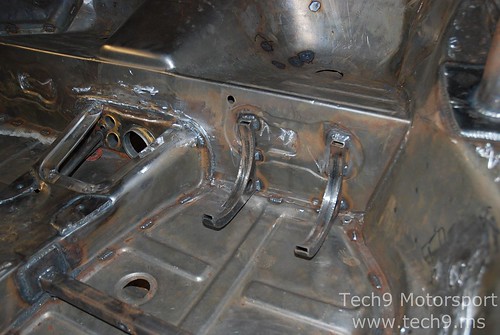
The seat mounting rails have been welded in to accept a pair of Recaro race seats. I got the mountings as low as possible into the chassis, the seat side mount brackets, then bolt directly onto the rails, this gives a good rigid mounting, seat can be moved fore and aft but will require unbolting.
For competition use, I prefer this method, as seat runners offer too much flex, and when I drive I get more 'feel' in terms of what the car is doing with a rigid seat mount.
The front strut brace has the mountings welded into the turrets, with a bolt-in bar.
Posted: Tue May 03, 2011 8:50 pm
by pht9
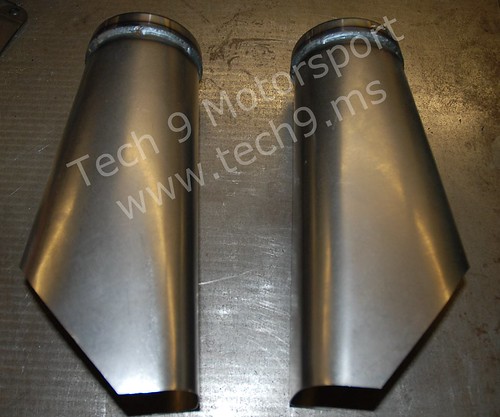
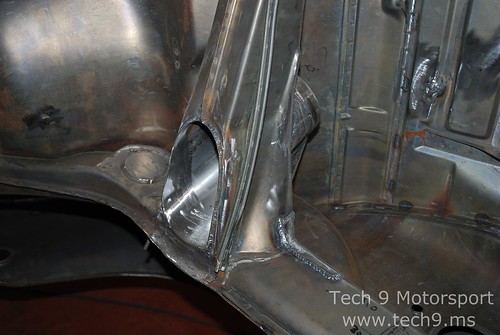
It is planned to run coilover suspension so the rear suspension turrets require modification. This is required to give clearance of the increased diameter of the rear damper with the coil spring fitted. The upper area is also strengthened, as the loadings on this part of the chassis will increase due to the new suspension layout.
I wanted to keep the modifications to the correct 'period' style like the RSR, with 100mm turrets, so first step is to graft in the complete turret housing into the rear chassis beam
Here is a picture that shows the bare turrets before installation
Here, the completed installation

Posted: Thu May 05, 2011 9:51 pm
by pht9
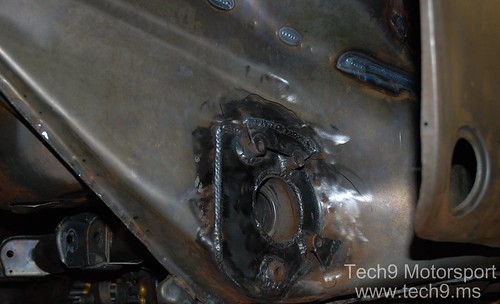
Detail shot of the strengthening to the engine mounting location
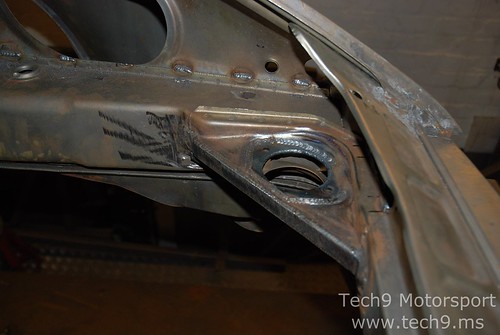
Torsion bar reinforcement
Posted: Thu May 05, 2011 10:23 pm
by 911hillclimber
Someone knows how to TIG weld there!
Still cannot get over the shell's condition.
Great to see this kind of work, please keep it coming!
Graham.