Part 25
Finally…….
Just build it……
Sounds simple and straight forward doesn’t it…..hymmmmm….as I have been discovering and reminded during the last year….as it is almost 12 months since the painted shell returned to me….months of looking forward to weekends of pure car building….supplemented by week day evenings of more of the same….spoilt only by the seemingly constant feeling that this car is fighting me every single part of the journey
I can safely say that there has not been a single component that has not ended me to make adjustments….or worse still realising access for the next component means I have too take things apart as their sequence of building is prescriptive …but not at all apparent…….and all this whilst for the major part being in the cab which is tiny and restricted in terms of access….I should have kept count….1,000….2,000 times I have been in and out…or underneath needing another tool….dropping an impossible awkward screw or nut into a crevice…or just under the car…scraping knuckles…elbows…head…knees along the way
If there is a Zen attitude towards this process I must have unknowingly adopted it….sure…3 counts of loosing it….cursing the thing as a simple task was thwarted by some predicable ill fitting reproduction component or impossibly demanding access…..…how did jaguar ever make any money…the entire car is built in-situ…..
However………at the end of every weekend I have only wished it were longer and I could continue…its a very slow process I am finding out…but I am truly looking forward to seeing it complete…and driving it…it’s like a female that you can’t get enough of…who is demanding and unpredictable at the same time…but you know its the right thing to spend all you’re time with…
The colour has now fully grown on me….anyone and everyone who sees the car in the flesh or on photos says they love the colour….what a great colour……so I guess they must be right….
So where did I start…..?…..and how did I continue….. and how do I want to tell the story….previoius threads have been the normal chronological sequence of gradual assembly….but with this one it will be more a series of individual parts of the car….as each one has if money small….and individual story
Windscreen Wiper
Seemingly as every car I have built does….the windscreen wiper assembly…..and the first case of me realising that when you modify a car you encounter unforeseen obstacles….as I upgraded the single speed motor that the XK120 came with to a modern 2 speed device…which as a kit from Guy Broad came with upgraded spindle mounts…new copper tube guides and a new push/pull cable
The problems were threefold….
The external spindles are a much more contemporary design….not the beautifully slim original type…sure they grip the wiper blades more effectively having the detail….but they are bigger than the original openings…so the original formed gasket would no longer work…
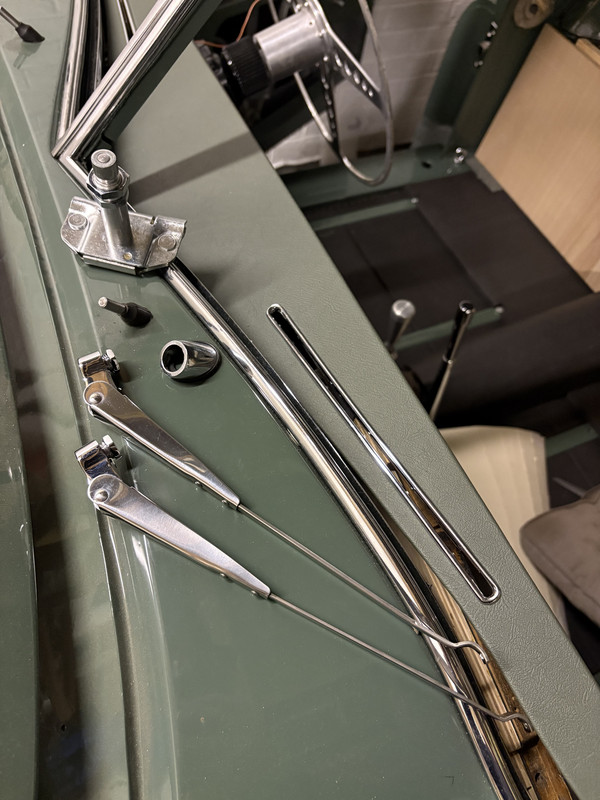
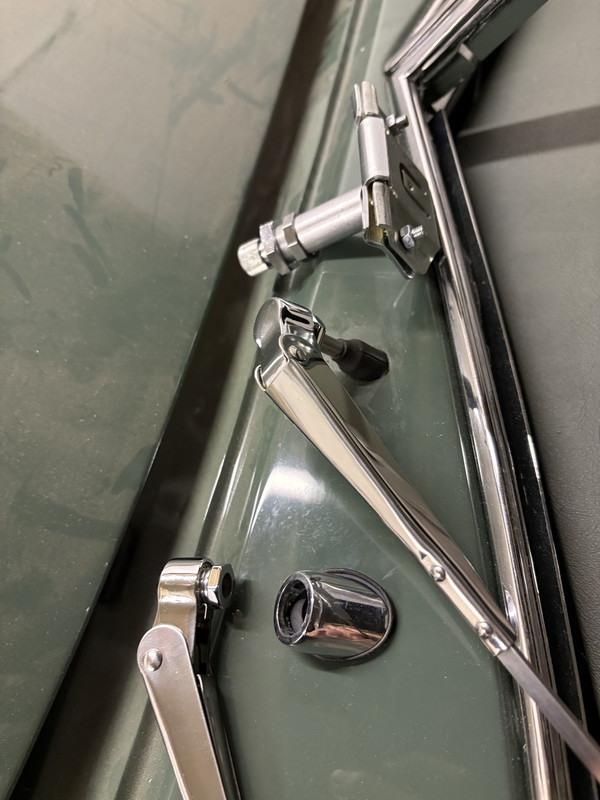
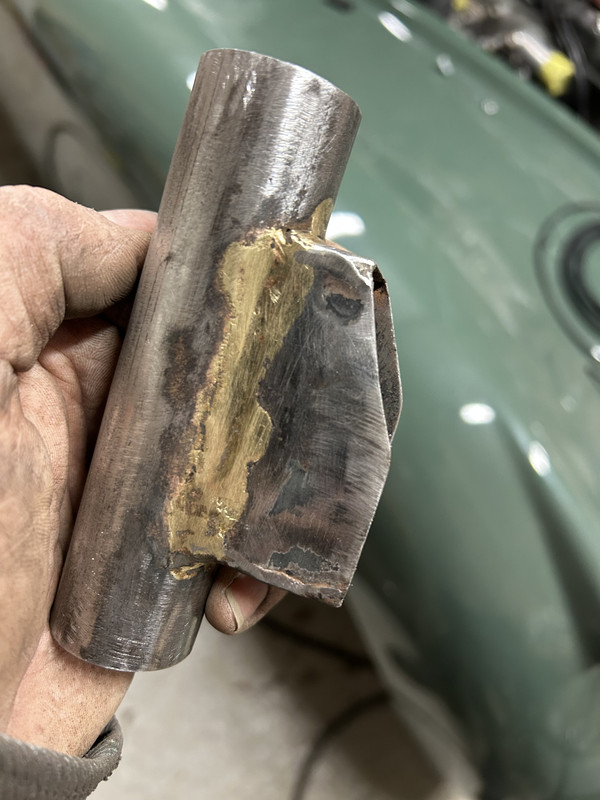
The new motor is bigger and was only supplied with a cheap U shaped clamp which looked dreadful….so out with the metalworking tools to add metal to the original bracket so it looked more original and less of an afterthought
The original serrated inner pull/push mechanism had a specially shaped end terminal to lock into the original motor…so this had to be modified so it would fit into the new motor…but the copper pipes supplied with were to act as guides were no longer useful….as I wasn’t using the newly supplied spindles….
So the end result is original pull/push cable…plus housing…original external spindles and a new motor…noted to self…try not to be so eager to buy upgrades for the sake of it
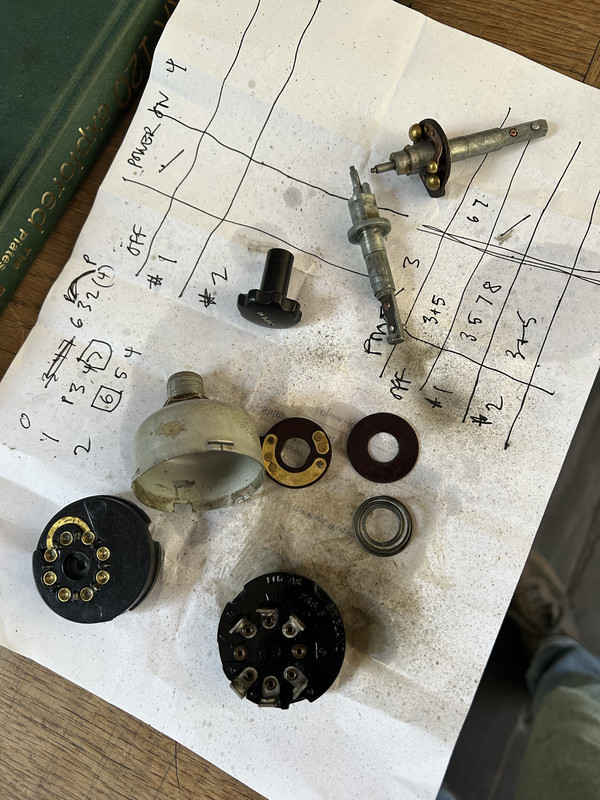
As for the wiring to 2 speed that was another test of patience….new switches are a crazy price, and anyway I wanted to keep as many of the old dials/switches and so on…so I can canabalised a couple of second hand Lucas switches and with the assistance of a small fabricated jumper cable I was able to modify my original switch (with donor innards) to give 2 positions for power…..I was especially proud of myself that day as it was driving me potty trying to work out which terminals received power in what combination..the jumper cable was such a simple solution…
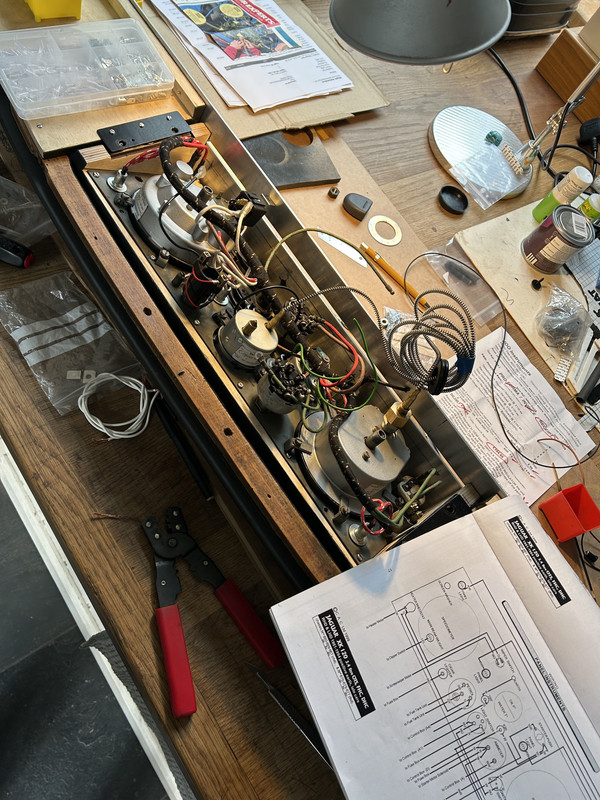
So what could have been a few hours work developed into days of work…..if I conservatively said it took 4 times longer….that gives you an idea of the typical rate of progress generally for all of this fitting out which was to ensue…..perhaps this picture might help that message to sink home….this is about one of the may times i was attempting to fit wiring onto and into the dash…(more on that subject next….)..tedious and trying are the understatement of the millennia….
…and how did I continue….well in a randomly organised sequence of impulsive decisions….otherwise known as doing what I felt most inclined to do at any time I felt the impulse
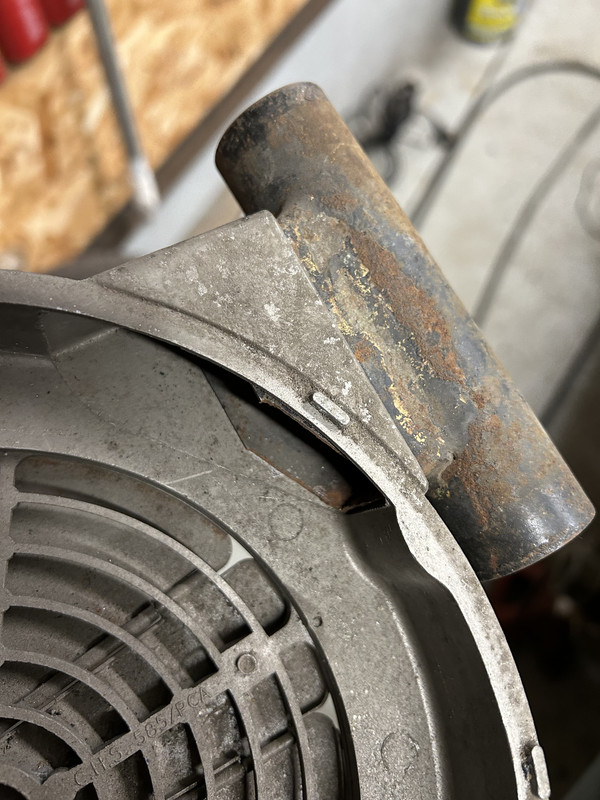
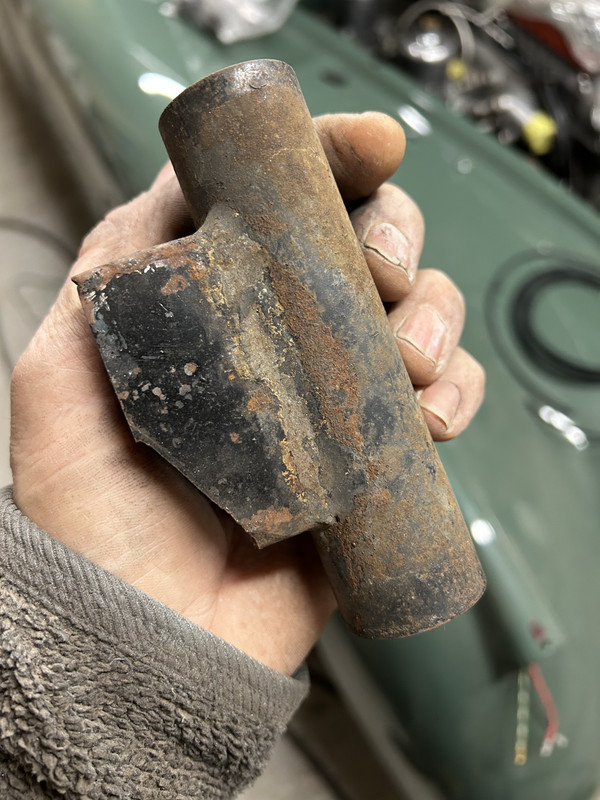
Heater
The heater on a vintage Jaguar is probably one of the most useless and least relevant components in the car…..why you may ask…and so I will tell you
250kg of cast iron, aluminium and various pieces of rapidly rotating straight 6 machinery anywhere between 800 and 5,500 rpm in harmony with an antique 4 speed Moss box generates enough heat to melt as small polar ice cap…so the idea the driver needs to increase that upward creation of temperature is bordering on insanity…however the circular heater is a lovely looking piece of vintage kit so I had to respond accordingly and improve it….
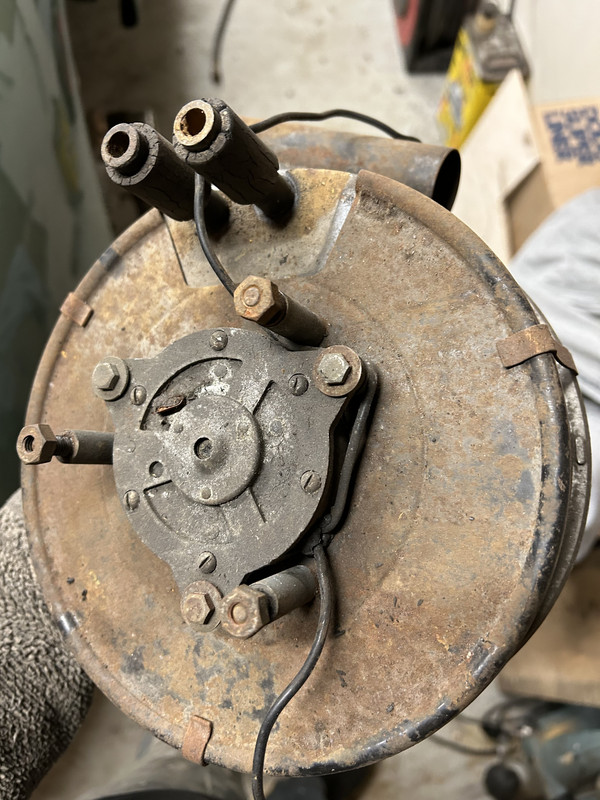
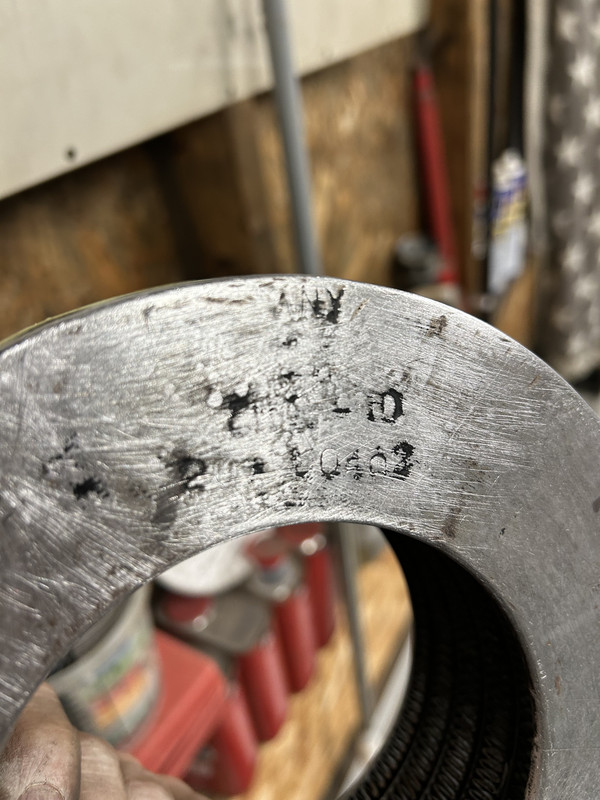
And whilst cleaning it up I came across a collection of markings….interesting but never did quite establish what they were…..
The perfectly workmanlike brazing of components is quite fit for purpose…but was not fit for my eyes…despite the fact that once installed it is totally impossible to notice….furthermore my efforts to improve quality had absolutely zero influence on airflow….
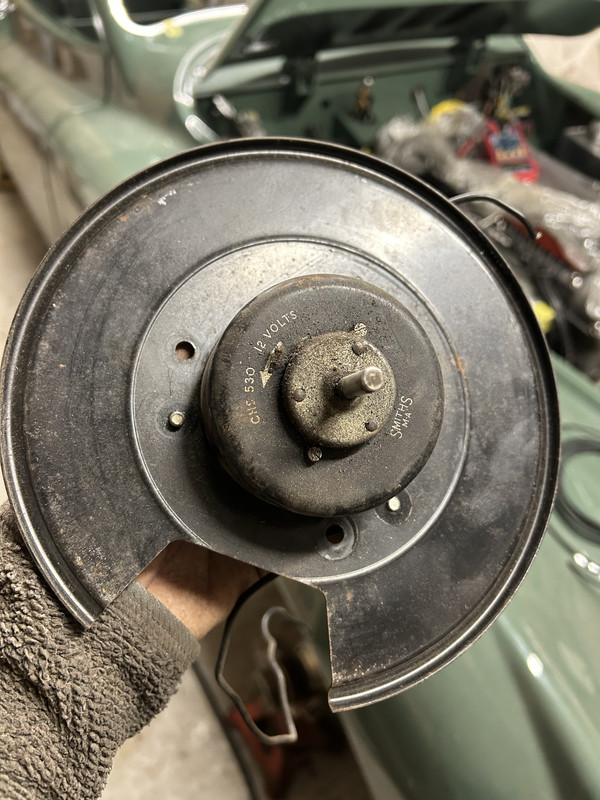
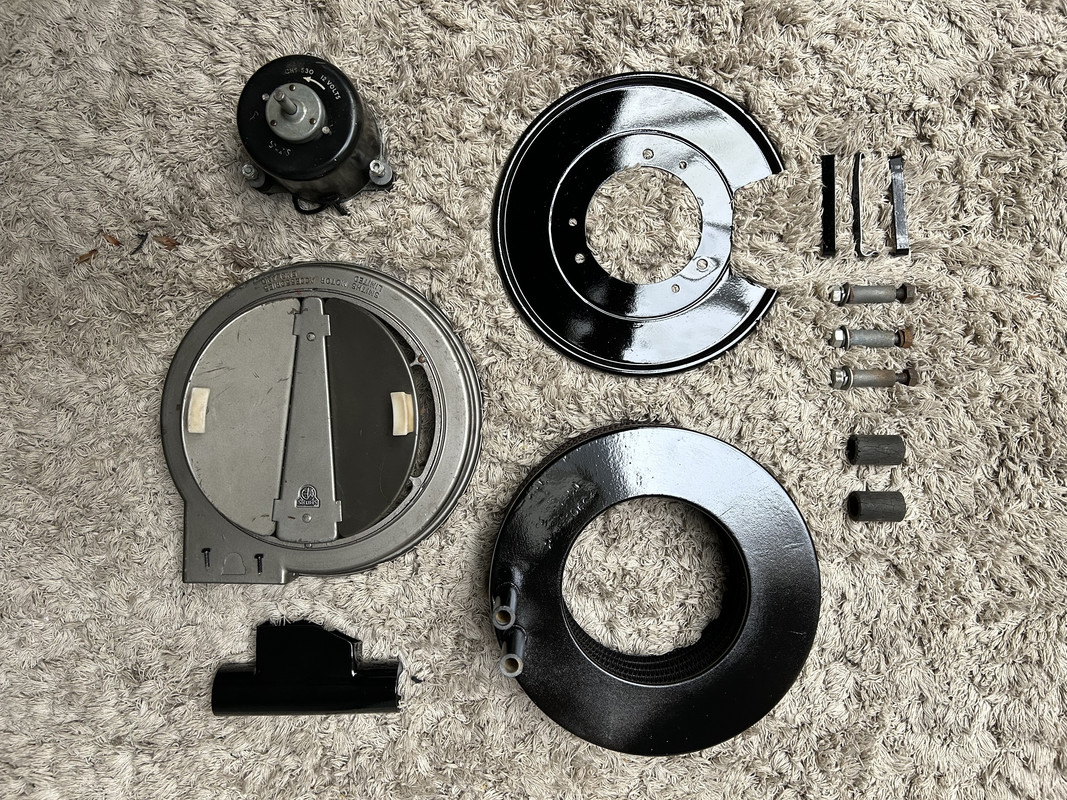
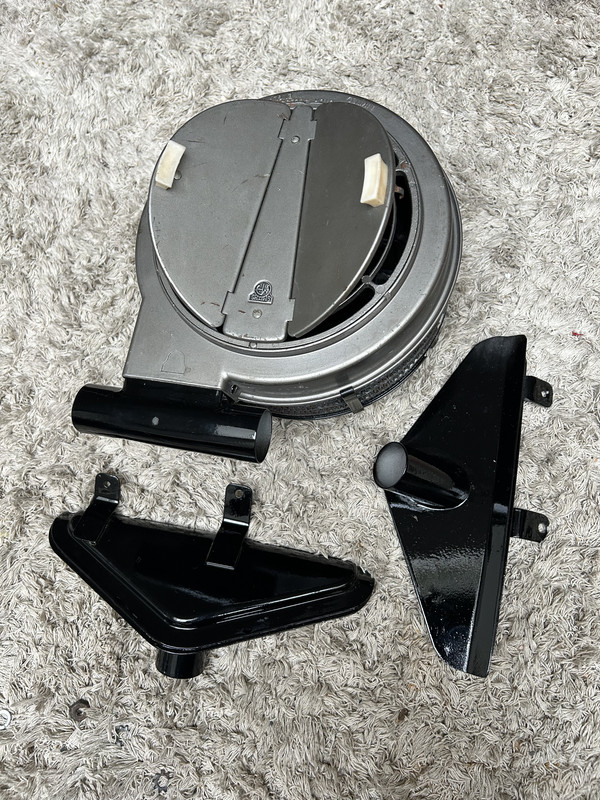
Made me feel better though…..
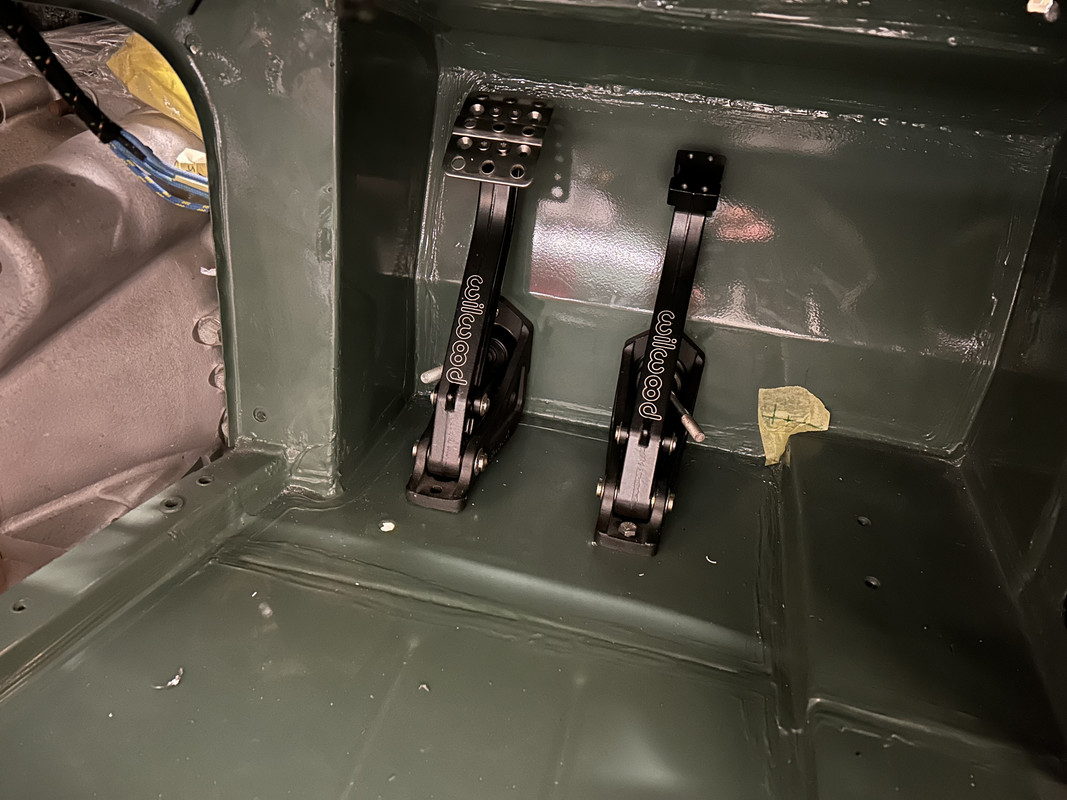
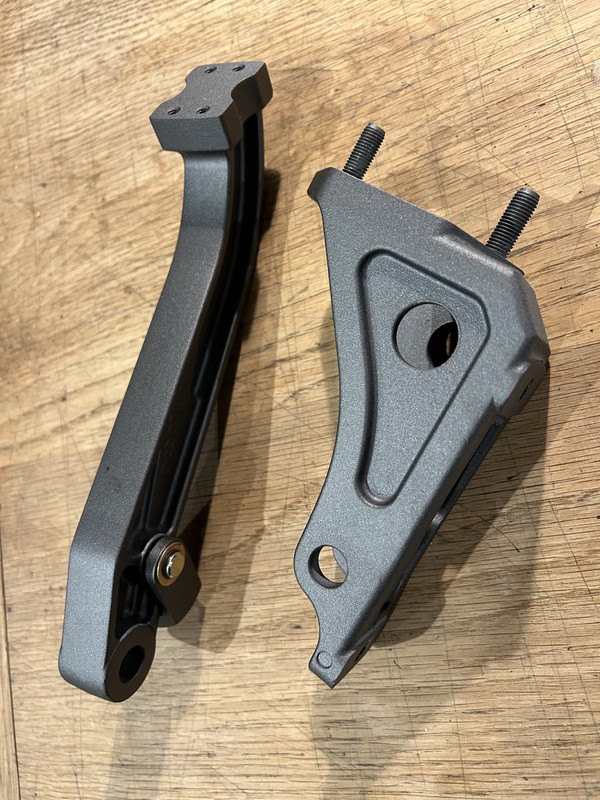
Pedals
In order to attempt some degree of control over the forward direction of travel I decided very early on in the build that the original Heath Robinson affair known as the pedal assembly needed a fundamental re-think….so a modern pedal box assembly from Willwood was sourced….except this is my car….and a Jaguar at that….so the idea that a third party could have its brand identity included in this build was terminated instantly….as were the less than perfect seam mould marks on the pedal levers…..and whilst at it I altered the colour from a dull satin black to a more pleasing dull anthracite

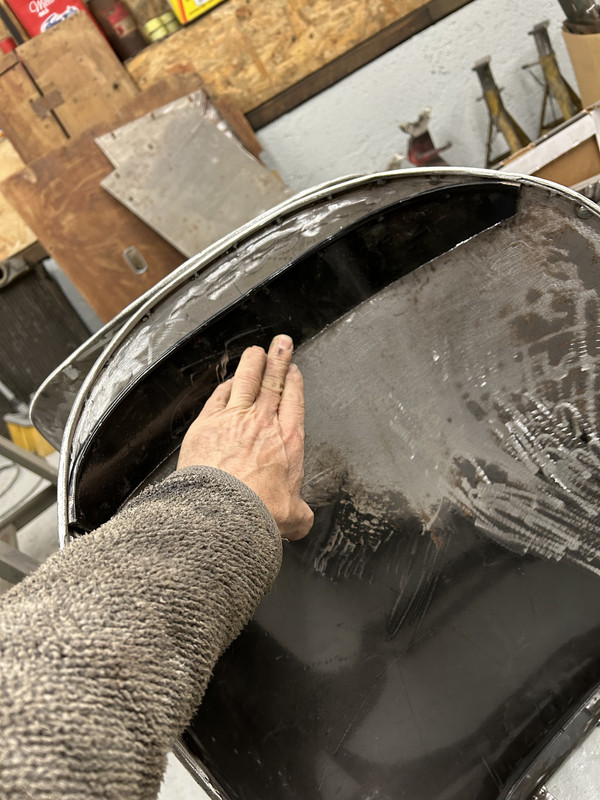
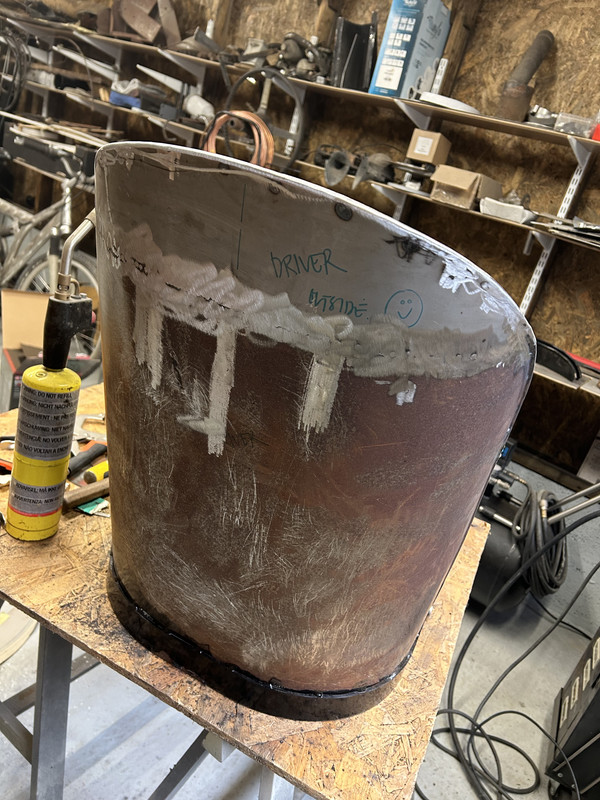
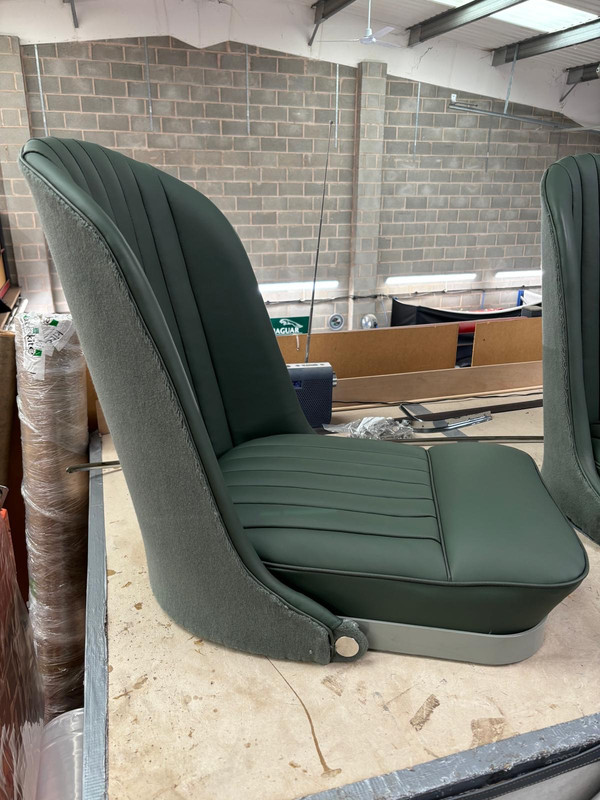
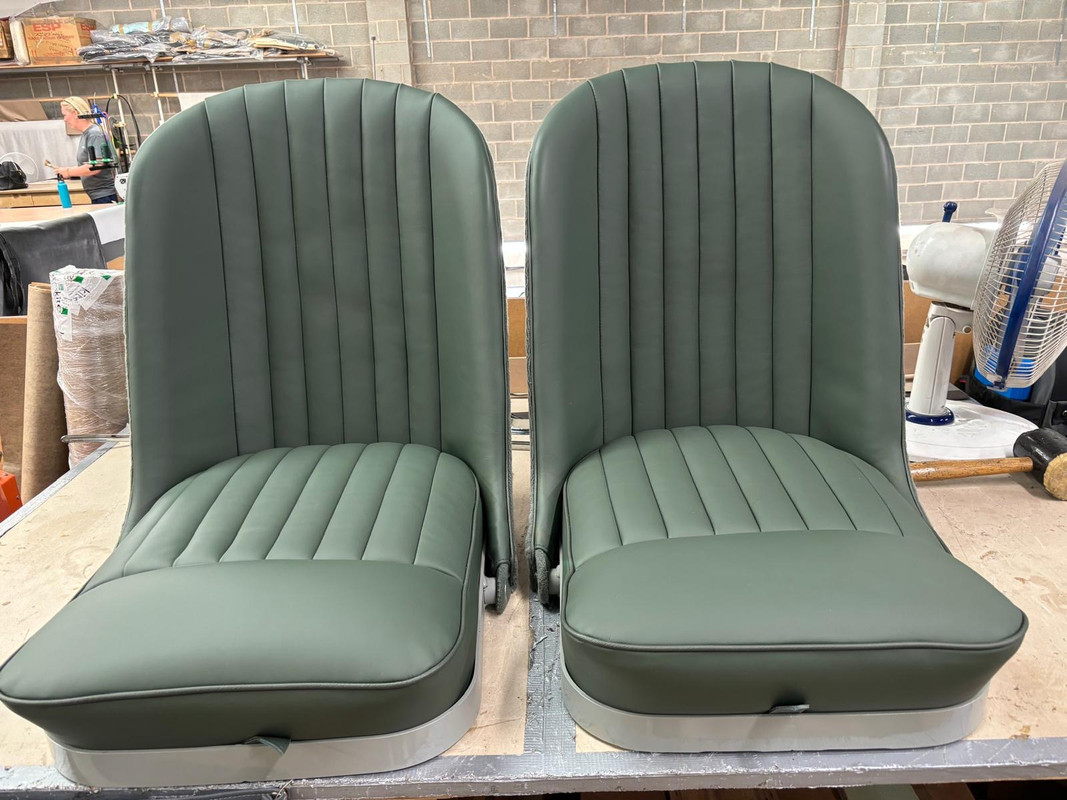
Seats
And lastly in this trilogy of overindulgence there was the pair of human supports…otherwise known as seats…..
On the basis that this was meant to be a gentleman’s driver of the period…then the soft bench like offering…beautiful yet more resembling of a sumptuous sofa had to be improved upon
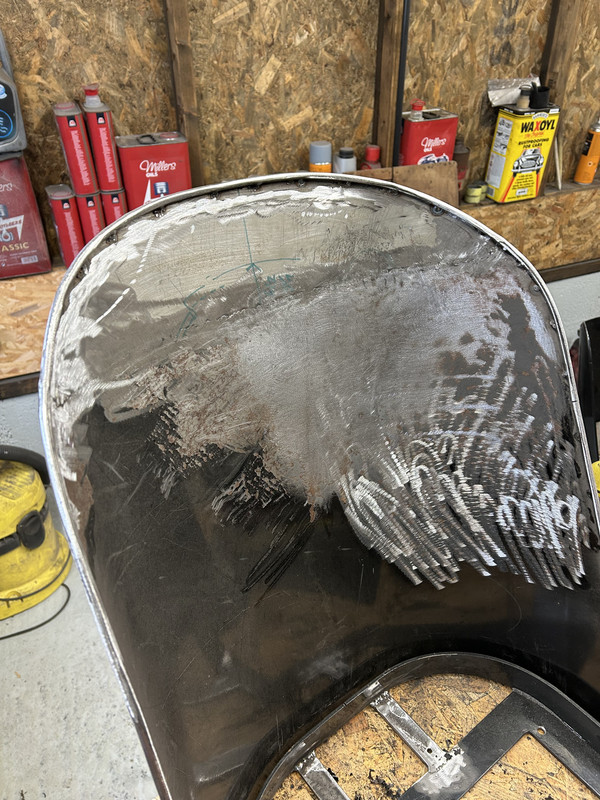
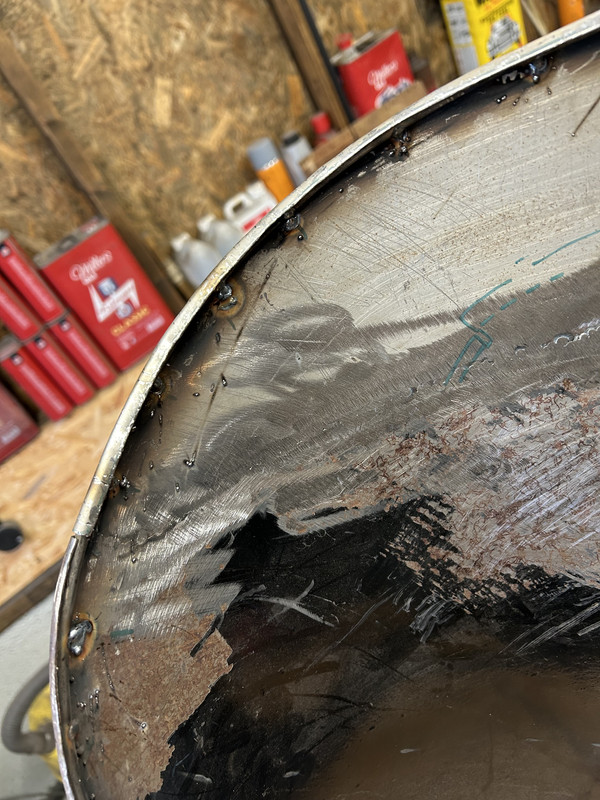
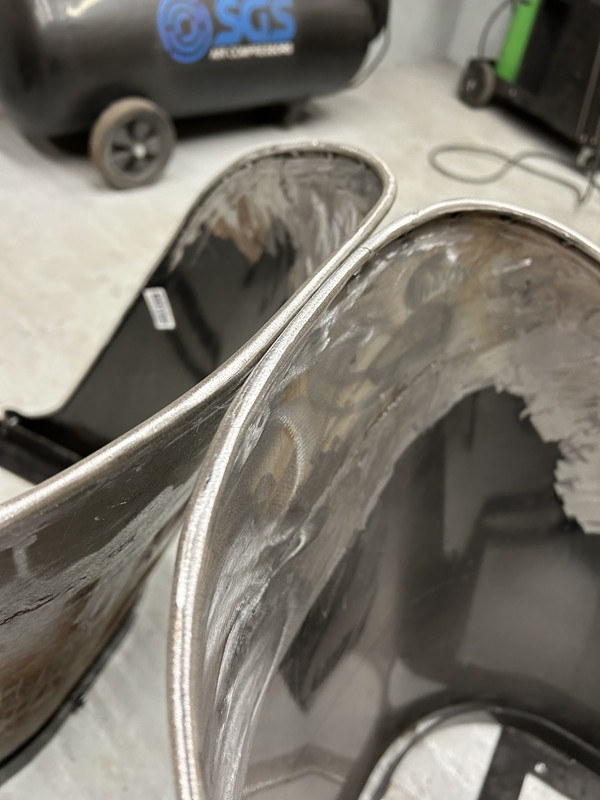
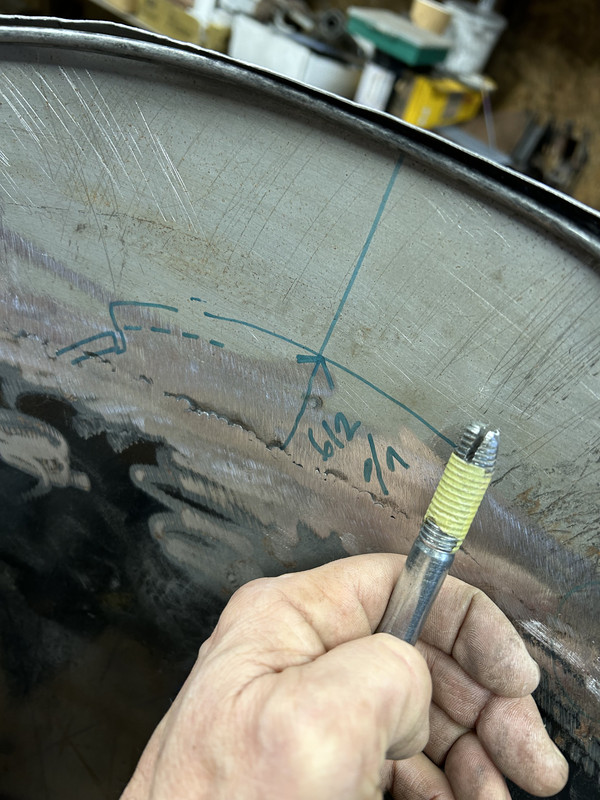
Bucket seat are easily available , however I didn’t like the shapes of the seat backs….the true buckets seats available had a pleasing curved upper silhouette..but the forward tilting ones did not….and I wanted a tilting seat….so I would be able to access the carefully crafted storage compartments behind the seats….so I was left with no choice….
Modify….
Which was a relatively simple affair and allowed me to create the profile I truly wanted….but that’s then came at a cost as the subsequent trimming became fully bespoke…requiring a bespoke pattern to be made…which required me to invest a deal more finance….
Such…dear reader is the price of individuality……….
These images show the difference in the profile…original in black in the first picture….which was a trial to get a matching shape for both seats…..but with the aid of a specially crafted tool allowed me to replicate the original rolled wire edge…
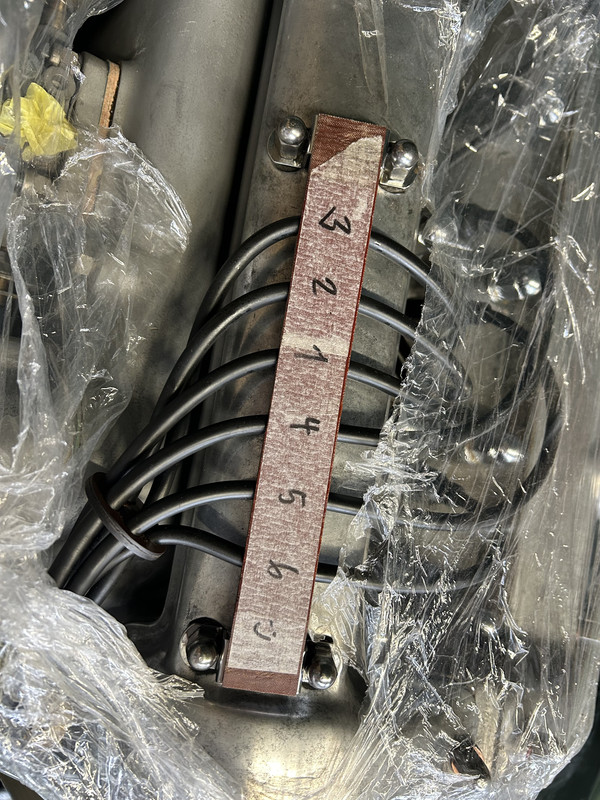
Oh….and one more piece of indulgence….the HT leads on an E Type run through a formed piece of coloured boasted….more substantial than pure cardboard…sometimes called millboard I believe…..I was the ported to use this…but the spacing of the cylinder head bolts is different on the 3.4 litre…so I bought this…..
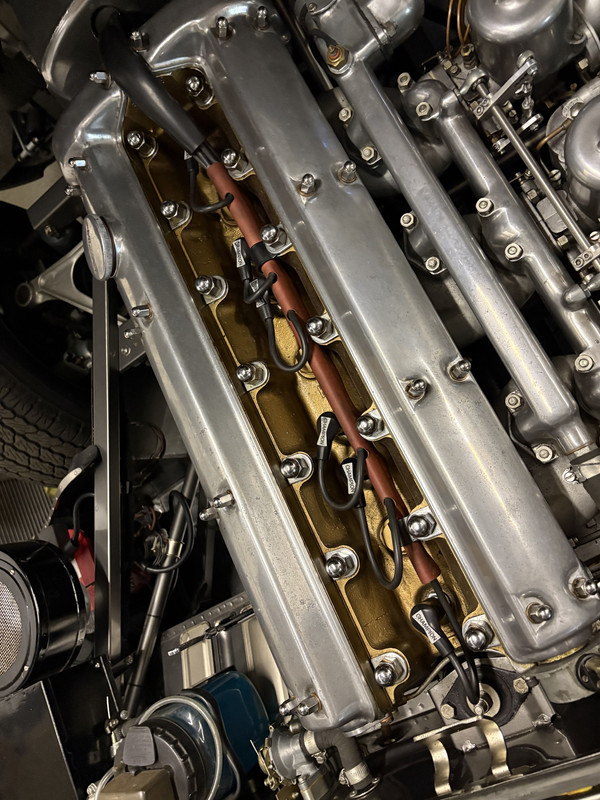
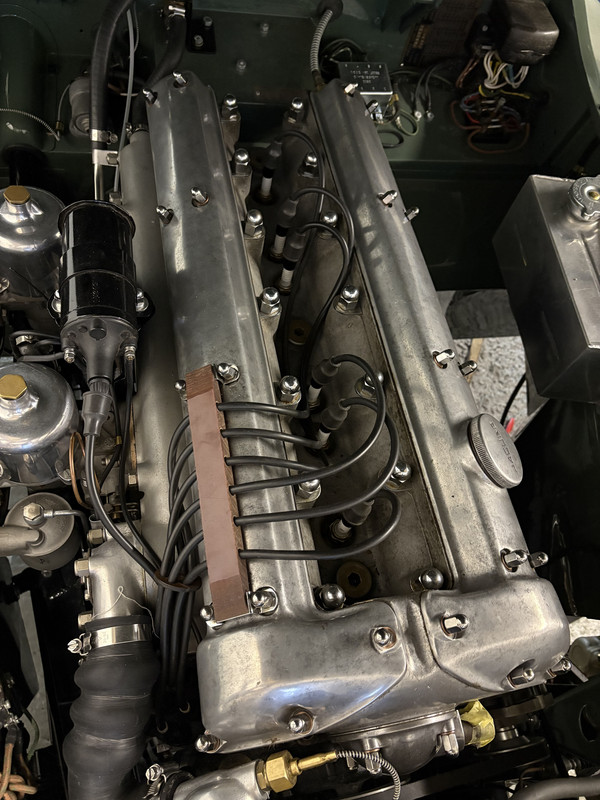
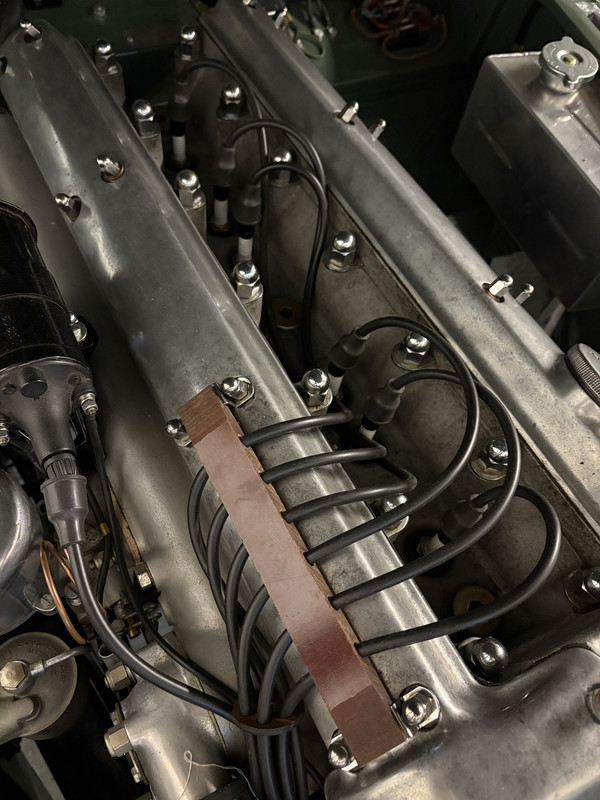

But of course then there is the question of how to distribute the HT leads….this resulted in a curious arrangement perhaps…but it did then arrange the leads perfectly in the valley of the head…..
Thanks for reading…..
 )…but then who said anything about