E Type 888330

The place to post images of your other cars.

Moderator: Bootsy

Post Reply
jtparr
DDK 1st, 2nd and 3rd for me!
Posts: 2356
Joined: Mon May 24, 2004 10:54 pm
Location: london/surrey

Re: E Type 888330

Post by jtparr »

I have certainly learnt a lot more about engines in the last couple of weeks…and more than anything the concept of repeatedly checking that fixings are tight and torqued up, and items installed the right way round…which to be honest I had to re-do twice


Getting the knack of the piston ring compressor tool took a while and multiple attempts to get them to pop into the bores….the lower oil ring is close to the point where the piston reduces in diameter so holding it, whilst stopping the rings from rotating around (they are all at 90 degrees to one another with 2 oil rings and 2 compression rings) whilst all lightly lubed up is a slippery business..and making sure they all faced the right way round

Image

The rear oil seal, which I mentioned I the last post to the crank was a pain as the first seal (white) was simply too fat…it ripped using the correct tool….second one (grey) I ordered was a different material specification and fitted easily….

Image


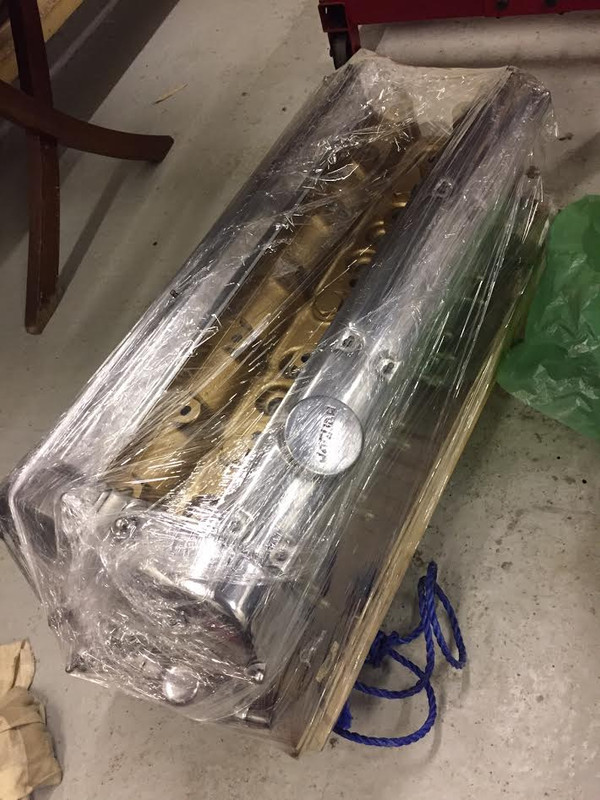
Not the first nor last time a new part doesn’t fit correctly…..


New oil pump has been fitted….a later pump design for the 4.2 series cars with a bigger capacity, and the original oil filter housing cleaned and reassembled...note the machined look of some of the casting which is my filing and hand sanding flat with set and dry to get a cleaner overall profile......note bolt heads tightened in a radial symmetry.....

Image

Image

Image

Image


The two double timing chains are held within a multi part cast aluminium housing which needed a full cleaning, all sprockets were changed as well as new

Image

Image

Image


Tensioning on the chain is by a single spring loaded mechanism on the main chain and an eccentric sprocket on the upper chains

Image

Image

Image


All installed and time for the front timing chain cover

Image

new (modern) oil seal

Image


then water pump and fan belt spring tensioner

Image


and a new set of head studs...note the black one is the larger locating dowel stud...(another re-use of old parts as the new one is too large a diameter and simply didn't fit in the recess in the block...!

Image


last image is off the top timing chains, as they sit waiting for the head and paired sprockets on the camshafts....and the silver bolt with multiple washers is a temporary bolt..I have mislaid the original GNK bolt and as I am fastidiously keeping all original fixings I am on the hunt for an original GKN headed bolt....5/16 diameter UNF thread 1 3/4"...not so easy to find....and they aren't made anymore....

Image

I forgot to order an O ring for the new oil pump so the sump is sitting waiting to be reunited next weekend....at which time I think I will take the block off the engine stand and complete assembly as it sits on the trolley..as its getting damn heavy.....but I haven't figured out how to do that last manoeuvre....!...


more in a week or so


thanks for looking
J
Last edited by jtparr on Sat Apr 14, 2018 6:14 pm, edited 1 time in total.
1974 2.7 Carrera
(full restoration. now as an RS Touring)
1963 3.8 E Type
( 11 years in the making…………………….)
1952. XK120…the next one ……….……..)
sladey
Nurse, I think I need some assistance
Posts: 9320
Joined: Sat Apr 23, 2005 9:08 pm
Location: Nottingham, UK

Re: E Type 888330

Post by sladey »

Fantastic stuff - thanks for sharing. When you're working on the engines I love that feeling as it goes from fear to realisation as to how it works to a (bit of) familiarity of how it goes together. Great stuff Mr P
The simple things you see are all complicated
I look pretty young but I'm just backdated yeah
User avatar
Darren65
Nurse, I think I need some assistance
Posts: 8161
Joined: Mon Dec 13, 2010 10:55 pm
Location: North Wiltshire
Contact:

Re: E Type 888330

Post by Darren65 »

Wonderful detailed posts JP great progress, you're a far braver man than I for taking this on and your work looks excellent 8)

Brilliant thread, thanks for sharing.
jtparr
DDK 1st, 2nd and 3rd for me!
Posts: 2356
Joined: Mon May 24, 2004 10:54 pm
Location: london/surrey

Re: E Type 888330

Post by jtparr »

I daresay installing the sump was and will remain about the easiest component on the car....prior to having it vapour blasted I sanded and filed the outer case to remove unwanted casting marks so it was arguably in better condition than the day it was first installed...and for god measure I sprayed it with a 2K clear lacquer which will keep it presentable for quite some time

the 2 main seals and either end o the crank were a god snug fit, and meant I had to gradually tighten the 26 or so bolts sequentially to draw it down smoothly onto the block......fingers crossed for a successful seal once I start her up in a year or so

Image

Image


this then allowed the further assembly of the crankshaft damper, which I had already had balanced, the aluminium fan belt pulley (which is detailed on the inner faces with the same gold paint used on the head) and the spring loaded fan belt tensioner

Image

Image


this then left me with a dilemma, which was how to now proceed....to take the engine of the stand before or after I installed the head....and in both cases how to do that......


the head had needed some remedial work....as is often the case the waterway passages were corroded, so SRS had them welded and ground back to form clean flat mating surfaces

Image

Image

I do love these old machine parts with their abundance of codes and serial numbers....I daresay these should tell me the date of manufacture for the head....

Image


I decided to install the head and then lift the entire engine off the stand....but at this point I also supported the cantilevered end of the engine on concrete blocks..cue assistant (son) as it was best with 2 pairs of hands...

I don't have any photos of this part, as I was so nervous about the block sitting up in the air only relying on gravity to stop it toppling off the blocks....suffice it to say we were both pretty reeived once it was lowered on to a bespoke timber trolley I had made up

Image

Image

Image

Image

Image


Nathaniel is 1.9m tall....so this gives you some idea of how big this engine is......


clutch and gearbox next.......
Last edited by jtparr on Sat Apr 14, 2018 6:16 pm, edited 1 time in total.
1974 2.7 Carrera
(full restoration. now as an RS Touring)
1963 3.8 E Type
( 11 years in the making…………………….)
1952. XK120…the next one ……….……..)
User avatar
Bootsy
Site admin and the Boss
Posts: 25602
Joined: Sat Nov 08, 2003 6:09 pm
Location: Norwich
Contact:

Re: E Type 888330

Post by Bootsy »

Top work Mr Parr
1972 911T | 1994 993 Carrera | 1999 986 Boxster |

Vintage Heuer, Omega, Zenith and other vintage watches - http://www.heuerheritage.co.uk
User avatar
inaglasshouse
DDK 1st, 2nd and 3rd for me!
Posts: 2450
Joined: Fri Mar 28, 2014 9:35 pm
Location: Surrey, UK

Re: E Type 888330

Post by inaglasshouse »

You sure that's a car engine? Ocean liner? Something railway-related?
Thanks for posting, very interesting stuff.
Cheers, Richard.
Gary71
Nurse, I think I need some assistance
Posts: 10694
Joined: Wed Mar 31, 2004 1:27 pm
Location: Cheshire
Contact:

Re: E Type 888330

Post by Gary71 »

Excellent stuff. Keep it coming!


Sent from my iPhone using Tapatalk
defianty
Put a fork in me, I'm done!
Posts: 1717
Joined: Sat Aug 05, 2006 7:02 pm
Location: Rochford, Essex

Re: E Type 888330

Post by defianty »

Coming along nicely. That's one big lump! Well, two big lumps really :lol:
Stephen

1973 914 3.0 GT Build Progress
1974 TR6

914 Rear Alignment Shims
911hillclimber
Nurse, I think I need some assistance
Posts: 20620
Joined: Mon Mar 10, 2008 6:26 pm
Location: West Midlands

Re: E Type 888330

Post by 911hillclimber »

I think we are all relieved you have that might lump off the stand.
It is alarming just how much they bend with a little 911 engine flyweight on the plate.

Great progress, wish Barry would get started!
73T 911 Coupe, road/hillclimber 3.2L
Lola t 492 / 3.2 hillclimb racer
Boxster 987 Gen II 2.9
jtparr
DDK 1st, 2nd and 3rd for me!
Posts: 2356
Joined: Mon May 24, 2004 10:54 pm
Location: london/surrey

Re: E Type 888330

Post by jtparr »

Installing the head also allowed me to make a small adjustment to the oil filer cap, which was in an earlier post....

Image


the cap typically tightens against a single fibre washer, but worked slightly better with 2 washers, each of which I sanded a fraction.....rather than just taking all the thickness out of one and leaving it to thin.....trial end error....

Image

until I achieved the required correct alignment...

Image


I rather like the original red paint within the jaguar script...rather than remove and repaint.....

Jonathan
Last edited by jtparr on Sat Apr 14, 2018 6:16 pm, edited 1 time in total.
1974 2.7 Carrera
(full restoration. now as an RS Touring)
1963 3.8 E Type
( 11 years in the making…………………….)
1952. XK120…the next one ……….……..)
User avatar
Nige
Nurse, I think I need some assistance
Posts: 6681
Joined: Wed Nov 26, 2003 9:11 pm
Location: Denby, Derbyshire

Re: E Type 888330

Post by Nige »

The oil cap is your best work so far. Well done :)
911hillclimber
Nurse, I think I need some assistance
Posts: 20620
Joined: Mon Mar 10, 2008 6:26 pm
Location: West Midlands

Re: E Type 888330

Post by 911hillclimber »

Haaaa! Haaa! :lol:
Indeed, made me smile after a Bad News Day.

I would leave that remnant of paint alone, witness to how it was.
73T 911 Coupe, road/hillclimber 3.2L
Lola t 492 / 3.2 hillclimb racer
Boxster 987 Gen II 2.9
jtparr
DDK 1st, 2nd and 3rd for me!
Posts: 2356
Joined: Mon May 24, 2004 10:54 pm
Location: london/surrey

Re: E Type 888330

Post by jtparr »

911hillclimber wrote:Haaaa! Haaa! :lol:
Indeed, made me smile after a Bad News Day.

I would leave that remnant of paint alone, witness to how it was.

Agreed...it's also why I have not polished the cam covers to a "better than new" condition....I like the wear and tear vein like marks in the metal....same for the gearbox and bell hose covers....some restorers go so far as to paint that aluminium silver which to me is just plain bizarre....

J
1974 2.7 Carrera
(full restoration. now as an RS Touring)
1963 3.8 E Type
( 11 years in the making…………………….)
1952. XK120…the next one ……….……..)
User avatar
Darren65
Nurse, I think I need some assistance
Posts: 8161
Joined: Mon Dec 13, 2010 10:55 pm
Location: North Wiltshire
Contact:

Re: E Type 888330

Post by Darren65 »

jtparr wrote:......until I achieved the required correct alignment...
....you are sad Mr Parr.......wonderful, but sad! xx

Excellent thread 8)
jtparr
DDK 1st, 2nd and 3rd for me!
Posts: 2356
Joined: Mon May 24, 2004 10:54 pm
Location: london/surrey

Re: E Type 888330

Post by jtparr »

.....and the last post for this week sees the gearbox now part of the engine assembly....

This first shot was lovely to do as it confirms the flywheel is the original component....certainly in the early days engine numbers were stamped onto the flywheel, as they were balanced back in the day....the capital letter B which you can see in the picture to the left of the engine number RA 1309 was meant to be set uppermost i.e. on top vertically when the number 1/6 pistons were at TDC


Image

and although this will never be seen I deceided to clean and paint the outer face of the flywheel....

Image

SRS had skimmed the front face of the flywheel which was dirty and scarred from use....but then as part of the overall balancing process had the flywheel and clutch cover balanced as a unit along with the crankshaft....so it was a simple matter for me to align the group of 3 dots between crank and flywheel and then between flywheel and clutch cover

You can see the 3 marks in the first picture

Image

and then see areas where the balancing removed excess weight off the flywheel

Image


and then removed areas of the clutch cover plate


Image


I deceided to make my own clutch alignment tool....which actually turned out to be pretty straightforward, using a tommy bar from the tool kit, one of the large sleeves from the rear suspension assembly asnd a rol of gaffer tape.(the Nikon lens cap is purely to give a scale comparison)......it sounds a bit Blue Peter but is actually able to be fine tuned to be the exact sizes I needed

Image


alignment was assisted with using the engine hoist to take the weight....the Moss box may be small....but like everything else jaguar it is surprisingly dense...!

Image


Image


and finally after 5 attempts, including one version where I took it apart and loosened the clutch cover plate.....and then another where I took it all apart and tried it again....I achieved success

Image

looks like it should be at home in a Spitfire... 8)

Image


next project is the rear suspension......


thanks for looking
Jonathan
Last edited by jtparr on Sat Apr 14, 2018 6:18 pm, edited 1 time in total.
1974 2.7 Carrera
(full restoration. now as an RS Touring)
1963 3.8 E Type
( 11 years in the making…………………….)
1952. XK120…the next one ……….……..)
Post Reply