Page 74 of 142
Re: My '72 911T
Posted: Thu Dec 24, 2020 4:29 pm
by Gary71
inaglasshouse wrote:Um... are you sure that's finished?
Took me 3 years from that point, I think

Does look good, enjoy.
When I say finished this is of course a euphemism for ‘months of work and thousands of £ yet to to go’. But one step at a time!

Re: My '72 911T
Posted: Thu Dec 24, 2020 6:13 pm
by AndrewSlater
inaglasshouse wrote:Um... are you sure that's finished?
Took me 3 years from that point, I think
Let's not burst the man's bubble of euphoria, with the true reality of the situation - especially at Christmas

Well done for extracting the car from the impending Tier 4 lockdown just in the nick of time.
Re: My '72 911T
Posted: Thu Dec 24, 2020 6:20 pm
by 911hillclimber
The worst bit for me will be seeing it by Easter in Viper Green, and wishing I had done mine in that colour, original to my 73!
I recon the next shell pre stages will be rapid, and I think more diy to come
Good Game as they used to say.
Re: My '72 911T
Posted: Thu Dec 24, 2020 7:10 pm
by DarthMJH
Looks fabulous, looking forward to the updates.
Re: My '72 911T
Posted: Sat Dec 26, 2020 5:17 pm
by Ian Comerford
hot66 wrote:as have I , it runs all the time in a timber garage that isn't even sealed ... but it does work well, never any discolouration of brake discs & all the paper documents & files that are also stored in there stay dry & crisp.
.. this was after a less than happy experience of using a carcoon
Would you mind sharing what model of dehumidifier you have? Thank you
Re: My '72 911T
Posted: Sun Dec 27, 2020 12:08 pm
by Gary71
Door gap obsession continues.
After Barry put quite so much work into the gaps I took it upon myself not to mess them up...
He recommends one wet coat of etch prime and do them up to be left forever, anymore and they go out of alignment.
So as extra security I also pinned the hinge location before releasing one at a time whilst supporting the door to clean, prep, and prime the outside then swiftly rebuild with a coat of primer on the mating surfaces with the pin giving that confidence they were in the right place.

Re: My '72 911T
Posted: Sun Dec 27, 2020 4:45 pm
by Gary71
Closures and bumpers off.
Now back in its favourite place (after hours of fighting with engine cranes, jacks and general violence) on the rollover jig.
Let the painting begin!

My '72 911T
Posted: Mon Dec 28, 2020 4:04 pm
by Gary71
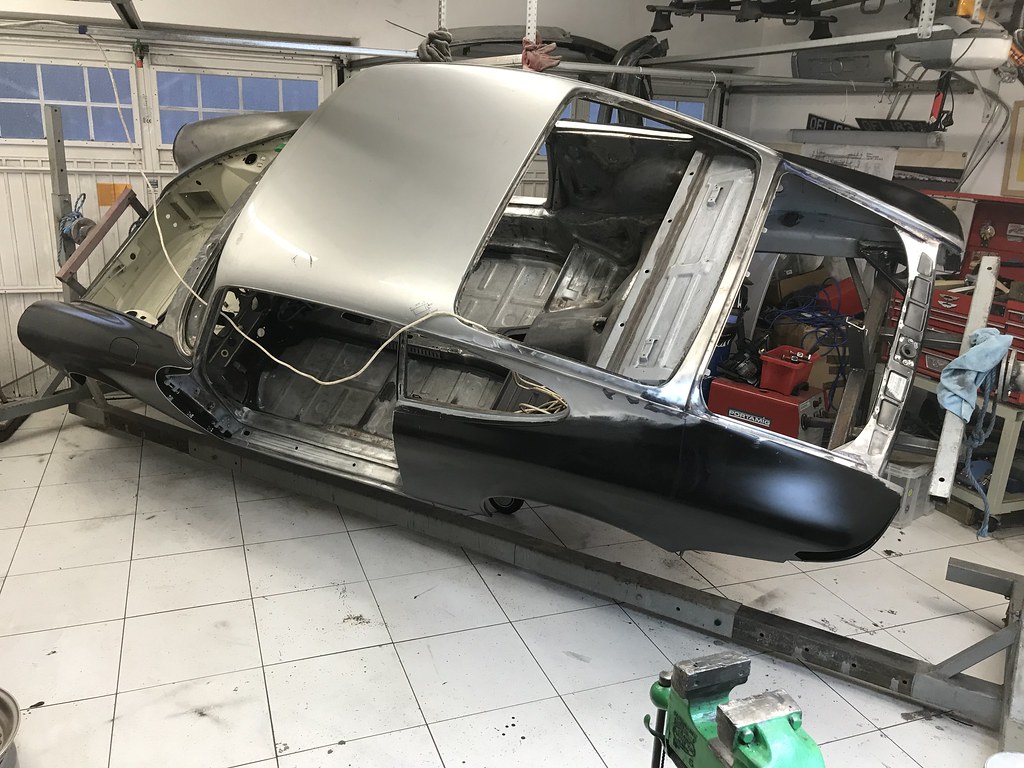
I had bigger plans for today but got distracted by a little hole at the top of the quarter to rear window that was missed in the final push and then took the afternoon to fiddle with bits that will be rarely seen...
Although fully assembled the cosmetics of 1/4 to slam were (intentionally) not fully done so spent a few hours working both sides to be the same, have the right radii etc. Still need filler as I'm not god, but they are straight and symmetrical.

I tipped up the shell to let the Hydrate 80 run into the seams around the 1/4 to slam panel joins. A classic 911 rust hot spot due to it's complexity so I'm trying to stall it coming back!

Re: My '72 911T
Posted: Mon Dec 28, 2020 4:25 pm
by coomo
Nice Tip.I use Vatcan which by the look of it, is the same generic rust inhibitor thats has a 100 trade names, that your using.Far more confidence with a low viscosity fluid,that runs out everywhere than trying to rely on some thick porridge like rustproofer.
Re: My '72 911T
Posted: Mon Dec 28, 2020 4:33 pm
by Gary71
Yes, this is like water, you can see it inside the engine bay having run through the seam.
It will be followed up with 2k epoxy then seam sealer then more 2k epoxy!
Re: My '72 911T
Posted: Mon Dec 28, 2020 6:09 pm
by 911hillclimber
Kurerust? (sp)
Been around for many decades, always worked for me, really thin, goes everywhere, ideal.
Is it too cold for these chemical mixes to work?
Re: My '72 911T
Posted: Tue Dec 29, 2020 8:06 pm
by Gary71
Today was a long painful slog, but finally put some paint on something!
I replaced a few of the tabs around the engine bay and touched in a few welds that were OK at the time but my standards have moved on in the two years since I started!
Then it was hour after hour of wire wheels, sandpaper, scotch brite, then several goes over with panel wipe.

Finally a coat of 2k epoxy goes on, certainly an improvement and seals everything for now, but needs another coat for completion.

I need to work out the painting sequence from now on to get the seam sealing, stonechip, and top coat in the right order thinking about the various areas of the car to avoid too much masking.
Re: My '72 911T
Posted: Wed Dec 30, 2020 6:58 pm
by Gary71
Same again today for the inside.
A few more bits of touch up welding required here and there to break the monotony of the wire brush.
Scuff, wipe and paint tomorrow:)

And yes that is a dehumidifier sat in the car

Re: My '72 911T
Posted: Wed Dec 30, 2020 10:39 pm
by Ralph
Are you doing all of the paintwork yourself?
Re: My '72 911T
Posted: Thu Dec 31, 2020 8:09 am
by Gary71
Ralph wrote:Are you doing all of the paintwork yourself?
No, only the inside/underneath bits that don’t matter.
I know my limits!


