964 C2 - Rolling Resto

Ongoing and archived Porsche (and other marques) restoration threads from DDK members

Moderator: Bootsy

Post Reply
rhd racer
Me and DDK sitting in a tree! KISSING
Posts: 2504
Joined: Wed Jun 23, 2004 9:47 pm
Location: Nottinghamshire

Re: 964 C2 - Rolling Resto

Post by rhd racer »

I had been tripping over the calipers for a few weeks, trying to summon up the motivation to strip them and rebuild them (not my favourite job). For those not familiar, the 964 caliper is a two piece aluminium affair with steel slider plates fitted on the inside, secured by an M6 allen bolt to each half. These act as a guide / slider for the pads to operate against.

The problem is my old friend galvanic corrosion, a particularly difficult thing to deal with where the different metals fuse, create a white powder and seize solid. My Boxster suspension was basically all fused together, so when I fitted urethane bushes to new coffin arms on it, what should have been a 1/2 day job turned into several nights of frustration, cut bolts, bruised fingers and eventually a cracked rear suspension member. Luckily I had one in stock, but still a proper nightmare.

So on the 964 brakes, galvanic corrosion occurs underneath these plates, bowing them, and making the brakes eventually seize on under the pressure. Mine weren't seized, so I thought all was good. Wrong

The previous 'specialist' looking after the car had come up with some redneck engineering to solve the problem involving an angle grinder....

Image

Image

I suppose giving them the benefit of the doubt, their customer might have insisted they do this, but even so.....

So, I was then fearing the worst on the strip down and this did indeed prove to be the case. The M^ bolts holding the plates together had turned to chocolate and are basically inaccessible with normal tools, and you cannot drive a socket in because there is not enough room. Another issue is that the plates being bowed out tears the piston rubbers, and they cannot be refitted pasted a bowed plate, so a full rebuild is the only option.

Therefore, I bit the bullet and the not inconsiderable expense of getting them rebuilt professionally, and with a lifetime paint finish. One piston was replaced, all the rubbers, the plates and fixings, and the bleed nipples. I can't show you what I went for yet, as I haven't had chance to collect them, but it is safe to say that I have two bases covered with my future colour plans...
93 964 C2
99 Boxster 2.5 > 3.4 hill climber

71 914/6 3.0 - gone

'You see Paul, hill climbing is like making love to a beautiful woman. You get your motor running, check your fluids, hang on tight and WHOA..30 seconds later it's all over!' Swiss Tony
rhd racer
Me and DDK sitting in a tree! KISSING
Posts: 2504
Joined: Wed Jun 23, 2004 9:47 pm
Location: Nottinghamshire

Re: 964 C2 - Rolling Resto

Post by rhd racer »

Onto the front suspension, the tear down will be easy right?

Firstly, a job as simple as removing the discs was a nightmare, having to drill out the securing screws on one side...

Image

I got away with this one, but only by hammering a torx bit into the screw head and it just gripped..

Image

And this shows the state of the backing plates

Image

Terrible image, but the PO also experimented with wheels with the wrong offset it seems

Image

Of course it won't - galvanic corrosion once again ruining several evenings that I won't get back. The simple truth is that a bit of specialist assembly paste prevents this, and if applied at the factory, several generations of Porsches could be maintained much more easily. It is also a problem on other modern marques, where aluminium is used for suspension components, and makes simple repairs turn into proper dramas....

On trying to take off the lower control arm, I loosened the bolt and it would turn but not unwind. I tried everything, but essentially the corrosion was gripping the bolt and it would not come out, or drive out with a drift. So I cut it off...

Image

Leaving this

Image

I could then cut the end of carefully to reveal the stuck bolt

Image

Which I could then start to drive out

Image

Image

I then decided to remove the front members to finish the job off, not least because the ARB mounts were fused with galvanic corrosion too. The gift which just keeps on giving....

Image

Image

So back to the stuck bolt...

Image

Then heat, drive out with a punch, twist using a hex and repeat. And repeat. And repeat.

Image

Image

Image

Until, success!

Image

This took 2 hours, even on the bench. I only took the photos to get through the boredom.

Worse still, because I knew what was greeting me on the other side. Yep, more of the same....

Image

I'll spare you the rest, but here is the money shot

Image

So then back to my happy place, cleaning up the front members. You can see the white corrosion in the top image where the steel ARB bracket has reacted with the cast aluminium....

Image

Image
93 964 C2
99 Boxster 2.5 > 3.4 hill climber

71 914/6 3.0 - gone

'You see Paul, hill climbing is like making love to a beautiful woman. You get your motor running, check your fluids, hang on tight and WHOA..30 seconds later it's all over!' Swiss Tony
rhd racer
Me and DDK sitting in a tree! KISSING
Posts: 2504
Joined: Wed Jun 23, 2004 9:47 pm
Location: Nottinghamshire

Re: 964 C2 - Rolling Resto

Post by rhd racer »

So cutting the control arms off was not an issue, because I already had new ones on the shelf with new ball joints. So having got them out of the box to familiarise myself with what I had / needed, it became evident that they did not come with the rubber aerodynamic fins, but also the camber adjusting bolts (the large allen headed dome bolt on the right). So, on the bench, the remnants of my old ones needed stripping. Another easy job then.

Image

Well, no actually. More galvanic corrosion

Image

Image

Even the M6 bolts holding the rubber fine on had corroded, so it needed cutting off carefully...

Image

So I cleaned up the bolts for re-use (before and after)

Image

And finally had a clean set of components ready to refit (once the ARB and brackets are painted) and new bearings fitted to the hubs

Image
93 964 C2
99 Boxster 2.5 > 3.4 hill climber

71 914/6 3.0 - gone

'You see Paul, hill climbing is like making love to a beautiful woman. You get your motor running, check your fluids, hang on tight and WHOA..30 seconds later it's all over!' Swiss Tony
Gary71
Nurse, I think I need some assistance
Posts: 10681
Joined: Wed Mar 31, 2004 1:27 pm
Location: Cheshire
Contact:

Re: 964 C2 - Rolling Resto

Post by Gary71 »

Lot of work there! One stuck bolt can ruin a day (or two!)
rhd racer
Me and DDK sitting in a tree! KISSING
Posts: 2504
Joined: Wed Jun 23, 2004 9:47 pm
Location: Nottinghamshire

Re: 964 C2 - Rolling Resto

Post by rhd racer »

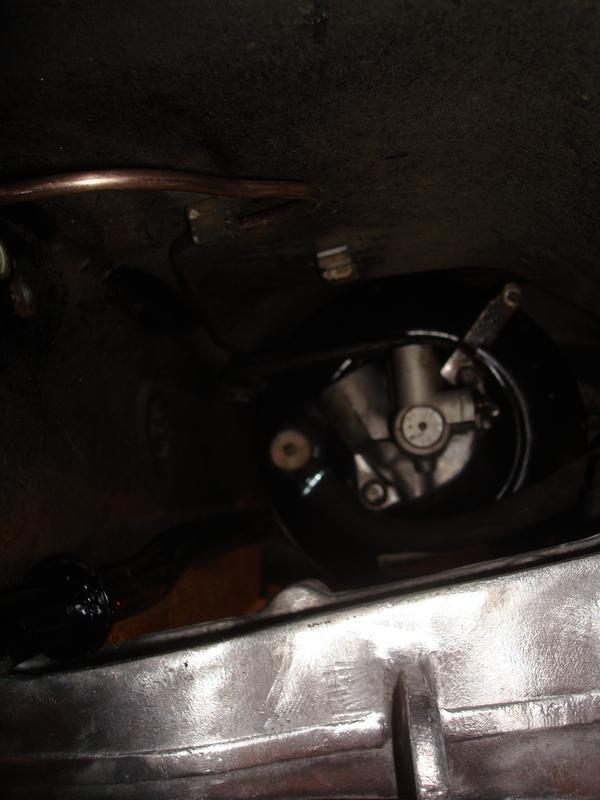
The next job I was set to do really was a leap into the unknown - rebuilding the ABS pump. The car has always had an ABS light on, which usually means a sensor wire is down, but on a 964 often means the pump has seized. But, the good news is that they can be repaired fairly easily and very cheaply using a second hand pump from a Merc 190E or similar. These are in plentiful supply, don't suffer the same issue as the Porsche unit, and cost about £30 on ebay. My car came with one, so even better.

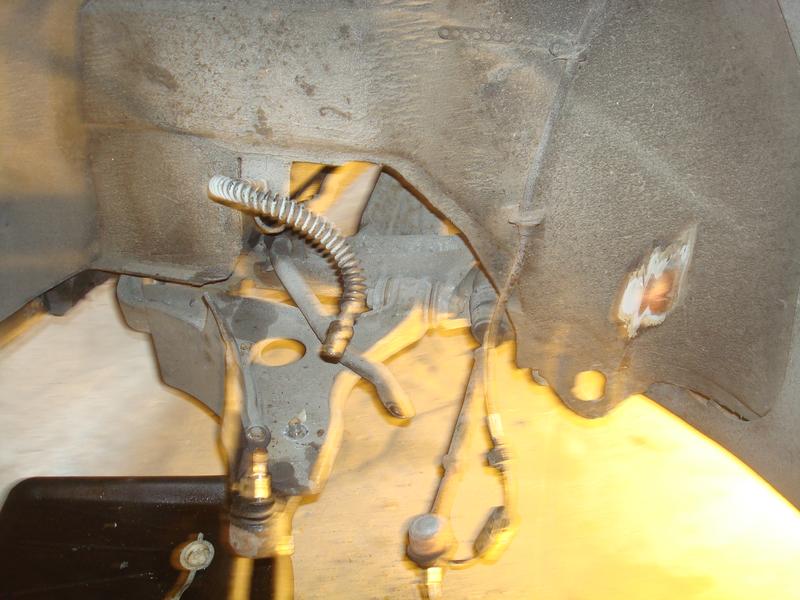
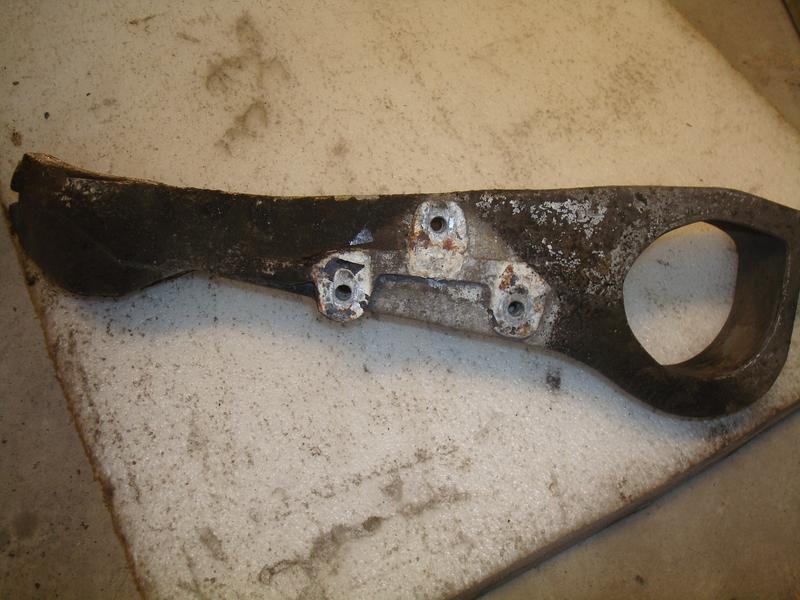
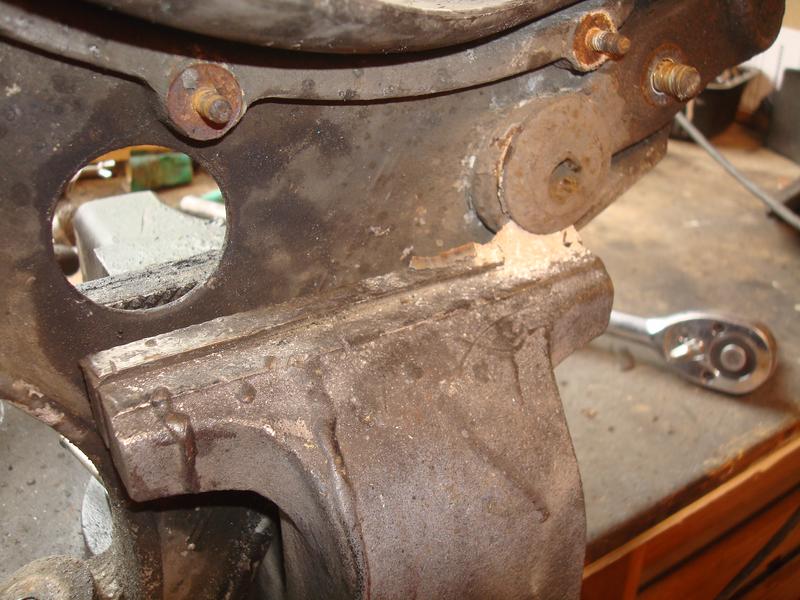
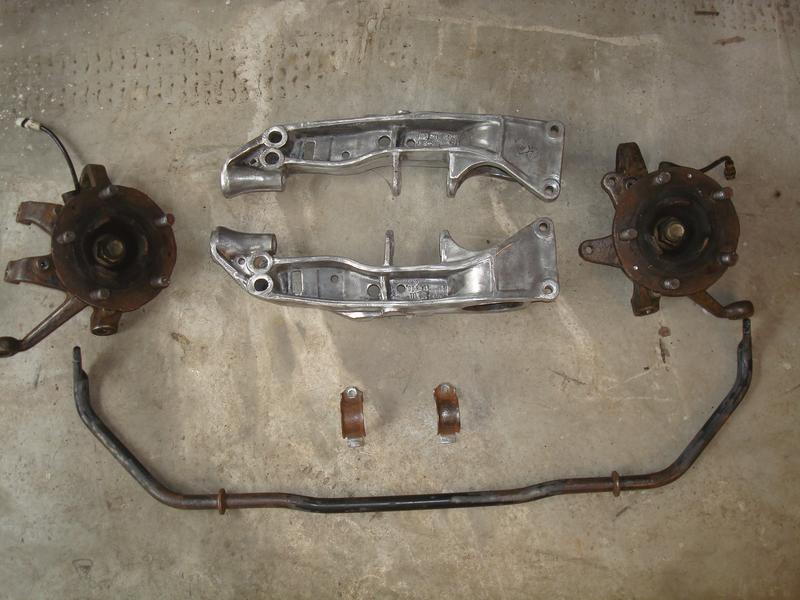
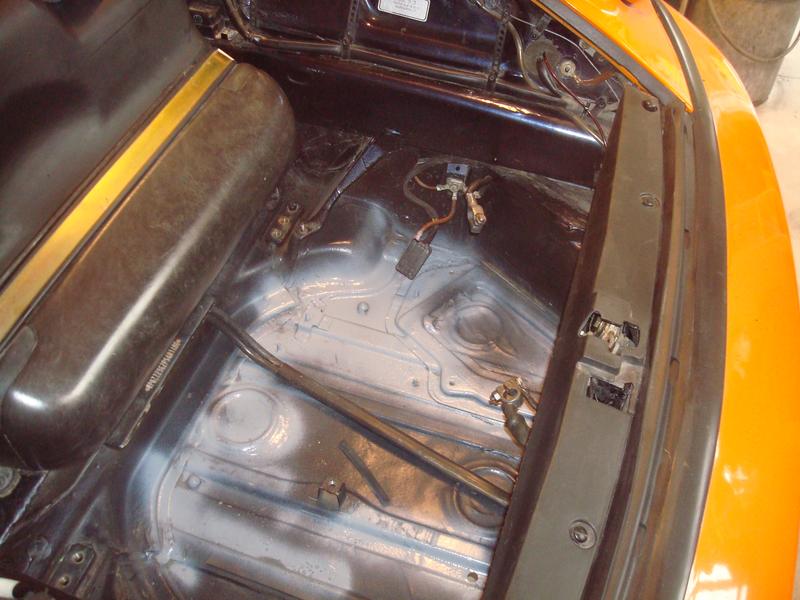
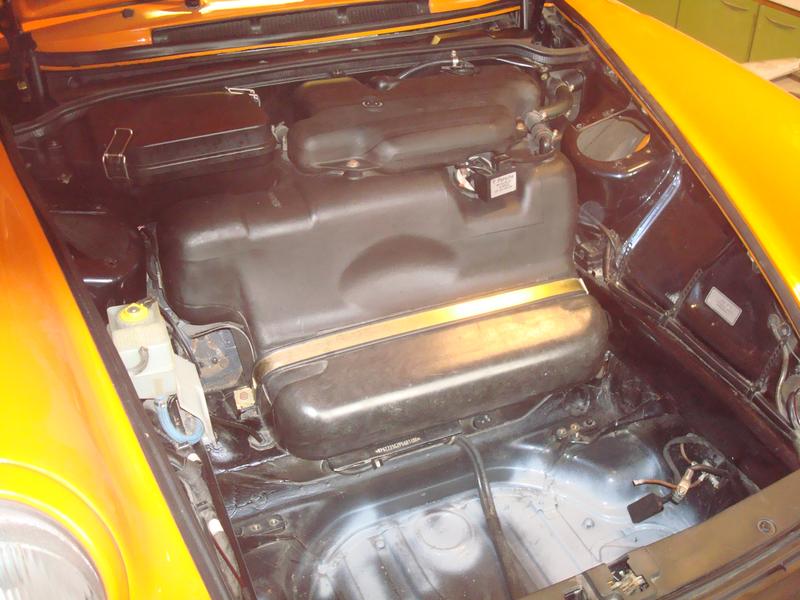
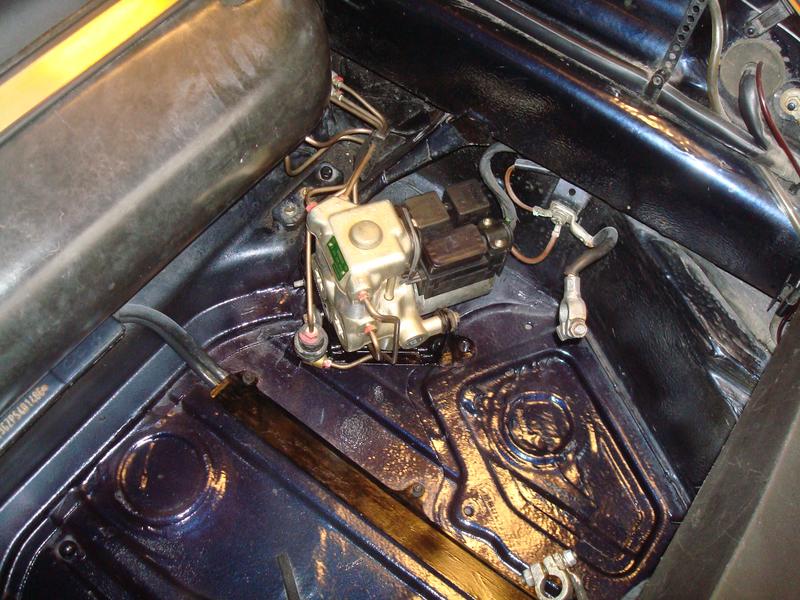
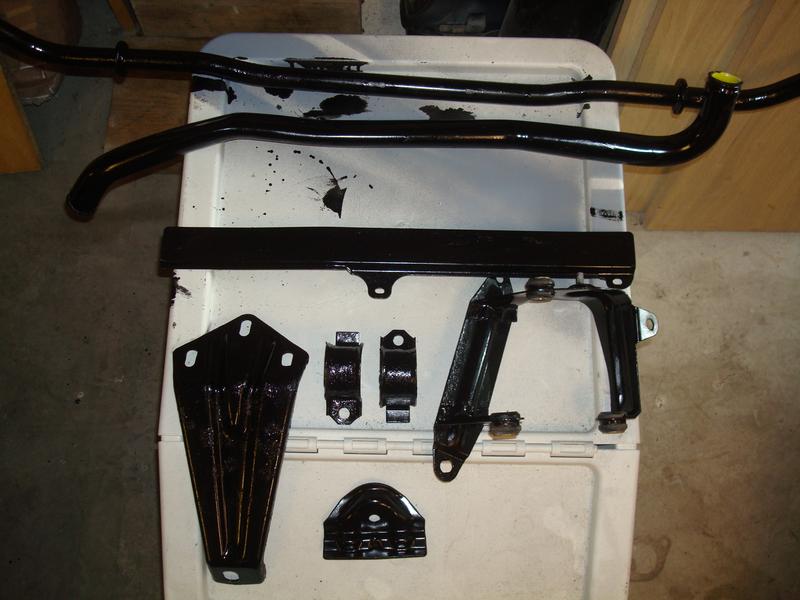
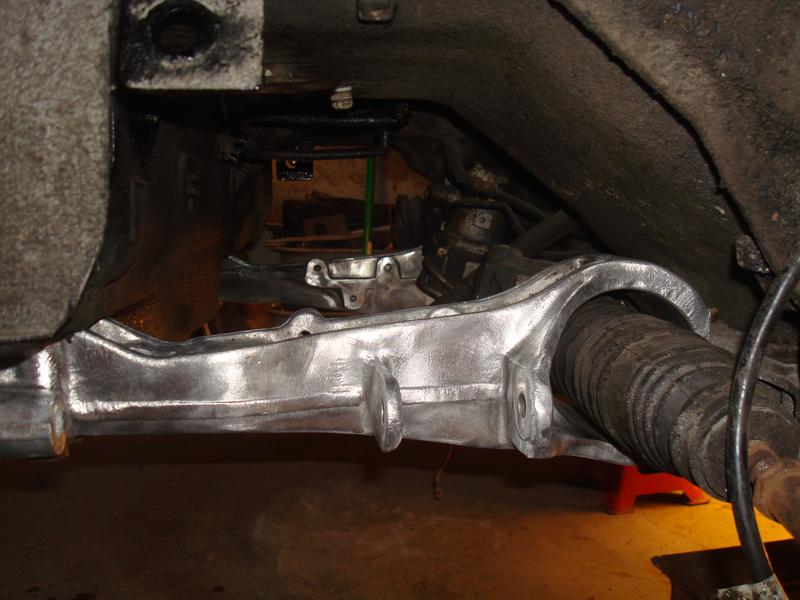
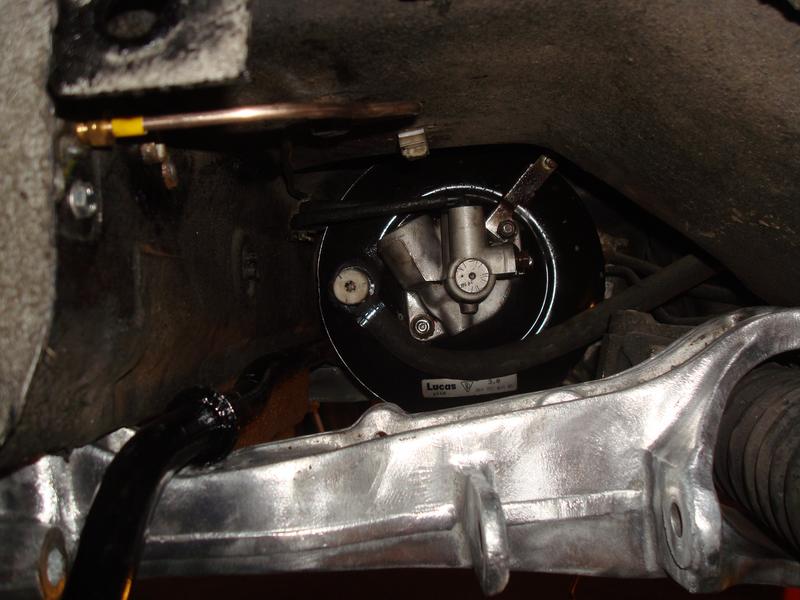
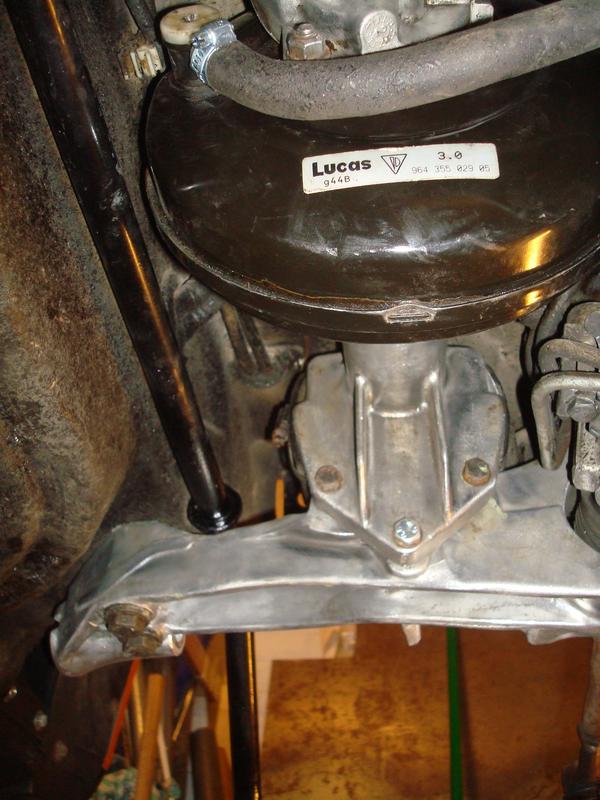
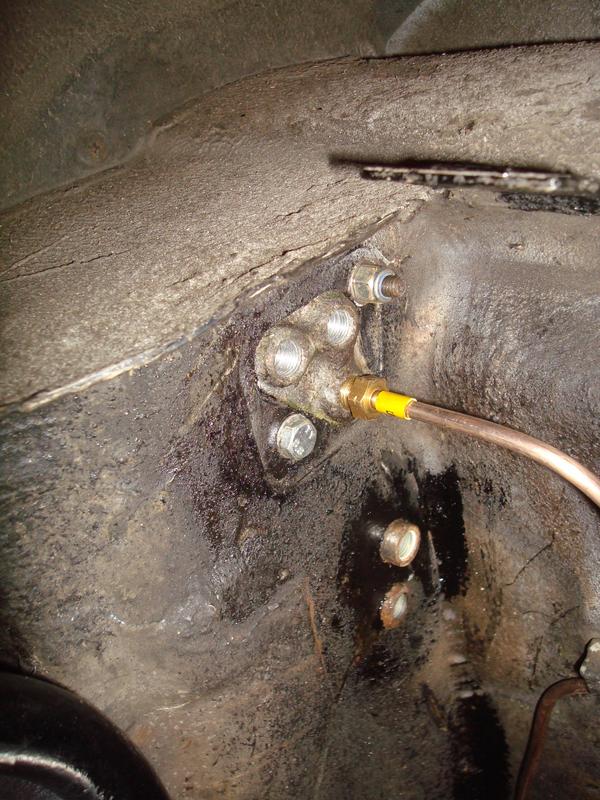
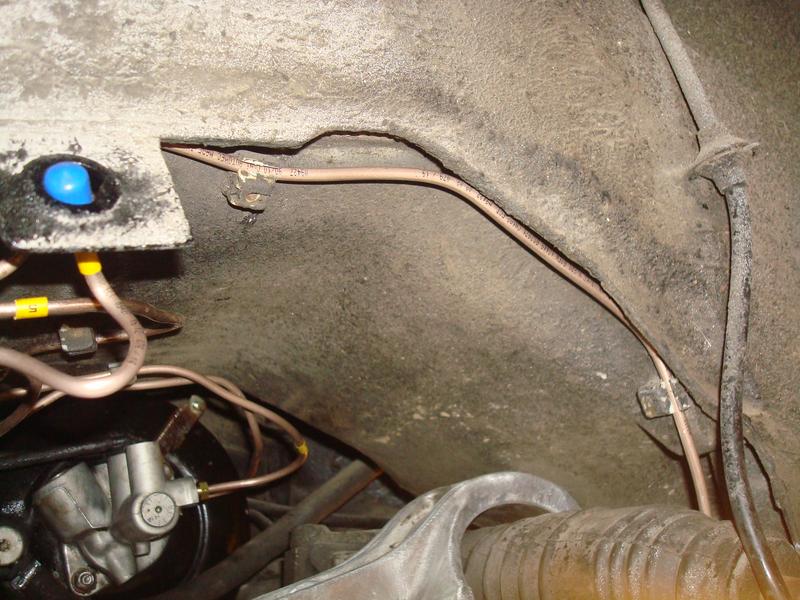
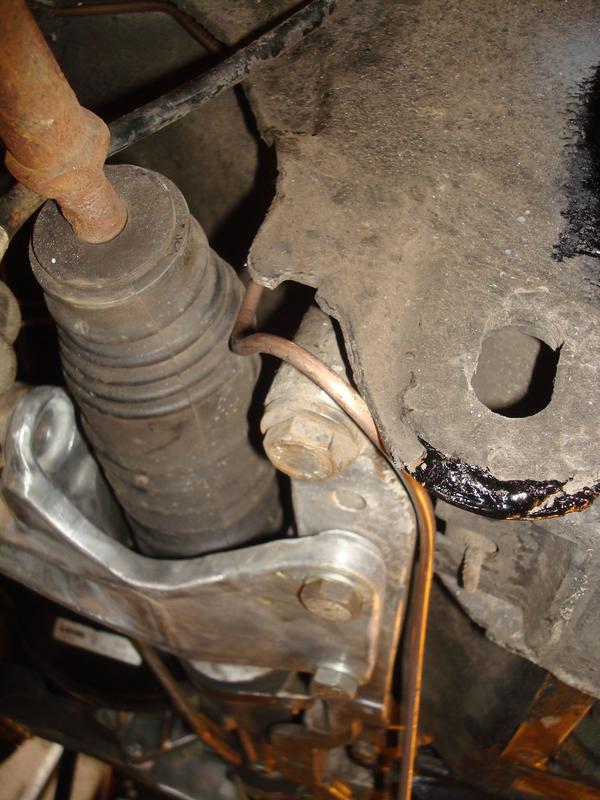
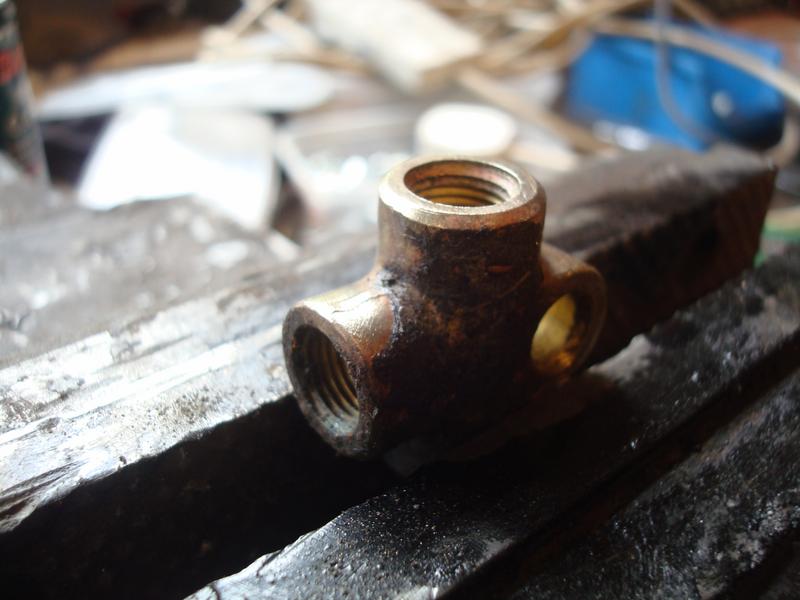
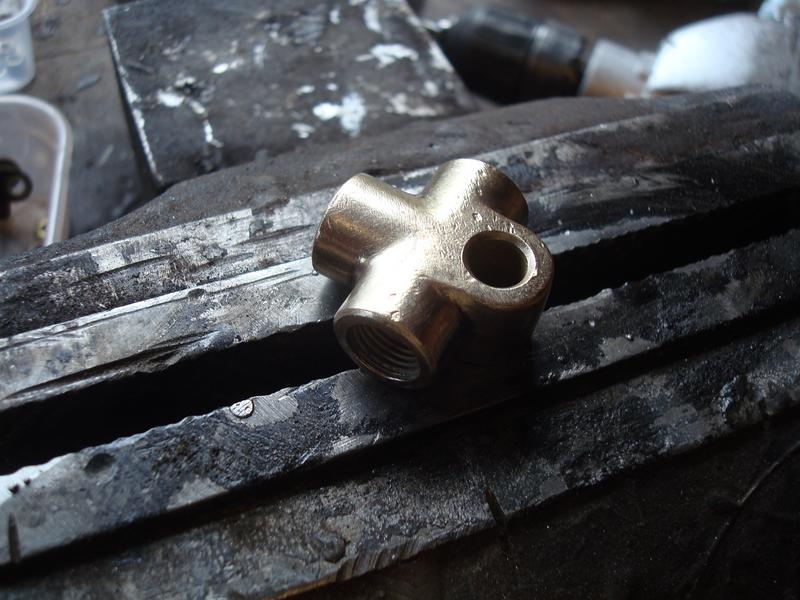
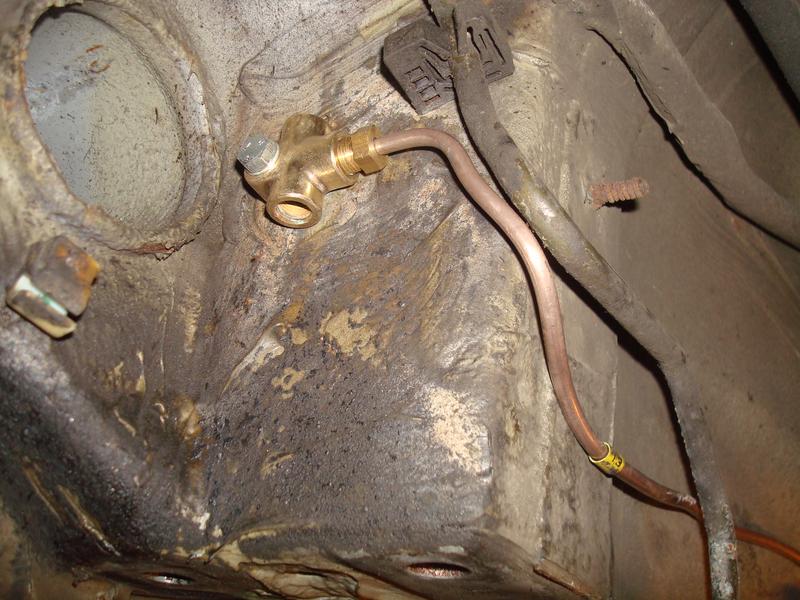
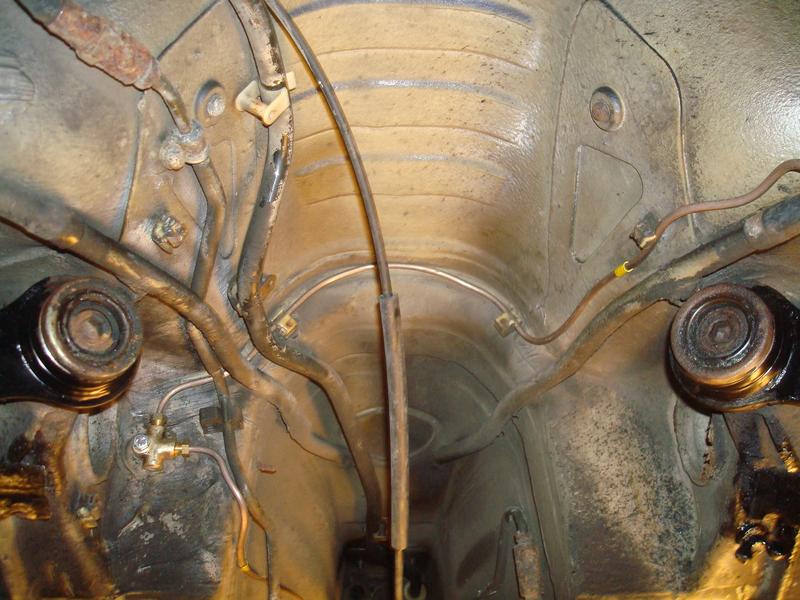
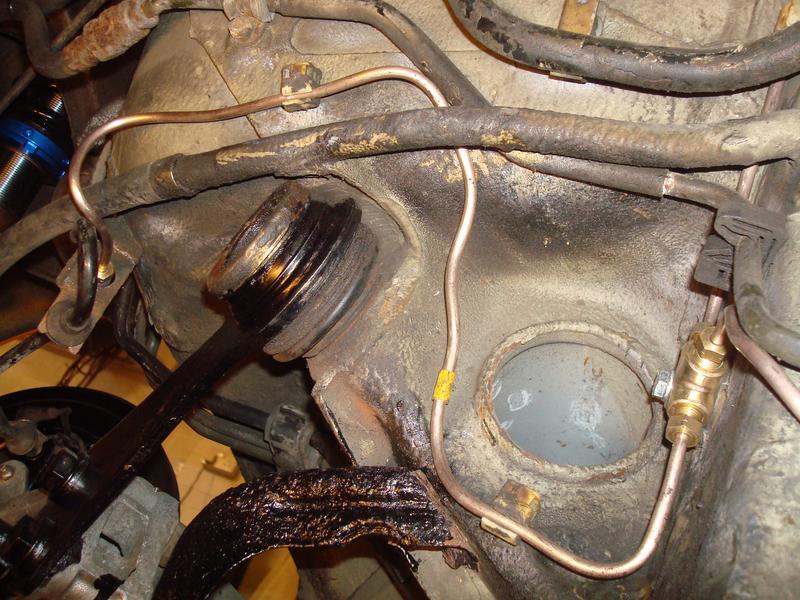
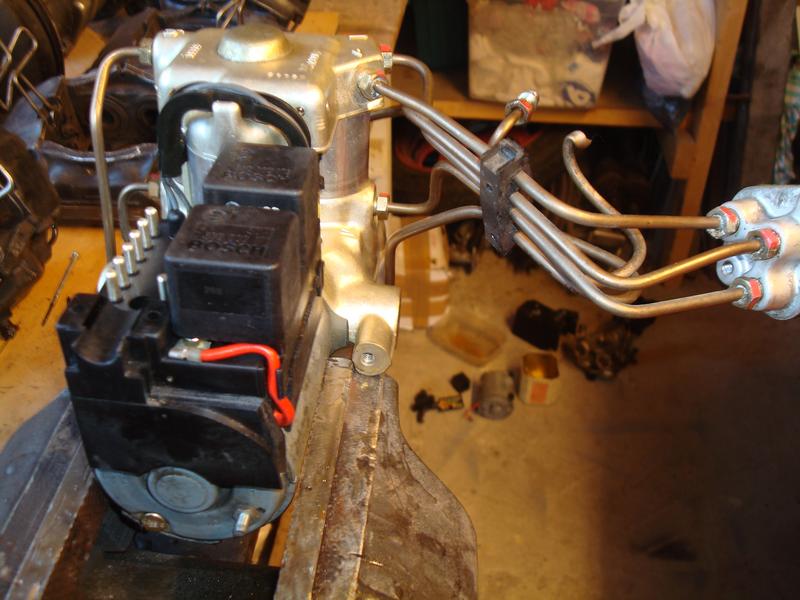
Removing the pump is easy, it is mounted in the front boot behind the battery. The only bit that is a pain is that it has five pipes that go from it, through the bulkhead, to the rest of the brake system. Three of these go into a bulkhead connector which is female on both sides, so has 3 pipes in, 3 pipes out, and the connector is secured by an M6 bolt allowing you to undo all the unions easily. Well, you could if they hadn't turned to chocolate, so the standard operating procedure of cutting them off tight to the union and then removing on the bench applied. Those on the boot side were fine, as protected from the elements. These 3 feed both front corners, and the rear circuit, going to the T-piece up the side of the gearbox shown earlier. Simple enough.

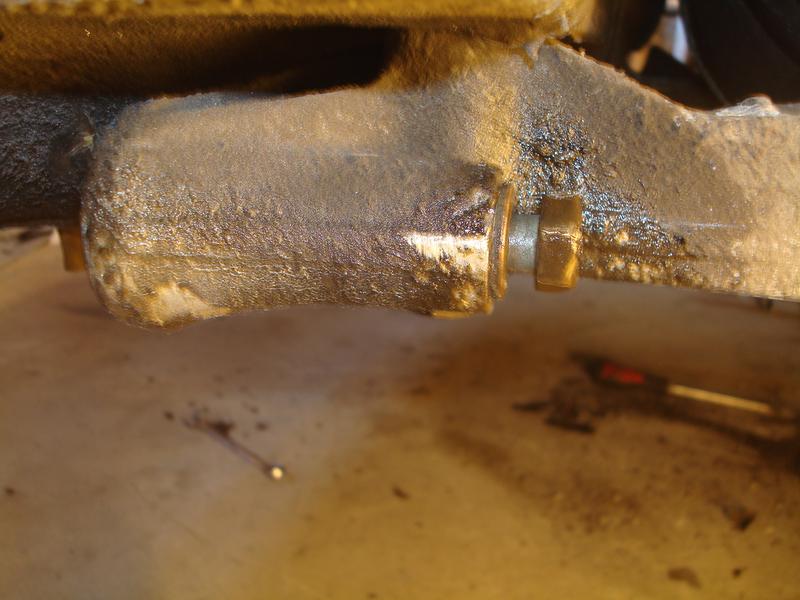
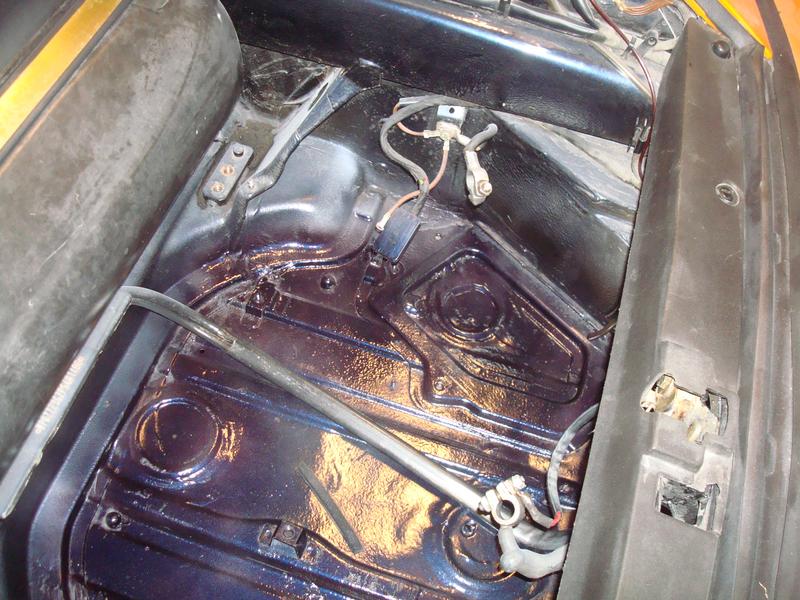
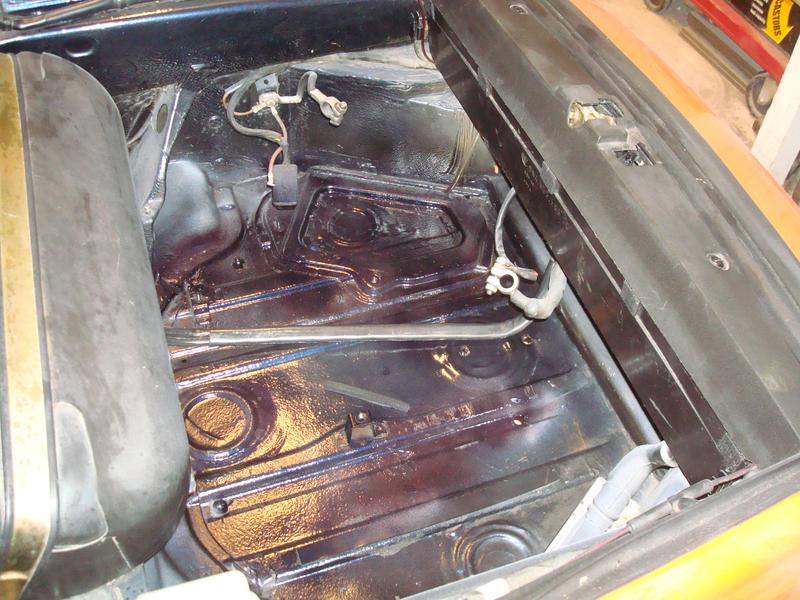
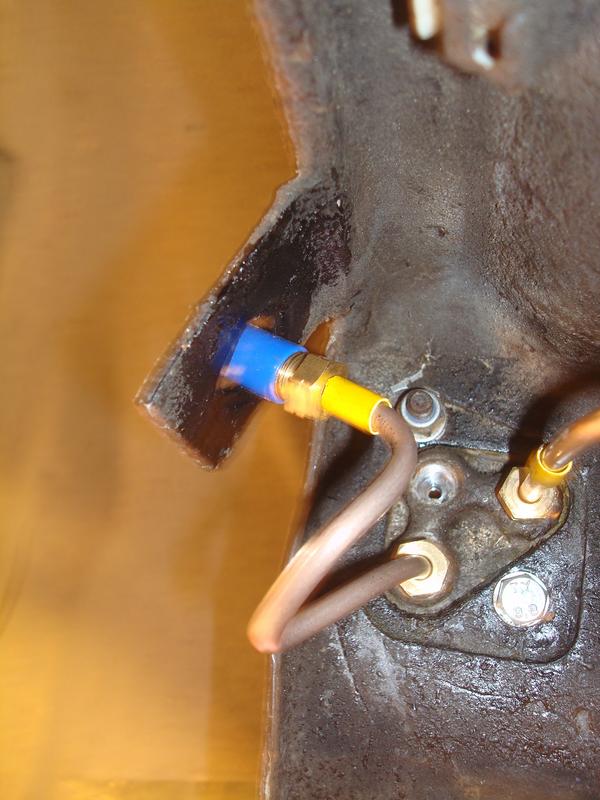
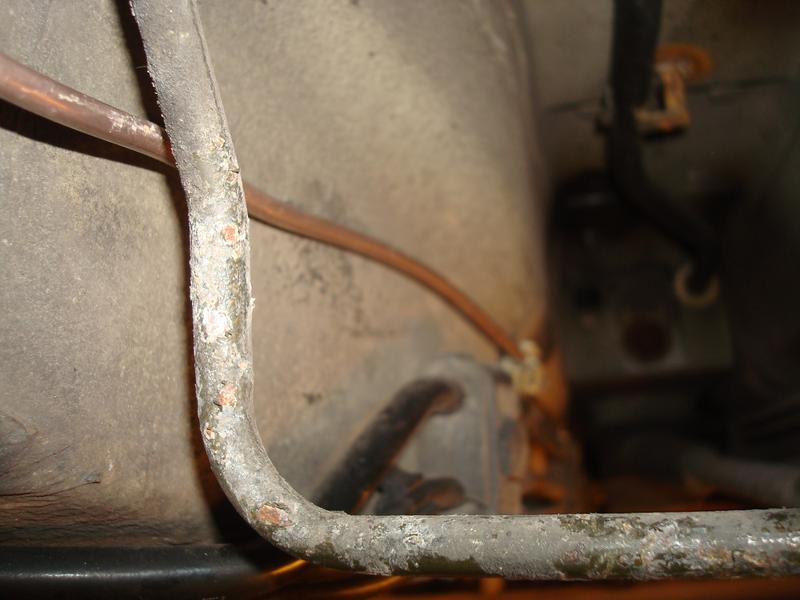
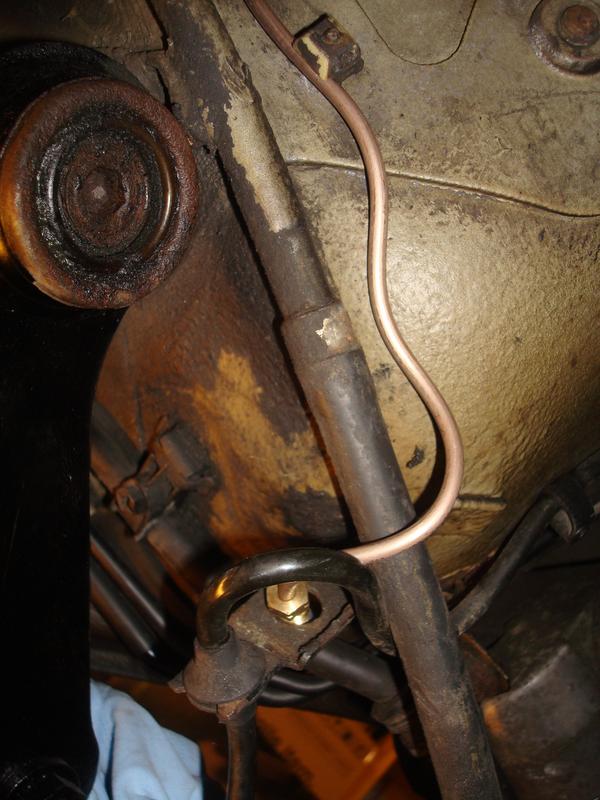
The other 2 go to the master cylinder, and each one goes through a cylindrical bulkhead connector which is not secured at all. So unless you are Mr Tickle, or have a helper, you cannot hold a spanner under the car and inside the boot at the same time.

Fun ensues.

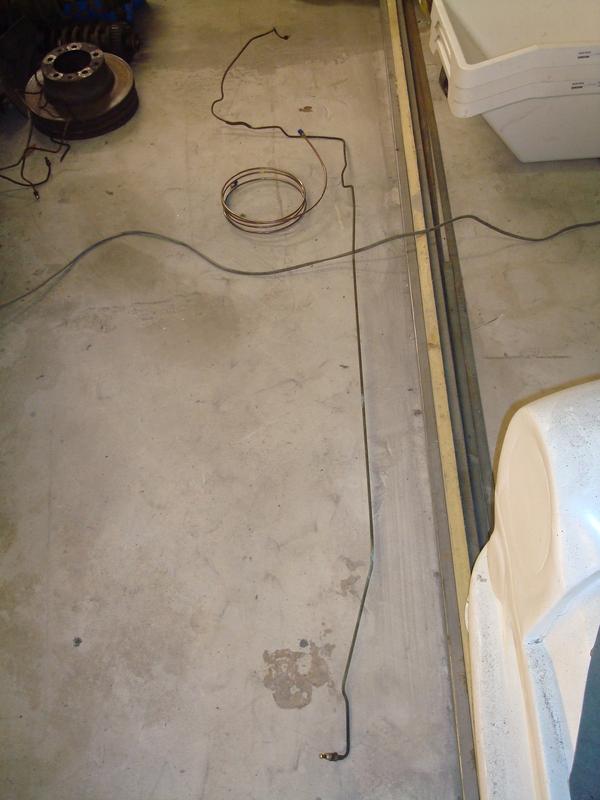
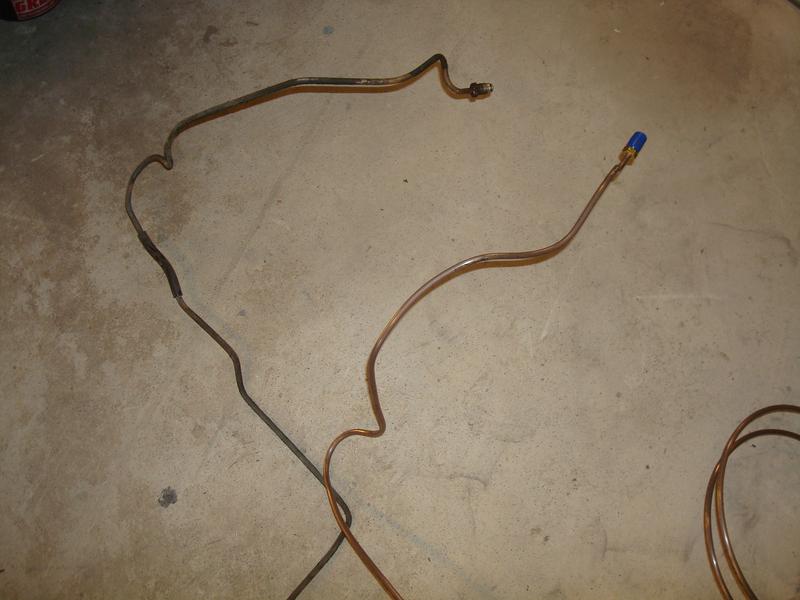
Kinked pipe results, another to replace letter.

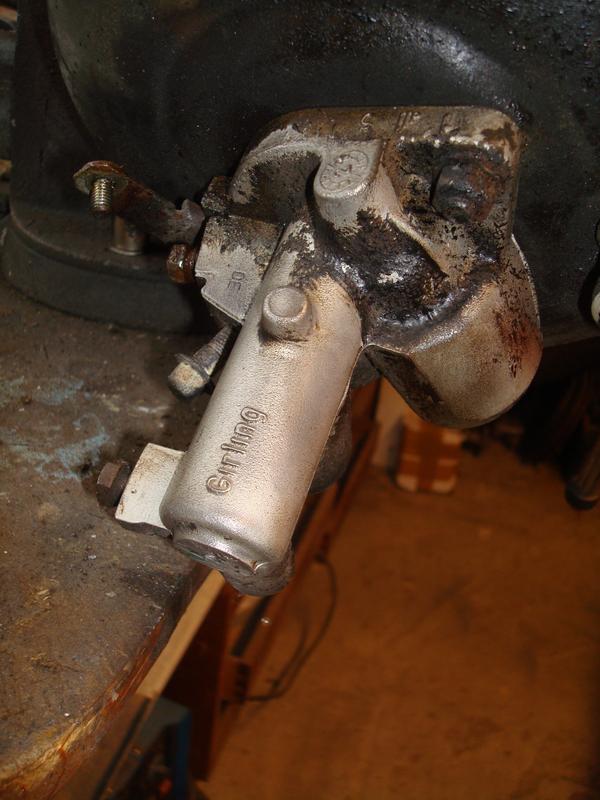
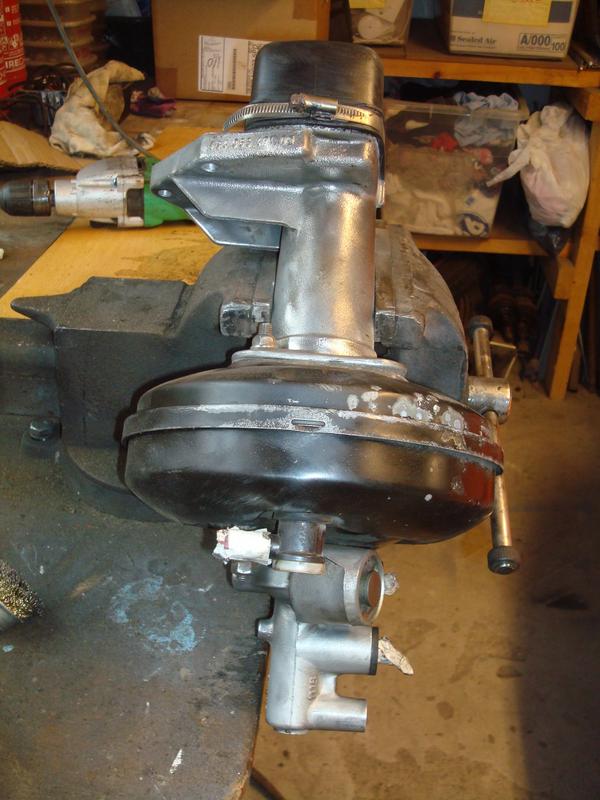
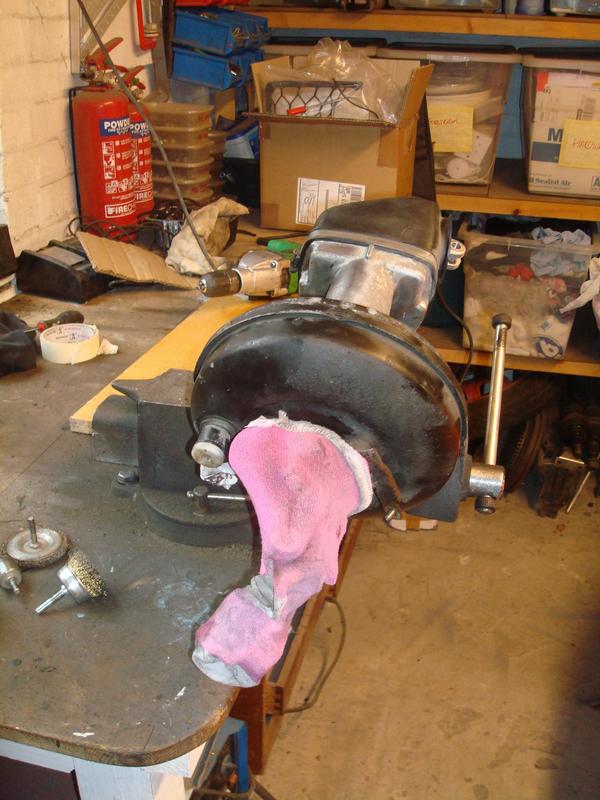
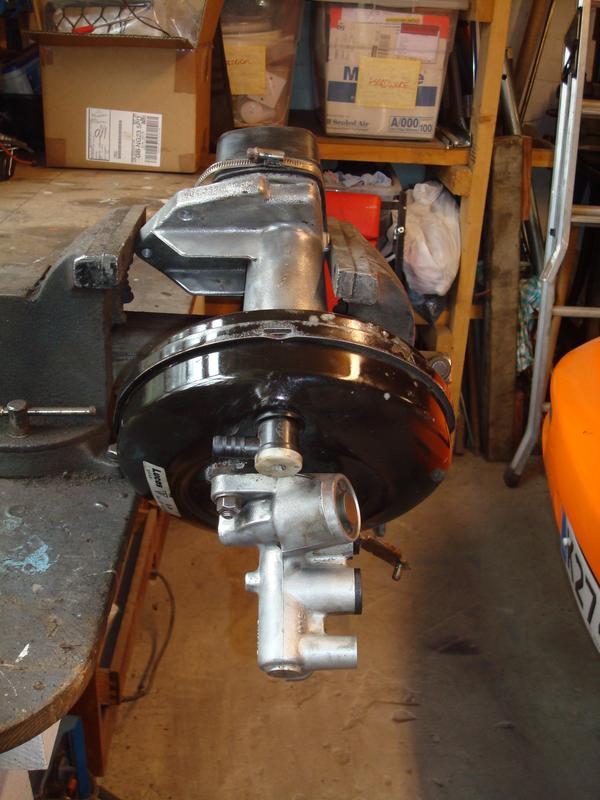
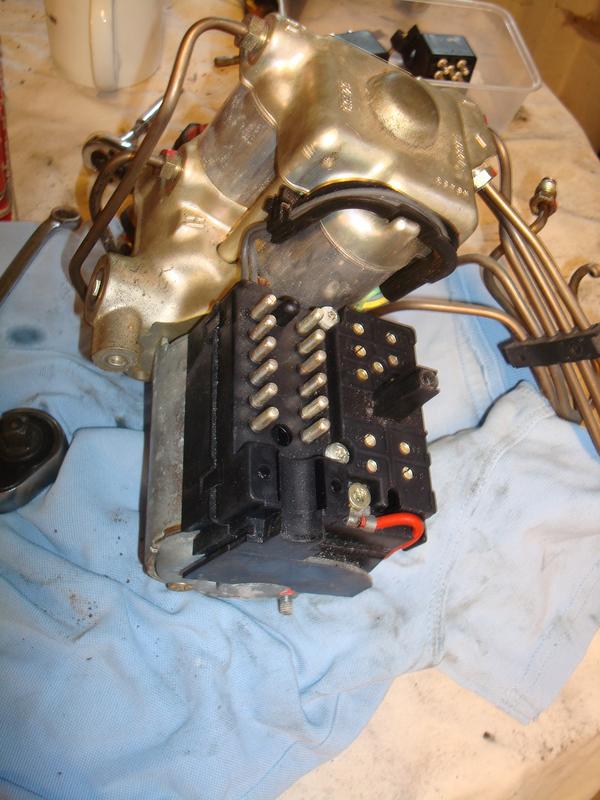
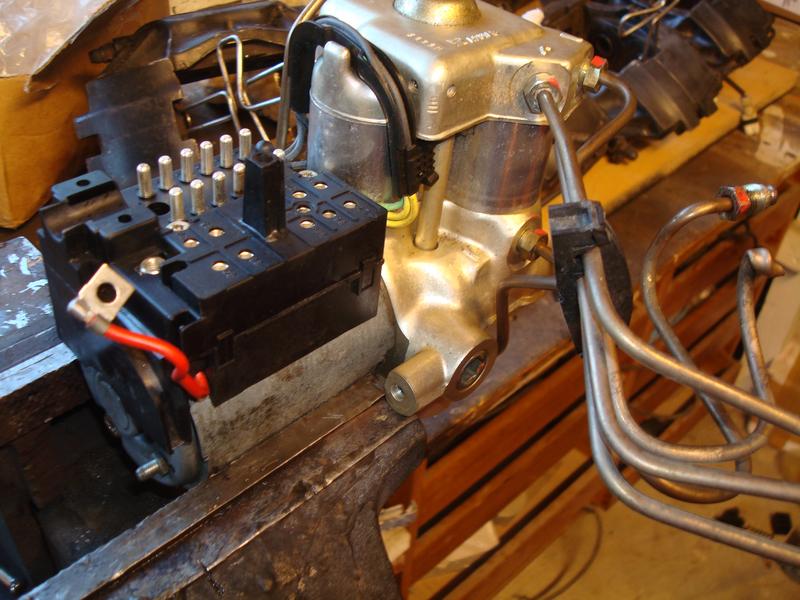
Anyhow, the unit out on the bench ready to pull apart.

Image

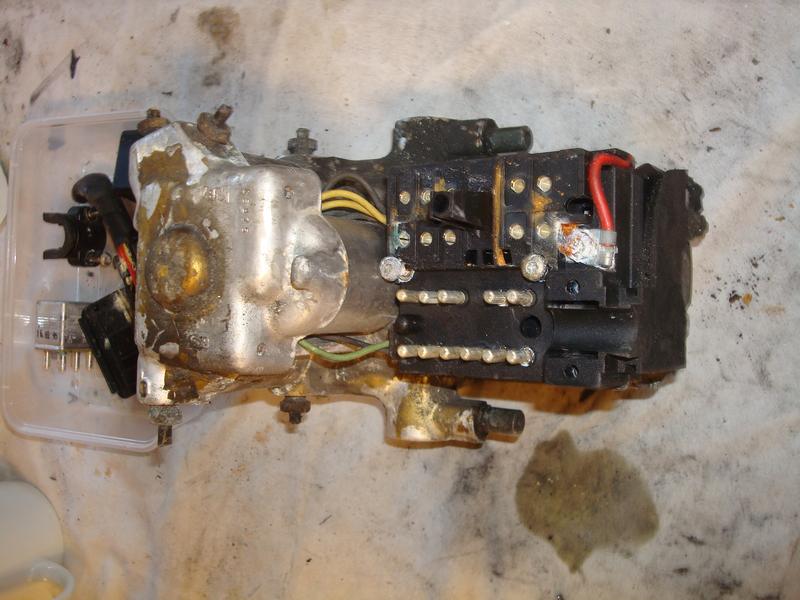
So, armed with a How to guide, taken from an american Porsche site, I set to it. Now, I have not done this before, and expecting the Porsche one to be in a right state and difficult to separate, I started with the Merc one. This also gave me the option of backing out if I ran out of talent :lol:

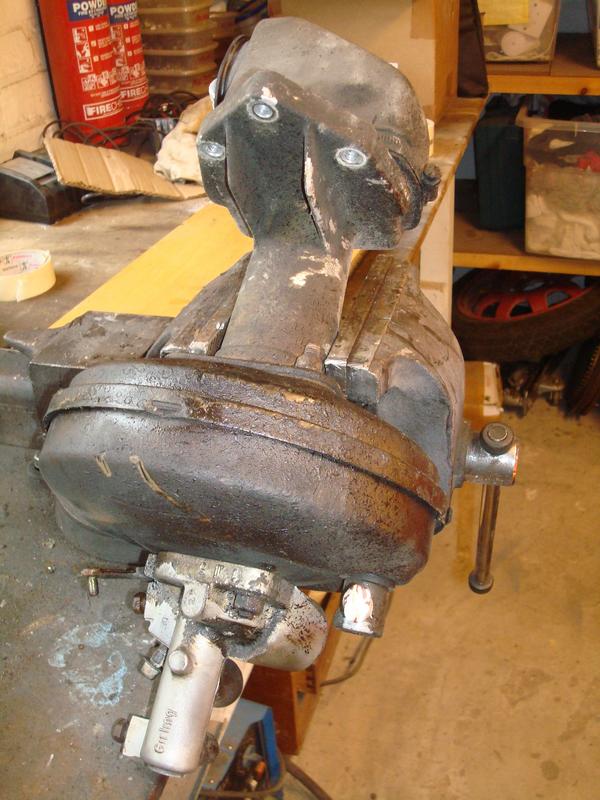
It genuinely is straightforward, remove the relays, disconnect the earth strap, remove the main power lead and then undo the bolts securing the relay board to the main body. I then cable tied this out of the way. Note, the donor pump had been cut out of the car.

Image

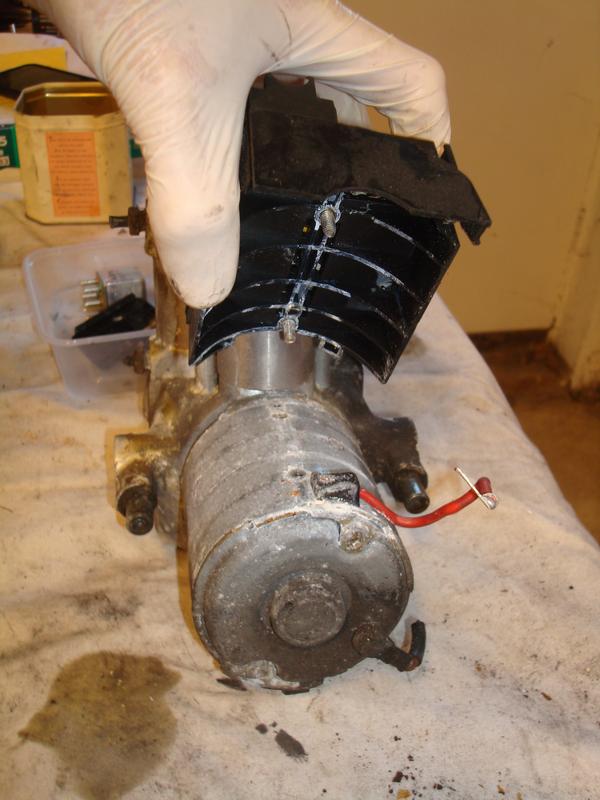
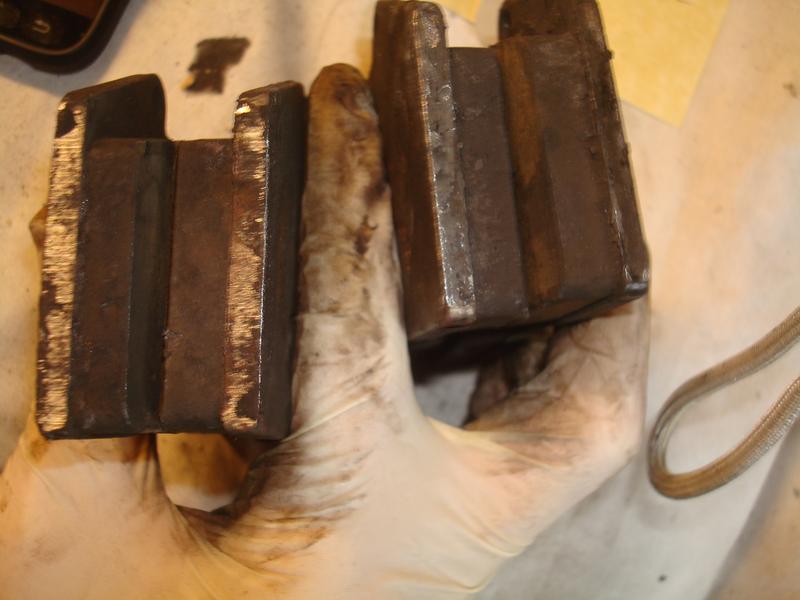
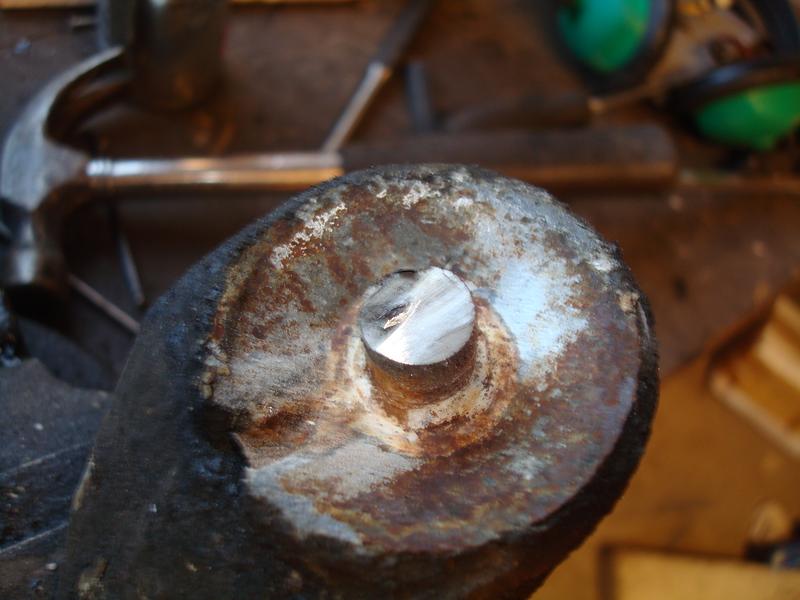
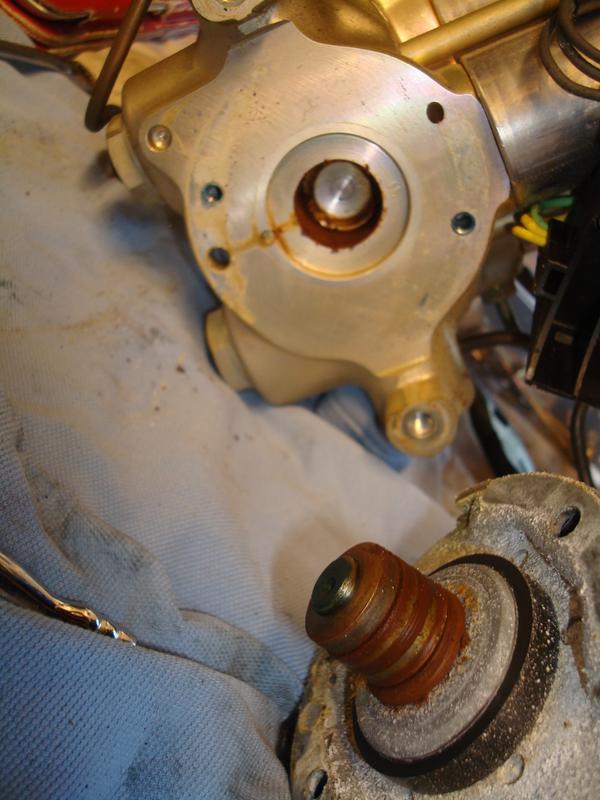
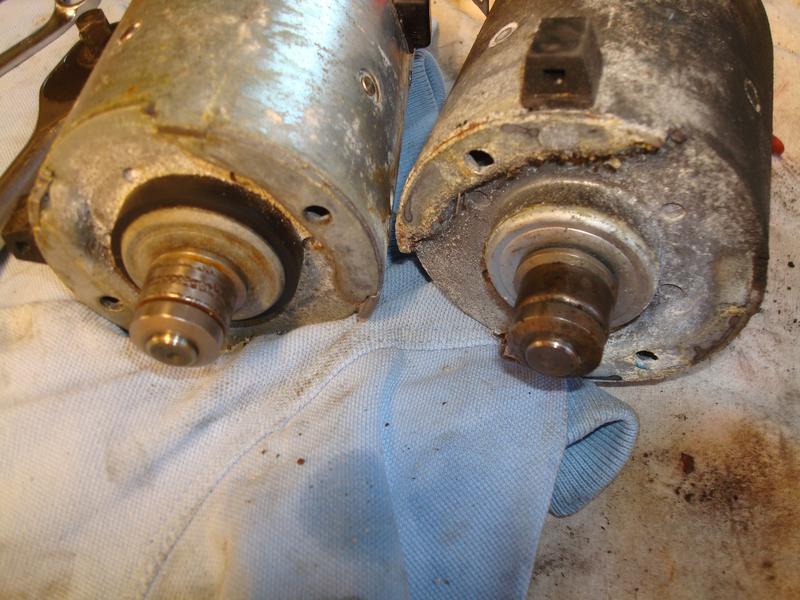
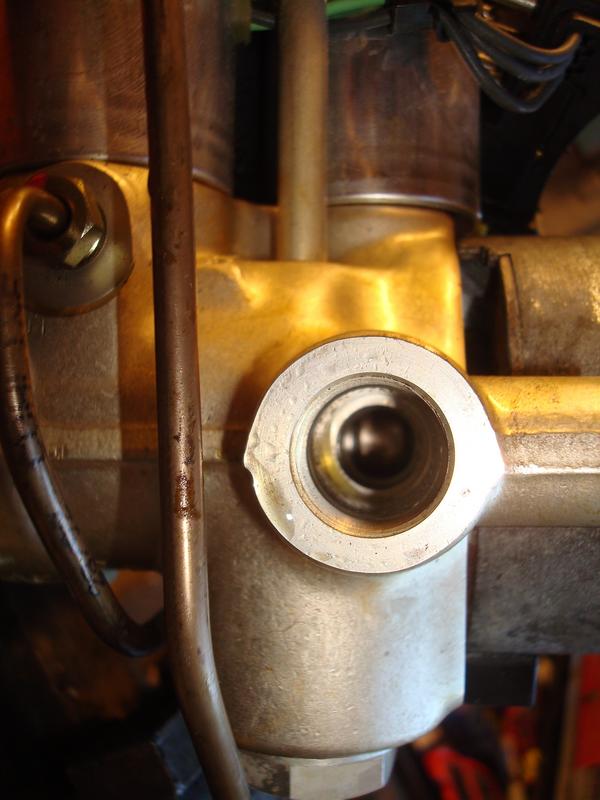
To then get to the bits we are interested in you simply remove the two very long torx bolts that secure the motor to the main pump, and carefully remove the motor. This is then revealed...

Image

Image


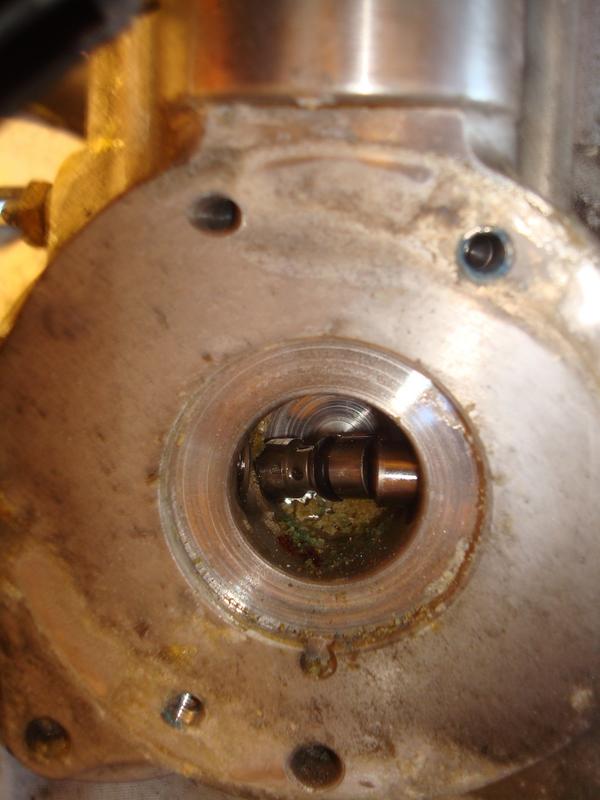
So on the end of the motor is a rotating cam and this operates two pistons in the pump. These are made up of a two piece piston inc 2 springs and a ball bearing. The order of them is critical, hence the careful disassembly. My plan was to remove one very carefully, suss out the order for the next build. Unhelpfully, my build thread had left this crucial info out, so it was imperative that I got this right.

Image

Image

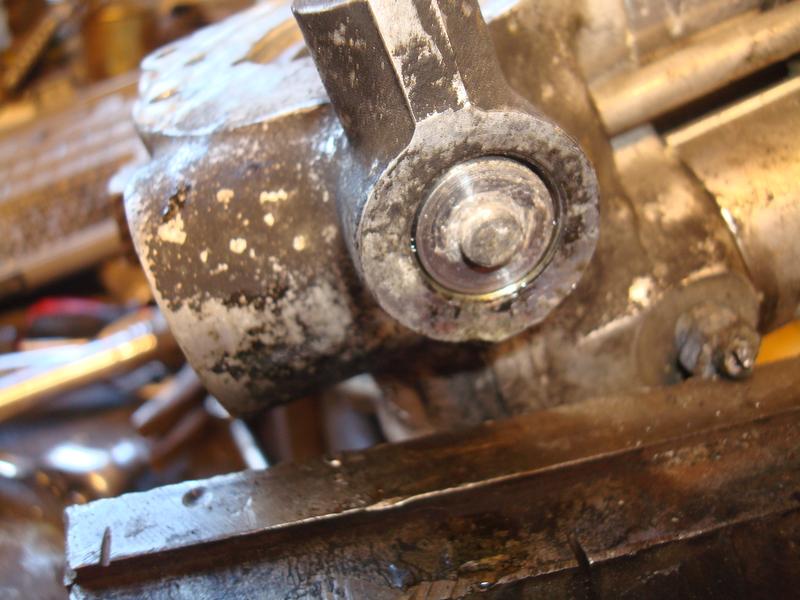
There was plenty of crud in there, but no corrosion at all

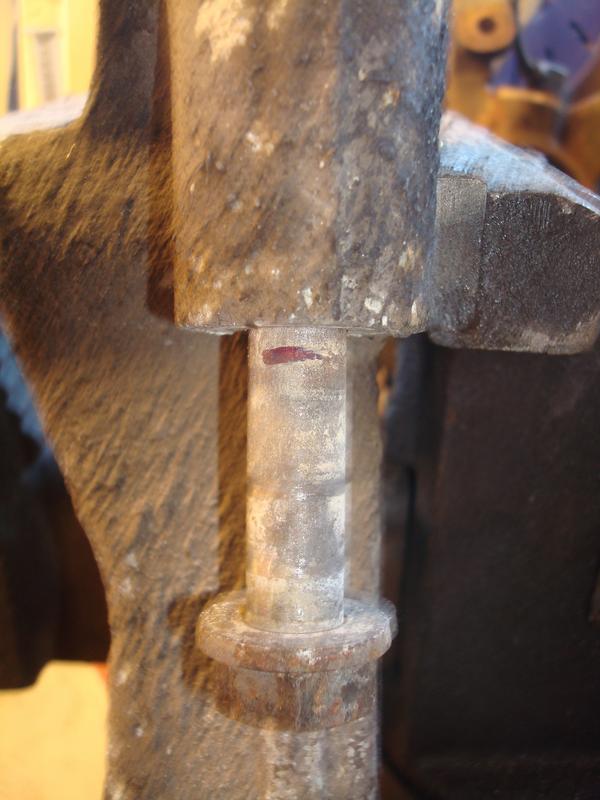
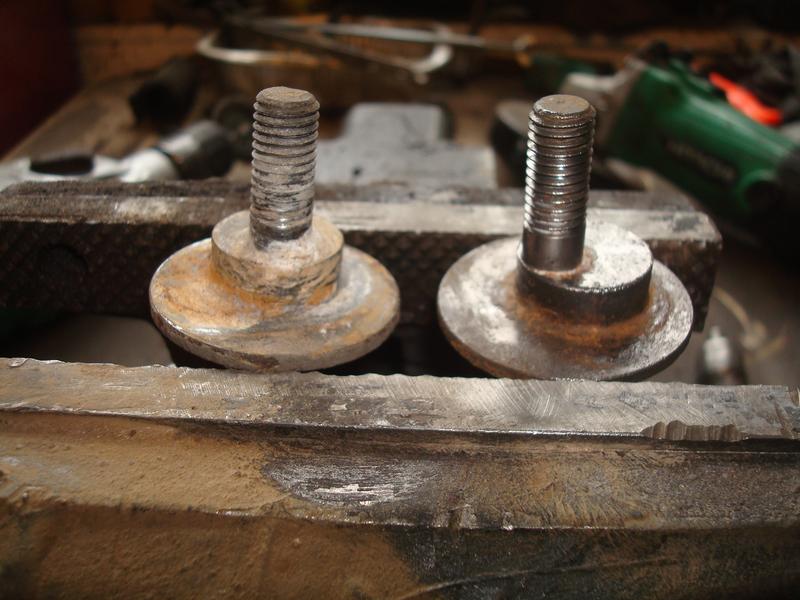
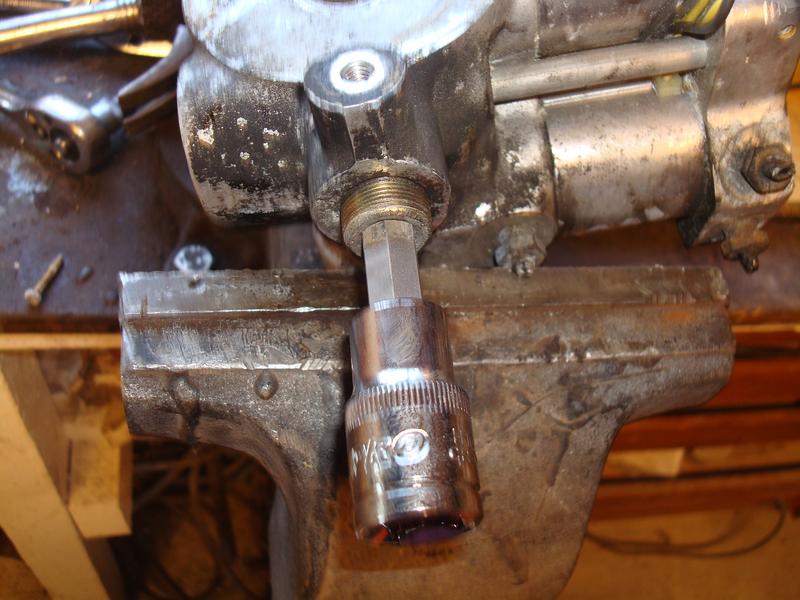
Access to the pistons is via 2 very large (10 or 12mm) allen headed bolts on the side of the pump. Once removed, you should be able to push out the pistons into the chamber in which they operate. Mine needed a good tap to free, but once removed were found to be in perfect condition. Thank you Mercedes!

Image

Image

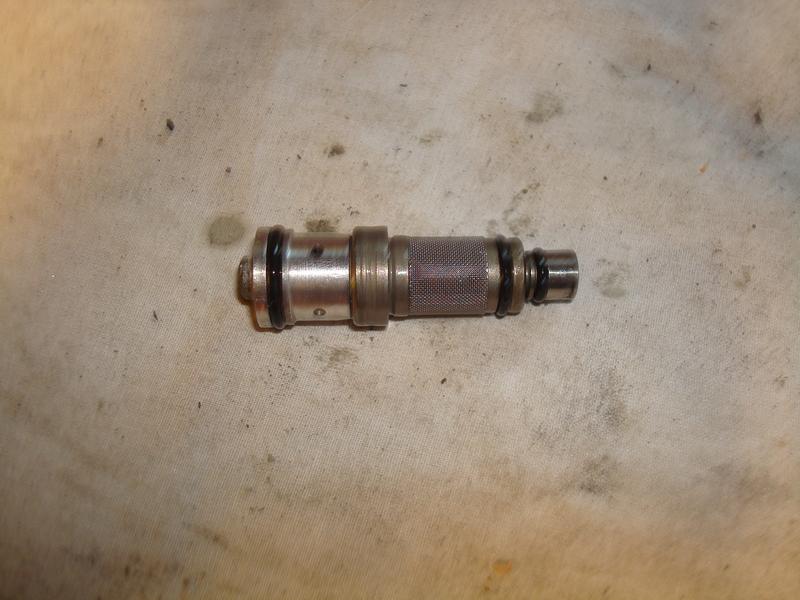
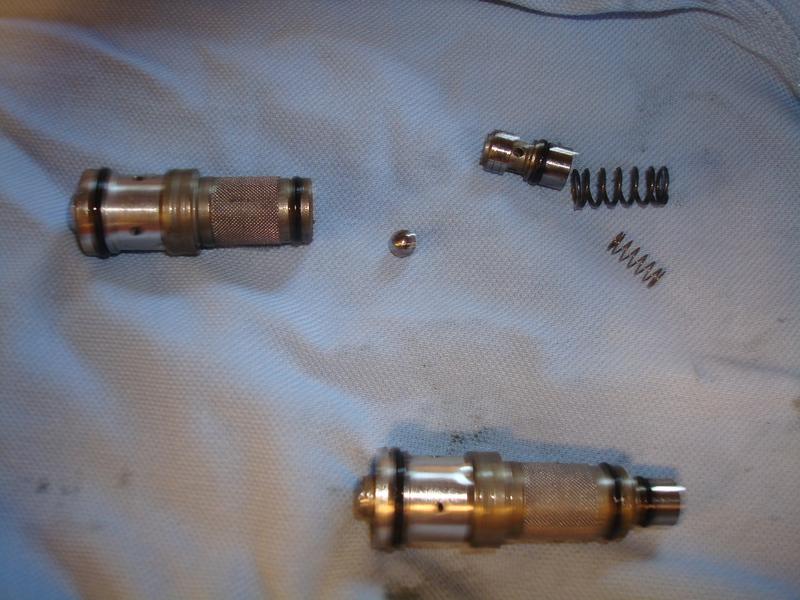
For anyone doing this, the order is large piston - contains the two springs set inside each other, the ball bearing then goes in (using the larger spring as a seat) and then the tiny piston presses into the larger one. I coated it in a little brake fluid, and you can then operate the tiny piston into the larger one. The rubber o ring stops it falling out, and the springs allow it to operate.

So, with a bit of confidence in what I was doing, I set about the Porsche pump.

Image

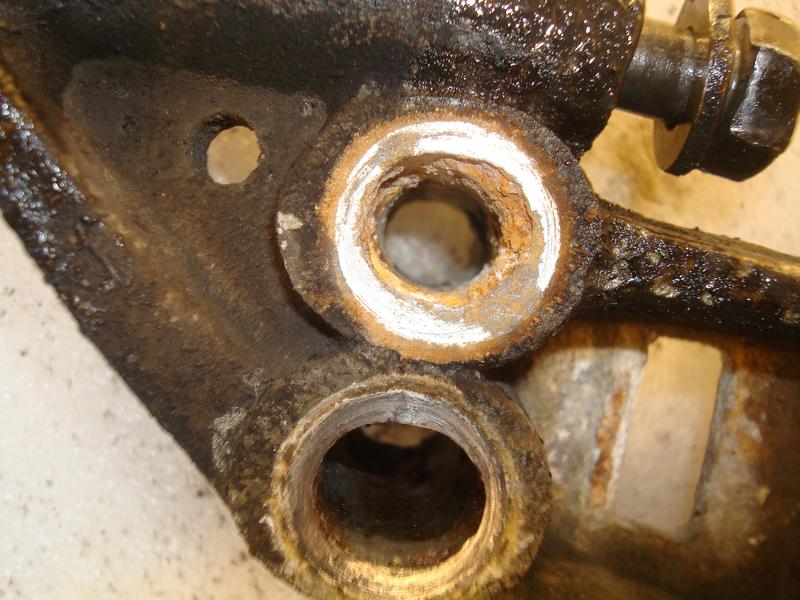
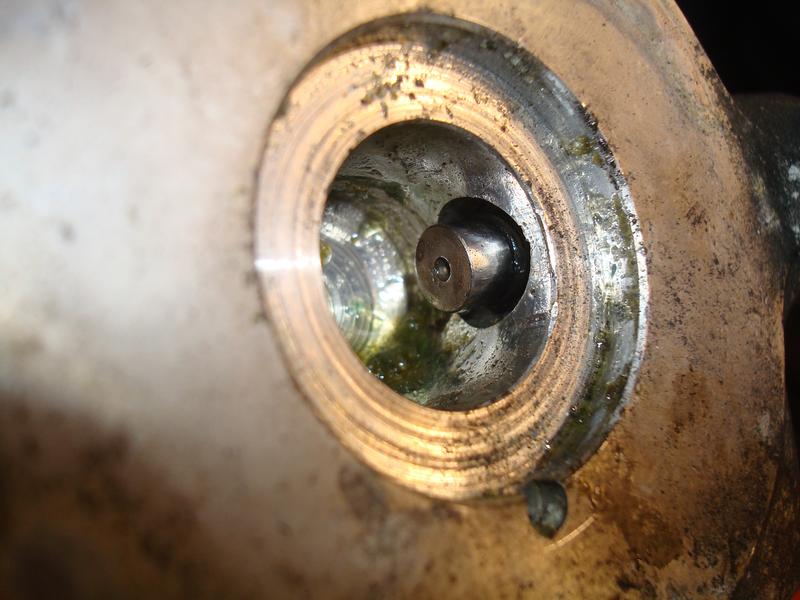
And then removing the motor reveals....

Image

Image

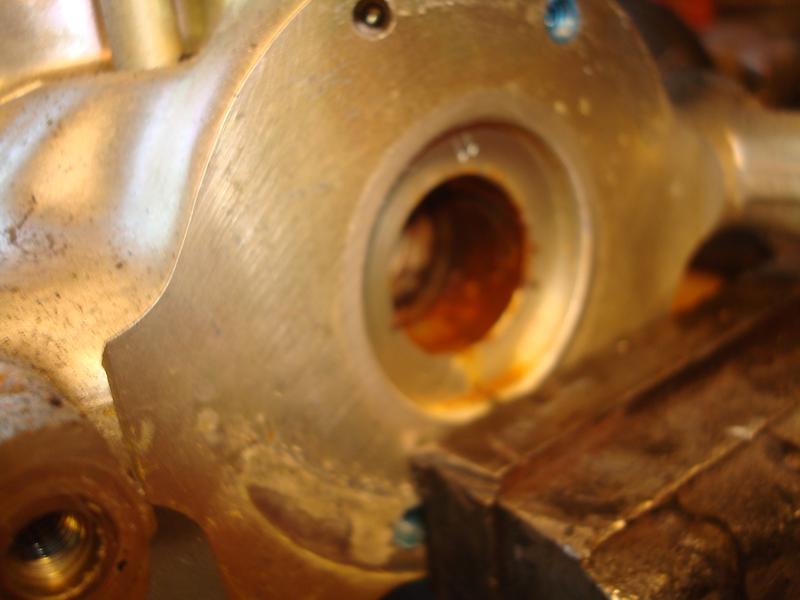
Thick with orange rusty crud. In fact, the pistons were seized solid and the tiny pitons were fully inserted into their larger counterparts and seized there (so much so that I can separate them).

Image

There are a few theories as to why this happens. The most credible is that the engine bay heat of the front engined Merc means that any moisture evaporates, whereas on the 964 it just causes rust.

So, I cleaned up the chamber, lubricated with a bit of fluid and inserted the rebuilt pistons. With the small outer piston compressed, you should be able to very carefully refit the motor. Of course, once the pistons have any pressure on them, they expand out to touch the cam on the motor.

Image

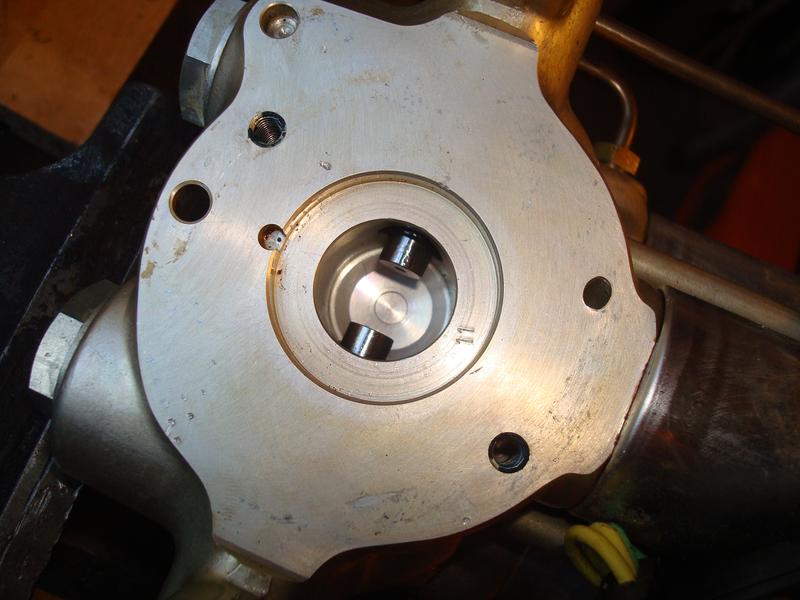
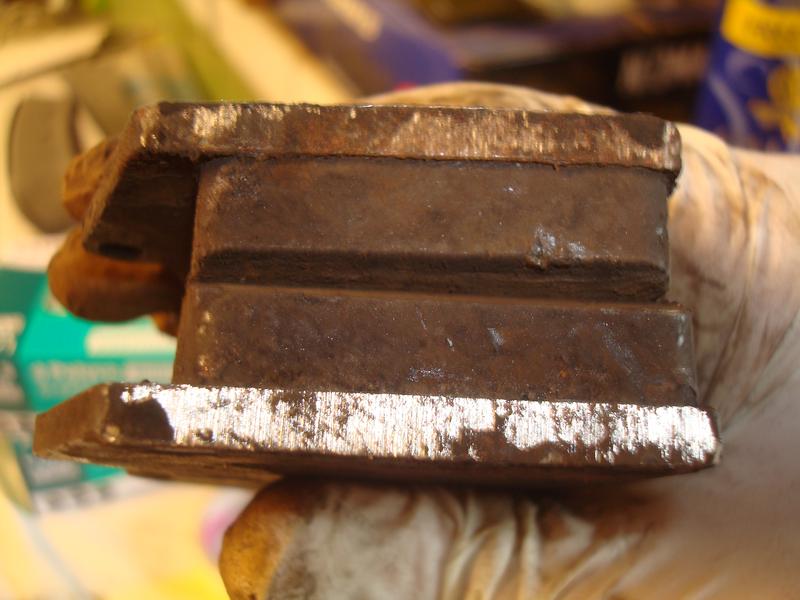
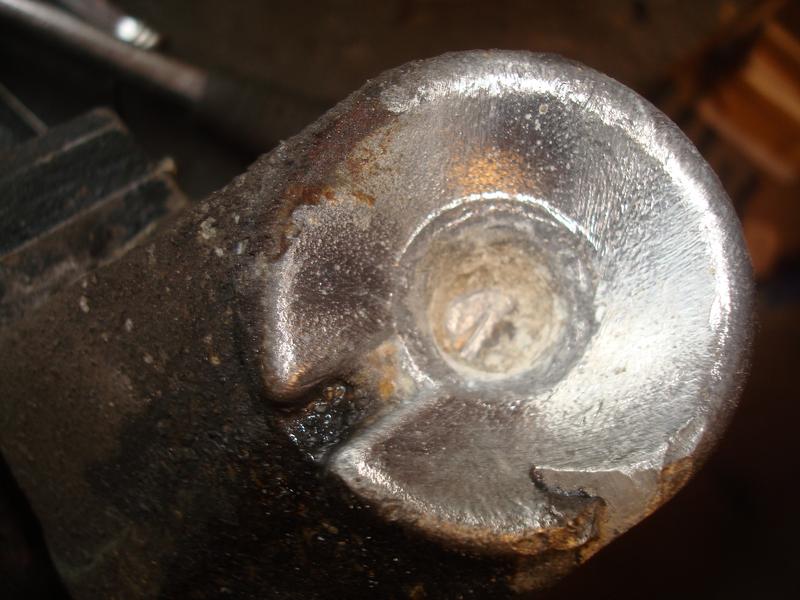
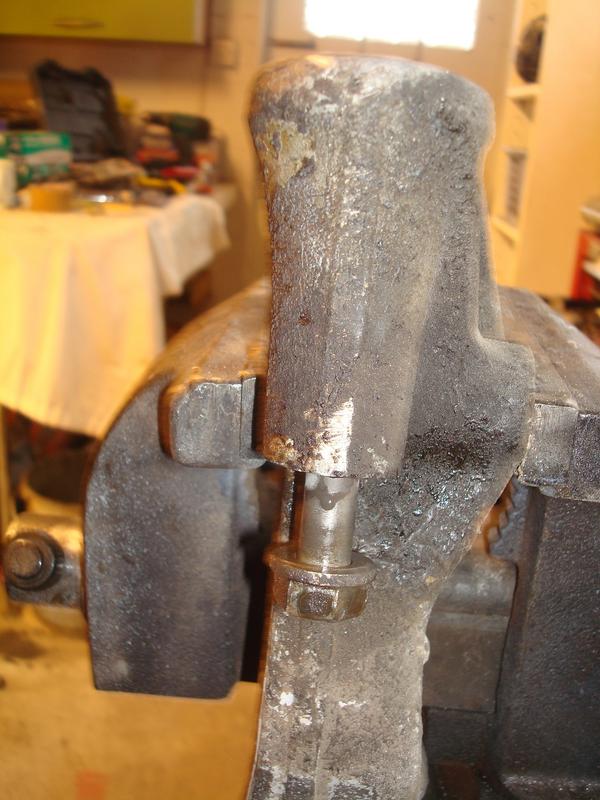
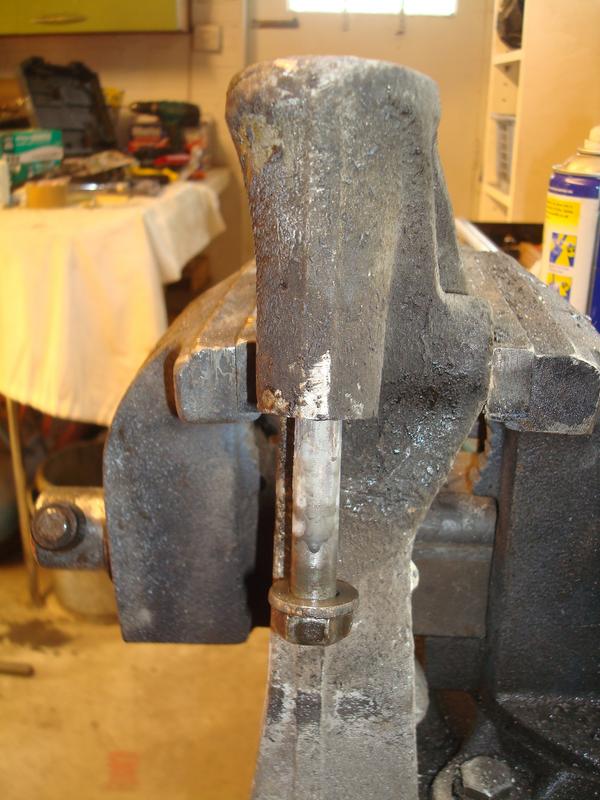
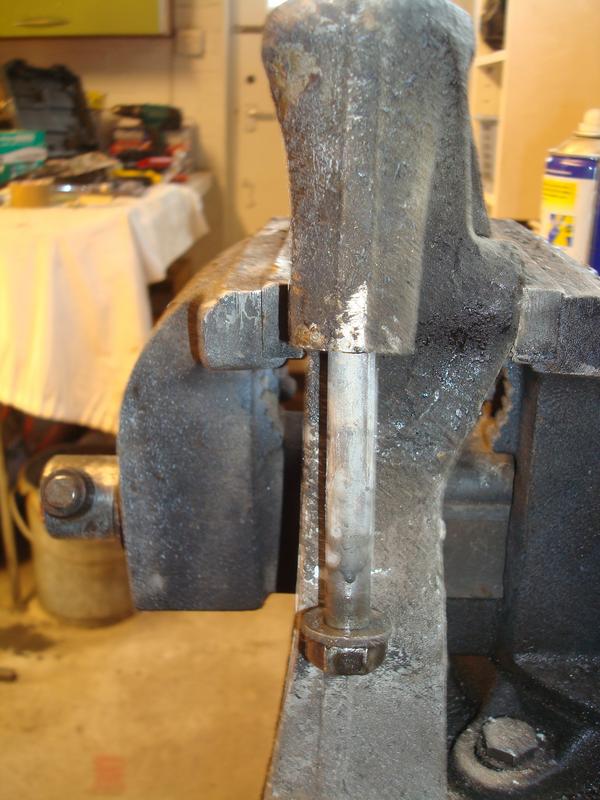
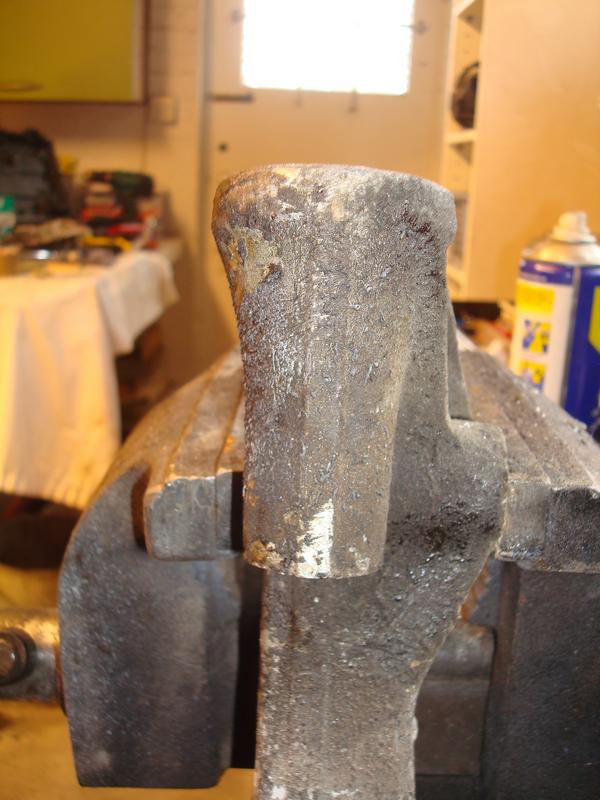
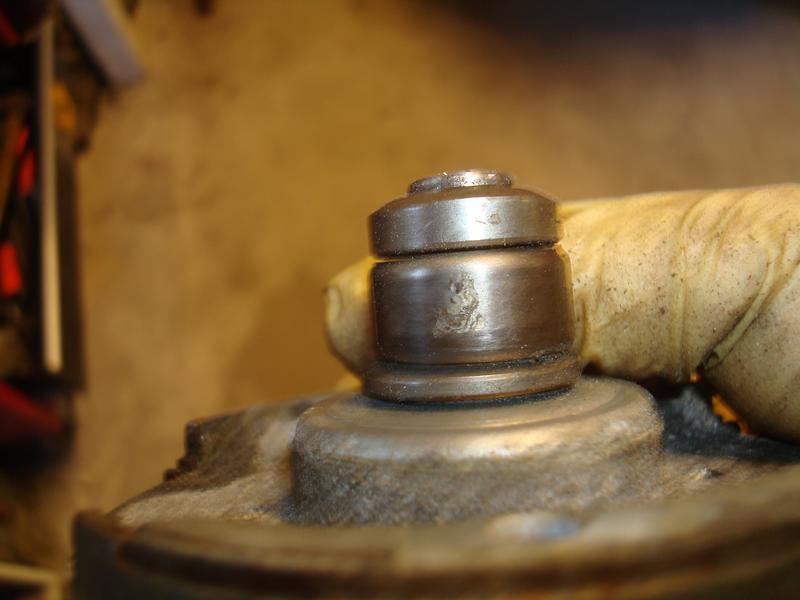
Now at this point I looked at the cam on the Porsche unit and was not very happy with the rust on it. It had been seized so long that it was completely pitted (would love to know how many years it got through an MOT with the ABS light permanently on...)

Image

Image

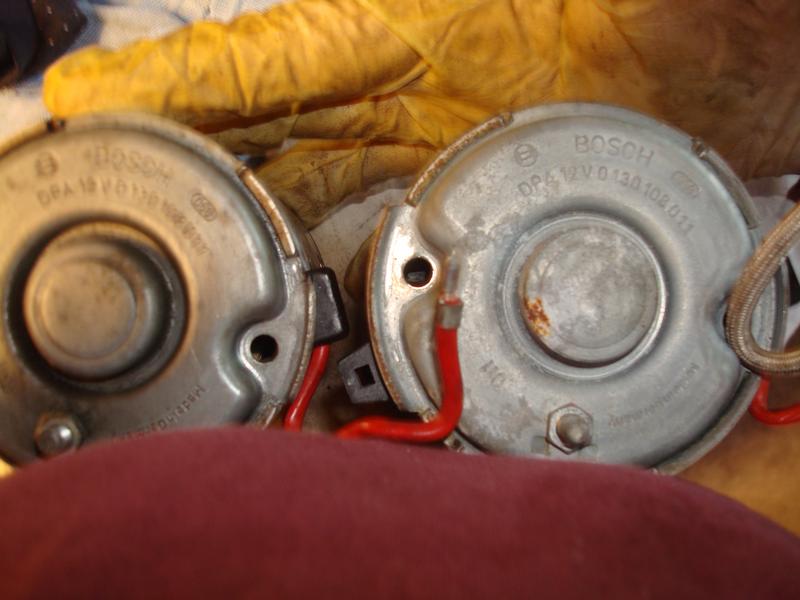
I looked then at the Merc motor, which was in much better condition. Would you believe it, whilst the pumps are different between the two cars, the motors share the same Bosch part number!

Image

Image

Image

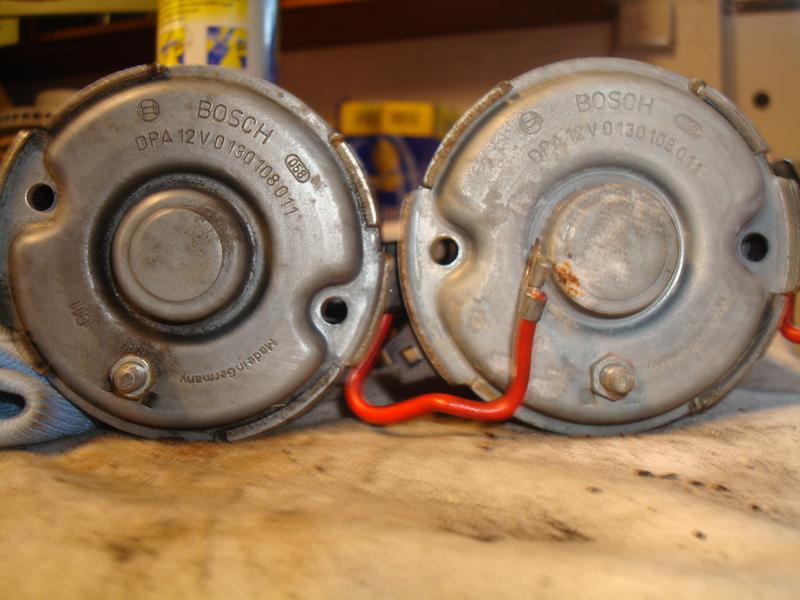
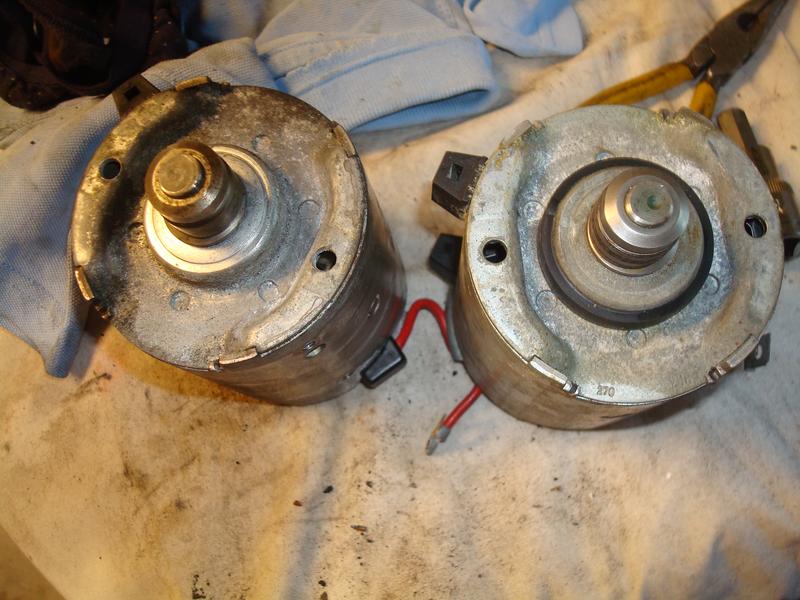
So I took a punt and put the Merc motor on my pump.

Image

Image

Image

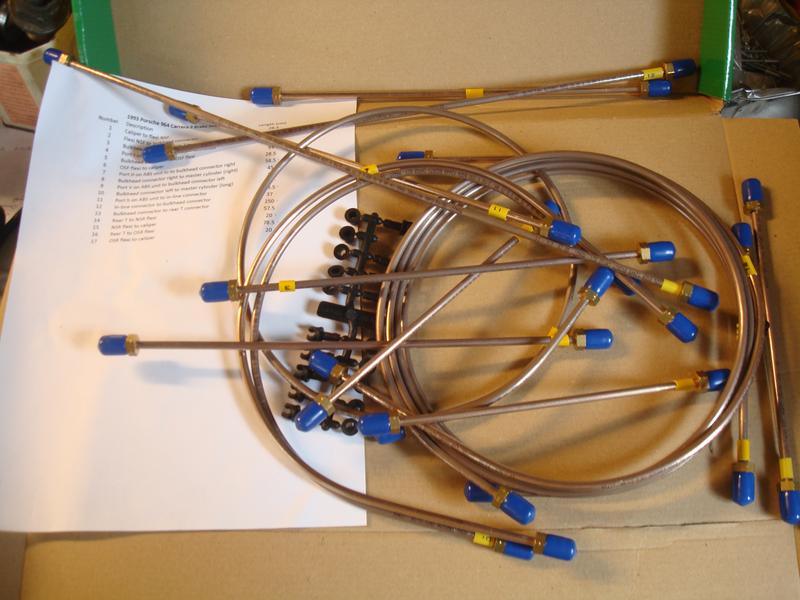
I replaced the damaged pipe and job done. I reckon it took 2 hours or so end to end.

Now I must confess, a day later I was clearing up the garage and found a ball bearing. My heart sank, was it from the ABS pump? Having come this far, and having not fitted it back in the car I decided it was better to take apart now and double check, which i did, and all was in order. I think the strip down and reassembly was done in 30 mins only this time round.

I later found out when I used my 3/8ths socket set it was the ball bearing from the hex socket. Grrrrr :oops:
93 964 C2
99 Boxster 2.5 > 3.4 hill climber

71 914/6 3.0 - gone

'You see Paul, hill climbing is like making love to a beautiful woman. You get your motor running, check your fluids, hang on tight and WHOA..30 seconds later it's all over!' Swiss Tony
rhd racer
Me and DDK sitting in a tree! KISSING
Posts: 2504
Joined: Wed Jun 23, 2004 9:47 pm
Location: Nottinghamshire

Re: 964 C2 - Rolling Resto

Post by rhd racer »

The next job on the list was the master cylinder / servo unit.

I have no reason to doubt it's function, and whilst I would normally replace the MC if torn down this far, for reasons I can't explain they are an eye watering £700 odd for a 964. So, I completed a cosmetic restoration only.

It, like the cross members, was covered in waxoyl, which is great for the bits I want it to protect, but looks horrible on the bits that don't need it. So, out with the wire brushes again to see what could be done, and I was impressed at how well it came up. The plastic cover for the linkage is remarkably resilient, and took loads of abuse and came up as clean as it was when it left the factory

Image

Image

Image

Image

With it looking so good, I was then left with the dilemma of what to do with the servo. The obvious thing was to repaint it, but it has a certain patina which I like, and painting it would lose the original Lucas sticker. So I settled for clear coat, and am pretty pleased with the result.

Image

Image
93 964 C2
99 Boxster 2.5 > 3.4 hill climber

71 914/6 3.0 - gone

'You see Paul, hill climbing is like making love to a beautiful woman. You get your motor running, check your fluids, hang on tight and WHOA..30 seconds later it's all over!' Swiss Tony
rhd racer
Me and DDK sitting in a tree! KISSING
Posts: 2504
Joined: Wed Jun 23, 2004 9:47 pm
Location: Nottinghamshire

Re: 964 C2 - Rolling Resto

Post by rhd racer »

Having spent a good month under the car, I am pretty pleased with what I have. It is true, the jobs have been properly fighting me, but the scope has not really crept beyond what I knew already (only brake hard lines and the oil pipe). Everything else was known, and much of the work has been to clean things up and put some love back into it after years of abuse and oil. The problem I have found is knowing when to stop; I could have put it back together with new parts but it would still have looked a bit of a dog...at least now, with a new engine and everything else replaced, rebuilt, it will be mechanically perfect.

I have also been super impressed at the lack of corrosion (probably the coating of oil :lol: ) and the straightness of the body. The chassis rail is dead straight, there are no signs of repair, straightening, creases, non factory welds - nothing. I can only assume that the rear wing damage at the time rendered it uneconomic to repair; they pulled them out without replacing, probably using a good amount of filler, and used the money saved to repaint in orange.

So luckily I am dealing with an orange, not a lemon :)

With the ABS unit out, I stripped out the front bonnet and cleaned everything up. I removed the battery and the cable tidy, and rust treated some tiny amounts of surface rust. I got some rattle can Midnight Blue paint and lacquer (it sprayed well, and the finish is good, and am really falling in love with the purple tinge of the colour) and finished it prior to refitting the ABS unit....

Image

Image

Image

Image

Image

And painting up the odd bits and pieces, including the ABS pump mounting bracket (and the new oil pipe to prevent the same happening again)

Image
93 964 C2
99 Boxster 2.5 > 3.4 hill climber

71 914/6 3.0 - gone

'You see Paul, hill climbing is like making love to a beautiful woman. You get your motor running, check your fluids, hang on tight and WHOA..30 seconds later it's all over!' Swiss Tony
rhd racer
Me and DDK sitting in a tree! KISSING
Posts: 2504
Joined: Wed Jun 23, 2004 9:47 pm
Location: Nottinghamshire

Re: 964 C2 - Rolling Resto

Post by rhd racer »

Then it was simply a case of fitting up nice clean parts...

Image

It only really being hampered by a spinning bolt when refitting the OS longitudinal member. I was starting to get concerned, because I thought this has mullered the thread in the transverse member thay supports the steering rack (again cast aluminium). Luckily, it turns out those nice people at Porsche bolt it with a plate containing two captive studs, so I just cut one off and re-welded it....

Image

And then carried on with the refit

Image

Image

Image
93 964 C2
99 Boxster 2.5 > 3.4 hill climber

71 914/6 3.0 - gone

'You see Paul, hill climbing is like making love to a beautiful woman. You get your motor running, check your fluids, hang on tight and WHOA..30 seconds later it's all over!' Swiss Tony
rhd racer
Me and DDK sitting in a tree! KISSING
Posts: 2504
Joined: Wed Jun 23, 2004 9:47 pm
Location: Nottinghamshire

Re: 964 C2 - Rolling Resto

Post by rhd racer »

It was then onto doing the brake pipes.

Now you may recall I was prepared to make them, but there is a lot (17 in fact) so I thought I would have a quick look to see if Automec made a set. Well they don't, but a quick call to them came up with a Plan B which was better than Plan A.

For £50 only, they will make up a set to a schematic. The person providing the schematic gets a great deal, and they get a pattern for making future sets for customers. So, I prepared the list below, and sent them a schematic and 3 days later I got a box of labelled lines through, for less than the cost of the components.

Number Description Length (cm)
1 Caliper to flexi NSF 28.5
2 Flexi NSF to bulkhead connector 16
3 Bulkhead connector from 2 to port l on ABS unit 27
4 Port r on ABS unit to bulkhead connector 20.5
5 Bulkhead connector to OSF flexi 93
6 OSF flexi to caliper 28.5
7 Port H on ABS unit to to bulkhead connector right 58.5
8 Bulkhead connector right to master cylinder (right) 45
9 Port V on ABS unit to bulkhead connector left 32
10 Bulkhead connector left to master cylinder (long) 51
11 Port h on ABS unit to in-line connector 28.5
12 In-line connector to bulkhead connector 37
13 Bulkhead connector to rear T connector 250
14 Rear T to NSR flexi 57.5
15 NSR flexi to caliper 20
16 Rear T to OSR flexi 78.5
17 OSR flexi to caliper 20


Image

Here is the first one installed, and clipped in place above the MC / Servo unit. 16 to go!

And that is everything right up to date, until tomorrow when I have a garage pass.....!
93 964 C2
99 Boxster 2.5 > 3.4 hill climber

71 914/6 3.0 - gone

'You see Paul, hill climbing is like making love to a beautiful woman. You get your motor running, check your fluids, hang on tight and WHOA..30 seconds later it's all over!' Swiss Tony
911hillclimber
Nurse, I think I need some assistance
Posts: 20579
Joined: Mon Mar 10, 2008 6:26 pm
Location: West Midlands

Re: 964 C2 - Rolling Resto

Post by 911hillclimber »

I'm impressed at your tenacity and determination.
I am un-impressed with such crappy engineering used by the Design Dept of the factory.

I guess my Skoda is much the same, and I'm sure my Boxster certainly is, but poor on such a pricey car?
I expect over the years of UK weather it is to be expected.

Keep the update coming Wayne!
73T 911 Coupe, road/hillclimber 3.2L
Lola t 492 / 3.2 hillclimb racer
Boxster 987 Gen II 2.9
rhd racer
Me and DDK sitting in a tree! KISSING
Posts: 2504
Joined: Wed Jun 23, 2004 9:47 pm
Location: Nottinghamshire

Re: 964 C2 - Rolling Resto

Post by rhd racer »

911hillclimber wrote:I'm impressed at your tenacity and determination.
I am un-impressed with such crappy engineering used by the Design Dept of the factory.

I guess my Skoda is much the same, and I'm sure my Boxster certainly is, but poor on such a pricey car?
I expect over the years of UK weather it is to be expected.

Keep the update coming Wayne!
Thanks Graham, sadly it is the same on your Skoda. My Passat (now replaced) went for a service last year and rear discs. All well within my capability but I have opted out of the co car scheme and so don't mind paying for someone else to maintain, I am quids in anyway. Well the calipers had corroded to the rear aluminium arms so needed drilling out, retapping etc etc. Not a problem you want on a car that you need the next day for a meeting or to run the kids around. At least on a hobby car if it takes a day or a week, it doesn't really matter...

It is a shame really, it requires a smear of paste to prevent, but with cars built by machines with complex mixes of metals, you can see why they don't. I am just glad I don't work in a garage dealing with this hangover of optimum cost control every day....
93 964 C2
99 Boxster 2.5 > 3.4 hill climber

71 914/6 3.0 - gone

'You see Paul, hill climbing is like making love to a beautiful woman. You get your motor running, check your fluids, hang on tight and WHOA..30 seconds later it's all over!' Swiss Tony
User avatar
hot66
Moderator
Posts: 19156
Joined: Tue Nov 11, 2003 4:17 pm
Location: North Yorkshire

Re: 964 C2 - Rolling Resto

Post by hot66 »

Wow, lots of work . Great to see it being detailed on here
James

1973 911 2.4S
1993 964 C2
2010 987 Spyder

1963 Honda C100 Supercub

Its not how fast you go, but how you go fast ;)
rhd racer
Me and DDK sitting in a tree! KISSING
Posts: 2504
Joined: Wed Jun 23, 2004 9:47 pm
Location: Nottinghamshire

Re: 964 C2 - Rolling Resto

Post by rhd racer »

hot66 wrote:Wow, lots of work . Great to see it being detailed on here Image
Thanks James - it is a bit of a labour of love! Today was no exception.....

So the plan for today was to do all the hard lines - brake and clutch. I knew this would be frustrating, and painful, as I have been on light duties for a bit after breaking a rib moving my old lathe a month or so ago after I sold it, and then trying to create an 11th finger last Monday with an angle grinder / 1mm cutting disc....

Image

This is a week on, healing nicely. Clean bill of health from the nurse on Friday, ok to work on the car again as long as I am careful and wear gloves. No excuses then.

So, this is what greeted me this morning...

Image

So, best crack on then.

Now, the reason I was resisting doing this (apart from the fact it was a day lying on my back on the crawler, and the associated pain with getting up / and trying to form lines with my finger - bring left handed too) but also how much of a PITA fine threaded unions are to join. On most cars you are connecting a hard line to a flexi, so it allows a bit of wiggle room, whereas I knew that the bulkhead fittings to the MC being rigid to rigid would take a lot of messing about and manipulating until they were perfect and do up without mullering the thread. And so it was.

I had kept all the old lines so I could form an approximate new line from the patterns, as on the 964 there are some very curious shapes and lots of fixing clips. After an hour of wrestling with the first hard line between the MC and the bulkhead, I was already thinking the day would be toast...

Luckily the 2nd was easier, and I was soon on a roll.

Image

The N/s front line is very short, and difficult to form. It is marginal as to whether I had overdone it, it did not kink at the tightest radius but it has slightly ovalled. I think it will be ok, but have kept the original (the only line on the whole car which I managed to take off without cutting) so if it is not right I can refit, or make a new one and be more careful.

Image

Next up, the biggest challenge - the long line that goes up the centre tunnel, which takes a very odd route around the front cross member and adjacent to the moving steering arms. I did consider for a second taking a more simple route up the tunnel towards the MC, and then follow the lines already fitted, but decided to do it properly as per OE. On reflection, I am guessing the route is determined by C2 and C4 configerations, where the front propshaft would dictate what it does as standard.

Anyhow, this is the old one I had removed....

Image

Image

I decided to replicate the front, complex section, fit it and then do the centre section on the hoof. This proved to be the best plan.

Image

Image

It is really tight to the steering, and even with copper nickel which is pretty easy to manipulate, very difficult to get where it should be. and of course it all needs feeding through once formed, which is not so easy with a 2m line!

I also cleaned up the T piece, which looked like scrap but cleaned up like a pin...

Image

Image

Anyway, got there eventually, the tunnel section being the easy bit, I opted for taking a slightly shallower route at the far end to the side of the gearbox as the original was overly complex for what was required.

Image

And, you have to feed all the rear lines around handbrake lines etc - it is all really tight. Another job that would have been almost impossible with the gearbox in, if not totally impossible.

Image
93 964 C2
99 Boxster 2.5 > 3.4 hill climber

71 914/6 3.0 - gone

'You see Paul, hill climbing is like making love to a beautiful woman. You get your motor running, check your fluids, hang on tight and WHOA..30 seconds later it's all over!' Swiss Tony
rhd racer
Me and DDK sitting in a tree! KISSING
Posts: 2504
Joined: Wed Jun 23, 2004 9:47 pm
Location: Nottinghamshire

Re: 964 C2 - Rolling Resto

Post by rhd racer »

The next one, which goes from the T piece over the gearbox to the O/s, was no easier. Again, threading around other things and a pretty complex shape

Image

Image

And the nearside. Well I formed this to be an exact copy of the one I removed, but it would not work in any orientation, so I had to go back to square one and form it in situ to the clips in the chassis. I think, as I found out, that it was so difficult to thread through the handbrake hard lines that I probably bent the old one on removal. But, it turned out ok in the end

Image
93 964 C2
99 Boxster 2.5 > 3.4 hill climber

71 914/6 3.0 - gone

'You see Paul, hill climbing is like making love to a beautiful woman. You get your motor running, check your fluids, hang on tight and WHOA..30 seconds later it's all over!' Swiss Tony
Tosh
Me and DDK sitting in a tree! KISSING
Posts: 2859
Joined: Mon Nov 17, 2008 9:19 pm

Re: 964 C2 - Rolling Resto

Post by Tosh »

Wow
Great skills - not just with an angle grinder :wink:
02 986 Boxster
68 T Sporto (sold)
91 964 C2 Tip (sold)
Post Reply