

964 C2 - Rolling Resto
Moderator: Bootsy
-
Jonny Hart

- Put a fork in me, I'm done!
- Posts: 1549
- Joined: Mon Feb 01, 2010 2:28 pm
Re: 964 C2 - Rolling Resto
Might add that we have a German fuse panel customer who is a lighting engineer. He measured the headlamp brightness increase with relays of 18%.
-
rhd racer
- DDK 1st, 2nd and 3rd for me!
- Posts: 2062
- Joined: Wed Jun 23, 2004 9:47 pm
- Location: Nottinghamshire
Re: 964 C2 - Rolling Resto
Thanks Jonny - validates my decision then! I have a table of lumens cod voltage with a standard bulb so will calculate a rough % once complete.
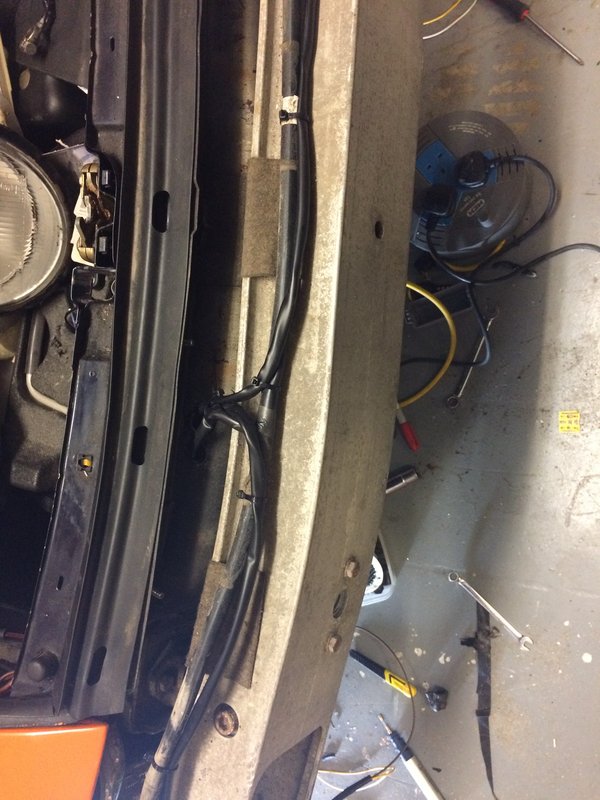
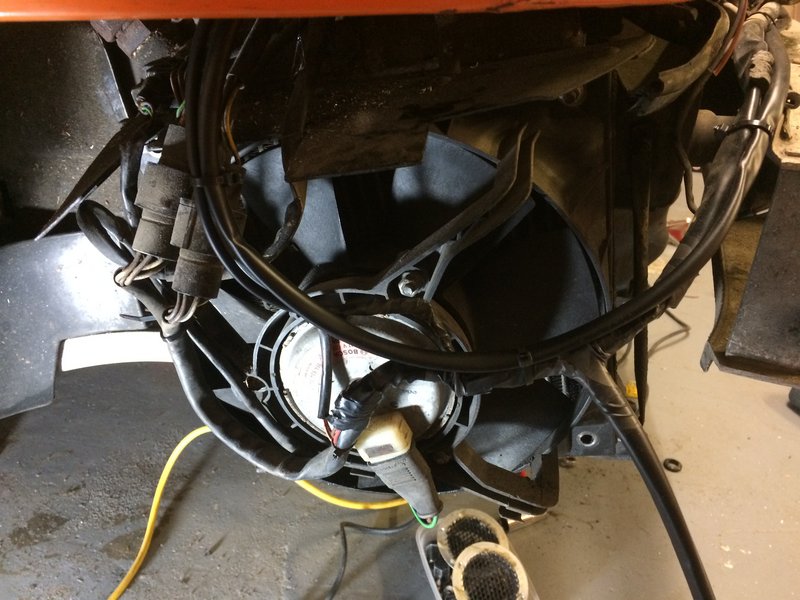
I had original thought I might be able to disconnect the wiring from the NSF and pull it through. It seemed tight, so I removed the bumper and was glad I hadn’t kept tugging at it! Despite the bumper being off for weeks last year I clearly paid absolutely no attention to these self adhesive felt pads holding the loom in place....

With the loom released I could pull out that junction where left and right looms split and recognised it...

It is the headlamp grommet! It was obviously just hanging there when I got the car and in ignorance I left it. So after some drilling (it needs a big hole) I refitted it to the bucket. I presume my bucket being the wrong year for the car (identified by the shape required for adjustable headlamps) uses a different grommet

So, loom released and laid out I can sort out the weak spots of prior repairs / bodges and replace.

I only had 45 mins outside so did not get far. However I removed some insulation and identified that the side lights share the earth on the 3 pin headlamp connector, which surprised me a bit TBH

I have ordered some more supplies as I was running out of heat shrink and sleeving, plus I have worked out how I am going to deliver the power for the relays so needed some fuse units and they arrived today, so aim to get it all done and tested on Saturday morning all being well.
Sent from my iPhone using Tapatalk
93 964 C2
99 Boxster 2.5 > 2.7 hill climber
71 914/6 3.0 - gone
'You see Paul, hill climbing is like making love to a beautiful woman. You get your motor running, check your fluids, hang on tight and WHOA..30 seconds later it's all over!' Swiss Tony
99 Boxster 2.5 > 2.7 hill climber
71 914/6 3.0 - gone
'You see Paul, hill climbing is like making love to a beautiful woman. You get your motor running, check your fluids, hang on tight and WHOA..30 seconds later it's all over!' Swiss Tony
-
rhd racer
- DDK 1st, 2nd and 3rd for me!
- Posts: 2062
- Joined: Wed Jun 23, 2004 9:47 pm
- Location: Nottinghamshire
Re: 964 C2 - Rolling Resto
I managed a whole half hour tonight before I couldn’t feel my fingers anymore!
Photos of electrical work are not exciting, and are not easy to make sense of so I will show the highlights so you can do this and leave you to fill in the gaps.
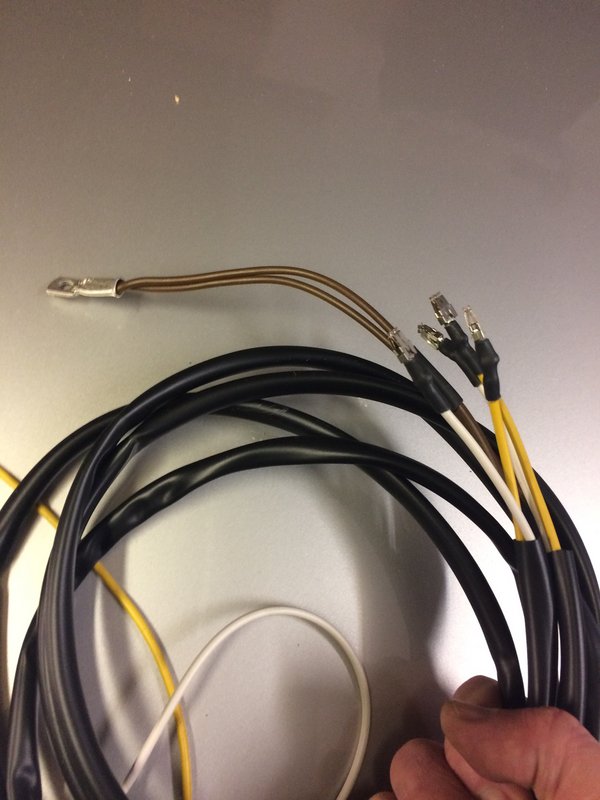
First job was to link the front left and right dip and main feeds as were together where they split. This creates one dip, one main wire to act as the trigger feed to operate each relay. Soldered and heat-shrunk.

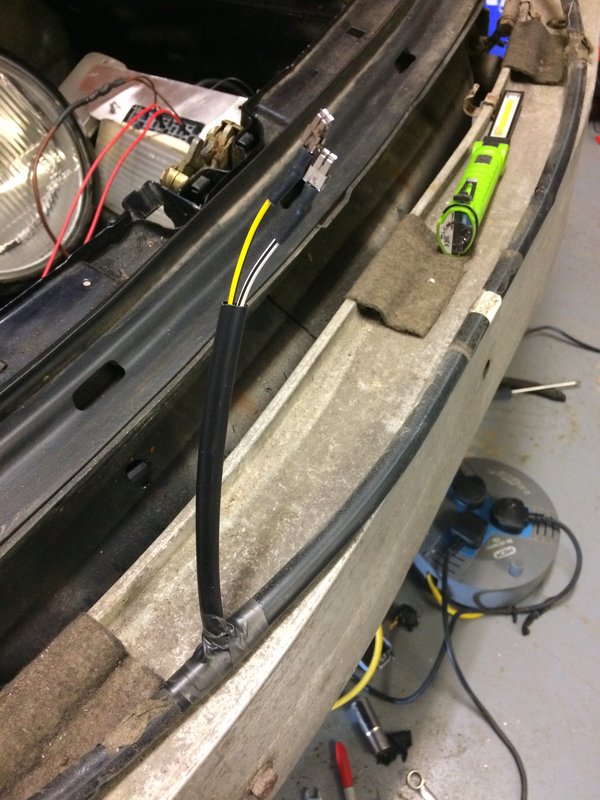
I then opened up the existing loom across the front of the car where I want to feed it into the frunk. Careful slit, Bob is your mother’s uncle


Finally I replaced the indicator loom which had two damaged sections of insulation, and as a result of a previous repair had a coloured earth instead of brown, and that just just plain annoys me!

I will make good the exposed T section tomorrow when I have run my new headlamp wires down the existing sleeving
Sent from my iPhone using Tapatalk
Photos of electrical work are not exciting, and are not easy to make sense of so I will show the highlights so you can do this and leave you to fill in the gaps.
First job was to link the front left and right dip and main feeds as were together where they split. This creates one dip, one main wire to act as the trigger feed to operate each relay. Soldered and heat-shrunk.

I then opened up the existing loom across the front of the car where I want to feed it into the frunk. Careful slit, Bob is your mother’s uncle


Finally I replaced the indicator loom which had two damaged sections of insulation, and as a result of a previous repair had a coloured earth instead of brown, and that just just plain annoys me!

I will make good the exposed T section tomorrow when I have run my new headlamp wires down the existing sleeving
Sent from my iPhone using Tapatalk
93 964 C2
99 Boxster 2.5 > 2.7 hill climber
71 914/6 3.0 - gone
'You see Paul, hill climbing is like making love to a beautiful woman. You get your motor running, check your fluids, hang on tight and WHOA..30 seconds later it's all over!' Swiss Tony
99 Boxster 2.5 > 2.7 hill climber
71 914/6 3.0 - gone
'You see Paul, hill climbing is like making love to a beautiful woman. You get your motor running, check your fluids, hang on tight and WHOA..30 seconds later it's all over!' Swiss Tony
-
rhd racer
- DDK 1st, 2nd and 3rd for me!
- Posts: 2062
- Joined: Wed Jun 23, 2004 9:47 pm
- Location: Nottinghamshire
Re: 964 C2 - Rolling Resto
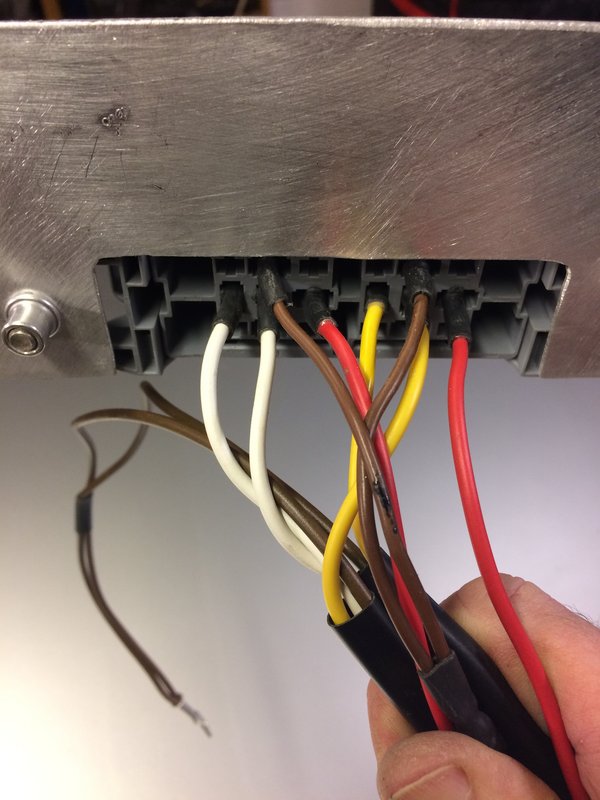
First job on Saturday morning was to make the new headlamp looms. A higher gauge wire than standard, and uprated earths, so they will take more load if I decide to fit upgraded bulbs at any stage. Obviously you will notice the error here, in that I have connected a relay terminal to the earths, where in fact they terminate directly on an earthing point. But you dont need me to tell you that.
Let's call it 2nd coffee exuberance
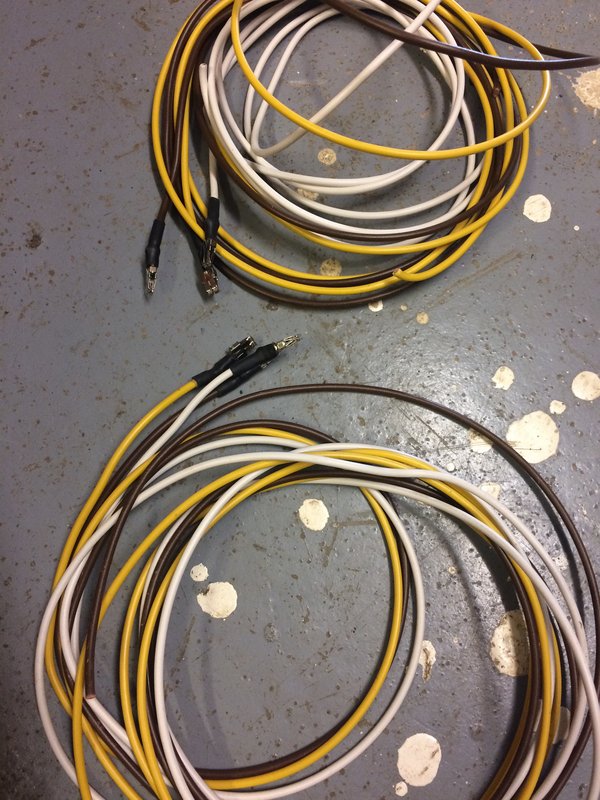
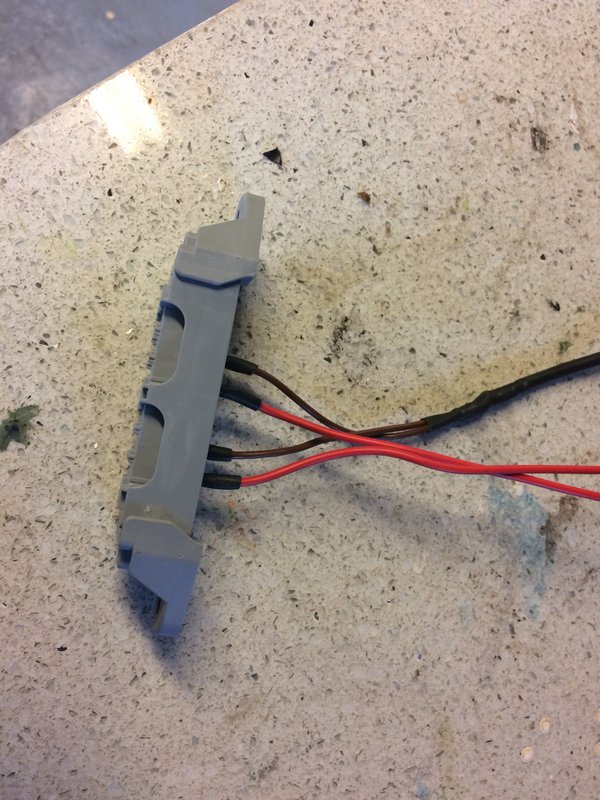
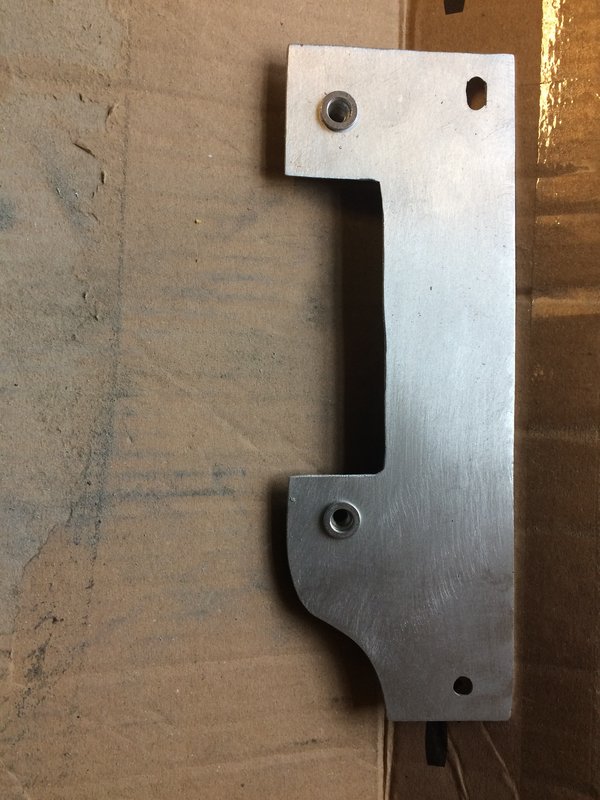
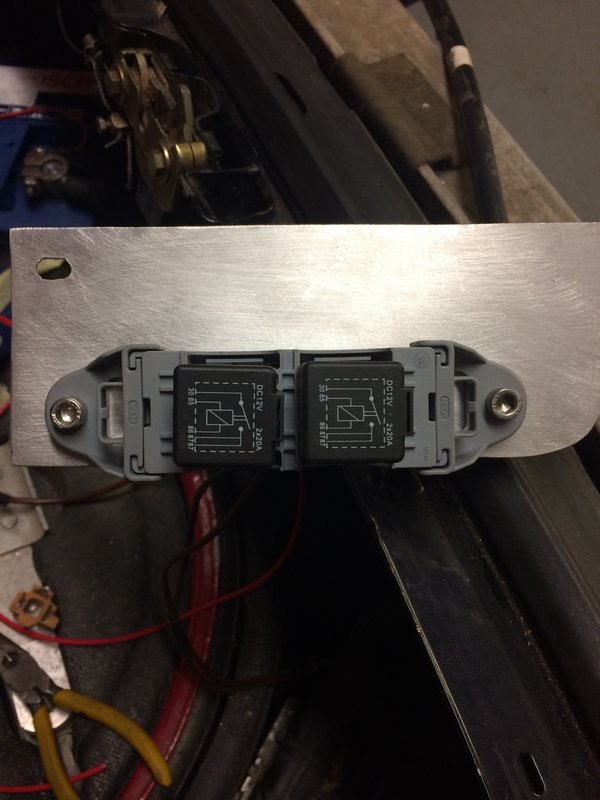
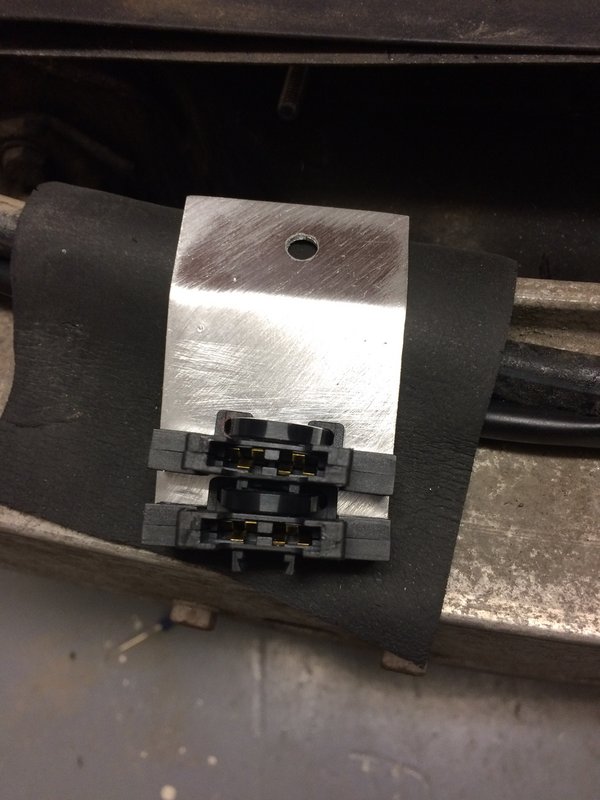
I then made up the live and earth wires and connected them to the relay holder, before making a simple panel out of aluminium. This started of one shape, morphed into another, before eventually ending up a shadow of its former self
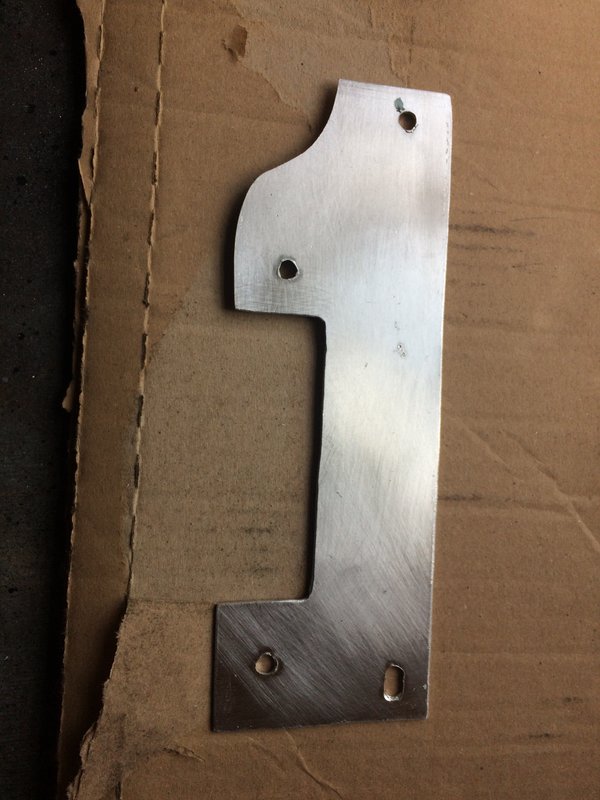
Riv nuts to secure the panel
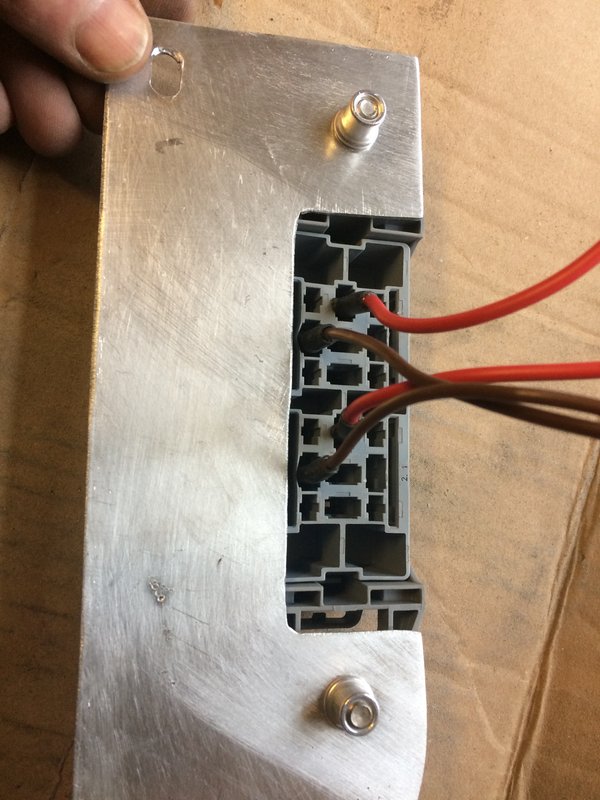
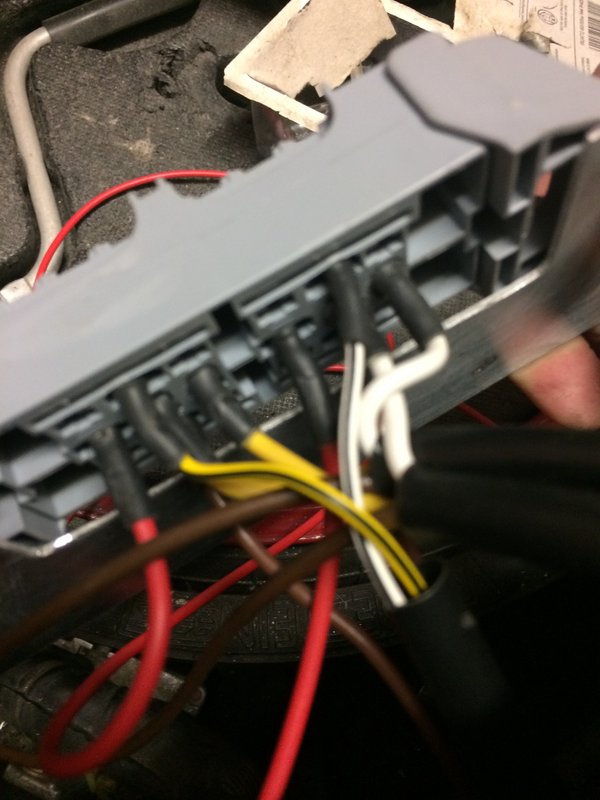
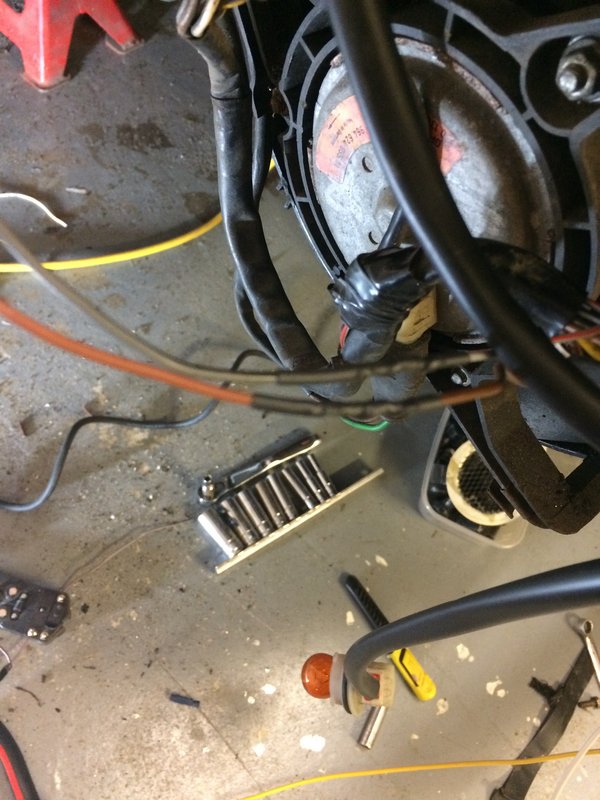
I then fed through the trigger wires for the relay. I had then decided to put the relay panel on the driver's side, because it might be a little touch an go with clearance for the battery, and removing the ABS pump to change the battery would be a little inconvenient! So I had to make a new hole in the original loom to pull the wires through in a different place
I then sleeved the new headlamp looms complete with earthing terminal and these are ready to feed through the lamps after connecting to the relay block
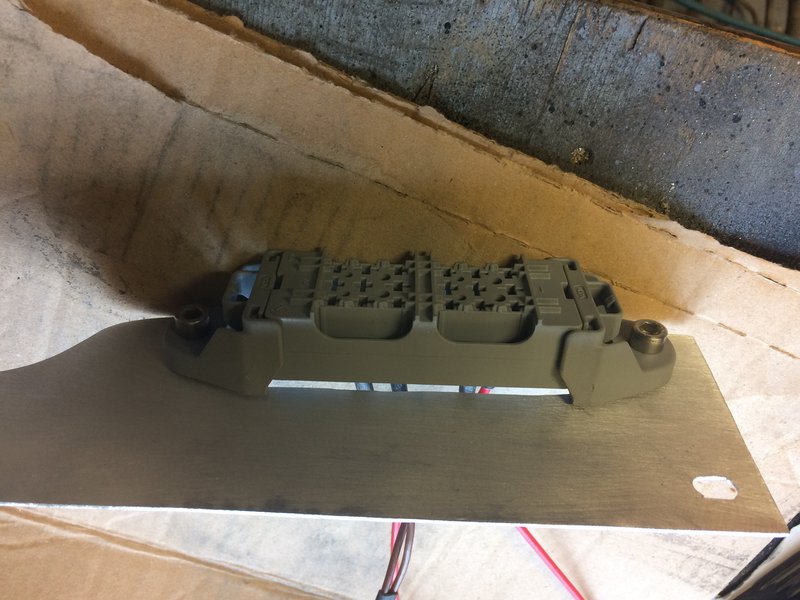
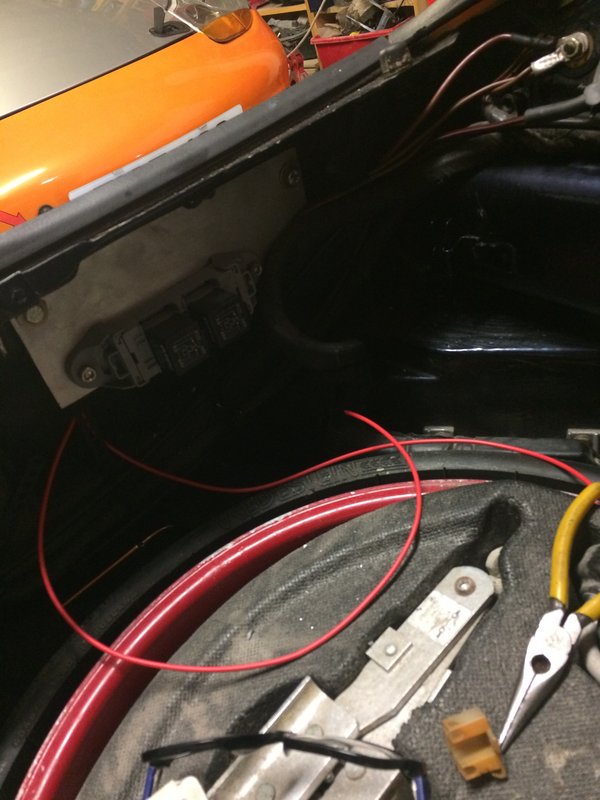
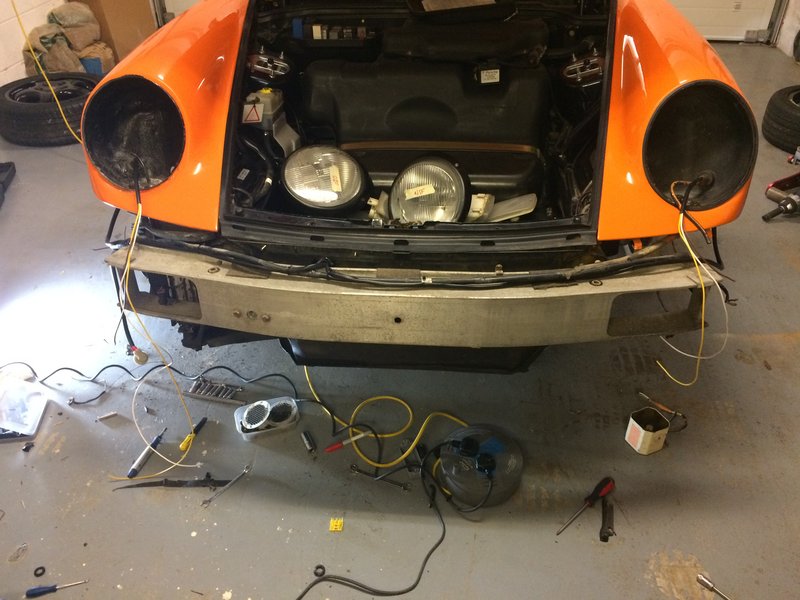
Then in situ under the front slam panel. I mounted it on the original bolts for the reinforcing panel which sits under the smile rubber, so only had to drill two holes for the looms behind the bumper bar. Obviously the slot is a design feature as holes are so last year....
Let's call it 2nd coffee exuberance
I then made up the live and earth wires and connected them to the relay holder, before making a simple panel out of aluminium. This started of one shape, morphed into another, before eventually ending up a shadow of its former self
Riv nuts to secure the panel
I then fed through the trigger wires for the relay. I had then decided to put the relay panel on the driver's side, because it might be a little touch an go with clearance for the battery, and removing the ABS pump to change the battery would be a little inconvenient! So I had to make a new hole in the original loom to pull the wires through in a different place
I then sleeved the new headlamp looms complete with earthing terminal and these are ready to feed through the lamps after connecting to the relay block
Then in situ under the front slam panel. I mounted it on the original bolts for the reinforcing panel which sits under the smile rubber, so only had to drill two holes for the looms behind the bumper bar. Obviously the slot is a design feature as holes are so last year....
93 964 C2
99 Boxster 2.5 > 2.7 hill climber
71 914/6 3.0 - gone
'You see Paul, hill climbing is like making love to a beautiful woman. You get your motor running, check your fluids, hang on tight and WHOA..30 seconds later it's all over!' Swiss Tony
99 Boxster 2.5 > 2.7 hill climber
71 914/6 3.0 - gone
'You see Paul, hill climbing is like making love to a beautiful woman. You get your motor running, check your fluids, hang on tight and WHOA..30 seconds later it's all over!' Swiss Tony
-
rhd racer
- DDK 1st, 2nd and 3rd for me!
- Posts: 2062
- Joined: Wed Jun 23, 2004 9:47 pm
- Location: Nottinghamshire
Re: 964 C2 - Rolling Resto
So the new main looms are in the headlamp buckets ready, next job was to sort out the sidelights.
Like the indicator looms I repaired, these had a few nicks in them....
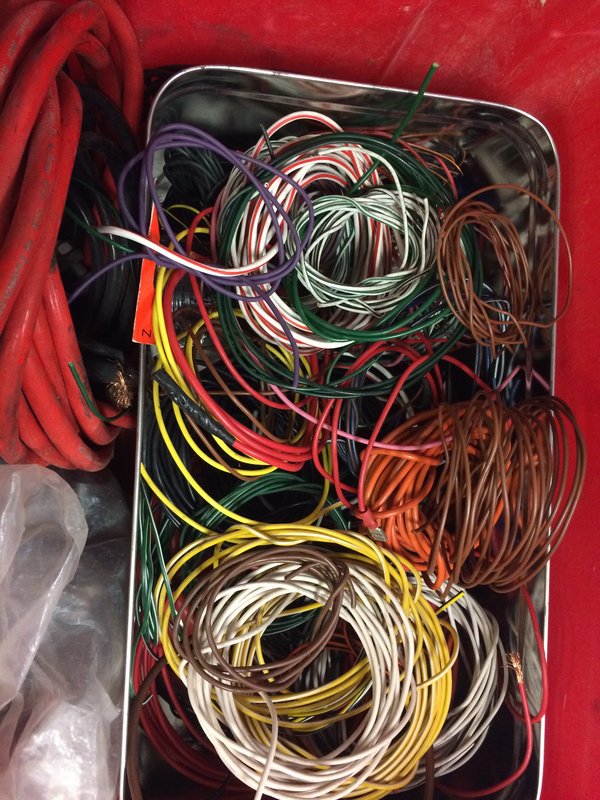
... so I replaced them from the main loom under each wheel arch, and connected the earths to the original shared headlamp sidelight earths. Then simply made good what was left. Luckily, having made the loom for the 914 means that I have a good supply of OE coloured wire!
Feeding the side light wires through the grommets as not exactly easy, and needed a few different methods using a wire feeder. Got there in the end
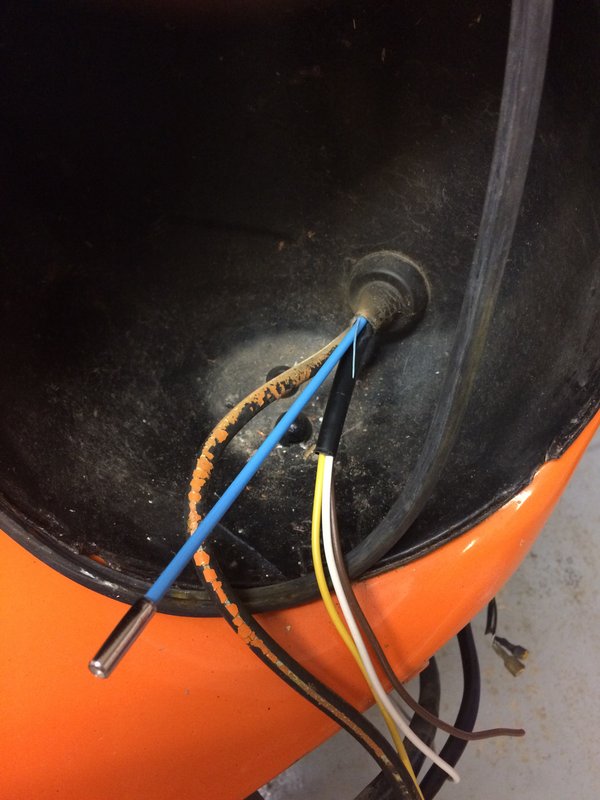
...before soldering and heatshrinking them into the loom
Unfortunately the complexity of all the other bits hanging off the same stretch of loom meant that it needed a short stretch of insulation tape, but you can have everything
I then fitted new side terminals to the side light looms and dug out the new headlamp connectors


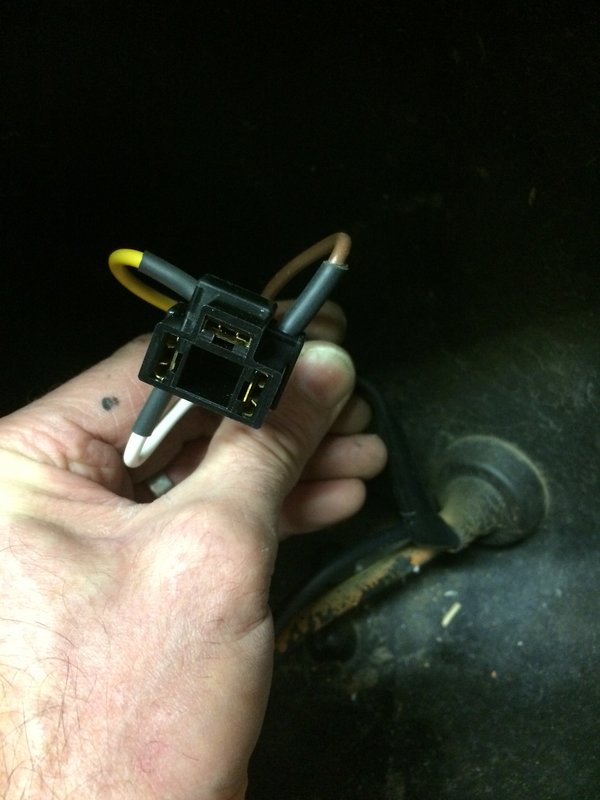
Again all soldered and heatshrunk. The non OE connector block means that the wires don't route in an especially neat way, but compared to the fire risk that was the old connectors I'll take that.
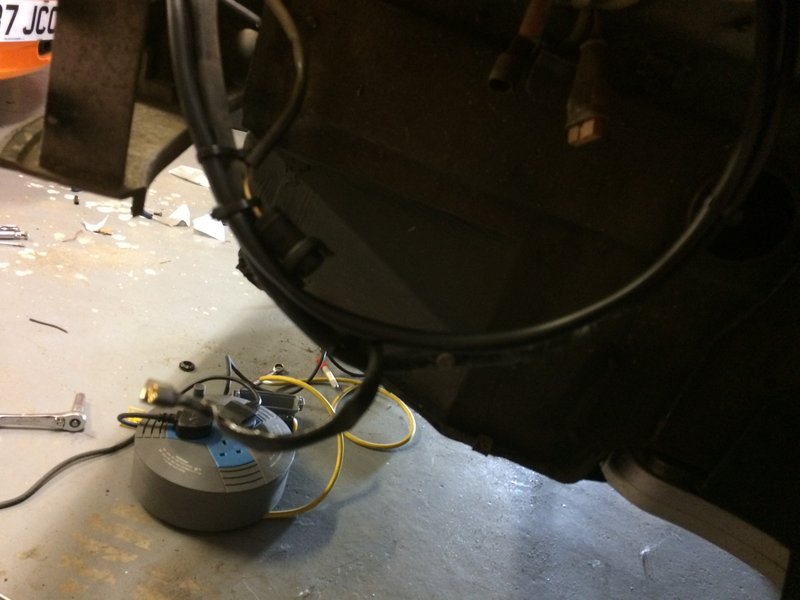
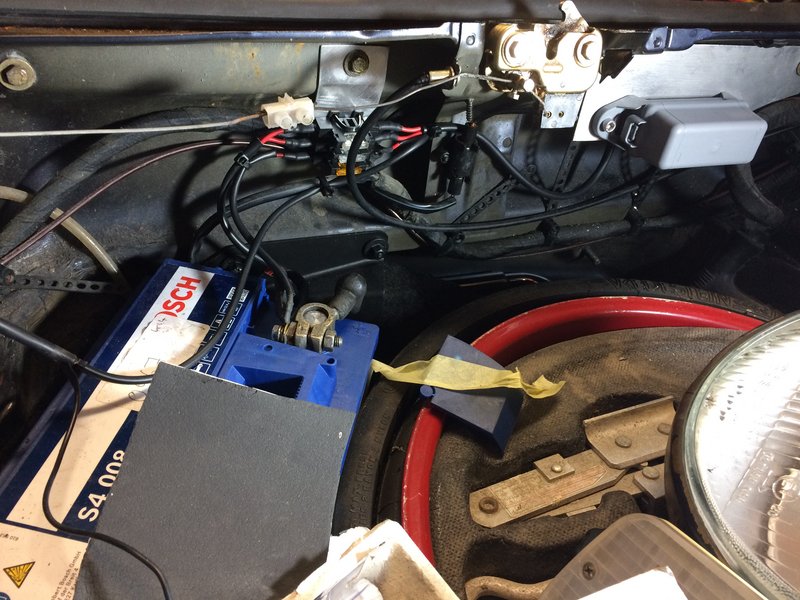
Tonight I made up a tiny panel to out of aluminium to hold the fuseholders. These again bolt onto the original bolt for the reinforcement panel on the opposite side to the relay, right above the battery. I would not normally take the load straight off the battery, but I took the main fuseboard out and it was a bit of a nightmare finding a spare hot terminal to take a spur from. This will work fine, and the fuse is only 2 inches away from the live terminal. I will add a third one tomorrow for my charging point take off too.
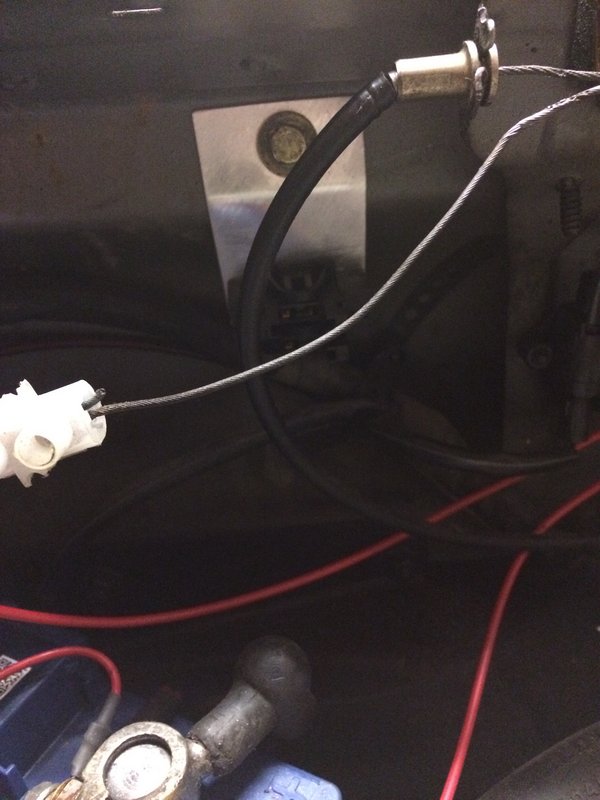
This will all be covered over by the trim panel so completely hidden.
I then made the main power feed from battery to fuses

So all I need to do is connect to the battery, pop the fuses in and test it all. I will then take some readings and redo the original test and calculate the difference in lumens.
Like the indicator looms I repaired, these had a few nicks in them....
... so I replaced them from the main loom under each wheel arch, and connected the earths to the original shared headlamp sidelight earths. Then simply made good what was left. Luckily, having made the loom for the 914 means that I have a good supply of OE coloured wire!
Feeding the side light wires through the grommets as not exactly easy, and needed a few different methods using a wire feeder. Got there in the end
...before soldering and heatshrinking them into the loom
Unfortunately the complexity of all the other bits hanging off the same stretch of loom meant that it needed a short stretch of insulation tape, but you can have everything
I then fitted new side terminals to the side light looms and dug out the new headlamp connectors
Again all soldered and heatshrunk. The non OE connector block means that the wires don't route in an especially neat way, but compared to the fire risk that was the old connectors I'll take that.
Tonight I made up a tiny panel to out of aluminium to hold the fuseholders. These again bolt onto the original bolt for the reinforcement panel on the opposite side to the relay, right above the battery. I would not normally take the load straight off the battery, but I took the main fuseboard out and it was a bit of a nightmare finding a spare hot terminal to take a spur from. This will work fine, and the fuse is only 2 inches away from the live terminal. I will add a third one tomorrow for my charging point take off too.
This will all be covered over by the trim panel so completely hidden.
I then made the main power feed from battery to fuses
So all I need to do is connect to the battery, pop the fuses in and test it all. I will then take some readings and redo the original test and calculate the difference in lumens.
93 964 C2
99 Boxster 2.5 > 2.7 hill climber
71 914/6 3.0 - gone
'You see Paul, hill climbing is like making love to a beautiful woman. You get your motor running, check your fluids, hang on tight and WHOA..30 seconds later it's all over!' Swiss Tony
99 Boxster 2.5 > 2.7 hill climber
71 914/6 3.0 - gone
'You see Paul, hill climbing is like making love to a beautiful woman. You get your motor running, check your fluids, hang on tight and WHOA..30 seconds later it's all over!' Swiss Tony
-
rhd racer
- DDK 1st, 2nd and 3rd for me!
- Posts: 2062
- Joined: Wed Jun 23, 2004 9:47 pm
- Location: Nottinghamshire
Re: 964 C2 - Rolling Resto
Tonight I managed half an hour to finish up and do the vital test......
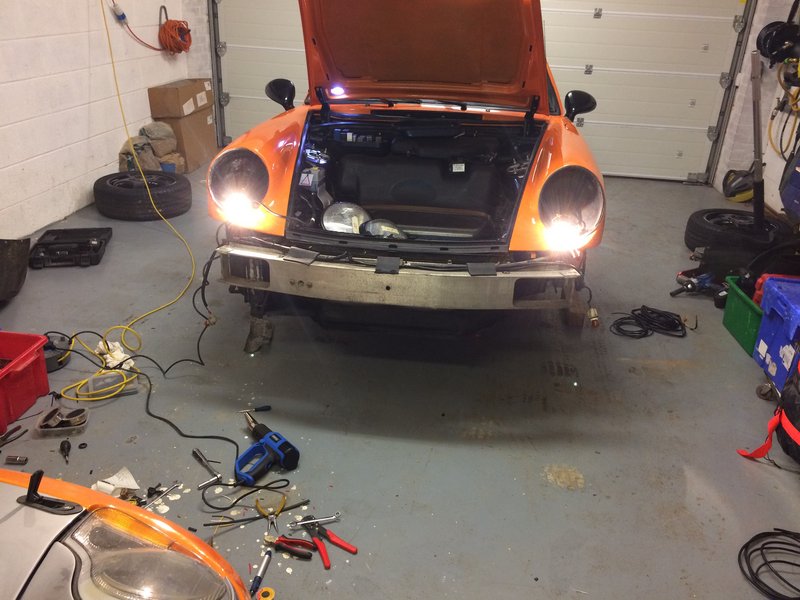
I connected the hot lead from the battery and fitted a 25A fuse to each holder, and fitted the bulbs to the holders. Battery earth connected, we are go! Ignition to click one, lights on and with an instant click of the relay we have full illumination!
Sent from my iPhone using Tapatalk
I connected the hot lead from the battery and fitted a 25A fuse to each holder, and fitted the bulbs to the holders. Battery earth connected, we are go! Ignition to click one, lights on and with an instant click of the relay we have full illumination!
Sent from my iPhone using Tapatalk
93 964 C2
99 Boxster 2.5 > 2.7 hill climber
71 914/6 3.0 - gone
'You see Paul, hill climbing is like making love to a beautiful woman. You get your motor running, check your fluids, hang on tight and WHOA..30 seconds later it's all over!' Swiss Tony
99 Boxster 2.5 > 2.7 hill climber
71 914/6 3.0 - gone
'You see Paul, hill climbing is like making love to a beautiful woman. You get your motor running, check your fluids, hang on tight and WHOA..30 seconds later it's all over!' Swiss Tony
-
rhd racer
- DDK 1st, 2nd and 3rd for me!
- Posts: 2062
- Joined: Wed Jun 23, 2004 9:47 pm
- Location: Nottinghamshire
Re: 964 C2 - Rolling Resto
It would appear I have reached my Postimage uplaod limit for the month - who knew there was one?!
Attached are the images to go with the above
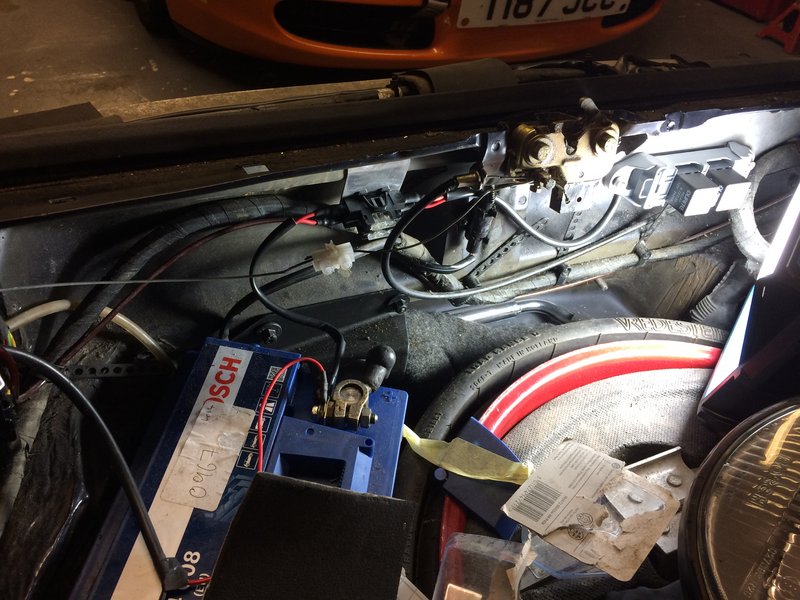
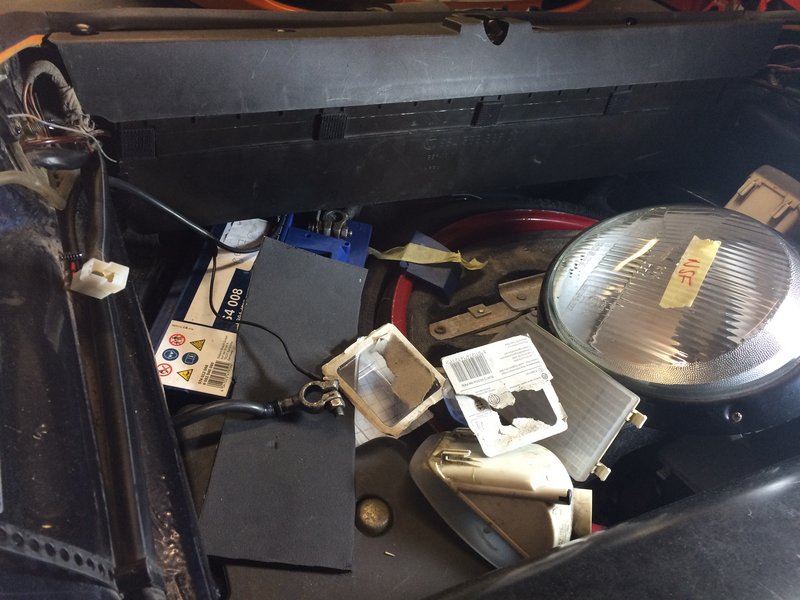
The full installation with the relay cover on, and a 3rd fuse with a 5A fuse which is the max draw of my trickle charger. This circuit now protected (not sure why I did not do this when I did that little job, but rectified now )
)
And then the final view with the trim back in place, so the whole installation is completely invisible and looks totally standard
So, the maths.
The original test was 13.1v at the bulb, from a 13.6v battery reading. It has been cold, and the battery off charge for 10 days to 2 weeks, so the running reading on fire up was just 13.51v. It was slowly rising, but I was time limited and could not wait for the battery to reach full health and it probably needs a few days of trickle charging or a good run for that.
So, a lower base point. However the reading at the bulb was up to 13.3v. Not dramatic (1.5%), and I have to say was probably a little disappointed. Then I looked at my lumens vs voltage table and it is fairly linear, so I could calculate that 13.1v was approx 1083 lumens, where 13.3v equates to 1141 lumens - a 5.3% improvement. I think with the battery fully charged and delivering a slightly higher running output this will put me roughly where I expected at 8-9% improvement in brightness with standard bulbs and no additional load on the system - in fact, greatly reduced load. So the other benefits are;
- New looms to the front, eliminating the issues I found including at least 4 damaged wires that were ready to short out
- Protect the expensive column switch, which is now just providing a signal to the system
- Uprated looms from standard, so I can fit some higher output bulbs without issue if I choose to
- Resealed the headlights with the original grommet, and greatly neatened up the looms so it looks more like a factory job than the 9 owner, every man and his dog has been there with their crimping tool effort that it was before
Who knows, I might get to drive it sometime and see what they are like! Refit starts tomorrow, all being well.
Attached are the images to go with the above
The full installation with the relay cover on, and a 3rd fuse with a 5A fuse which is the max draw of my trickle charger. This circuit now protected (not sure why I did not do this when I did that little job, but rectified now
And then the final view with the trim back in place, so the whole installation is completely invisible and looks totally standard
So, the maths.
The original test was 13.1v at the bulb, from a 13.6v battery reading. It has been cold, and the battery off charge for 10 days to 2 weeks, so the running reading on fire up was just 13.51v. It was slowly rising, but I was time limited and could not wait for the battery to reach full health and it probably needs a few days of trickle charging or a good run for that.
So, a lower base point. However the reading at the bulb was up to 13.3v. Not dramatic (1.5%), and I have to say was probably a little disappointed. Then I looked at my lumens vs voltage table and it is fairly linear, so I could calculate that 13.1v was approx 1083 lumens, where 13.3v equates to 1141 lumens - a 5.3% improvement. I think with the battery fully charged and delivering a slightly higher running output this will put me roughly where I expected at 8-9% improvement in brightness with standard bulbs and no additional load on the system - in fact, greatly reduced load. So the other benefits are;
- New looms to the front, eliminating the issues I found including at least 4 damaged wires that were ready to short out
- Protect the expensive column switch, which is now just providing a signal to the system
- Uprated looms from standard, so I can fit some higher output bulbs without issue if I choose to
- Resealed the headlights with the original grommet, and greatly neatened up the looms so it looks more like a factory job than the 9 owner, every man and his dog has been there with their crimping tool effort that it was before
Who knows, I might get to drive it sometime and see what they are like! Refit starts tomorrow, all being well.
Last edited by rhd racer on Wed Jan 20, 2021 9:30 am, edited 1 time in total.
93 964 C2
99 Boxster 2.5 > 2.7 hill climber
71 914/6 3.0 - gone
'You see Paul, hill climbing is like making love to a beautiful woman. You get your motor running, check your fluids, hang on tight and WHOA..30 seconds later it's all over!' Swiss Tony
99 Boxster 2.5 > 2.7 hill climber
71 914/6 3.0 - gone
'You see Paul, hill climbing is like making love to a beautiful woman. You get your motor running, check your fluids, hang on tight and WHOA..30 seconds later it's all over!' Swiss Tony
Re: 964 C2 - Rolling Resto
Like that a lot. Did similar to my mk2 Golf GTI years ago - made a huge difference to those candles! Sticking 95/100w bulbs was possible as well, which meant that you could actually see where you were going. Not strictly legal but given they were still nowhere near as bright as all the HIDs and Xenons that were becoming popular then, I never had an issue.
-
rhd racer
- DDK 1st, 2nd and 3rd for me!
- Posts: 2062
- Joined: Wed Jun 23, 2004 9:47 pm
- Location: Nottinghamshire
Re: 964 C2 - Rolling Resto
Thanks - glad I've done it, not sure how often I'll drive at night, but at least I wont have to spend another £300 on an indicator switch in my lifetime!
I decided to crack on with the interior this weekend - given my diary has become immediately clear and all that! Other than the colour change, there are two things I know need addressing;
1. This previous loom repair (not mine!)
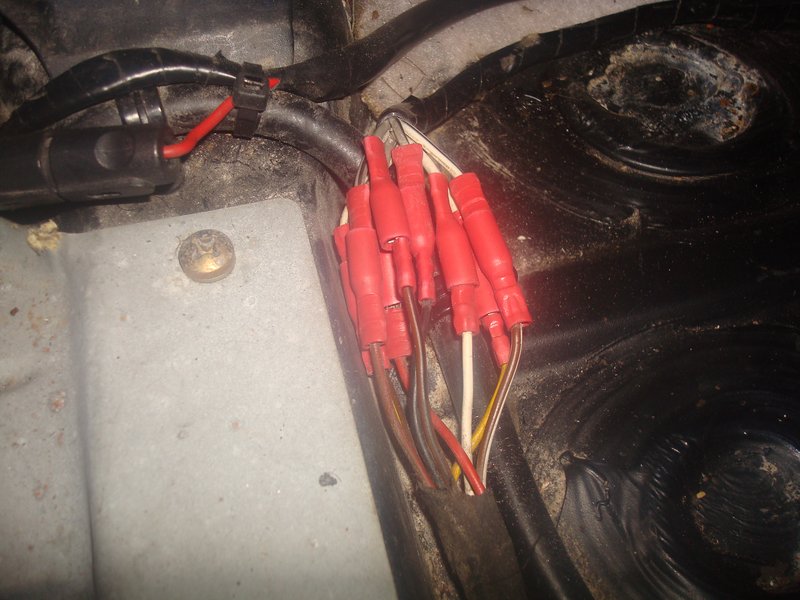
2. The cracked seat mount, that I repaired around last year to get the car on the road
 [/img]
The plan was to simply solder the wires and heat shrink, and to weld a reinforcement panel of some description over the seat mount.
First to strip out the seats - my god they are heavy - I will try and weigh one tomorrow but guess at 25kg or so. Then the centre console which is straight forward in terms of finding the screws but the wiring for the front switches was a bit tricky in a confined space, and they all connect in different ways, so you have to work out the method of release without being able to see / feel your way around very easily...
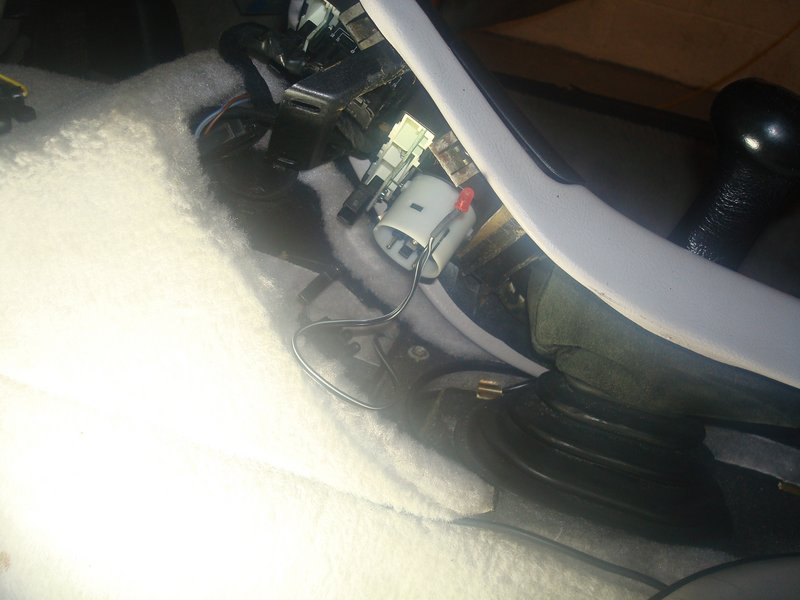

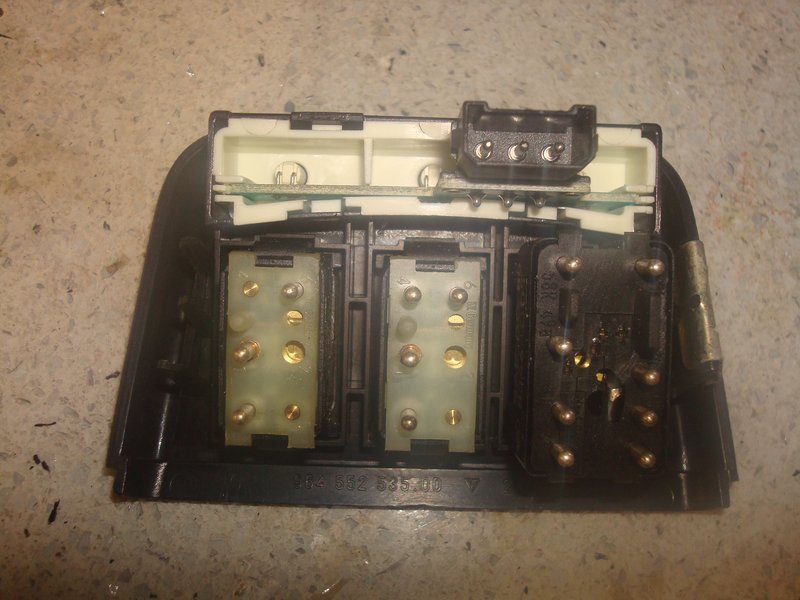
nother part of my plan for the console (apart from the colour change) is to install a cigarette lighter for phone charging duties, and to replace all the tiny soldered bulbs which light up the swptches for hazards / locking / rear spoiler etc. Removing the circuits boards to do this was both easy and hard - one was easy, one was hard and required 5 hands. Got there eventually. Black bulbs a feature...


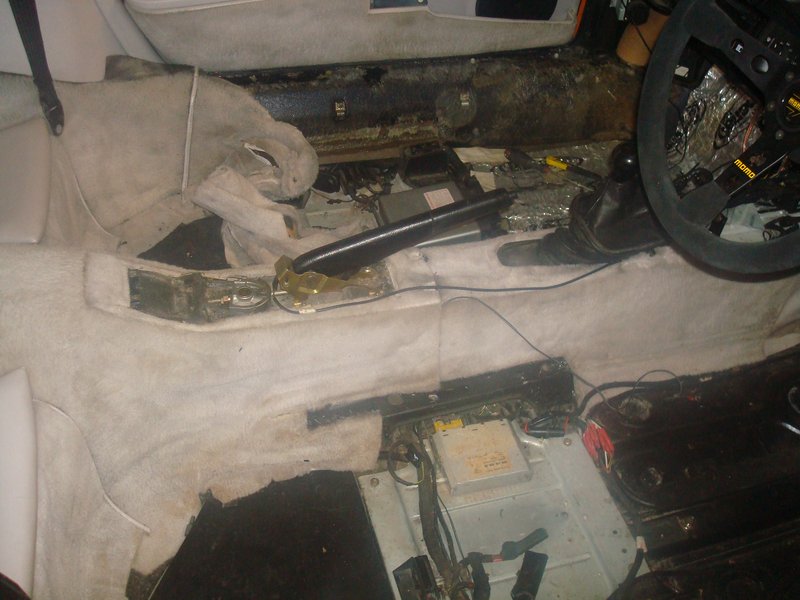
That done, I continued stripping out and eventually got to the carpets. Now I know I am preaching to the converted here, but WTF! The sill panels are a nightmare, and of course access is poor around the panels so geting in there to pull them is a nightmare in itself. In fact, I pulled so hard that I a) pulled the whole car back so it hit the garage door (handbrake was off after removing the console) and b) ripped the carpet in half, meaning you are then starting from scractch and have nothing to pull at.
I found the best way was to pull and maintain tension, then cut with a craft knife, as this terrible pic shows
So after 4 hours, I got to here, before family Monopoly (I won!) took over. Having seen otther threads, I am can't wait to do the rear seat squabs!
I also found the prior Cat C damage in the drivers footwell; comprises of a deformed wheel arch, the very edge of the floor pan, and a dent to the door pillar and inner sill. I am chewing over whether to get a section from another car now, and make it right (there are a couple of helpful repair panels but not many) or ignore it and do later, or never. It is one to sleep on, I have plenty of time. I suspect the car hit something on the OSF, and the damage I am seeing is a result of the wheel hitting the body. The suspension points are all super solid, in the right place, and the car has a chassic certificate, plus Angus said it aligned well, so it is partly cosmetic, partly strength making the cogs move at the moment....
I decided to crack on with the interior this weekend - given my diary has become immediately clear and all that! Other than the colour change, there are two things I know need addressing;
1. This previous loom repair (not mine!)
2. The cracked seat mount, that I repaired around last year to get the car on the road
[/img]The plan was to simply solder the wires and heat shrink, and to weld a reinforcement panel of some description over the seat mount.
First to strip out the seats - my god they are heavy - I will try and weigh one tomorrow but guess at 25kg or so. Then the centre console which is straight forward in terms of finding the screws but the wiring for the front switches was a bit tricky in a confined space, and they all connect in different ways, so you have to work out the method of release without being able to see / feel your way around very easily...
nother part of my plan for the console (apart from the colour change) is to install a cigarette lighter for phone charging duties, and to replace all the tiny soldered bulbs which light up the swptches for hazards / locking / rear spoiler etc. Removing the circuits boards to do this was both easy and hard - one was easy, one was hard and required 5 hands. Got there eventually. Black bulbs a feature...
That done, I continued stripping out and eventually got to the carpets. Now I know I am preaching to the converted here, but WTF! The sill panels are a nightmare, and of course access is poor around the panels so geting in there to pull them is a nightmare in itself. In fact, I pulled so hard that I a) pulled the whole car back so it hit the garage door (handbrake was off after removing the console) and b) ripped the carpet in half, meaning you are then starting from scractch and have nothing to pull at.
I found the best way was to pull and maintain tension, then cut with a craft knife, as this terrible pic shows
So after 4 hours, I got to here, before family Monopoly (I won!) took over. Having seen otther threads, I am can't wait to do the rear seat squabs!
I also found the prior Cat C damage in the drivers footwell; comprises of a deformed wheel arch, the very edge of the floor pan, and a dent to the door pillar and inner sill. I am chewing over whether to get a section from another car now, and make it right (there are a couple of helpful repair panels but not many) or ignore it and do later, or never. It is one to sleep on, I have plenty of time. I suspect the car hit something on the OSF, and the damage I am seeing is a result of the wheel hitting the body. The suspension points are all super solid, in the right place, and the car has a chassic certificate, plus Angus said it aligned well, so it is partly cosmetic, partly strength making the cogs move at the moment....
93 964 C2
99 Boxster 2.5 > 2.7 hill climber
71 914/6 3.0 - gone
'You see Paul, hill climbing is like making love to a beautiful woman. You get your motor running, check your fluids, hang on tight and WHOA..30 seconds later it's all over!' Swiss Tony
99 Boxster 2.5 > 2.7 hill climber
71 914/6 3.0 - gone
'You see Paul, hill climbing is like making love to a beautiful woman. You get your motor running, check your fluids, hang on tight and WHOA..30 seconds later it's all over!' Swiss Tony
-
911hillclimber
- Nurse, I think I need some assistance
- Posts: 18986
- Joined: Mon Mar 10, 2008 6:26 pm
- Location: West Midlands
Re: 964 C2 - Rolling Resto
IMHO: leave the body alone.
If it aligns ok then it is ok.
Still cannot believe all the work you are pouring into the car!
If it aligns ok then it is ok.
Still cannot believe all the work you are pouring into the car!
73T 911 Coupe, road/hillclimber 3.2L
Lola t 492 / 3.2 hillclimb racer
Boxster 987 Gen II 2.9
Lola t 492 / 3.2 hillclimb racer
Boxster 987 Gen II 2.9
-
Gary71
- Nurse, I think I need some assistance
- Posts: 10312
- Joined: Wed Mar 31, 2004 1:27 pm
- Location: Cheshire
- Contact:
Re: 964 C2 - Rolling Resto
Great work on the headlight loom. Will be doing the same myself once rebuild time
I’d also leave the body alone if it’s not causing a geometry or functional problem. You’d probably upset the structure more by cutting out and rewelding than just leaving it.
I’d also leave the body alone if it’s not causing a geometry or functional problem. You’d probably upset the structure more by cutting out and rewelding than just leaving it.
-
rhd racer
- DDK 1st, 2nd and 3rd for me!
- Posts: 2062
- Joined: Wed Jun 23, 2004 9:47 pm
- Location: Nottinghamshire
Re: 964 C2 - Rolling Resto
911hillclimber wrote:IMHO: leave the body alone.
If it aligns ok then it is ok.
Still cannot believe all the work you are pouring into the car!
Gary71 wrote:Great work on the headlight loom. Will be doing the same myself once rebuild time
I’d also leave the body alone if it’s not causing a geometry or functional problem. You’d probably upset the structure more by cutting out and rewelding than just leaving it.
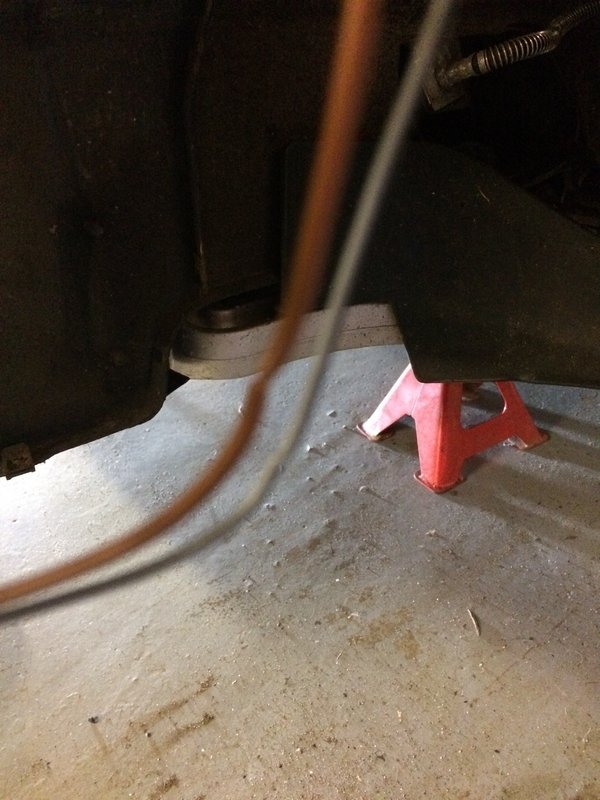
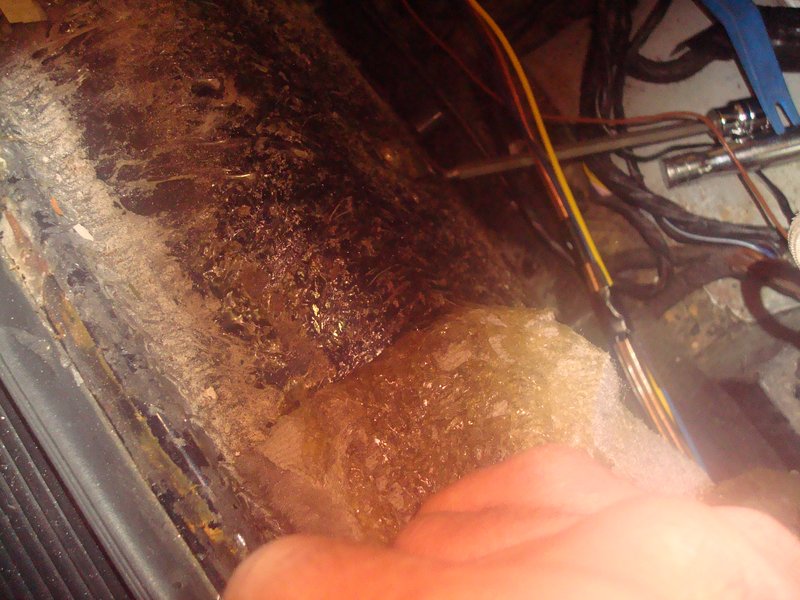
Thanks gents - here are the pics. The one where my finger is pointing is showing a dent in the heater channel. You will see a shallow grey V where this panel meets the next section in the footwell to the right of the panel - I suspect it has popped a spot weld on impact and just slightly opened up this gap. I did think about stitching a weld down this,but I am a bit worried about the cardboard heater pipe catching and getting myself in a bigger pickle! So I think I will leave it alone...
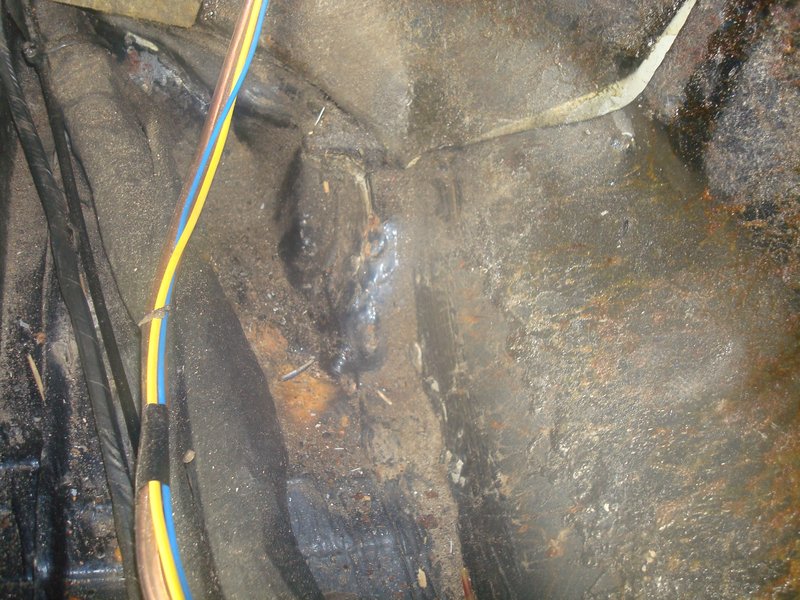
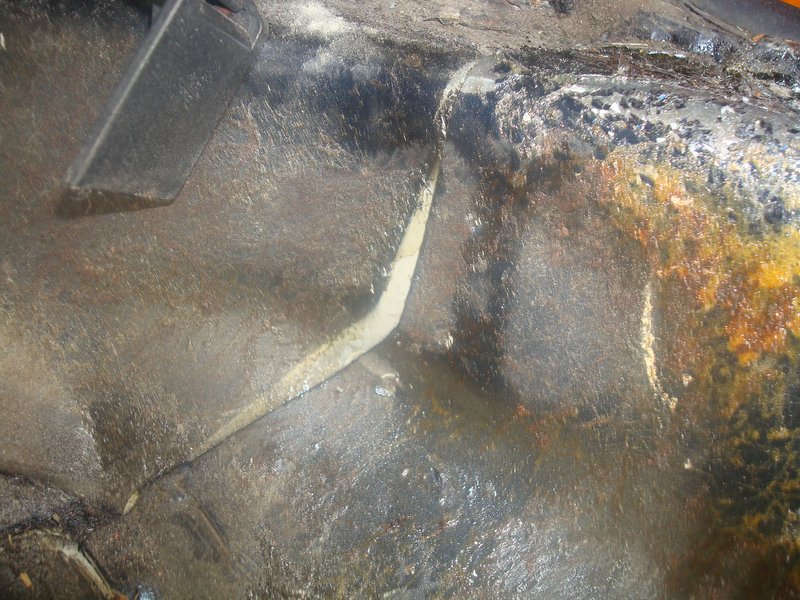

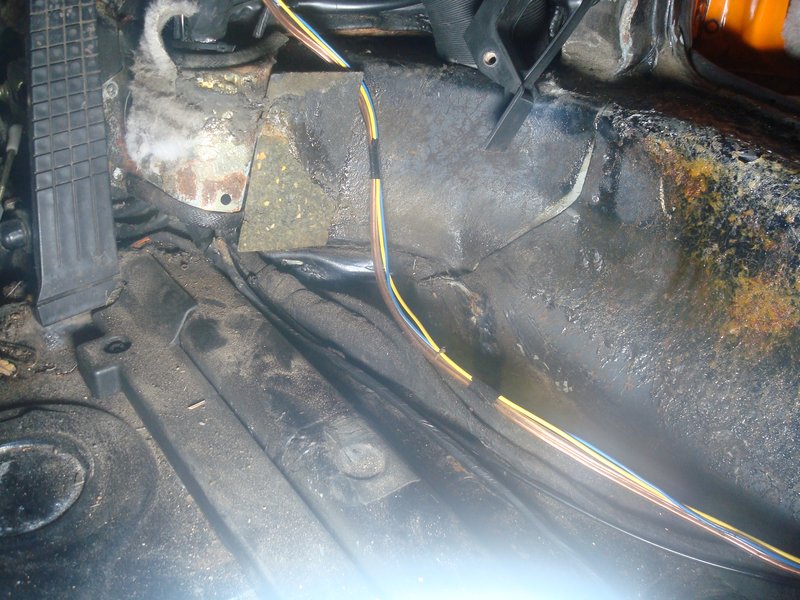
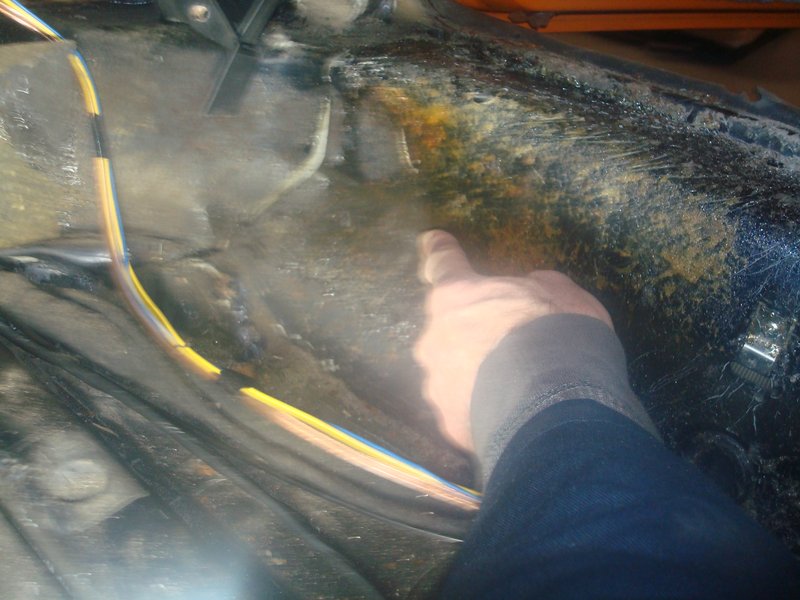
Sorry about the terrible pics - they are taken with the 'garage camera' which struggles in the dark
In the grand scheme of things it is not bad at all - the Boxster I broke had an MOT on it but was made up of 2 cars joined by a monkey with a stick welder!
I'm not surprised Graham - remember it had 3 pages of defects on the initial inspection report
93 964 C2
99 Boxster 2.5 > 2.7 hill climber
71 914/6 3.0 - gone
'You see Paul, hill climbing is like making love to a beautiful woman. You get your motor running, check your fluids, hang on tight and WHOA..30 seconds later it's all over!' Swiss Tony
99 Boxster 2.5 > 2.7 hill climber
71 914/6 3.0 - gone
'You see Paul, hill climbing is like making love to a beautiful woman. You get your motor running, check your fluids, hang on tight and WHOA..30 seconds later it's all over!' Swiss Tony
-
rhd racer
- DDK 1st, 2nd and 3rd for me!
- Posts: 2062
- Joined: Wed Jun 23, 2004 9:47 pm
- Location: Nottinghamshire
Re: 964 C2 - Rolling Resto
Am feeling too ropey to venture outside today so did a little job at my desk to keep forward momentum - soldering the bulbs into the PCBs in the centre console.
The bulbs, incidentally came from Germany in about 3 days, though I was sure I ordered from a UK supplier. Still, Brexit did not hold them up.
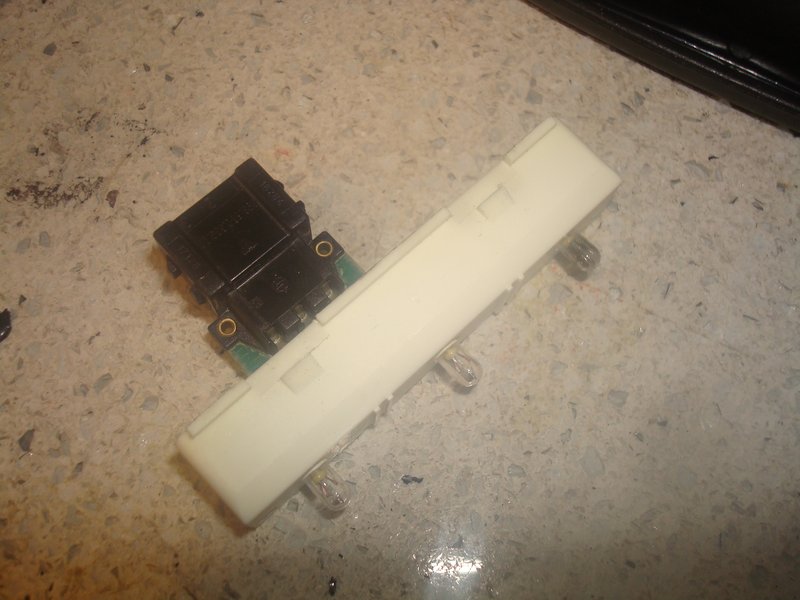
The pics are self explanatory. Getting the old bulbs out was easy as they just pulled out when the solder was warm, getting them back in took a little jig of clamps to create a 3rd arm. It made me realise how poor my eyesight is for detailed work and really need one of those clamp arrangements incorporating a magnifying glass!!


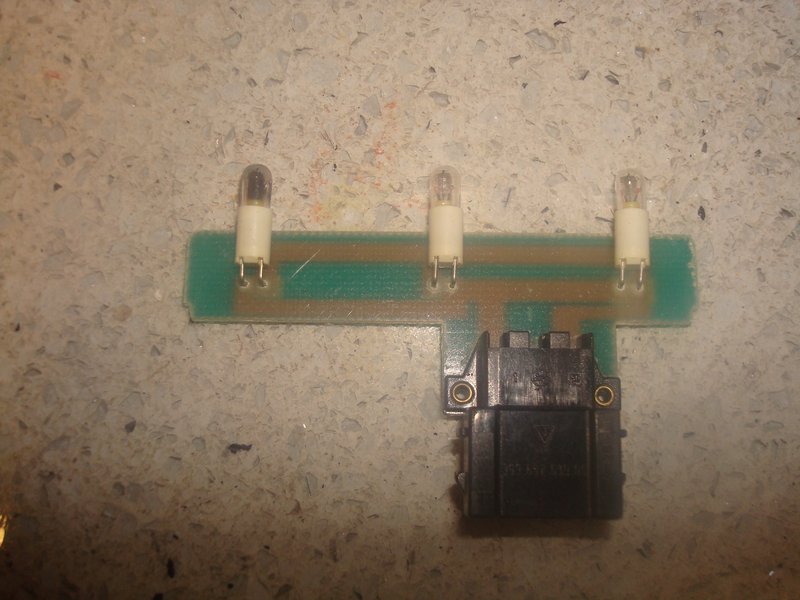
Then new ones back in


.

Then I tested them with just the bare boards - success


Before refitting onto the switch panels


And then a retest to see what they look like


Another box ticked in my quest to get everything working as it should
Sent from my iPhone using Tapatalk
The bulbs, incidentally came from Germany in about 3 days, though I was sure I ordered from a UK supplier. Still, Brexit did not hold them up.
The pics are self explanatory. Getting the old bulbs out was easy as they just pulled out when the solder was warm, getting them back in took a little jig of clamps to create a 3rd arm. It made me realise how poor my eyesight is for detailed work and really need one of those clamp arrangements incorporating a magnifying glass!!


Then new ones back in


.

Then I tested them with just the bare boards - success


Before refitting onto the switch panels


And then a retest to see what they look like


Another box ticked in my quest to get everything working as it should
Sent from my iPhone using Tapatalk
93 964 C2
99 Boxster 2.5 > 2.7 hill climber
71 914/6 3.0 - gone
'You see Paul, hill climbing is like making love to a beautiful woman. You get your motor running, check your fluids, hang on tight and WHOA..30 seconds later it's all over!' Swiss Tony
99 Boxster 2.5 > 2.7 hill climber
71 914/6 3.0 - gone
'You see Paul, hill climbing is like making love to a beautiful woman. You get your motor running, check your fluids, hang on tight and WHOA..30 seconds later it's all over!' Swiss Tony
-
Trantorman
- DDK Newbie
- Posts: 17
- Joined: Sun Nov 25, 2018 5:12 pm
- Location: the frozen north
Re: 964 C2 - Rolling Resto
where did you order the bulbs from this is a job i need to do?
Thanks.
Thanks.
-
rhd racer
- DDK 1st, 2nd and 3rd for me!
- Posts: 2062
- Joined: Wed Jun 23, 2004 9:47 pm
- Location: Nottinghamshire
Re: 964 C2 - Rolling Resto
Here is the link, states Manchester!
https://www.ebay.co.uk/itm/8X-LAMP-3X7- ... 2921170028
Hope that helps
https://www.ebay.co.uk/itm/8X-LAMP-3X7- ... 2921170028
Hope that helps
93 964 C2
99 Boxster 2.5 > 2.7 hill climber
71 914/6 3.0 - gone
'You see Paul, hill climbing is like making love to a beautiful woman. You get your motor running, check your fluids, hang on tight and WHOA..30 seconds later it's all over!' Swiss Tony
99 Boxster 2.5 > 2.7 hill climber
71 914/6 3.0 - gone
'You see Paul, hill climbing is like making love to a beautiful woman. You get your motor running, check your fluids, hang on tight and WHOA..30 seconds later it's all over!' Swiss Tony