

Rich, if you are going new inserts on the Boge struts I'd go for Bilstein if you want a more sportier/stiffer ride. You can buy Bilstein inserts specifically for Boge struts, Type 911 list all variations.
I replaced those Boge struts with Bilstein struts and inserts and the difference is night and day, a lot more responsive. Though they do ride potholes much more harshly and the front end 'bobs' a lot more than the Boges.
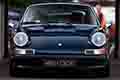
2.2s Targa rebuild
Moderator: Bootsy
-
Alan @ CanfordClassics
- Nurse, I think I need some assistance
- Posts: 4206
- Joined: Fri Nov 14, 2003 3:10 pm
- Location: Bournemouth
- Contact:
Re: 2.2s Targa rebuild
Hi, with regards to inserts just let me know as I am pretty sure I have both types, and also konis in stock.
Thanks
Alan
Thanks
Alan
http://www.canfordclassics.co.uk
Porsche Restoration & Sales
Porsche Restoration & Sales
Re: 2.2s Targa rebuild
Thanks Nige & Alan - I'm trying to decide what to have regarding suspension. Do we have a view on what is right for a targa? I can see that Bilsteins would be good and stiffen things up, but it might make the twist on the body a bit more pronounced. As I'm not racing, what I'm looking for is a good flat(ish)-cornering ride, but one that absorbs the lumps and bumps on the roads round here....bobbing front end doesn't sound like I'd enjoy that 
Any suggestions in terms of fronts & rears? I'm keen to keep it feeling 'factory' as much as possible, is it important to have same manfacturer front and rear?
Any suggestions in terms of fronts & rears? I'm keen to keep it feeling 'factory' as much as possible, is it important to have same manfacturer front and rear?
1971 2.2 S Targa viewtopic.php?f=28&t=37364
1978 3.0 SC Coupe
1970 VW Type 2 viewtopic.php?f=43&t=62339&p
1978 3.0 SC Coupe
1970 VW Type 2 viewtopic.php?f=43&t=62339&p
-
Barry
- Nurse, I think I need some assistance
- Posts: 4319
- Joined: Tue Aug 24, 2004 8:50 pm
- Location: East Sussex
Re: 2.2s Targa rebuild
Reinforcing bar pictures moved to other thread here, sorry for borrowing your thread Richard :
http://www.ddk-online.com/phpBB2/viewto ... 23#p316223
http://www.ddk-online.com/phpBB2/viewto ... 23#p316223
DDK Member1243 07741 273865. Now booking Spring '24. Home of the RY Austin 7 Trophy's
Re: 2.2s Targa rebuild
No problem, I like having open discussion here. All good
R
ps, Barry, thanks for the photos, looking great, I'll get them posted up when I'm back from the muddy field I'm in at the moment with the kids....who said you can't do proper festivals with children.....just requires a little more energy and less alcohol...
Hopefully the sun will shine for the rest of the weekend so we can all dry out!
1971 2.2 S Targa viewtopic.php?f=28&t=37364
1978 3.0 SC Coupe
1970 VW Type 2 viewtopic.php?f=43&t=62339&p
1978 3.0 SC Coupe
1970 VW Type 2 viewtopic.php?f=43&t=62339&p
-
Barry
- Nurse, I think I need some assistance
- Posts: 4319
- Joined: Tue Aug 24, 2004 8:50 pm
- Location: East Sussex
Re: 2.2s Targa rebuild
DDK Member1243 07741 273865. Now booking Spring '24. Home of the RY Austin 7 Trophy's
Re: 2.2s Targa rebuild
So - on to the front end proper. Get rid of the old slam panel, tank support, suspension pan, chassis legs & one of the battery boxes. This represents the largest amount of metal being taken out of the car. But for good reason.

This bit was the section we felt needed the most work to it - remember the agricultural repairs?

Look at the welding around the cut-out section

Well it looked like there were more issues underneath. And there were. When Barry got the old metal out and opened up the chassis leg, we found this - nothing like a bit of 'new on old' to make a future problem.


And around the slam panel, this:


And after some flange repair and cleaning it looked like this

On the passenger side, we started with this:

And managed to save the battery box on that side - but underneath it, Barry took out the dodgy section and put a new patch in place, along with a new flange section.

 .
.
It takes only a couple of minutes to write about this - but look how complicated that all is.....bends, curves, straights. Impressive
This bit was the section we felt needed the most work to it - remember the agricultural repairs?
Look at the welding around the cut-out section
Well it looked like there were more issues underneath. And there were. When Barry got the old metal out and opened up the chassis leg, we found this - nothing like a bit of 'new on old' to make a future problem.
And around the slam panel, this:
And after some flange repair and cleaning it looked like this
On the passenger side, we started with this:
And managed to save the battery box on that side - but underneath it, Barry took out the dodgy section and put a new patch in place, along with a new flange section.
.It takes only a couple of minutes to write about this - but look how complicated that all is.....bends, curves, straights. Impressive
1971 2.2 S Targa viewtopic.php?f=28&t=37364
1978 3.0 SC Coupe
1970 VW Type 2 viewtopic.php?f=43&t=62339&p
1978 3.0 SC Coupe
1970 VW Type 2 viewtopic.php?f=43&t=62339&p
Re: 2.2s Targa rebuild
Tidy up the corner of the inner wing


Including a new patch for the driver's side, where there was significant pitting:


and ready for some big bits of metal to go back in.

Including a new patch for the driver's side, where there was significant pitting:
and ready for some big bits of metal to go back in.
1971 2.2 S Targa viewtopic.php?f=28&t=37364
1978 3.0 SC Coupe
1970 VW Type 2 viewtopic.php?f=43&t=62339&p
1978 3.0 SC Coupe
1970 VW Type 2 viewtopic.php?f=43&t=62339&p
Re: 2.2s Targa rebuild
Next up was the trial fitting of the long front suspension pan. This is also a good shot to see where the front chassis leg was cut away to repair and replace. I didn't realise that this was a 'box' section...not sure what I did think it was to be honest, but anyway, that's what it looks like in section.


Check it's all straight underneath


and marry up with the front slam panel

Check it's all straight underneath
and marry up with the front slam panel
1971 2.2 S Targa viewtopic.php?f=28&t=37364
1978 3.0 SC Coupe
1970 VW Type 2 viewtopic.php?f=43&t=62339&p
1978 3.0 SC Coupe
1970 VW Type 2 viewtopic.php?f=43&t=62339&p
Re: 2.2s Targa rebuild
So then Barry gets to the tank support, which goes on top of the front suspension pan and in his words, he said.
"Didn't quite get the tank support in this week, as came over all anal, stopped your clock, and made up the bits to make the backdated pressing in the tank-support. First I've done: actually it wasn't long ago that nobody bothered backdating the tank support at all: even xxxxx put one in as-is in an RS only (I think) last year. Anyway, quite a bit of work, but quite satisfying (or sad, depending on your point of view ....)"
So here you go - a world premier....possibly. And of a piece that no-one will ever see. I love that. Properly detailed detail....


Weld up the flap

Make yourself some new tools.....

Stretch, form, weld, clean....hey presto


Weld in the new chassis legs and see how it all looks


Looking a lot more solid and fresh up there now....

"Didn't quite get the tank support in this week, as came over all anal, stopped your clock, and made up the bits to make the backdated pressing in the tank-support. First I've done: actually it wasn't long ago that nobody bothered backdating the tank support at all: even xxxxx put one in as-is in an RS only (I think) last year. Anyway, quite a bit of work, but quite satisfying (or sad, depending on your point of view ....)"
So here you go - a world premier....possibly. And of a piece that no-one will ever see. I love that.
Weld up the flap
Make yourself some new tools.....
Stretch, form, weld, clean....hey presto
Weld in the new chassis legs and see how it all looks
Looking a lot more solid and fresh up there now....
1971 2.2 S Targa viewtopic.php?f=28&t=37364
1978 3.0 SC Coupe
1970 VW Type 2 viewtopic.php?f=43&t=62339&p
1978 3.0 SC Coupe
1970 VW Type 2 viewtopic.php?f=43&t=62339&p
-
Darren65

- Nurse, I think I need some assistance
- Posts: 7873
- Joined: Mon Dec 13, 2010 10:55 pm
- Location: North Wiltshire
- Contact:
Re: 2.2s Targa rebuild
Such work is the labour of a true artist and in my opinion, very beautiful...
Love it
Love it
Darren
72T 2.5... http://ddk-online.com/phpBB2/viewtopic.php?f=10&t=56183
73 2.4E ... http://ddk-online.com/phpBB2/viewtopic.php?f=10&t=44242
77 Carrera 3.0...to 74 3.0RS ... http://ddk-online.com/phpBB2/viewtopic.php?f=28&t=63389
72T 2.5... http://ddk-online.com/phpBB2/viewtopic.php?f=10&t=56183
73 2.4E ... http://ddk-online.com/phpBB2/viewtopic.php?f=10&t=44242
77 Carrera 3.0...to 74 3.0RS ... http://ddk-online.com/phpBB2/viewtopic.php?f=28&t=63389
Re: 2.2s Targa rebuild
Another update set of photos from Barry on Friday and we're already over halfway through - 126 hours in - I can hardly believe it. This week was all of the fiddly jobs that Barry's not really been looking forward to I think
Tank support welded in place - how good does that welding look? Factory? I think so....

Front scuttle area

Channel is very iffy on both sides


So Barry creates a new one...

Puts in new corners

And welds in the new channel

Tank support welded in place - how good does that welding look? Factory? I think so....
Front scuttle area
Channel is very iffy on both sides
So Barry creates a new one...
Puts in new corners
And welds in the new channel
Last edited by murph2309 on Sun Jul 29, 2012 9:30 pm, edited 1 time in total.
1971 2.2 S Targa viewtopic.php?f=28&t=37364
1978 3.0 SC Coupe
1970 VW Type 2 viewtopic.php?f=43&t=62339&p
1978 3.0 SC Coupe
1970 VW Type 2 viewtopic.php?f=43&t=62339&p
Re: 2.2s Targa rebuild
Chassis leg to bulkhead triangle welded in:

Then underneath to put the correct tow hook on - the one on the pattern suspension pan isn't correct and for a few extra pounds, makes sense to put the right one on....infact, this will be the first time I've ever had a tow hook on this car, the old repairs were made without...

Then to the back of the car - if you remember, the portion near the torsion-bars had been incorrectly used as a jacking point resulting in flattened metal. We decided to replace this, even though the metal was good, as it would give us a chance to look inside the torsion-bar area and make sure that there wasn't any nasty-rust surprises similar to the ones we found in the front chassis legs - although we knew that there hadn't been any repairs there, so it was likely OK. But worth a check.
It looked like this before -

When we cut it open, Barry found that it was essentially perfect, apart from a light dusting of surface rust - quickly neutralised with the etch primer

And then welded back to correct shape

Then finally for this update, onto the A-pillars - again, this will never be seen as it's under padding on a targa, but we couldn't leave it looking like this....


So after some cutting of the dash to get to the base of the post and then fixing up again, it looks like this....


There are also some updates for fixes to the front inner wings on the passenger side and to the targa bar itself - but they'll be later next week.
So overall, huge progress - we're getting to the end of the monocoque, it will be onto the outer panels next. I think this has been 30 hours that Barry would prefer to forget though, bitty, time consuming and what seems to be small bits of progress. But for me, the detail that is being put into this is really impressive, he just doesn't give up, even when it's a all bit tedious. For me, that's what makes good, great.
R
Then underneath to put the correct tow hook on - the one on the pattern suspension pan isn't correct and for a few extra pounds, makes sense to put the right one on....infact, this will be the first time I've ever had a tow hook on this car, the old repairs were made without...
Then to the back of the car - if you remember, the portion near the torsion-bars had been incorrectly used as a jacking point resulting in flattened metal. We decided to replace this, even though the metal was good, as it would give us a chance to look inside the torsion-bar area and make sure that there wasn't any nasty-rust surprises similar to the ones we found in the front chassis legs - although we knew that there hadn't been any repairs there, so it was likely OK. But worth a check.
It looked like this before -
When we cut it open, Barry found that it was essentially perfect, apart from a light dusting of surface rust - quickly neutralised with the etch primer
And then welded back to correct shape
Then finally for this update, onto the A-pillars - again, this will never be seen as it's under padding on a targa, but we couldn't leave it looking like this....
So after some cutting of the dash to get to the base of the post and then fixing up again, it looks like this....
There are also some updates for fixes to the front inner wings on the passenger side and to the targa bar itself - but they'll be later next week.
So overall, huge progress - we're getting to the end of the monocoque, it will be onto the outer panels next. I think this has been 30 hours that Barry would prefer to forget though, bitty, time consuming and what seems to be small bits of progress. But for me, the detail that is being put into this is really impressive, he just doesn't give up, even when it's a all bit tedious. For me, that's what makes good, great.
R
Last edited by murph2309 on Sun Jul 29, 2012 11:00 pm, edited 1 time in total.
1971 2.2 S Targa viewtopic.php?f=28&t=37364
1978 3.0 SC Coupe
1970 VW Type 2 viewtopic.php?f=43&t=62339&p
1978 3.0 SC Coupe
1970 VW Type 2 viewtopic.php?f=43&t=62339&p
-
Matt black70
- DDK forever
- Posts: 510
- Joined: Fri Aug 04, 2006 9:40 pm
- Location: Wolverhampton
Re: 2.2s Targa rebuild
Black 70T
72 Beetle 1302s
70 Triumph TR6
Corrado VR6 storm(kindly written of by a friendly police officer)
BMW E92 335D
Volvo V70 D5
72 Beetle 1302s
70 Triumph TR6
Corrado VR6 storm(kindly written of by a friendly police officer)
BMW E92 335D
Volvo V70 D5