Restoring my first 914

For all you Porsche 914 fanatics!

Moderators: drummerboytom, MdR

Post Reply
Darren C
DDK rules my life!
Posts: 1397
Joined: Sat Dec 27, 2014 9:43 am
Location: Chichester UK

Restoring my first 914

Post by Darren C »

As a newbie on here, having made my introductions a couple of weeks ago; I’ve got started on my 914 restoration with enough to show some progress; to begin a New Thread on the story so far:

I bought my 914 blind on ebay late one evening last year from Desert Hot Springs California. After exchanging a few “ask the seller a question” I got a phone number and spoke with the vendor. It was the Daughter of the original owner (1 owner from new) and her late father’s car. Having sat for 6 years or so on her drive after his death it needed a full re-commission/restoration.
Fortunately I got the address and Google Earth, street viewed it and sure enough the little 914 was sat on her drive as described. It was a bit of a gamble but the car was cheap enough to make it viable (far cheaper than Mike Brewer paid in Wheeler Dealers for their 914).
I was well prepared for a repaint and replace anything rubber or vinyl, but took a punt that it shouldn’t need welding, having spent all its life in the Californian Desert.
I arranged shipping with TGAL, and the car arrived in a container in Southampton a couple of weeks before Christmas.

Rear view

Image

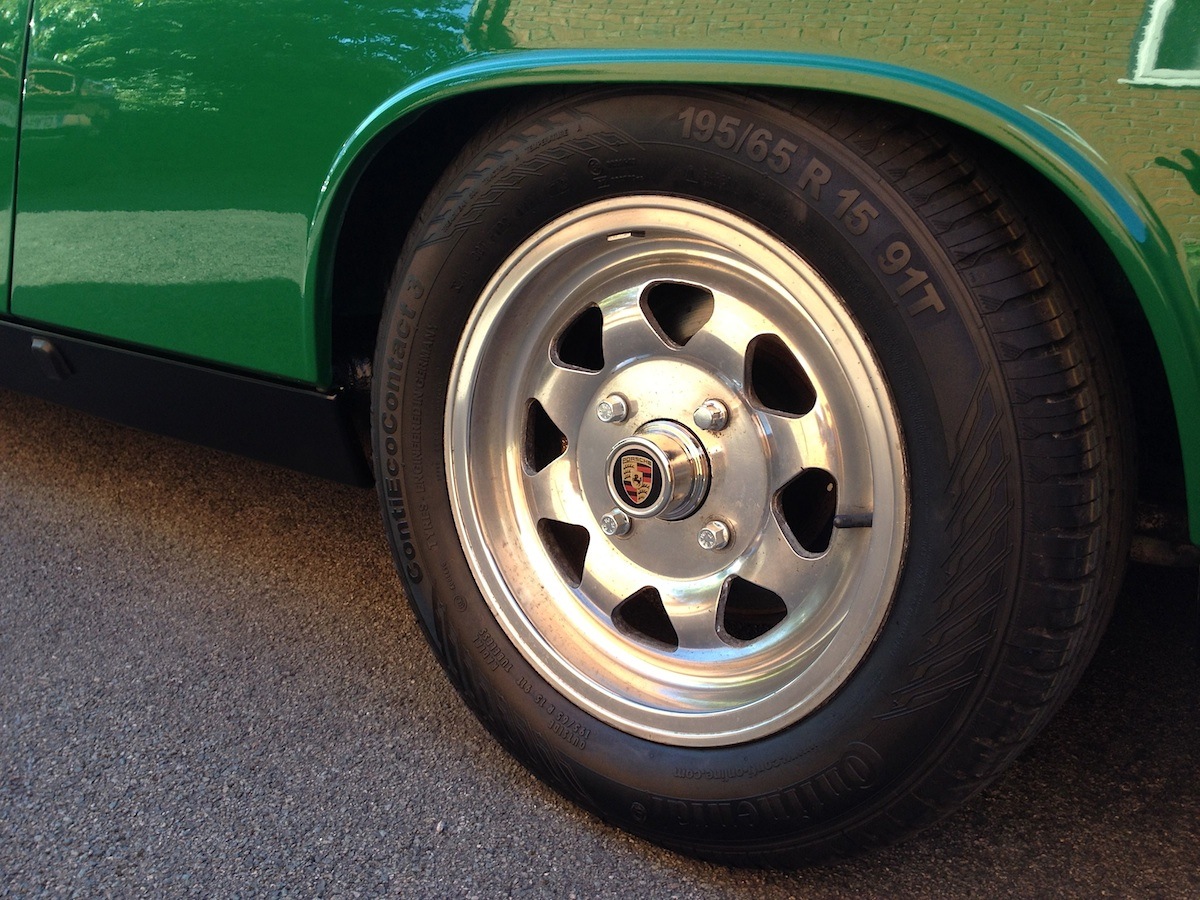
It was surprising the tyres held any air as they were perished beyond belief and the lacquer on the paint (from some bad respray in the past) just peeled off in sheets like sunburnt skin. However it was complete and with a good history file that proved a single ownership from new at the California Desert address.

My first task was to try and turn it over. Having not run for 6 years the seller had over filled right to the top, yep until level with the filler spout, with about 15 litres of oil to put the car into hibernation!!!!
This stopped all the seals and internals drying out but it had got everywhere, I took the plugs out and yes, oil came out the plug holes.
I then noticed all the crusty bone dry hoses and wires. A bit like the Skittles advert where everything the guy touches turns to Skittles; that was the state of all the rubber hoses. One touch and you had a 1000 little fragments. Totally sun baked.
There was nothing for it but to strip it all down.
My next nemesis was SAND….buckets and BUCKETS of the damn stuff. The relay board cover was cracked and when I lifted it off, a perfect sand castle the shape of the cover buried the relays entirely! I got 3 x Henry Hoovers FULL of Desert sand just out the engine bay alone. The “hell holes” in the forward corners were 6 inches deep in sand alone. Surfice to say it took all of a Saturday and a Sunday just cleaning it out of the engine bay.
I could then see that the cooling flap link bar from 1&2 to 3&4 cooling flaps was missing???? Obviously removed in some foolish attempt to get more cooling when the Thermostat had failed.
Hey ho, that meant the tinware had to come off too.


Removed Tinware

Image

This gave me a chance to drop it off for bead blasting and powder coating. Whilst I tracked down a new Flap assembly and thermostat. This was found at Mega Bug, who sold me all the parts, flaps, rods, spring, pulley wheel & shouldered bolt, plus brand new thermostat, wire and bracket.
While working in that area I dropped all the oil, fitted a new filter, and dropped and cleaned the strainer and plate. Next a new fan belt went on. The old one simply snapped in two when I pressed on it so was very easy to get off. Especially with the tinware out of the way. Again when under the car I found some interesting wiring and a second starter solenoid self tapping screwed up under the boot floor. Twisted nasty extra wires just had to go. A new starter sourced from VW heritage (fitted yesterday) and the wiring left to tidy up should hopefully make it reliable.
Poking around underneath my list gets bigger of stupid stuff required. Handrake cable boots, rubber boot on starter main feed etc etc.

Next the Battery tray. The only real rust I found and to be fair was told about buy the seller was the battery tray. The two funnel rain water ducts from the boot lid had long lost there tubes having gone brittle as you like, and the battery side one was missing completely so any rain in the desert, plus battery leakage had eaten the corner out of the battery tray. I roughly sanded the tray to reveal the spot welds and drilled them out.

Old battery tray

Image

A new tray was found on ebay.de for about £40, and duly arrived in the post. During the 3 days it took to arrive I got another hoover full of sand out from under the tray and started to clean up everything ready for welding back in.
A very small job that quickly turned into a MONSTER TASK.

The original soundproofing pad had fallen off the bulkhead onto the engine where it had draped in the intense desert heat until it was transformed into a rock solid shape the profile of the engine (never to be fitted again). This was stripped out and some new material obtained from Woolies. Cut to shape with a combination of Stanley knife, tin snips, my best scissors and a gasket punch set; I made a new one. 10mm thick I sealed the fibrous back and edges with black engine paint, followed by Tiger PU bond (squeezed into an old margarine tub & applied with a filler spreader) to replicate the tar type finish on the edges of the original. This took a few evenings to make, was very messy, but well worth it I think.
Next I stripped out the wiring loom so it was hung vertical over the rear window onto the roof and cleaned ALL wires with cellulose thinners to remove years of grime.
Followed by taking off all the cable clip protective vinyl sleeves and cleaning them too, followed by all grommets and clips.
I stripped the engine bay bare, and then set about sanding it all down. The paint was very thin and white primmer showed through from old scratches and battle scars. The Hell holes had surface rust as did the battery tray frame support, so all had to be cleaned off with rotary wire brush, sand paper and scotchbrite.
4 days work solid, back breaking. I took the boot lid off too, and spent two days sitting in the boot leaning over sanding and cleaning up until my fingers bled.
Once clean to bare metal I spot welded in the new battery tray and painted everything with rust encapsulating primer. Next I got some Alaska Blue base coat mixed up and sprayed the entire bay. Two coats over two days followed by a light clear (fuel resistant) lacquer.
Only then could I start the nice grand assembly

Image

Image

High heat resistant adhesive and new retaining plugs (still available from Porsche) hold the soundproofing on, along with freshly painted tabs (rock hard rear window seal removed to aid painting properly). New grommets from Porsche & VW Heritage. Freshly powder coated tinware with stainless slotted screws. (I know, I know… I couldn’t resist a nice bit of bling from my old VW trophy hunting days!)

Image

Engine lid lock was removed, soaked to removed sand jamming it up, cleaned and replaced with a new grommet where the wire pokes through the tube. Boot light, stripped, cleaned and replaced as are the two bowl cups each side. New engine seal around the tinware (the old one was torn and perished badly on the drivers side)
The list goes on & on.

But this is not even the first month of the cars new ownership and I’m only just beginning the long journey ahead to right the wrongs and I hope to share it with you in this thread.
I hope you enjoy reading my ramblings as much as I am enjoying saving this little 914.

Kind regards
Darren
@classiccarguru1
myatt1972
DDK rules my life!
Posts: 1445
Joined: Sun Apr 18, 2010 9:03 pm
Location: Staffordshire Moorlands

Re: Restoring my first 914

Post by myatt1972 »

Keep your ramblings coming Darren, very enjoyable so far. :cheers:
Keith...

73 911e sporto
73 914 2.0l
86 928s S2
85 Mazda Rx7 (TWR)
85 Mazda Rx7
The Bonser fork truck
Volvo V40 T4 (200bhp workhorse)
jackstowers
DDK rules my life!
Posts: 1092
Joined: Sat Dec 08, 2007 4:25 pm
Location: Gillingham, Kent

Re: Restoring my first 914

Post by jackstowers »

Great to meet you at Brooklands and great to see some pics of your car. Keep them coming
David

1973 914 zambezi green
1972 911T (lhd 71E engine)sadly sold
SiJ
DDK addict
Posts: 107
Joined: Thu Jun 04, 2009 4:33 pm
Location: Bromley, Kent

Re: Restoring my first 914

Post by SiJ »

We love a good rambling thread, looking forward to the next installment.

Good luck

Si
'72 914-GT Conv 2.7 RS
'85 930 Turbo
Lancia Delta Integrale Evo 1
ollieg
DDK slapper chatter
Posts: 302
Joined: Tue May 24, 2011 9:09 pm
Location: Cambridge

Re: Restoring my first 914

Post by ollieg »

Great stuff Darren!...following with interest.
shandyhaggis
DDK rules my life!
Posts: 1013
Joined: Tue Jan 11, 2011 4:25 pm
Location: Staffs UK

Re: Restoring my first 914

Post by shandyhaggis »

Hi Darren

love the colour! I bought mine blind as well whilst drunk in an Las Vegas hotel room. I dont drink anymore:-)

Ive had mine 3 years this February. Just heard the painting has just been finished so the body should be back home in a couple of weeks.

Yours looks great and will be fab once the painting is all done:-)

Keep posting

Andrew
1976 914 2.0 (Orange now without Brown flecks)
2016 BMW X3 3.0d
2020 Globe Car 640 Summit
Mr Pharmacist
Me and DDK sitting in a tree! KISSING
Posts: 2698
Joined: Wed Oct 17, 2007 6:56 pm
Location: Leeds

Re: Restoring my first 914

Post by Mr Pharmacist »

Looks great so far - thats lovely colour

Regarding the battery tray and your monster task comment - i reckon you've got off lightly there - normally if the battery tray is rotted everything below is rotted too, so the monster task could have ended up being much, much, much bigger if the rot had got into the hell hole!! :P

Darren C wrote:
Old battery tray

Image

A new tray was found on ebay.de for about £40, and duly arrived in the post. During the 3 days it took to arrive I got another hoover full of sand out from under the tray and started to clean up everything ready for welding back in.
A very small job that quickly turned into a MONSTER TASK.
Stuart

1970 914 2056cc
1979 924 n/a - RIP
1986 924S
1969 912 Targa - sold
Darren C
DDK rules my life!
Posts: 1397
Joined: Sat Dec 27, 2014 9:43 am
Location: Chichester UK

Re: Restoring my first 914

Post by Darren C »

Thanks for the kind words of encouragement guys.

I love the colour too!
Jack, great to meet you all at Brooklands on New Years day...just about defrosted my toes now (too much standing still admiring 914's!)
Stuart, yes granted if the rust had got in the Hell holes it'd be a whole different story. The Monster task I was referring to was the clean up around the battery tray that ended up being the whole engine bay in the end. I cleaned and sprayed the steel blue under the battery tray before I welded in the new "top" and it looked so nice and shiny,showed up everything else around it, that I just had to do the whole engine bay.
Tonight after work I've done a little on the last piece of tinware that's back from bead blast & powder coat (the rear hoop piece) Got some new cable grommets fitted and two rubber lined P clips to hold the main battery lead to the starter firmly on the back. (couldn't seem to find a reference to the original plastic clips anywhere for the two factory clips?) Cleaned up the battery terminal clamp and put it back together ready to fit to the car this weekend. Also searched on line and ordered a few little items like the oil switch rubber boot/plug cover for the big hole in the tinware by the dizzy and two new rubber bump stops that steady the engine lid. (x ref to beetle rear boot stop, but x 2 for a 914). I also got a metre of yellow 4mm cable to re wire the starter solenoid. PO had cut it back and crimped two short bits (obviously cut it too short the first time) together of black smaller cable when they botched the starter solenoid. The Haynes diagrams and the remaining short bit of cable show yellow for this feed, so while i'm sorting stuff out under there I might as well put it right.
Hope to pop in tomorrow lunch to our local ironmongers and pick up a few more stainless nuts, bolts and washers to brighten it all up.

I reckon if I do an hour minimum each night in prep, I'll get more achieved at the weekend when I have the luxury of daylight!
Boy I hate the dark evenings
Last edited by Darren C on Tue Jan 13, 2015 8:55 pm, edited 1 time in total.
@classiccarguru1
DaveW
DDK slapper chatter
Posts: 432
Joined: Fri May 17, 2013 11:22 pm
Location: Cheshire

Re: Restoring my first 914

Post by DaveW »

Great job! Looking forward to hearing more. Are your jacking points / floor-pan and boot floors all solid? If so, you will have got off lightly if all you have needed to replace is the tray. Mine started as just the tray and progressed to floor, jacking points and reinforcement of the original metal under the tray that was paper thin. Love the colour too. Have you got a target date for getting it back on the road?
Dave Watson

'75 914 1.8 FI
'86 911 Turbo SE
'79 928 Series 1 Manual
'92 928 S4 Auto (daily driver)
Darren C
DDK rules my life!
Posts: 1397
Joined: Sat Dec 27, 2014 9:43 am
Location: Chichester UK

Re: Restoring my first 914

Post by Darren C »

Hi Dave,

So far fingers crossed all looks very good. The floor pans are rock solid all through front to back. I will be getting around to stripping the shell for a respray at some point soon, so once the sill covers are off I can have more of a poke around.
There's no real target or deadline other than a desire to have it roadworthy for the summer. My main task is to get it running and stopping first of all. (not necessarily in that order) :lol:
It's much kinder to my local paintshop if the car drives when I take it in for the respray. It needs 5 new tyres and so far Longstone seem to be the only source of Michelin XWX ? but very pricy.

I was considering buying a cheap s/hand set of beetle steel wheels & tyres to sit the car on while at the paintshop. I can then spend hours of endless fun polishing the original Fuch wheels while the car gets painted, just in time to put them back on with new tyres when it rolls out.
@classiccarguru1
Darren C
DDK rules my life!
Posts: 1397
Joined: Sat Dec 27, 2014 9:43 am
Location: Chichester UK

Re: Restoring my first 914

Post by Darren C »

This weekend I managed to get a few more jobs done.
I repaired the cabling to the starter and got a new rubber boot from Porsche Centre Portsmouth to go over the main starter feed.
Next I replaced the feed cable to the fuel pump as it had been cut out and badly joined by the PO. All the spade connections I cleaned up on the engine loom (top tip, I use a spray can lid with “Wonder Wheels” alloy wheel cleaner in it. Dip in any spades or bare wire and after 5 mins it’s as clean as new) Ready to take solder, new crimps or just connect up!
The last bit of tinware was fitted (rear hoop) what a fiddly job trying to line up the lower tinware threaded holes. Tries the patience of a saint…
Next I fitted a new fuel pump and hoses up to the engine bay. Proper old school fuel hose and some nice proper fuel hose clamps (found some stainless ones on ebay) not jubilees. All with new genuine Porsche grommets into the engine bay and new rubber feet on the pump.
I cleaned up the area under the car before fitting the pump & a new filter, then gave it a nice clear waxoil so you can just see the Alaska Blue beneath.
Took the dizzy out (had a good clean up under it) and fitted new points, condenser rotor and cap.
After the one step forward I had two back…my nice new leads from VW Heritage for a type 4 were too SHORT… :( what a pain. I’ll have to get them changed over next week.
One question for you experts out there….Rotor arms…..my new bosch one has a much wider brass end than the original. The original end is slightly narrower than the bakerlite/resin arm, the new one is just wider than the arm. This means the end is about half as wide again as the original.
Anyone had this before? Is it ok or do I need to look for the narrower original type? (That is to say if my original one is right in the first place???)

Also had a new original ATE brake master cylinder turn up. It’s hanging on a wire over my radiator in the kitchen, after a nice coat of paint. Hopefully this’ll keep it looking good in comparison to bare cast iron when its fitted. :)
@classiccarguru1
jonat127
DDK forever
Posts: 659
Joined: Tue Jun 12, 2007 11:14 pm
Location: Broadstairs, Kent

Re: Restoring my first 914

Post by jonat127 »

Darren C wrote:This weekend I managed to get a few more jobs done.
I repaired the cabling to the starter and got a new rubber boot from Porsche Centre Portsmouth to go over the main starter feed.
Next I replaced the feed cable to the fuel pump as it had been cut out and badly joined by the PO. All the spade connections I cleaned up on the engine loom (top tip, I use a spray can lid with “Wonder Wheels” alloy wheel cleaner in it. Dip in any spades or bare wire and after 5 mins it’s as clean as new) Ready to take solder, new crimps or just connect up!
The last bit of tinware was fitted (rear hoop) what a fiddly job trying to line up the lower tinware threaded holes. Tries the patience of a saint…
Next I fitted a new fuel pump and hoses up to the engine bay. Proper old school fuel hose and some nice proper fuel hose clamps (found some stainless ones on ebay) not jubilees. All with new genuine Porsche grommets into the engine bay and new rubber feet on the pump.
I cleaned up the area under the car before fitting the pump & a new filter, then gave it a nice clear waxoil so you can just see the Alaska Blue beneath.
Took the dizzy out (had a good clean up under it) and fitted new points, condenser rotor and cap.
After the one step forward I had two back…my nice new leads from VW Heritage for a type 4 were too SHORT… :( what a pain. I’ll have to get them changed over next week.
One question for you experts out there….Rotor arms…..my new bosch one has a much wider brass end than the original. The original end is slightly narrower than the bakerlite/resin arm, the new one is just wider than the arm. This means the end is about half as wide again as the original.
Anyone had this before? Is it ok or do I need to look for the narrower original type? (That is to say if my original one is right in the first place???)

Also had a new original ATE brake master cylinder turn up. It’s hanging on a wire over my radiator in the kitchen, after a nice coat of paint. Hopefully this’ll keep it looking good in comparison to bare cast iron when its fitted. :)
Re rotor arms, I have noticed the different end profiles. TBH it doesn't matter because its the points and the timing that dictate when the spark jumps. With a wider end the arm can be used for a greater range of timings so they only need to make one instead of several for different motor applications. So long as it fits inside the cap it will be fine.
1970 914-6 conversion
1977 Stag one of the last made
Vauxhall Mokka - Wifes car and unexpectedly good!
VW T5 camper - custom day van conversion
DaveW
DDK slapper chatter
Posts: 432
Joined: Fri May 17, 2013 11:22 pm
Location: Cheshire

Re: Restoring my first 914

Post by DaveW »

Only difference on rotor arms that I am aware of is the factory fitted ones differed between models. Originally some had a rev limiter built in to the rotor. Pretty sure though that most folks don't bother now.

What year is your car. Engine size?

Also there are various folks here running different tyres. My car has non-standard Dan Gurney alloys though so far as I can recall they are standard 15 x 5.5. I have 195/65/15's fitted which gave me more choice. Ride is comfy too though you need to be careful with clearance on the wings if the ride height isn't standard... :wink:

Image
Dave Watson

'75 914 1.8 FI
'86 911 Turbo SE
'79 928 Series 1 Manual
'92 928 S4 Auto (daily driver)
MdR
Moderator
Posts: 2089
Joined: Tue Nov 11, 2003 4:19 pm
Location: East Preston, West Sussex

Re: Restoring my first 914

Post by MdR »

Hello! I'm just up the road in East Preston :)
Darren C wrote:Proper old school fuel hose and some nice proper fuel hose clamps (found some stainless ones on ebay) not jubilees.
Did you use modern fuel hose that will withstand the current E10 unleaded?
Martin Rogers
+44 (0)7812 167547
'69 Ossi blue warmrod 3.0 911T
[sold & sorely missed]'67S '70 Targa T '75 914/4 x 2
Darren C
DDK rules my life!
Posts: 1397
Joined: Sat Dec 27, 2014 9:43 am
Location: Chichester UK

Re: Restoring my first 914

Post by Darren C »

Thanks Jon, that's pretty much what I was hoping on the rotor arm.

Dave, I'm not sure on your wheels but what great bodywork and very, very nice paint job :wink: The wheel thing is just personal choice. I love the Fuch that came with my car, and yours for sure are far far nicer than steel wheels, but I'm a sucker for Fuch wheels in any design! As for my car its a May 74, 2.0L

Martin, East Preston, that's only 1/2 hr away, do you still have a 914? With reference to the fuel hose, I opted for the externally braided "period" type, but it does have the latest "suitable for unleaded fuel" printed in fine writing and the supplier assured me it was ok. Granted the E10 thing is a problem, but unless you do a lot of continental driving it's in low percentage mixes over here. Thankfully.

I had a couple more bits turn up in the post today, so I'll be fettling in my shed all week getting bits just right to go back on the car.
I am an engineer by trade and have installed 3 phase 415V at home in my workshop so I can run my Harrison Lathe, Pillar Drill and other "proper" machines...no hobbyist playschool machines allowed here :lol:

My relay box in the engine bay had a smashed up cover.(or should I say "what was left of it") I managed to get a brand new replica one (quality a bit suspect) and the knurled retaining nut plus the two horse shoe cable retaining clips from Auto Atlanta, but I'm missing the post that screws into the relay board, passes through the cover and the knurled nut attaches to.
I was going to turn one down from some stainless bar on my lathe, since I cant find one for sale anywhere? Does anyone have a picture of what it looks like. I can kinda guess and certainly make something that works well, but I'd like it to look like the original. (Picture request maybe :wink: )
Thanks in advance.

Also if anyones interested I've got some spare bulkhead soundproofing left over. (about enough to make 3 more) and I have tracked down the wire hose clips that hold the rainwater drain tube onto the funnels either side of the engine bay. (exact OEM size and type, no longer available from Porsche) I had to buy a bag of 20 so have some spare, including enough spare black flexi PVC hose (looks very close to OEM) for another 10 cars (had to buy a 5m roll). Also I found that the funnels are still available from Porsche at a very reasonable £6.49 each. (only bought the 2 of these I needed) :wink:
@classiccarguru1
Post Reply