1971 Burgundy 911T

The place to post image of your PORSCHES

Moderator: Bootsy

Lightweight_911
Nurse, I think I need some assistance
Posts: 16856
Joined: Wed Nov 12, 2003 10:48 pm
Location: Worcs/W Mids border

Re: 1971 Burgundy 911T

Post by Lightweight_911 »

bjmullan wrote: Sat Apr 06, 2024 9:37 am - how did you get the dials out?
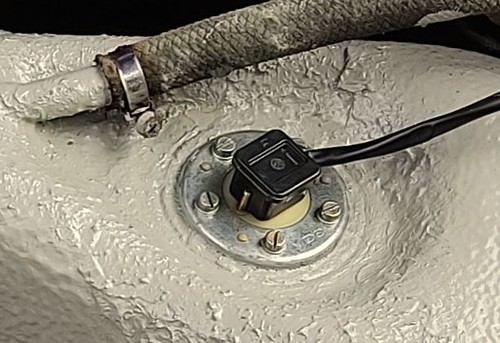
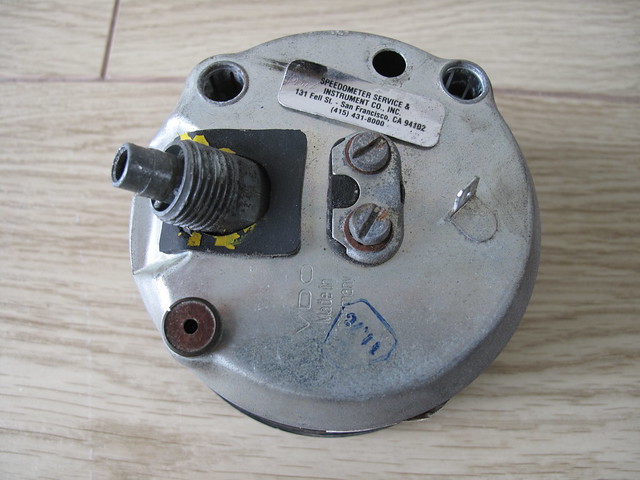
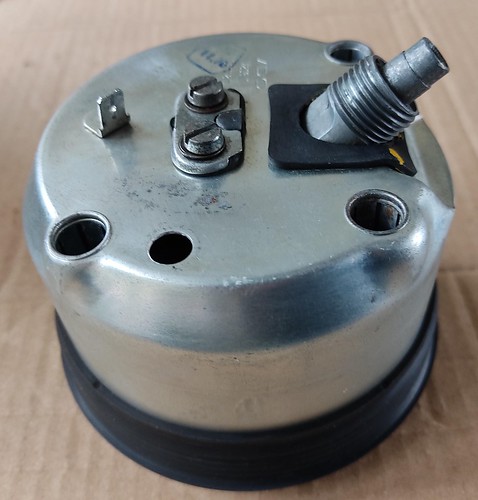
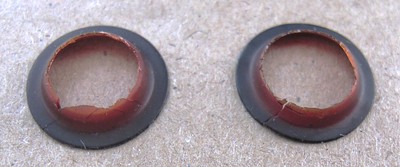
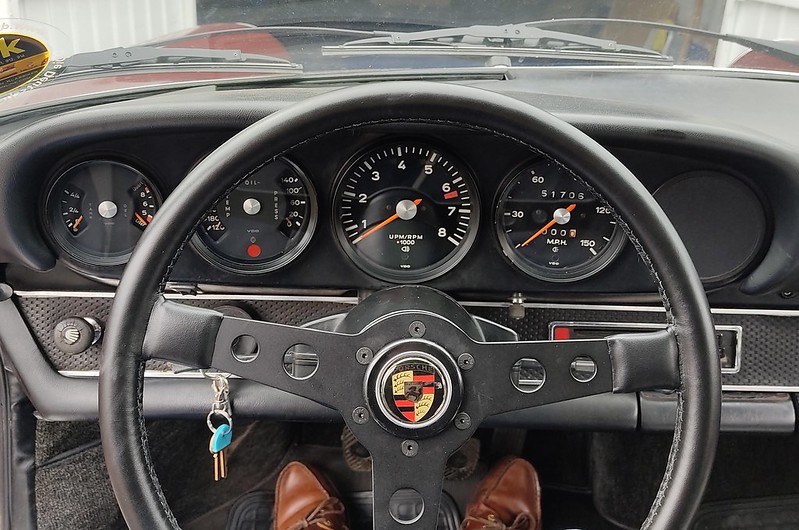
Brendan - the '70-on cars did away with the retaining brackets/threaded studs on the rear of the instruments &, instead, utilised 'concertina' rubber seals to hold them in the dash - so they are much easier to remove/replace.

Image
Andy

“Adding power makes you faster on the straights;
- subtracting weight makes you faster everywhere”
Lightweight_911
Nurse, I think I need some assistance
Posts: 16856
Joined: Wed Nov 12, 2003 10:48 pm
Location: Worcs/W Mids border

Re: 1971 Burgundy 911T

Post by Lightweight_911 »

.

In parallel to the interior refurbishment, I was continuing to clean up the front luggage compartment.

Initially, once the Perlon mats had been removed, it looked like this:

Image

Image

- but, with a bit of brushing/vacuuming & a wipe over, it was already significantly better:

Image

I felt that it could be further improved by painting the fuel tank &, although this would have been better with the tank out of the car, I had no intention of removing it at this stage.

Most of the time a 911's fuel tank is out of sight under the (Perlon) 'carpet' - & much of it is hidden by the spare wheel & tyre anyway - but I would know what was lurking under there so wanted to 'spruce it up'.

After wire brushing & painting the few bare metal areas with Kurust, I gave them a stippled brush coating of Gravitex stone chip.

Rather than the typically-chosen stone grey for the paint finish I opted for more of a beige tint &, after having some paint mixed, I gave the tank a couple of (brush) coats :

Image

Image

I also took the opportunity to remove the sender unit & give it a good clean, making a new gasket whilst it was out & then refitted it.

Image

Image

Image

It's by no means perfect but to my mind looks a thousand times better* ... :)


Image


* once I have the car back home I'll replace all of the old/hardened/discoloured vapour venting hoses which will smarten up the area further.


.
Andy

“Adding power makes you faster on the straights;
- subtracting weight makes you faster everywhere”
Lightweight_911
Nurse, I think I need some assistance
Posts: 16856
Joined: Wed Nov 12, 2003 10:48 pm
Location: Worcs/W Mids border

Re: 1971 Burgundy 911T

Post by Lightweight_911 »

.

Both underbonnet lamps were missing from my car & I was somewhat surprised at just how much the prices for these Hella lamps varied - cheapest I found were from Heritage Parts (even more so with a DDK discount !) & the most expensive were over 200% dearer ! :roll:

In addition I decided to convert them to LED bulbs - so all in all a reasonable total of ~£30 for 2 lamps & 2 LED bulbs.

Image

- & this is improved illumination provided by switching to LED's:

Image


Next gauge to receive some attention was the speedo:

Image

- it turned out that it wasn't the first time it'd been apart:

Image

Image


- & after dismantling/cleaning/repainting:


Image

- then re-assembled:

Image

Image

- & stickers re-applied:

Image

Image


- followed shortly afterwards by the oil temp/pressure gauge.

The only slight problem was that the red warning lenses for oil pressure & charge light disintegrated upon removal:

Image


I was sure I had an old roll of red lens repair tape somewhere in the garage - which I did but it was too thick & not translucent enough.

However, I did find a roll of red see-through adhesive tape - 'contractor's sheathing tape' - no idea where it came from but I used it anyway ...

Image

Image

Hopefully it'll do the trick :


Image
Andy

“Adding power makes you faster on the straights;
- subtracting weight makes you faster everywhere”
Lightweight_911
Nurse, I think I need some assistance
Posts: 16856
Joined: Wed Nov 12, 2003 10:48 pm
Location: Worcs/W Mids border

Re: 1971 Burgundy 911T

Post by Lightweight_911 »

.

Finished off refreshing the gauges by removing the rev counter - which involves taking off the steering wheel/hub followed by the column plastic 'clamshells' :

Image

- I think that's the first 911 I've owned where there wasn't any damage to the threaded fixing lugs or the fragile plastic side lugs.

Dismantling/cleaning/repainting the bezels all went according to plan

Image

- only the green lenses behind the indicator 'tell-tale' warning lights required some attention as the arrowed areas had faded:

Image

I didn't have any translucent green acrylic so simply coloured the faded areas in with a green felt tip marker ...

Gauges all back in & looking much better:

Image


Also managed a bit more progress on the passenger side lightweight RS-style door panel


Image

- just need to cut out the access hole for/& fit the leather pull strap ...


.
Andy

“Adding power makes you faster on the straights;
- subtracting weight makes you faster everywhere”
Gunscrossed
DDK Fanatic
Posts: 50
Joined: Mon Jan 12, 2009 1:00 pm
Location: Essex

Re: 1971 Burgundy 911T

Post by Gunscrossed »

Fantastic thread Andy, lovely car (sort of wish I’d bought it but would never have done it the justice you are).
DarthMJH
I luv DDK!
Posts: 842
Joined: Sun Oct 09, 2011 10:47 am
Location: NW London

Re: 1971 Burgundy 911T

Post by DarthMJH »

Hi Andy, great work as always. I have a couple of questions.
How did you attach the seat belt receiver to the lightweight seat mounting? I have attached mine but it’s not that elegant.
Also how did you remove and refit the bezel around the rev counter? Did you use a knife to bend the metal around the gauge to get it off, and then use a small screwdriver to bend it back?

Cheers
Mike
1973 RHD 911T
1995 993 C4
Lightweight_911
Nurse, I think I need some assistance
Posts: 16856
Joined: Wed Nov 12, 2003 10:48 pm
Location: Worcs/W Mids border

Re: 1971 Burgundy 911T

Post by Lightweight_911 »

DarthMJH wrote: Sat Apr 20, 2024 10:35 am How did you attach the seat belt receiver to the lightweight seat mounting?
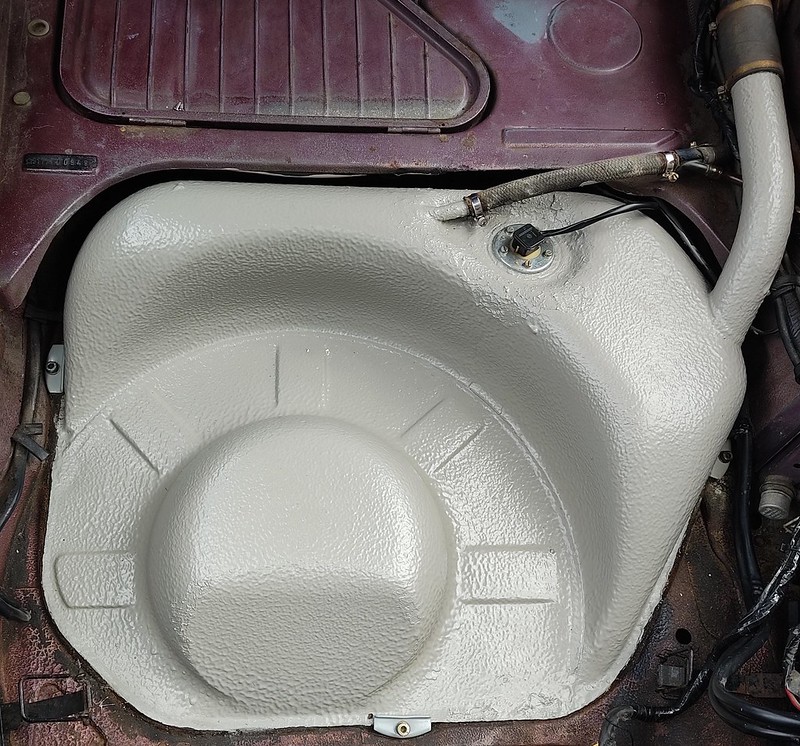
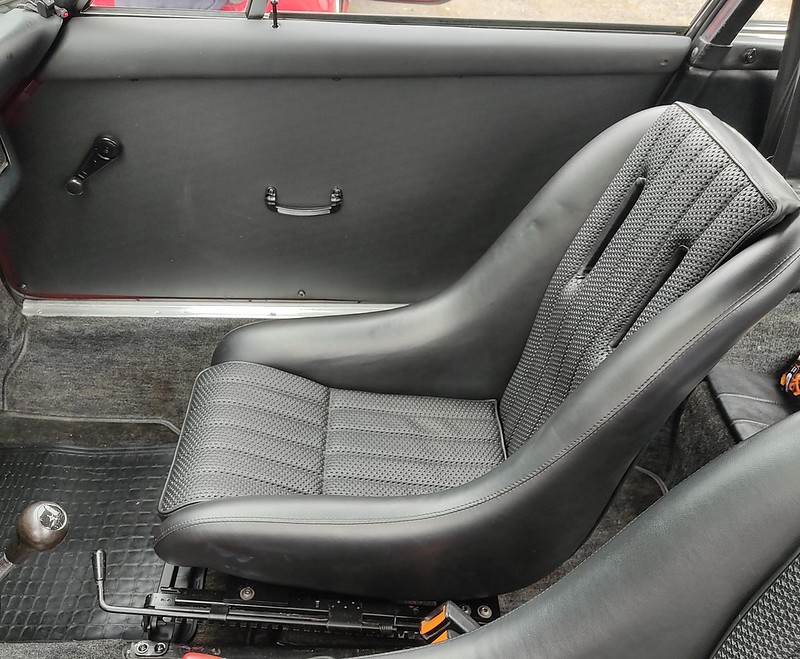
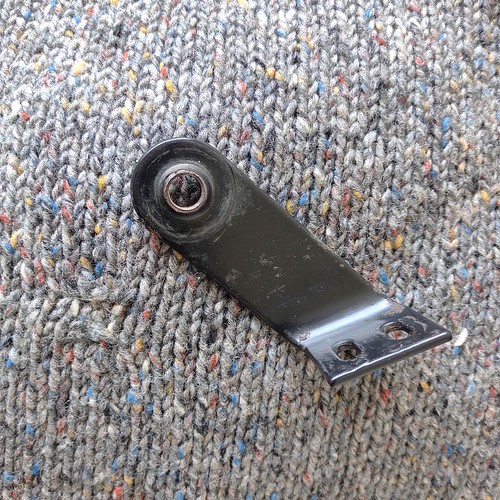
I used the angled brackets from the original comfort seats - this is the passenger side (before repainting):

Image

- had to enlarge/elongate the holes slightly & then mounted it between the lwt cross bar & the original seat runner support bracket :

Image

- sorry, that's the only picture I took of the fitting.
DarthMJH wrote: Sat Apr 20, 2024 10:35 am Also how did you remove and refit the bezel around the rev counter ?
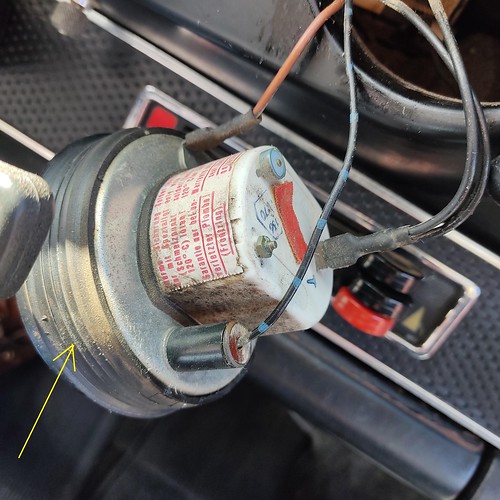
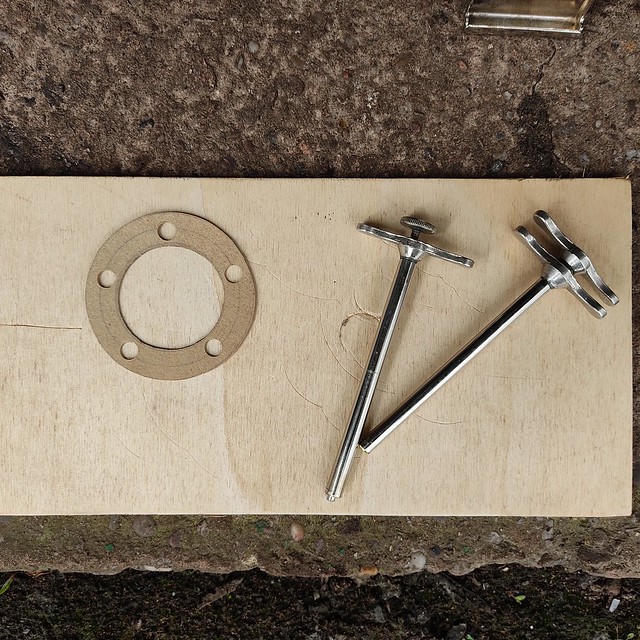
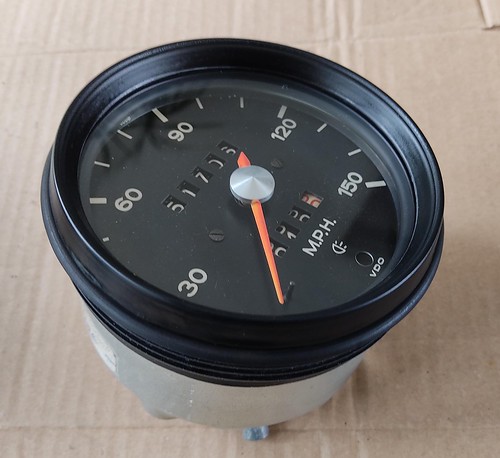
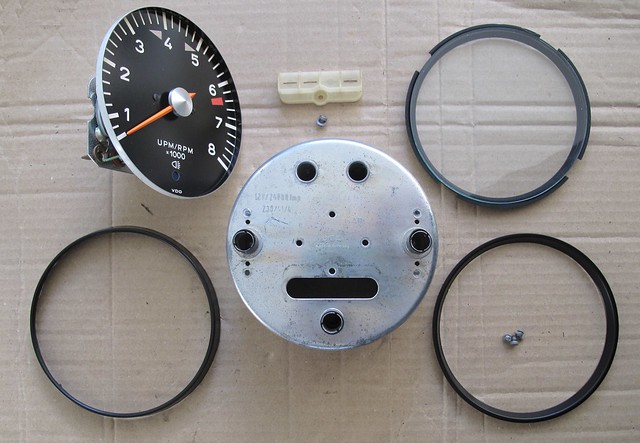
To remove the bezels I use a small blunt screwdriver & go round the rear edge multiple times levering the lip up/out a little at a time.

When replacing I use a selection of 'tools' - short lengths of hard plastic & hardwood dowels - again going round the rear edge mutiple times until the bezel is crimped on.


.
Andy

“Adding power makes you faster on the straights;
- subtracting weight makes you faster everywhere”
DarthMJH
I luv DDK!
Posts: 842
Joined: Sun Oct 09, 2011 10:47 am
Location: NW London

Re: 1971 Burgundy 911T

Post by DarthMJH »

Thanks Andy. Did you use the same bracket to attach the receiver the other side of the seat, the inside?
Mike
1973 RHD 911T
1995 993 C4
Lightweight_911
Nurse, I think I need some assistance
Posts: 16856
Joined: Wed Nov 12, 2003 10:48 pm
Location: Worcs/W Mids border

Re: 1971 Burgundy 911T

Post by Lightweight_911 »

.

No MIke - the car has inertia reel seatbelts & utilises this Factory part for the receivers:


Image


- sorry I don't have a specific picture but this screen shot from another one is the best I have:

Image


.
Andy

“Adding power makes you faster on the straights;
- subtracting weight makes you faster everywhere”
DarthMJH
I luv DDK!
Posts: 842
Joined: Sun Oct 09, 2011 10:47 am
Location: NW London

Re: 1971 Burgundy 911T

Post by DarthMJH »

Thanks for that Andy. Didn’t know that was available
Mike
1973 RHD 911T
1995 993 C4
IanM
DDK rules my life!
Posts: 1131
Joined: Thu Dec 18, 2003 10:45 pm

Re: 1971 Burgundy 911T

Post by IanM »

DarthMJH wrote: Sun Apr 21, 2024 7:54 pmDidn’t know that was available
But the question is - How do you install that? On top of the tunnel like this?
D2B61C72-2B9A-46F5-A6CB-236E6678B8BD.jpg
Anyway, inertia seat belts were first introduced in around 1970, so you can use the angled brackets from the stock comfort seats (both inner and outer).
Post Reply