

The XK
Moderator: Bootsy
-
sladey
- Nurse, I think I need some assistance
- Posts: 8723
- Joined: Sat Apr 23, 2005 9:08 pm
- Location: Nottingham, UK
Re: The XK
True dat - keep it coming - we all love the updates
The simple things you see are all complicated
I look pretty young but I'm just backdated yeah
I look pretty young but I'm just backdated yeah
-
jtparr
- DDK 1st, 2nd and 3rd for me!
- Posts: 2237
- Joined: Mon May 24, 2004 10:54 pm
- Location: london/surrey
Re: The XK
Part 8
Engine and suspension
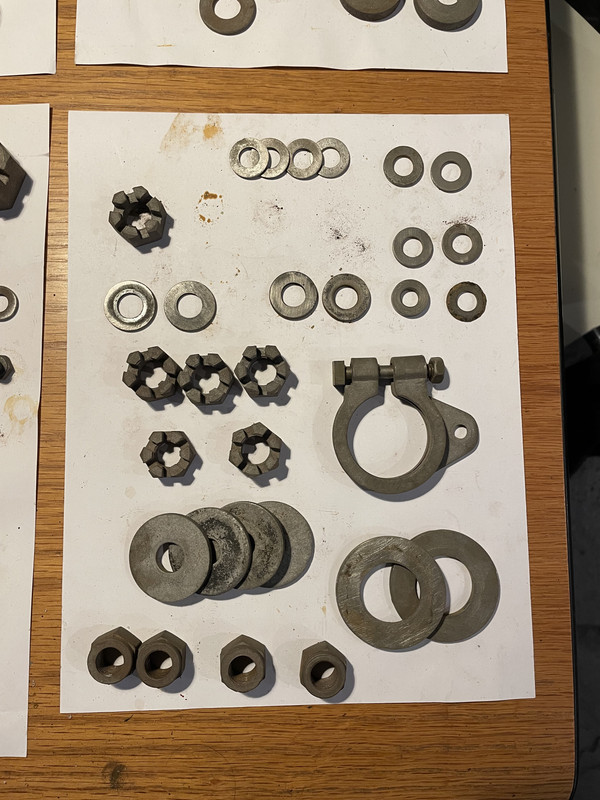
Envirostrip dealt with the car very efficiently during July 2022 and I arranged for them to deliver the car directly to Barry, as I needed the space here to continue a more detailed stripping and cleaning of all the nuts,bolts and assorted fasteners….to sort them ready for bright zine/black zinc or nickel plating……and to de-rust/prime and 2K top coat all of the suspension components
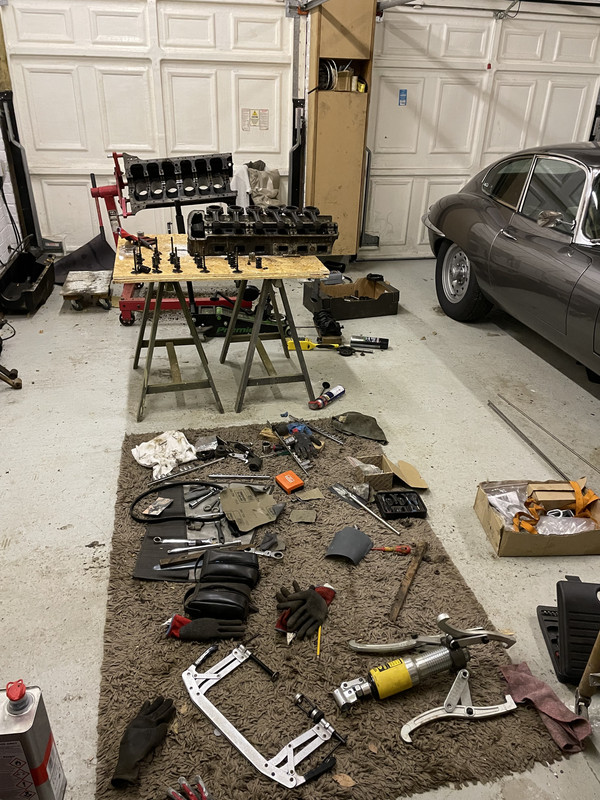

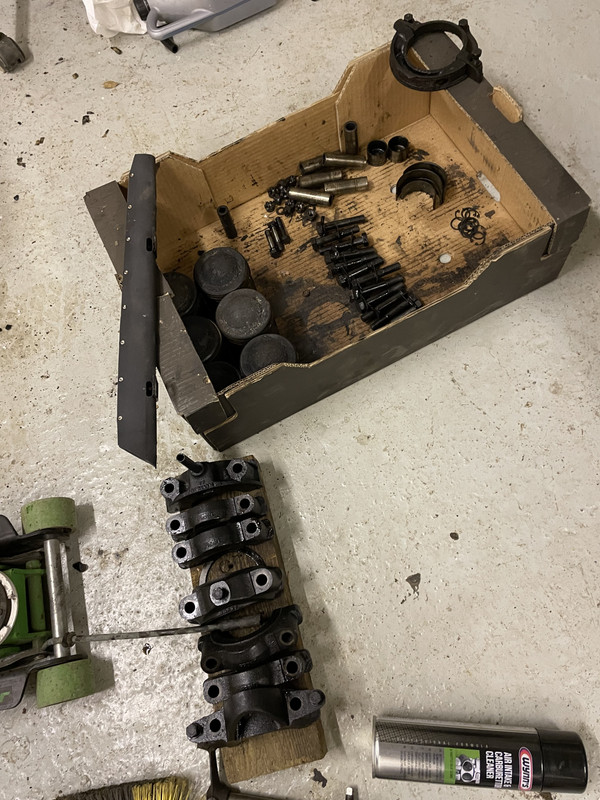
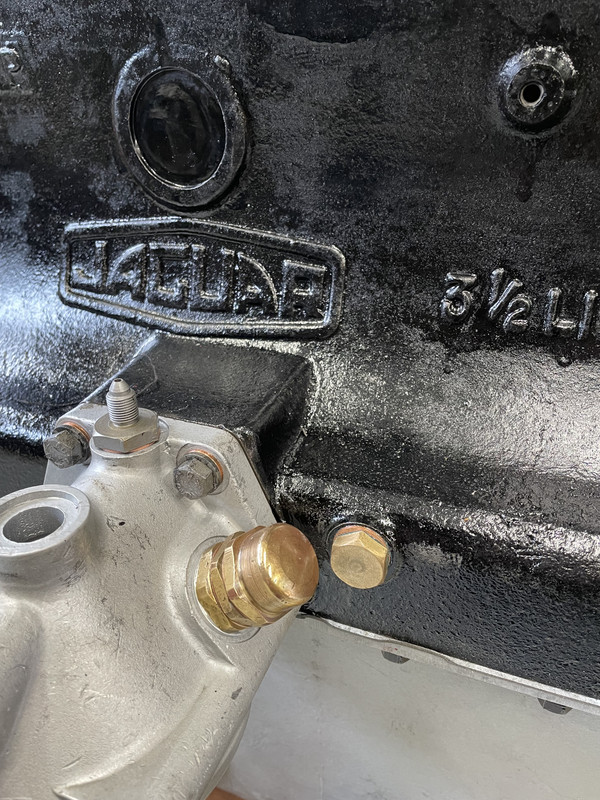
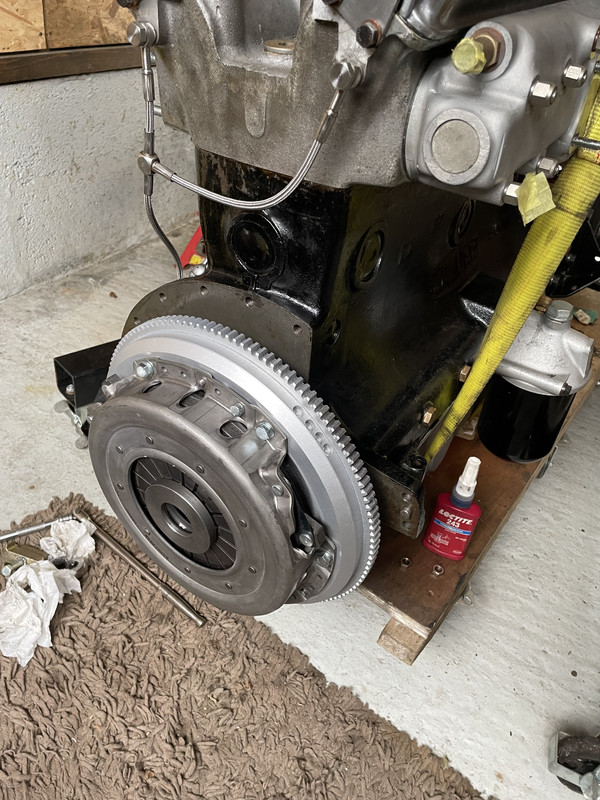
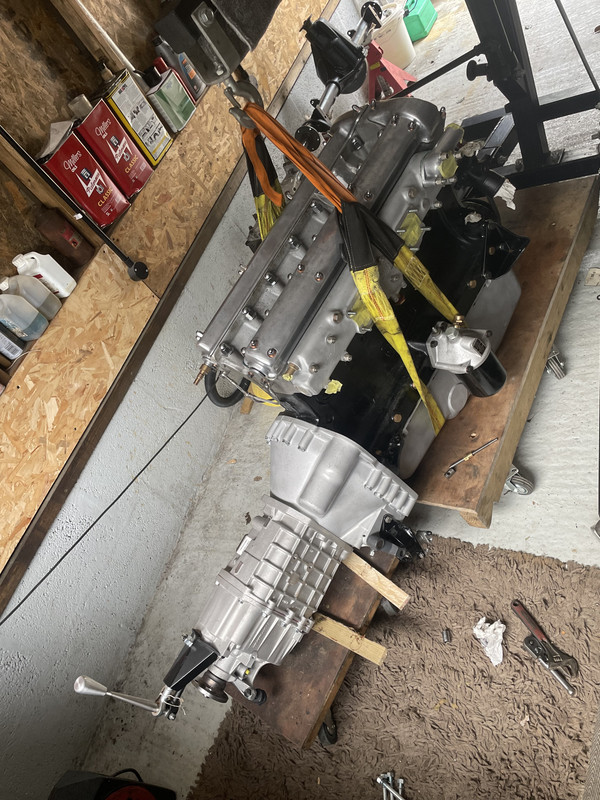
I also stripped the engine and got it ready to take down to Twyfords to have all the machine work done and get the head machined and re-built
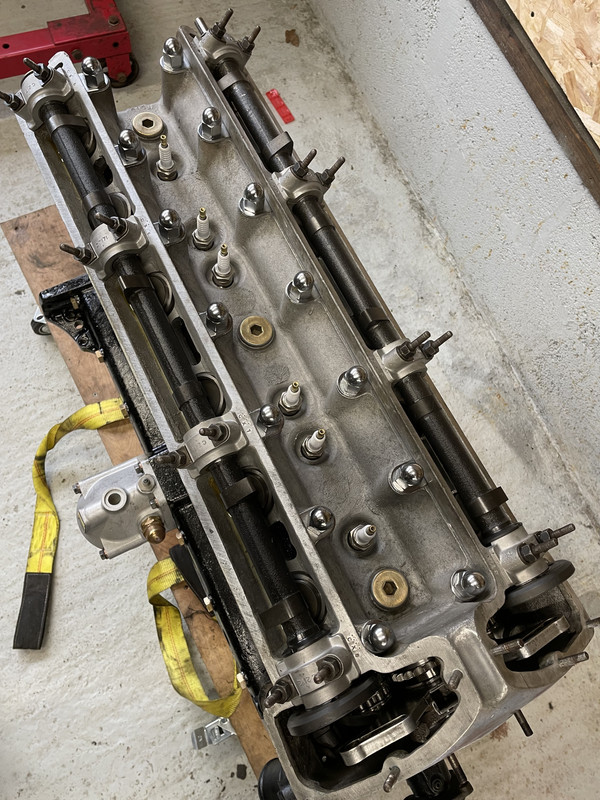
I was happy to build the engine, but wanted the head done for me with all valve clearances set to the correct 4 and 6 thou gaps
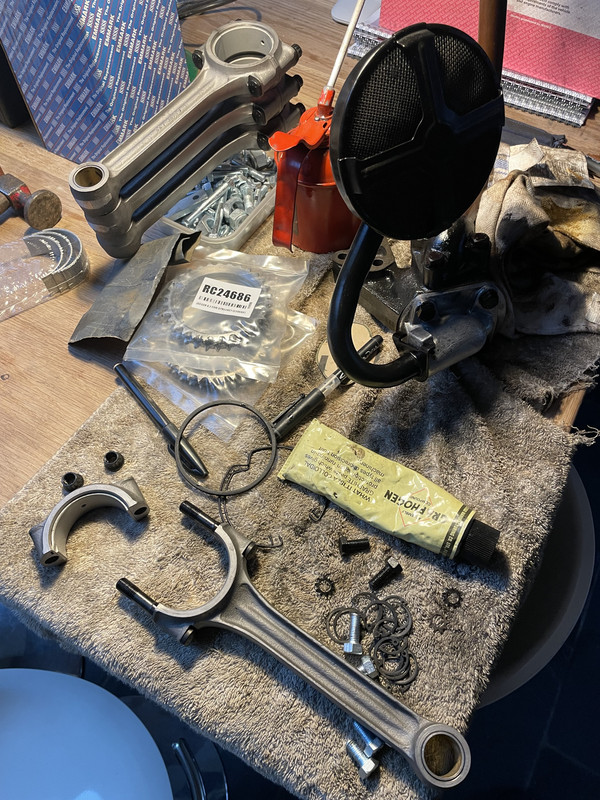


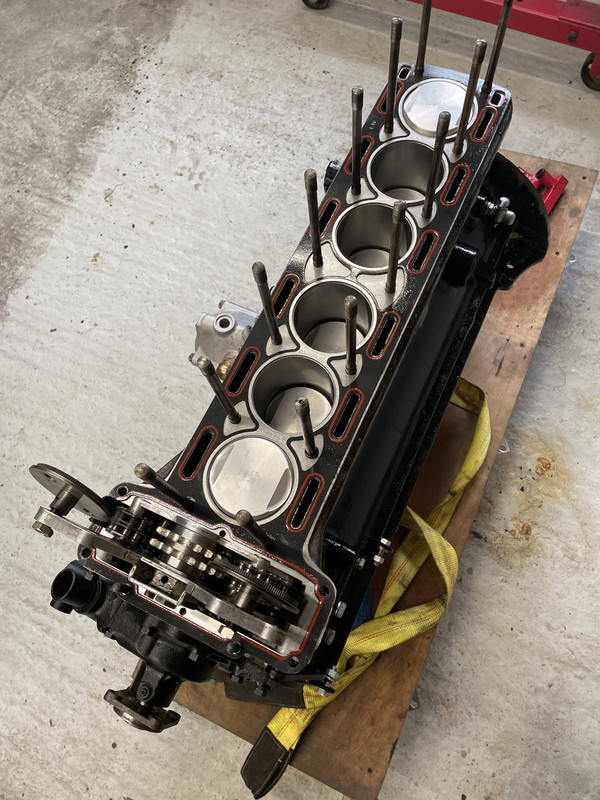

The engine would be slightly upgraded
Fast road specification camshafts
Increased inlet valves and ports from 1.5” to 2” plus a pair of new 2” HSU carbs
New valve guides
All new chains and sprockets
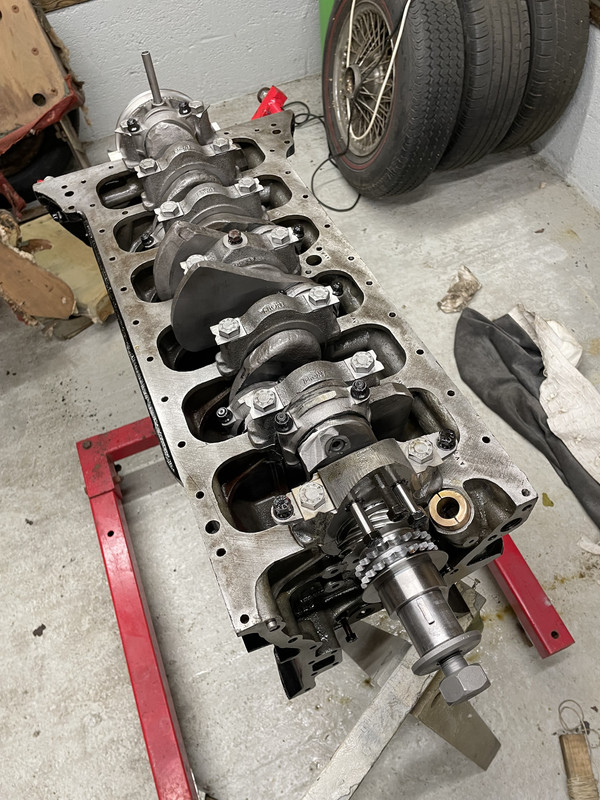
ARP crankshaft bolts
All new bearings
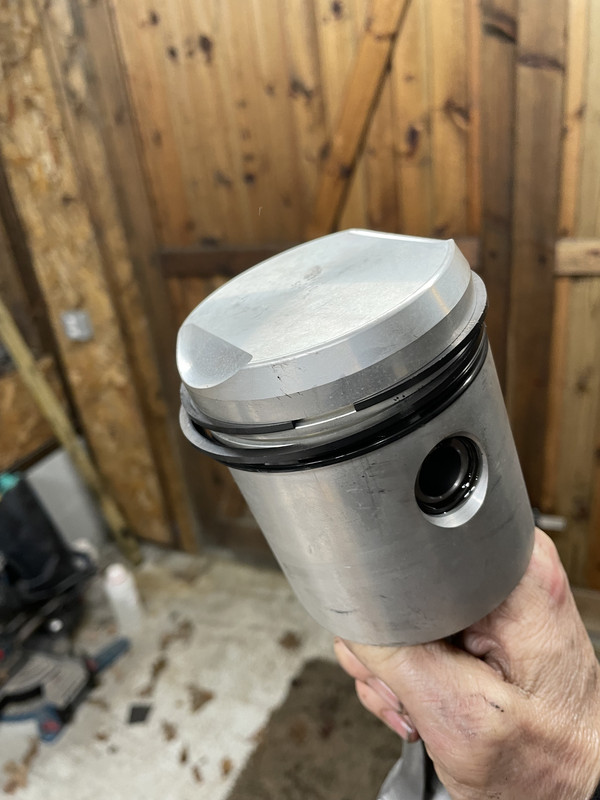
New pistons (+20)
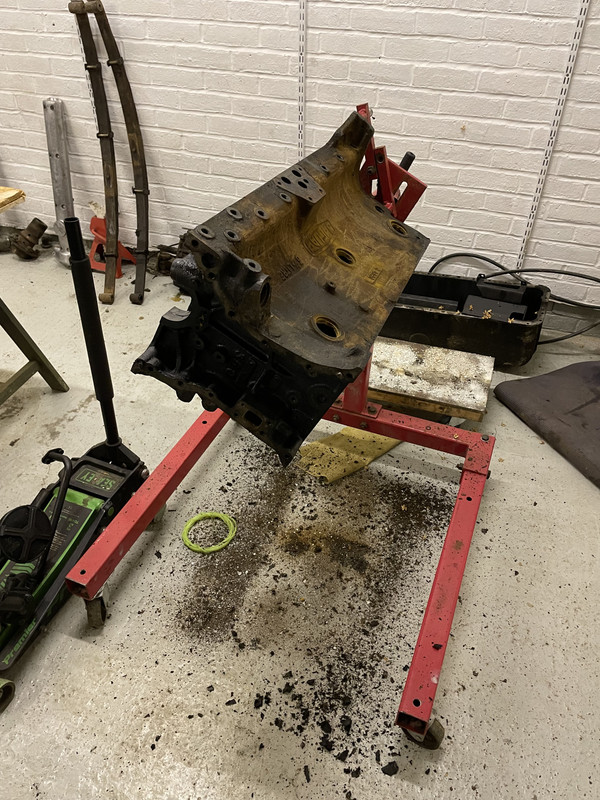
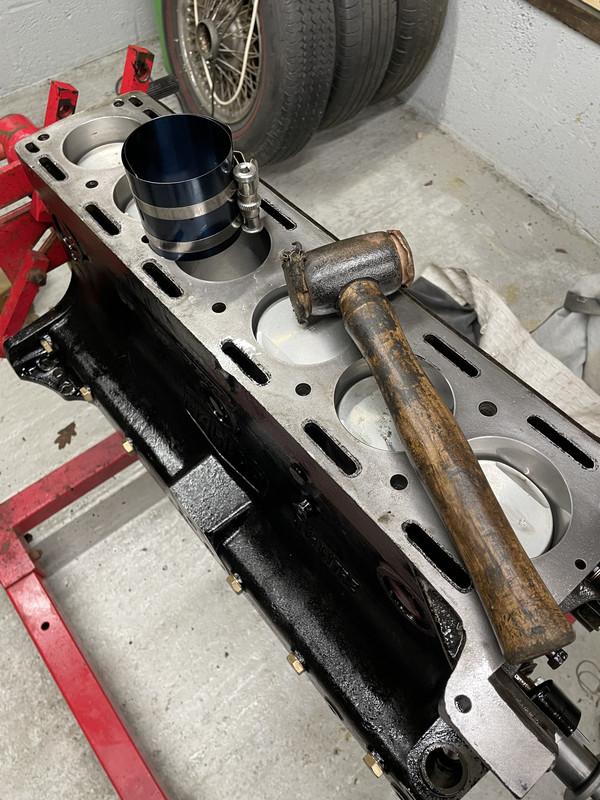
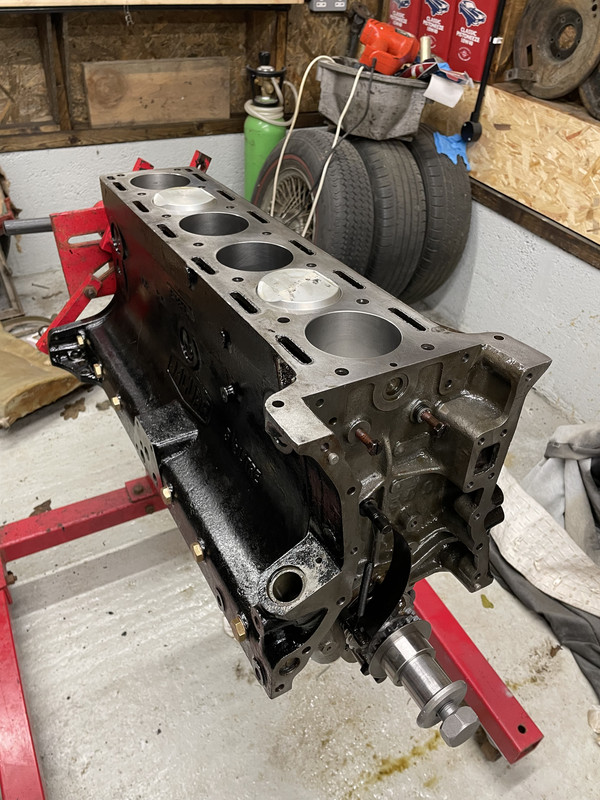
All components balanced and the block line bored
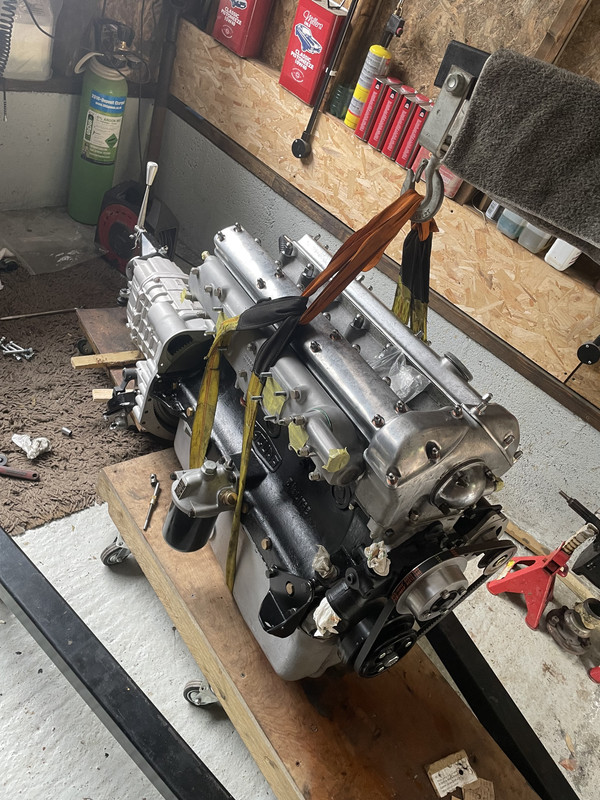
Larger 10” lightweight clutch
Machined rear crankshaft main seal conversion
All mated to a new 5 speed gearbox as having driven the E Type for a while I had admitted to myself it really does need a fifth gear do higher speed cruising….so for the XK it was always a done deal
Twyfords also checked the internals and end floats on the differential crown and pinion internals bearings, whilst I then replaced all bearings and seals
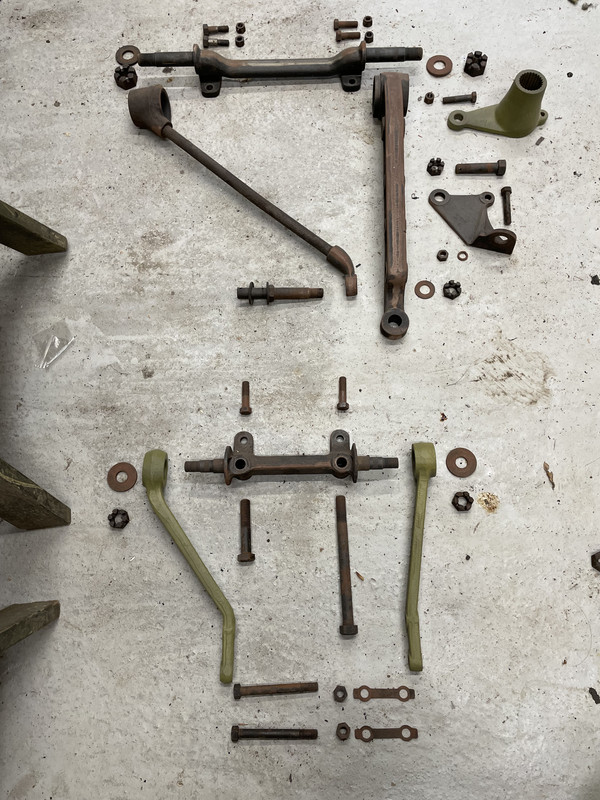
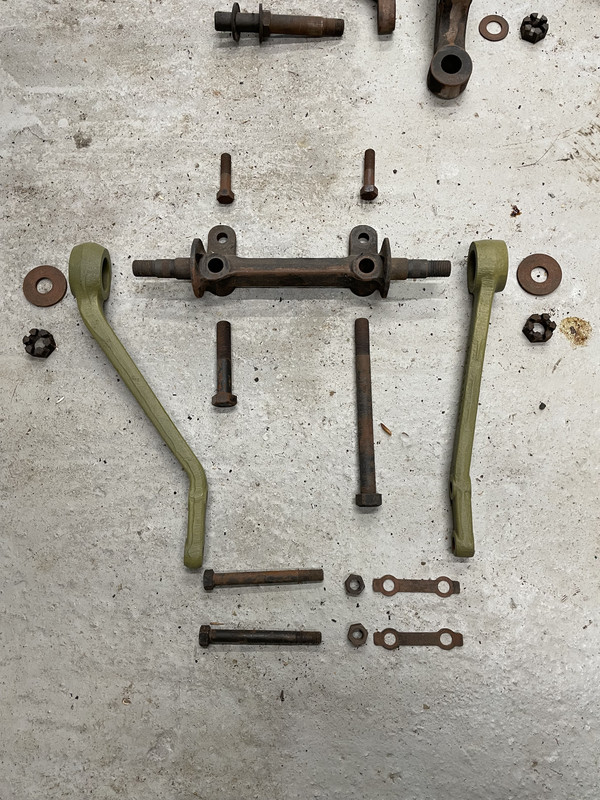
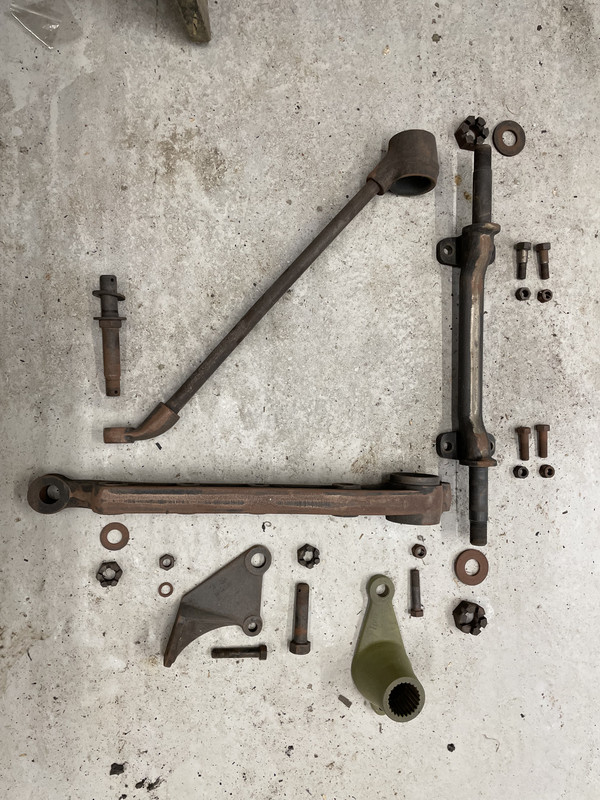
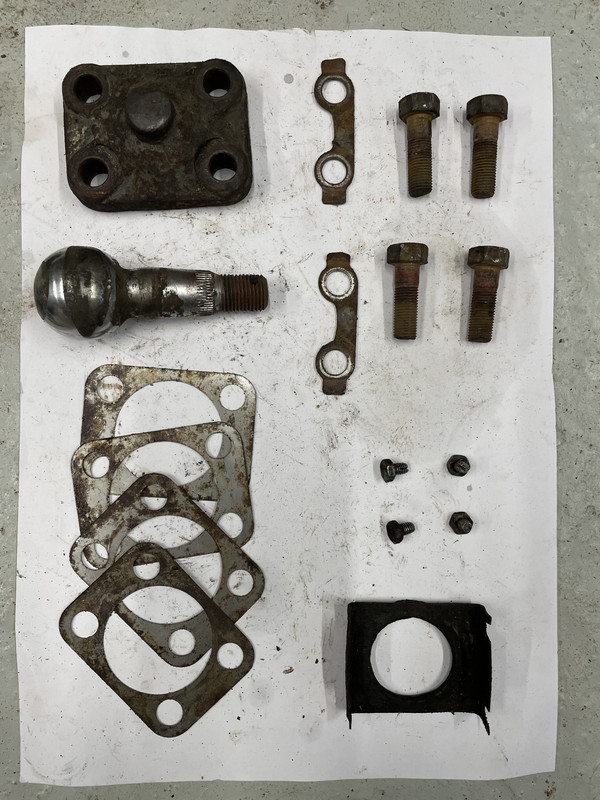
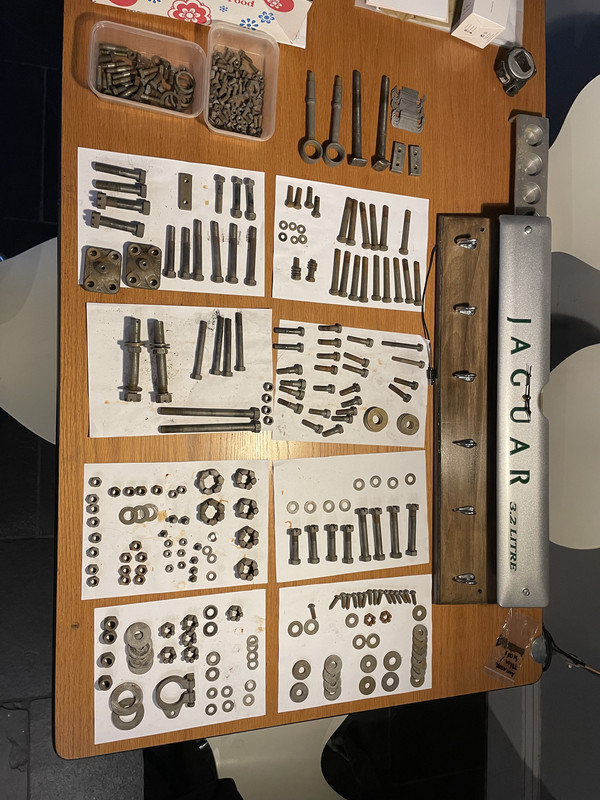
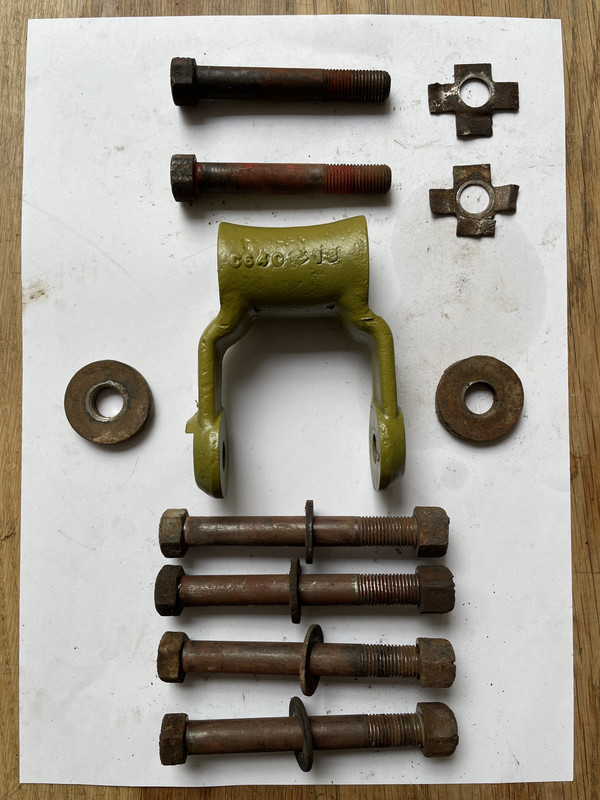
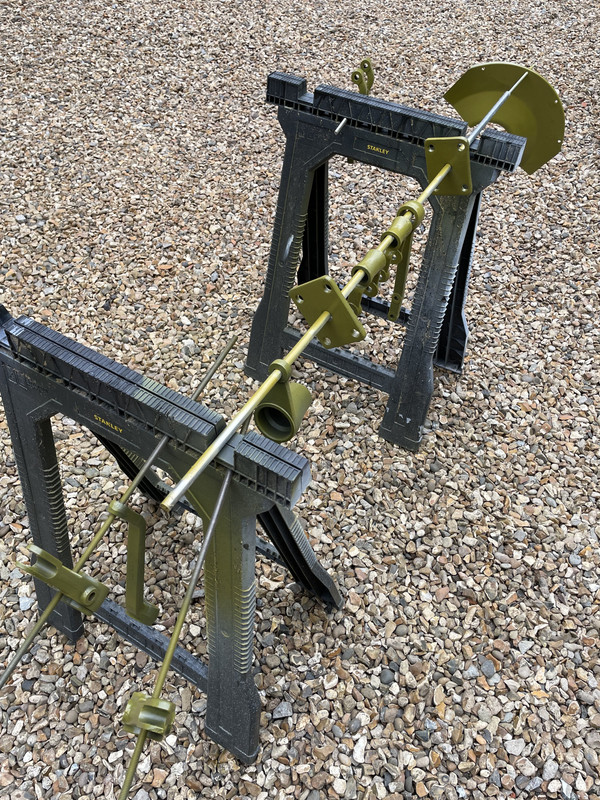
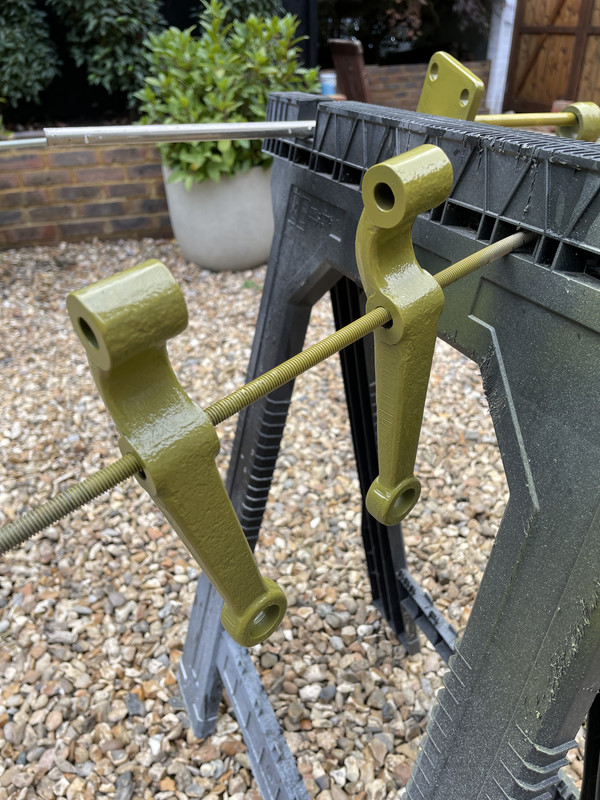
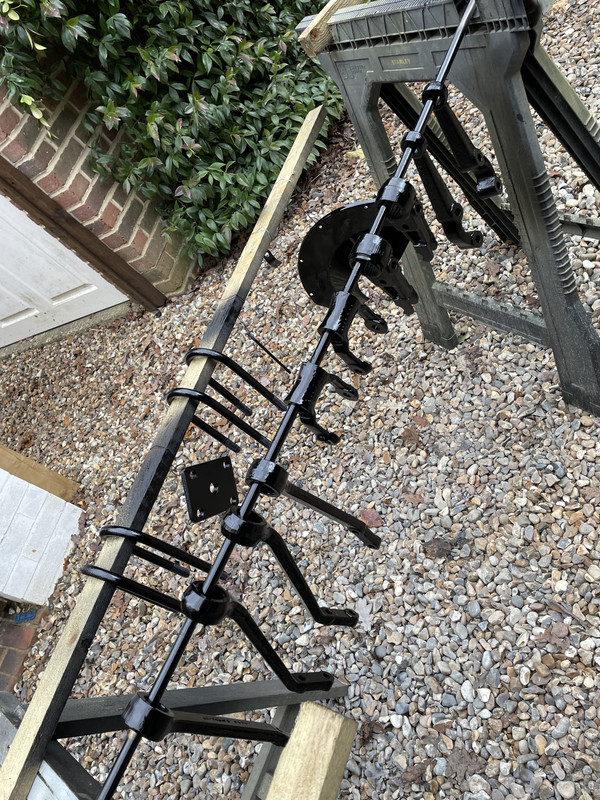
Suspension would be upgraded with a common addition of adjustable dampers to the rear, but with black coloured poly bushes all round its character is intended to be largely standard…and given the car had laid dormant for so many years I stripped the rear leaf springs, painting each one individually, prior to re-greasing and reassembly, finished off with the period correct leather shrouds

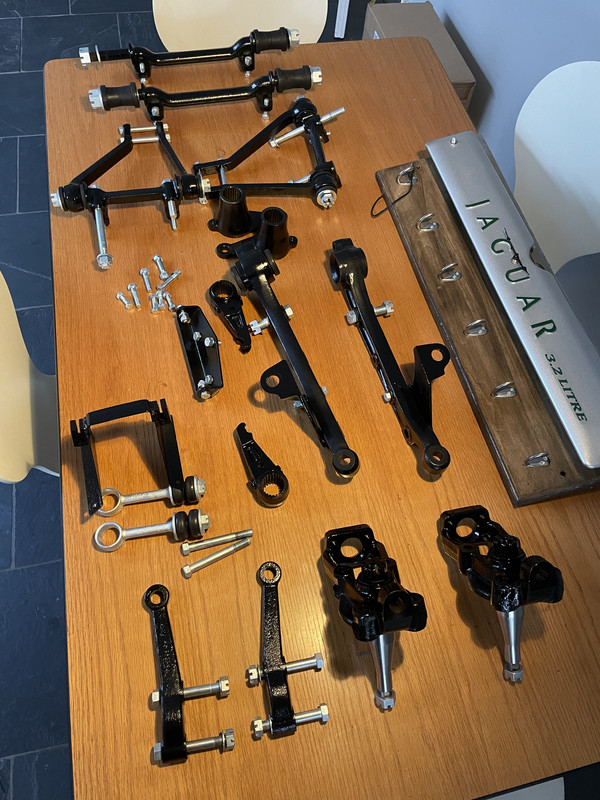
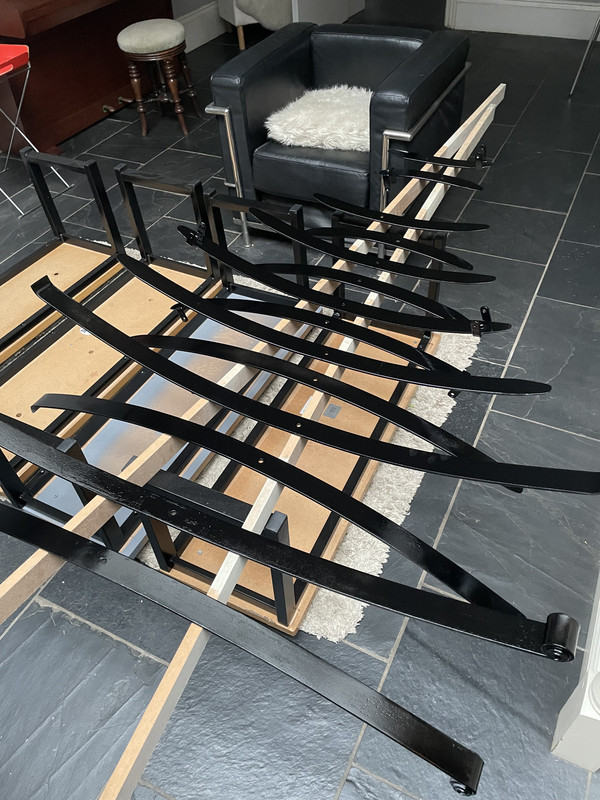
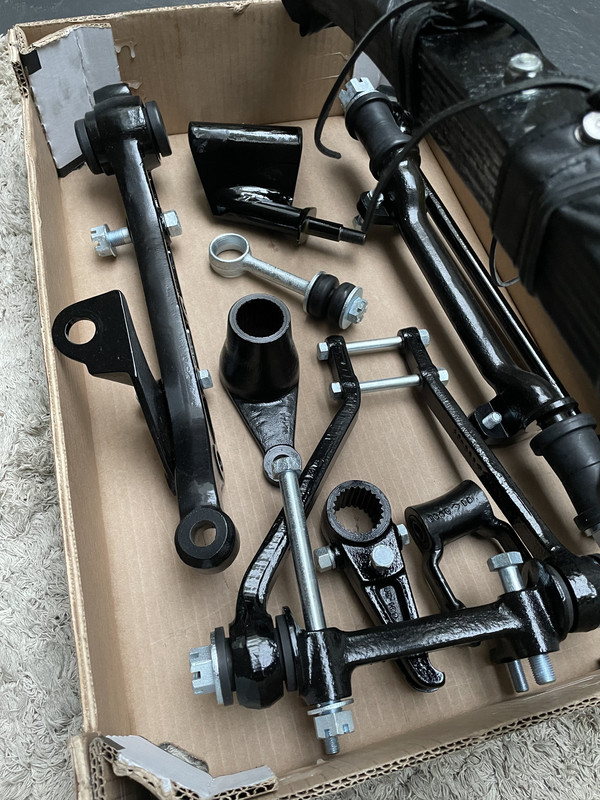
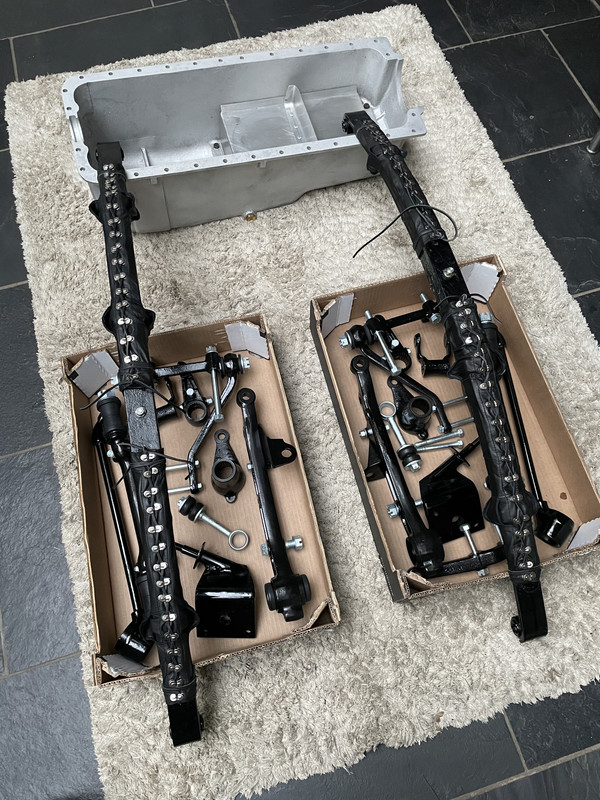
It really is a lovely collection having so many new parts ready to bolt back together…..all I needed was a chassis….trouble is it was holding a body together…and would need to do so, for some time to come….
Engine and suspension
Envirostrip dealt with the car very efficiently during July 2022 and I arranged for them to deliver the car directly to Barry, as I needed the space here to continue a more detailed stripping and cleaning of all the nuts,bolts and assorted fasteners….to sort them ready for bright zine/black zinc or nickel plating……and to de-rust/prime and 2K top coat all of the suspension components
I also stripped the engine and got it ready to take down to Twyfords to have all the machine work done and get the head machined and re-built
I was happy to build the engine, but wanted the head done for me with all valve clearances set to the correct 4 and 6 thou gaps
The engine would be slightly upgraded
Fast road specification camshafts
Increased inlet valves and ports from 1.5” to 2” plus a pair of new 2” HSU carbs
New valve guides
All new chains and sprockets
ARP crankshaft bolts
All new bearings
New pistons (+20)
All components balanced and the block line bored
Larger 10” lightweight clutch
Machined rear crankshaft main seal conversion
All mated to a new 5 speed gearbox as having driven the E Type for a while I had admitted to myself it really does need a fifth gear do higher speed cruising….so for the XK it was always a done deal
Twyfords also checked the internals and end floats on the differential crown and pinion internals bearings, whilst I then replaced all bearings and seals
Suspension would be upgraded with a common addition of adjustable dampers to the rear, but with black coloured poly bushes all round its character is intended to be largely standard…and given the car had laid dormant for so many years I stripped the rear leaf springs, painting each one individually, prior to re-greasing and reassembly, finished off with the period correct leather shrouds
It really is a lovely collection having so many new parts ready to bolt back together…..all I needed was a chassis….trouble is it was holding a body together…and would need to do so, for some time to come….
1974 2.7 Carrera
(full restoration. now as an RS Touring)
1963 3.8 E Type
( 11 years in the making…………………….)
1952. XK120…the next one ……….……..)
(full restoration. now as an RS Touring)
1963 3.8 E Type
( 11 years in the making…………………….)
1952. XK120…the next one ……….……..)
-
911hillclimber
- Nurse, I think I need some assistance
- Posts: 18924
- Joined: Mon Mar 10, 2008 6:26 pm
- Location: West Midlands
Re: The XK
The engine sure is a long stroke!
Seems almost odd to see rods so long, but the engine is so tall too!
It must weigh-in a substantial figure. You must be tempted to put the same 5 speeder in the E Type?
Thanks for the updates as ever.
Seems almost odd to see rods so long, but the engine is so tall too!
It must weigh-in a substantial figure. You must be tempted to put the same 5 speeder in the E Type?
Thanks for the updates as ever.
73T 911 Coupe, road/hillclimber 3.2L
Lola t 492 / 3.2 hillclimb racer
Boxster 987 Gen II 2.9
Lola t 492 / 3.2 hillclimb racer
Boxster 987 Gen II 2.9
-
jtparr
- DDK 1st, 2nd and 3rd for me!
- Posts: 2237
- Joined: Mon May 24, 2004 10:54 pm
- Location: london/surrey
Re: The XK
Hi Graham
Plan is indeed to change the EType over to a 5 speed…but it’s a full engine out job….so……not in a rush to do so…..it’s also a very tight fit…
Plan is indeed to change the EType over to a 5 speed…but it’s a full engine out job….so……not in a rush to do so…..it’s also a very tight fit…
1974 2.7 Carrera
(full restoration. now as an RS Touring)
1963 3.8 E Type
( 11 years in the making…………………….)
1952. XK120…the next one ……….……..)
(full restoration. now as an RS Touring)
1963 3.8 E Type
( 11 years in the making…………………….)
1952. XK120…the next one ……….……..)
-
jtparr
- DDK 1st, 2nd and 3rd for me!
- Posts: 2237
- Joined: Mon May 24, 2004 10:54 pm
- Location: london/surrey
Re: The XK
Part 9
The Metal Meister …part 1
The arrangement with Envirostrip that they deliver the car directly to Barry was also to keep the freshly cleaned shell in his dry workshop, as although he was not be able to start immediately, it was a better environment than my slightly moist newly built garage
The good news was that it fitted through the doors of Barry’s workshop and that Envirostrip didn’t leave any of the panels back at the works…
In terms of what should be done first I left this very much to Barry, as once he had received the bare shell we could develop an understanding of what made sense to tackle first, second and so on
Having firstly restored my 911 and then subsequently the E Type I had already begun to appreciate the difference in car design and how it had developed, refined and arguably been simplified and certainly mechanised from the 1950’s through to the 1970s, as although for example the E Type was launched in March 1961, it’s roots are very much in the 1950’s, as that’s when the car was largely designed.
In the case of the XK we were not only very much in the 1940s way of designing but also very much the way of production and indeed the availability of materials and the skill levels available in England at that time
Cars were totally hand built, steel was rationed but aluminium and plywood and general timber were not, skilled labour shortages are an influence and in the case of Jaguar the ability to draw upon labour pools from the local furniture industry lead to the use of timber frames skinned with aluminium for all opening panels ….more of that later……..
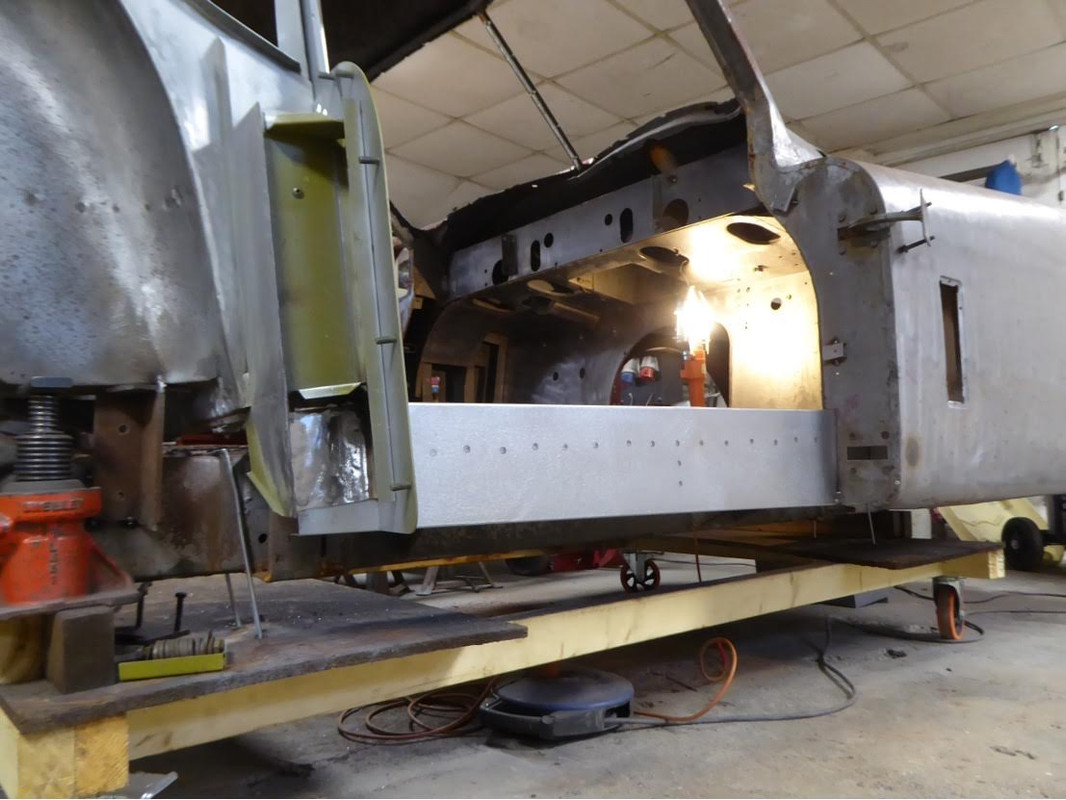
The really good news was the chassis was not only extremely well preserved with no serious rot or rust whatsoever, but that it was perfectly straight and true, so we could take it as a sound basis from which to set out and assemble the bodywork…first task therefore was to make small adjustments to the position of the body relative to the chassis so that we knew we had a reliable base from which to proceed
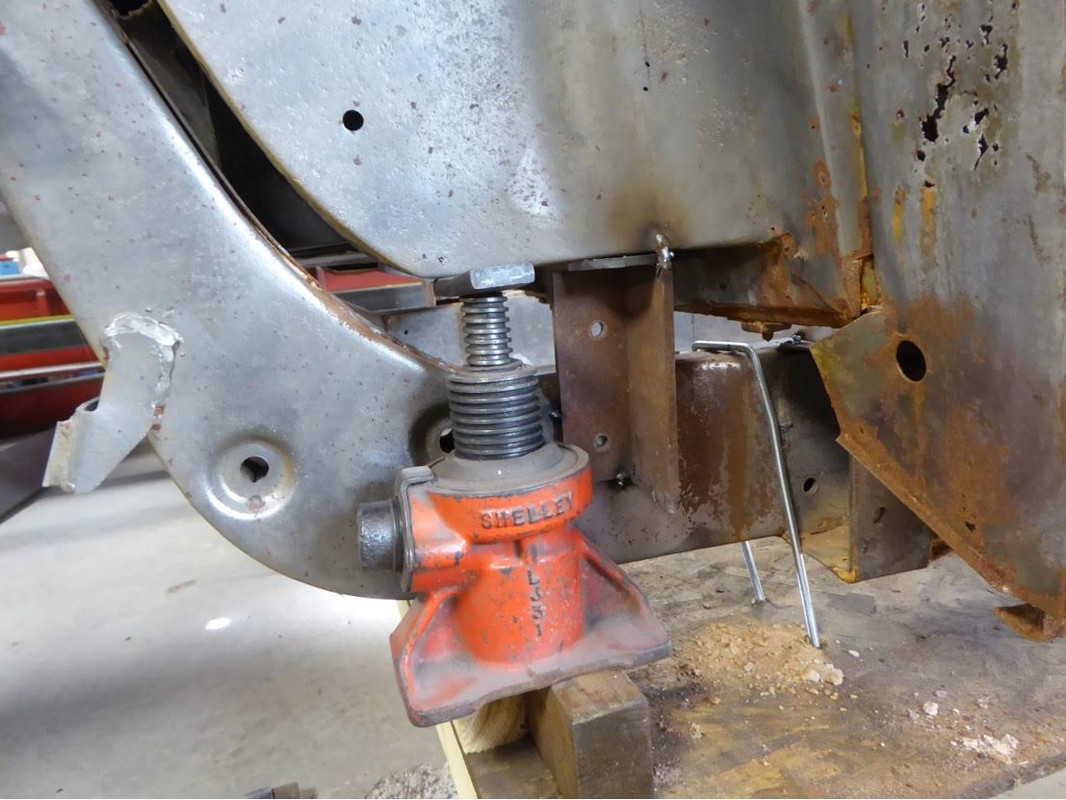
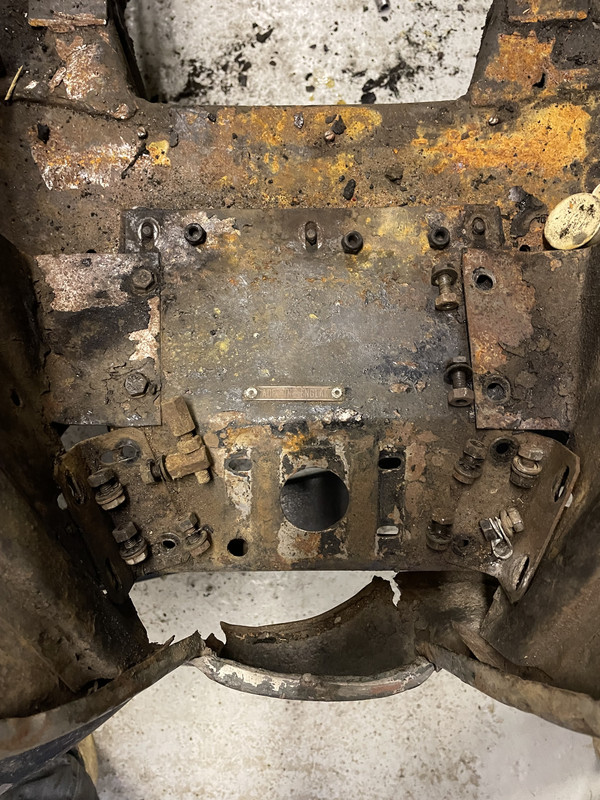
Small brackets were fabricated and with the aid of bottle jacks the shell was adjusted before being firmly bolted and welded to the chassis, which is through 12 no. 7/16” bolts that locate through a series of cast aluminium spacer blocks
- under each front bulkhead panel astride the gearbox tunnel
- front and rear of each cill in line with A and B posts
- high level behind the B post
- behind the C post
- tail end of the rear chassis legs
And is also laterally restrained with fairly flimsy stays at each outer wing and is secured with all manner of agricultural brackets at the front
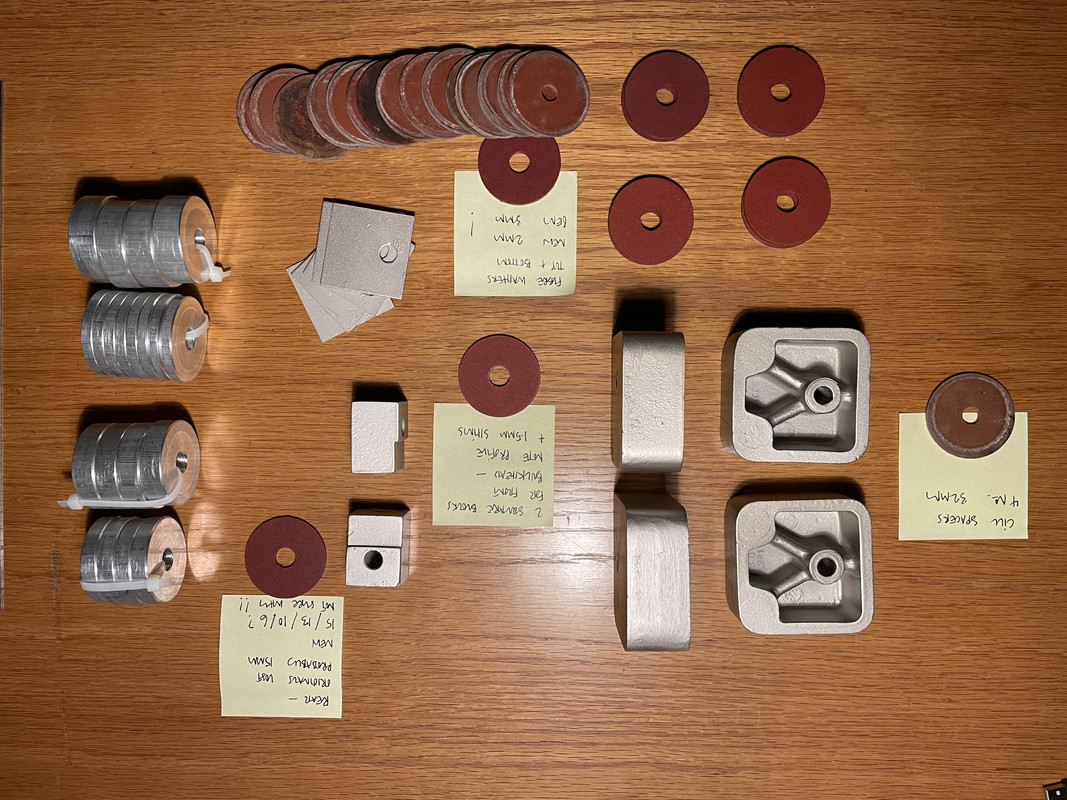
Prior to deliver to Envirostrip I had managed to undo all the brackets within the engine bay, the front bulkhead and all four of the cill bolts…but all of those at the rear were seized solid, meaning I had to resort to angle grinders and reciprocating power saws… and replace the aluminium blocks with stacks of thick steel washers….as they would have dissolved in the chemicals at Envirostrip, resulting in a loose shell relative to the chassis
These are the old spacers, refreshed with silver paint after grit blasting…plus new fibre washers..
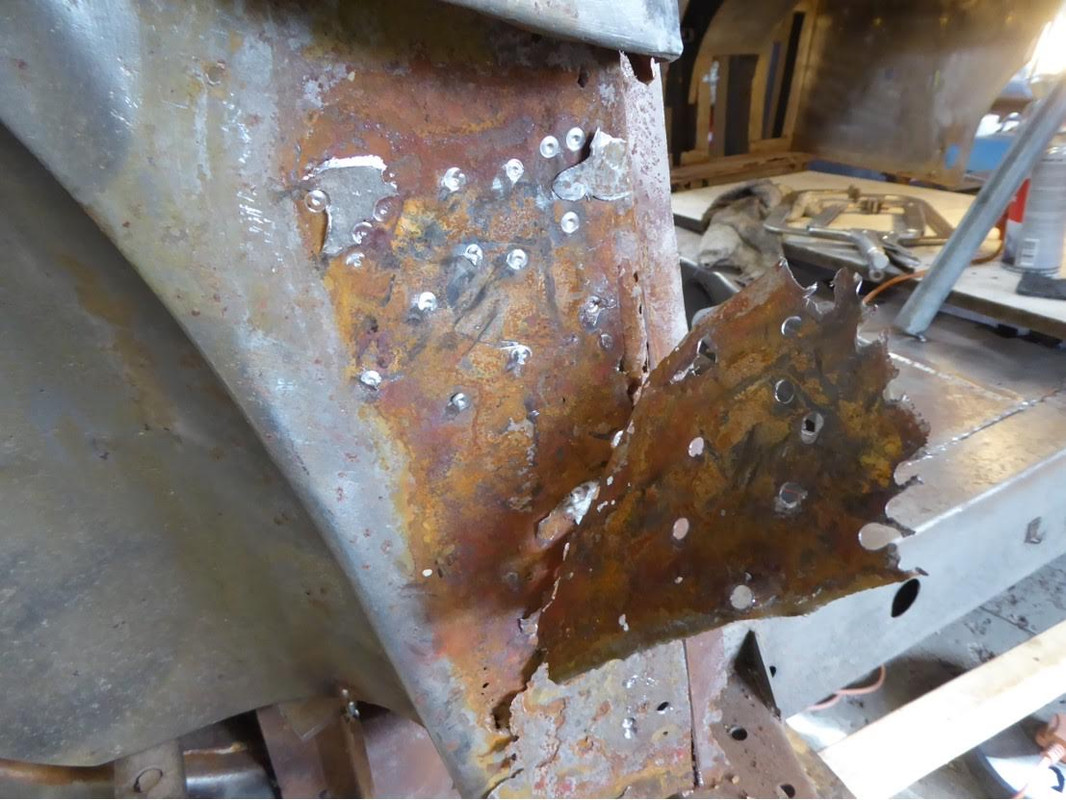
The most sensible thing to do was to cut out and replace all of the rust in the centre of the tub (same as of the 911 the heart of the stiffness is in the cills) once this was done, we knew we had a reliable and accurate enough central core to the body which gave us a lot of confidence as he knew the subsequent elements of work would involve for a lot more chopping out about to deal with the rust issues
After that attention was to next move to the front of the car and address
- Visible damage to the offside bumper area
- Remove and repair headlamp and indicator pods
- Bumper delete and brake vent hole delete
- Strengthen front mounting of the shell to the chassis
- refine lower bonnet/grille profile
With what I am writing it sounds as though the body was incredibly rusty, which in many respects, it actually wasn’t. It was just that where there was rust it was quite impressive, but the main thing was the car had never been restored before so we were never having to deal with other peoples botched work
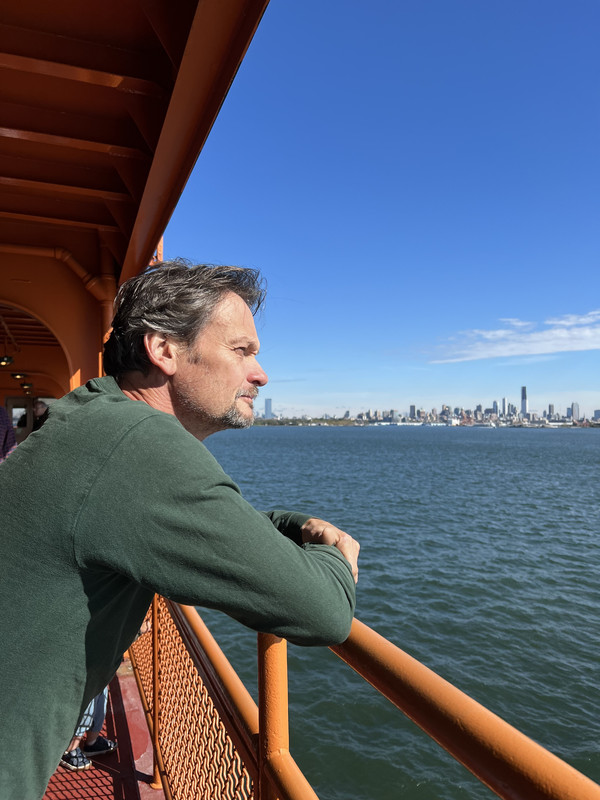
So …it was now November 2022….a perfect time to take my 2 children to New York and celebrate the fact that their old man was now 60….and a damn fine reason to start metalwork…..
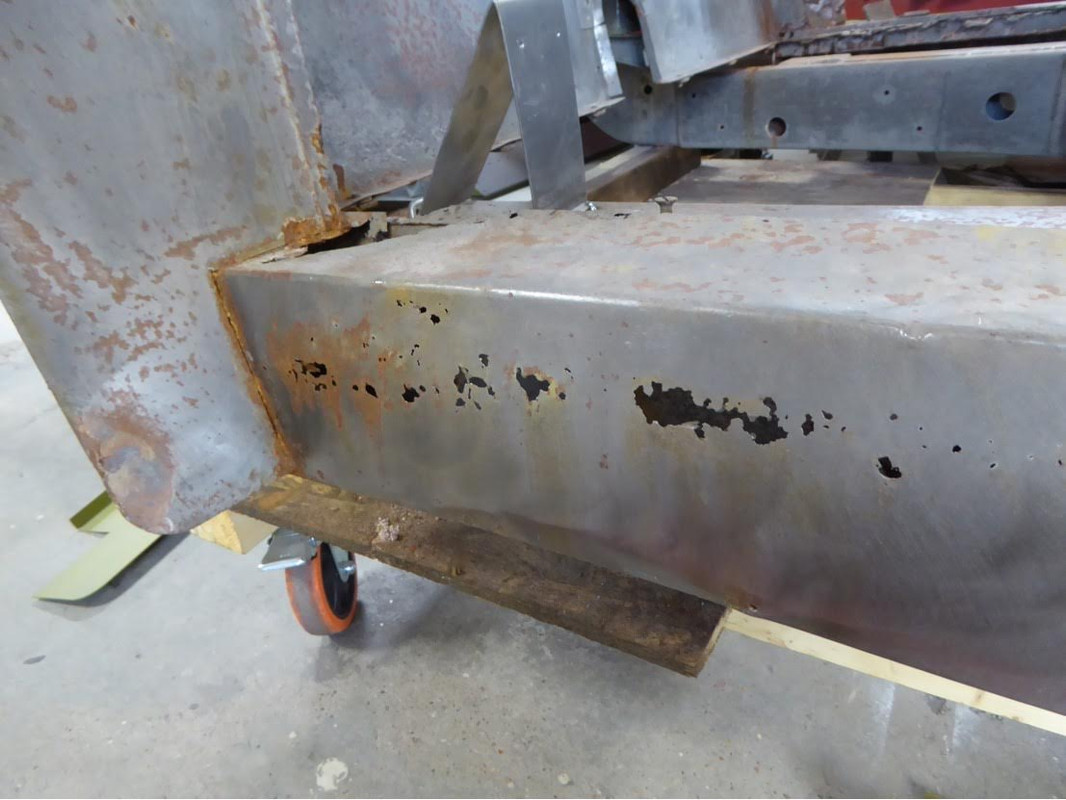
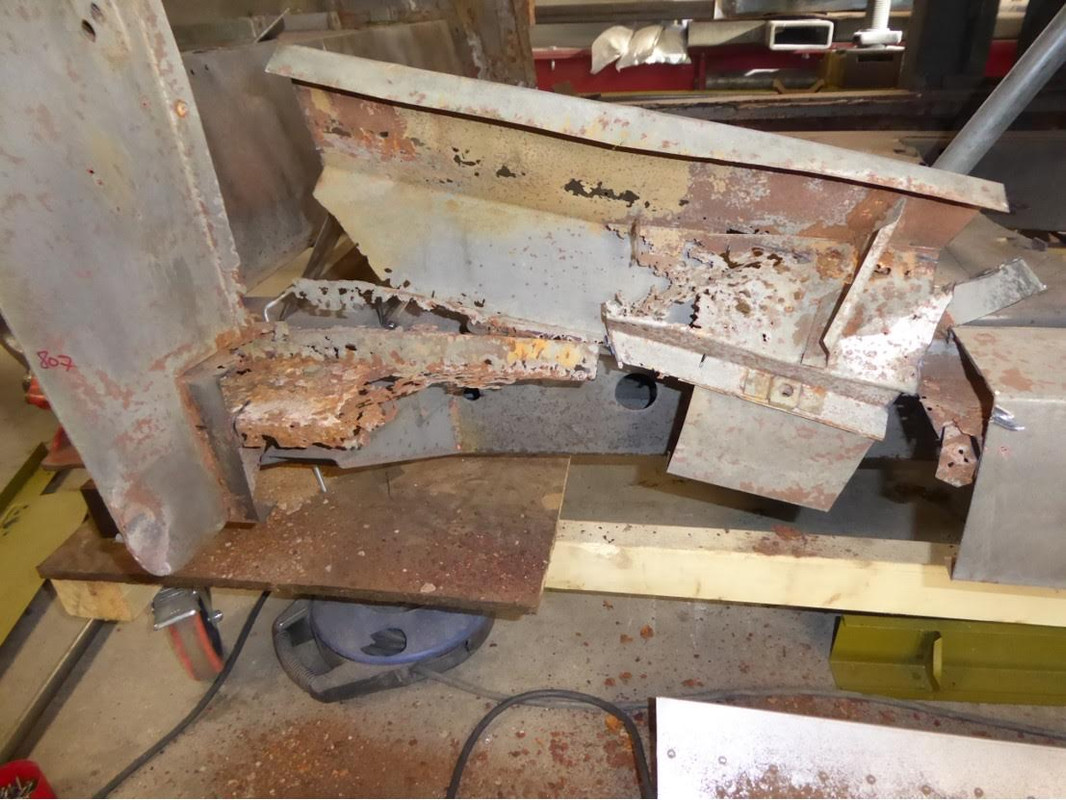
Bottom of A posts…requIring fabricated sections..much better made than originals….naturally…needed to do this to establish a clean and accurate A-Post panel surface to accept….
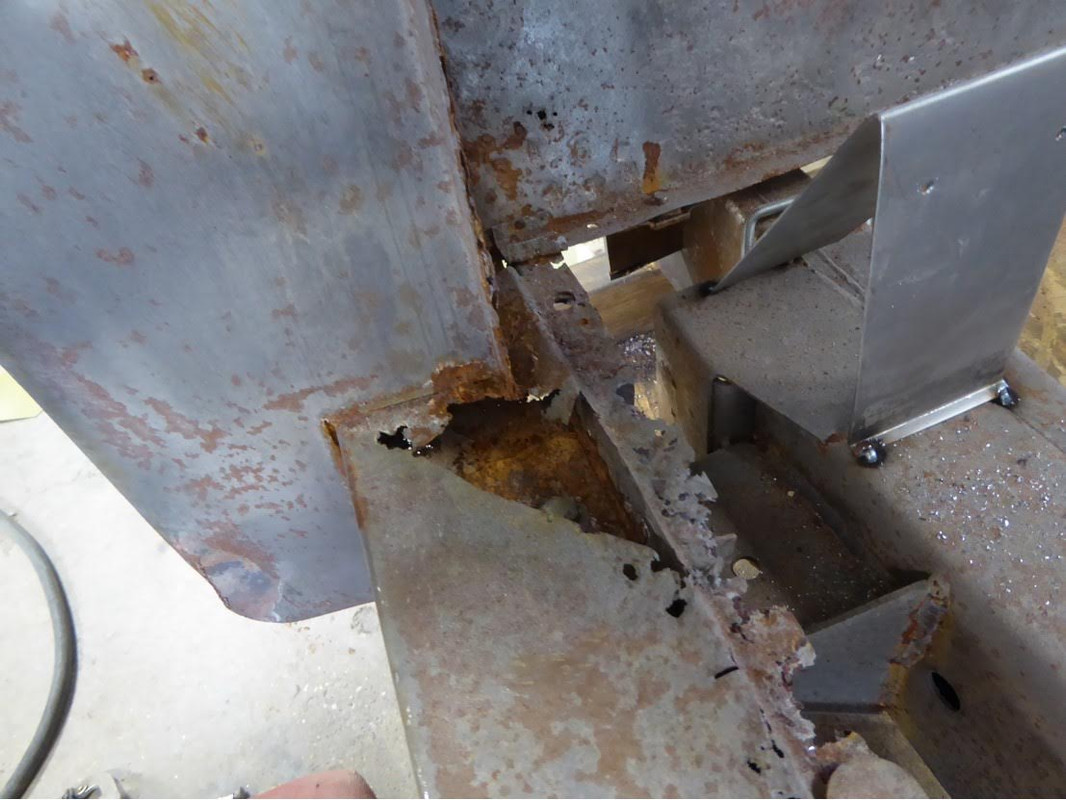
Replacement cills, …except there was a lot to remove before new ones could be added..…absolutely necessary here without any doubt…. leaving an impressive gaping void….
But before they could be installed there was the small matter of
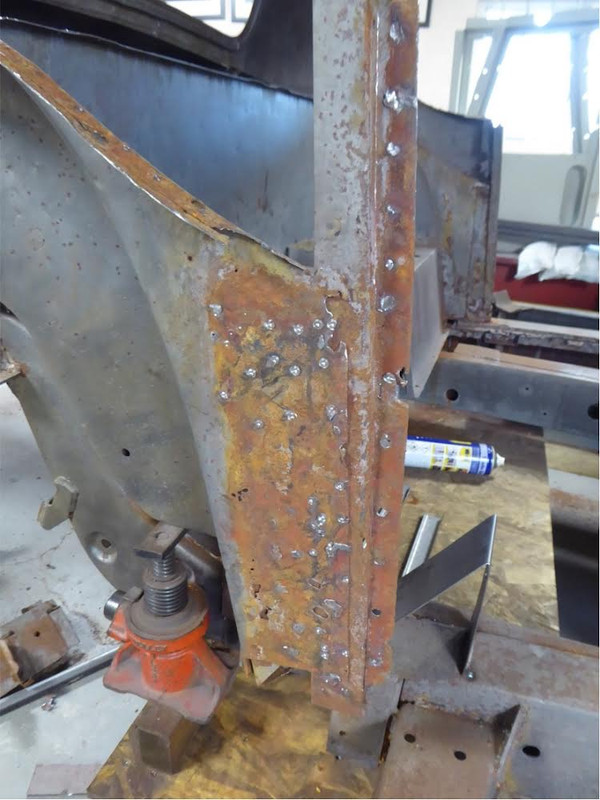


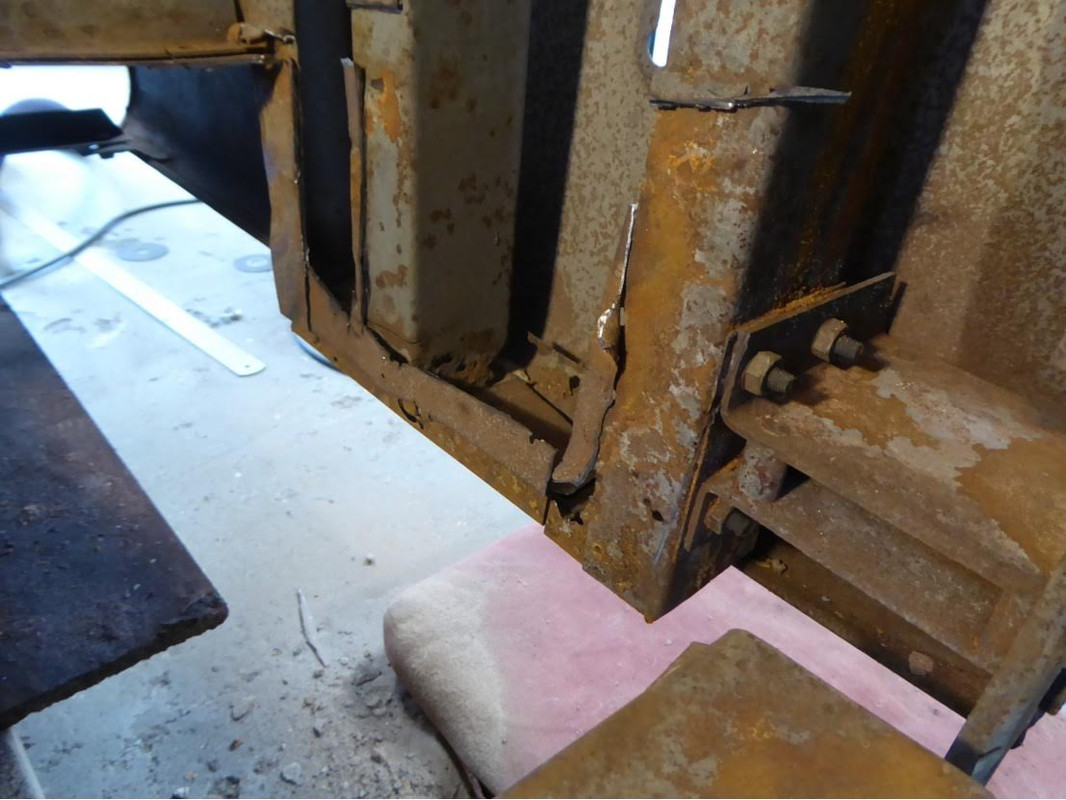
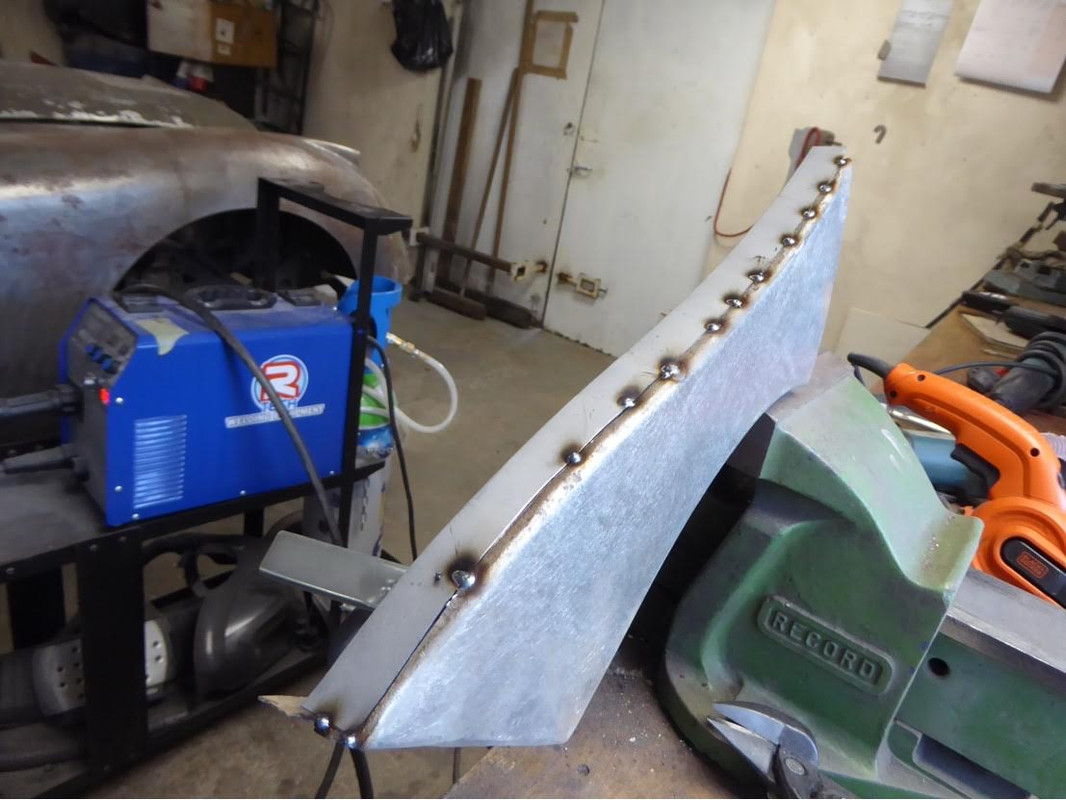
A complete B post fabrication which are made up, (in classic Jaguar fashion) of something like a dozen simply formed, single curvature, if not flat profiles… They can be bought as a pre-assembled item, which is what I did, but it still needed a host of initial surgery to give us something to actually be able to the weld the new B posts to
Which then led onto repairs to rear quarter light area….now they were splendidly rusty… as to was the whole of the double curved tops to the doors….and the gutter profile, which was a separate profile normally riveted in place….(soon to change….)

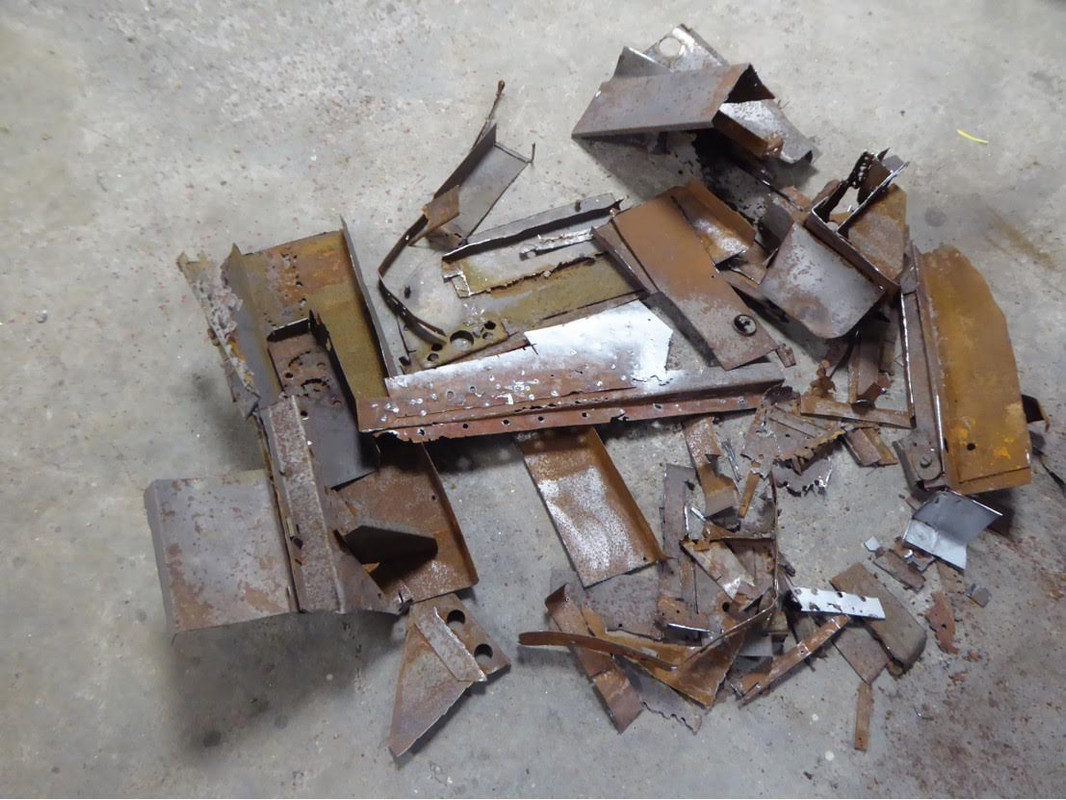
Fridays soon became my favourite evening…an update from Barry …always including the comedy photo of the scrap that was generated …..accompanying a beer at my local
Thanks for reading….
The Metal Meister …part 1
The arrangement with Envirostrip that they deliver the car directly to Barry was also to keep the freshly cleaned shell in his dry workshop, as although he was not be able to start immediately, it was a better environment than my slightly moist newly built garage
The good news was that it fitted through the doors of Barry’s workshop and that Envirostrip didn’t leave any of the panels back at the works…
In terms of what should be done first I left this very much to Barry, as once he had received the bare shell we could develop an understanding of what made sense to tackle first, second and so on
Having firstly restored my 911 and then subsequently the E Type I had already begun to appreciate the difference in car design and how it had developed, refined and arguably been simplified and certainly mechanised from the 1950’s through to the 1970s, as although for example the E Type was launched in March 1961, it’s roots are very much in the 1950’s, as that’s when the car was largely designed.
In the case of the XK we were not only very much in the 1940s way of designing but also very much the way of production and indeed the availability of materials and the skill levels available in England at that time
Cars were totally hand built, steel was rationed but aluminium and plywood and general timber were not, skilled labour shortages are an influence and in the case of Jaguar the ability to draw upon labour pools from the local furniture industry lead to the use of timber frames skinned with aluminium for all opening panels ….more of that later……..
The really good news was the chassis was not only extremely well preserved with no serious rot or rust whatsoever, but that it was perfectly straight and true, so we could take it as a sound basis from which to set out and assemble the bodywork…first task therefore was to make small adjustments to the position of the body relative to the chassis so that we knew we had a reliable base from which to proceed
Small brackets were fabricated and with the aid of bottle jacks the shell was adjusted before being firmly bolted and welded to the chassis, which is through 12 no. 7/16” bolts that locate through a series of cast aluminium spacer blocks
- under each front bulkhead panel astride the gearbox tunnel
- front and rear of each cill in line with A and B posts
- high level behind the B post
- behind the C post
- tail end of the rear chassis legs
And is also laterally restrained with fairly flimsy stays at each outer wing and is secured with all manner of agricultural brackets at the front
Prior to deliver to Envirostrip I had managed to undo all the brackets within the engine bay, the front bulkhead and all four of the cill bolts…but all of those at the rear were seized solid, meaning I had to resort to angle grinders and reciprocating power saws… and replace the aluminium blocks with stacks of thick steel washers….as they would have dissolved in the chemicals at Envirostrip, resulting in a loose shell relative to the chassis
These are the old spacers, refreshed with silver paint after grit blasting…plus new fibre washers..
The most sensible thing to do was to cut out and replace all of the rust in the centre of the tub (same as of the 911 the heart of the stiffness is in the cills) once this was done, we knew we had a reliable and accurate enough central core to the body which gave us a lot of confidence as he knew the subsequent elements of work would involve for a lot more chopping out about to deal with the rust issues
After that attention was to next move to the front of the car and address
- Visible damage to the offside bumper area
- Remove and repair headlamp and indicator pods
- Bumper delete and brake vent hole delete
- Strengthen front mounting of the shell to the chassis
- refine lower bonnet/grille profile
With what I am writing it sounds as though the body was incredibly rusty, which in many respects, it actually wasn’t. It was just that where there was rust it was quite impressive, but the main thing was the car had never been restored before so we were never having to deal with other peoples botched work
So …it was now November 2022….a perfect time to take my 2 children to New York and celebrate the fact that their old man was now 60….and a damn fine reason to start metalwork…..
Bottom of A posts…requIring fabricated sections..much better made than originals….naturally…needed to do this to establish a clean and accurate A-Post panel surface to accept….
Replacement cills, …except there was a lot to remove before new ones could be added..…absolutely necessary here without any doubt…. leaving an impressive gaping void….
But before they could be installed there was the small matter of
A complete B post fabrication which are made up, (in classic Jaguar fashion) of something like a dozen simply formed, single curvature, if not flat profiles… They can be bought as a pre-assembled item, which is what I did, but it still needed a host of initial surgery to give us something to actually be able to the weld the new B posts to
Which then led onto repairs to rear quarter light area….now they were splendidly rusty… as to was the whole of the double curved tops to the doors….and the gutter profile, which was a separate profile normally riveted in place….(soon to change….)
Fridays soon became my favourite evening…an update from Barry …always including the comedy photo of the scrap that was generated …..accompanying a beer at my local
Thanks for reading….
1974 2.7 Carrera
(full restoration. now as an RS Touring)
1963 3.8 E Type
( 11 years in the making…………………….)
1952. XK120…the next one ……….……..)
(full restoration. now as an RS Touring)
1963 3.8 E Type
( 11 years in the making…………………….)
1952. XK120…the next one ……….……..)
-
sladey
- Nurse, I think I need some assistance
- Posts: 8723
- Joined: Sat Apr 23, 2005 9:08 pm
- Location: Nottingham, UK
Re: The XK
Lovely stuff
The simple things you see are all complicated
I look pretty young but I'm just backdated yeah
I look pretty young but I'm just backdated yeah
-
rhd racer
- DDK 1st, 2nd and 3rd for me!
- Posts: 2043
- Joined: Wed Jun 23, 2004 9:47 pm
- Location: Nottinghamshire
Re: The XK
Great update, thanks
Sent from my iPhone using Tapatalk
Sent from my iPhone using Tapatalk
93 964 C2
99 Boxster 2.5 > 2.7 hill climber
71 914/6 3.0 - gone
'You see Paul, hill climbing is like making love to a beautiful woman. You get your motor running, check your fluids, hang on tight and WHOA..30 seconds later it's all over!' Swiss Tony
99 Boxster 2.5 > 2.7 hill climber
71 914/6 3.0 - gone
'You see Paul, hill climbing is like making love to a beautiful woman. You get your motor running, check your fluids, hang on tight and WHOA..30 seconds later it's all over!' Swiss Tony
-
911hillclimber
- Nurse, I think I need some assistance
- Posts: 18924
- Joined: Mon Mar 10, 2008 6:26 pm
- Location: West Midlands
Re: The XK
Good to see and read, all that simple fabrication though can take for ever.
Looking forward to next steps.
Looking forward to next steps.
73T 911 Coupe, road/hillclimber 3.2L
Lola t 492 / 3.2 hillclimb racer
Boxster 987 Gen II 2.9
Lola t 492 / 3.2 hillclimb racer
Boxster 987 Gen II 2.9
-
jtparr
- DDK 1st, 2nd and 3rd for me!
- Posts: 2237
- Joined: Mon May 24, 2004 10:54 pm
- Location: london/surrey
Re: The XK
Part 10
The Metal Meister …part 2
Moving into December 2022 progress picked up in a visual sense as the reinstatement of the cills, plus the A and B posts was a great stage to get to…as all of us who have been through the restoration process knows there is a lot of faith needed at times when money seems to be flowing in just one direction and the car isn’t getting any better to look at…
However..the next stage was tremendously uplifting as not only was corrosion being replaced with clean metal but there were tangible developments in appearance
- Visible damage to the offside bumper area


My gut feeling was this damage occurred when the car was retrieved from storage..the folds in the metal are all outwards and commensurate with how a badly aligned towing rope could inflict damage….nothing that a porter power and a modicum of slapping couldn’t rectify….
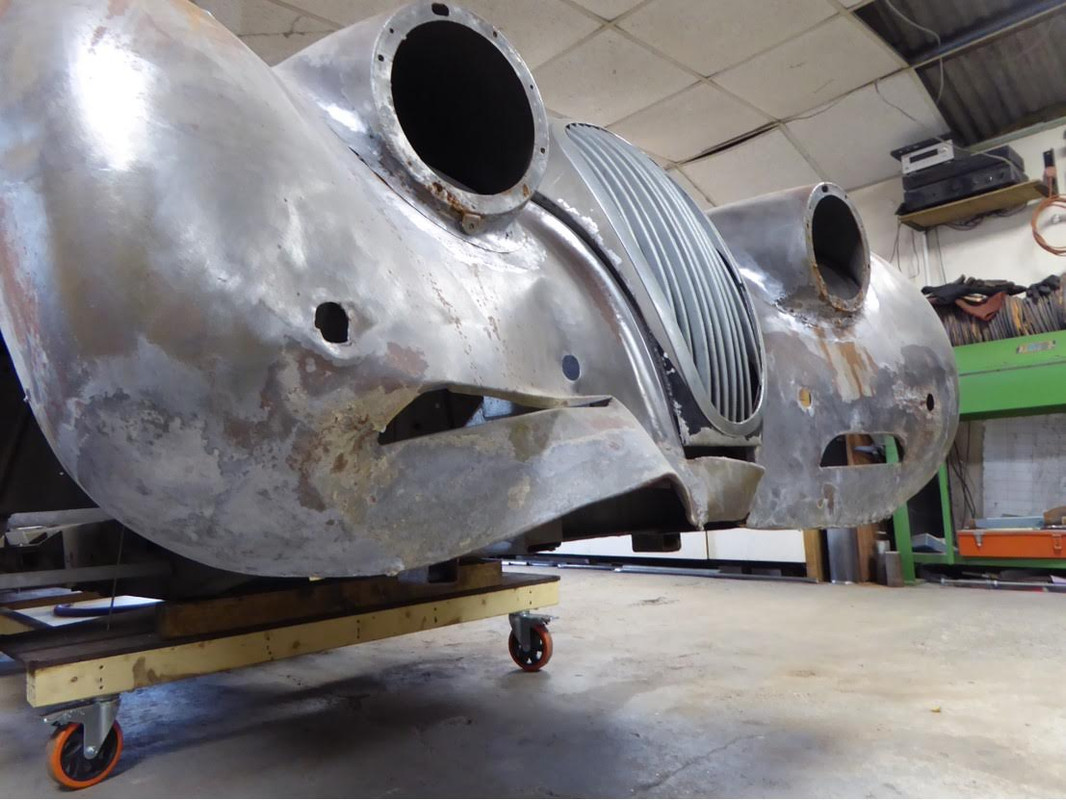
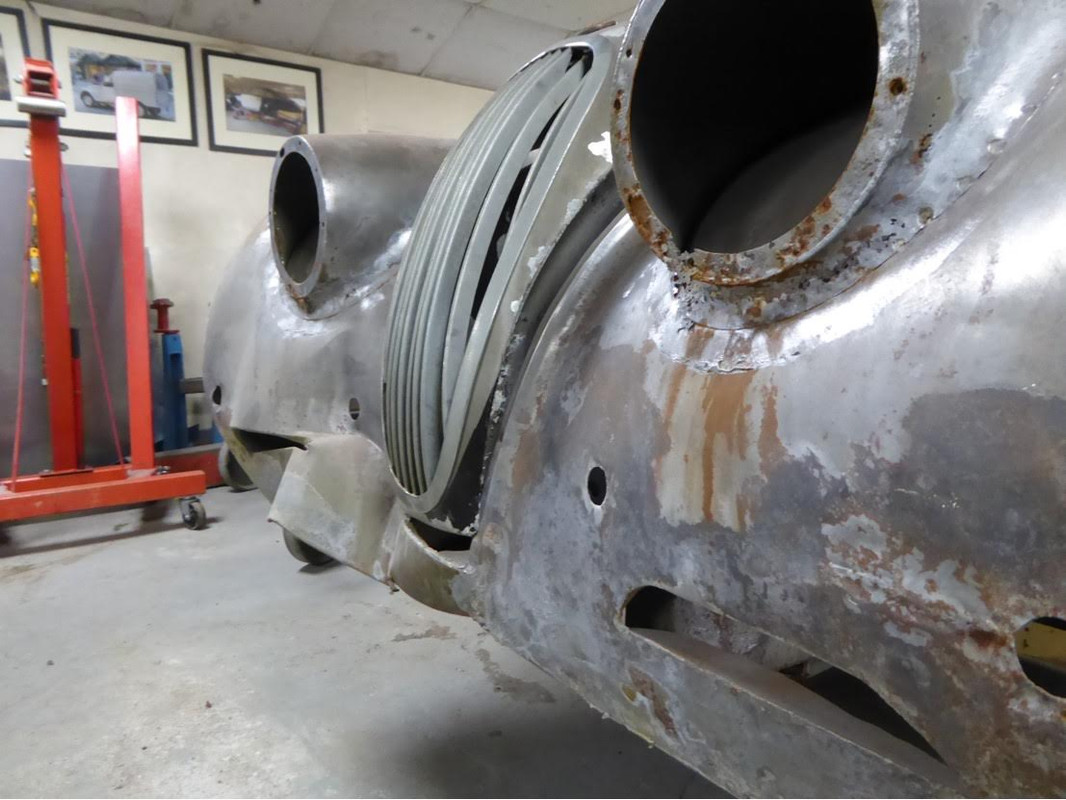
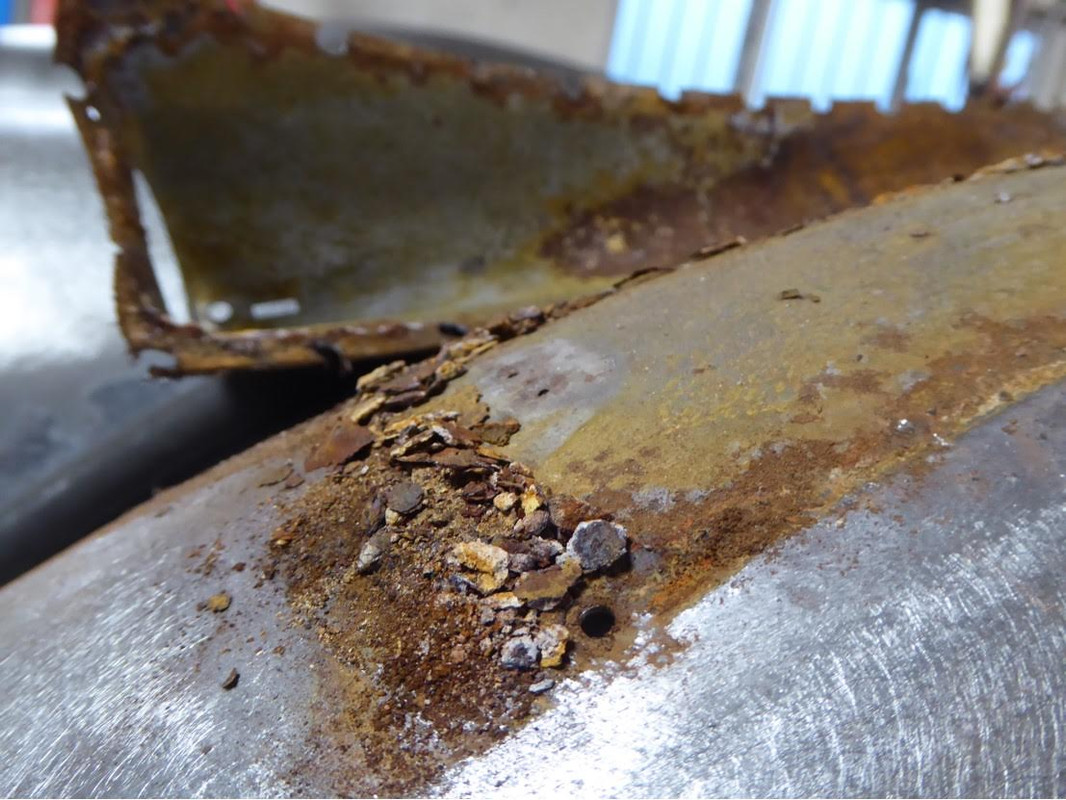
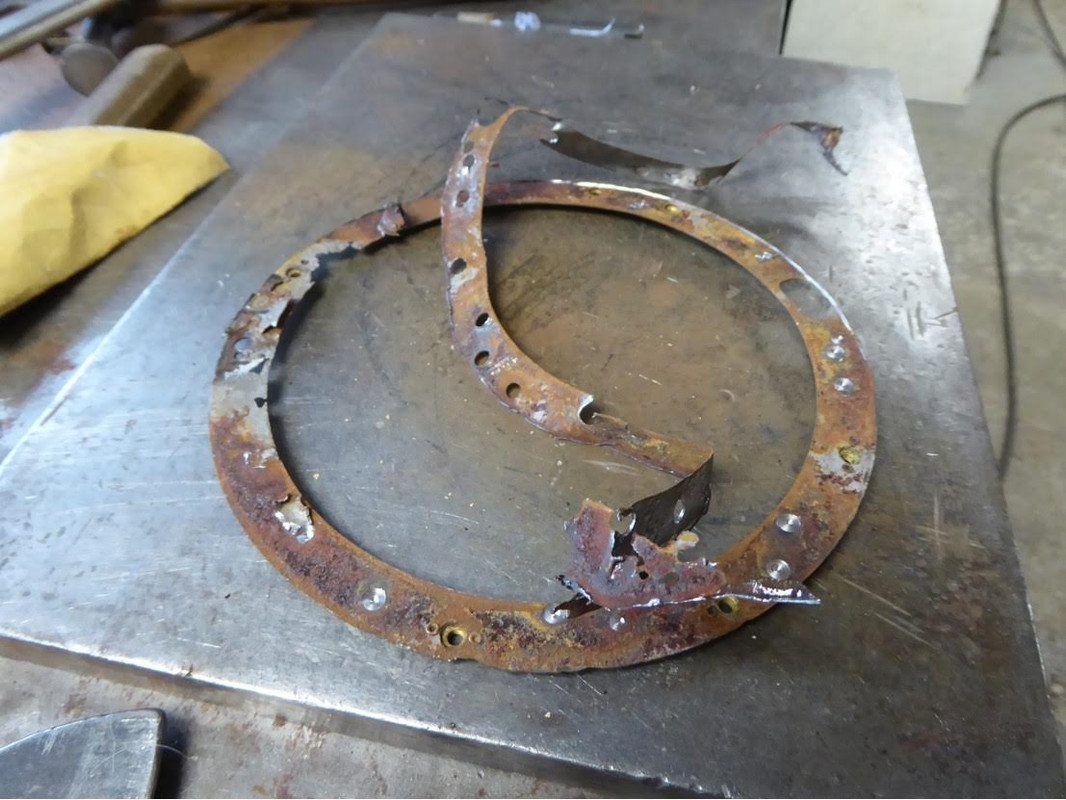
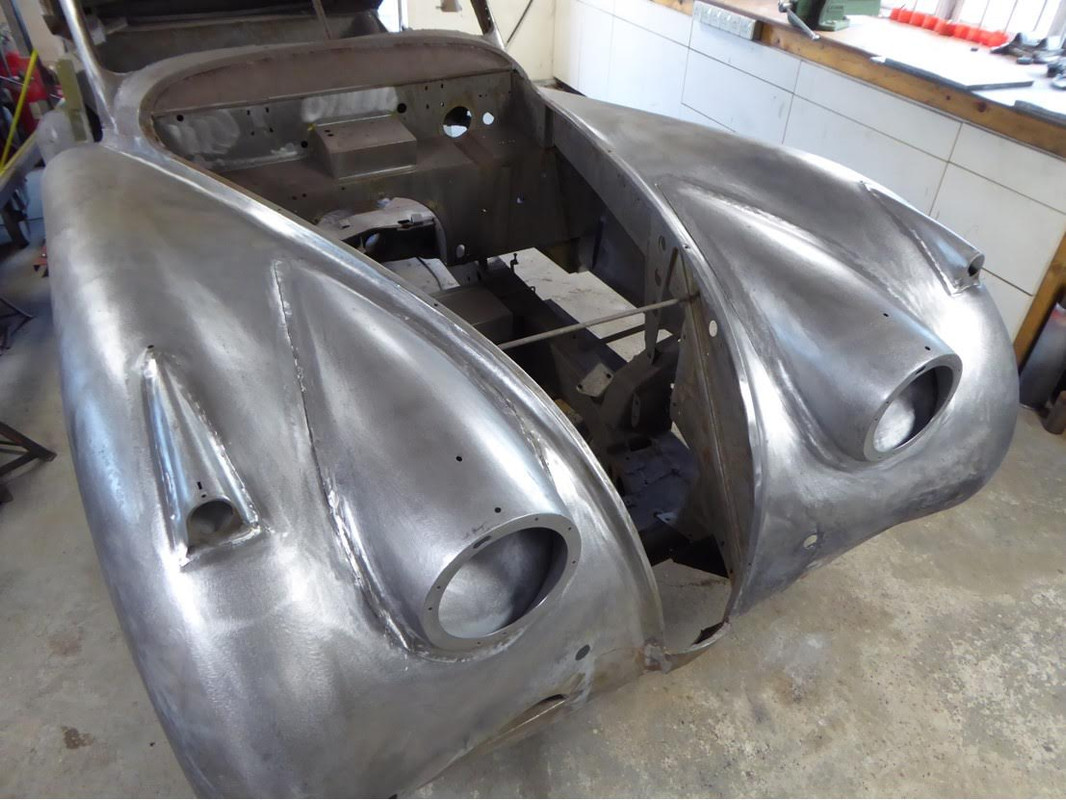
- Remove and repair headlamp and indicator pods
Ever wondered how the voluptuous light pods of vintage cars are actually made….?…truth is….quite crudely….welded forms onto the wings, ultimately blended in with lead…and without any drain holes….so a wonderful place for rust to spread…unknown….
So no choice here…if we are going to do something just once now…we need to do it properly


The shell may well have been dipped but rust lurked everywhere…so whilst far better than media blasting these had to be removed…
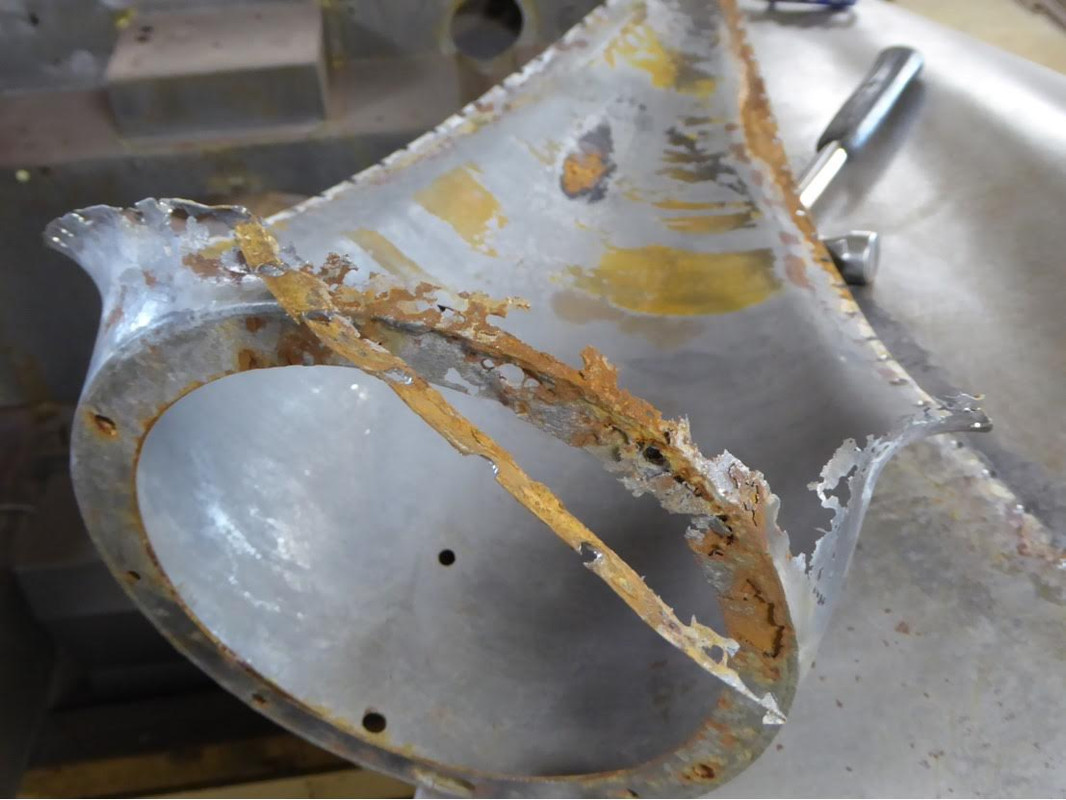
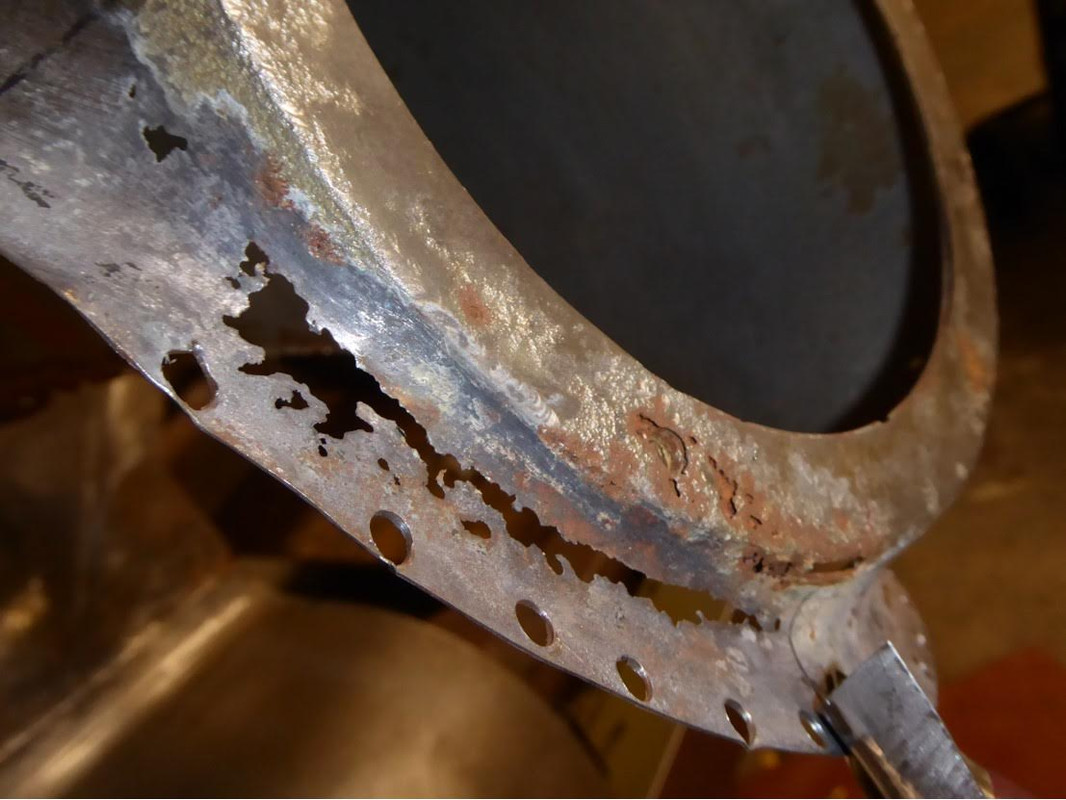
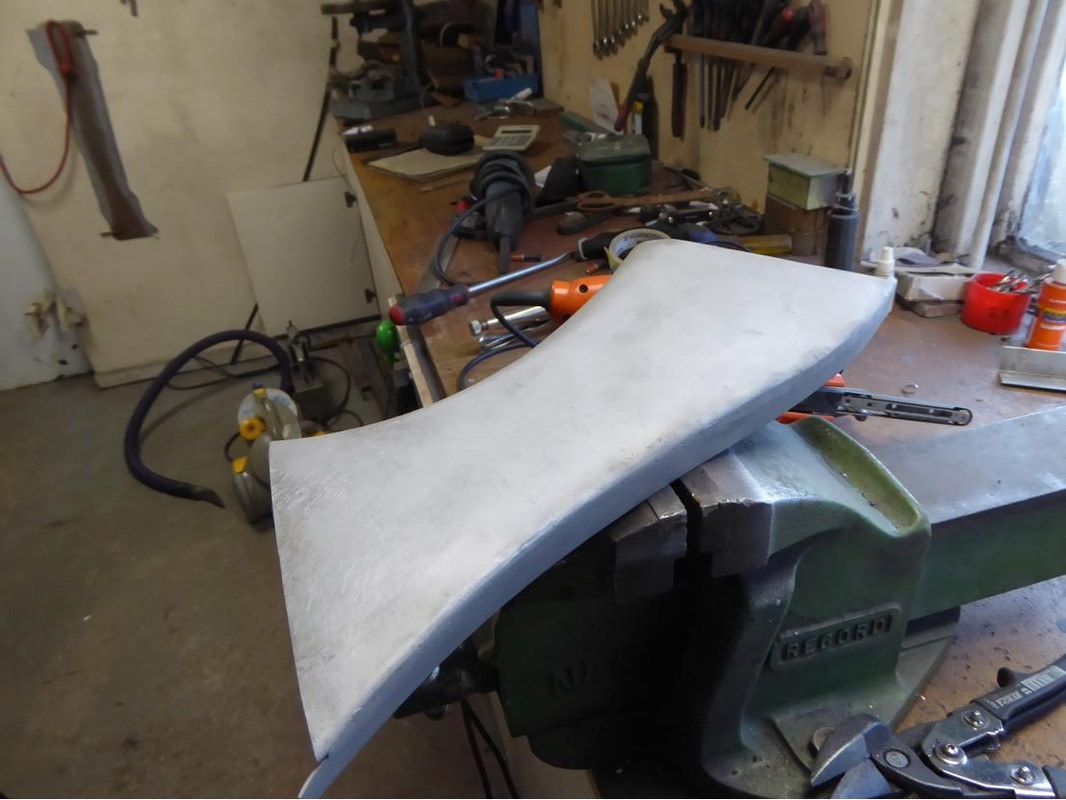
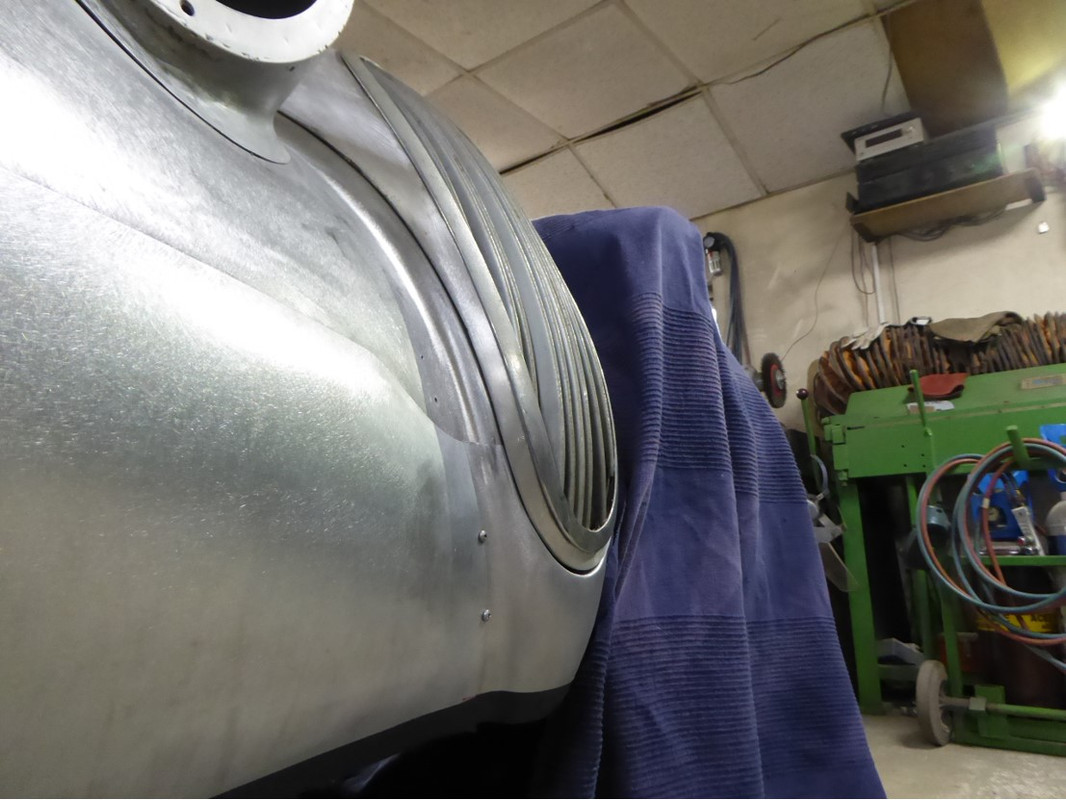
Which then requires careful sculpting of new metal….
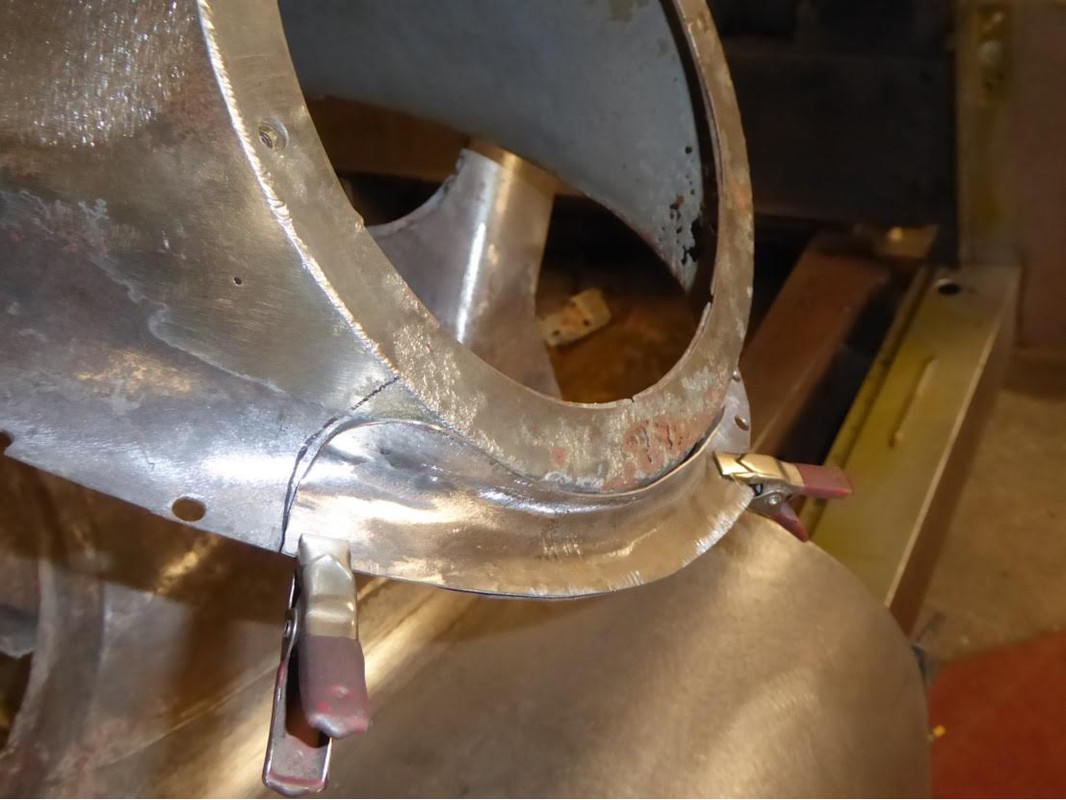

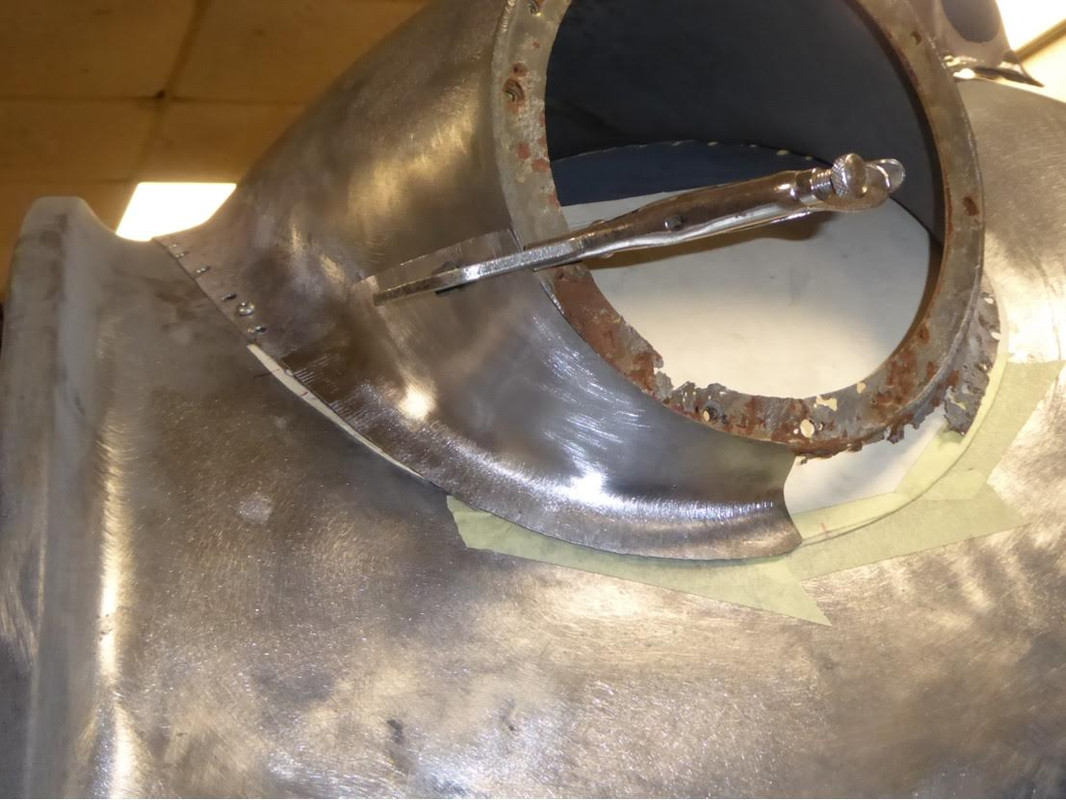
To allow the scoops to be fully repaired….
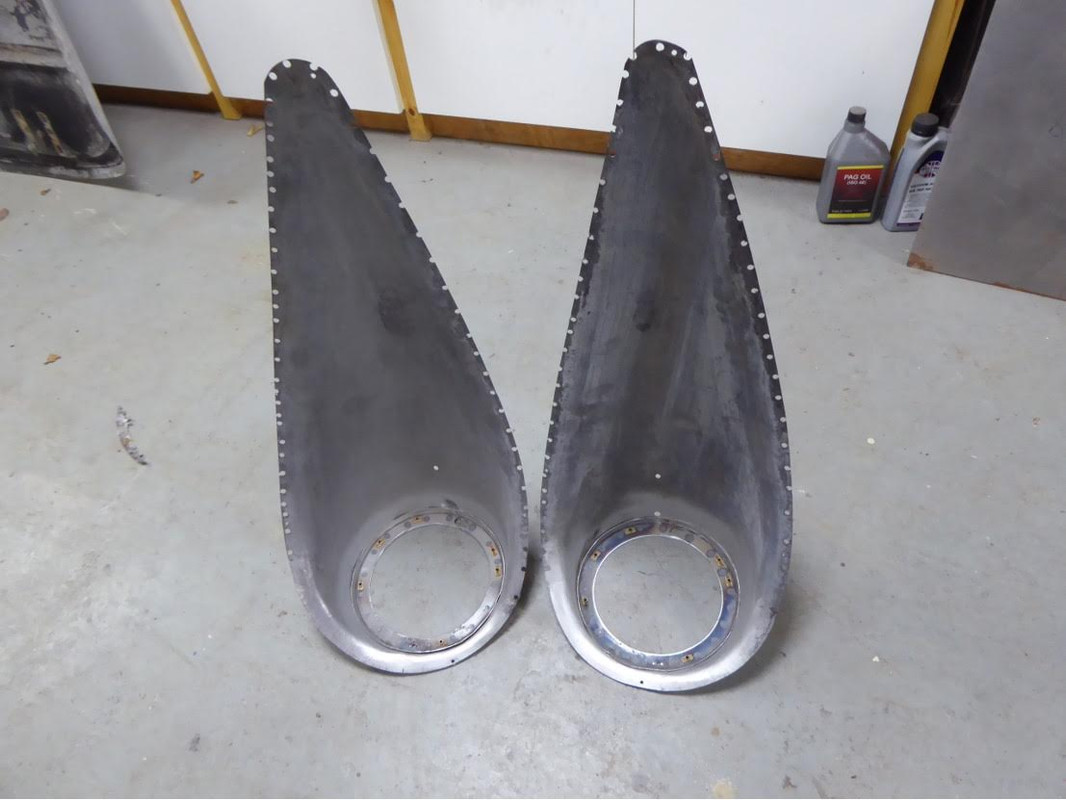
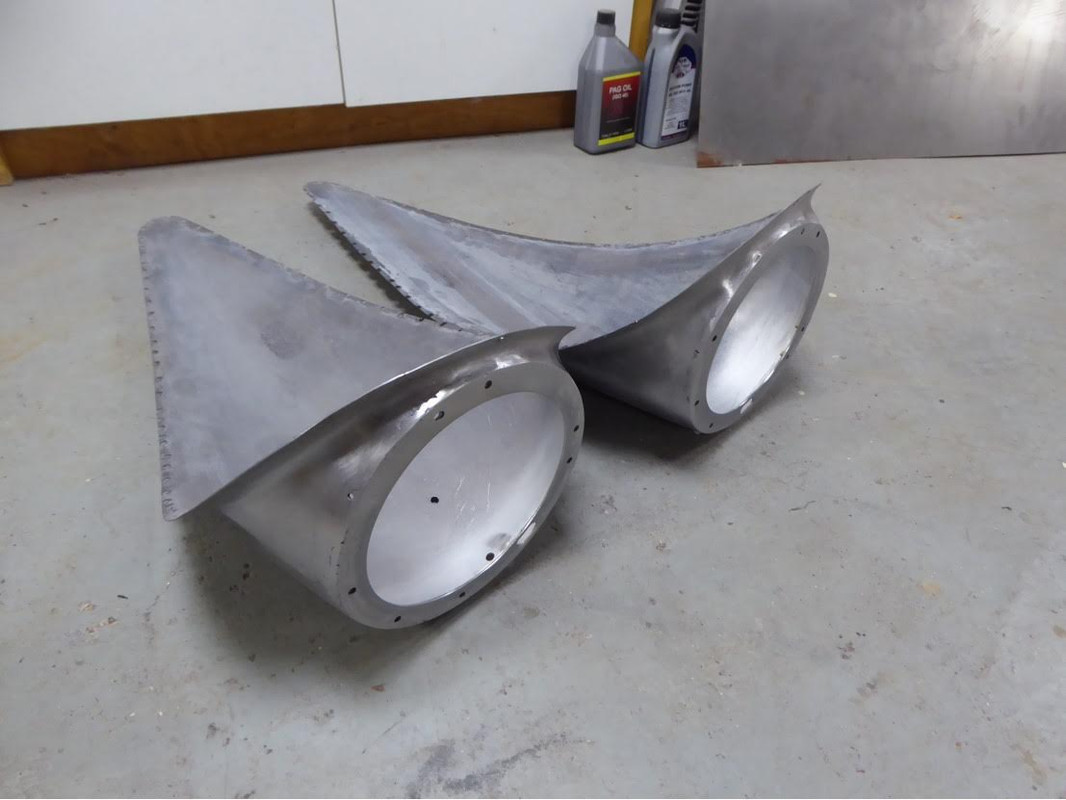
Including the fabrication of new closer discs……..
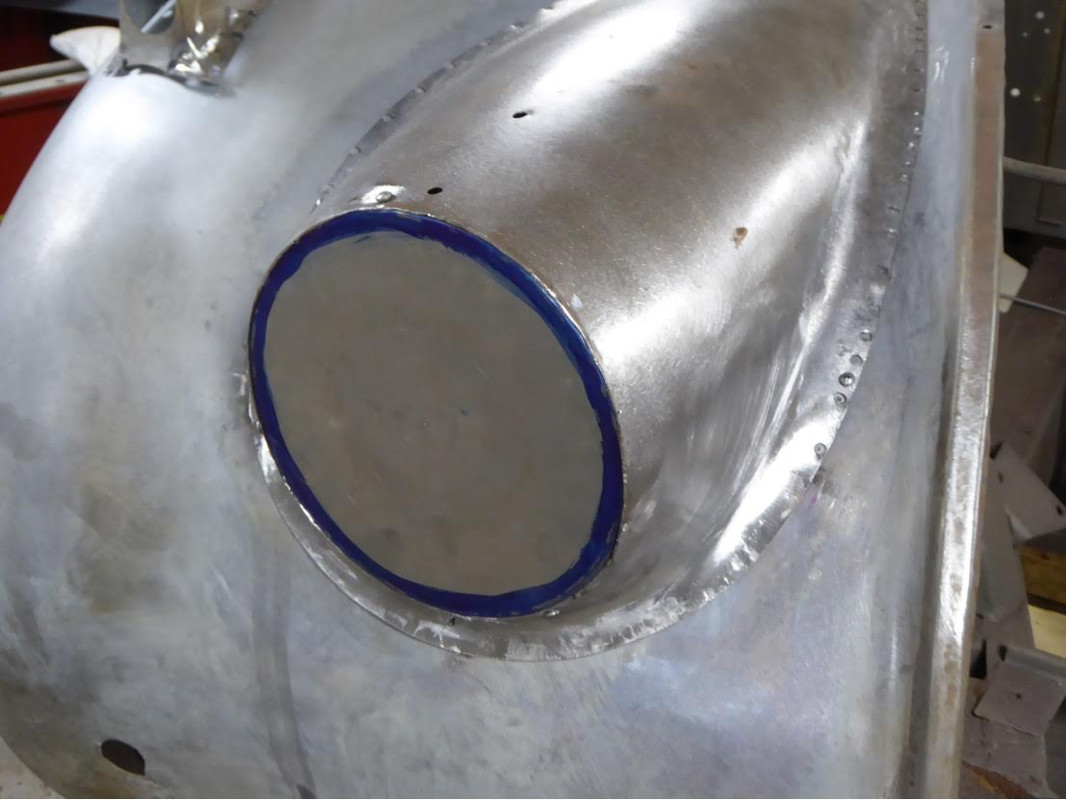
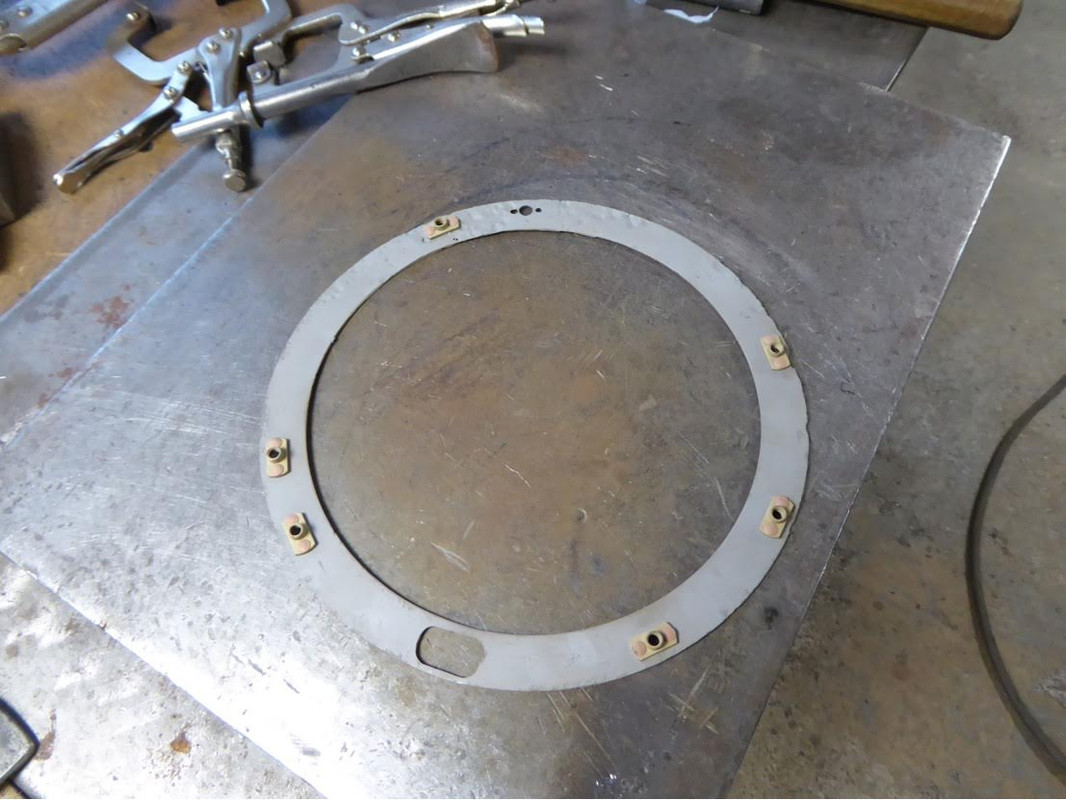
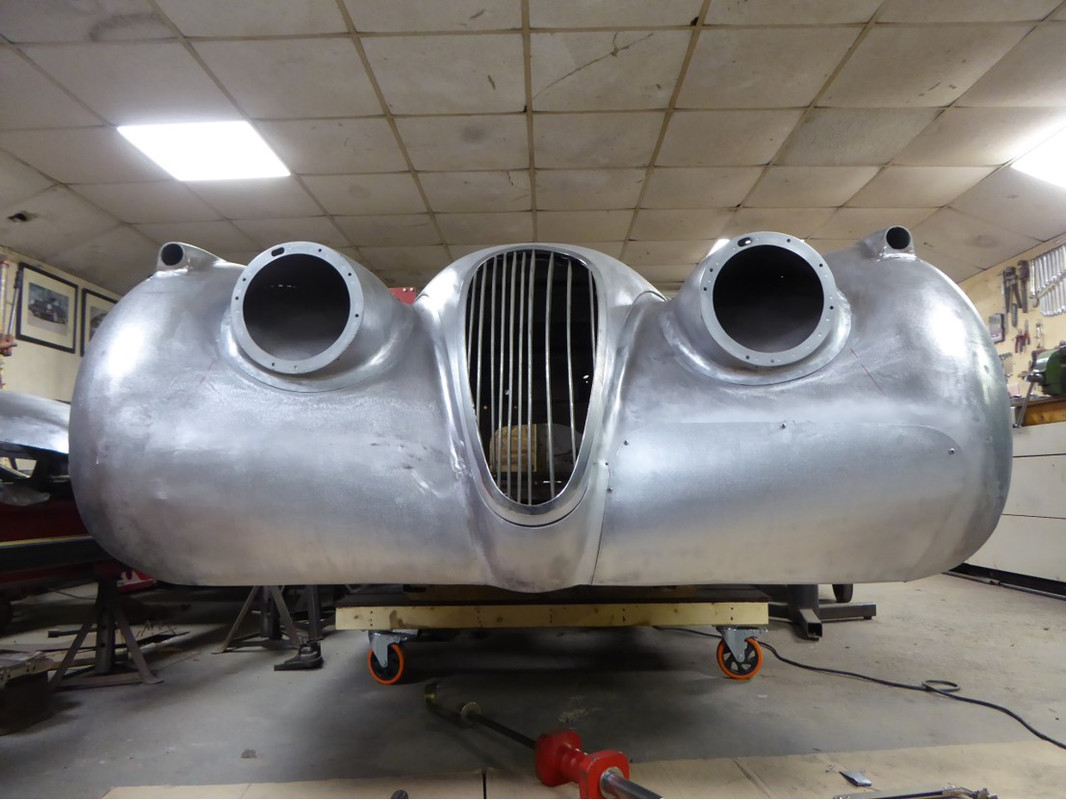
Beautiful when complete….
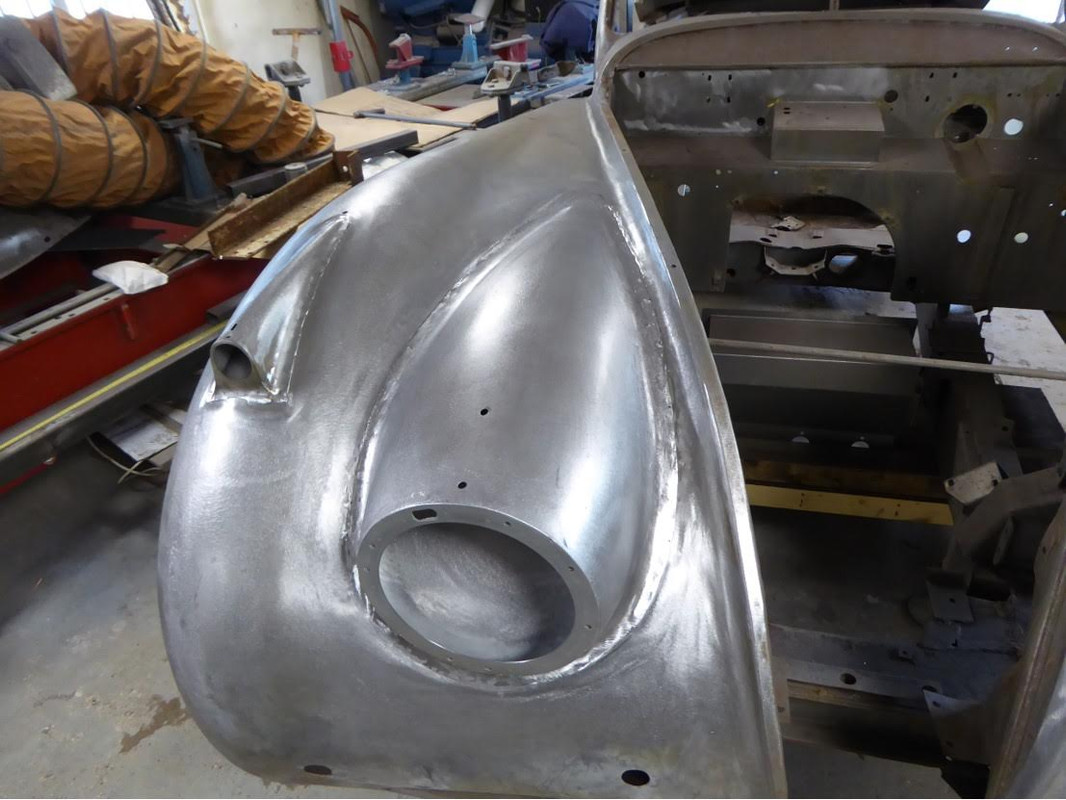
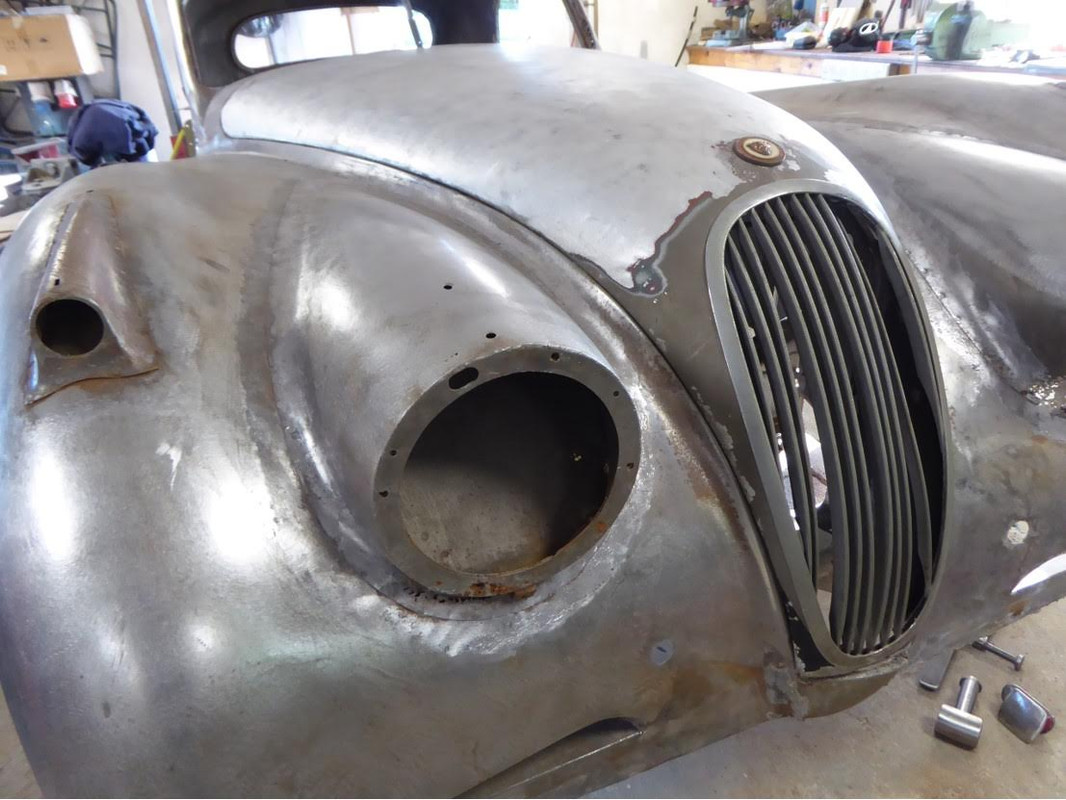
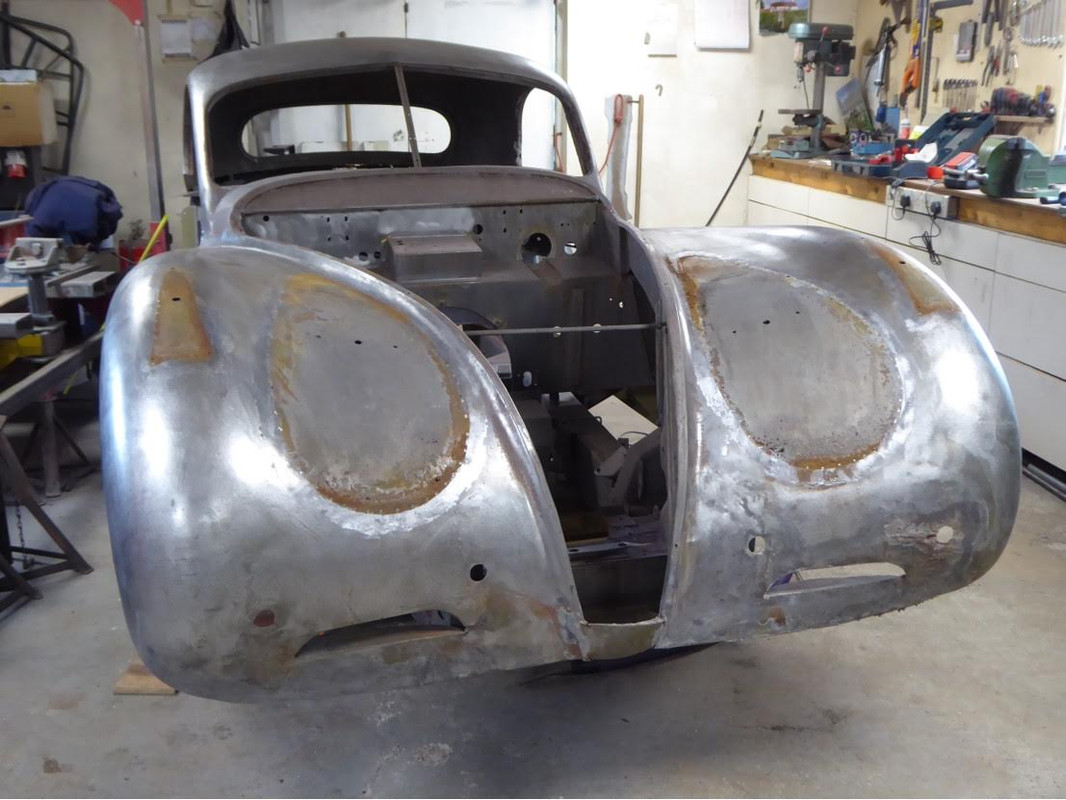
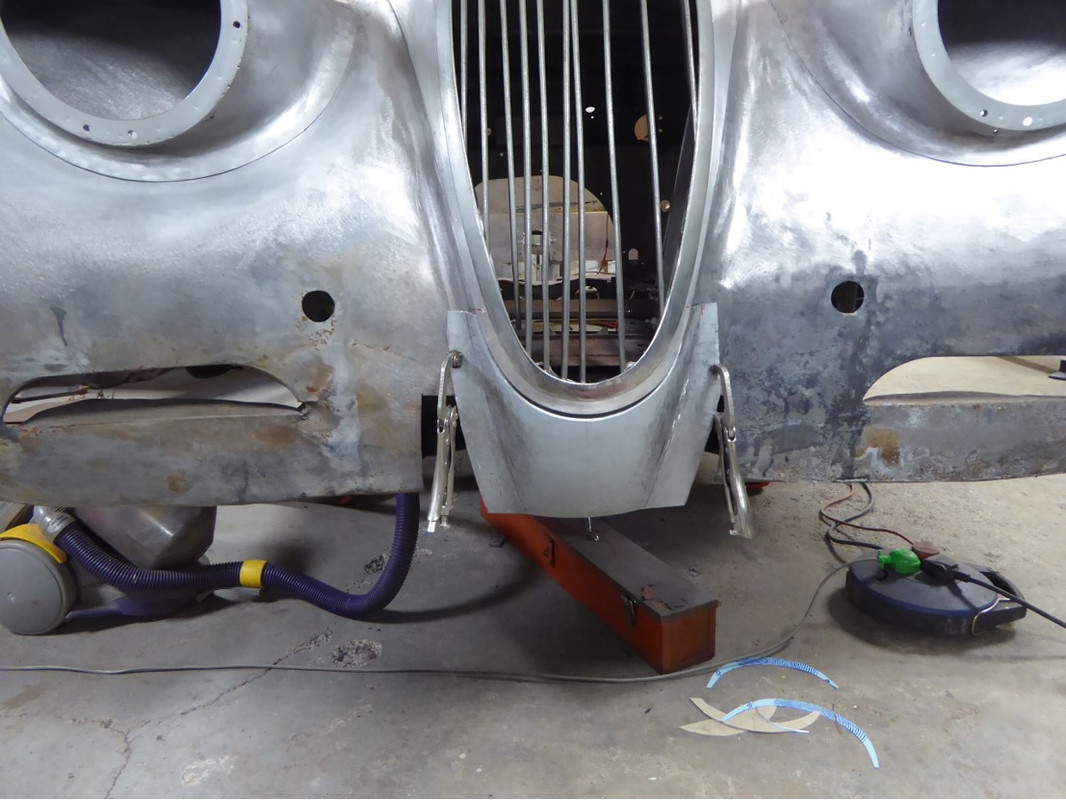
- Bumper delete, brake vent hole delete and bonnet nose profile
I always detested the way in which the original flowing for of the body ended abruptly at the nose….so decided it was about time someone finally resolved a 70 year old oversight..which integrated perfectly into the desire to improve the fixing of the front of the car…and deleting the vent slots..
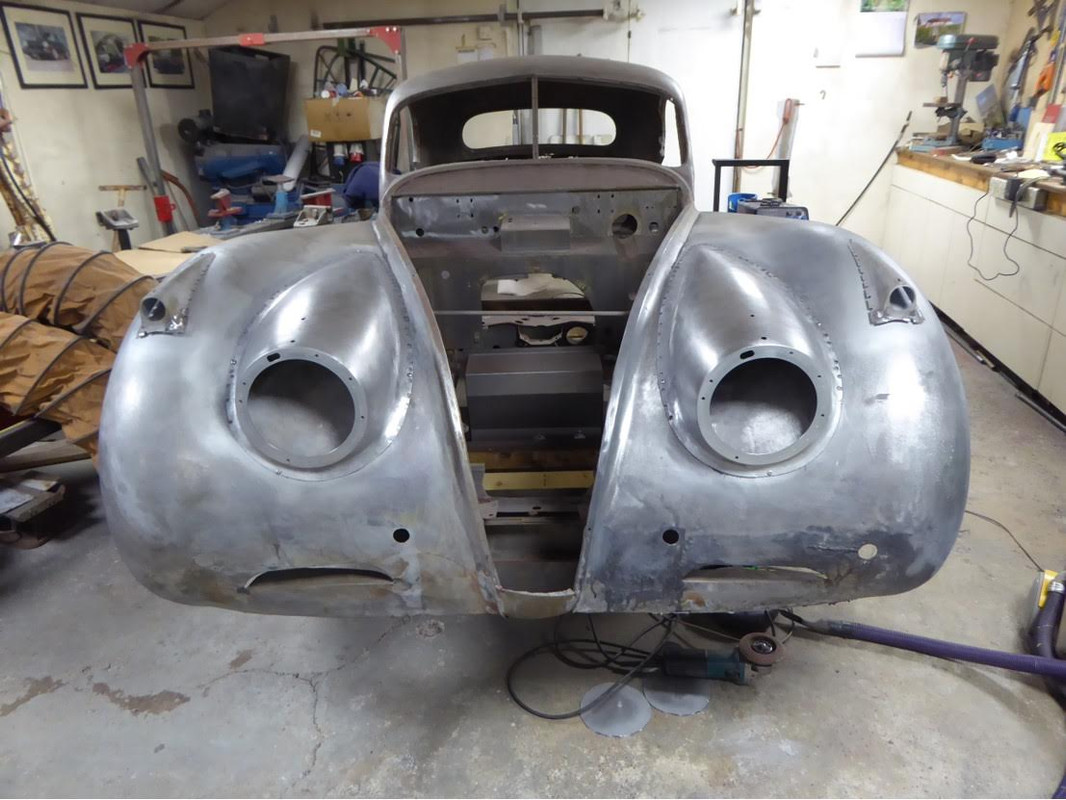
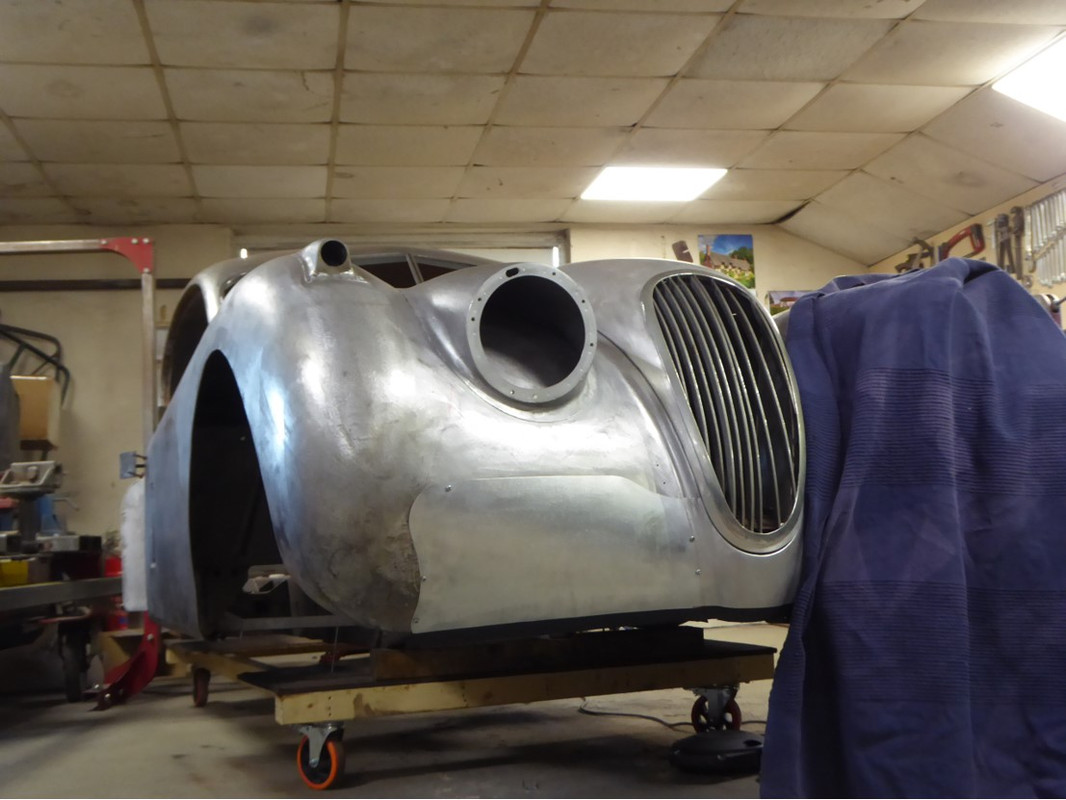

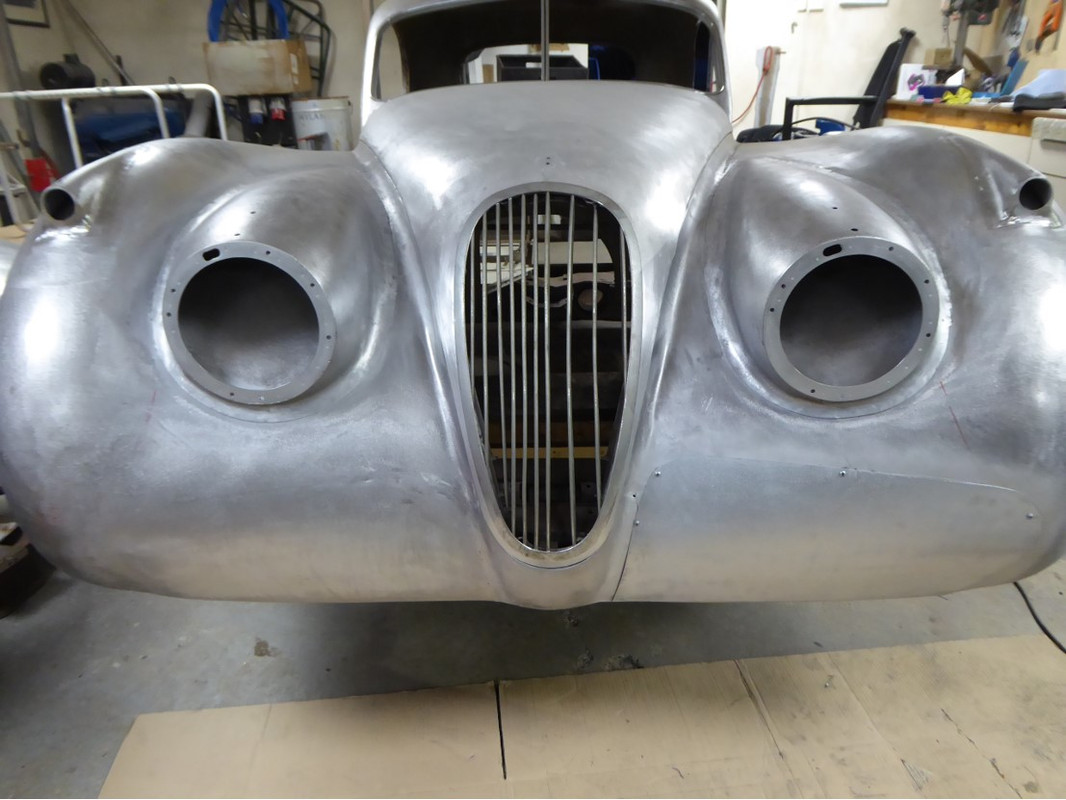
The front vent slots were for the original specification of drum brakes, which were a feature of the initial XK120 model. By the time the XK140 arrived Jaguar had adopted the early disc brake technology’s that were successfully developed in collaboration with Dunlop for the C Type racing cars that had already won Le Mans in ‘51 and ‘53….so as I am improving safety by installing discs these are no longer needed which is an improvement as they serve only to allow rain to be blown into the engine bay
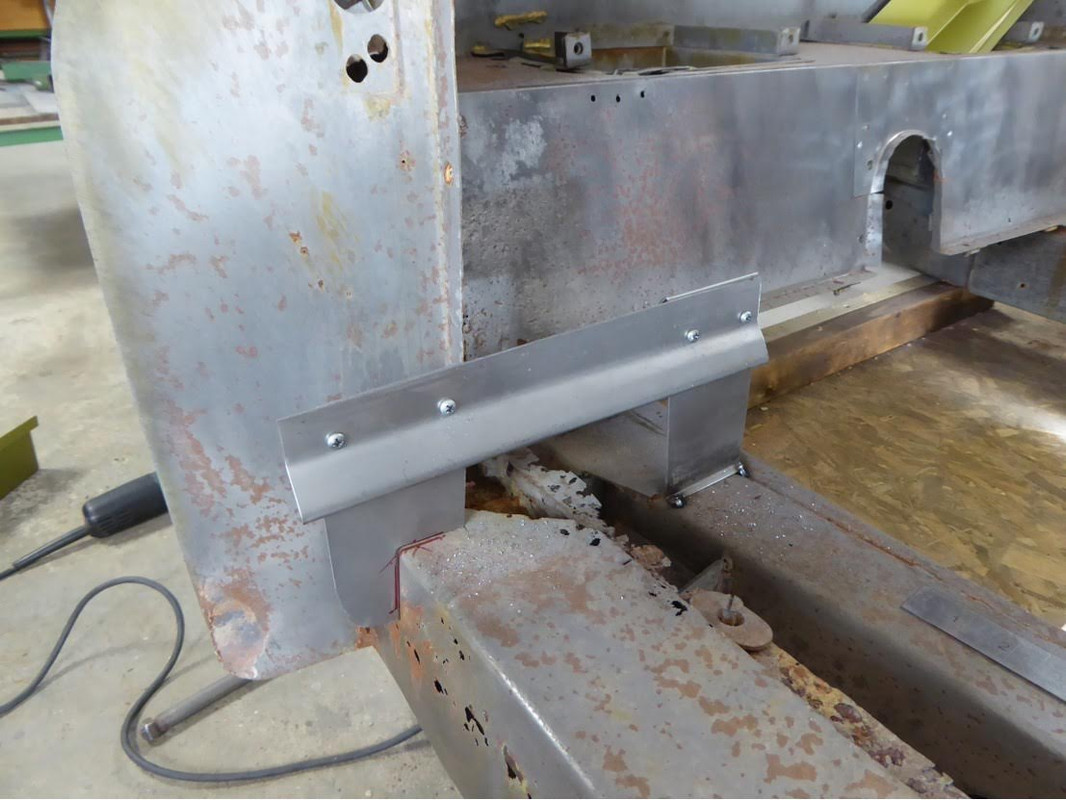
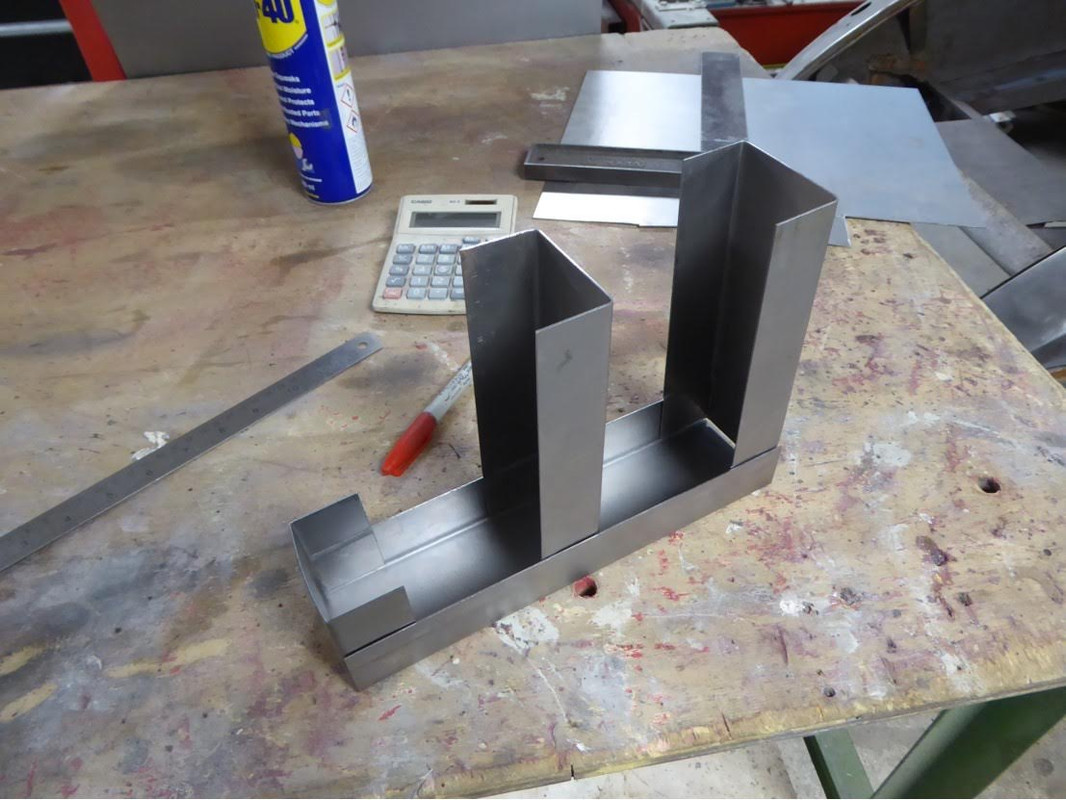
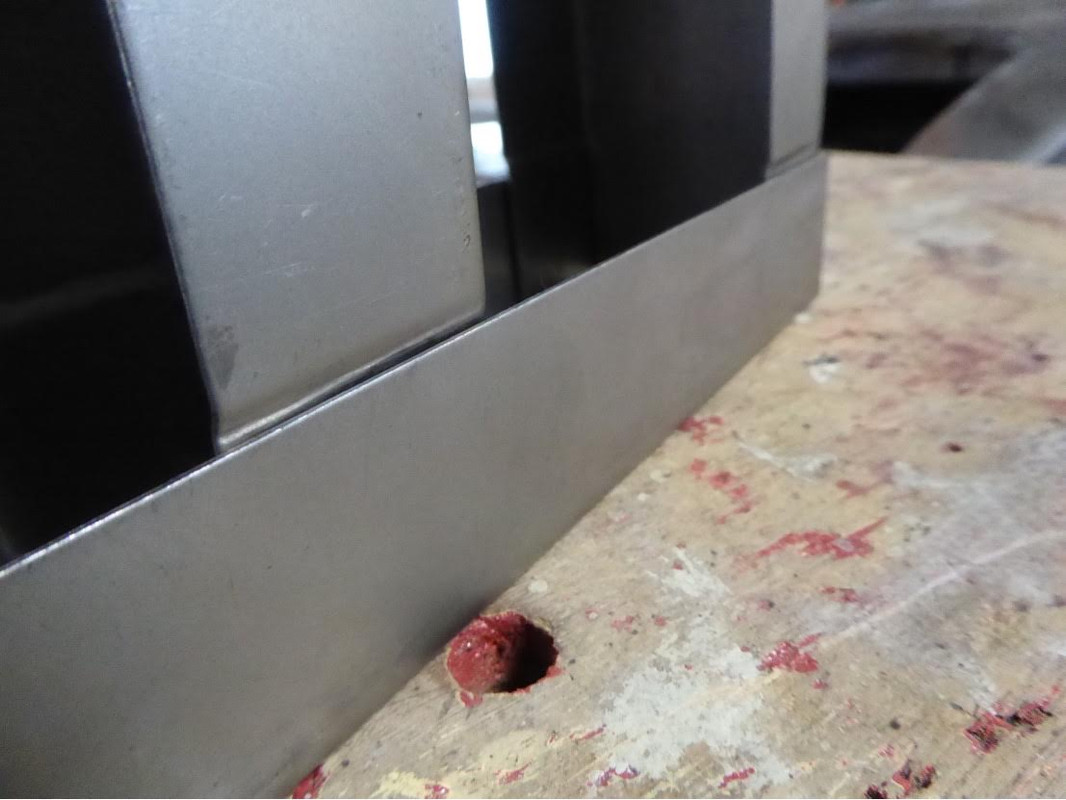
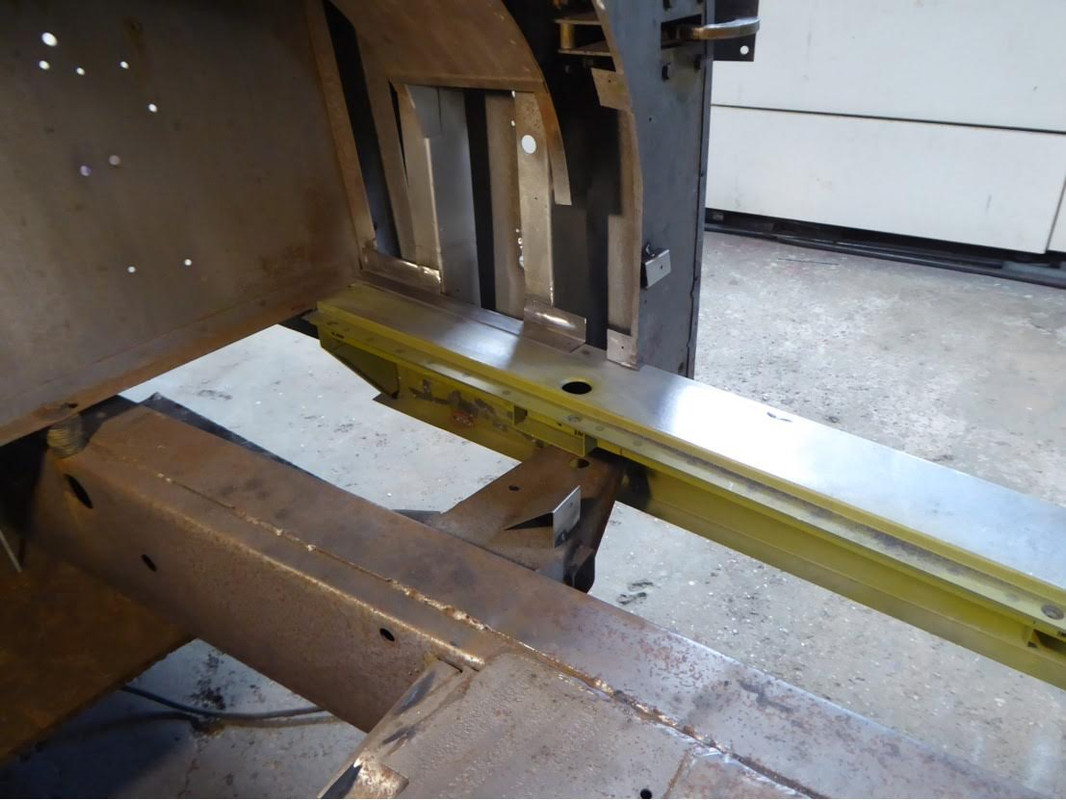
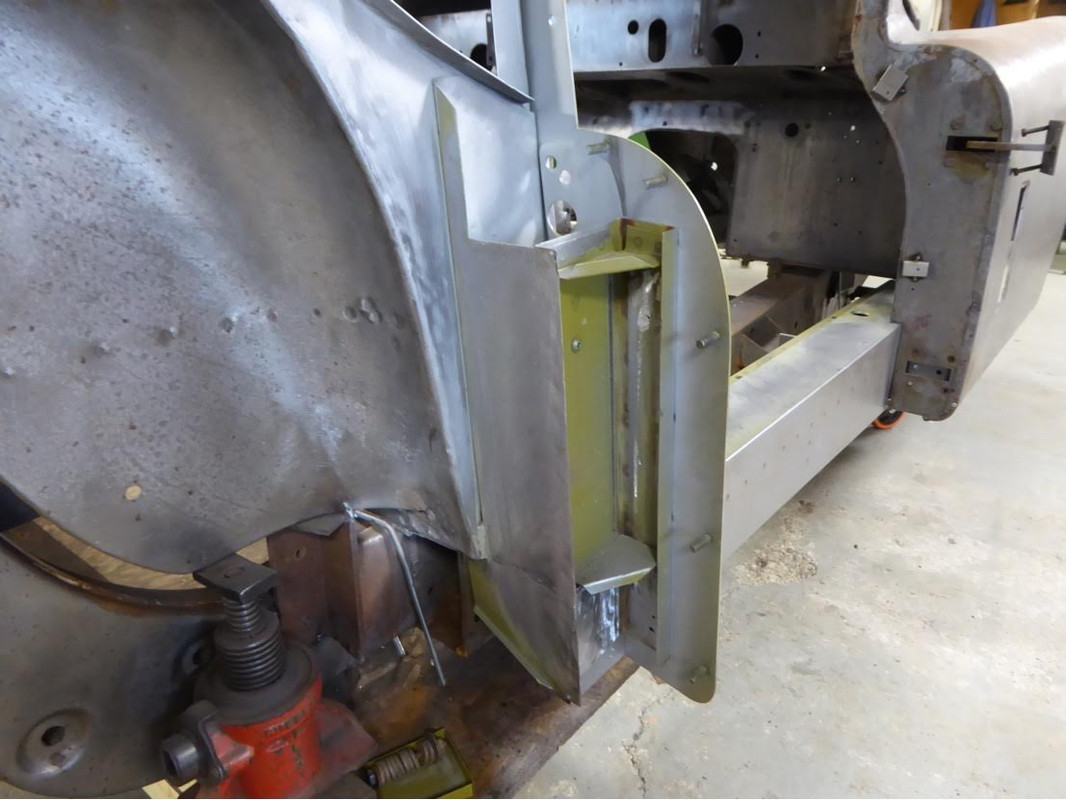
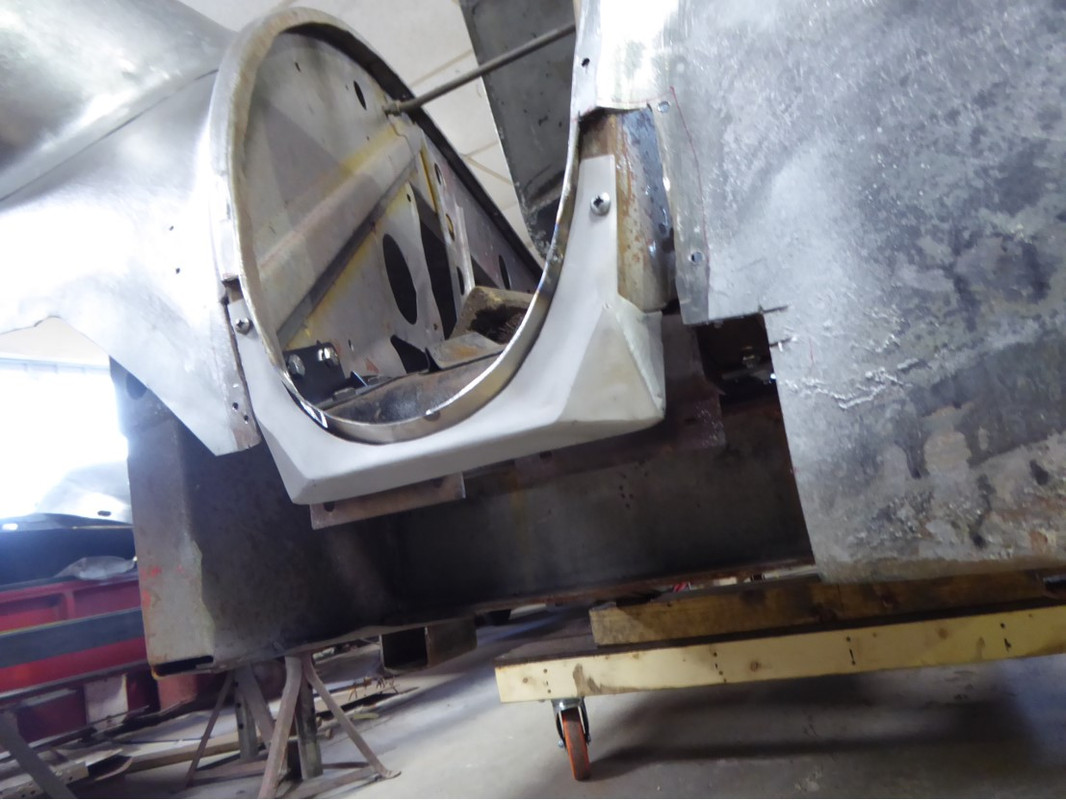
- Strengthen front mounting of the shell to the chassis
Whilst the rear of the car was relatively stable as was the centre part of the tub, the front was incredibly floppy so we took the decision to firstly modify all of the front brackets and locate the shell much more rigidly…and in the process reduce them number of fiddly brackets…
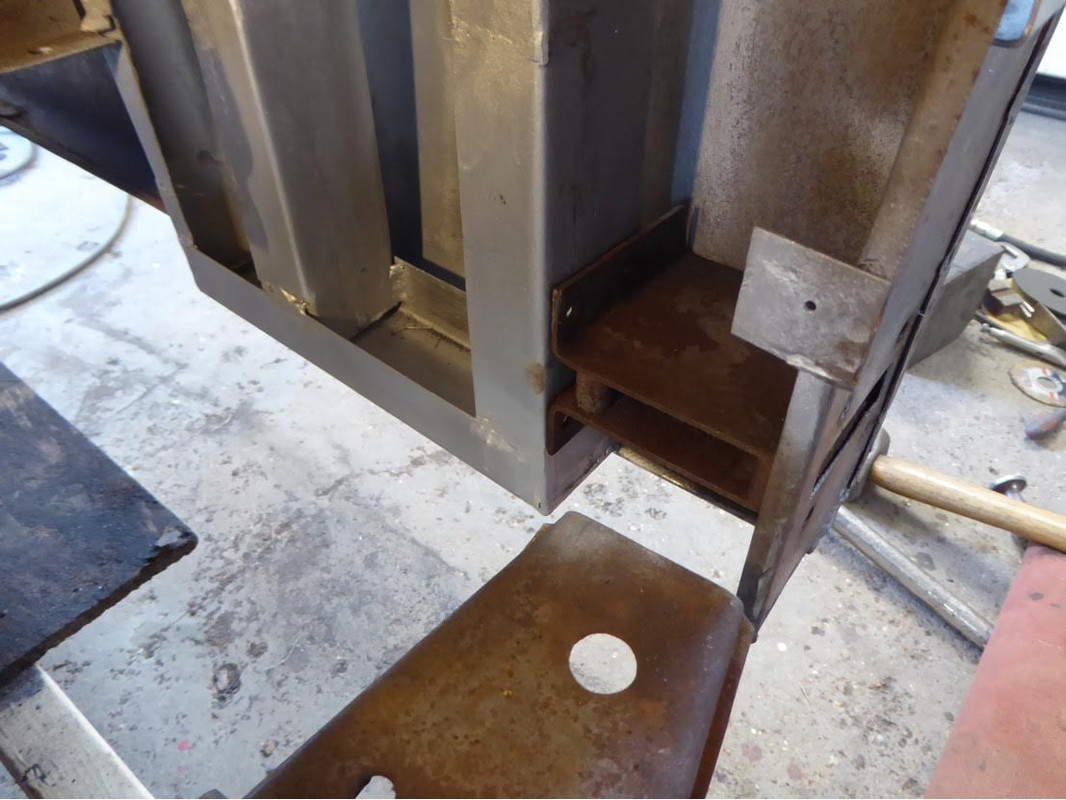
As original….
And then….


This pursuit of a more rigid shell had implications;
I would have to wait quite some time before I could take the chassis back home with me and start my work, as barry wanted to keep the 2 united until we got at least to the final stages of building the doors
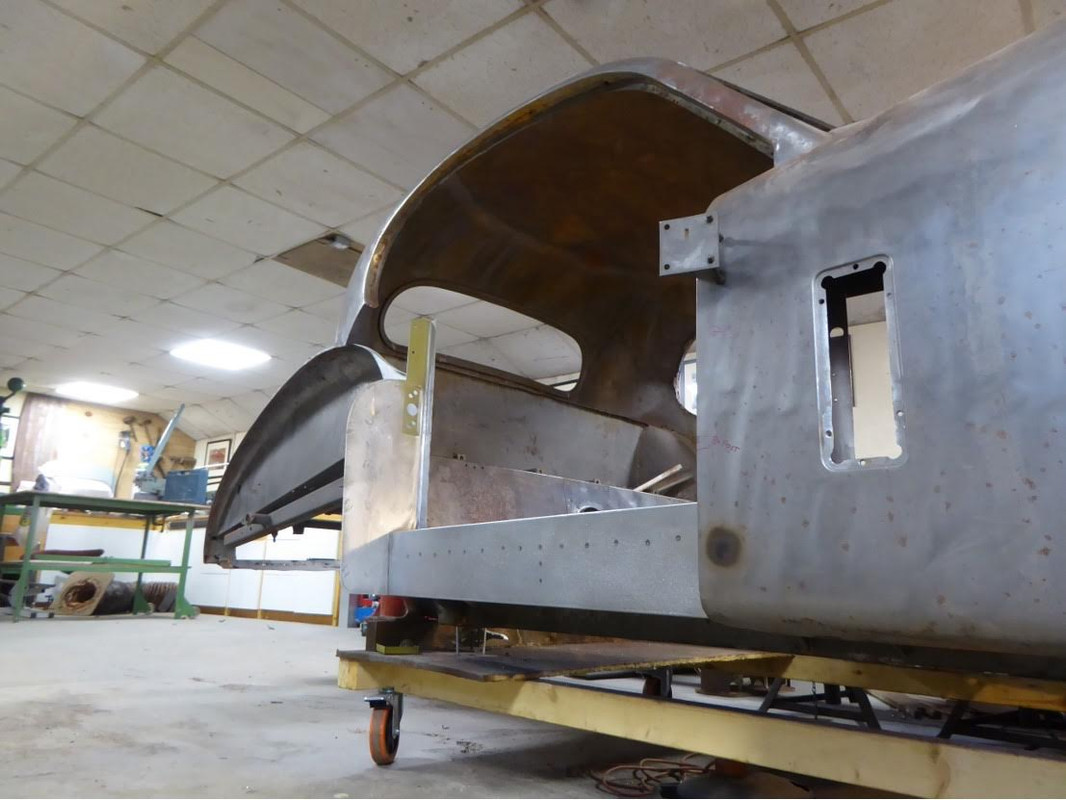
That period of waiting would be further extended as mission creep developed, specifically as we realised that the inner shell had relied a great deal on the bolted outer rear wings, which when removed allowed us to distort the shell which wasn’t so reassuring…..so we took the decision to optimise the inner rear bulkhead of the car, to work more efficiently without the wings, which once finished made a huge difference to the lateral stiffness of the shell
However, we both agreed the chassis being in good condition (and after taking some initial measurements was proven to be perfectly straight and true), was a perfect jig for the project and it was foolhardy to do otherwise….
Thanks for reading…
The Metal Meister …part 2
Moving into December 2022 progress picked up in a visual sense as the reinstatement of the cills, plus the A and B posts was a great stage to get to…as all of us who have been through the restoration process knows there is a lot of faith needed at times when money seems to be flowing in just one direction and the car isn’t getting any better to look at…
However..the next stage was tremendously uplifting as not only was corrosion being replaced with clean metal but there were tangible developments in appearance
- Visible damage to the offside bumper area
My gut feeling was this damage occurred when the car was retrieved from storage..the folds in the metal are all outwards and commensurate with how a badly aligned towing rope could inflict damage….nothing that a porter power and a modicum of slapping couldn’t rectify….
- Remove and repair headlamp and indicator pods
Ever wondered how the voluptuous light pods of vintage cars are actually made….?…truth is….quite crudely….welded forms onto the wings, ultimately blended in with lead…and without any drain holes….so a wonderful place for rust to spread…unknown….
So no choice here…if we are going to do something just once now…we need to do it properly
The shell may well have been dipped but rust lurked everywhere…so whilst far better than media blasting these had to be removed…
Which then requires careful sculpting of new metal….
To allow the scoops to be fully repaired….
Including the fabrication of new closer discs……..
Beautiful when complete….
- Bumper delete, brake vent hole delete and bonnet nose profile
I always detested the way in which the original flowing for of the body ended abruptly at the nose….so decided it was about time someone finally resolved a 70 year old oversight..which integrated perfectly into the desire to improve the fixing of the front of the car…and deleting the vent slots..
The front vent slots were for the original specification of drum brakes, which were a feature of the initial XK120 model. By the time the XK140 arrived Jaguar had adopted the early disc brake technology’s that were successfully developed in collaboration with Dunlop for the C Type racing cars that had already won Le Mans in ‘51 and ‘53….so as I am improving safety by installing discs these are no longer needed which is an improvement as they serve only to allow rain to be blown into the engine bay
- Strengthen front mounting of the shell to the chassis
Whilst the rear of the car was relatively stable as was the centre part of the tub, the front was incredibly floppy so we took the decision to firstly modify all of the front brackets and locate the shell much more rigidly…and in the process reduce them number of fiddly brackets…
As original….
And then….
This pursuit of a more rigid shell had implications;
I would have to wait quite some time before I could take the chassis back home with me and start my work, as barry wanted to keep the 2 united until we got at least to the final stages of building the doors
That period of waiting would be further extended as mission creep developed, specifically as we realised that the inner shell had relied a great deal on the bolted outer rear wings, which when removed allowed us to distort the shell which wasn’t so reassuring…..so we took the decision to optimise the inner rear bulkhead of the car, to work more efficiently without the wings, which once finished made a huge difference to the lateral stiffness of the shell
However, we both agreed the chassis being in good condition (and after taking some initial measurements was proven to be perfectly straight and true), was a perfect jig for the project and it was foolhardy to do otherwise….
Thanks for reading…
1974 2.7 Carrera
(full restoration. now as an RS Touring)
1963 3.8 E Type
( 11 years in the making…………………….)
1952. XK120…the next one ……….……..)
(full restoration. now as an RS Touring)
1963 3.8 E Type
( 11 years in the making…………………….)
1952. XK120…the next one ……….……..)
-
911hillclimber
- Nurse, I think I need some assistance
- Posts: 18924
- Joined: Mon Mar 10, 2008 6:26 pm
- Location: West Midlands
Re: The XK
Nice. Everything can be improved.
Nose looks great!
You did make some good drain holes after all that?
Nose looks great!
You did make some good drain holes after all that?
73T 911 Coupe, road/hillclimber 3.2L
Lola t 492 / 3.2 hillclimb racer
Boxster 987 Gen II 2.9
Lola t 492 / 3.2 hillclimb racer
Boxster 987 Gen II 2.9
-
jtparr
- DDK 1st, 2nd and 3rd for me!
- Posts: 2237
- Joined: Mon May 24, 2004 10:54 pm
- Location: london/surrey
Re: The XK
Oh yes….
1974 2.7 Carrera
(full restoration. now as an RS Touring)
1963 3.8 E Type
( 11 years in the making…………………….)
1952. XK120…the next one ……….……..)
(full restoration. now as an RS Touring)
1963 3.8 E Type
( 11 years in the making…………………….)
1952. XK120…the next one ……….……..)
-
middlefour1
- DDK rules my life!
- Posts: 1079
- Joined: Thu Nov 20, 2003 8:14 am
- Location: Northamptonshire...but only just!!
Re: The XK
What amazing work, looks fantastic.
Steve
1970 Silver 914 - Gone but never forgotten........
#1200
1970 Silver 914 - Gone but never forgotten........
#1200
-
jtparr
- DDK 1st, 2nd and 3rd for me!
- Posts: 2237
- Joined: Mon May 24, 2004 10:54 pm
- Location: london/surrey
Re: The XK
Thanks guys…
Part 11
Refinements
The other true pleasure was mulling over in my mind for hours on end what I actually wanted to do with the car…a process I am still enjoying though the car is soon to go for paint…..
It is indeed a wonderful luxury sometimes inspired by the work of others…..
This delightful film was part of that source of such inspiration, but is also just simply lovely and shows what a graceful car it is……whatever your age
https://youtu.be/V2RMRjGtHrw?si=C4hFbk8frsIKLd_o
I knew that it wouldn’t retain remain standard, there was no doubt about that, so I began to work up a wish list of things that I wanted to do….with an overall idea of gentleman racer not a member of the golf club style….
Firstly there were the pragmatic items for safety and convenience
- change to RHD, including rack and pinion steering
- upgrade to disc brakes all round
- upgrade to LED lighting throughout
- new wiring loom, with possible upgrades to fuses and relays like I did for the E Type
- upgraded windscreen wiper motor and mechanism
- install inertia reel seat belts
- upgrade to 5 speed gearbox
- upgrade to add adjustable rear dampers
- upgrade to a modern pedal box with hydraulic clutch and cable operated throttle pedal
- tilting bucket seats
- aluminium fuel tank
Then there were some fun ones….
- upgrade to fast road engine specification
- bigger bore 2” stainless sports exhaust
- install electric windows
And finally there were the visual ones….
- delete and remove all evidence of bumpers, front and rear
- remodel the front of the car to remove the lower air vents which were originally for the drum brakes
- remodel the rear subtly, delete external boot handle, recessed rear number plate and reverse lights
- remodel rear lights to be similar to teardrop style front indicator light pods
- revise square shape to lower bonnet nose to curved
- Monza style external fuel filler cap
- retain wire wheels but increase width, probably to 6” rims
I also knew I wanted to modify the interior to incorporate a revised dash and transmission tunnel design…somehow…probably change the walnut veneer aesthetic to something more like the natural aluminium finish of the E Type, and relocate the batteries forward, to a bigger capacity AGM type in the footwells, which would then allow us to rework and modify the rear bulkhead (where the original paired 6 volt batteries were placed) to increase internal storage…similar to the E Type…it may be a long car but it’s full of engine and people…with minimal proper luggage and storage space
And a proper approach to sound proofing and insulation generally, and build my own inner wheel arch liners
Perhaps that sounds like a lot and is contradicting the idea of restoring a lovely looking car, but in terms of bodywork it is only cleaning up the front and back subtly…the rest is a series of details that were available in period….always with a mind to build the car better, stiffer, lighter where possible and improve reliability and safety
1974 2.7 Carrera
(full restoration. now as an RS Touring)
1963 3.8 E Type
( 11 years in the making…………………….)
1952. XK120…the next one ……….……..)
(full restoration. now as an RS Touring)
1963 3.8 E Type
( 11 years in the making…………………….)
1952. XK120…the next one ……….……..)
-
210bhp
- Nurse, I think I need some assistance
- Posts: 8048
- Joined: Sat Feb 28, 2004 12:28 am
- Location: Scotland
Re: The XK
Lovely colour that one in the vid JT.
Enjoying the details in your thread. Keep it coming.
Beautiful car. They say the E type is the nicest but that is a sublime curvaceous body.
Regards
Mike
Enjoying the details in your thread. Keep it coming.
Beautiful car. They say the E type is the nicest but that is a sublime curvaceous body.
Regards
Mike
_____________________________
73 RS (Sold)
67 S
Mint T (Sold)
996 Turbo (Sold)
73 2.4E (home after 25 years) and Sold again
73T targa (signal yellow project)
1953 Vauxhall Velox
914/6
1963 356B
https://www.mybespokeroom.com/
73 RS (Sold)
67 S
Mint T (Sold)
996 Turbo (Sold)
73 2.4E (home after 25 years) and Sold again
73T targa (signal yellow project)
1953 Vauxhall Velox
914/6
1963 356B
https://www.mybespokeroom.com/