Page 21 of 25
Re: Meet Ralph - 1970 ST project
Posted: Wed May 10, 2023 5:50 pm
by rich73
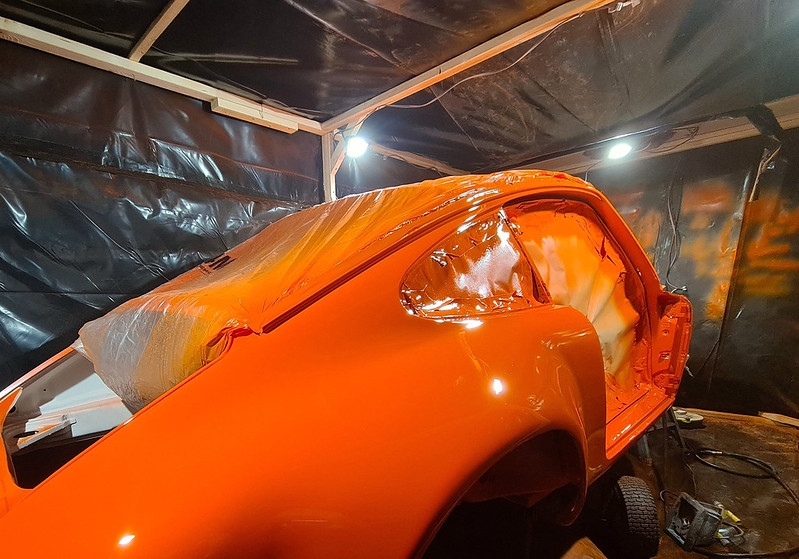
Getting there, hoping to be fully painted by the weekend. Plan is then to get the polishing done and panels fitted as soon as possible to reduce risk of damage and increase the usability of the rest of the house.
Is there anything that I need to get fitted to the doors such as check straps that needs to be done before I install them? Really don't want to be removing the pins again. This also brings up the questing of do I just fit the old pins or buy new ones, thinking new as many other parts will be freshly plated and will look odd with some fresh and some unrestored.
 2023-05-09_07-46-17
 by
richard cannings, on Flickr
Rich
Re: Meet Ralph - 1970 ST project
Posted: Wed May 10, 2023 9:03 pm
by Gary71
Looking fab

Doors can be fitted as bare shells so no worries there. I got the check straps on mine pretty quick when it got back from paint to avoid any risk of over opening.
Re: Meet Ralph - 1970 ST project
Posted: Wed May 10, 2023 9:48 pm
by RobFrost
Have you thought how you'll knock the door pins in without bashing the doors?
Sent from my SM-G988B using Tapatalk
Re: Meet Ralph - 1970 ST project
Posted: Wed May 10, 2023 10:10 pm
by Gary71
Carefully

Re: Meet Ralph - 1970 ST project
Posted: Wed May 10, 2023 10:12 pm
by Gary71
Just thinking Rich have you painted the black inside the doors? Better to do that now before putting them back on.
Re: Meet Ralph - 1970 ST project
Posted: Thu May 11, 2023 7:24 am
by stretch
Great work Rich. There's nothing more satisfying than building your own car. It's going to be a cracker. Look forward to seeing it in the flesh soon.
Dave
Re: Meet Ralph - 1970 ST project
Posted: Thu May 11, 2023 11:07 am
by matteo68
Awesome work Rich!
Re: Meet Ralph - 1970 ST project
Posted: Fri May 12, 2023 9:21 pm
by rich73
Thanks for the comments all,
Gary, that's really helpful thanks. Didn't want to fit that doors only to find I needed to remove them again. Hadn't thought of painting the inside black, I'll have a look at what needs to be black.
Rob ,hoping I can get the pins in without drama , although if anything does go wrong one of the advantages of painting yourself is that repairing damage isn't an issue.
Dave, would be great to have a meet up, I need to start to think about getting some of the shiny bits like harnesses ordered soon.
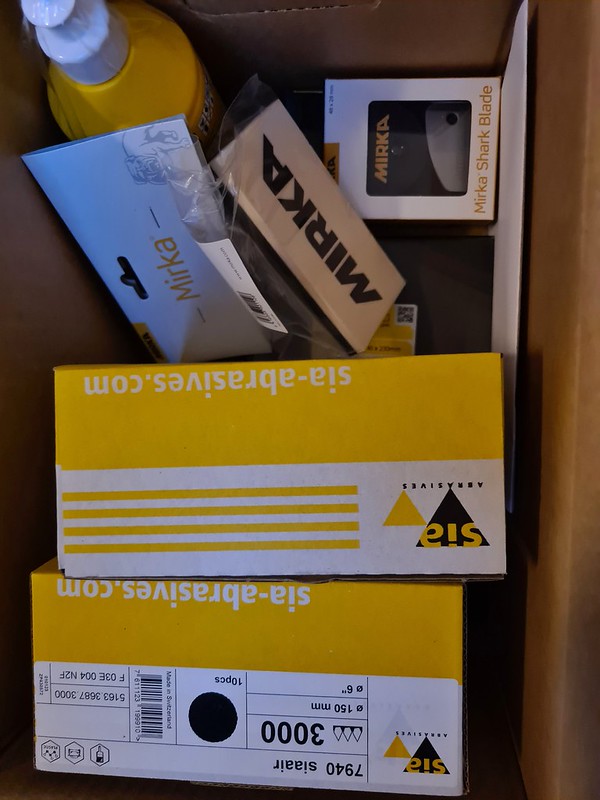
Bit of a milestone, managed to get the painting finished today, and a box arrived ready for the next stage.
 2023-05-12_08-31-46
 by
richard cannings, on Flickr
Autopaints Brighton supplied the 2K Gloss and have been have been great to deal with, Anne was especially knowledgeable.
Marlowpaintsupplies through ebay have been amazing for consumables and supplying things like tinted Raptor.
paints4u.com have been a great supplier for Lechler products like epoxy primer and will tint if required.
mdabitec through ebay are also really good for consumables.
Rich
Re: Meet Ralph - 1970 ST project
Posted: Fri May 12, 2023 10:25 pm
by RobFrost
Do you sand the colour coat to matt before applying clear?
Sent from my SM-G988B using Tapatalk
Re: Meet Ralph - 1970 ST project
Posted: Sun May 14, 2023 8:28 am
by rich73
Hi There,
Paint is 2K Singe Stage/direct gloss and doesn't need a clearcoat, my understanding is that this what would have been originally used.
There seems to be many variations on polishing Process but I'll probably be doing something like this:
Remove any dust with Blade
Sand with 2000 Grit
DA sand with 3000 Grit
Maching polish with Farelca G3
Maching polish with Farelca G10
I haven't done much polishing before but expect the process to change depending on the level of finish I got on the area.
Re: Meet Ralph - 1970 ST project
Posted: Tue May 16, 2023 9:33 pm
by jtparr
Rich
Have you installed the plastic tube which guides the fuel flap wire already….its a bitch to do so when the wing….and the door is on….ask me how I know…
Best
Jonathan
Re: Meet Ralph - 1970 ST project
Posted: Wed May 17, 2023 3:37 pm
by rich73
Thanks Jonathan, luckily I don't need to worry about fuel flap as I welded it up.
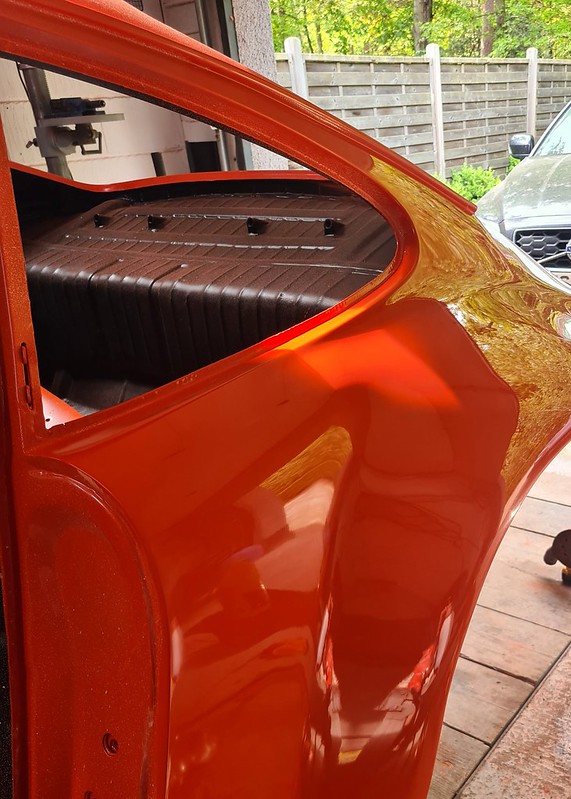
Getting to grips with the polishing. Engine lid done and this rear qtr is getting there.
 2023-05-17_03-26-57
 by
richard cannings, on Flickr
Re: Meet Ralph - 1970 ST project
Posted: Wed May 17, 2023 5:14 pm
by rhd racer
That looks fabulous Richard
Re: Meet Ralph - 1970 ST project
Posted: Sat May 20, 2023 9:33 pm
by rich73
Thanks, really starting to get the hang of the polishing now. One thing I heard somewhere about bodywork if not to try and fix something at the next stage, this is so true with polishing. If you have marks left from flatting with 2000 wet and dry your not going to remove it with G10 easily. (I have tried). Just go back to a 3000 Trizact to remove it in seconds. Loving the Engine lid pull delete.
 2023-05-20_09-20-49
 by
richard cannings, on Flickr
Re: Meet Ralph - 1970 ST project
Posted: Wed May 31, 2023 4:21 pm
by rich73
Think that's me done with polishing for now. There may be a bit more that I find needs more work later but happy with it for now.
 2023-05-24_09-32-38
 by
richard cannings, on Flickr
Decided to start with installing the wiring loom, loom seems it really great condition which is a bit of a relief considering the price of a new one. If anyone could point me in the direction of 1970/71 wiring diagram that would be amazing, I've had a bit of a google but presume there must be copyright on them or something. Pelican had one that was taken down.
Also there are 5 bulkhead connectors where things such as the ignition switch and the headlamp connections are routed inside, if anyone could tell me which one should be where that would be really helpful. None of them look to be keyed so it may just be a case of deciding on the positions and following the wire colour coding through.
Thanks