

Meet Ralph - 1970 ST project
Moderator: Bootsy
-
Gary71
- Nurse, I think I need some assistance
- Posts: 10296
- Joined: Wed Mar 31, 2004 1:27 pm
- Location: Cheshire
- Contact:
Re: Meet Ralph - 1970 ST project
When I bought my new plate it came with those rivets. They are serated and dig into the side of the hole. I must admit I glued my plate on and then put the rivets in as I didn’t have much hope of them working second time, but they bit ok.
Re: Meet Ralph - 1970 ST project
Thanks Gary,
Just had a google and they seem to be called Hanner Drive screws. Hadn't come across them before, might just remove the plate then I don't risk damaging it.
Just had a google and they seem to be called Hanner Drive screws. Hadn't come across them before, might just remove the plate then I don't risk damaging it.
Re: Meet Ralph - 1970 ST project
What a great discovery - I've never heard of a hammer drive screw before and always assumed that they were rivets.rich73 wrote:Thanks Gary,
Just had a google and they seem to be called Hanner Drive screws. Hadn't come across them before, might just remove the plate then I don't risk damaging it.
Would you mind please posting the size if you do manage to source some?
Brilliant work on the tank by the way - you're obviously a very handy chap!
Dean
1973T Targa MFI 334 met blu- under restoration https://www.ddk-online.com/phpBB2/viewt ... 28&t=67060
1980 924 Turbo, blu/grn tartan - restored
1973T Targa MFI 334 met blu- under restoration https://www.ddk-online.com/phpBB2/viewt ... 28&t=67060
1980 924 Turbo, blu/grn tartan - restored
-
PeterK

- DDK rules my life!
- Posts: 1070
- Joined: Mon Sep 01, 2014 3:04 pm
- Location: GU51 - Fleet, Hampshire, UK
Re: Meet Ralph - 1970 ST project
I got mine from Roger Bray Restorations
'79 Targa - restoration now mainly complete & being driven
viewtopic.php?f=28&t=59756
viewtopic.php?f=28&t=59756
Re: Meet Ralph - 1970 ST project
Screws removed, It's possible to cut a slot in with a Dremel and just unscrew them.
 2022-03-02_01-27-17 by richard cannings, on Flickr
2022-03-02_01-27-17 by richard cannings, on Flickr-
RobFrost
- DDK 1st, 2nd and 3rd for me!
- Posts: 2065
- Joined: Thu Jul 08, 2021 8:18 am
- Location: Lichfield
Re: Meet Ralph - 1970 ST project
Great to know.rich73 wrote:Screws removed, It's possible to cut a slot in with a Dremel and just unscrew them.
1970 911T, Signal orange (Restoration thread)
1988 3.2 Carrera backdate, Black
2001 996 Turbo, Lapis blue (am I allowed to put that here?)
I'm looking for a pre-impact bumper 911S or other high-revving 911 to restore - please let me know if you see one.
1988 3.2 Carrera backdate, Black
2001 996 Turbo, Lapis blue (am I allowed to put that here?)
I'm looking for a pre-impact bumper 911S or other high-revving 911 to restore - please let me know if you see one.
Re: Meet Ralph - 1970 ST project
I tried removing the hinge pins a while ago bit didn't get far, I think it was Gary who let me know it really needed a slide hammer tool.
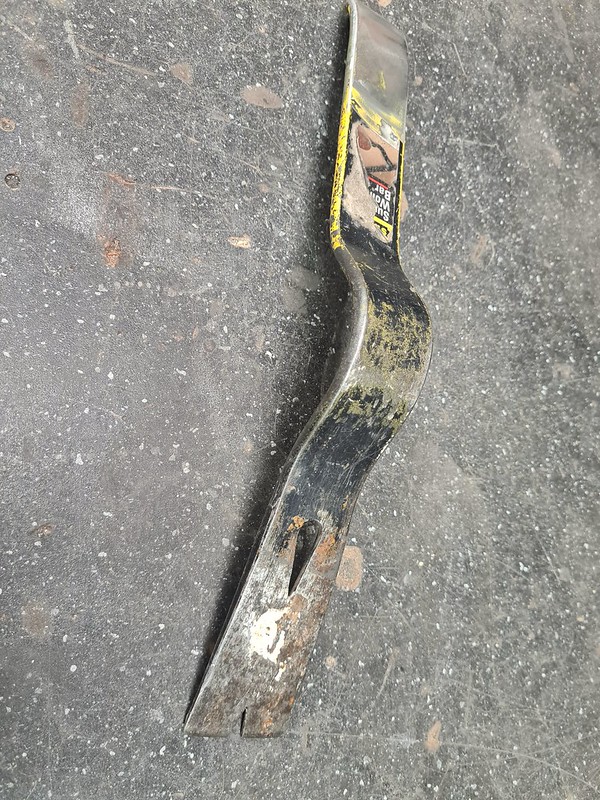
I had a flat crow bar that I broke a while ago, one end had already become a bodywork bumping tool.
 2022-03-04_11-26-45 by richard cannings, on Flickr
 2022-03-04_11-27-10 by richard cannings, on Flickr
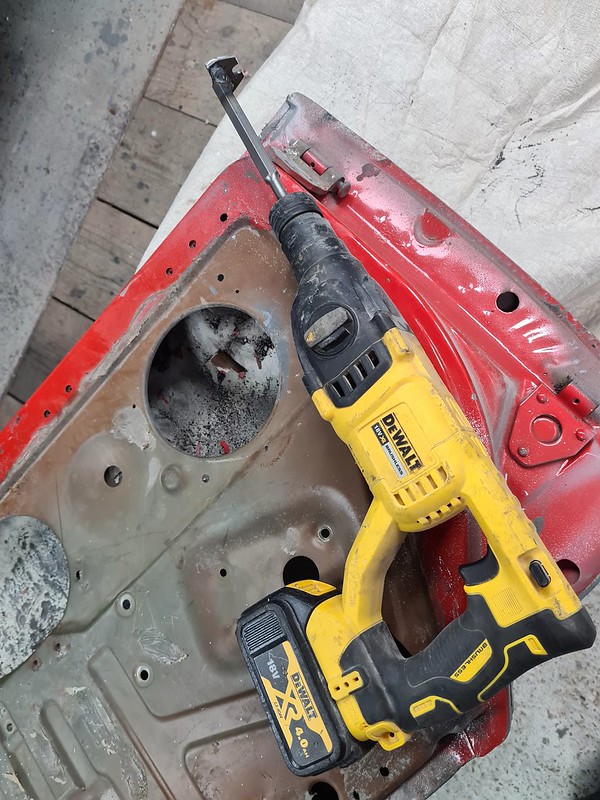
Copped off the other end and enlarged the slot to fit the pins, then rather than use a slide hammer thought I'd give it a try with an SDS bit.
 2022-03-04_11-27-25 by richard cannings, on Flickr
Worked really well, tops both came straight out and the bottoms soon after with a little heat from the heat gun.
 2022-03-04_11-27-36 by richard cannings, on Flickr
I had a flat crow bar that I broke a while ago, one end had already become a bodywork bumping tool.
2022-03-04_11-26-45 by richard cannings, on Flickr2022-03-04_11-27-10 by richard cannings, on FlickrCopped off the other end and enlarged the slot to fit the pins, then rather than use a slide hammer thought I'd give it a try with an SDS bit.
2022-03-04_11-27-25 by richard cannings, on FlickrWorked really well, tops both came straight out and the bottoms soon after with a little heat from the heat gun.
2022-03-04_11-27-36 by richard cannings, on FlickrRe: Meet Ralph - 1970 ST project
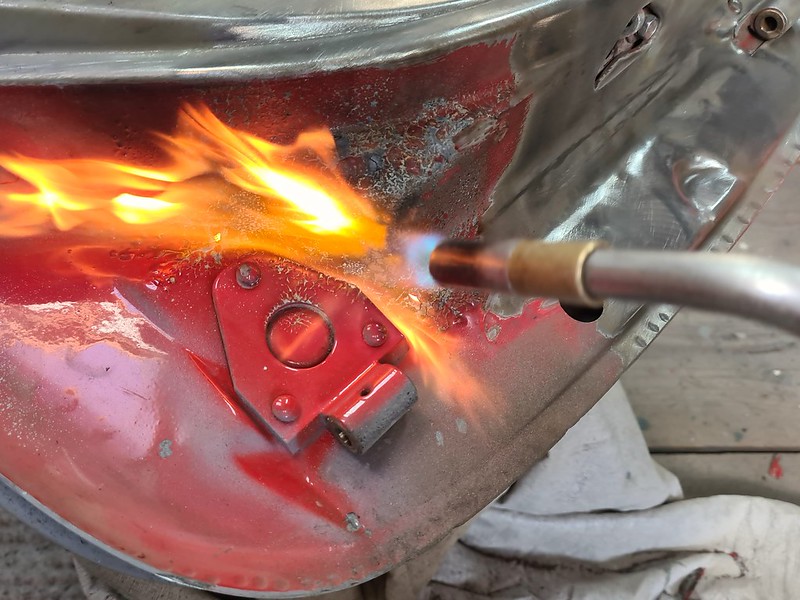
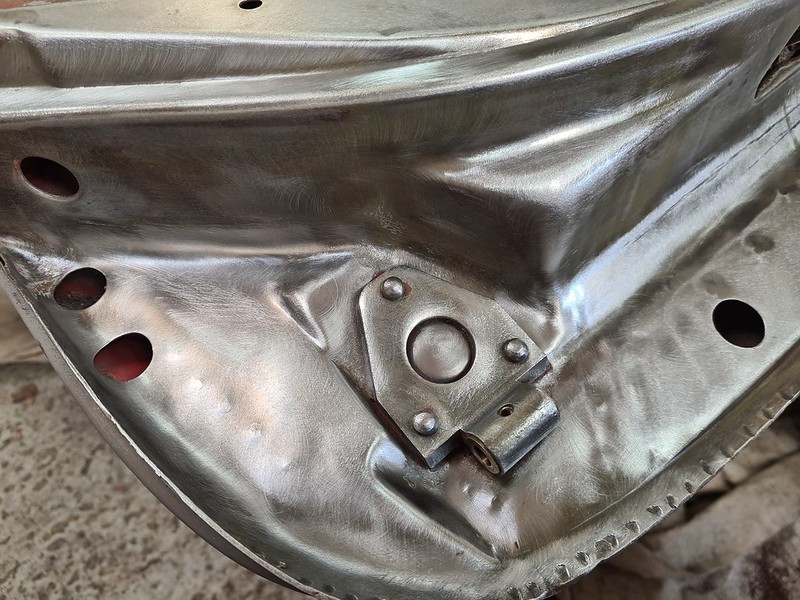
Not the most interesting but quite rewarding getting the doors cleaned up. Quick blast with the blow torch then wire brush on a drill seems to work well.
 2022-03-07_03-15-18 by richard cannings, on Flickr
 2022-03-07_03-15-30 by richard cannings, on Flickr
Having bit of a sort out too, I presume this is some sort of expansion tank. I'd be grateful of someone could let me know if I need to keep this of if a neater more elegant solution exists?
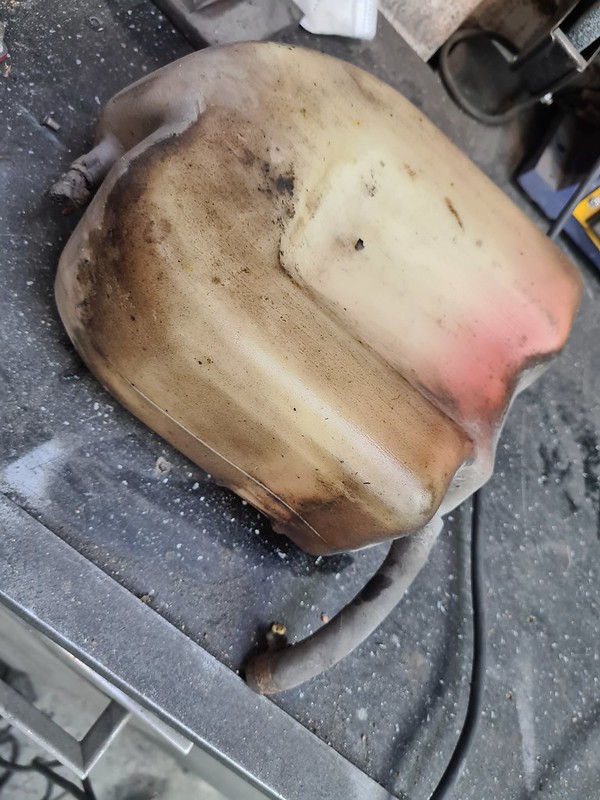 2022-03-07_04-30-05 by richard cannings, on Flickr
Thanks
2022-03-07_03-15-18 by richard cannings, on Flickr2022-03-07_03-15-30 by richard cannings, on FlickrHaving bit of a sort out too, I presume this is some sort of expansion tank. I'd be grateful of someone could let me know if I need to keep this of if a neater more elegant solution exists?
2022-03-07_04-30-05 by richard cannings, on FlickrThanks
-
RobFrost
- DDK 1st, 2nd and 3rd for me!
- Posts: 2065
- Joined: Thu Jul 08, 2021 8:18 am
- Location: Lichfield
Re: Meet Ralph - 1970 ST project
If you blow torch it then the hand wire brush is often very fast, faster and more convenient even than the drill as you can use the torch and brush one in each hand but watch out for big flat panels bowing if they get too hot!
I have that expansion vessel in mine. I think in conjunction with the charcoal canister it also helps prevent a vacuum forming as fuel is drawn out but I'd also be interested in alternative solutions.
I have that expansion vessel in mine. I think in conjunction with the charcoal canister it also helps prevent a vacuum forming as fuel is drawn out but I'd also be interested in alternative solutions.
1970 911T, Signal orange (Restoration thread)
1988 3.2 Carrera backdate, Black
2001 996 Turbo, Lapis blue (am I allowed to put that here?)
I'm looking for a pre-impact bumper 911S or other high-revving 911 to restore - please let me know if you see one.
1988 3.2 Carrera backdate, Black
2001 996 Turbo, Lapis blue (am I allowed to put that here?)
I'm looking for a pre-impact bumper 911S or other high-revving 911 to restore - please let me know if you see one.
Re: Meet Ralph - 1970 ST project
Thanks Rob, I'll give that a try.
Finished cleaning the doors and got some Epoxy on them this morning.
Saw Allen Millyard using a wire brush on a pillar dill so thought I'd give it a try, worked perfect.
 2022-03-08_05-29-49 by richard cannings, on Flickr
Also converted some later type door hinges to early.
 2022-03-08_05-29-11 by richard cannings, on Flickr
 2022-03-08_05-29-01 by richard cannings, on Flickr
Finished cleaning the doors and got some Epoxy on them this morning.
Saw Allen Millyard using a wire brush on a pillar dill so thought I'd give it a try, worked perfect.
2022-03-08_05-29-49 by richard cannings, on FlickrAlso converted some later type door hinges to early.
2022-03-08_05-29-11 by richard cannings, on Flickr2022-03-08_05-29-01 by richard cannings, on FlickrRe: Meet Ralph - 1970 ST project
I'm in a good routine at the moment of doing 5 mornings a week on the car. Seems to be working well and I'm defiantly getting more work done in 2 half days than 1 would working a full one.
This mornings progress;
 2022-03-09_02-27-09 by richard cannings, on Flickr
Other side on too using some temporary bolts.
Also gone from red bonnet;
 2022-03-09_02-27-24 by richard cannings, on Flickr
To much less red bonnet;
 2022-03-09_02-27-56 by richard cannings, on Flickr
I'm tracking how much time I've spent on the project, just checked and I'm currently at 750 hours. Main reason for this is so that I can plan more accurately for future projects. In the past I do realise that I've based a days effort on late teens me spending 14hours a day in the garage.
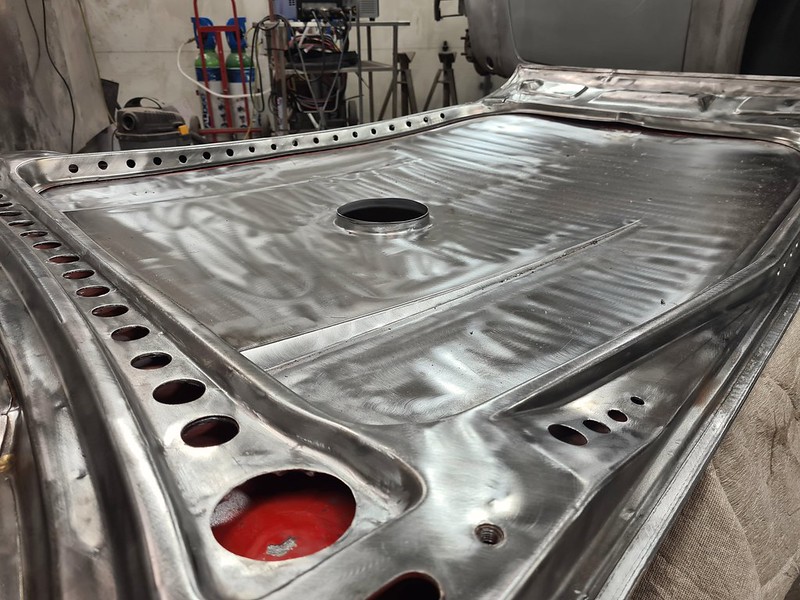
Might drill a few holes in the bonnet frame before painting tomorrow.
 bonnet 2 by richard cannings, on Flickr
This mornings progress;
2022-03-09_02-27-09 by richard cannings, on FlickrOther side on too using some temporary bolts.
Also gone from red bonnet;
2022-03-09_02-27-24 by richard cannings, on FlickrTo much less red bonnet;
2022-03-09_02-27-56 by richard cannings, on FlickrI'm tracking how much time I've spent on the project, just checked and I'm currently at 750 hours. Main reason for this is so that I can plan more accurately for future projects. In the past I do realise that I've based a days effort on late teens me spending 14hours a day in the garage.
Might drill a few holes in the bonnet frame before painting tomorrow.
bonnet 2 by richard cannings, on FlickrRe: Meet Ralph - 1970 ST project
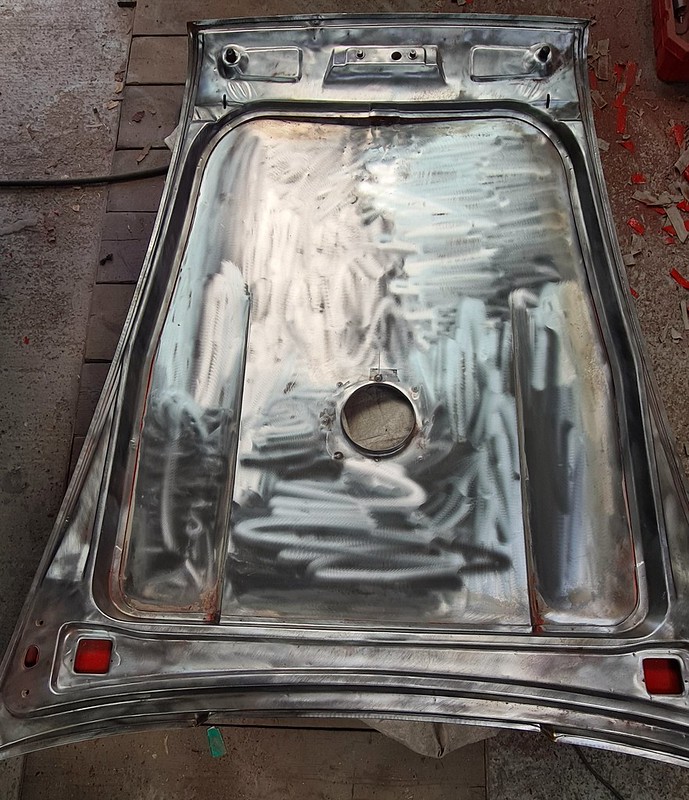
I presume the square holes were for lights, I decided to weld them up for a cleaner look.
 2022-03-10_06-02-14 by richard cannings, on Flickr
 2022-03-10_06-02-23 by richard cannings, on Flickr
Hopefully drill a few holes in it tomorrow before painting.
 2022-03-10_06-06-29 by richard cannings, on Flickr
2022-03-10_06-02-14 by richard cannings, on Flickr2022-03-10_06-02-23 by richard cannings, on FlickrHopefully drill a few holes in it tomorrow before painting.
2022-03-10_06-06-29 by richard cannings, on Flickr-
Gary71
- Nurse, I think I need some assistance
- Posts: 10296
- Joined: Wed Mar 31, 2004 1:27 pm
- Location: Cheshire
- Contact:
Re: Meet Ralph - 1970 ST project
Looks good  Have fun with the drill!
Re: Meet Ralph - 1970 ST project
Thanks Gary, I did !
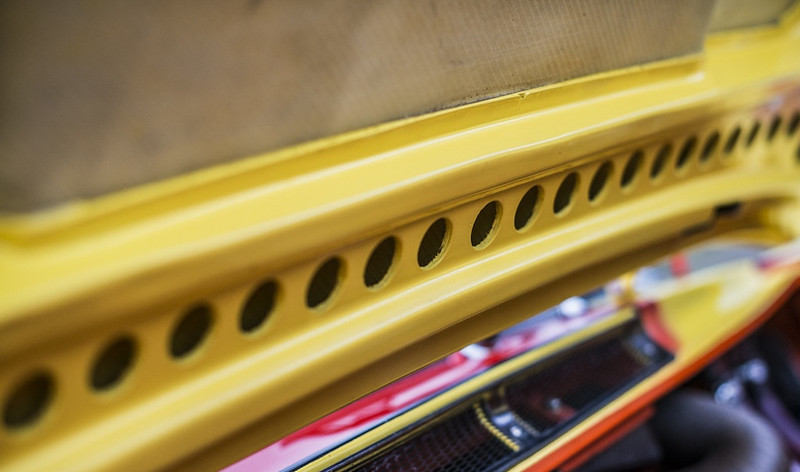
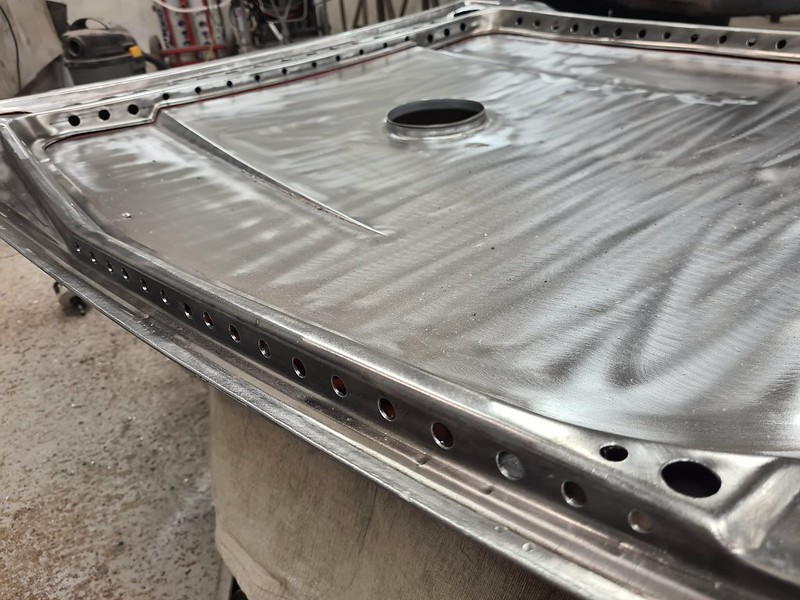
Tip of the day is not to use a hand held drill with a step bit for >30mm holes, gets a bit lively.
All went well though, set myself 2 hour drilling time limit to ensure I had some bonnet left at the end. I can see now 'just a few more' could easily take over.
 2022-03-11_07-02-38 by richard cannings, on Flickr
 2022-03-11_07-02-56 by richard cannings, on Flickr
Nice to get some epoxy on so it didn't spent the weekend rusting.
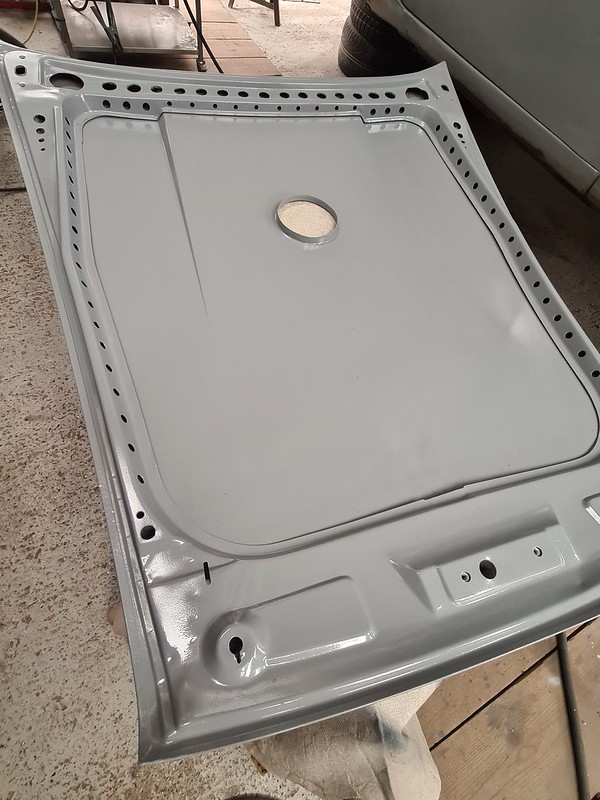 2022-03-11_07-03-24 by richard cannings, on Flickr
 2022-03-11_07-03-08 by richard cannings, on Flickr
Looks better than it did on Wednesday.
2022-03-09_02-27-24 by richard cannings, on Flickr
Tip of the day is not to use a hand held drill with a step bit for >30mm holes, gets a bit lively.
All went well though, set myself 2 hour drilling time limit to ensure I had some bonnet left at the end. I can see now 'just a few more' could easily take over.
2022-03-11_07-02-38 by richard cannings, on Flickr2022-03-11_07-02-56 by richard cannings, on FlickrNice to get some epoxy on so it didn't spent the weekend rusting.
2022-03-11_07-03-24 by richard cannings, on Flickr2022-03-11_07-03-08 by richard cannings, on FlickrLooks better than it did on Wednesday.
2022-03-09_02-27-24 by richard cannings, on FlickrRe: Meet Ralph - 1970 ST project
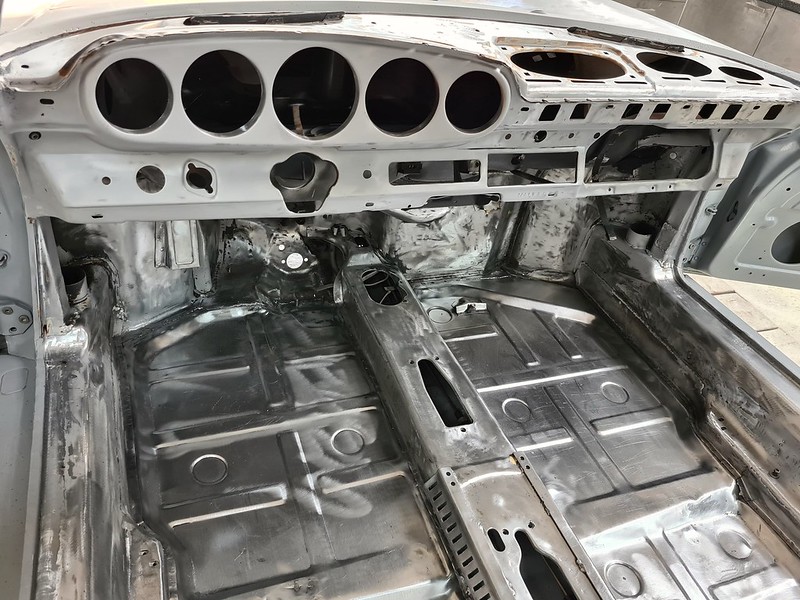
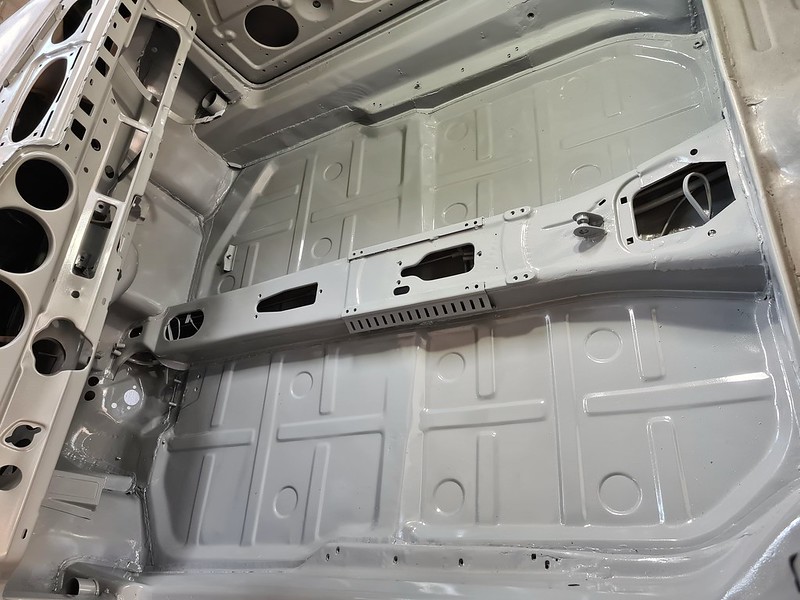
My world is slowly getting shinier.
 2022-03-25_08-34-45 by richard cannings, on Flickr
 2022-03-25_08-35-08 by richard cannings, on Flickr
 2022-03-25_08-35-28 by richard cannings, on Flickr
 2022-03-25_08-35-44 by richard cannings, on Flickr
2022-03-25_08-34-45 by richard cannings, on Flickr2022-03-25_08-35-08 by richard cannings, on Flickr2022-03-25_08-35-28 by richard cannings, on Flickr2022-03-25_08-35-44 by richard cannings, on Flickr