

Adrian, I'm not 100% familiar with the setup in question but yes as I mentioned in my previous reply if there is an increase in distance the oil has to travel (ie additional length lines) then yes it will take longer to fill the lines and there will be a delay before oil reaches its destination, no question.
However if we are talking about a filter (always full) and console fitted directly onto the pump housing (no additional lines) it’s surely going to be very close to a stock system, granted there may be a slight difference but I’d imagine it’s tiny?
It started with a pop
Re: It started with a pop
Burgundy 69 912
Audi A4 1.8T sport avant
VW T25 magnum multivan
Audi A4 1.8T sport avant
VW T25 magnum multivan
Re: It started with a pop
Timo, a filter is equivalent in pressure drop terms, to quite a bit of plain oil line.....you are probably right, it will be a very short delay, but that delay is important.....if modern cars have the same arrangement, i might be convinced
Adrian Rendle
Re: It started with a pop
Fair comment regarding modern design Adrian. I concur that any delay is not good, I wonder if any test data exists on this subject, would be great to see the pressure at bearings vs time graph comparing each system.
Burgundy 69 912
Audi A4 1.8T sport avant
VW T25 magnum multivan
Audi A4 1.8T sport avant
VW T25 magnum multivan
Re: It started with a pop
Any more progress on the engine Andrew?
Burgundy 69 912
Audi A4 1.8T sport avant
VW T25 magnum multivan
Audi A4 1.8T sport avant
VW T25 magnum multivan
-
AndrewSlater

- I luv DDK!
- Posts: 969
- Joined: Wed Nov 30, 2011 3:35 pm
Re: It started with a pop
All of my efforts in recent days has been on cleaning and further cleaning of parts - not much that is picture worthy.
I had ordered new inlet valves as my original ATE ones were measuring at 9.97 - 9.98mm stem diameter, and my original technical spec book shows the lower limit to be 9.98mm.
The new TRW ones measured the same - so technically borderline spec.
I ordered some intervalve ones too and these also measure identical - so I expect my originals would have gone again.
Have also ordered new exhaust valves so will see how they turn up.
I've already cleaned up the heads and installed the inlet valves.
The spec book gives an installed height of 41.0mm, got them to 41.02, 41.05, 41.04 and 40.94mm respectively so happy with that.
The next problem is understanding what the installed height of the exhaust valves should be.
Everything I have read online states 40.5mm, whereas my tech spec says 40.0mm - anyone know the answer?
1966 Porsche 912 Slate Grey, red interior - first owner owned for 41 years
1974 Porsche 911 2.7 (The Manhattan project) viewtopic.php?f=28&t=51455
1973 VW 914 1.7 Olympic Blue - ( gone to a good home )
1974 Porsche 911 2.7 (The Manhattan project) viewtopic.php?f=28&t=51455
1973 VW 914 1.7 Olympic Blue - ( gone to a good home )
-
AndrewSlater
- I luv DDK!
- Posts: 969
- Joined: Wed Nov 30, 2011 3:35 pm
Re: It started with a pop
A lot of rebuild items have been turning up - so much so that I had to buy some more tables to organise it all.
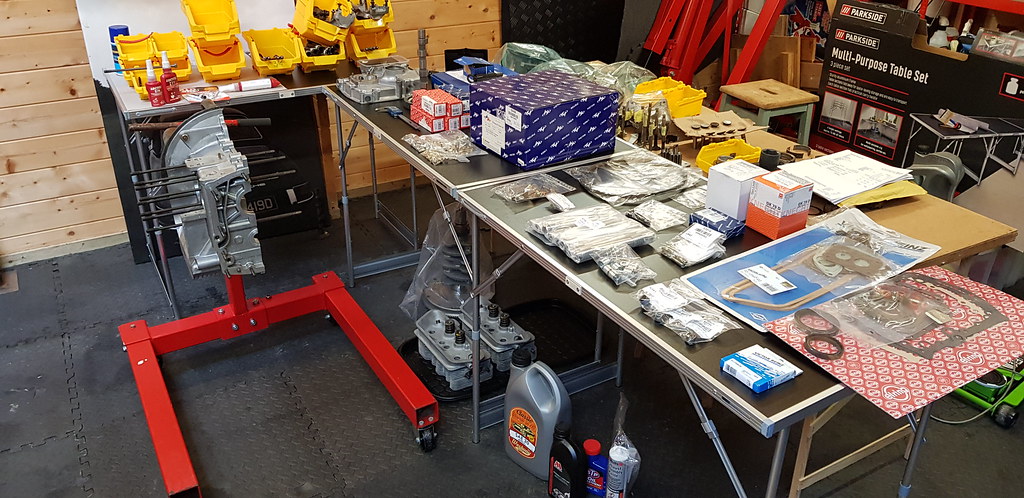
Despite placing multiple orders from multiple suppliers I still forgot to order the new flywheel gland nut. - Doh!
As part of the cleaning process I've noticed a few parts that were showing signs of wear - generally small value items but worth replacing at this stage.
One example was that one of the valve adjusting screws was tight in the arm and got tighter as I tried to wind it out.
Easiest option was to saw it in half and extract if through the path of least resistance.

I then had to clean up the threads on the arm - and retapped it.
My replacement Pistons and Cylinder kit arrived - I went for the big bore AA piston kit with the Biral Cylinders and Graphite Coated Hypereutectic pistons. If I had gone for the cast iron cylinders that would have been replacing like for like - at least with this kit it is closer to the original spec. They are marketed under the Retroclassic range at Design911. I have yet to study them but my first observation is that they don't come with any installation instructions and the pistons are pre-ringed and fitted to the cylinders. I expect some people just fit straight out of the box, but clearly that's not the right thing to do.
My replacement Intervalve exhaust valves were the same story as the inlets. The old valves were borderline spec on stem thickness so I bought new - however the new ones are identically sized - oh well they look shinier! So I've completed the cylinder head rebuild.
Now that I have a lot of replacement parts I'm running out of excuses not to start to repopulate the case!
I will have to await the gland nut, oh and did I mention I ordered the Precision Matters Full Oil Flow kit from Prill Classics - need to find out how to mill / dremel!!
Despite placing multiple orders from multiple suppliers I still forgot to order the new flywheel gland nut. - Doh!
As part of the cleaning process I've noticed a few parts that were showing signs of wear - generally small value items but worth replacing at this stage.
One example was that one of the valve adjusting screws was tight in the arm and got tighter as I tried to wind it out.
Easiest option was to saw it in half and extract if through the path of least resistance.
I then had to clean up the threads on the arm - and retapped it.
My replacement Pistons and Cylinder kit arrived - I went for the big bore AA piston kit with the Biral Cylinders and Graphite Coated Hypereutectic pistons. If I had gone for the cast iron cylinders that would have been replacing like for like - at least with this kit it is closer to the original spec. They are marketed under the Retroclassic range at Design911. I have yet to study them but my first observation is that they don't come with any installation instructions and the pistons are pre-ringed and fitted to the cylinders. I expect some people just fit straight out of the box, but clearly that's not the right thing to do.
My replacement Intervalve exhaust valves were the same story as the inlets. The old valves were borderline spec on stem thickness so I bought new - however the new ones are identically sized - oh well they look shinier! So I've completed the cylinder head rebuild.
Now that I have a lot of replacement parts I'm running out of excuses not to start to repopulate the case!
I will have to await the gland nut, oh and did I mention I ordered the Precision Matters Full Oil Flow kit from Prill Classics - need to find out how to mill / dremel!!
1966 Porsche 912 Slate Grey, red interior - first owner owned for 41 years
1974 Porsche 911 2.7 (The Manhattan project) viewtopic.php?f=28&t=51455
1973 VW 914 1.7 Olympic Blue - ( gone to a good home )
1974 Porsche 911 2.7 (The Manhattan project) viewtopic.php?f=28&t=51455
1973 VW 914 1.7 Olympic Blue - ( gone to a good home )
Re: It started with a pop
Hi Andrew
do the pistons you have have an offset wrist pin as the original Mahle pistons?
if they do be careful with their orientation
do you have a Pellow book to aid with rebuild?
this is a great resource for general maintenance and tolerances if you don't already have it
https://www.912bbs.org/forum/resources/ ... 8/download
will pm you re Torque M
1966 912 LHD
1980 911 SC Targa
1969 912 RHD in process of restoration
1980 911 SC Targa
1969 912 RHD in process of restoration
Re: It started with a pop
Hi Andrew
I also went with the AA pistons and cylinders, but I went with the cast iron type cylinders.
The weights and ring gaps etc needed no adjusting just a strip down and really good clean.
Regarding the full flow kit I am sure you will find the installation easy, as you say you just need a Dremel type tool and steady hand! It comes with a template so you can mark out how much to remove.
good luck on the build!
cheers
Rob
Re: It started with a pop
Andrew, i went with exactly the same p&c's as you, the rings did need very little gapping, hardly anything, although i took the sharpness off the open ends as well....please beware of the cylinders, mine had a run-out on the top sealing surface and i had to have them machined true all round to the bore, should have returned them, really.
Adrian Rendle
-
AndrewSlater
- I luv DDK!
- Posts: 969
- Joined: Wed Nov 30, 2011 3:35 pm
Re: It started with a pop
Hi Andrew, I've yet to inspect the pistons but they do have orientation markings which suggests to me that they do have some wrist pin offset. However I have read some stories of some batches being incorrectly marked so I will definitely be doing some careful observation and measuring. I have got copies of the Maestros videos and a copy of Secrets of the Inner Circle - I should probably refresh myself on them - been a while since I looked at them.
Hi Rob, I'm wondering whether I can simply drill out the material required, otherwise it will probably be the Dremel. I probably need to see the instructions and the parts to better visualise what needs doing. I'm sure there will be plenty of scope for me to cock it up
Hi Adrian, now you've got my attention - Can you expand upon what I should look out for? I've already read threads were these pistons had a batch with the incorrect orientation arrows, and also supplied with wrist pins with inadequate wall thickness - and now this. If you can let me know what to check ( and how ) that would be really appreciated.
Thanks to everyone for their invaluable input - between us I might not cock this up
1966 Porsche 912 Slate Grey, red interior - first owner owned for 41 years
1974 Porsche 911 2.7 (The Manhattan project) viewtopic.php?f=28&t=51455
1973 VW 914 1.7 Olympic Blue - ( gone to a good home )
1974 Porsche 911 2.7 (The Manhattan project) viewtopic.php?f=28&t=51455
1973 VW 914 1.7 Olympic Blue - ( gone to a good home )
Re: It started with a pop
hi Andrew, i had the cyl's checked by my machinist, he set them on a surface plate with distance blocks so the lower ledge rests on them....then rest a dial gauge on the top sealing surface and rotate the cyl slowly....any runout will be shown on the dial gauge....i'm not absolutely sure of the tolerance but mine showed a 3-4 thou runout on 2 of them, so they are now a pair on one side.....also, each pair needs to be exactly the same length from lower to upper sealing face
Adrian Rendle
-
neilbardsley
- Nurse, I think I need some assistance
- Posts: 7758
- Joined: Mon Apr 16, 2012 4:31 pm
Re: It started with a pop
Andrew really good thread here
https://www.912bbs.org/forum/threads/re ... ion.52396/
Scroll down for some pictures which show you exactly what to do. You might be able to drill.
Two of the engine building gurus on there make a very good point, on another thread, about not installing the third piece back on the engine before checking that the oil pump gears arent binding. They install the pump first. Jack Staggs and Tim B both recommended this. They are both very, very experienced engine builders
Sent from my Redmi 7 using Tapatalk
“A REMINDER. I would be grateful if those members who have borrowed bits from me in emergencies (e.g starter motor, oil cooler, etc) would return them and/or contact me”. – Chris Turner RIP
-
Kneeslider
- DDK slapper chatter
- Posts: 401
- Joined: Tue Oct 01, 2013 5:04 pm
Re: It started with a pop
Liking this thread very much, as I will soon be building my engine back up (for the second time!). I have bought a Precision Matters full flow adaptor also. I looked at what was necessary to modify my third piece, and instead of breaking out the Dremmel, I decided to see a mate with a milling machine, who could use a 1/2in cutter to enlarge the hole with more accuracy than I could manage by hand.
It is rather awkward to measure the required number of shims that go underneath the valve springs to give the correct preload, so while on a trip to PRS for something else, I took my heads, and shims and springs with me so they could use the proper tool and check my numbers. I can't remember off the top of my head the spec number though.
My AA piston kit came with the rings already installed over the pistons, but I thought that I should give the ring gaps a measure before fitting. The 2nd compression rings were all just a touch too tight (About 1.5 2 thou) but all else seemed to check out OK. I will check to make sure that any piston offsets are going in the correct way.
BTW, my engine failed after about 6k miles because of metal in the oil after a carb float had failed allowing the oil to become diluted with fuel. All the pistons showed signs of wear, as well as one of the roller big ends was on its way out. It hadn't gone too far though, and the engine still performed well, and wasn't overly noisy. I have no idea how long the fuel had been dripping into the sump, but the oil level always stayed OK ish. It was only at oil change time when I removed the filter gauze and found it rather alarmingly furry...
'65 356 SC
'91 Ducati 750/900ss mongrel
1963 Velocette Viper (mostly) with '39 KSS OHC engine
'05 997 C2
1954 FB Mondial 200 Extra Lusso
'91 Ducati 750/900ss mongrel
1963 Velocette Viper (mostly) with '39 KSS OHC engine
'05 997 C2
1954 FB Mondial 200 Extra Lusso
-
neilbardsley
- Nurse, I think I need some assistance
- Posts: 7758
- Joined: Mon Apr 16, 2012 4:31 pm
Re: It started with a pop
There is a thread on the 912 or 356 registry about solex floats failing and repair if that helps
Sent from my Redmi 7 using Tapatalk
Sent from my Redmi 7 using Tapatalk
“A REMINDER. I would be grateful if those members who have borrowed bits from me in emergencies (e.g starter motor, oil cooler, etc) would return them and/or contact me”. – Chris Turner RIP
Re: It started with a pop
Andrew, there's a few other things to be aware of, see
https://www.912bbs.org/forum/threads/en ... hts.57422/
some of them are quite easily overlooked
https://www.912bbs.org/forum/threads/en ... hts.57422/
some of them are quite easily overlooked
Adrian Rendle