So, it’s been a long time…… what have I been up to (other than more sailing and a quick week in Cornwall) ……
Well, I reset the Warm Up Regulator (WUR or control pressure regulator more accurately) pressures the week before last, but I couldn’t get the pressures I wanted for warm pressures with vacuum without maxing the warm pressure without vacuum. System pressure was also right at the top end of the allowable range. So I started tweaking again Tuesday.
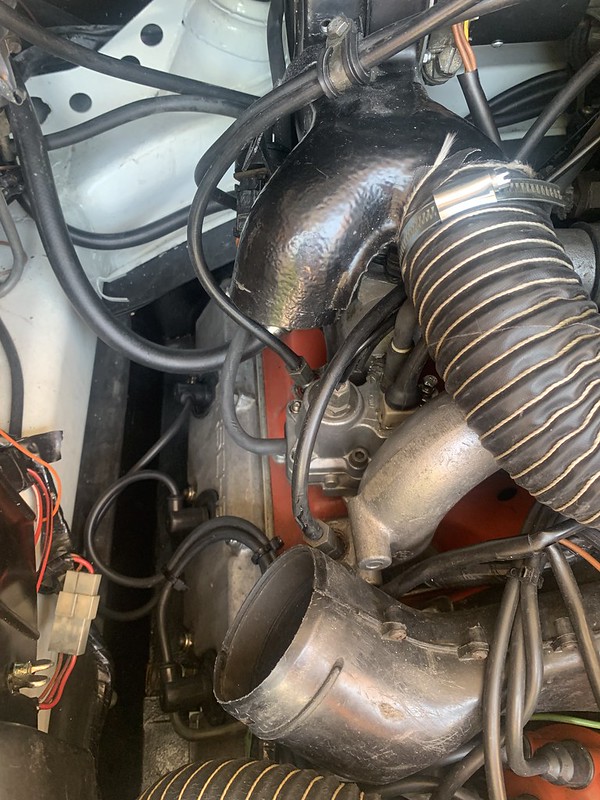
For those that don’t recognise the engine bay view of an SC, the WUR is hidden under the left side fan pipework

So that had to go
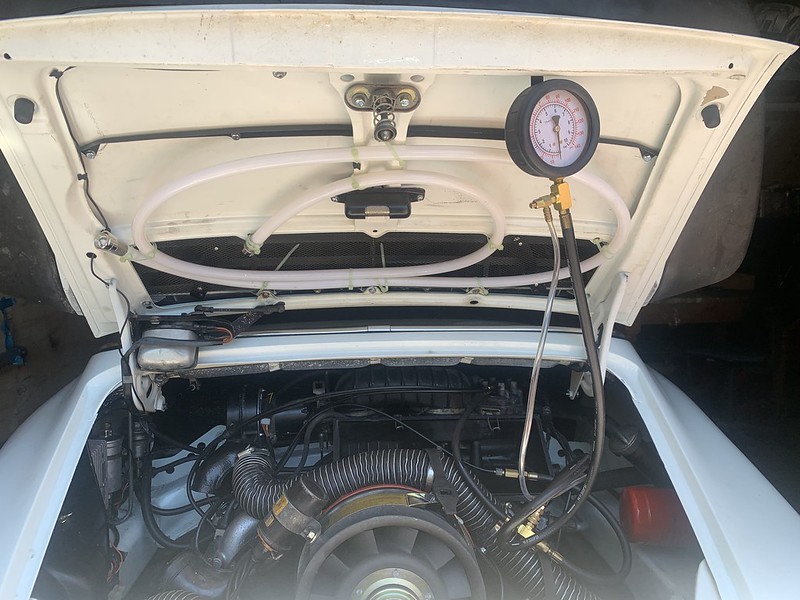
I connected the valve for the pressure gauge into the pipe from the fuel distributor to the WUR

And hung up my gauge
The WUR came out

And was dismantled

The grey round bit (that I didn’t photograph very clearly) is the underside of the fuel connections. If this is drifted out of the body, warm control pressure reduces, and if it is drifted more inwards, they rise.

The lower membrane is the bit that impacts the with vacuum warm control pressures. The kit that I bought to rebuild my WUR is somewhat universal. By using a hex key in the centre, you can adjust the warm control pressures with vacuum.

On the left end of the top of the WUR, where I have made my ‘adustability’ mods, is the top side of the post that the electrically heated element is attached.

By drifting the plug in, you lower the cold control pressure, and out for raising. I previously drilled and tapped an M5 hole. By tapping the top of the bolt, the plug goes inward and cold pressures drop. By holding the M5 bolt steady and winding down the M5 nut underneath, it pulls the plug up, increasing cold control pressures. The 2 M6 nuts and the washer are simply to raise the height of the M5 adjusting nut so that I can adjust in-situ.
You will also notice in this photo that I had removed the heated bar and electrical connection. Had I set the warm pressures with the cold compensator in place, I would have had to wait (probably overnight) for the WUR to cool down before testing the cold pressures, then repeat the warm pressure exercise (maybe with more adjustment).
I got over-excited (and just a little bored) here and forgot to take any further photos. However, having added a relay by-pass to run the fuel pump and removed the cold compensator, I refitted the WUR and checked system pressure. It was 5.1, which was just within the acceptable range of 4.5 – 5.2, with an adjusting target of 4.7 – 4.9. I had bought a set of washers so that I could set it right in the middle. However, when I pulled the pressure regulator out (it’s towards the rear on the rhs of the fuel distributor), I realised that I just needed to remove one of the existing washers, not add new ones. So, system pressure is now sitting nicely at 4.8b.
Warm pressures next, starting with the no vacuum. Target was 2.7 – 3.1 and it was sat at 3.1. So WUR out again and a bit of tappy tappy on the fuel connection area (from underneath). Refit, test, remove, more adjustment, refit, test, remove, adjust (in a bit, out a bit) etc ad nauseum, but finally, warm pressure 2.9.
Add vacuum and the warm pressure rose to about 3.1. Remove WUR, adjust the diaphragm bit, refit, retest, remove, readjust, etc, etc. The best I managed was 3.4, which is at the lower end (so running at the rich end on low engine vacuum scenarios, but better that than too lean) of the acceptable range of 3.4 – 3.8.
Remove WUR again, refit the cold compensator parts, drift the post out a bit (so that adjustments would all be tapping back in, with no need to strip the WUR again) and test cold pressures. Almost nothing, so tappy tappy and watch the needle on the gauge. Given the temperature, I needed to be in the range 1.65 – 2.05, and set it to 1.9.
Remove gauges, reattach the vacuum pipes to the WUR and turn the key. Blimey, it started and ran quite well. I took a blast around the big block and tweaked the mixture at tick-over – it still wasn’t far out from where I had set it last time. Having made it to the Fairmile meet last night

I did notice that the revs dropped a little low when I had the electric aircon running and jumped off the throttle onto the brakes, so next time it’s warm, I’ll tweak the tick-over up a smidge.
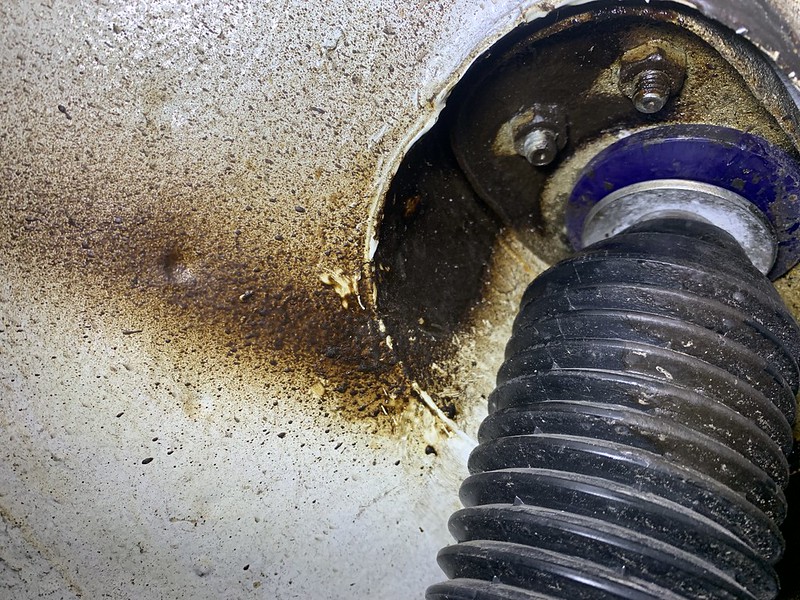
Other news. I now have about 625 miles on the car, and it has developed a tendency to crash over bumps, not when moving at speed, but over short, sharp speed bumps and low speed pot holes. I had also noticed that the big washers on the tops of the front struts appear to have had an argument with the polybushes.

Checking the parts manual shows a NLA spacer that I don’t have (part number 911 341 615 00). My thinking was that when I rebuilt the struts, the polybushes came with their own metal inner tube, so I might have thrown the original spacers away, and therefore might the polybushes now be sliding down the top of the inserts, rather than sitting on the shoulder of a spacer. What I needed was a load spreading washer to suit on the top of the strut insert and spread the load over the underside of the polybush.
DDK was down, so I popped a question on IB to see if anyone could give me details of the spacer’s size. No-one did, although Chris Taylor took a photo of his SC and I immediately twigged.
I now think that that spacer may have been for the US market, whereas my issue was the struts themselves, or more accurately, the dust cap / covers. My strut dust caps were so poor that I took the good advice from IB and had used the rubber dust caps from a Golf. As dust caps go, they're fine, but of course they don't spread the load across the base of the polybush like the originals do. Shame that I gave the old caps away - always wise after the event.
Anyone got a pair of dust caps knocking about ?
Anyway, I spent some time looking for a chunk of metal to make some load spreading spacers, but all I had in a suitable size was aluminium and I thought that that might not be strong enough. However, my top big, tabbed strut washers are looking a bit second-hand, so I’ve ordered a new pair. I then drilled the old ones out to use as load spreaders underneath.
A lathe does come in useful at times

My special washers, with an insert from a polybush.

I didn’t want to take the easy route and simply remove the strut top mount, as that would mess up my alignment. So, remove road wheel, undo the nut on the top of the strut, remove the front torsion adjuster bolt and compress the strut down, add spacer and reinsert strut in the polybush. Nothing torqued here.
Then I added the big washer from the other side just to check, and look, no argument, all friends between the spacer and the polybush, even when not fully torqued down. Yes, I know that's not the correct locking tab washer, I just wanted to use a washer under the nut for testing. The strut also centred properly once the car was back done on its wheels.

So, repeat for other side, reset ride height and I’m now waiting for my new top washers (with new tab locking washers). Hopefully they will arrive on Monday, so that when I get back form sailing, I can fit the Tuesday morning before I go away sailing again. Once I get back from the Round the Island Race, I only have 2 days before I go to CLM, so I hope no new issuettes.


