Wot, not another '79 Targa resto thread

Ongoing and archived Porsche (and other marques) restoration threads from DDK members

Moderator: Bootsy

User avatar
PeterK
DDK rules my life!
Posts: 1069
Joined: Mon Sep 01, 2014 3:04 pm
Location: GU51 - Fleet, Hampshire, UK

Re: Wot, not another '79 Targa resto thread

Post by PeterK »

Well, no garage time for weeks, then rain stopped garden chores two days in a row – result :bounce: . Snuck into the garage and attacked the rust spots above the oil pipes.
Image

My welding is getting better, but I'm still over grinding / linishing sometimes when checking that I have no holes between welds, etc. It's a right royal pain in the ar$e having to redo where I've over-thinned or holed patches.

Anyway, a quick coat of primer
Image

and we’re done on the inner wings.

Next job will be the scuttle, starting with the front edge
Image
'79 Targa - restoration now mainly complete & being driven
viewtopic.php?f=28&t=59756
User avatar
PeterK
DDK rules my life!
Posts: 1069
Joined: Mon Sep 01, 2014 3:04 pm
Location: GU51 - Fleet, Hampshire, UK

Re: Wot, not another '79 Targa resto thread

Post by PeterK »

Well, not much time in the garage recently – too much sailing. Anyhow, onto the screen flange / scuttle edge rather than the leading corners. I started by cutting out all of the rot in the OS screen corner, top of dash and edge of scuttle panel. Quite a hole now.

Image

As you can see, there is more rot at the front edge of the scuttle, and a dent where the bonnet has come up at some point in the past (strange, but there is a matching dent on the other side as well :lol: )

I made a cardboard template of the curve of the windscreen seal flange on the NS, as that is much less rusted, with mainly only a part of the actual flange needing attention, and flipped it to give me the shape for the OS.

Where the edge of the dash meets the flange is almost U-shaped, and there is no way that I would be able to get the welder in there once the outer flange had been attached. I considered cutting out more of the dash, so that I could flip it over, weld up underneath, then replace in the car. I then tried to build up just a part of the inner flange.

Image

I made a few patches for the dash edge too

Image

and the shrinker stretcher got a work out for the flange itself.
Image

I’ve lost count of the number patches for the dash edge flange and the scuttle side of the flange I have tried, but in the end, I wasn’t happy that I had sufficient accuracy. Given that the right shape of flange here will be vital to ensure the windscreen seal fits tightly to prevent leaks and future rot, I bit the bullet, and ordered a panel part from Matt at Type911.
It arrived this morning, so just laid on top and it is just the right size. This gives me the confidence that the flange shaping is correct, and I can patch the dash edges to suit.

Image


While waiting for the panel to arrive, I cut out the previous patch repair made to where the fuel pipe runs through the rear of the NSF inner wing. It originally looked like
Image

Clearly another example of welding a panel straight over the rot, without cutting much away, and with little rust prevention treatment.

A quick attack with the cutting disk and grinder and I had
Image

and

Image

and with a little more cleaning up

Image

I need to refit the front wing and petrol tank with filler pipe to work out what size and where in space the hole needs to be, but I was able to start the patching from the front edge.

Image

Luckily I left the rubber pipe that joins the filler pipe to the tank on the filler during dismantling, and the rubber ‘seal’ is still in pace, together with a tiny residual part of the old ‘hole’. Together with the dirt marks indicating exactly how far along the tank pipe the rubber joint goes, I am confident (should that be naively hopeful ?) that I can mash up a patch panel for here.

That said, if anyone has a template, I would be most grateful indeed………

Playtime has been temporarily stopped, as apparently 18 months is far too long to leave some internal doors unpainted and they are now glossed up on a bench in the garage. Somehow I think that grinding and welding next to my freshly painted doors might not be the best idea, but with SWMBO away this weekend, I intend to make more progress on the SC.
'79 Targa - restoration now mainly complete & being driven
viewtopic.php?f=28&t=59756
User avatar
PeterK
DDK rules my life!
Posts: 1069
Joined: Mon Sep 01, 2014 3:04 pm
Location: GU51 - Fleet, Hampshire, UK

Re: Wot, not another '79 Targa resto thread

Post by PeterK »

Started today by finishing painting the wardrobe doors, then continued by tidying the garage a bit. It did need it
Image
Image

Then refitted the front wing to see where the fuel filler pipe needed to go
Image

It needs to go here somewhere
Image

a bit like this
Image


I decided to start fabricating the patch panel with a hole. This was my way of starting, but if there's a smarter / quicker / netter way, please shout quickly
Image

Using a hole saw into a block
Image

and then I enlarged the hole in the wood
Image

and used that to start forming the flange
Image

finally getting to this
Image

and with the seal / grommet fitted
Image

Time for tea, so that will have to do for now.
'79 Targa - restoration now mainly complete & being driven
viewtopic.php?f=28&t=59756
User avatar
PeterK
DDK rules my life!
Posts: 1069
Joined: Mon Sep 01, 2014 3:04 pm
Location: GU51 - Fleet, Hampshire, UK

Re: Wot, not another '79 Targa resto thread

Post by PeterK »

So back into the garage this afternoon.

I did ask whether there was a better / smarter way of starting my patch panel for where the fuel pipe passes through the inner wing. Lots of views but no comments since May – should I continue ??

Anyway, there is a better way, or at least, putting the hole in and flanging it first certainly made it hard to form the rest of the panel. But I digress. First I refitted the wing (again), to make another template for where the pipe needed to be in space.
Image

Next was forming the curve at the top of the patch panel
Image
Image

Then a bit of beating into shape using the sandbag
Image
Image

and add some stiffening webs using an old punch as my former
Image
Image

Not the prettiest, and the forward edge (when fitted to the car) is a bit of a harsh bend rather than nice gradual curve. But, hey ho, we are where we are, I smoothed it a little, but ……

and temporarily fix to the car to check alignment
Image


Refit the wing and
Image
oh $h1t.

When I measured my template earlier, I noted that I needed to relocate it 0.3mm along and 1.3mm in the vertical (you can see my new marks in the second photo above). It appears that I then went the wrong way.

Never mind – I can now try shaping the panel first and cutting the hole out afterwards. In the meantime, SWMBO has arrived home, so a cup of tea beckons ….
'79 Targa - restoration now mainly complete & being driven
viewtopic.php?f=28&t=59756
911hillclimber
Nurse, I think I need some assistance
Posts: 18932
Joined: Mon Mar 10, 2008 6:26 pm
Location: West Midlands

Re: Wot, not another '79 Targa resto thread

Post by 911hillclimber »

This looks a tricky area to rebuild.
I think your method is great as it gives a repeatable reference every time you bring the parts together.
I would find it difficult to tidy the surfaces but that is my lack of skill and tools.
Keep going!
73T 911 Coupe, road/hillclimber 3.2L
Lola t 492 / 3.2 hillclimb racer
Boxster 987 Gen II 2.9
User avatar
PeterK
DDK rules my life!
Posts: 1069
Joined: Mon Sep 01, 2014 3:04 pm
Location: GU51 - Fleet, Hampshire, UK

Re: Wot, not another '79 Targa resto thread

Post by PeterK »

Thx
Away sailing for the next few days, but hopefully back into the garage by the weekend for attempt 2
Peter
'79 Targa - restoration now mainly complete & being driven
viewtopic.php?f=28&t=59756
User avatar
PeterK
DDK rules my life!
Posts: 1069
Joined: Mon Sep 01, 2014 3:04 pm
Location: GU51 - Fleet, Hampshire, UK

Re: Wot, not another '79 Targa resto thread

Post by PeterK »

What with too much sailing (OK that’s a bit misleading - you can never have too much sailing, especially when you’re paid to do it :lol: ), sick parents, SWMBO dropping to 3 days a week (really impacts my ability to get eBay deliveries under the radar !), and voluntary work, my time in the garage has been none recently.

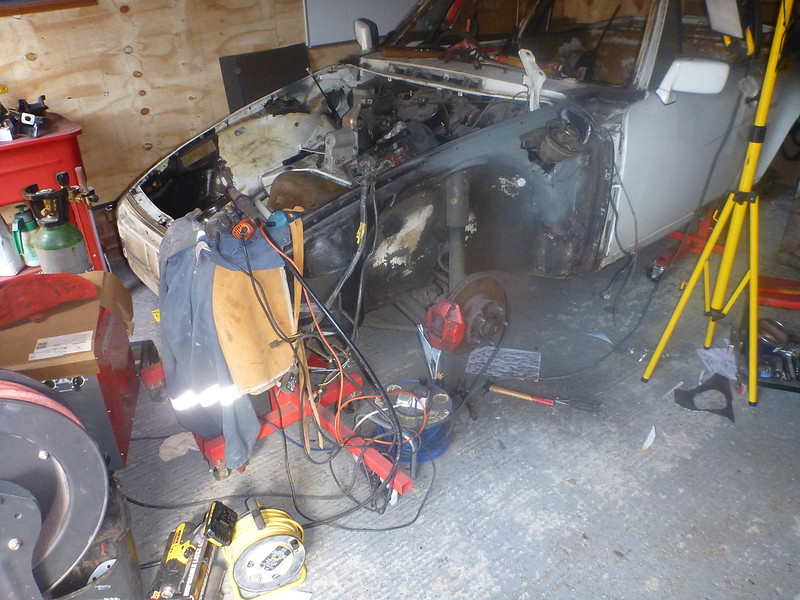
Anyway, mid-week, Alexcxcx came around and we moved the compressor to outside of the garage and while I plumbed and wired it, he built a lean-to for protection from the elements :cheers: . With the back end of his hack inside the garage I could launch another attempt (attempt 4) at repairing the rear quarter. Attempt 1 started well, the huge gash on the rear quarter (a night-time present, left by a careless neighbour perhaps) was filled, primed, and base coated. It didn’t look right, but he ‘knew’ the metallic colour for his car. So I clear coated, hoping (naively of course) that it would blend, but no. Checking the Ford paint pages, his car VIN shows a close, but clearly different metallic base colour. Attempt 2, and armed with the right colour, the base coat went on well, but as the clear was drying, it started to rain :cry: . Attempt 3, I rubbed down the clear coat, resprayed it – and it rained again !. That wasn’t forecast, so we quickly erected a polythene sheet cover and went for lunch. On return, the sheet had fallen and stuck to the clear coat in two places ! :cry: . Attempt 4, rub down clear coat and respray. 5h1te Halfrauds clear coat started spitting as I put the final coat on :evil: , so more rubbing down and make the best of a bad job. Maybe I’ll buy some clear coat and use a spray gun next spring.

I was looking through another Barry magic show, and saw the quality job he did in hammering a patch panel just like what I needed - you can really go off people :lol: 
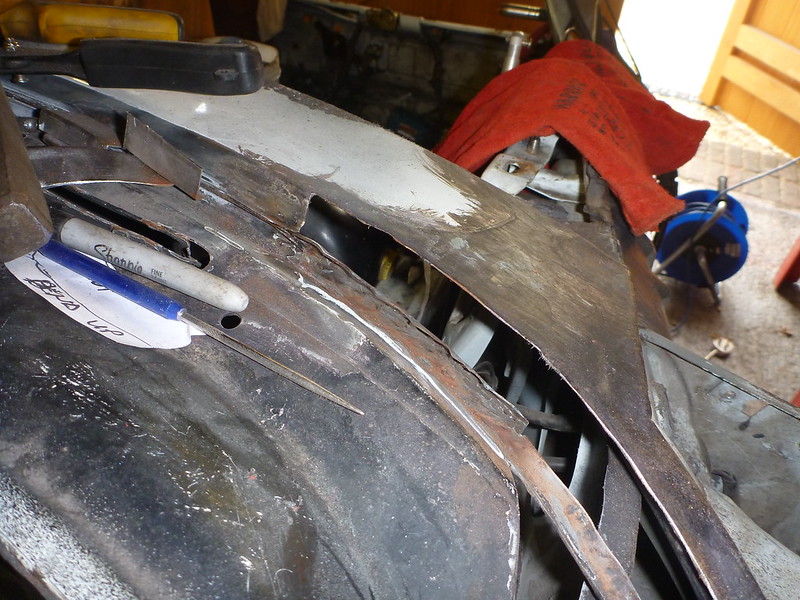
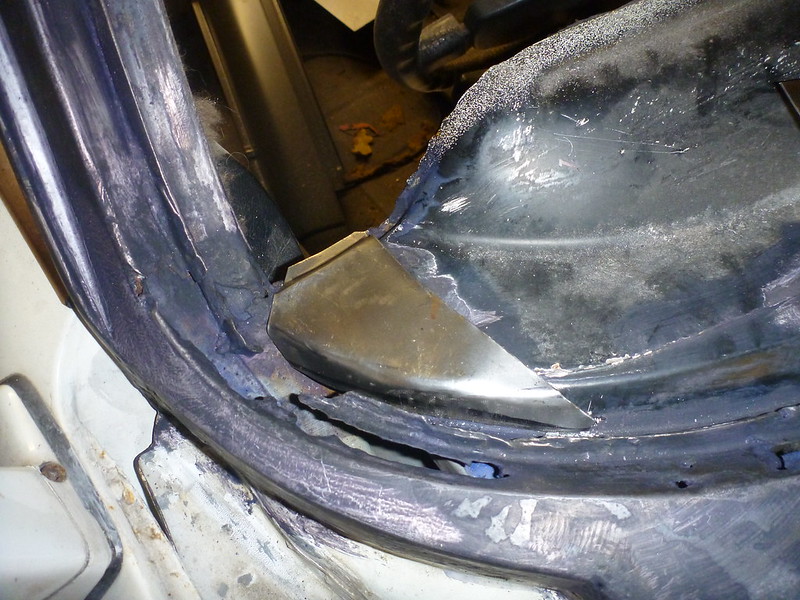
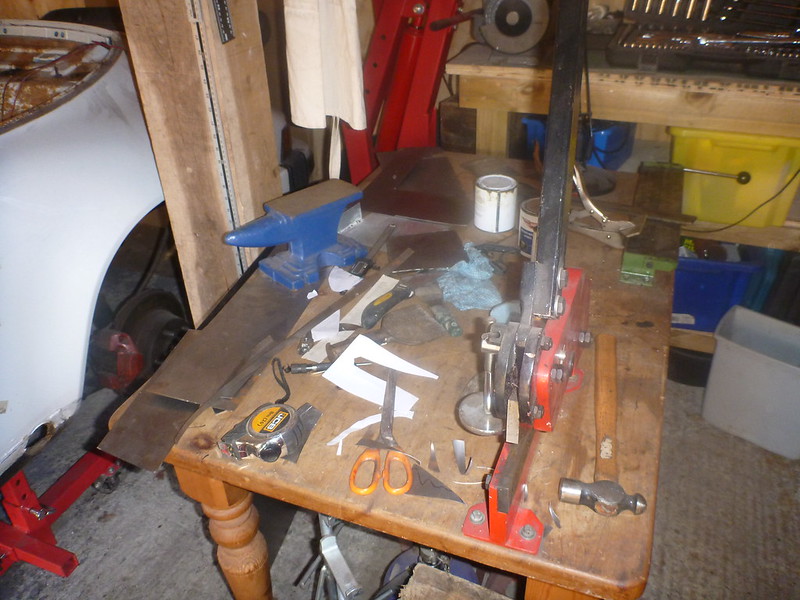
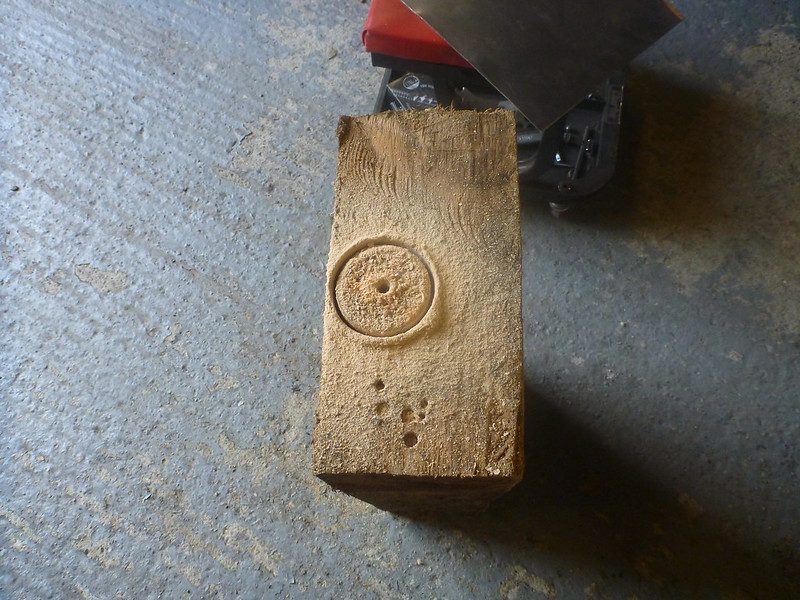
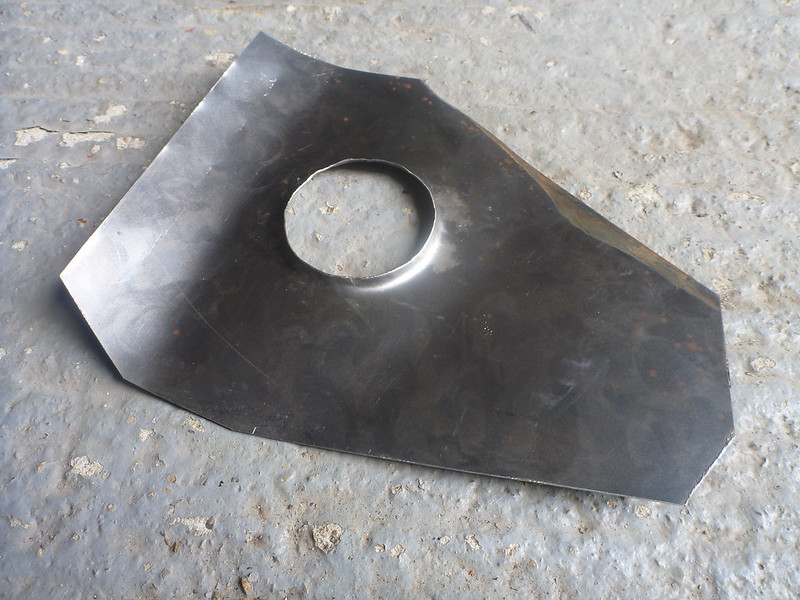
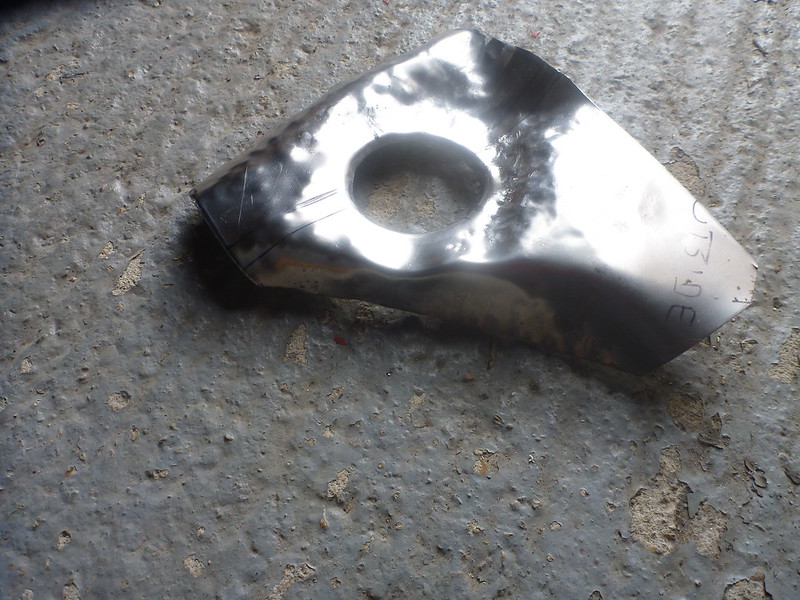
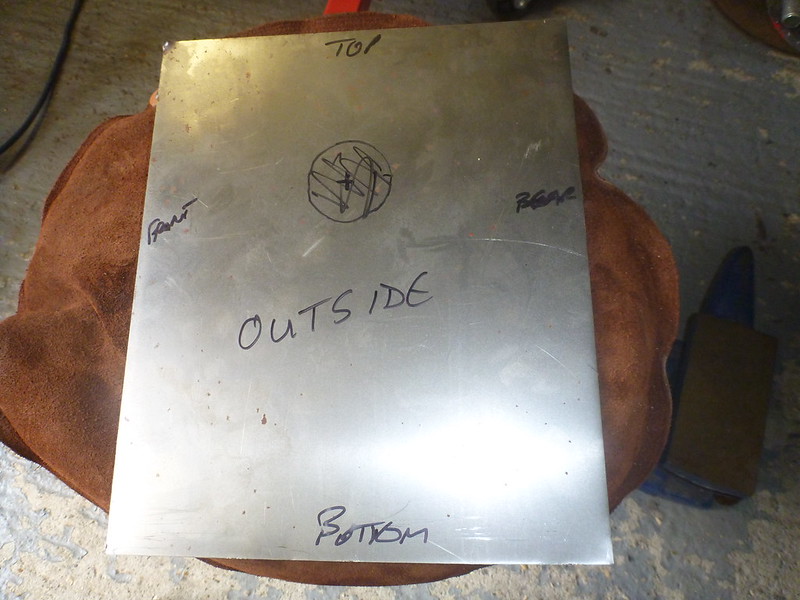
. Anyway, I managed to grab a few hours in the garage, and started over again. Starting with a new piece of sheet, suitable marked up to hopefully avoid the debacle of measuring the wrong way
Image

Some hitting
Image

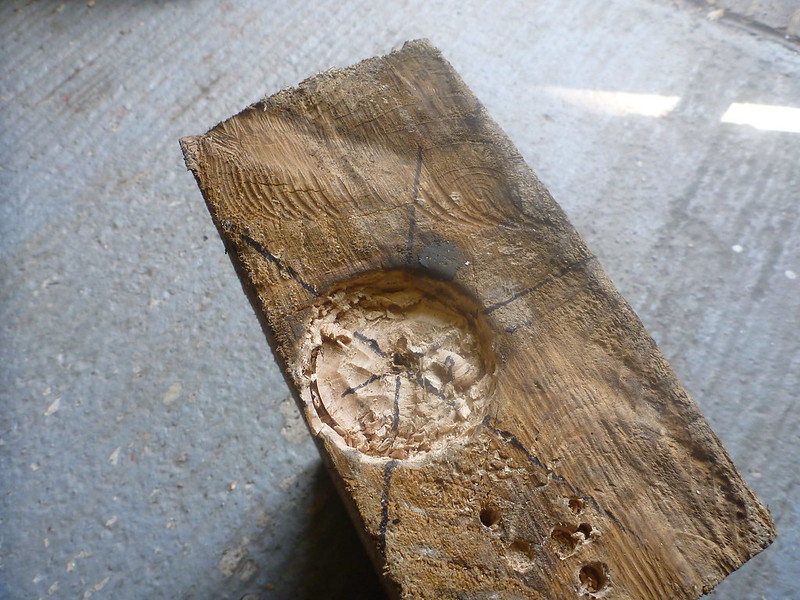
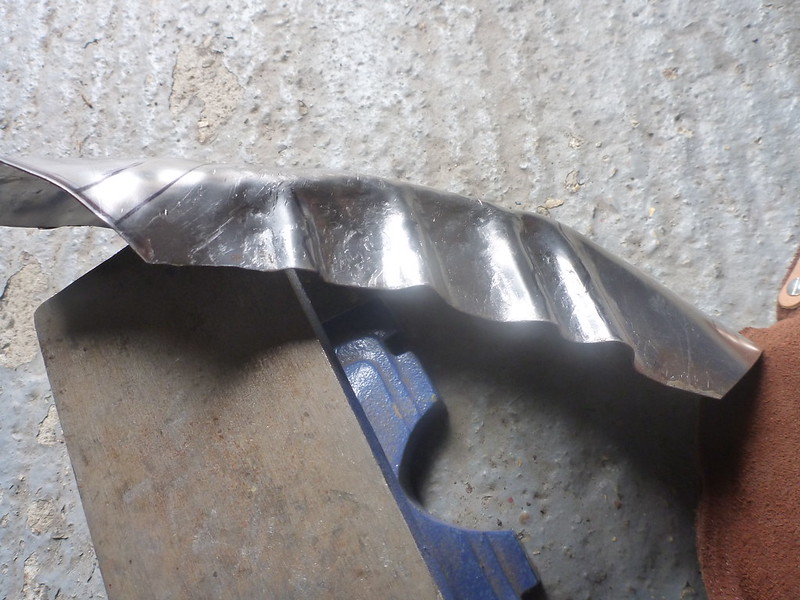
…. some more hitting to form the ribs
Image

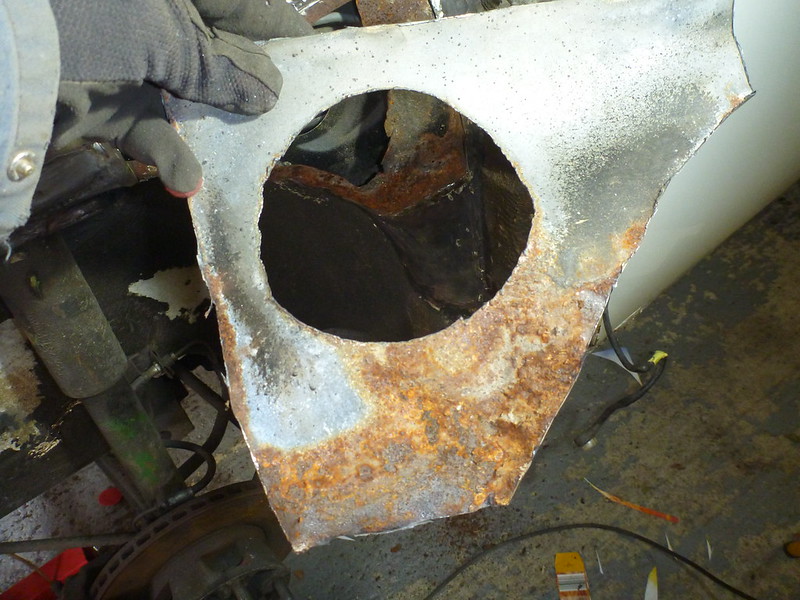
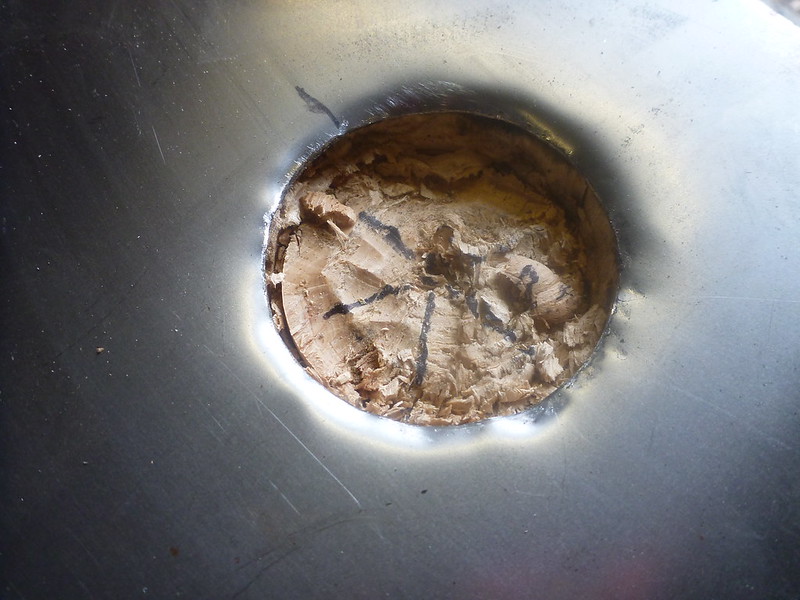
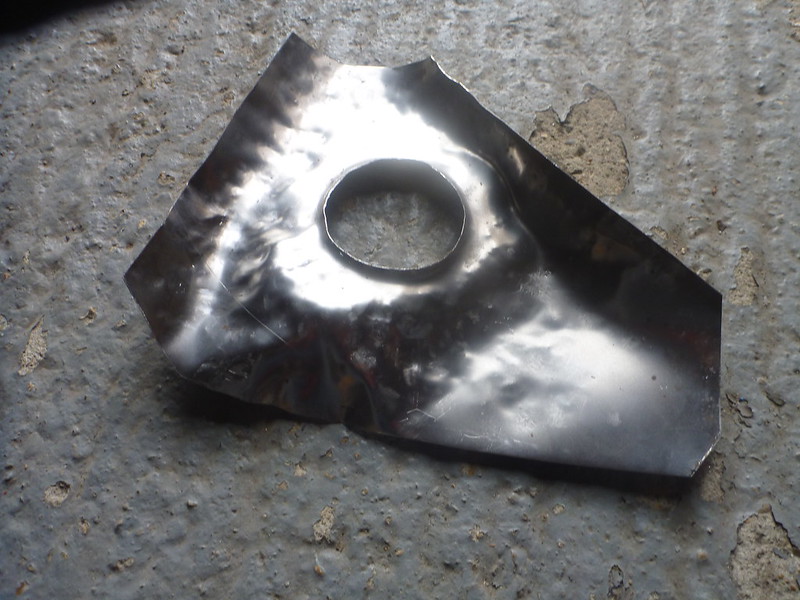
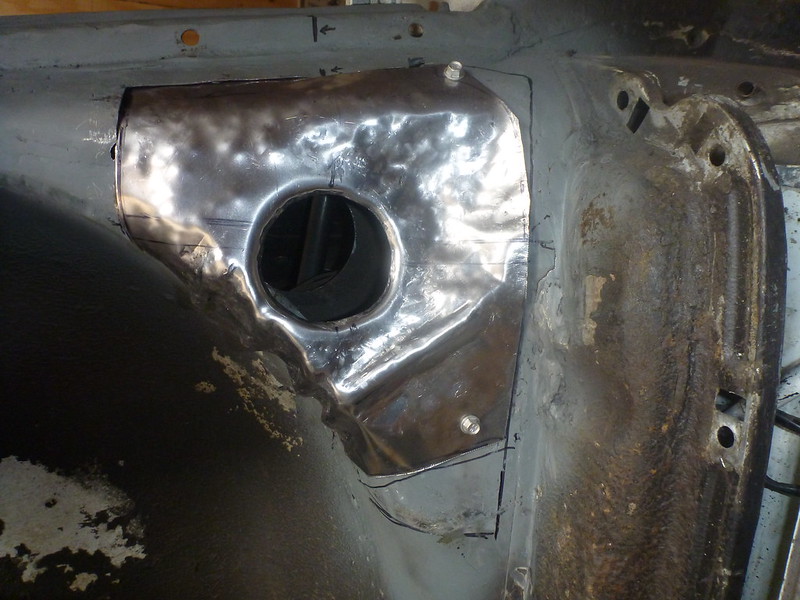
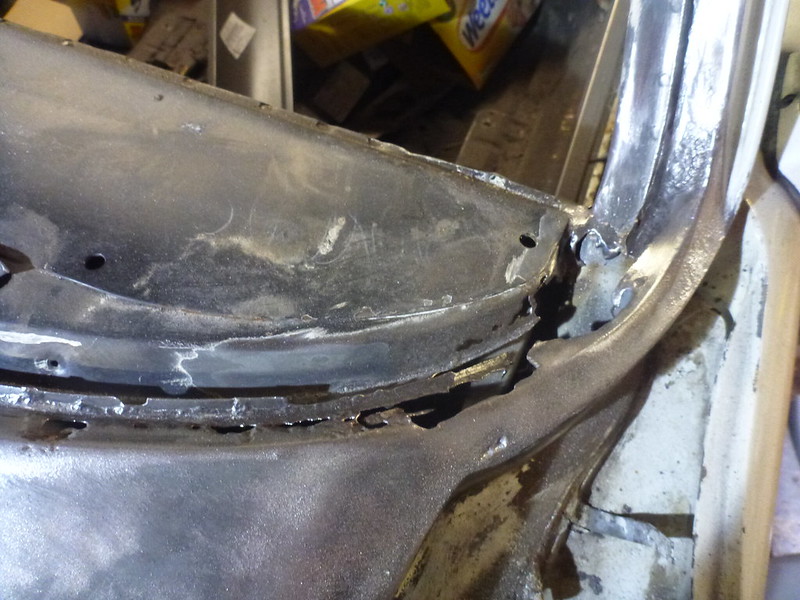
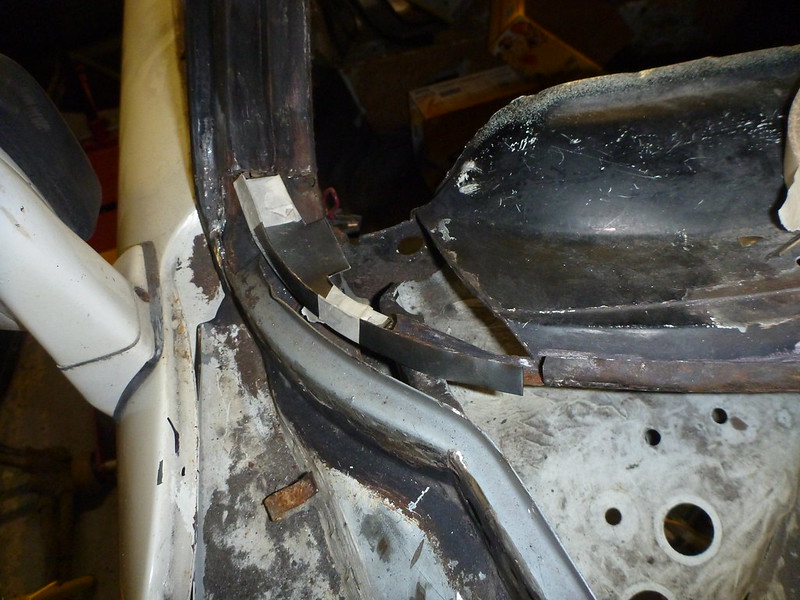
and drill the hole and trim to maximise the amount of old metal retained
Image

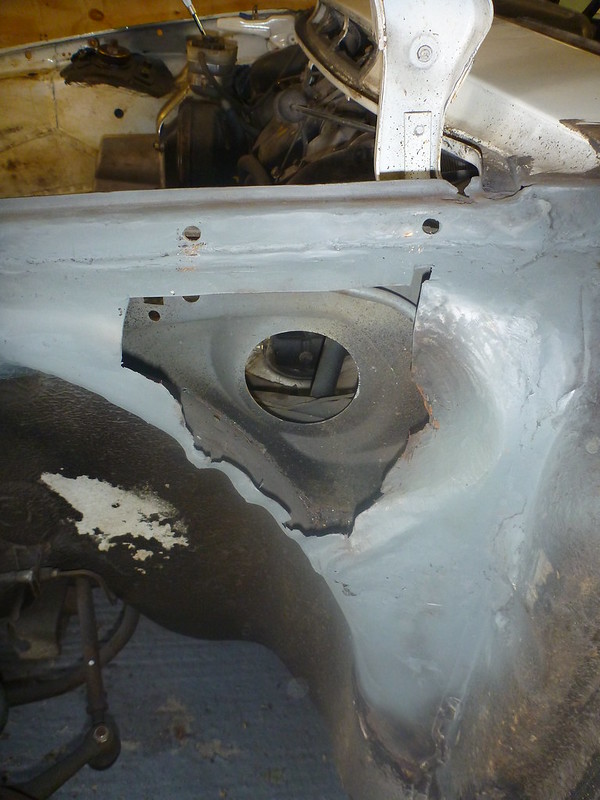
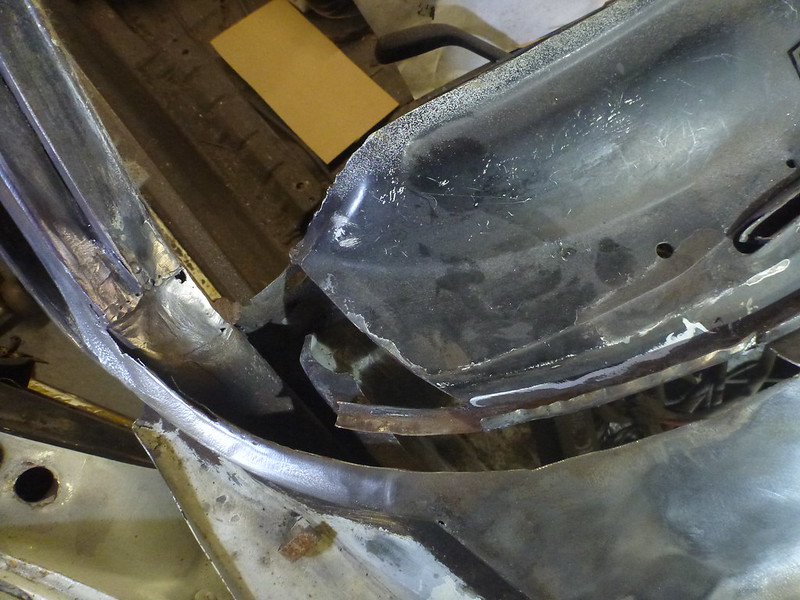
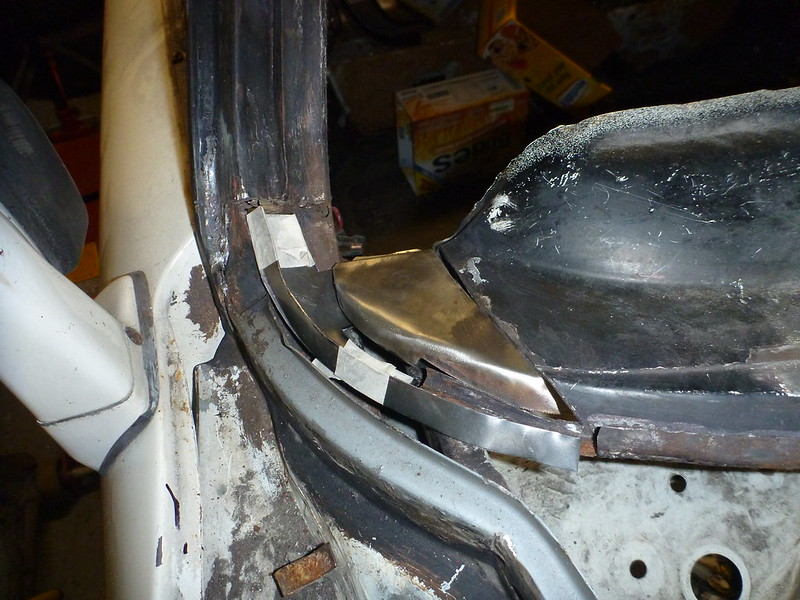
and trim the body to suit the patch
Image

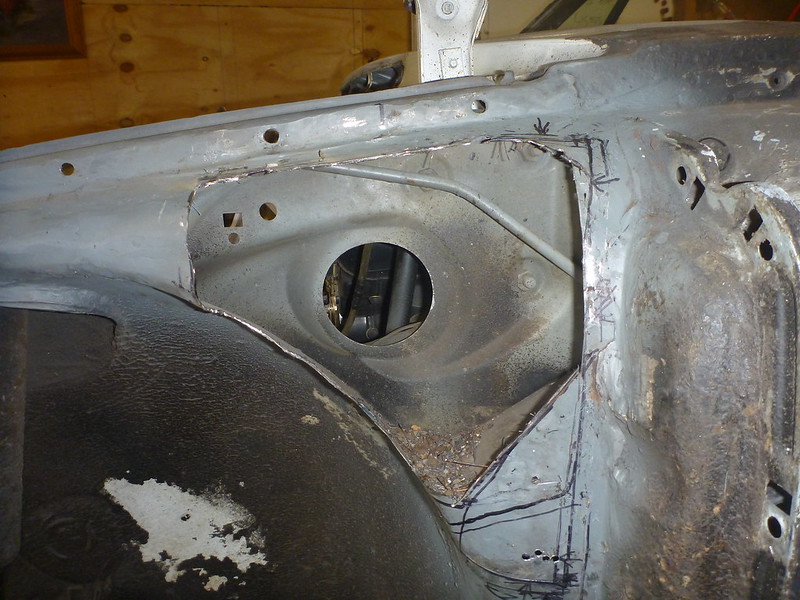
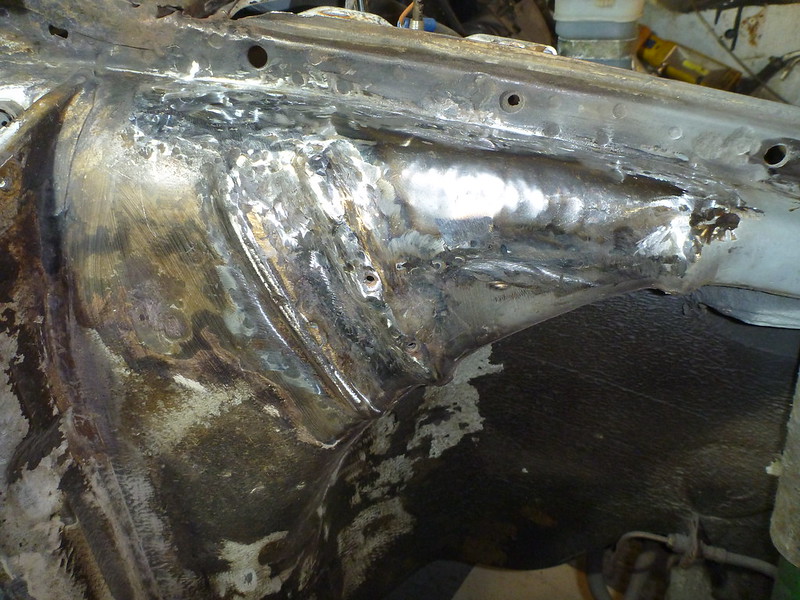
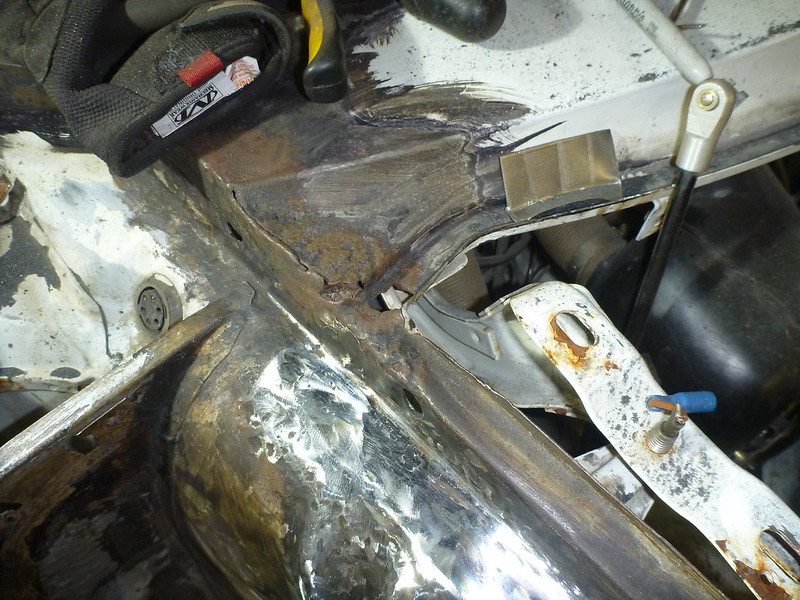
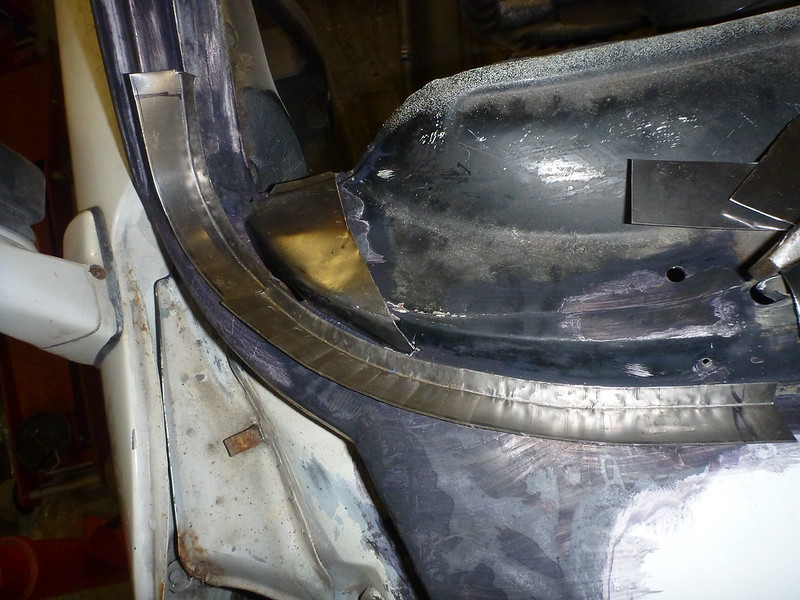
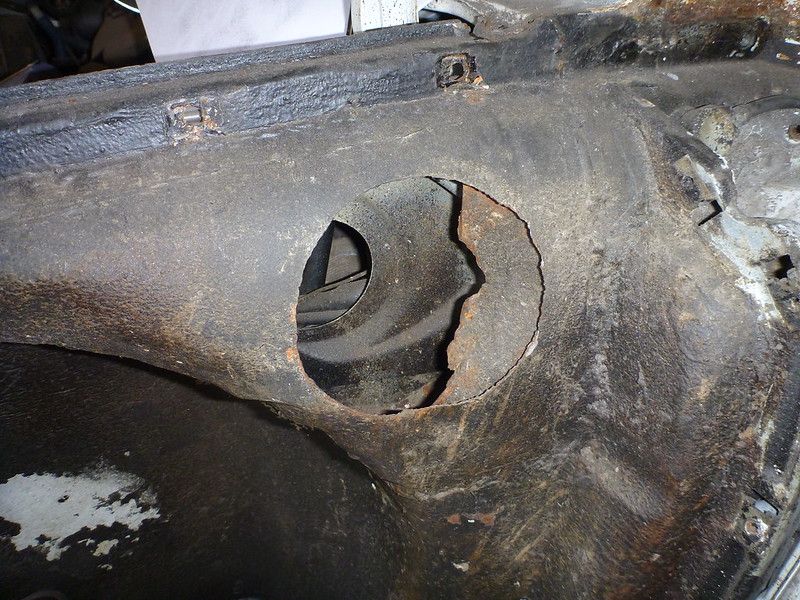
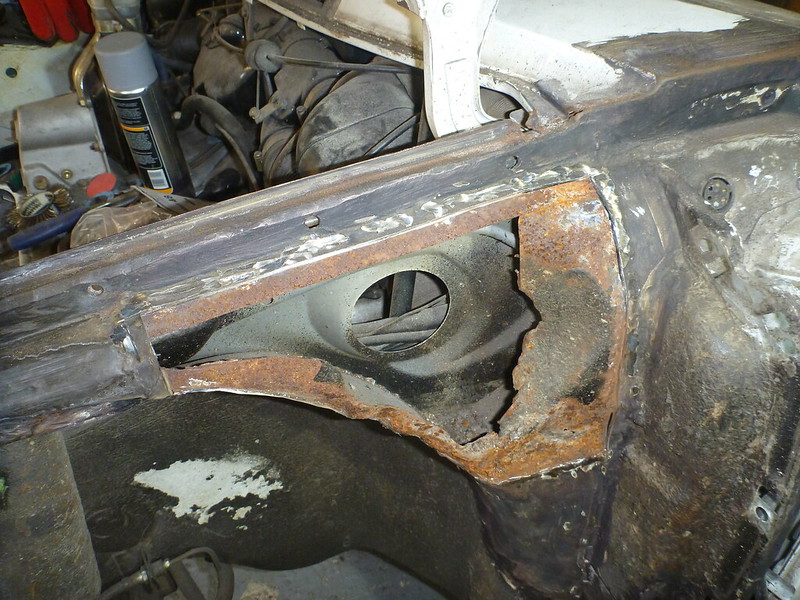
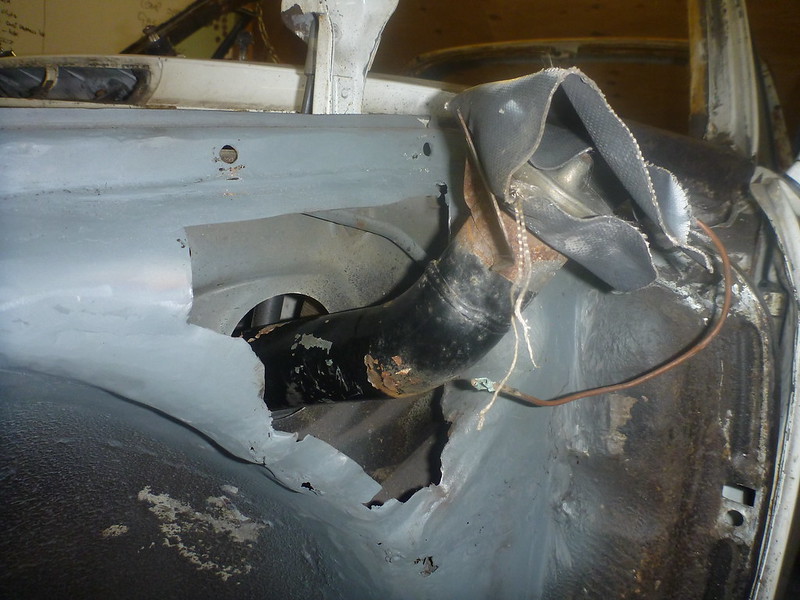
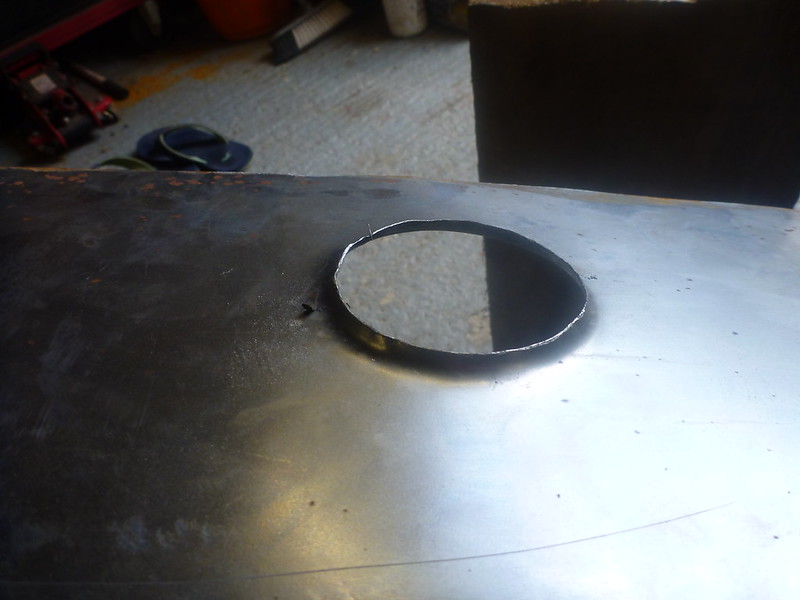
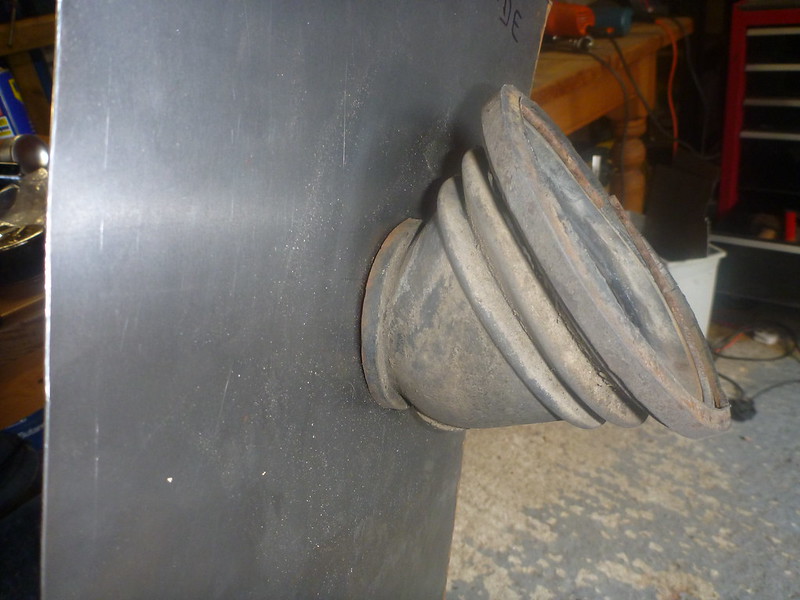
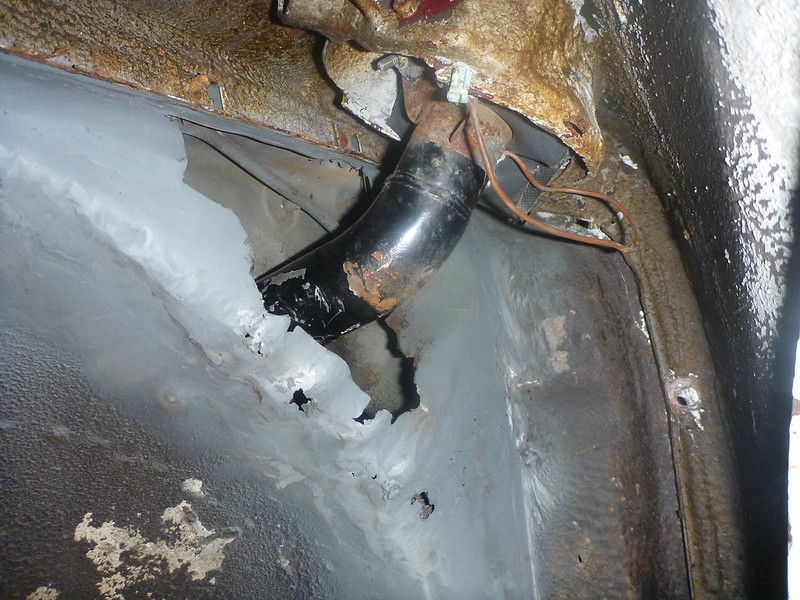
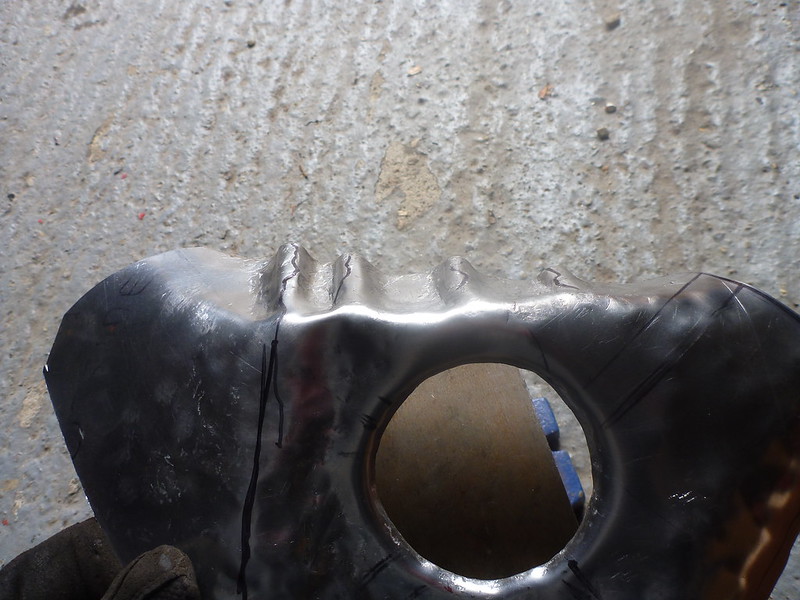
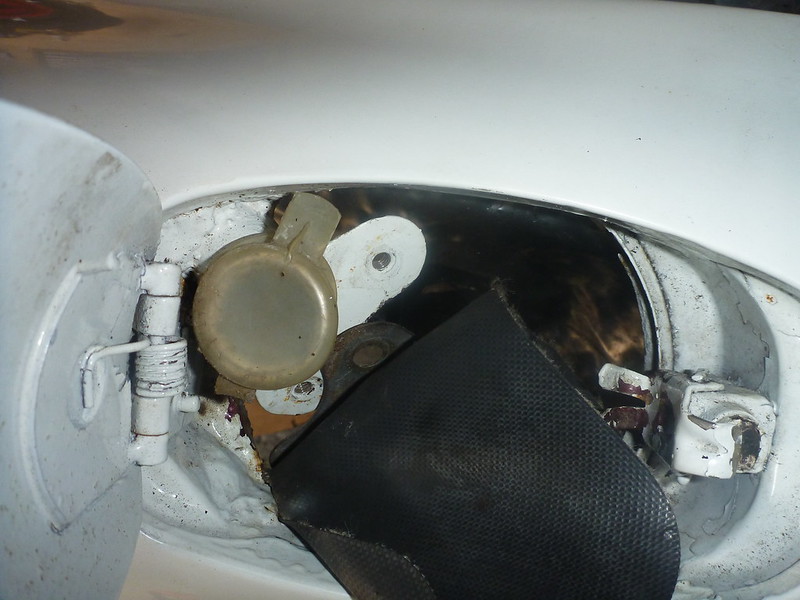
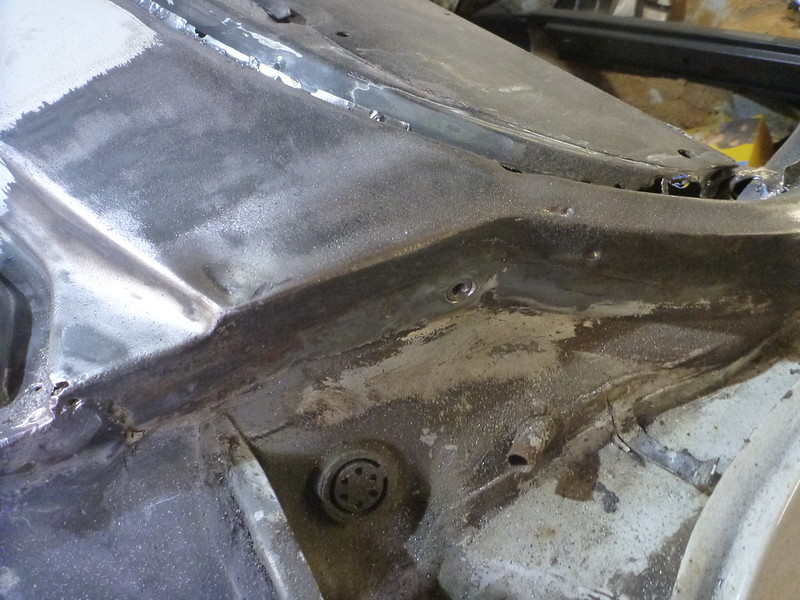
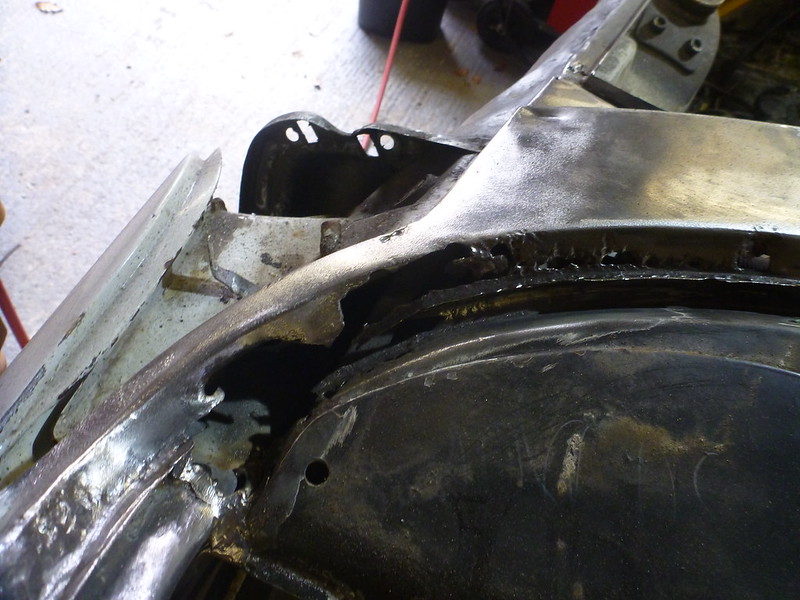
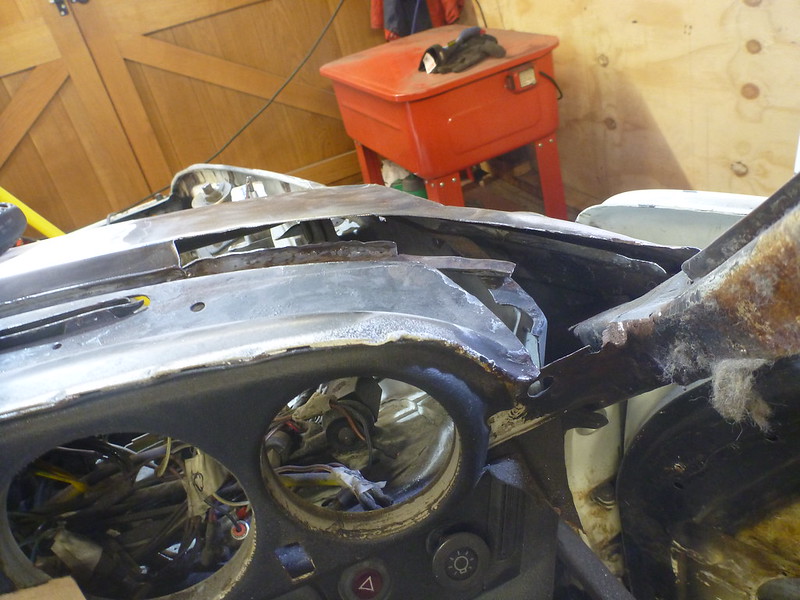
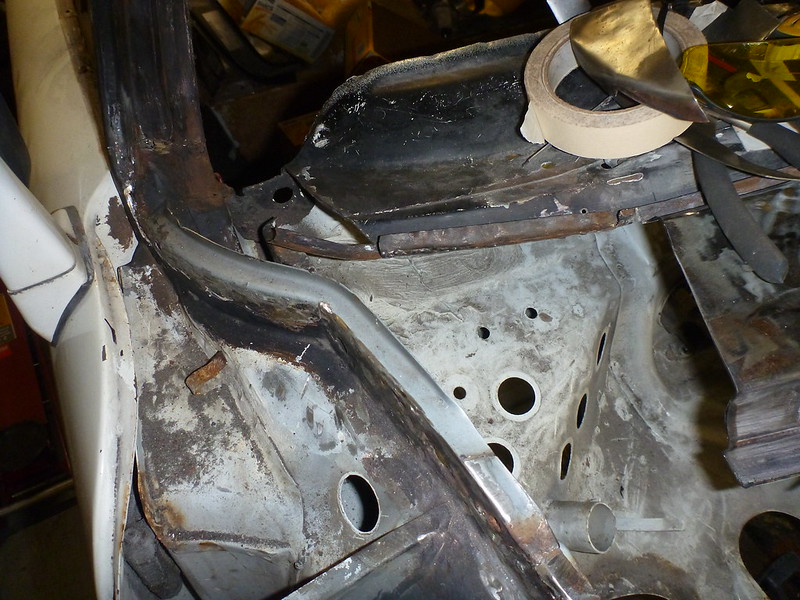
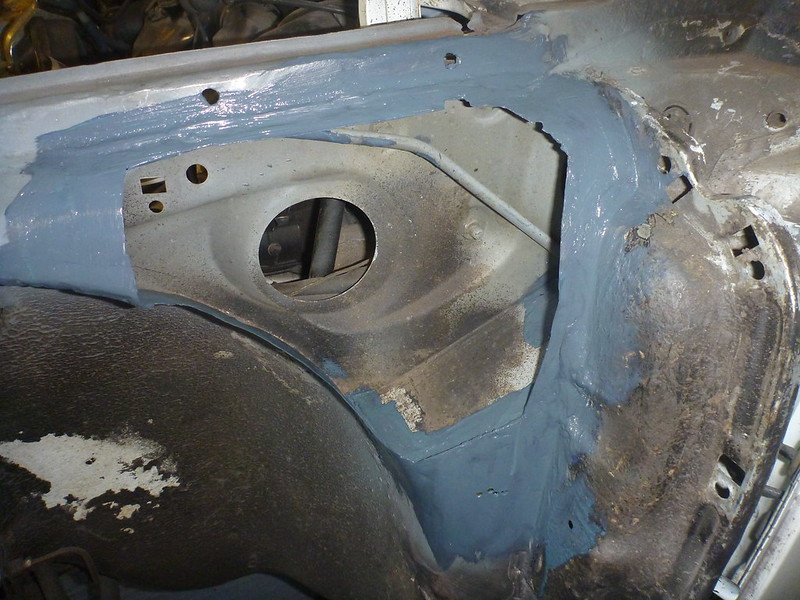
The wing must have been on and off 6 or more times as I check the positioning of the fuel filler pipe, trying to centre it in the hole. You can also see the array of holes where I repositioned the patch panel trying to get the filler pipe in the right place in space. Also, having trimmed the body, I realised that not only had a large lapped panel been fitted previously (which I removed at the start of this), but also someone had tried filling small holes and left a veritable porcupine of MIG wire inside
Image

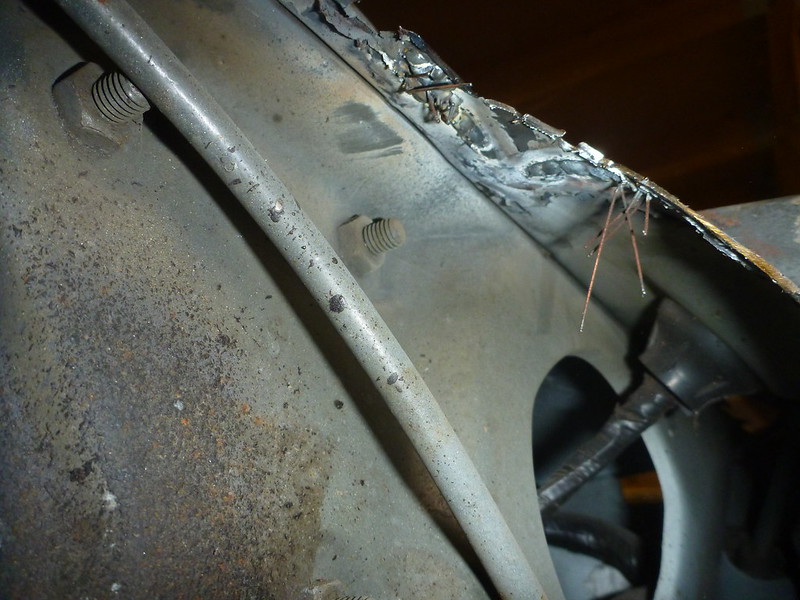
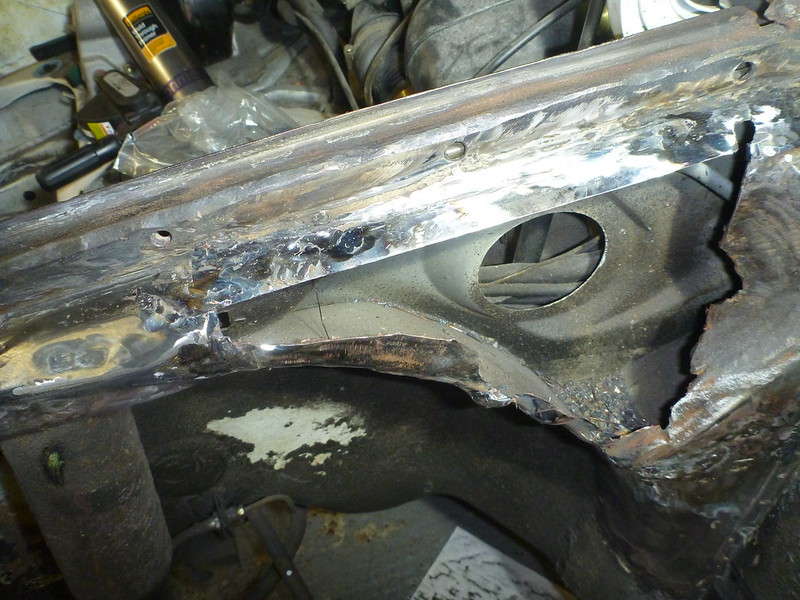
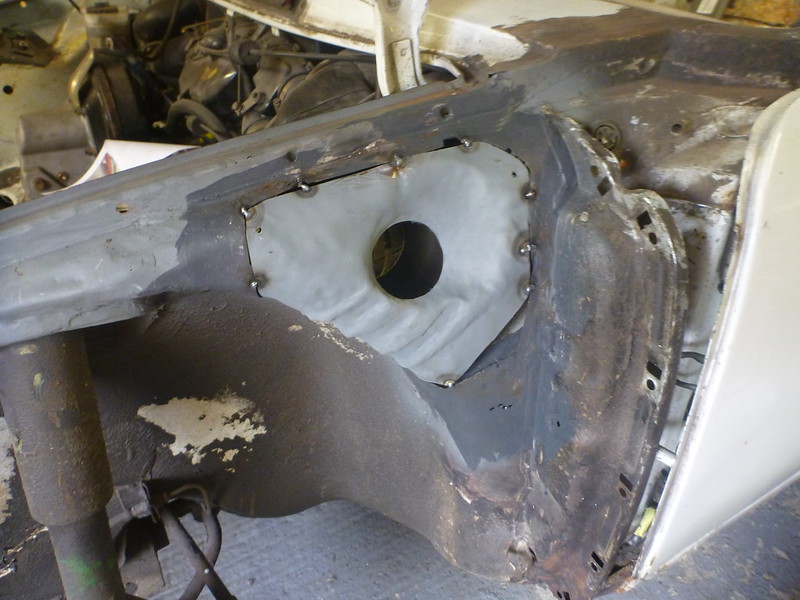
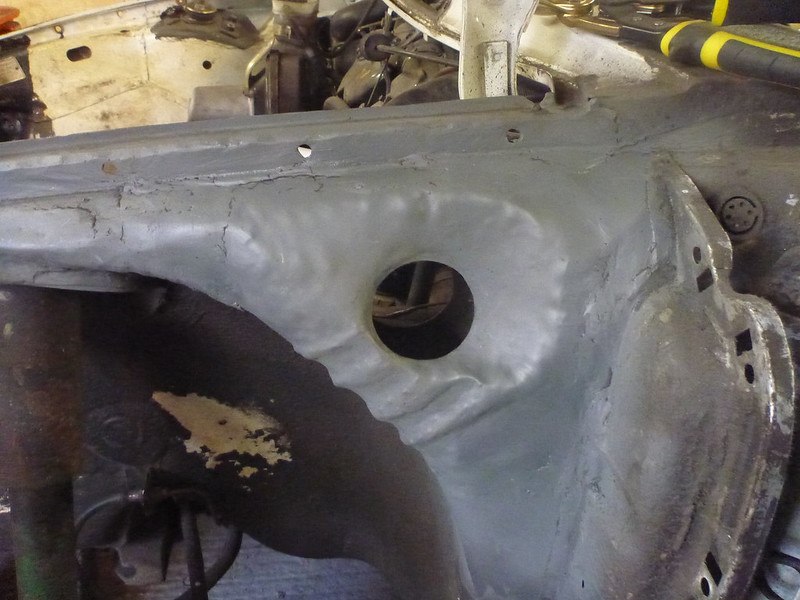
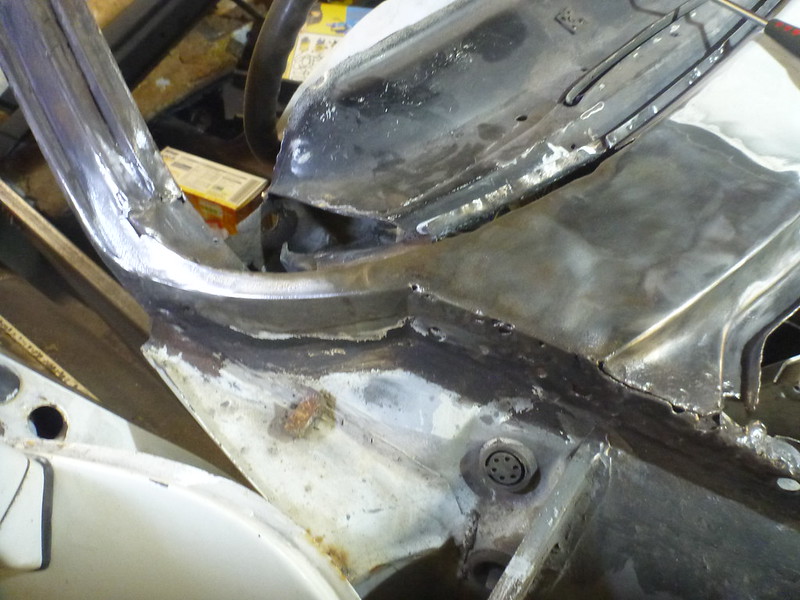
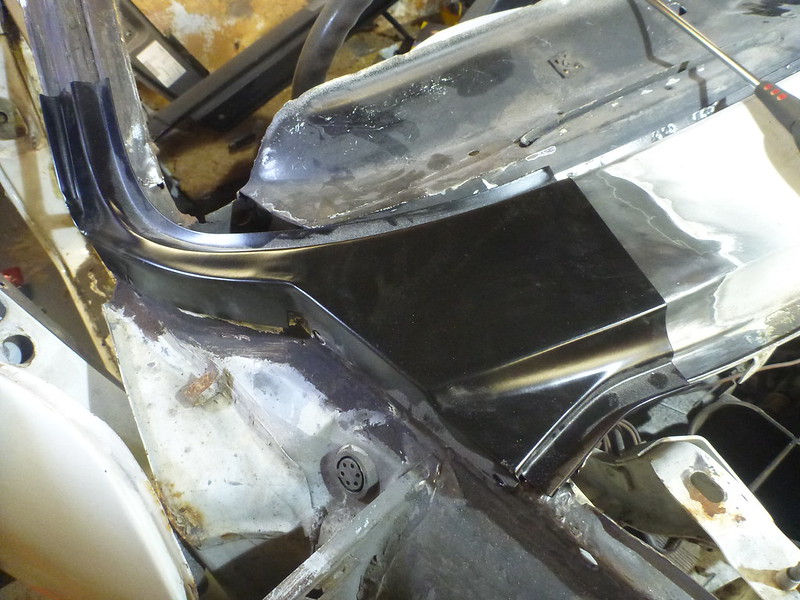
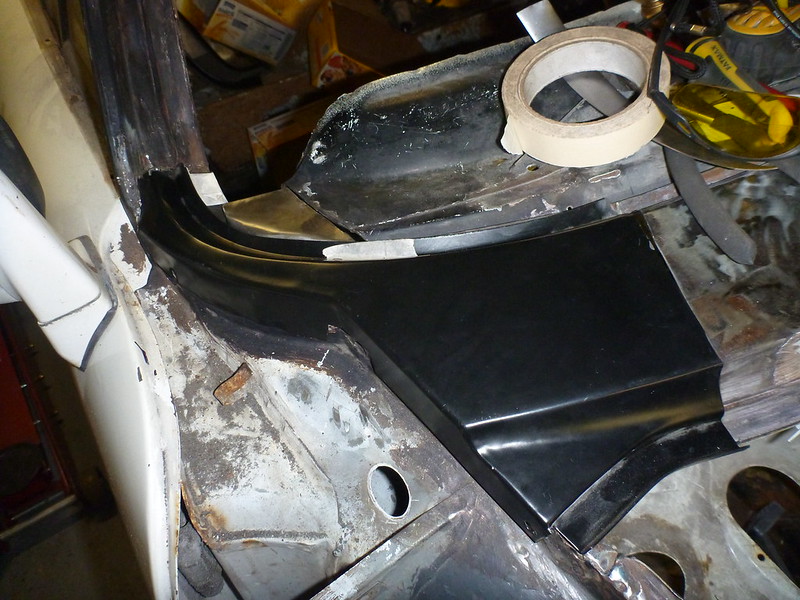
So I cut more out, and will need a patch on my patch now. Anyway, the body is ready and primed.
Image

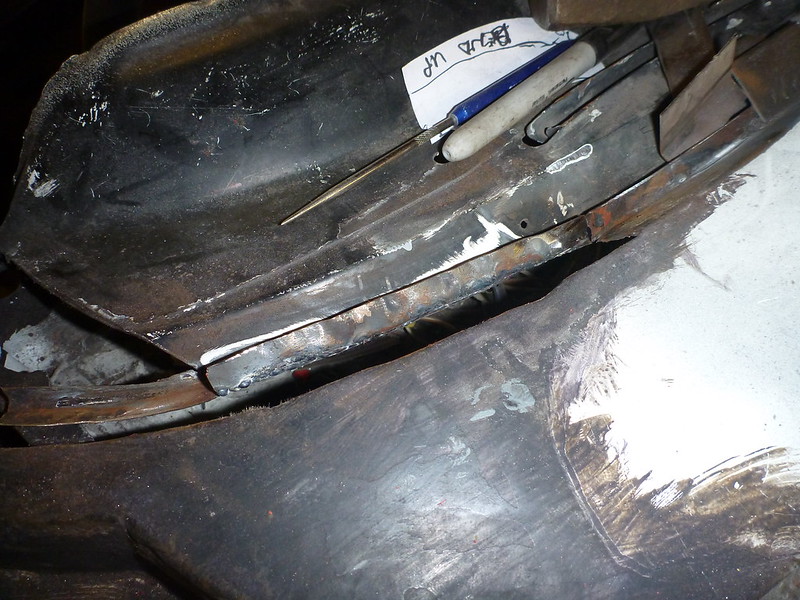
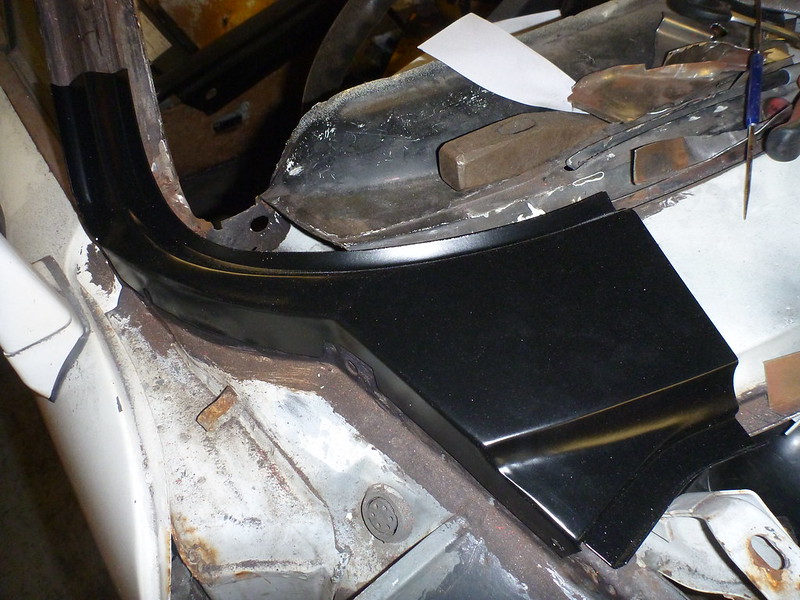
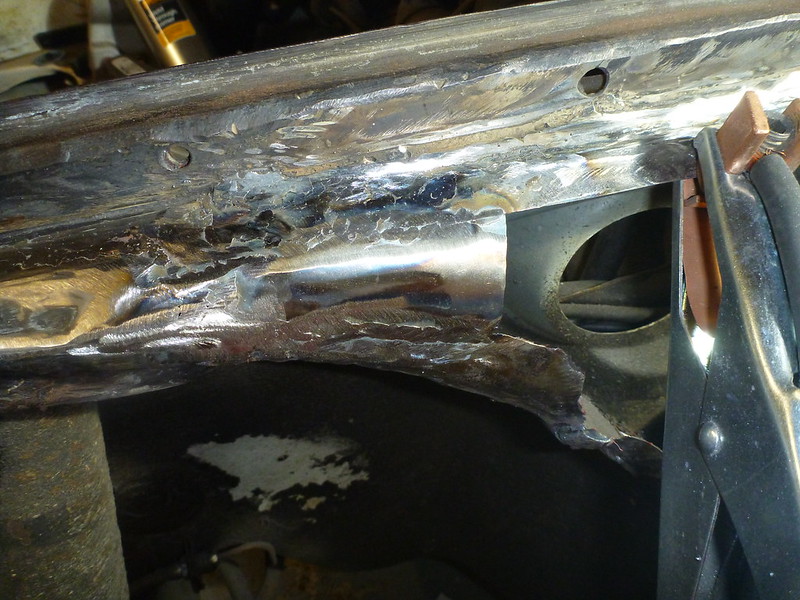
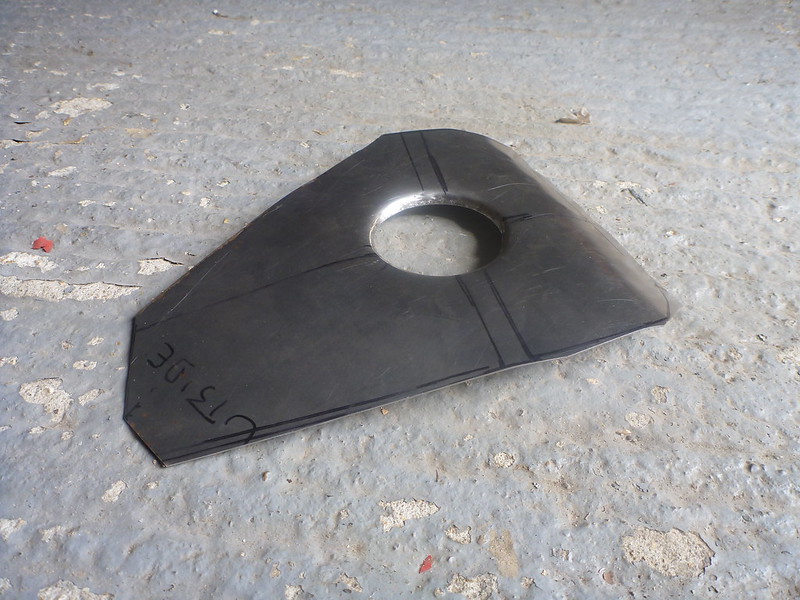
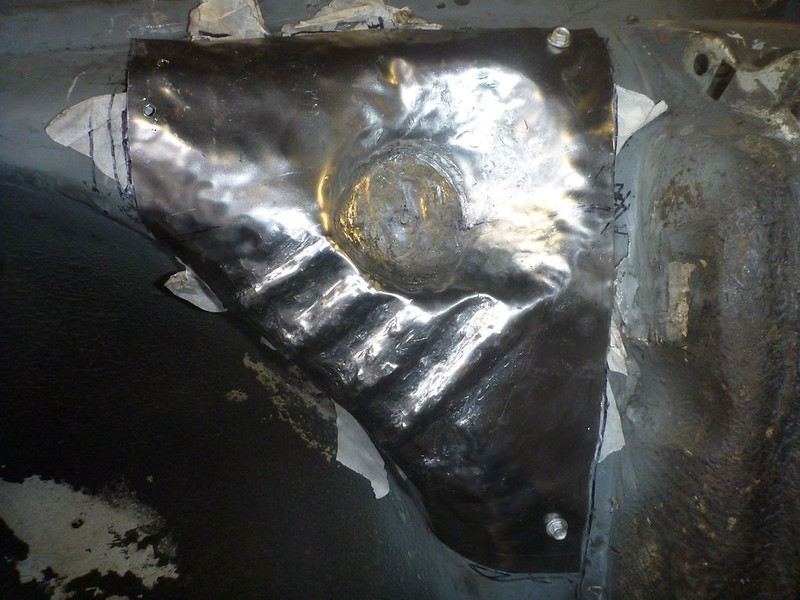
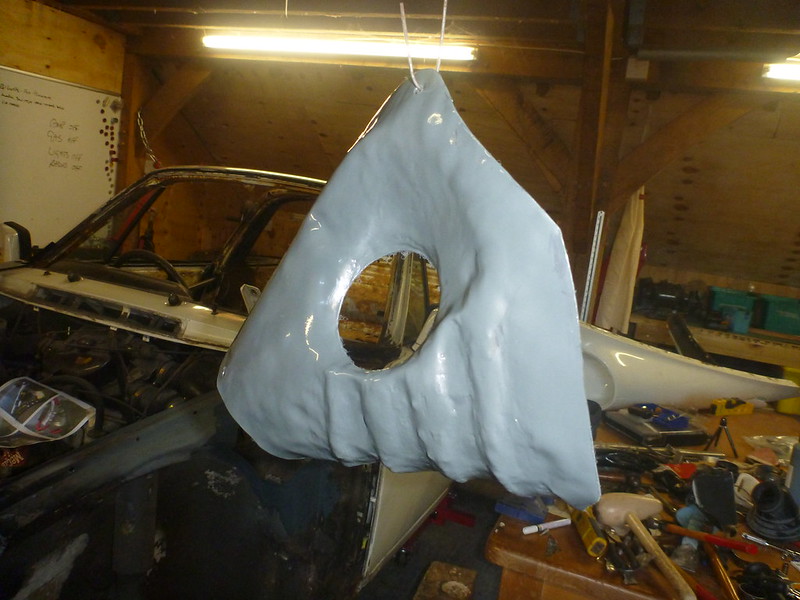
as is the patch panel itself. Not even close to the quality that Barry turns out, but it fits (where it touches) and Stevie Wonder thinks it's passable once the wing hides it.
Image

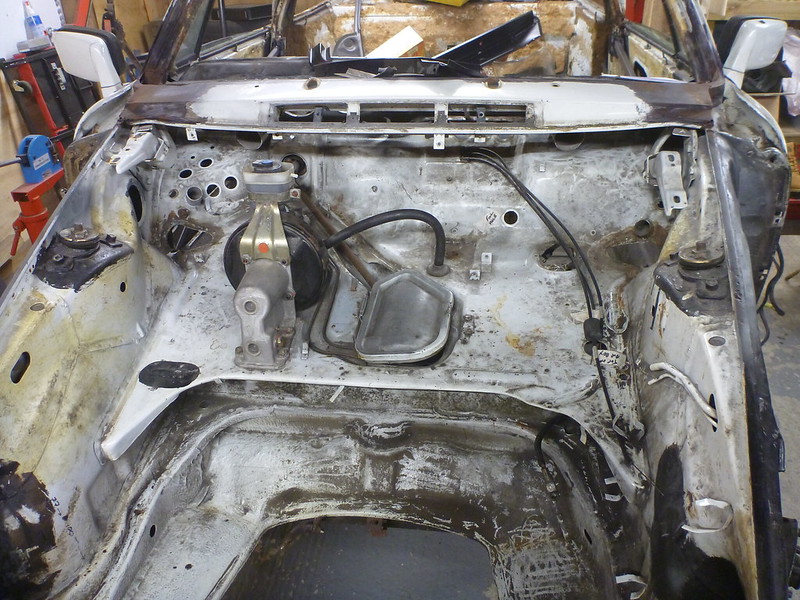
Welding to follow. I’ll initially just tack it in and check that the fuel filler is in the right place before I commit to full welding.
'79 Targa - restoration now mainly complete & being driven
viewtopic.php?f=28&t=59756
User avatar
PeterK
DDK rules my life!
Posts: 1069
Joined: Mon Sep 01, 2014 3:04 pm
Location: GU51 - Fleet, Hampshire, UK

Re: Wot, not another '79 Targa resto thread

Post by PeterK »

Quick update. Now that sailing has probably finished for this year (may get another gig, but nothing in the diary at the moment), I’ve snuck into the garage for a couple of hours.

So I tacked the patch into the nsf inner wing, put the outer wing back on and checked that the petrol filler was in the right place.
Image

Remarkably it was, so happy days and on with the welding, including patching the extra areas that were too thin once I got there, and a quick splash of weld through primer (I know that I should use epoxy primer, but I had a spray can of weld thru’ right next to me, and I needed a cup of tea).
Image

I didn't grind some of the welds completely flush this time, not wanting to thin the metal too much, plus they will be disguised with epoxy primer and underseal :wink: .

Anyway, thinking of getting a pressure pot at the NEC if I can find a good offer, and soda blasting the inner wings and repair areas prior to epoxy priming. Thoughts ????

Next time in the garage will be back onto the scuttle / windscreen corner.
'79 Targa - restoration now mainly complete & being driven
viewtopic.php?f=28&t=59756
User avatar
PeterK
DDK rules my life!
Posts: 1069
Joined: Mon Sep 01, 2014 3:04 pm
Location: GU51 - Fleet, Hampshire, UK

Re: Wot, not another '79 Targa resto thread

Post by PeterK »

So, just ahead of my travels, I grabbed some me time in the garage this afternoon.
After a quick tidy up, I took the paint off the windscreen corners and also removed the ‘structural’ filler !

Image

Image

Image

Image

Image

Image

I’ve bought a patch panel for this OSF corner
Image


Anyway, onto the welding and I decided to start with welding a small hole up, using a block of copper behind to weld upto. Got everything ready and started to weld. Almost immediately, the welder started spitting. I’d run out of gas ! My previous bottle lasted 5 years, this one only 6 moths. Maybe that has something to do with the Lotus being fibreglass and the Porkie being steel and rust. Hey ho, it will have to wait until I get back from my travels now.


In other news, lots of views but almost no comments. Is this thread of interest, and rather than post day by day as I progress (or not), should I save things up and just post a shedload of update in one go ?
Peter
'79 Targa - restoration now mainly complete & being driven
viewtopic.php?f=28&t=59756
stichill99
DDK Fanatic
Posts: 96
Joined: Tue May 31, 2011 9:20 pm

Re: Wot, not another '79 Targa resto thread

Post by stichill99 »

I think all build threads are of interest and especially so the diy ones. Its really interesting to see how an amateur gets on with shaping and welding. Carry on :cheers:
911hillclimber
Nurse, I think I need some assistance
Posts: 18932
Joined: Mon Mar 10, 2008 6:26 pm
Location: West Midlands

Re: Wot, not another '79 Targa resto thread

Post by 911hillclimber »

Every one who does a big thread on their project finds times where there seems to be zero response for lots of inputs and you wonder if it is worth it.
I've run 5 big threads over the last 10 years on various sites, always the same, it's normal.
The hits prove the interest more than the posts IMHO.
73T 911 Coupe, road/hillclimber 3.2L
Lola t 492 / 3.2 hillclimb racer
Boxster 987 Gen II 2.9
User avatar
hot66
Moderator
Posts: 18274
Joined: Tue Nov 11, 2003 4:17 pm
Location: North Yorkshire

Re: Wot, not another '79 Targa resto thread

Post by hot66 »

Keep,posting ... Love resto threads.
James

1973 911 2.4S
1993 964 C2
2010 987 Spyder
1973 MGB Roadster

Its not how fast you go, but how you go fast ;)
User avatar
inaglasshouse
DDK 1st, 2nd and 3rd for me!
Posts: 2427
Joined: Fri Mar 28, 2014 9:35 pm
Location: Surrey, UK

Re: Wot, not another '79 Targa resto thread

Post by inaglasshouse »

911hillclimber wrote:Every one who does a big thread on their project finds times where there seems to be zero response for lots of inputs and you wonder if it is worth it.
I've run 5 big threads over the last 10 years on various sites, always the same, it's normal.
The hits prove the interest more than the posts IMHO.
Yes, this.
I have a thread going that's 29 pages already and we're not even at paint. It's mostly for my own amusement, but I do occasionally wonder if anyone else is looking at it.
Turns out plenty of kind folks are reading, as I found out last month at Hedingham.
Thanks for posting!
Cheers, Richard.
User avatar
PeterK
DDK rules my life!
Posts: 1069
Joined: Mon Sep 01, 2014 3:04 pm
Location: GU51 - Fleet, Hampshire, UK

Re: Wot, not another '79 Targa resto thread

Post by PeterK »

No I've not welded myself to the SC, but I am back from my hols, and even been out on the motorbike - to the Ace Café Porsche night (hats off to those that actually drive into London – it’s bad enough on the bike, where I can at least make progress between the lines of slow moving traffic).

Anyway, on the SC front some progress has been made, although it doesn’t really look like it. Ahead of any more welding on the scuttle, I have removed the ventilation gubbins from the froot, the wiring and had a general clean up with the vacuum cleaner.

Looking a little better in there now
Image
Obviously still need to remove the heater control sliders, steering and the brake master cylinder.

Unfortunately one of the terminal snapped off the fuel pump while trying to disconnect the wiring – has anyone repaired this damage before, or is it new pump time ?
'79 Targa - restoration now mainly complete & being driven
viewtopic.php?f=28&t=59756
User avatar
PeterK
DDK rules my life!
Posts: 1069
Joined: Mon Sep 01, 2014 3:04 pm
Location: GU51 - Fleet, Hampshire, UK

Re: Wot, not another '79 Targa resto thread

Post by PeterK »

Well, a bit more playtime and the heater controls are out. The steering will stay for a while, as I need to put the wheels back on, roll the body out and clean all the cr4p off the surfaces previously covered by the wiring and ventilation pipework.

Following a bit (well quite a lot if truth be told) of a clear up, involving vaccuming an incredible amount of grinding detritus from the inside of the car, putting all the tools back in their proper places so I can find them next time, sweeping the floor, it was time to get back to the windscreen surround & front scuttle.

I wasted a huge amount of time trying to mock up a new flange for the near side, including getting the windscreen down from the loft for a test fit. In the end I think getting this area right is too important. Its curves in three dimensions (and probably the fourth dimension with all the time I’m taking) must be right to ensure a leak free dash, so even though at first it didn’t look too bad, I’ll bite the bullet, open the wallet and buy a patch panel. Most will be discarded, but the flange area will be right.

Moving onto the OSF, where I had already given up and bought the patch panel, I got my brave pants on, drilled out numerous spot welds, and cut the end of the scuttle away. I melted the lead from the base of the A-pillar, cut away the poor material on the A-pillar and scuttle and trimmed the patch panel (poorly as it turns out, but never mind, that’s what welders are for!).
Now I’m left with a big hole
Image

Once the patch panel is welded in, it will be somewhere between awkward and impossible for a mere mortal like me to weld in the flange on the dash, so I spent an enjoyable, frustrating and ultimately unsuccessful period trying the make the dash patch from one, then two pieces. In the end I admitted defeat and decided to make 2 new patches – the flange edge and the base / channel to bridge from here to the dash end I had previously fabricated. I used masking tape to hold the flange edge and channel together
Image

then added the dash end
Image

and finally the trimmed scuttle patch panel
Image

Stew and dumplings for tea, so welding will have to wait for another day.
'79 Targa - restoration now mainly complete & being driven
viewtopic.php?f=28&t=59756
Post Reply