

Thanks Gary
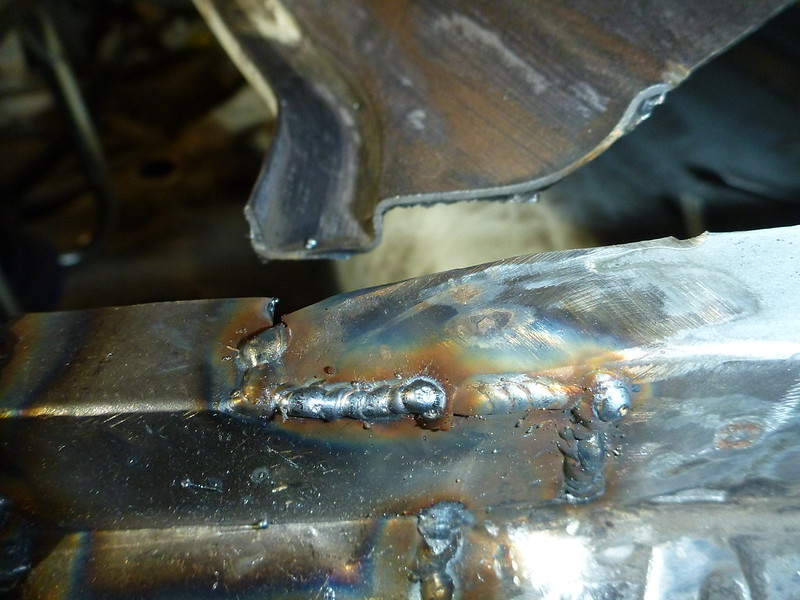
The primer was (brush on) weld though primer and although the photo shows paint still on with the clamps in place, after taking the photo I did actually flap disc some of the paint off the edges before welding. I didn't remove much, certainly not 20mm either side of the joint, more like 5-10mm. For this joint I had to bridge a 2mm gap (crap panel trimming to suit the patch), so I used a length of copper bar underneath (held by the welding clamp) to limit the snot on the underside. For the first run, I tried to use a series of widely spaced small tack welds, pretty much as 911hillclimber described. For the second run, I used probably 10mm weld runs in place of the spots as I wanted to get more heat in to the metal to ensure I got better penetration. I'll try the pulsing when I get to the other side (patch panel due sometime Tuesday).
Peter
Wot, not another '79 Targa resto thread
Moderator: Bootsy
-
PeterK

- DDK rules my life!
- Posts: 1069
- Joined: Mon Sep 01, 2014 3:04 pm
- Location: GU51 - Fleet, Hampshire, UK
Re: Wot, not another '79 Targa resto thread
'79 Targa - restoration now mainly complete & being driven
viewtopic.php?f=28&t=59756
viewtopic.php?f=28&t=59756
-
Gary71
- Nurse, I think I need some assistance
- Posts: 10274
- Joined: Wed Mar 31, 2004 1:27 pm
- Location: Cheshire
- Contact:
Re: Wot, not another '79 Targa resto thread
Sounds good. I only said 20mm as it stops it burning off and covering everything in nasty smoke!
-
911hillclimber
- Nurse, I think I need some assistance
- Posts: 18924
- Joined: Mon Mar 10, 2008 6:26 pm
- Location: West Midlands
Re: Wot, not another '79 Targa resto thread
A gap of 2mm is rather wide and would prove difficult with my current welder to do without blow or wide melting.
If you look at Barrys fitting of panels he gets thing really tight.
If you look at Barrys fitting of panels he gets thing really tight.
73T 911 Coupe, road/hillclimber 3.2L
Lola t 492 / 3.2 hillclimb racer
Boxster 987 Gen II 2.9
Lola t 492 / 3.2 hillclimb racer
Boxster 987 Gen II 2.9
-
PeterK
- DDK rules my life!
- Posts: 1069
- Joined: Mon Sep 01, 2014 3:04 pm
- Location: GU51 - Fleet, Hampshire, UK
Re: Wot, not another '79 Targa resto thread
Having scribed around the edge of the patch panel, I then messed up the cutting of the original panel.
Using a block of copper behind the gap made it easier to weld the gap without blowing through and without ending up with a load of dripping snot on the underside. You can weld over the gap, but the weld doesn't stick to the copper. Without that I would have had to cut the gap wider and inserted a strip of new steel. Don't know where I saw that trick, but it certainly saved me a load of grief.
Using a block of copper behind the gap made it easier to weld the gap without blowing through and without ending up with a load of dripping snot on the underside. You can weld over the gap, but the weld doesn't stick to the copper. Without that I would have had to cut the gap wider and inserted a strip of new steel. Don't know where I saw that trick, but it certainly saved me a load of grief.
'79 Targa - restoration now mainly complete & being driven
viewtopic.php?f=28&t=59756
viewtopic.php?f=28&t=59756
-
PeterK
- DDK rules my life!
- Posts: 1069
- Joined: Mon Sep 01, 2014 3:04 pm
- Location: GU51 - Fleet, Hampshire, UK
Re: Wot, not another '79 Targa resto thread
Well a great trip to the NEC for the Classic Car Show. Thoroughly enjoyed myself, even if I didn’t buy as much as I expected (there’s a first !) Had a list of things needed, but having priced them up beforehand, I could actually get things for the same or cheaper prices, including delivery so I didn’t need to carry as much on the day. That said, I did end up with quite a trolley full even so 
Back home, I had another play with the welder following the comments from Sladey & Gary71. I found that cranking the welder up to 4 worked best for rosette welds where I had a hole in the outer panel, and 5 for pulse welding. This was the result today in the ‘real world’ and there’s plenty of penetration.
Who’s a happy (and grateful) bunny now


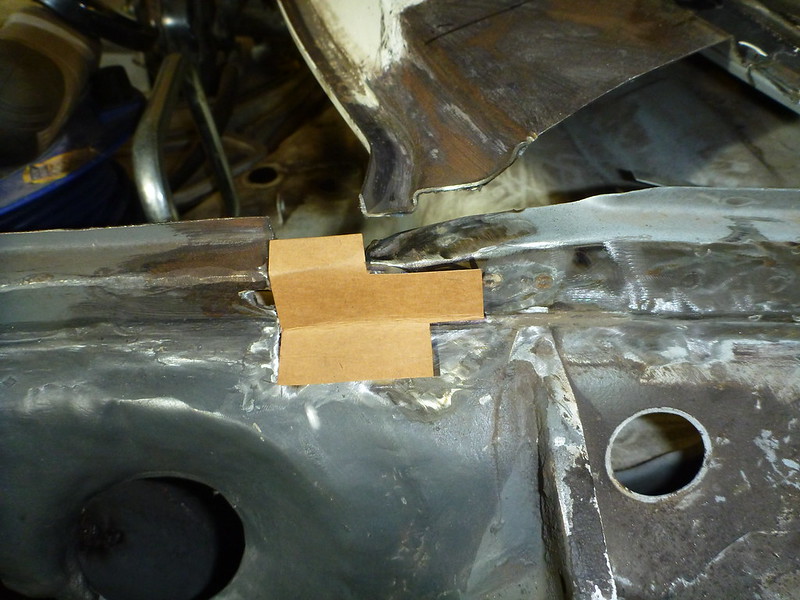
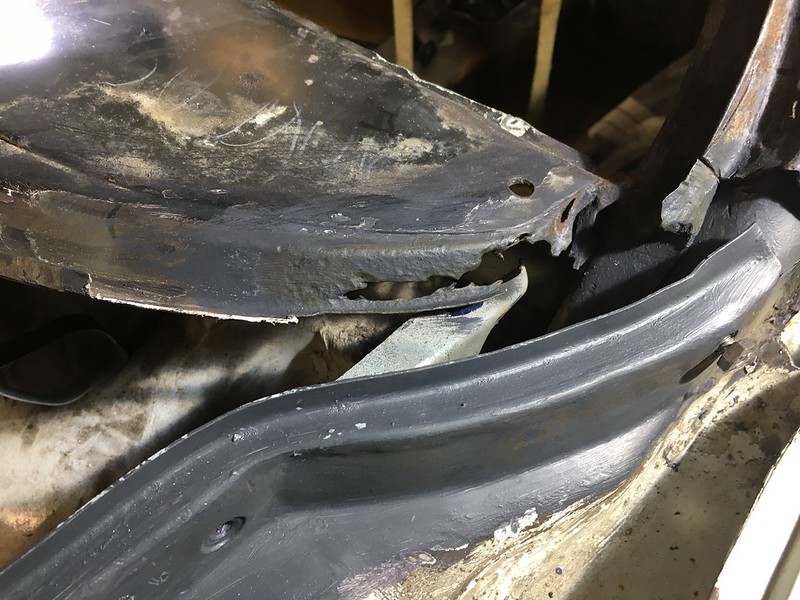
So, the patch panel for the near side end of the windscreen scuttle arrived this afternoon, and as SWMBO is away for a couple of days, playtime called. As a reminder, it is not as bad as the other side, but this is what I was faced with

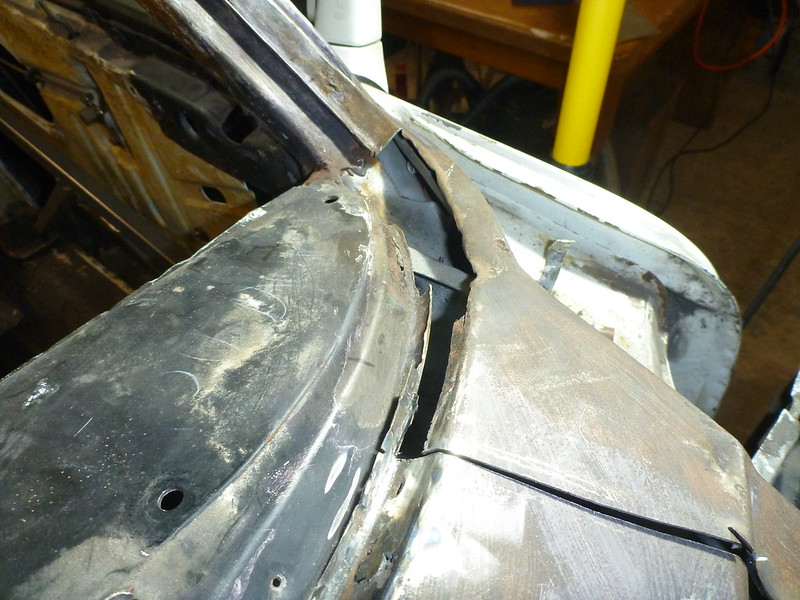
I worked out that it would probably be best (easiest ?) to trim the patch panel just under the pillar, but to use the rest

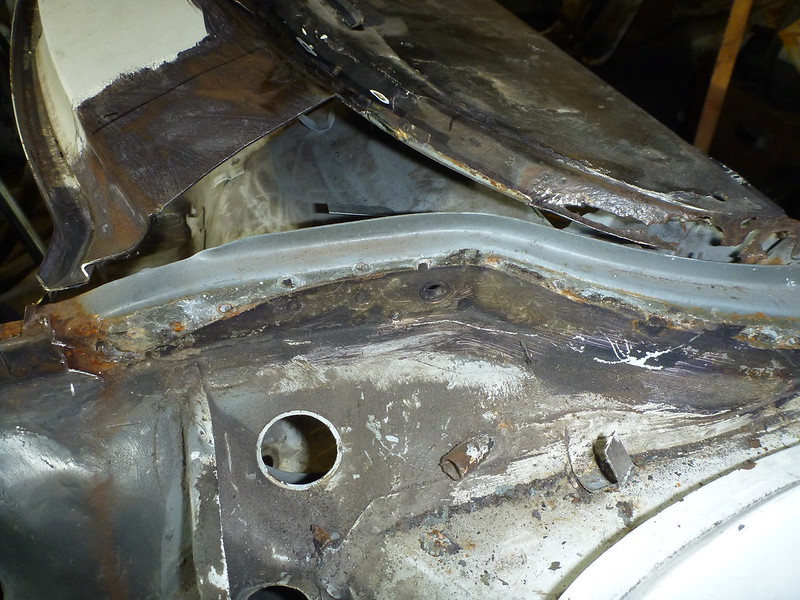
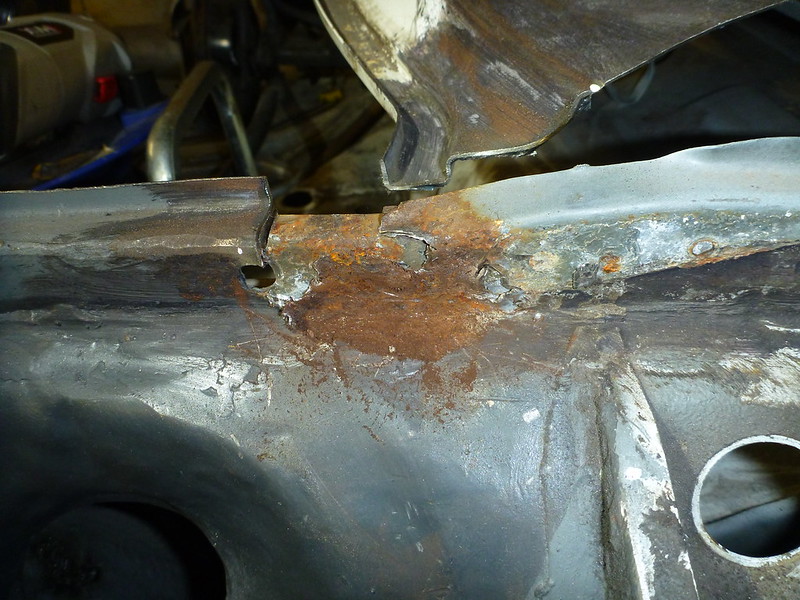
One I had roughly cut the end off the scuttle, I could see that further remedial work would be needed
A bit of marking up

some CAD
some welding

and grinding
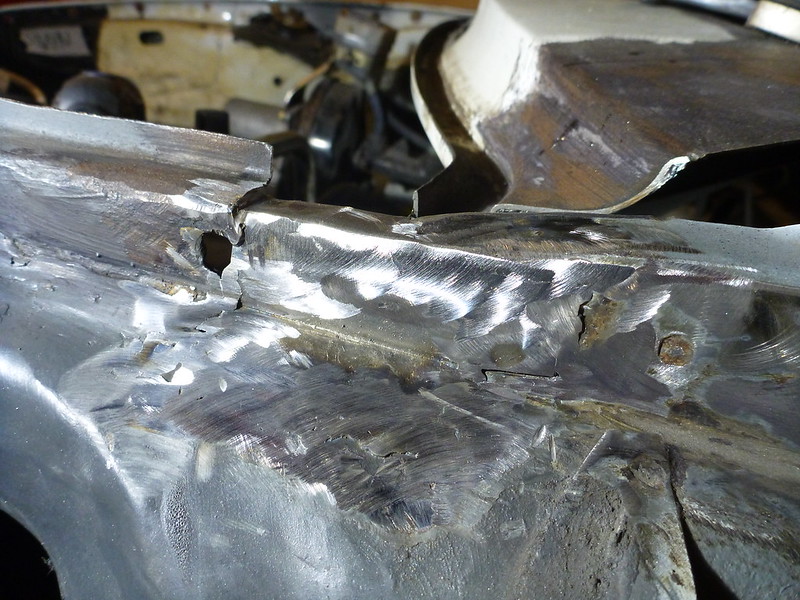
and the patch panel is fitting quite nicely on the outer edge
I now need to finish the inner wing top / gutter piece, trim the inside edge of the new patch panel and weld it all in. For today I coated in primer and called it a day. Sods law – I had ordered weld thru' primer when I got back from the NEC but it hadn’t arrived, so I had to use the trusty paintbrush again. I finished up, went in doors, the doorbell rang and it was my delivery of weld thru’ primer !
Unfortunately I’m unlikely to get time on the car for a few days now
Back home, I had another play with the welder following the comments from Sladey & Gary71. I found that cranking the welder up to 4 worked best for rosette welds where I had a hole in the outer panel, and 5 for pulse welding. This was the result today in the ‘real world’ and there’s plenty of penetration.
Who’s a happy (and grateful) bunny now
So, the patch panel for the near side end of the windscreen scuttle arrived this afternoon, and as SWMBO is away for a couple of days, playtime called. As a reminder, it is not as bad as the other side, but this is what I was faced with
I worked out that it would probably be best (easiest ?) to trim the patch panel just under the pillar, but to use the rest
One I had roughly cut the end off the scuttle, I could see that further remedial work would be needed
A bit of marking up
some CAD
some welding
and grinding
and the patch panel is fitting quite nicely on the outer edge
I now need to finish the inner wing top / gutter piece, trim the inside edge of the new patch panel and weld it all in. For today I coated in primer and called it a day. Sods law – I had ordered weld thru' primer when I got back from the NEC but it hadn’t arrived, so I had to use the trusty paintbrush again. I finished up, went in doors, the doorbell rang and it was my delivery of weld thru’ primer !
Unfortunately I’m unlikely to get time on the car for a few days now
'79 Targa - restoration now mainly complete & being driven
viewtopic.php?f=28&t=59756
viewtopic.php?f=28&t=59756
-
sladey
- Nurse, I think I need some assistance
- Posts: 8728
- Joined: Sat Apr 23, 2005 9:08 pm
- Location: Nottingham, UK
Re: Wot, not another '79 Targa resto thread
Good stuff
The simple things you see are all complicated
I look pretty young but I'm just backdated yeah
I look pretty young but I'm just backdated yeah
-
PeterK
- DDK rules my life!
- Posts: 1069
- Joined: Mon Sep 01, 2014 3:04 pm
- Location: GU51 - Fleet, Hampshire, UK
Re: Wot, not another '79 Targa resto thread
Well back on the car. I left off previously with the new scuttle end panel trimmed on the outer edge, but with the scuttle still needing to be trimmed on the inner edge.
Apologies for the pictures - not brilliant to start with, but daughter 1 has borrowed my camera for her trip to India, so it's my iphone.
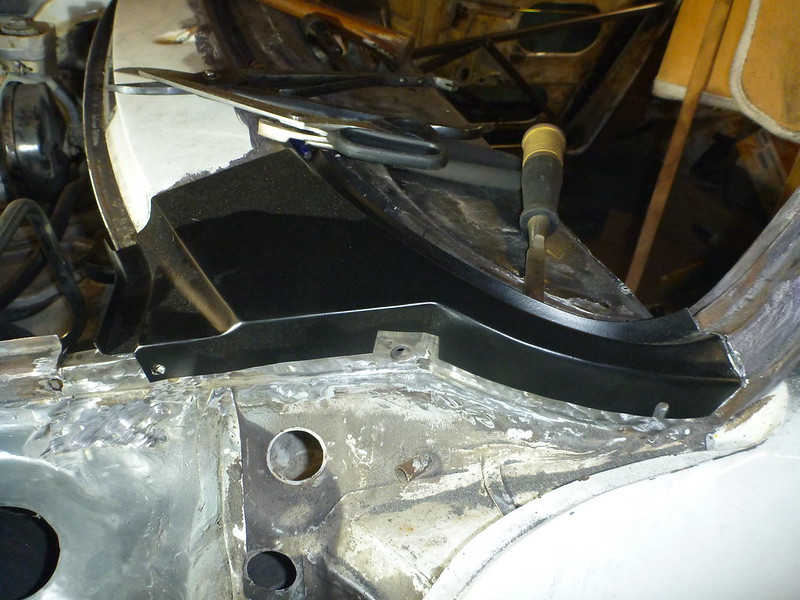
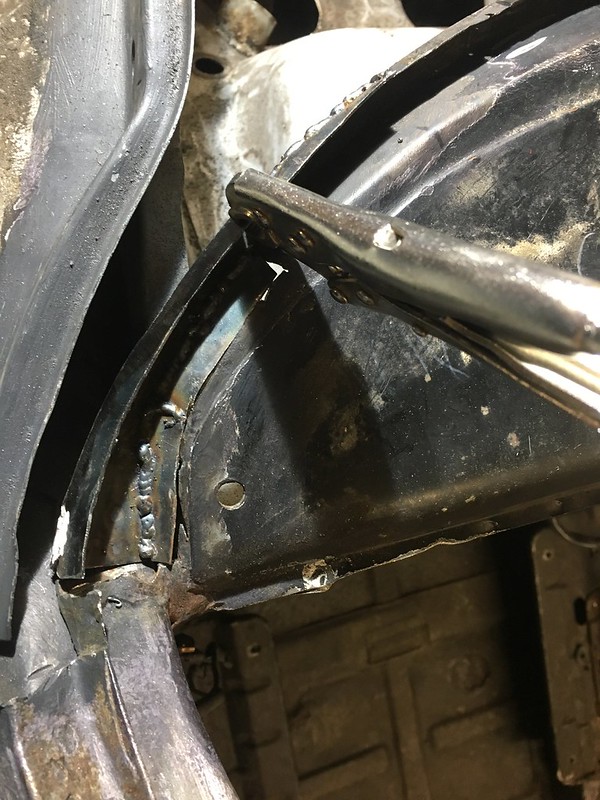
What will take just a few words to write took a couple of hours in the garage. I tried several ways to bend metal to make a patch to join the dash with the new scuttle patch panel, with its channel, compound curves, etc. In the end, I conceded defeat and just cut a number of pieces of steel and welded them all together. Finally I had something looking reasonable. Here the patch is being test fitted before final welding up and grinding.
And then back on it today. I finished off the dash end patch, cleaned it and the scuttle patch panel and coated them with some weld thru’. It was then time to weld it all in
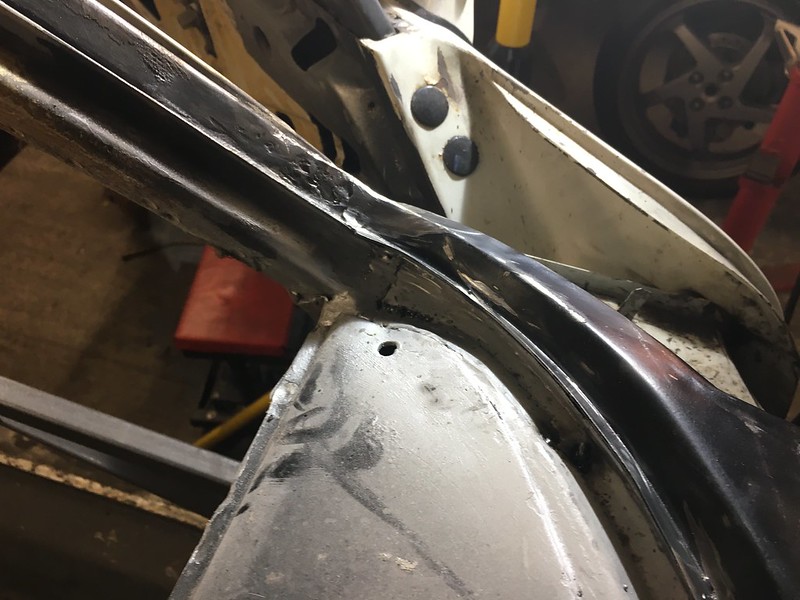
The new scuttle patch panel didn't match the profile of the original dash as well as the other side, but I cut a short slot left to right near the leading edge, a little bashing with the hammer and it looks OK to me.
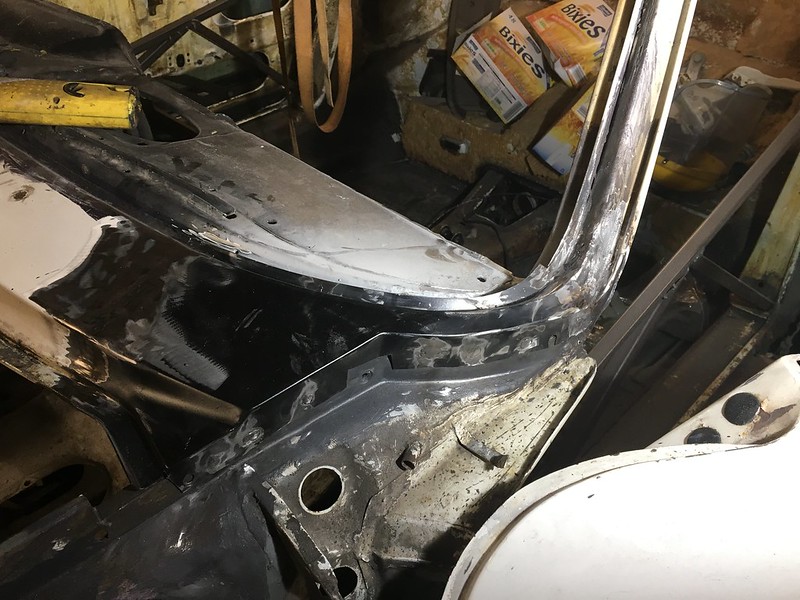
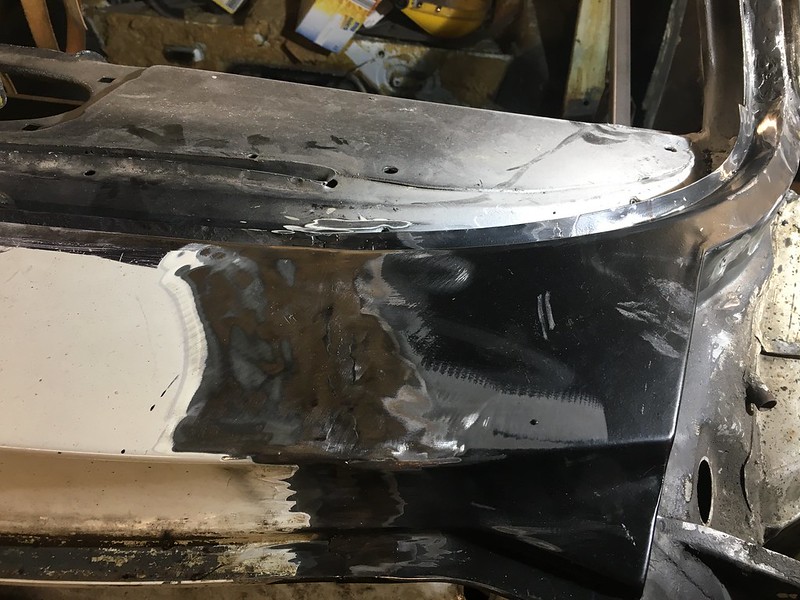
A couple of hours of welding, grinding, filling a couple of pin holes, and a coat of primer
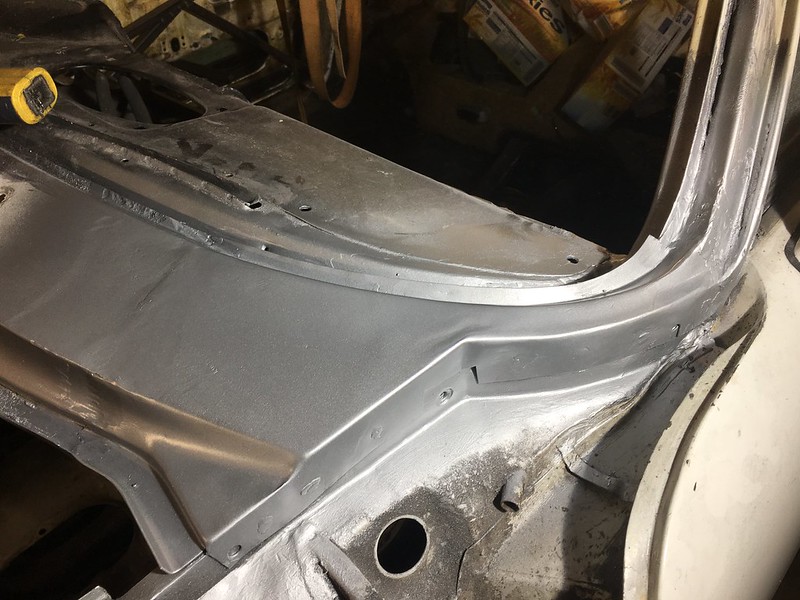
Now it's primed and with the side lighting, I can see there's a spot that needs a touch more grinding. The other 'ridge' to the left is just where I removed the original paint, but without any feathering.
I was surprised how much lead loading there was at the base of the windscreen A pillar joins the scuttle. I thought that it was steel - well until I tried welding to it
Just the channels at the top of the wings, where it joins the scuttle panel to fabricate on both sides and the windscreen area is done.
Apologies for the pictures - not brilliant to start with, but daughter 1 has borrowed my camera for her trip to India, so it's my iphone.
What will take just a few words to write took a couple of hours in the garage. I tried several ways to bend metal to make a patch to join the dash with the new scuttle patch panel, with its channel, compound curves, etc. In the end, I conceded defeat and just cut a number of pieces of steel and welded them all together. Finally I had something looking reasonable. Here the patch is being test fitted before final welding up and grinding.
And then back on it today. I finished off the dash end patch, cleaned it and the scuttle patch panel and coated them with some weld thru’. It was then time to weld it all in
The new scuttle patch panel didn't match the profile of the original dash as well as the other side, but I cut a short slot left to right near the leading edge, a little bashing with the hammer and it looks OK to me.
A couple of hours of welding, grinding, filling a couple of pin holes, and a coat of primer
Now it's primed and with the side lighting, I can see there's a spot that needs a touch more grinding. The other 'ridge' to the left is just where I removed the original paint, but without any feathering.
I was surprised how much lead loading there was at the base of the windscreen A pillar joins the scuttle. I thought that it was steel - well until I tried welding to it
Just the channels at the top of the wings, where it joins the scuttle panel to fabricate on both sides and the windscreen area is done.
'79 Targa - restoration now mainly complete & being driven
viewtopic.php?f=28&t=59756
viewtopic.php?f=28&t=59756
-
PeterK
- DDK rules my life!
- Posts: 1069
- Joined: Mon Sep 01, 2014 3:04 pm
- Location: GU51 - Fleet, Hampshire, UK
Re: Wot, not another '79 Targa resto thread
So, it’s been a while since I last updated, as some domestics rather inconveniently got in the way. However, as a break from sorting ‘stuff’ today, I did escape into the garage for a couple of hours. Despite the temperature being just above freezing and it sleeting outside, with the insulation I put into the garage walls when we first moved in I can report that I was toasty without the need for any heating .
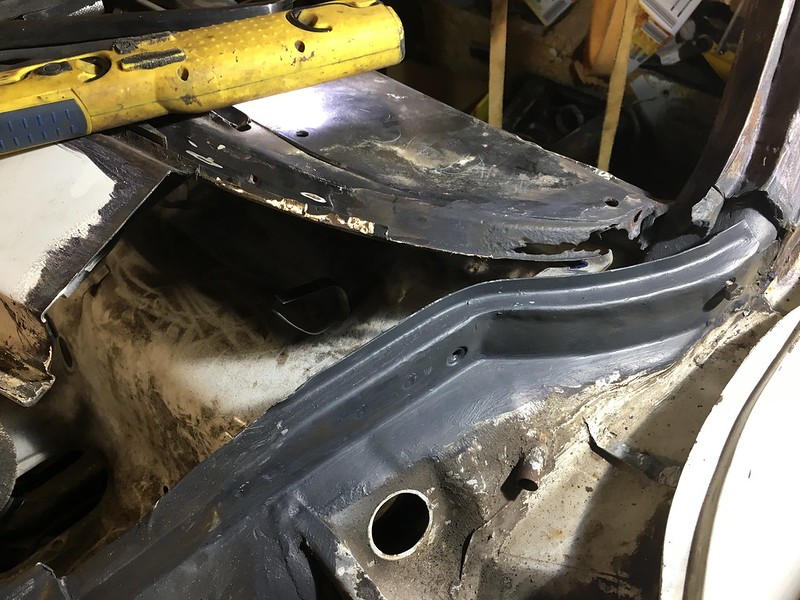
After the last update I did let a small patch into the panel ahead of the OS A-pillar
And in preparation for welding on the bumper mounting brackets, I removed all of the epoxy paint I had applied previously, cleaned the inside of the mounts to bare metal and coated all with weld through primer. They are just partially bolted on for now, and early in the New Year, with Alexcxcx back on garage bitch duties, the wings and bumpers will be fitted to ensure that the bumper brackets are in the right place before final welding.
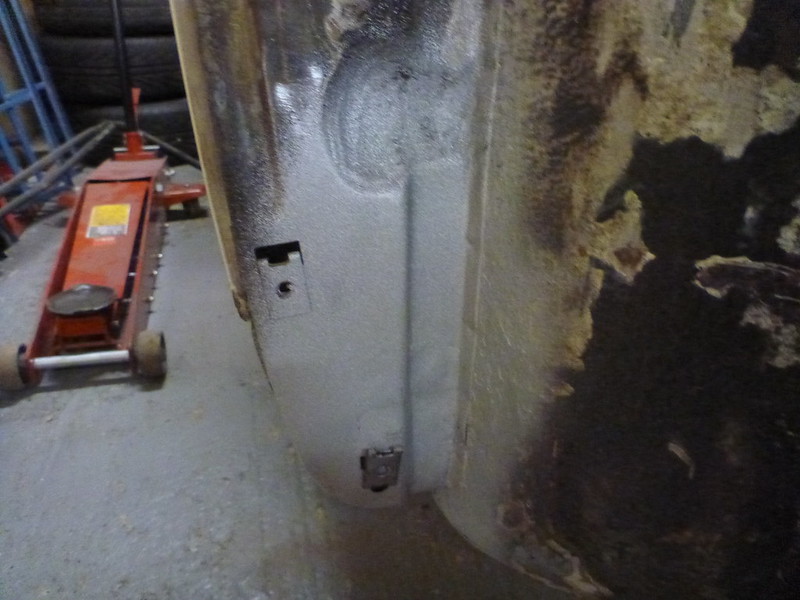
Anyway, back to today, and time to look at the doors – well the near side one to start with. Door gaps were horrendous when I bought the car – front wings had been replaced or refitted at some earlier stage of life, and fairly poorly as well. It appears that the doors were then adjusted to be in the middle of the ‘hole’.
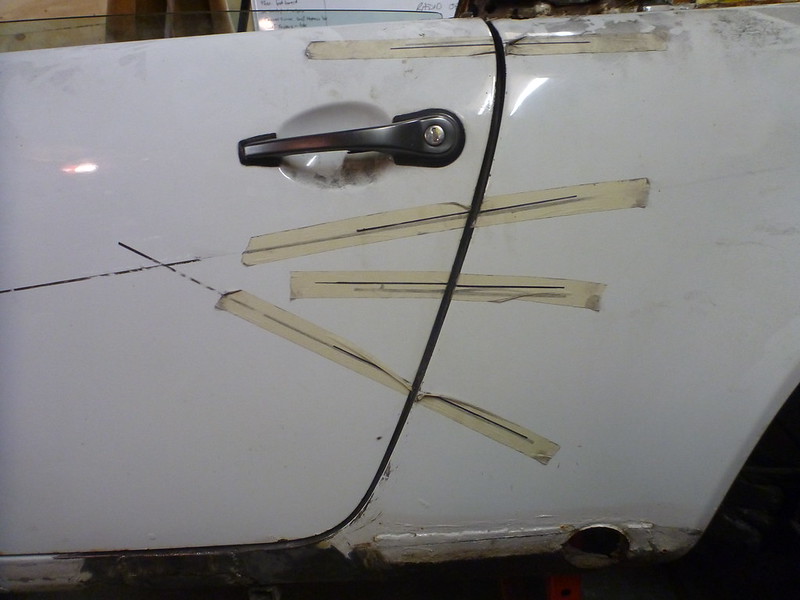
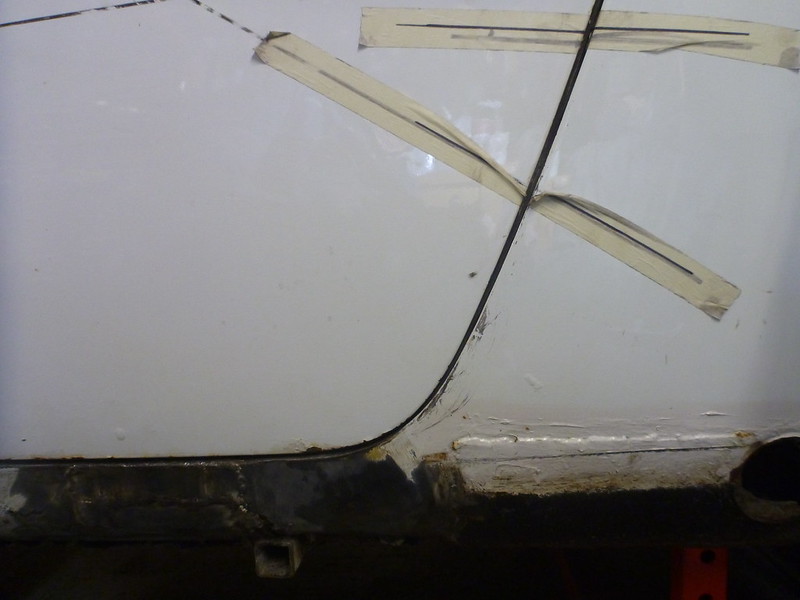
Not sure how well the photo actually shows the as found situation, but the door gaps under the door ranged from almost non-existent at the front, rising to around 8mm at the rear. There were similar variable door gaps to the B-pillar.
The tape and marker lines were my crude attempt to check for flex in the body as I jacked it up and down - luckily I couldn't discern any, so happy that the shell is still reasonably stiff before I start cutting the sills out.
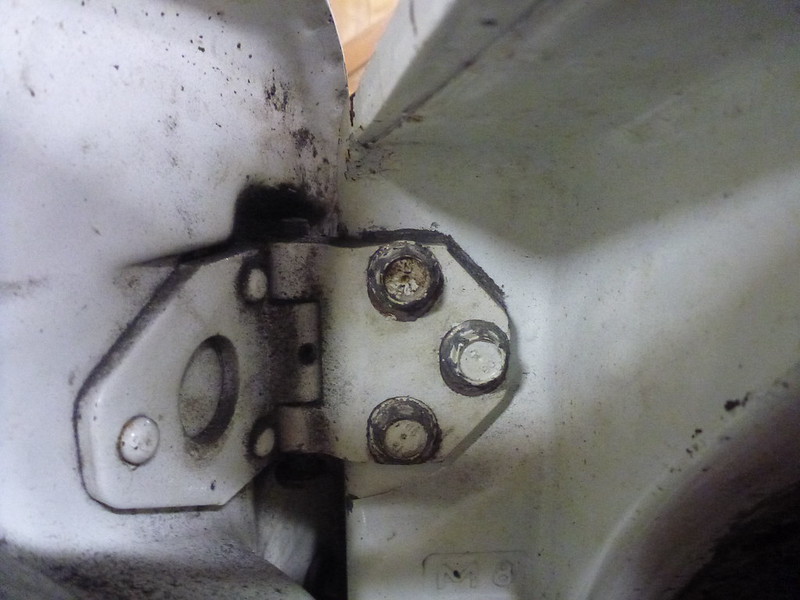
Checking the hinge mounts confirmed that they had been ‘adjusted’
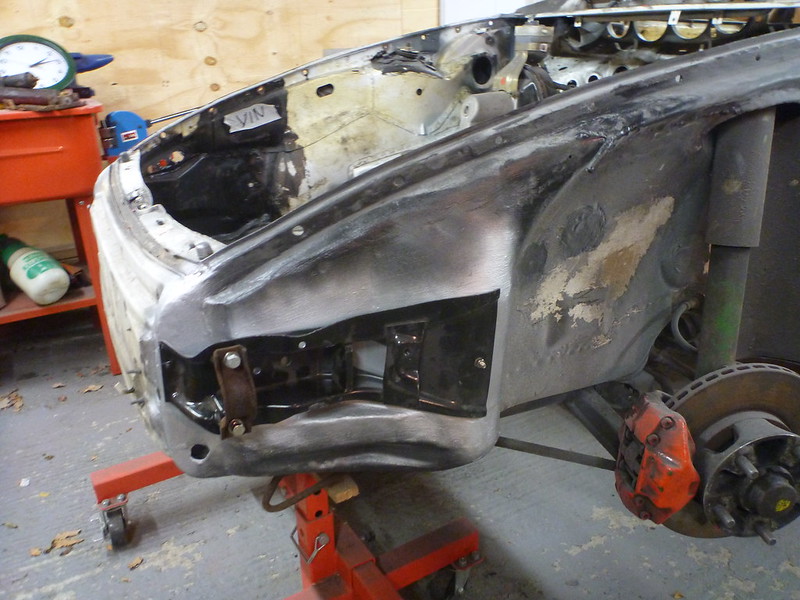
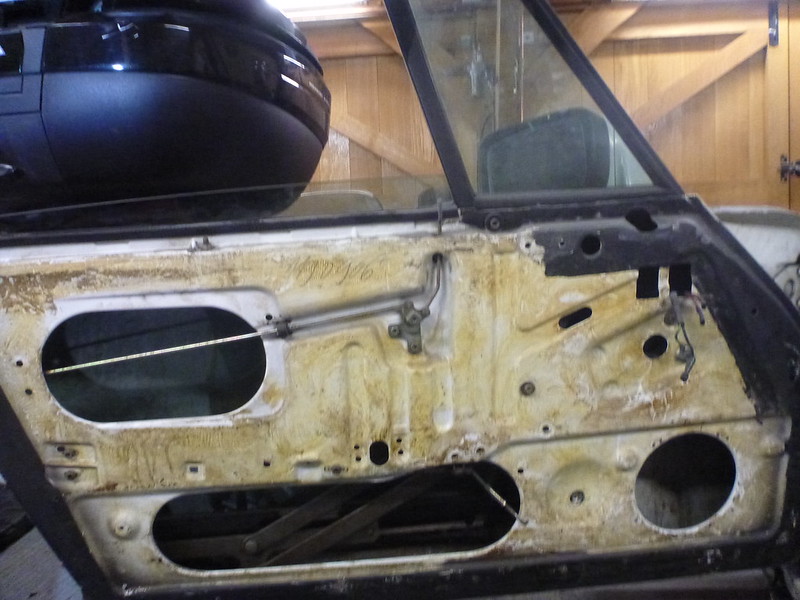
So first job was to make the door lighter, and so out with all of the glass, locks, motors, etc. and so in a blink of an eye (well maybe a few), we went from this
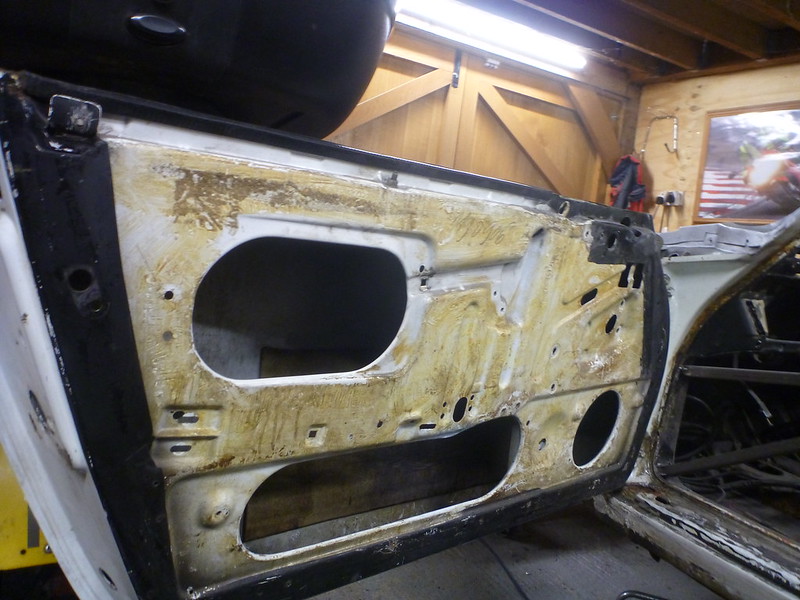
to this
I played with adjustment at the hinges, but it was clear that some shims were needed, so off with the door to make a pattern
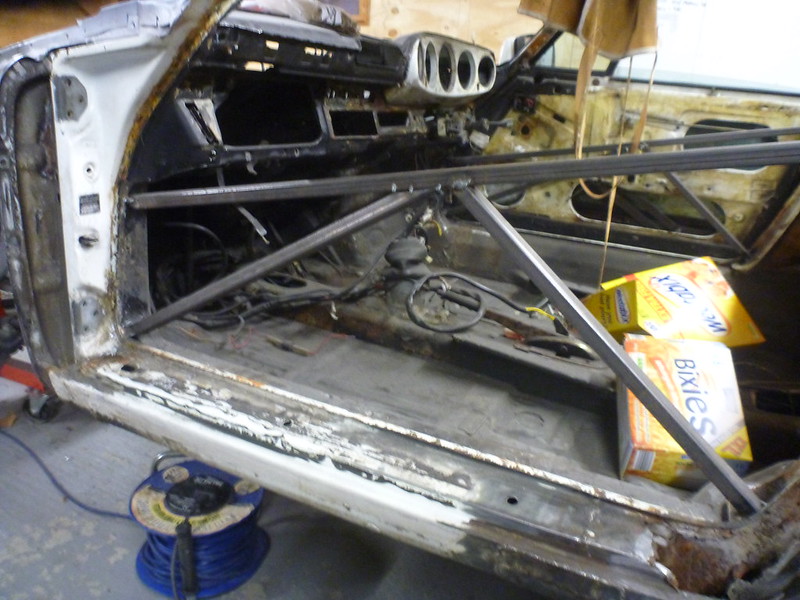
That’s just a gratuitous (and out of focus) shot in case you’re not sure what a 911 looks like with the door removed And no prizes for guessing what I have for breakfast weekdays !
Had to add a reasonable sized temporary shim only to the top hinge, but that gave me door gaps fairly consistently between 3.5 and 4.5mm all around the door, so well pleased with that. The end result is better than this photo shows but ......
I'll probably have to 'dress' the rear, bottom corner, but as the bottom of the wing is just a slightly bent piece of sheet, crudely welded over the rusty base of the wing, my crystal ball is hinting that my future includes a fair bit of work there anyway.
After the last update I did let a small patch into the panel ahead of the OS A-pillar
And in preparation for welding on the bumper mounting brackets, I removed all of the epoxy paint I had applied previously, cleaned the inside of the mounts to bare metal and coated all with weld through primer. They are just partially bolted on for now, and early in the New Year, with Alexcxcx back on garage bitch duties, the wings and bumpers will be fitted to ensure that the bumper brackets are in the right place before final welding.
Anyway, back to today, and time to look at the doors – well the near side one to start with. Door gaps were horrendous when I bought the car – front wings had been replaced or refitted at some earlier stage of life, and fairly poorly as well. It appears that the doors were then adjusted to be in the middle of the ‘hole’.
Not sure how well the photo actually shows the as found situation, but the door gaps under the door ranged from almost non-existent at the front, rising to around 8mm at the rear. There were similar variable door gaps to the B-pillar.
The tape and marker lines were my crude attempt to check for flex in the body as I jacked it up and down - luckily I couldn't discern any, so happy that the shell is still reasonably stiff before I start cutting the sills out.
Checking the hinge mounts confirmed that they had been ‘adjusted’
So first job was to make the door lighter, and so out with all of the glass, locks, motors, etc. and so in a blink of an eye (well maybe a few), we went from this
to this
I played with adjustment at the hinges, but it was clear that some shims were needed, so off with the door to make a pattern
That’s just a gratuitous (and out of focus) shot in case you’re not sure what a 911 looks like with the door removed
Had to add a reasonable sized temporary shim only to the top hinge, but that gave me door gaps fairly consistently between 3.5 and 4.5mm all around the door, so well pleased with that. The end result is better than this photo shows but ......
I'll probably have to 'dress' the rear, bottom corner, but as the bottom of the wing is just a slightly bent piece of sheet, crudely welded over the rusty base of the wing, my crystal ball is hinting that my future includes a fair bit of work there anyway.
'79 Targa - restoration now mainly complete & being driven
viewtopic.php?f=28&t=59756
viewtopic.php?f=28&t=59756
-
maxakarudy
- DDK Fanatic
- Posts: 75
- Joined: Tue Nov 28, 2017 1:00 pm
Re: Wot, not another '79 Targa resto thread
Ambitious project well done for getting stuck in.
I would be really cautious about tackling the sills without mounting the body on jig or frame and checking first why the doors don't line up, you could be over looking a big problem.
A repair jig with brackets is the best way, easy if you are pro, but checking the basic squareness of the chassis is possible with plumblines on the floor then checking diagonally.
Keep up the good work
Cheers
Martin
No matter how clever you are, stupidity is always one step ahead of you!
Martin
No matter how clever you are, stupidity is always one step ahead of you!
-
sladey
- Nurse, I think I need some assistance
- Posts: 8728
- Joined: Sat Apr 23, 2005 9:08 pm
- Location: Nottingham, UK
Re: Wot, not another '79 Targa resto thread
There are a few good threads on supporting the car ready for that - using triangulation first and then supporting using caravan jacks. I can't remember if I put links in my own thread when I did this work - I started the work around the end of 2013 and finished summer 2014.
I think the point was - if you're just keeping the shell in the position it currently is with stuff working then generally you should be OK if you are very careful; if you're looking to twist/pull/push it back into shape then it needs to be on a jog. The general idea is that your doors become your data point.
HTH
The simple things you see are all complicated
I look pretty young but I'm just backdated yeah
I look pretty young but I'm just backdated yeah
-
PeterK
- DDK rules my life!
- Posts: 1069
- Joined: Mon Sep 01, 2014 3:04 pm
- Location: GU51 - Fleet, Hampshire, UK
Re: Wot, not another '79 Targa resto thread
Thanks
I'd love to put the body on a Celette and check it, but when I started I couldn't find anyone reasonably local (GU51) who has one (whether they would let me if they did, is of course a completely different matter !).
Surprisingly, overall the sills look really strong and original, except on this near side one the top face at the rear where they meet the B-pillar (which was toast), at the front where just the horizontal weld seems to be rusty and an 'MOT' patch at one point. The kidney seems solid at the rear edge but completely missing at the front section (typical I suppose, as that's where the mud collects), with various bits of unprotected steel sheet tacked on it strange places - guess that's what happens when someone tries to do an MOT bodge without getting proper access to the area. Using an endoscope suggests the inner sill is healthy, but I guess I'll only know for sure once the outer sill is off. The very top of the jacking mount doesn't look too special in a couple of small places - not sure whether I will get away with repairing or whether just to replace.
As I jacked the car up and down and jumped in it, I couldn't detect any flex in the door gaps, and I added the crude bracing with the car sat on its wheels. The door fitted really well once I adjusted the hinges and added the shim, which was a relief. I'm hoping / assuming that the poor gaps were only due to poor wing fitment and then bodging the door to be central in the hole.
Once I'm ready to do the sills and B-posts, my plans are to level the car using my axle stands on the rear torsion bars, and to avoid inducing twist, caravan stands under the front - all as per Barrie's guidance. I have some body dimension drawings and, as you suggest, plan to check what I can, although until I get into it I won't know whether I have enough or the right dimensions to check against. I guess, other than squareness of the underbody, key dimensions will be from the top edge of the screen to the top of the B-post and maybe from a door hinge to the striker plate.
Peter
'79 Targa - restoration now mainly complete & being driven
viewtopic.php?f=28&t=59756
viewtopic.php?f=28&t=59756
-
maxakarudy
- DDK Fanatic
- Posts: 75
- Joined: Tue Nov 28, 2017 1:00 pm
Re: Wot, not another '79 Targa resto thread
I'd never suggest anything other than a chassis jig with the correct bracketry for a 100% appraisal, but a tramel is a very simple but accurate way of measuring symmetry of frames.
Although I wouldn't buy one of this guys cars, I do think there is a lot to learn from watching him work, judge for yourself....https://youtu.be/q6aSyIoT_FU
Martin
Although I wouldn't buy one of this guys cars, I do think there is a lot to learn from watching him work, judge for yourself....https://youtu.be/q6aSyIoT_FU
Martin
Cheers
Martin
No matter how clever you are, stupidity is always one step ahead of you!
Martin
No matter how clever you are, stupidity is always one step ahead of you!
-
911hillclimber
- Nurse, I think I need some assistance
- Posts: 18924
- Joined: Mon Mar 10, 2008 6:26 pm
- Location: West Midlands
Re: Wot, not another '79 Targa resto thread
Access and use of a jig would be wonderful, but not always available if DIY is your path.
I did my sills and floor edges without a jig, but a lot of spirit levels and plumbs, and a lot of checking of key points during welding.
I had done 3 cars before (MGB's)
I had the engine out! Not sure if you have?
I also re-skinned and re-aligned each door and put the hardware in as this all adds to the burden on the hinges and the front of the door case. I was sensitive to this because of changing the skins so the doors were possibly all over the place.
After doing the car and it on the road, I crashed it hard on the NS front racing it on a hill climb.
It went to a cellette jig to be pulled out. The people who did that commented how straight the car was overall aft of the NSF, so with great care you can get there in my one 911 rebuild experience.
The front corner was 23mm back and twisted under and took a "lot to get it out"
Good going on the project! 11/10 for DIY determination, just take your time.
73T 911 Coupe, road/hillclimber 3.2L
Lola t 492 / 3.2 hillclimb racer
Boxster 987 Gen II 2.9
Lola t 492 / 3.2 hillclimb racer
Boxster 987 Gen II 2.9
-
PeterK
- DDK rules my life!
- Posts: 1069
- Joined: Mon Sep 01, 2014 3:04 pm
- Location: GU51 - Fleet, Hampshire, UK
Re: Wot, not another '79 Targa resto thread
Thanks again guys
Yes, engine and box are out. At the rear, I've still got engine cover, lights, rear bumper and wiring to come off / out and the steering and suspension will be removed once the car is cleaned and before sill work starts.
Still can't make my mind up whether to spend almost £2k getting the car stripped and treated, or to just poly disk the paint off and epoxy it myself.
Peter
'79 Targa - restoration now mainly complete & being driven
viewtopic.php?f=28&t=59756
viewtopic.php?f=28&t=59756
-
911hillclimber
- Nurse, I think I need some assistance
- Posts: 18924
- Joined: Mon Mar 10, 2008 6:26 pm
- Location: West Midlands
Re: Wot, not another '79 Targa resto thread
IMHO, pay for it. They will get to places you can't and remove more than you can.
It might also show up some places you have missed!
It might also show up some places you have missed!
73T 911 Coupe, road/hillclimber 3.2L
Lola t 492 / 3.2 hillclimb racer
Boxster 987 Gen II 2.9
Lola t 492 / 3.2 hillclimb racer
Boxster 987 Gen II 2.9