Burnt Pig - 356 Pre a Build Thread

Replica owners or enthusiasts are very welcome

Moderator: Bootsy

Robneal
DDK above all
Posts: 197
Joined: Tue Jul 26, 2016 10:26 pm

Re: Burnt Pig - 356 Pre a Build Thread

Post by Robneal »

Lots of progress this month......and a few problems

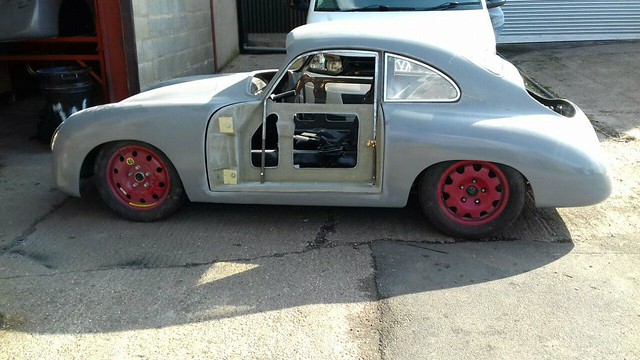
Went up to see Gary last week at Speedster Clinic and here is the progress report....

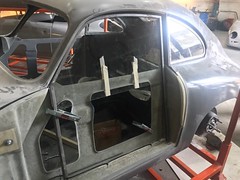
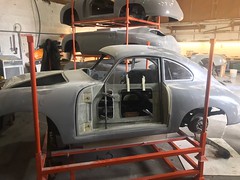
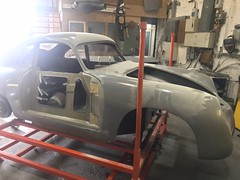
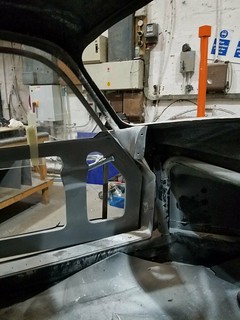
Door outer shells are now fitted to the car and Gary is now trial fitting the original door frames which need to be shortened by 10mm, and he will fit all of the electric window mechanism whilst the door skin is off and then when all the bracketary is fixed and working then he will bond on the outer door skin so it gets great panel fit.

Image

Image

Image

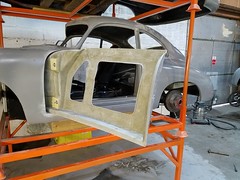
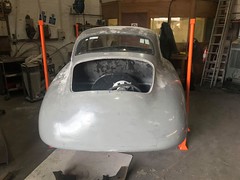
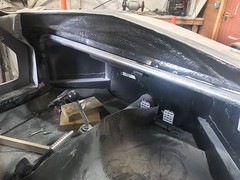
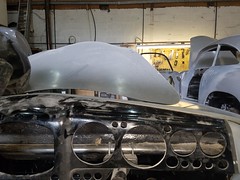
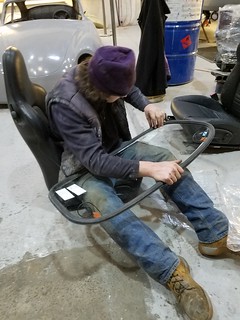
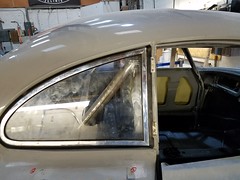
The rear screen was trial fitted and seems to fit OK, but needs a little fettling and sanding to get it to fit. Using Pre A rubbers front and back as these are all black and do not have the slot for the chrome deco strip.

Image

Image

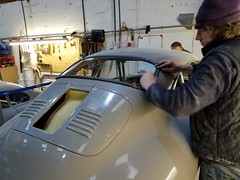
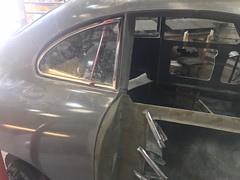
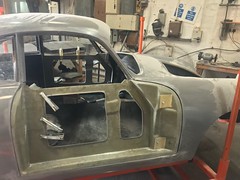
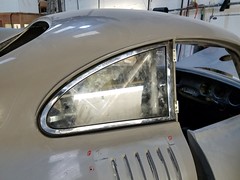
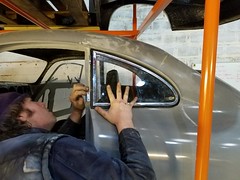
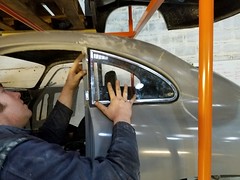
Rear Quarter windows were trial fitted and these seem to fit quite well too, just a bit of sanding and work to do to fit the front hinges. Right hand fit was tried in CHris Holdsworths car as this was easier to access..

Image

Image

Image

Image

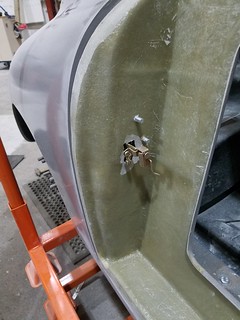
Took my Karmmen Ghia rear number plate light up to see how it will fit and by the looks of it it will fit almost perfectly without any modifications apart for drilling the mounting holes

Image

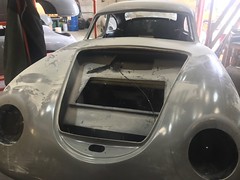
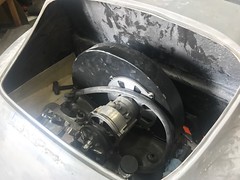
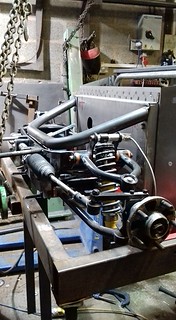
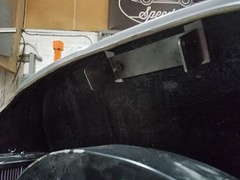
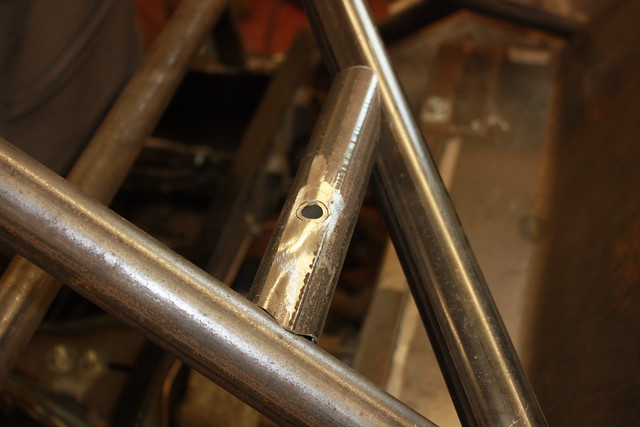
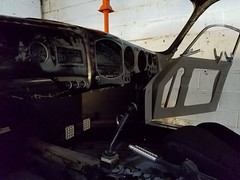
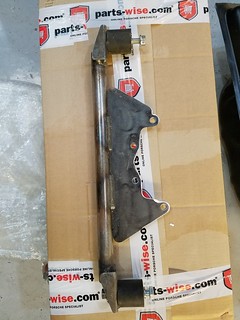
We discussed the fit of the rear engine stabiliser bar and Gary recommended that instead of a rear stabiliser bar that he fits a gearbox mid-mount he has welded the bits on to the rear frame horns which has also allowed him to relocate the front mounts for the rear stabiliser bar which now means these no longer foul on the body, so one problem solved.....

Image

The New front end sub frame still needs to be re-made to fit the RED9 suspension, but Gary needs to set it all up to make it fit on his chassis table.

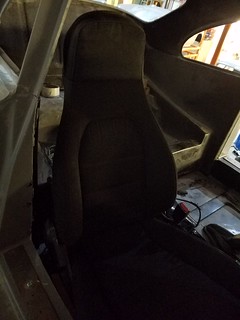
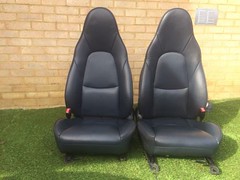
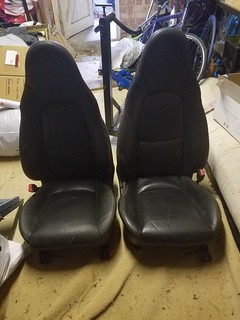
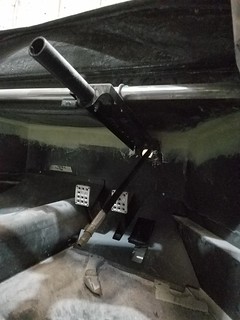
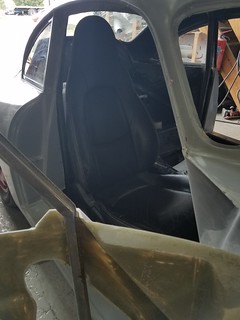
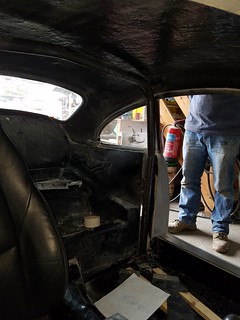
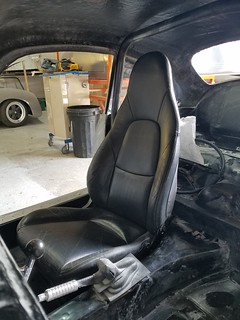
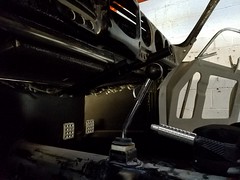
Also took my modern Porsche 911 seats up with me to Speedster Clinic to check for fit, but after a few tries it is obvious the seats are too tall and also they will not mount far enough back as the Beetle transmission tunnel is in the way. Gary had an MX5 seat hanging about in the workshop which seems to fit OK, so now on the lookout for MX5 seats to replace the Porsche ones, so Porsche ones will be back on EBAY soon.

Image

Image
sladey
Nurse, I think I need some assistance
Posts: 8729
Joined: Sat Apr 23, 2005 9:08 pm
Location: Nottingham, UK

Re: Burnt Pig - 356 Pre a Build Thread

Post by sladey »

Interesting stuff - thanks for Sharing
The simple things you see are all complicated
I look pretty young but I'm just backdated yeah
User avatar
hot66
Moderator
Posts: 18264
Joined: Tue Nov 11, 2003 4:17 pm
Location: North Yorkshire

Re: Burnt Pig - 356 Pre a Build Thread

Post by hot66 »

looking forward to seeing the finished car .. it's really coming together 8)
James

1973 911 2.4S
1993 964 C2
2010 987 Spyder
1973 MGB Roadster

Its not how fast you go, but how you go fast ;)
Robneal
DDK above all
Posts: 197
Joined: Tue Jul 26, 2016 10:26 pm

Re: Burnt Pig - 356 Pre a Build Thread

Post by Robneal »

Forgot to post the long list of Jobs that Gary is doing before I get the car back in May....This is the List and Gary being such a great guy he has ticked a few off already - marked in Purple.

1. Fit body to chassis.
2. Fit original 356 engine lid hinges.
3. Fit rear quarter windows.
4. Fit door frames, electric window winder mechanisms, door glass, door locks, door stops, door top strips and door handles.
5. Fit rear screen
6. Fit front screen
7. Remake front chassis sub frame to fit RED9 front suspension.
8. Fit bonnet catch
9. Fit engine lid catch
10. Fit front lights and headlamp bowls.
11. Fit seatbelt extension brackets to be IVA compliant and fit seat belts.
12. Bond in dash side pieces.
13. Fit MX5 seats.
14. Machine front hubs so wheel bearings fit correctly.
15. Make / fit remainder of rear engine tinware to fit beetle cut out in engine bay.
16. Modify Beetle fuel tank to fit in front engine bay 9 needs a small modification.

Hope to get this all done by mid May the long lead time at the moment is still the Front Windscreen which is due for delivery some time before 4th May.....

Also just found a set of 4 matching Pre A door garnish rails on EBAY for £360, that is really the last main bit that I have been looking for..
Robneal
DDK above all
Posts: 197
Joined: Tue Jul 26, 2016 10:26 pm

Re: Burnt Pig - 356 Pre a Build Thread

Post by Robneal »

Lots more progress this week, Gary is really pushing on with the build now so here's the updated list of jobs he is working on and some photos courtesy of Chris Holdsworth & Gary (Thanks Chris....)

Completed Jobs
1. Fit body to chassis.
2. Fit original 356 engine lid hinges.
3. Fit rear quarter windows.
5. Fit rear screen
9. Fit engine lid catch

Work in Progress
4. Fit door frames, electric window winder mechanisms, door glass, door locks, door stops, door top strips and door handles.
7. Remake front chassis sub frame to fit RED9 front suspension.
15. Make / fit remainder of rear engine tinware to fit beetle cut out in engine bay.
12. Bond in dash side pieces.
17. Fit steering column

Not Started Yet
6. Fit front screen
8. Fit bonnet catch
10. Fit front lights and headlamp bowls.
11. Fit seatbelt extension brackets to be IVA compliant and fit seat belts.
13. Fit MX5 seats.
14. Machine front hubs so wheel bearings fit correctly.
16. Modify Beetle fuel tank to fit in front engine bay as it needs a small modification.

and here are the progress Photos.....

Image

Image

Image

Image

Image

Image

Image

Image

Image

Image

Image

I also found and picked up some black Leather MX5 seats from EBay for £150, will need a bit of restoration, but physically sound and will do for now.

Image

These are the 4 garnish rails I found on EBAY that are currently in transit

Image

I also found a pair of sun visors complete with clips not for a Pre A but for a later model 356, but they came complete with the hinges and brackets so another bargain at £88 shipped from USA

Image

Lastly, I have decided that I would run the servo for the brakes from a vacuum pump rather than from Manifold pressure, so have been hunting for a reasonably priced vacuum pump and picked up this Audi one for £40. I will mount this in the front alongside the servo to make the brakes feel like a modern breaking system. Needs a bit of a clean up and a mounting bracket making but should do the trick.

Image

I now need to go up and deliver the seats to Gary, so will do that over Easter sometime, so hopefully we can stay on track for me to get my car back in May.
Robneal
DDK above all
Posts: 197
Joined: Tue Jul 26, 2016 10:26 pm

Re: Burnt Pig - 356 Pre a Build Thread

Post by Robneal »

I finally got a chance to pop up to Speedster Clinic this morning to see Gary and drop off the MX5 seats, the door tops and a few other little bits. I also had a look at the work Gary and Anthony have done and lot's more progress and only a few bits left to do. Here's the updated list.....

Completed Jobs
1. Fit body to chassis.
2. Fit original 356 engine lid hinges.
3. Fit rear quarter windows.
5. Fit rear screen
7. Remake front chassis sub frame to fit RED9 front suspension.
8. Fit bonnet catch
9. Fit engine lid catch
10. Fit front lights and headlamp bowls.
12. Bond in dash side pieces.
14. Machine front hubs so wheel bearings fit correctly - This was not actually required as the bearings had been machined already, so just needed cleaning & adjustment to get it to fit propperly
16. Modify Beetle fuel tank to fit in front engine bay as it needs a small modification - A bit of heat and hammering here has put the necessary clearance in place.

Work in Progress
4. Fit door frames, electric window winder mechanisms, door glass, door locks, door stops, door top strips and door handles.
11. Fit seatbelt extension brackets to be IVA compliant and fit seat belts.
15. Make / fit remainder of rear engine tinware to fit beetle cut out in engine bay.
17. Fit steering column

Not Started Yet
6. Fit front screen - Still waiting for this to be made - latest date is still 4th May
13. Fit MX5 seats.
18. Oh yes added a new item to Gary's list - Body bumpers like on the early Pre A

The doors are looking good and now Gary has all the bits he should be able to finalise the installation and add the Electric Window winders, a little bending on the frame is required to improve the fit.

Image

Image

The seat belts that came with the MX5 seats dont look like they are going to work, but Gary is going to have a look to see if they can be modified, else I will have to look at alternatives, any recommendations on this gratefully received..

The steering column has been set-up and is nearly finished, just the bearings to add to the column to finish it off but we need to wait till the front end is back from being powder coated and installed to make sure they are installed in the right place.

Image

The original 356 engine lid hinges have been trial fitted and Gary made up a bracket to fit these too. The original rear hinges are better in my opinion than the reporoductions as they have the drilled look, but the best bit is they also have a ratchet mechanism in them which means the engine lid stays open when you lift it up. The one limitation is the access to the engine bay is fairly restrictive, so I will make and fit some quick release pins to make working on the engine bay easier.

Image

The engine bay and bonnet catches have also been fitted...

Image


So all on track to get my car back in about a months time....
Richardab1967
DDK Fanatic
Posts: 59
Joined: Tue Jan 01, 2013 12:27 am

Re: Burnt Pig - 356 Pre a Build Thread

Post by Richardab1967 »

Robneal wrote: 18. Oh yes added a new item to Gary's list - Body bumpers like on the early Pre A
Oooo body bumpers, nice, grp or steel, did you see how hebster52 made his
Robneal
DDK above all
Posts: 197
Joined: Tue Jul 26, 2016 10:26 pm

Re: Burnt Pig - 356 Pre a Build Thread

Post by Robneal »

Richardab1967 wrote:
Robneal wrote: 18. Oh yes added a new item to Gary's list - Body bumpers like on the early Pre A
Oooo body bumpers, nice, grp or steel, did you see how hebster52 made his
Think GRP but they will need a good deal of support as they are long, so probably some steel in there somewhere.
How are you getting on with yours????

Sent from my SAMSUNG-SM-G891A using Tapatalk
Richardab1967
DDK Fanatic
Posts: 59
Joined: Tue Jan 01, 2013 12:27 am

Re: Burnt Pig - 356 Pre a Build Thread

Post by Richardab1967 »

Robneal wrote:Think GRP but they will need a good deal of support as they are long, so probably some steel in there somewhere.
How are you getting on with yours????

Sent from my SAMSUNG-SM-G891A using Tapatalk
I was thinking of squeezing modern crash bumper bars behind the grp bumper to help support it a bit, but all that will be after iva.

Going ok, got both doors working nicely, lock mechs working from inside and out, winders sorted both sides now just waiting on side glass from sgi. Plucking up the courage to cut and reposition bent b-pillar so i have been practicing some grp, it is definately out of line, but i’ll wait to double check when the glass arrives.
Robneal
DDK above all
Posts: 197
Joined: Tue Jul 26, 2016 10:26 pm

Re: Burnt Pig - 356 Pre a Build Thread

Post by Robneal »

Richardab1967 wrote:
Robneal wrote:Think GRP but they will need a good deal of support as they are long, so probably some steel in there somewhere.
How are you getting on with yours????

Sent from my SAMSUNG-SM-G891A using Tapatalk
I was thinking of squeezing modern crash bumper bars behind the grp bumper to help support it a bit, but all that will be after iva.

Going ok, got both doors working nicely, lock mechs working from inside and out, winders sorted both sides now just waiting on side glass from sgi. Plucking up the courage to cut and reposition bent b-pillar so i have been practicing some grp, it is definately out of line, but i’ll wait to double check when the glass arrives.
Hi Richard, good to here that you are progressing and sounds like we are going to be at a similar stage once I get mine back from Gary's.
I would speak to Gary re the B pillar as I am sure he will know the best way to resolve the issue, I must say that am a massive fan of his capabilities as everything he has done on my car has been top notch and he has solved all of the problems I have had. Can't recommend him highly enough and am sure he will be happy to give advice on this.
If we ever get a sunny day would be great to see some pictures of your progress.

Sent from my SAMSUNG-SM-G891A using Tapatalk
Robneal
DDK above all
Posts: 197
Joined: Tue Jul 26, 2016 10:26 pm

Re: Burnt Pig - 356 Pre a Build Thread

Post by Robneal »

More progress this week and another visit to Speedster clinic to check on progress as had a work meeting not far away....

SO Front end is now completely re-made and the Red9 front end is now welded on to a complete bespoke front end. Gary has made an ace job of this and it is all now powder coated and bolted back in position. It was bolted at the lowest setting on the chassis and the stance of the car is just right, and still has good suspension travel. When he tried to fit my wheels and tyres though they were too tight on the back with one side rubbing and the other ony 2mm away so have swapped the 195 x 50 x 16 tyres for 175 x 60 x 16. This should give plenty of clearance, now bought some new tyres and Gary is getting them fitted tomorrow.... The picture below is of my front wheels and a set of Gary's back wheels, just used to get it rolling.

Image

The other major change is that I decided to fit a roll bar in the end to make the fitting of seat belts easier as else there was going to be an ugly bit sticking up in the middle of the rear Quarter window. Gary has fitted the roll-bar into the actual body work in the B pillar and he is getting some rear brace bars made that will tie into the chassis in the engine bay but will not cut across the rear windows as many of the other cages I have seen.

Image

Image

They have also mounted the MX5 seats on IVA compliant spreader plates onto the seat mounting part of the chassis and although they are a tight fit they give the look that I am after and are really comfortable. I had a sit in it and the driving position is actually really good with good vision out the front and side window. I'm 5' 11" and although the Steering wheel is about an inch or so off centre, with a big banjo wheel i really don't think I am going to notice. heres a view from my driving position.

Image

Image

Brand new seatbelts ordered from Car Builder Solutions and then these will get attached to the Roll Hoop at IVA compliant heights....

Still waiting on the screen, but that should be here in a couple of weeks, then back home for fitting all the other bits I have....
Richardab1967
DDK Fanatic
Posts: 59
Joined: Tue Jan 01, 2013 12:27 am

Re: Burnt Pig - 356 Pre a Build Thread

Post by Richardab1967 »

Rob,

Looking fantastic, especially the view out of the cockpit. My wheel is a fair bit off centre too, I think we will get used to it very quickly.

I have struggled so much getting my seats and belts in IVA compliant position (and I'm still not 100% I have), looking at your roll cage I'm thinking I should have gone that route!
Robneal
DDK above all
Posts: 197
Joined: Tue Jul 26, 2016 10:26 pm

Re: Burnt Pig - 356 Pre a Build Thread

Post by Robneal »

Richardab1967 wrote:Rob,

Looking fantastic, especially the view out of the cockpit. My wheel is a fair bit off centre too, I think we will get used to it very quickly.

I have struggled so much getting my seats and belts in IVA compliant position (and I'm still not 100% I have), looking at your roll cage I'm thinking I should have gone that route!
Yeah lots of head scratching was required before I decided that it was going to be ugly and impractical to put the seat belt upper mounts in. So then when looking for solutions Gary suggested a roll hoop that is actually going to be inside the B pillar so you will only see the top half of it and he is bending some rear brace bars that are not visible through the window so it's going to be safe and not in you face like the other roll cages I've seen people put in. waiting for some more pictures of the brace bars when they are installed. Gary is pleased with it and I think it's going to make its way into his future offering as it's so simple and elegant and solves the seatbelt problem for the IVA.

Are you still making progress with yours?

Sent from my SAMSUNG-SM-G891A using Tapatalk
greg356a
I luv DDK!
Posts: 861
Joined: Sun Mar 25, 2012 9:16 am
Location: Norwich area
Contact:

Re: Burnt Pig - 356 Pre a Build Thread

Post by greg356a »

Car is looking great, don't forget that you when fitting the top seat belt anchor through the roll cage it needs to have a sleeve tube through and welded at each end to the roll bar, hope that description makes sense. Maybe the pic below helps

The tube is before welding. Weld needs to be neat to show some level of quality.
ImageIMG_4204 by Greg Moore, on Flickr

Also I believe you need to use to M8 bolt 8.8 or better

Hope this helps
1963 Karmann Ghia
1959 356A Coupe Outlaw
1957 3.2 Speedster replica
Robneal
DDK above all
Posts: 197
Joined: Tue Jul 26, 2016 10:26 pm

Re: Burnt Pig - 356 Pre a Build Thread

Post by Robneal »

Hi Greg,
Cheers for the advice....will ensure that the upper mount is sleeved through the roll bar...
Post Reply