

This is my build thread which I started quite a while ago on another website so please bear this in mind as you read it as some of the discussion may be directed at comments from member of that site. I have tried to re-write the various bits that are specific to the site, but may have missed one or two bits.
The way that images are posted seems the same as the other site, so I am hoping that this should be a straight copy and past exercise.
Here we go............
H-Gs Project 356
Moderator: Bootsy
Re: H-Gs Project 356
Welcome to Project 356, which is my attempt to create a replica Porsche 356.
I have started this thread to try and record each and every step that it take along this journey, in a s much detail as I possibly can. While this is not strictly your every day bug or bus, the majority of the running gear will be taken directly from a classic beetle therefore my thinking is that by documenting the refurbishment of major (and minor) components may provide assistance to others out there undertaking similar jobs, but also to seek opinions and advice from the more experienced and knowledgeable of you out there. I also hope that it may inspire others to take on projects of their own and creat a technical database for those that follow.
The story so far...
After much "Shall I, Shan't I", "The times not right", "Can I Afford it?" and so on, I came to agreement with my better half that I would build us a car for a very special occasion that (I hope) will happen at some point in the future. After buying our bus, The Baron, and working to bring him up to a usable and reliable condition we decided that it should be something that she could drive to events; trouble was that she wanted a soft top but didn't like a Beetle. Long story shortened, it was to be a 356. Next came the quandary of who to use to supply the main parts, namely the body? After much Internet searching I came up one this site;
http://www.speedsterclinic.com/
A few weeks ago I went to pay them a visit and was impressed by the workmanship and the dedication to create components that are as close to the original as possible. I was also impressed by the solutions to some of the most basic requirements, such as engine cover and bonnet hinges which are all laser cut and concealed.
Soon after I subscribed to their FaceBook page and saw a one-off deal come up for a chassis. A few emails later a deal was done and I will take delivery of a custom made IRS chassis in September.
It's not all been plain sailing up to this point though! I have acquired an IRS back end with the view to having it mated to an early front end. I have to date been stripping the IRS, removing the trailing arms so far and have the spring plates to do. I have a few photographs of the work so far which I will post later this month with a few words outlining what I have done to date and then continue from there.
This is not going to be a fast build by any means; I am probably looking at a couple of years (a bit like one of those models that you will see advertised in December, where you collect a piece per week!). As with all projects, it will be governed by the holy trinity, Time, Cost and Quality. Quality will not be compromised, therefore it will be utterly dependent on depth of pockets and (mindful that we have just moved house) the length of my "Honey Do" list.
I am looking forward to the project and hope that one or two of you out there will find some bits of interest.
Last edited by H-G on Wed Jan 28, 2015 6:51 pm, edited 1 time in total.
Re: H-Gs Project 356
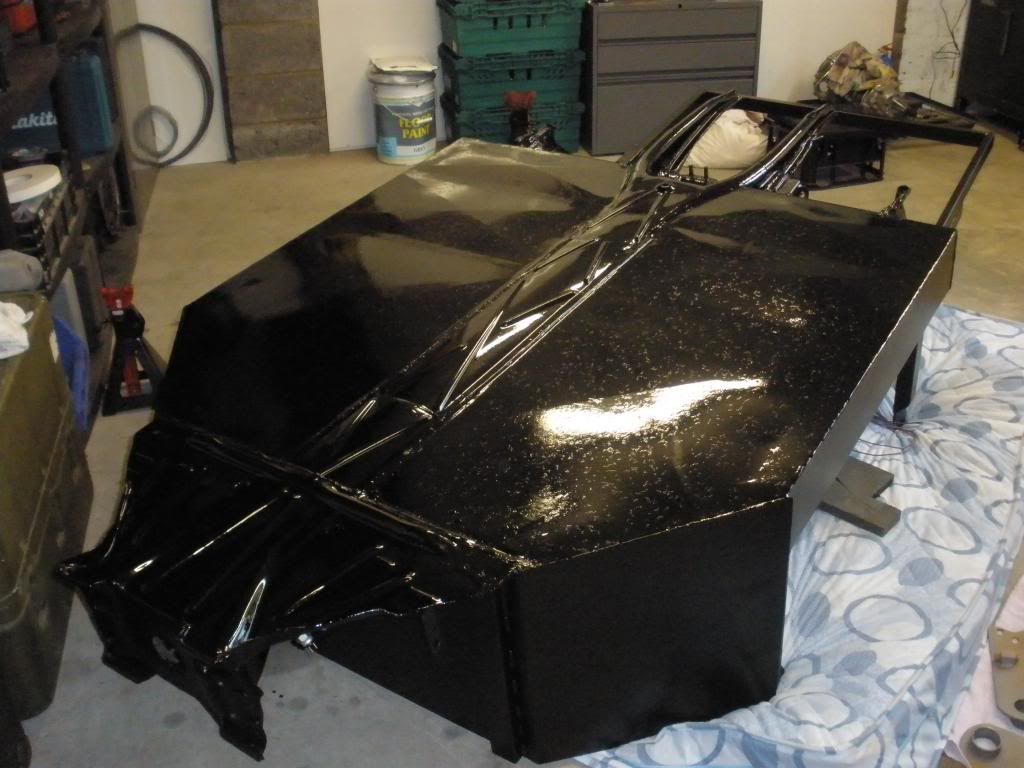
Well today marks the start proper. Not only did I celebrate the 3rd anniversary of my 40th Birthday this arrived:
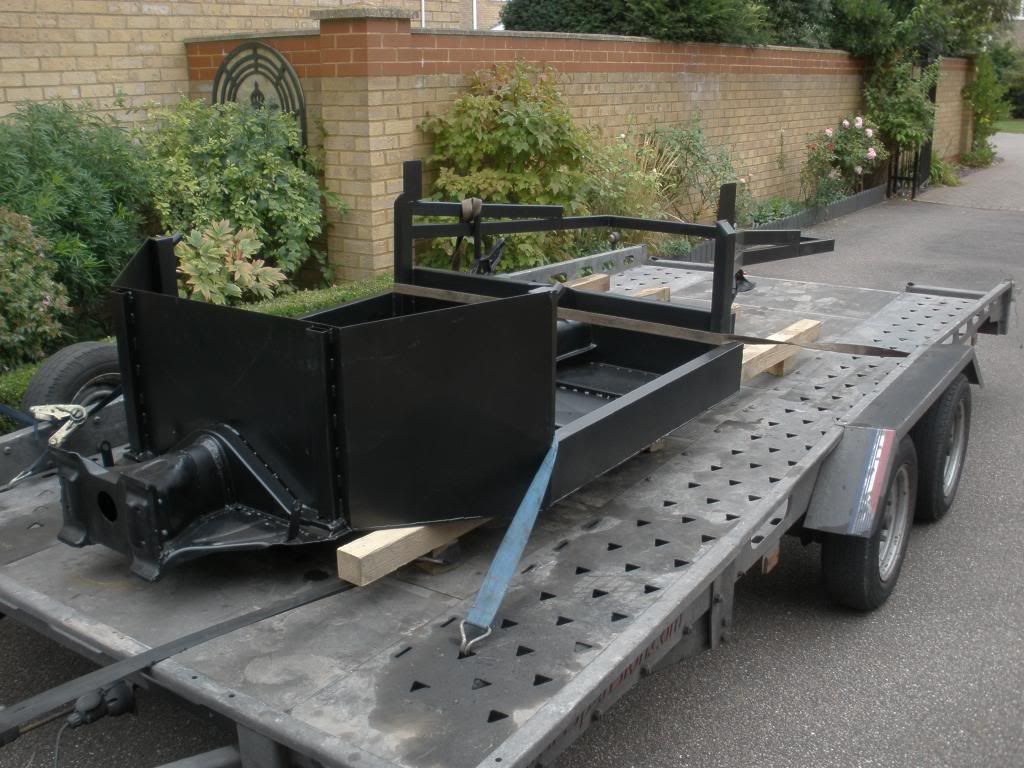
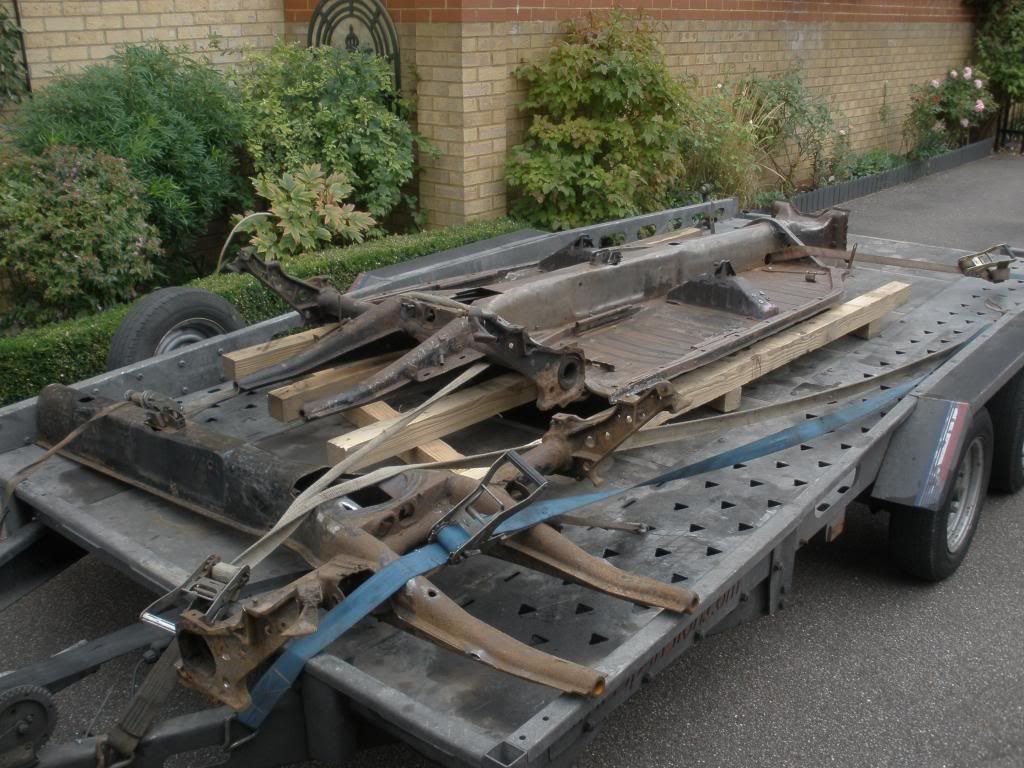
As part of the deal, these departed:
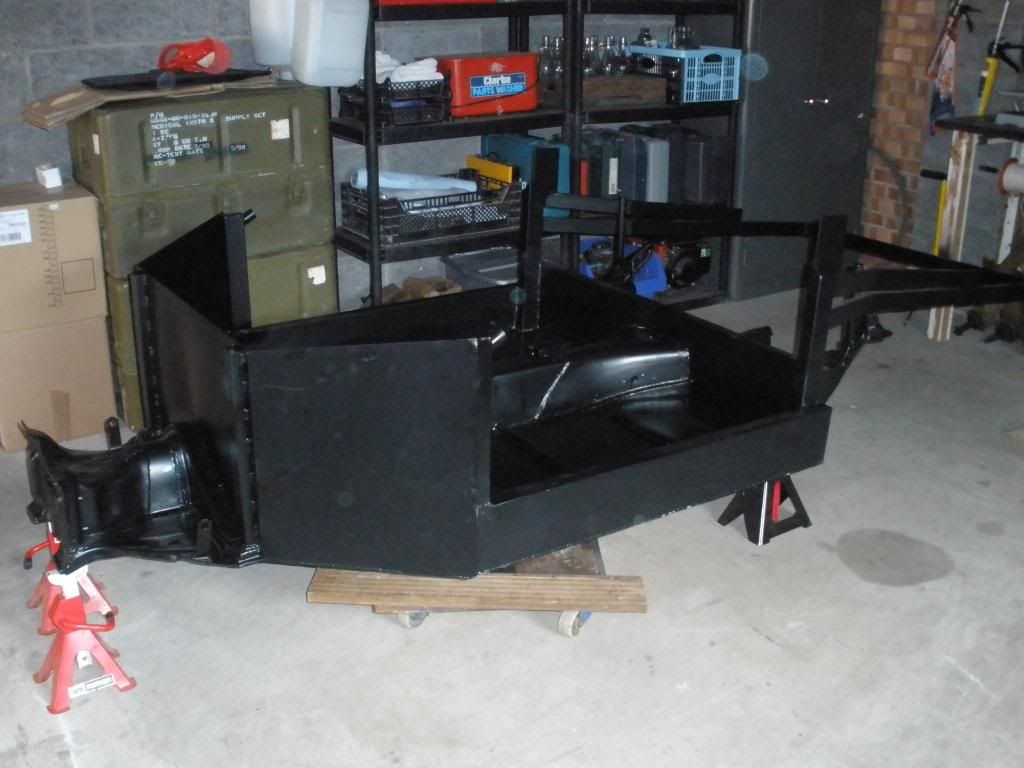
It is now settled in the garage where I can go and gaze at it and dream of the day that I get to drive it out for the first time:
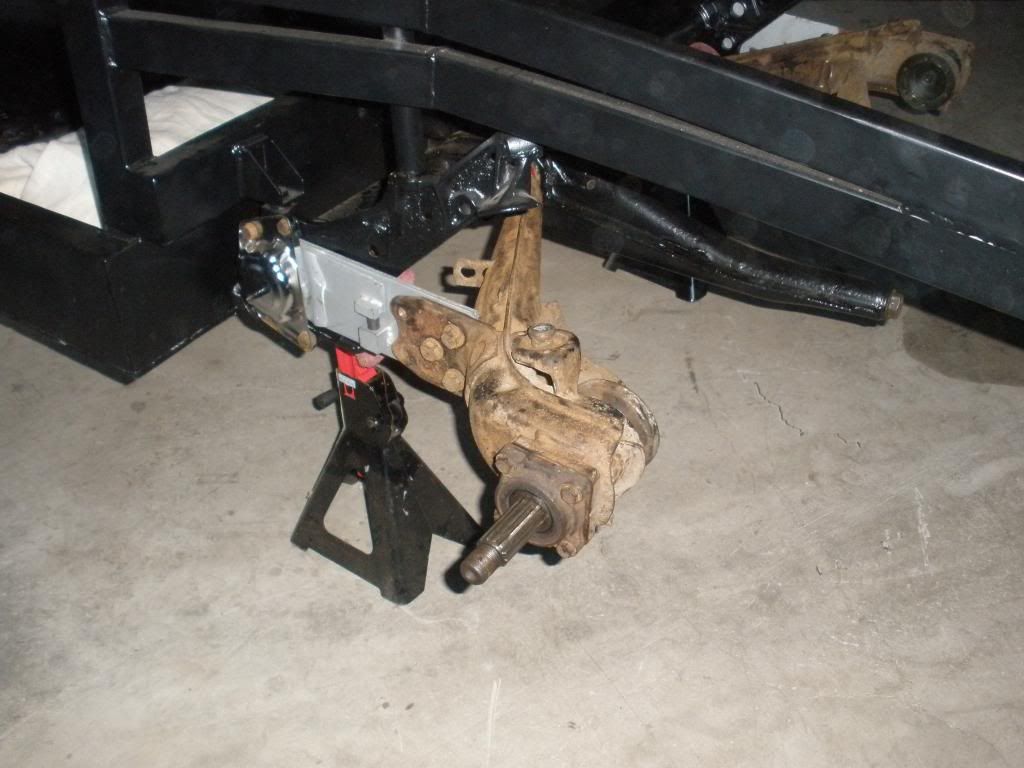
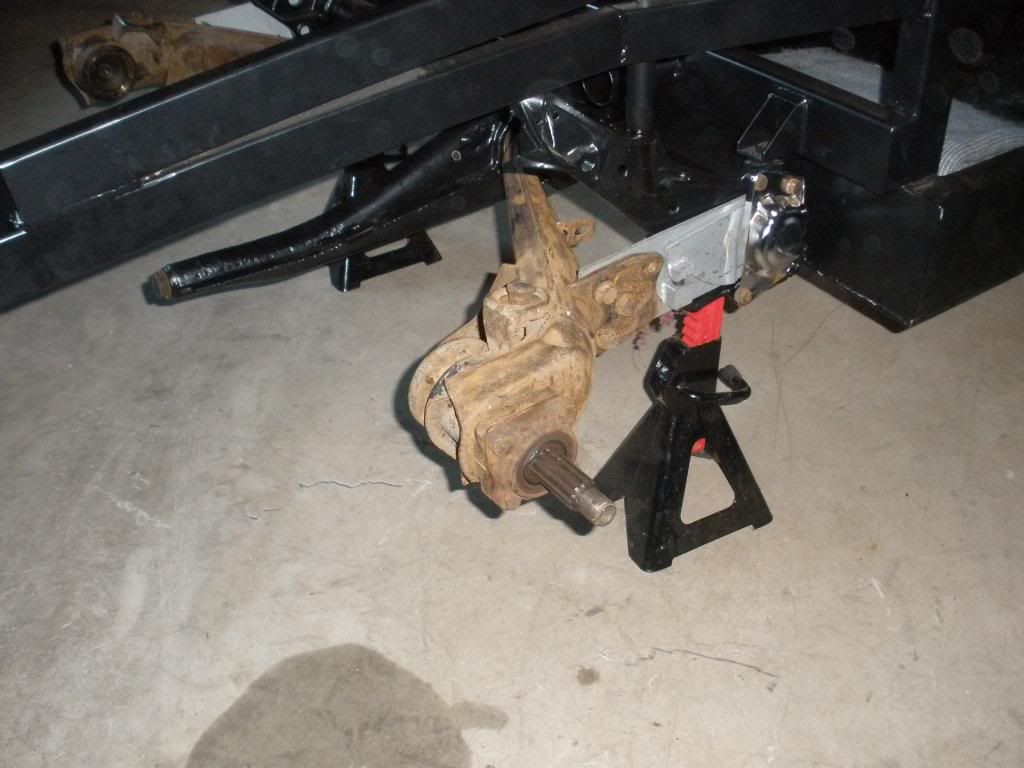
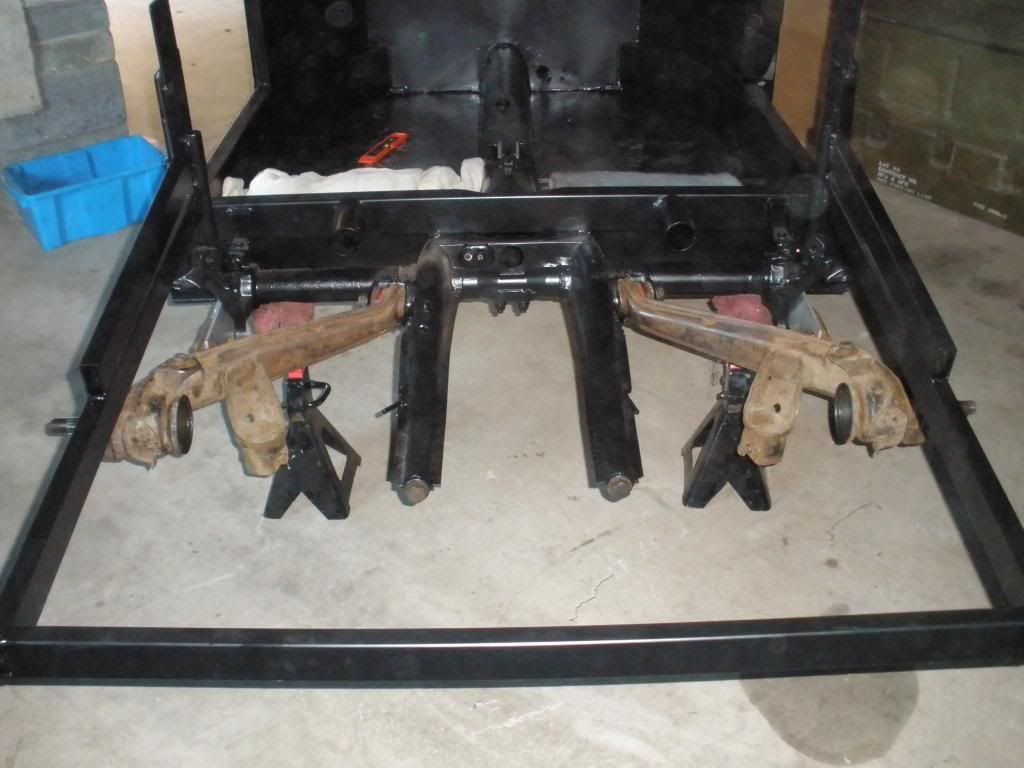
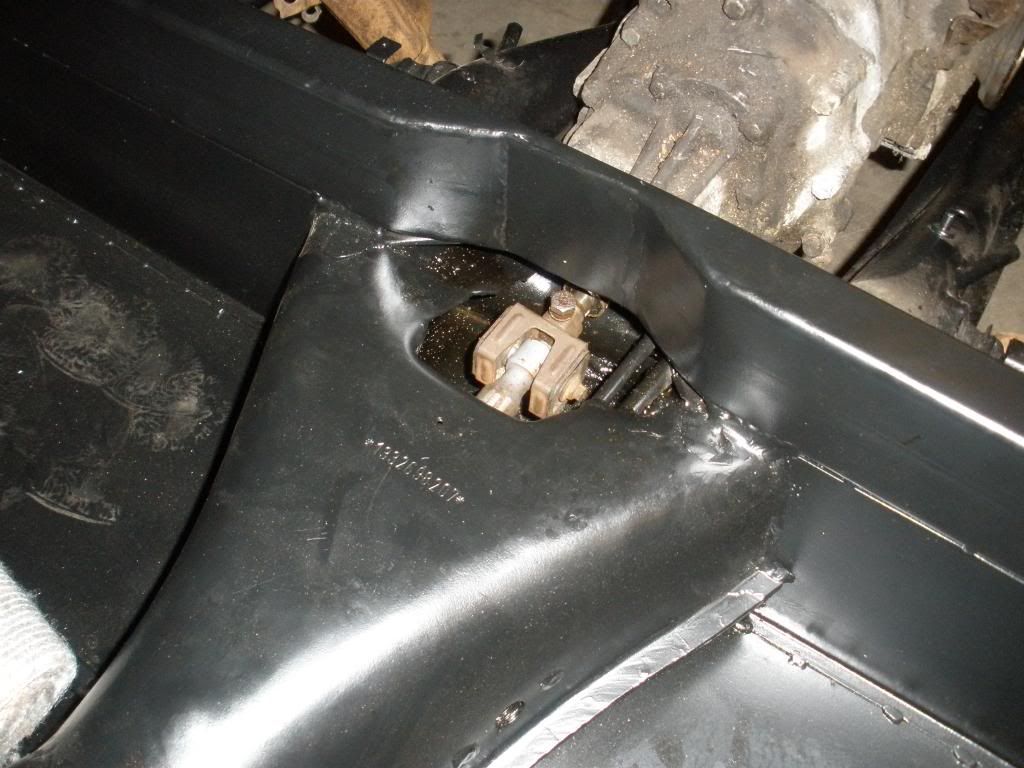
Before getting to this stage, I had to remove the trailing arms and spring plates from the exchange IRS back end.
I am documenting pretty much everything so I can put up a write-up on the springplate removal (and in time the re-fit)and can then go into detail regarding the trailing arm re-builds, beams re-builds etc as I am gong to be scourcing everything from scratch and refurbing components before fitting them to the chassis.
As part of the deal, these departed:
It is now settled in the garage where I can go and gaze at it and dream of the day that I get to drive it out for the first time:
Before getting to this stage, I had to remove the trailing arms and spring plates from the exchange IRS back end.
I am documenting pretty much everything so I can put up a write-up on the springplate removal (and in time the re-fit)and can then go into detail regarding the trailing arm re-builds, beams re-builds etc as I am gong to be scourcing everything from scratch and refurbing components before fitting them to the chassis.
Last edited by H-G on Wed Jan 28, 2015 6:55 pm, edited 1 time in total.
Re: H-Gs Project 356
After a reasonably productive weekend last weekend I visited the Speedster Clinic to learn more about the chassis and picked up some shortened cables and gear selection rod. Sunday a few of us went to the Autobahn Show at the Stafford showground and were somewhat underwhelmed by the number of stalls and even more underwhelmed by the autojumble, I did manage to pick up some springplate and trailing arm bushes, springplate covers, CV boots, front beam castor shims and a couple of other bits, and I finally got to spend some time in the garage today. I have to thank RD for the loan of a pair of 2 inch polybushes so that I can get things started.
First thing was to clean out the bolt holes as the chassis arrived powdercoated - this took a fair bit longer than expected but after a while the 8 holes were clear and the bolts could be screwed in. Next was to find a neutral setup for the springplates, which will allow me to mock up the rear end without the need to pre-load the torsion bars; this will let me remove things relatively easily as needed. I have to say that the lovely shiny EMPI springplate covers don't seem to be all that sturdy as the holes seem to have elongated when I tightened the covers down for the first time. I used the adjustment in the springplates to provide a preload for the rest of the mock-up.
Offside
Nearside:

I know that I could have done this a lot more easily, but I wanted to get rid of the torsion bars extending beyond the springplates. The IRS torsion bars are a fair bit softer then the standard bars however to torsion bars I've fitted have come from a scrapped bug (thanks Murph) which had a Z-Bar back end and the 'softest' bars from a swing-axle beetle. I am hoping that a combination of rotating the springplates one spline and the adjustable springplates, will allow me to set a softer pre-load to take account of the reduced weight; While it's a while off, I will be firming up the front end using and ARB which should have the effect of inducing some understeer.
Spurred on by actually fitting something rather than removing or taking items apart I made a start on the trailing arms. I took them to the 'Know Your Dub Day' that RD organised and gave them a going over with a wire brush on an angle grinder. Not a perfect finish, but it got most of the crap off so that I can work with them.
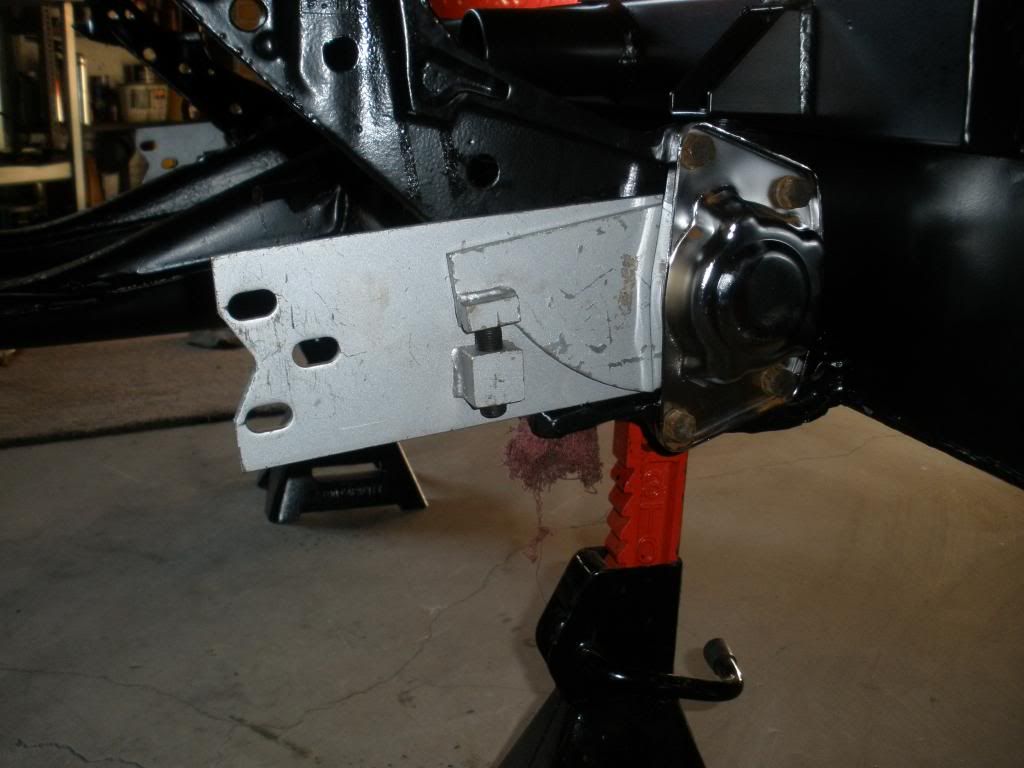
Fitting the polybushes was pretty straight forward but I had to clean away some of the powdercoating to allow the trailing arm bolt to be fitted. Once done, the trailing arms went in easily, however I have struck upon a small challenge; I replaced the shim washers as they had been removed from the old chassis but the brackets seem to be wider on this chassis as there is a gap which is approximately 5mm. I'm guessing the easy fix is to insert more shim washers but will look into alternative options.
So a few pics of the trailing arms fitted:
Nearside:
Offside:
Two arms, one chassis:
Finally, I also acquired some driveshafts and, to go with the case, crank and rods I now have (thanks RD), a pair of twinport heads - back to cleaning again!
Small steps I know, but in the right direction at last.
First thing was to clean out the bolt holes as the chassis arrived powdercoated - this took a fair bit longer than expected but after a while the 8 holes were clear and the bolts could be screwed in. Next was to find a neutral setup for the springplates, which will allow me to mock up the rear end without the need to pre-load the torsion bars; this will let me remove things relatively easily as needed. I have to say that the lovely shiny EMPI springplate covers don't seem to be all that sturdy as the holes seem to have elongated when I tightened the covers down for the first time. I used the adjustment in the springplates to provide a preload for the rest of the mock-up.
Offside
Nearside:
I know that I could have done this a lot more easily, but I wanted to get rid of the torsion bars extending beyond the springplates. The IRS torsion bars are a fair bit softer then the standard bars however to torsion bars I've fitted have come from a scrapped bug (thanks Murph) which had a Z-Bar back end and the 'softest' bars from a swing-axle beetle. I am hoping that a combination of rotating the springplates one spline and the adjustable springplates, will allow me to set a softer pre-load to take account of the reduced weight; While it's a while off, I will be firming up the front end using and ARB which should have the effect of inducing some understeer.
Spurred on by actually fitting something rather than removing or taking items apart I made a start on the trailing arms. I took them to the 'Know Your Dub Day' that RD organised and gave them a going over with a wire brush on an angle grinder. Not a perfect finish, but it got most of the crap off so that I can work with them.
Fitting the polybushes was pretty straight forward but I had to clean away some of the powdercoating to allow the trailing arm bolt to be fitted. Once done, the trailing arms went in easily, however I have struck upon a small challenge; I replaced the shim washers as they had been removed from the old chassis but the brackets seem to be wider on this chassis as there is a gap which is approximately 5mm. I'm guessing the easy fix is to insert more shim washers but will look into alternative options.
So a few pics of the trailing arms fitted:
Nearside:
Offside:
Two arms, one chassis:
Finally, I also acquired some driveshafts and, to go with the case, crank and rods I now have (thanks RD), a pair of twinport heads - back to cleaning again!
Small steps I know, but in the right direction at last.
Re: H-Gs Project 356
So, Slough swapmeet today with RD - not as big a venue as Dubfreeze, but certainly more autojumble focussed with just a smattering of stalls selling new stuff.
I picked up a few new and shiny bits and bobs -
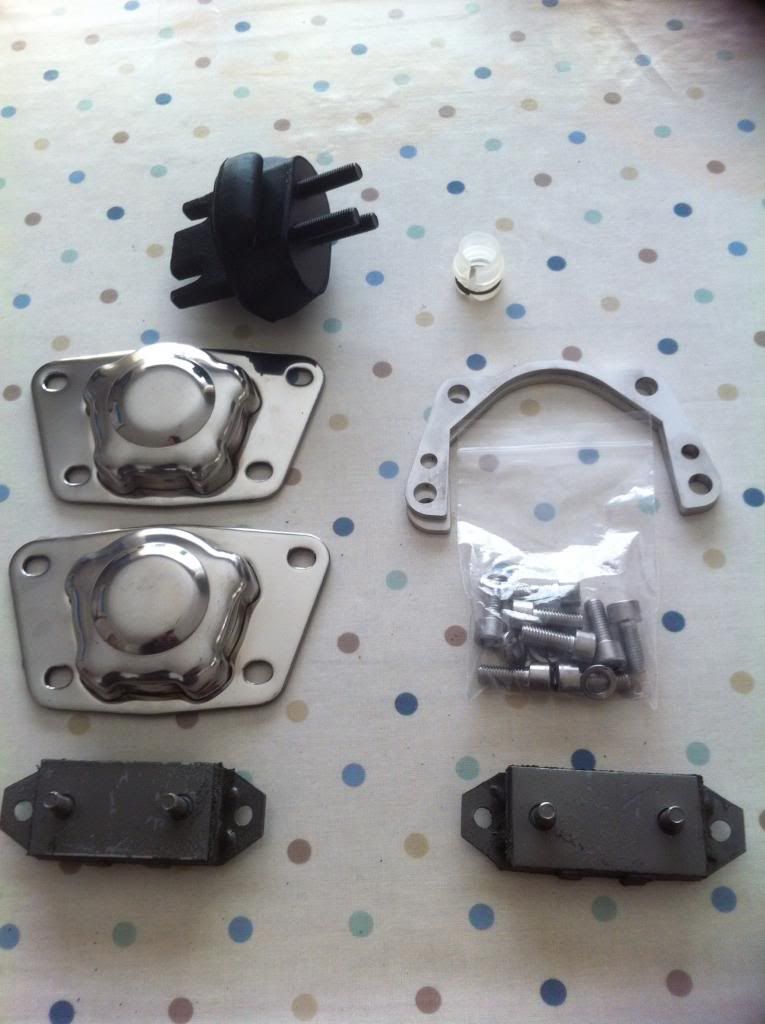
After a cuppa when we got back, I headed into the garage for a bit man-cave time. Started off by changing the spring plate covers. As I mentioned before the ones I got at Dubfreeze didn't seem to be all that sturdy; by comparison these are a massive improvement. The spacers accommodate the thicker adjustable springplates and fit perfectly from the packet. Flatlands engineering seem to have done their homework with these and I would recommend them.

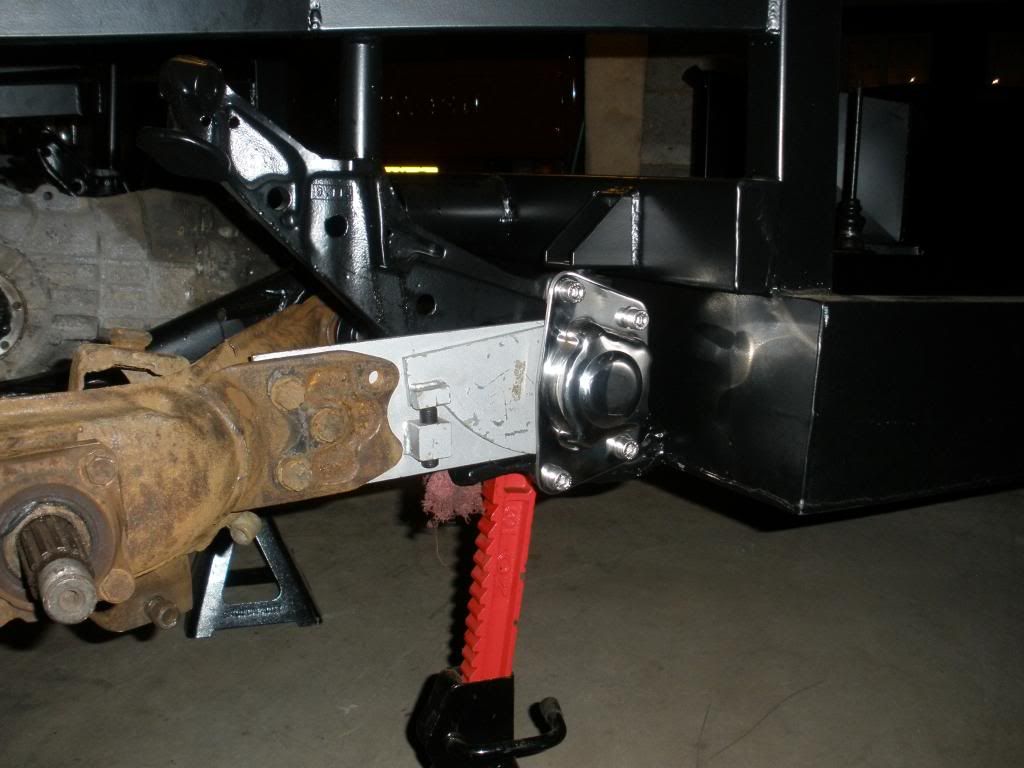
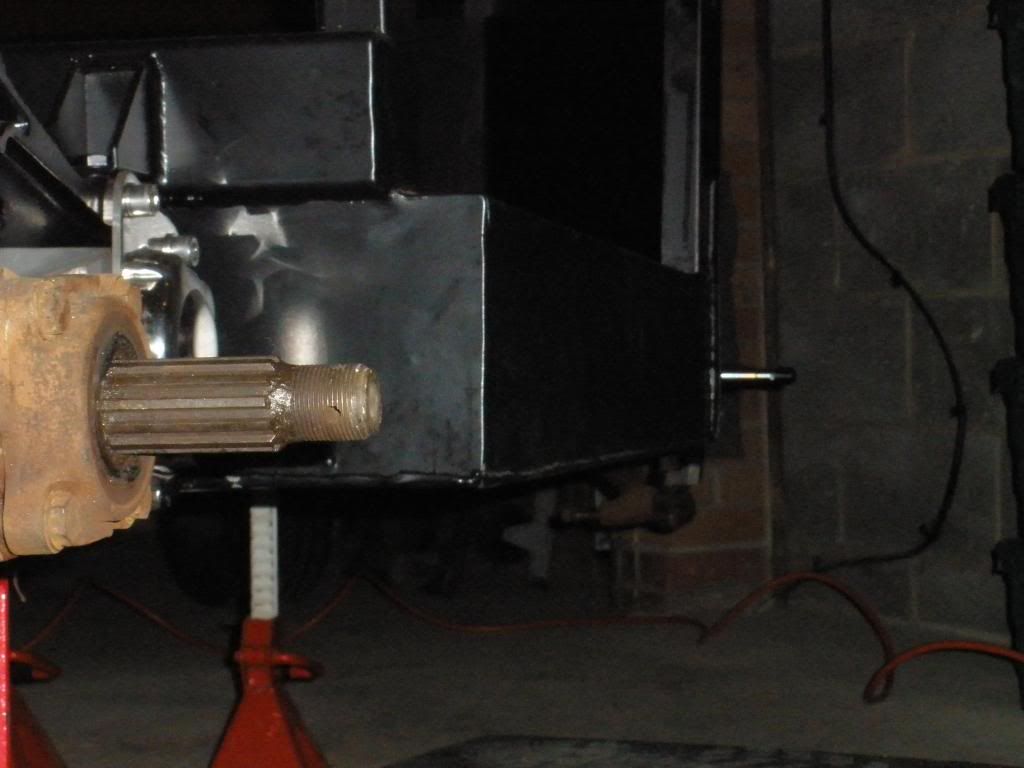
On to a trial fit of the gearbox next. Started by wirebrushing the chassis nuts for the front gearbox mounts to remove the powdercoating. One nut came off with no problem, the second resisted so applied heat. Ping - broken stud! A job for later - drill out the old stud and tap a hole for a new stud/bolt. Enough there to allow me to continue though. Fitted the rear gearbox cradle to the chassis and then the grey heavy duty rear mounts to the gearbox before lifting it onto the chassis. A few nuts and bolts later and
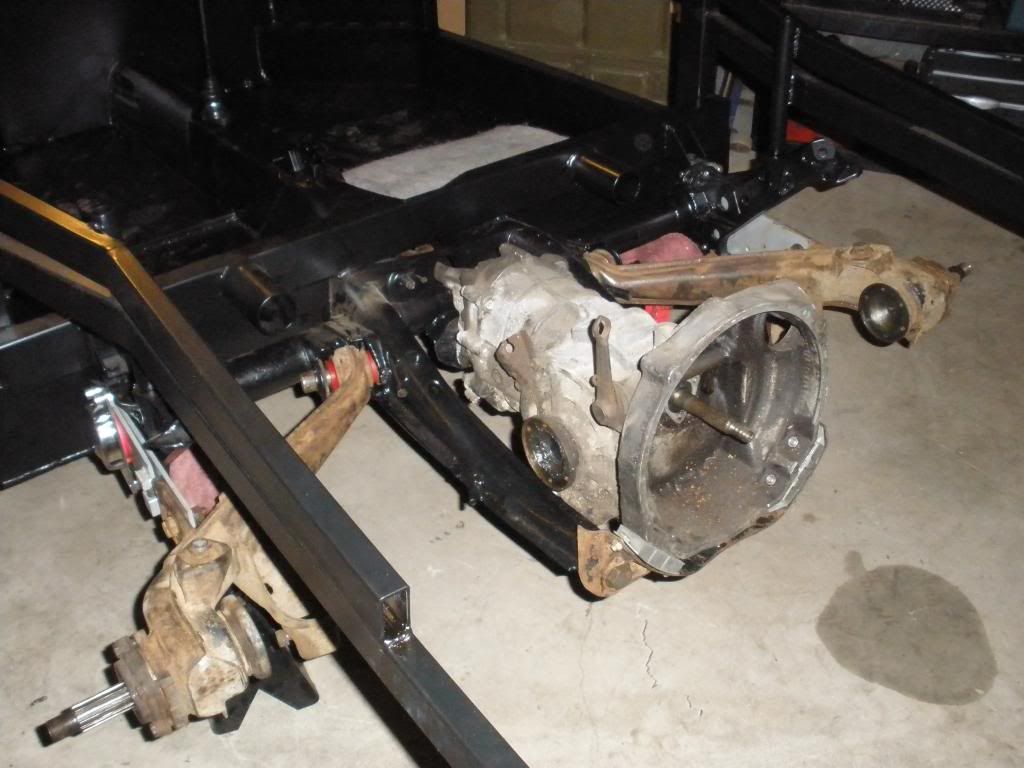

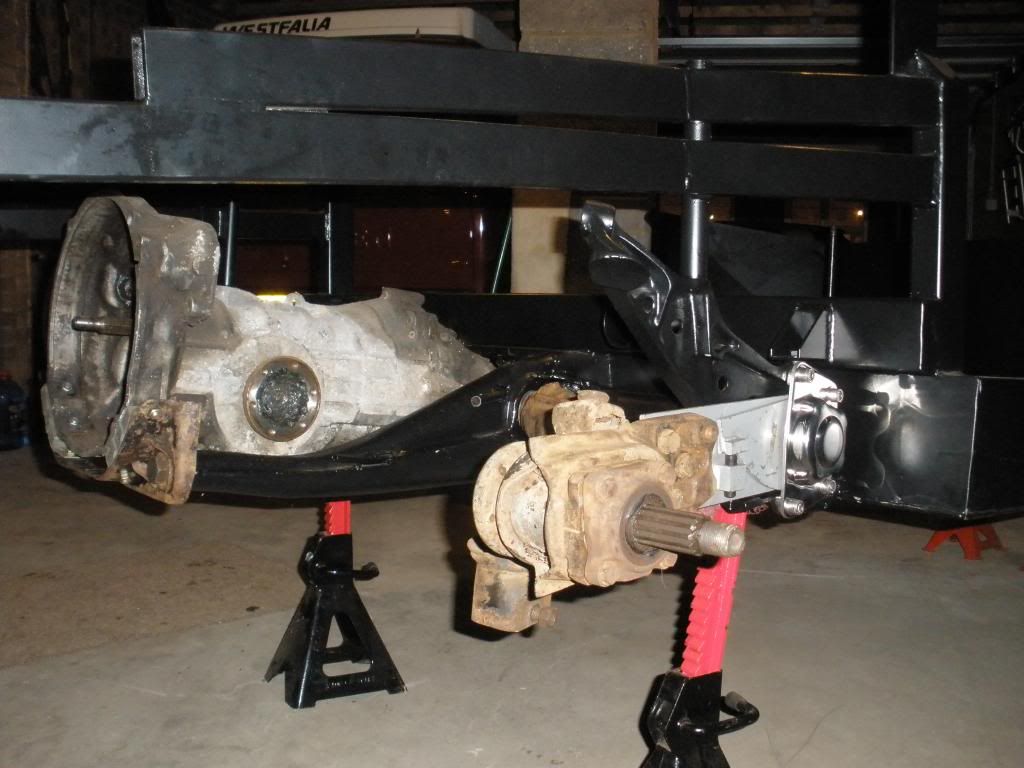
Feeling pretty good about things and with a little more time before 'The Call' from the house i had a go at fitting the gear linkage. Expecting this to be a right pain in the butt, this went surprisingly well. Spring clip round bush, bush in hole, greased shaft through bush. Fitted the old union between the linkage and the gearbox and then fitted the gearstick.
Despite the gearbox being loose, I was able to select all gears ok.
Vintagespeed were at the swapmeet - taken a bit of a shine to one of these:
http://www.vintagespeed.co.uk/index.php ... Itemid=119
All in all a good day I think. Next on the agenda is to find a 2" narrowed adjustable ball joint beam with 2" drop spindle - Dear Santa............
I picked up a few new and shiny bits and bobs -
After a cuppa when we got back, I headed into the garage for a bit man-cave time. Started off by changing the spring plate covers. As I mentioned before the ones I got at Dubfreeze didn't seem to be all that sturdy; by comparison these are a massive improvement. The spacers accommodate the thicker adjustable springplates and fit perfectly from the packet. Flatlands engineering seem to have done their homework with these and I would recommend them.
On to a trial fit of the gearbox next. Started by wirebrushing the chassis nuts for the front gearbox mounts to remove the powdercoating. One nut came off with no problem, the second resisted so applied heat. Ping - broken stud! A job for later - drill out the old stud and tap a hole for a new stud/bolt. Enough there to allow me to continue though. Fitted the rear gearbox cradle to the chassis and then the grey heavy duty rear mounts to the gearbox before lifting it onto the chassis. A few nuts and bolts later and
Feeling pretty good about things and with a little more time before 'The Call' from the house i had a go at fitting the gear linkage. Expecting this to be a right pain in the butt, this went surprisingly well. Spring clip round bush, bush in hole, greased shaft through bush. Fitted the old union between the linkage and the gearbox and then fitted the gearstick.
Despite the gearbox being loose, I was able to select all gears ok.
Vintagespeed were at the swapmeet - taken a bit of a shine to one of these:
http://www.vintagespeed.co.uk/index.php ... Itemid=119
All in all a good day I think. Next on the agenda is to find a 2" narrowed adjustable ball joint beam with 2" drop spindle - Dear Santa............
Re: H-Gs Project 356
So a small update after a busy weekend.
A trip to collect a pile of whiteboards and a few other bits and bobs found most of Saturday in the garage putting OSB in the rafters so that I have somewhere to store things as well as begin to line the walls with 4 feet x 8 feet white boards. I acquired 39 in total so rather than painting the walls I have enough to completely line all of the walls as well as screw then to the underside of the rafters. Wipe clean walls which will also make the place a whole let lighter.
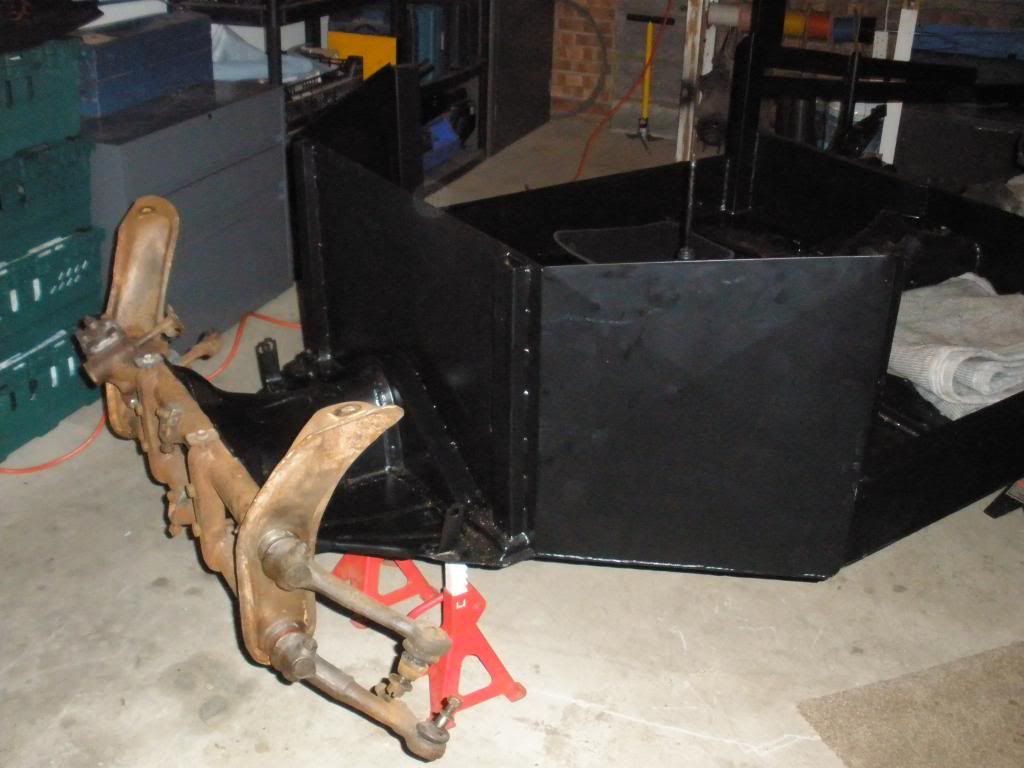
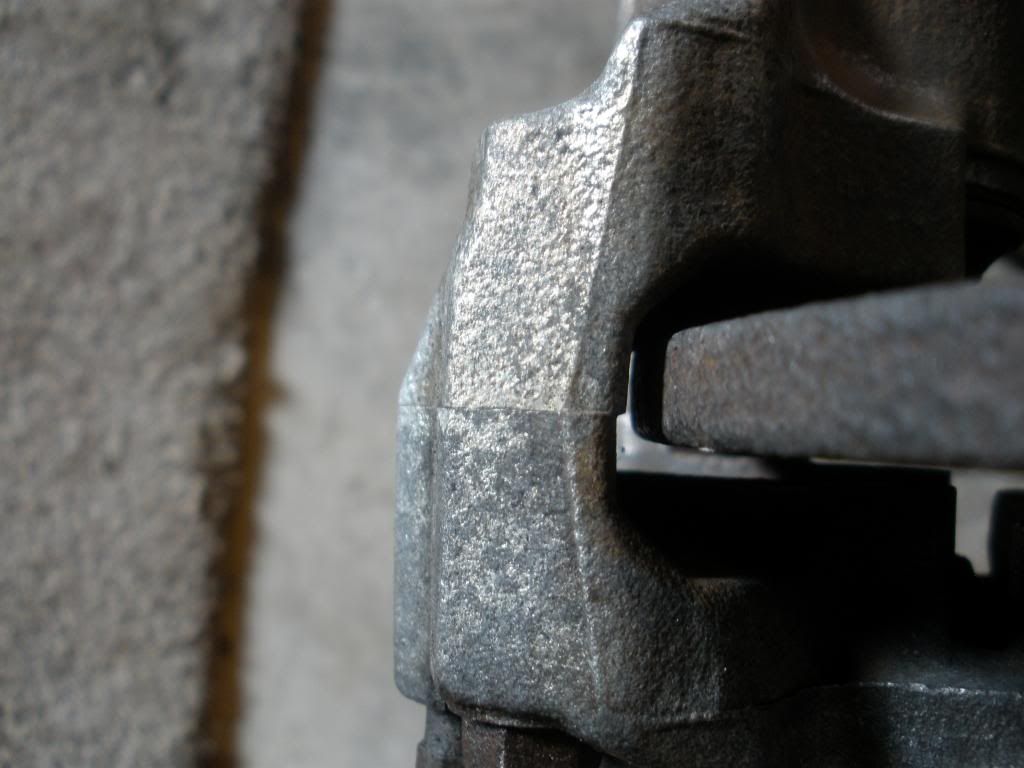
On to Sunday which, after an early start, saw the Boss and I heading up to Preston to see a very nice chap selling a few bits and bobs. In exchange for a few pennies, I came away with this little lot:
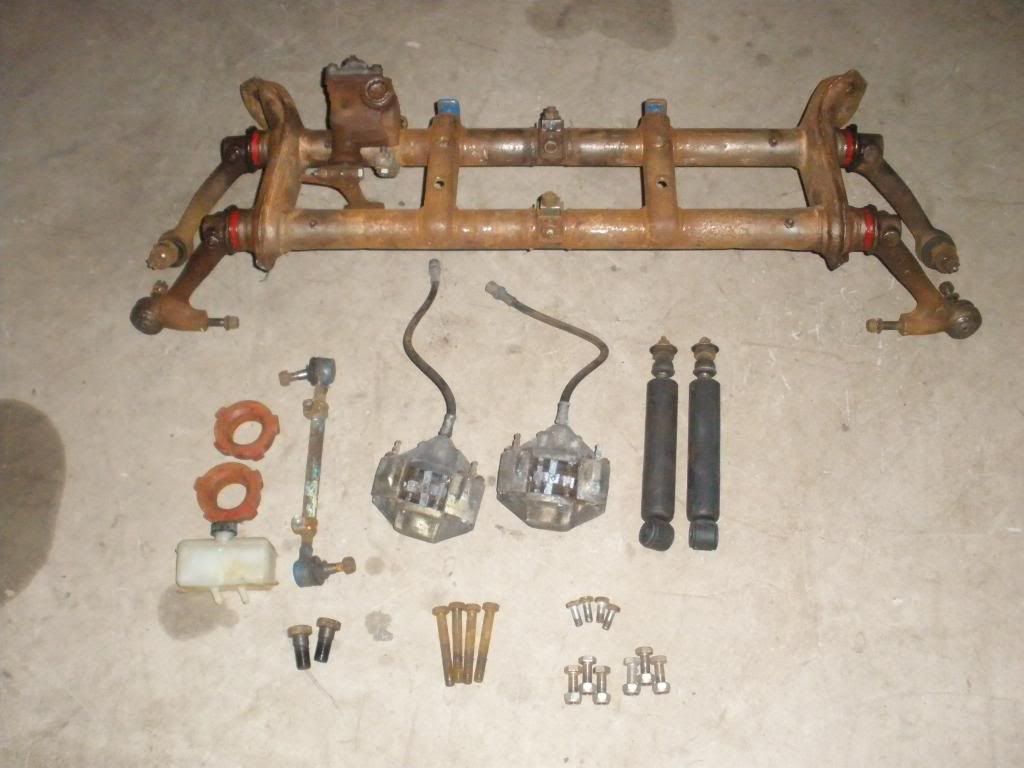
From the top, an adjustable 2 inch narrowed beam, complete with steering box, urethane bushed, long travel ball joints, a pair of dirty, but very little used calipers, shortened shocks, dual circuit brake reservoir, a pair of 1 7/8 inch urethane bushes and bolts for the gearbox cradle, springplates, beam and calipers.
In total about 7 1/2 hours on the road for a 30 min visit. Worth every minute, especially for the beam.
When we got home I have to say that the front end looked very bare so I had to show it some attention. So after cleaning out the bolt holes the front end looks like this:
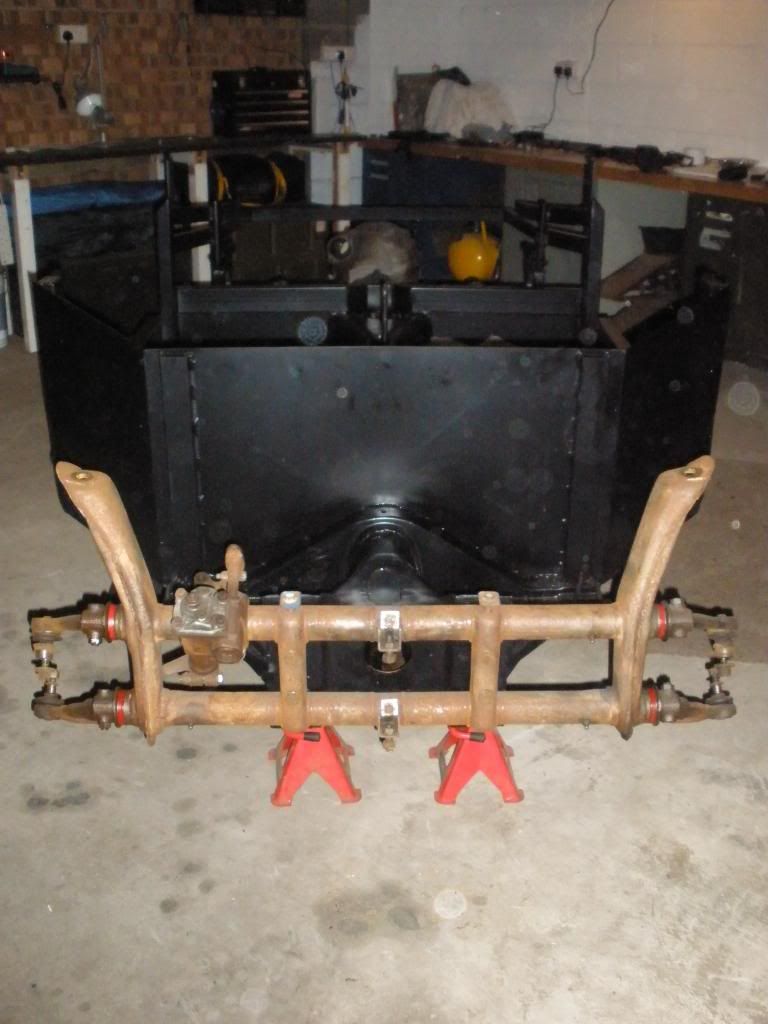
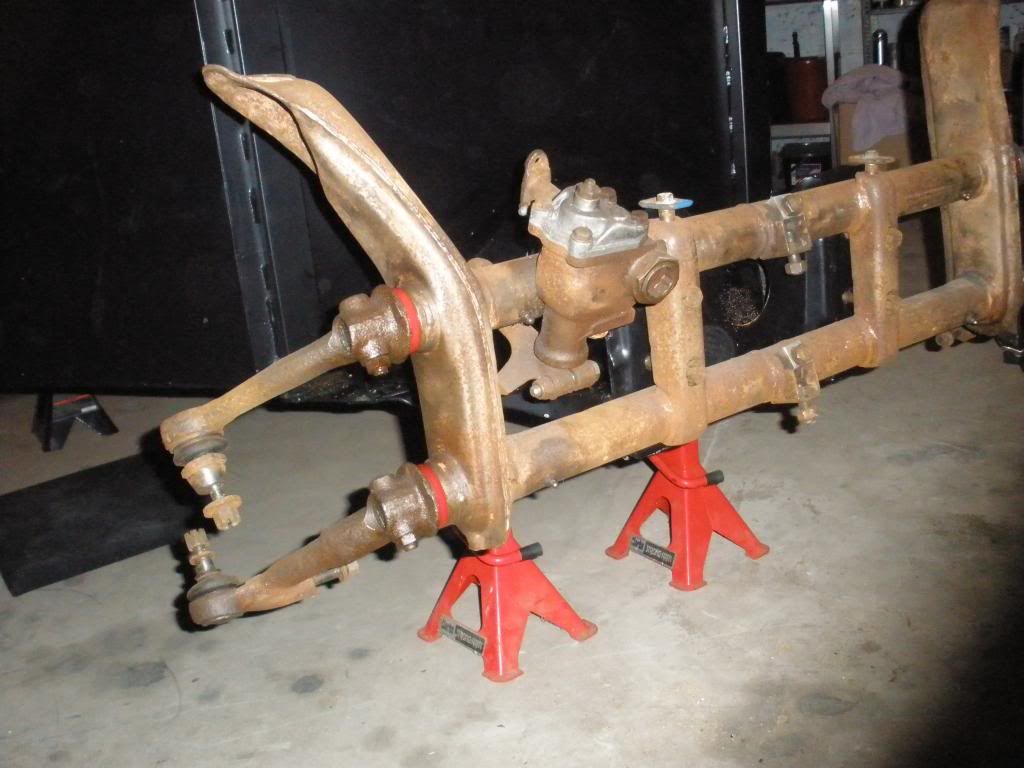
Next thing on the list is a set of 2 inch dropped spindles; if anyone out there has a set for sale, let me know.
A trip to collect a pile of whiteboards and a few other bits and bobs found most of Saturday in the garage putting OSB in the rafters so that I have somewhere to store things as well as begin to line the walls with 4 feet x 8 feet white boards. I acquired 39 in total so rather than painting the walls I have enough to completely line all of the walls as well as screw then to the underside of the rafters. Wipe clean walls which will also make the place a whole let lighter.
On to Sunday which, after an early start, saw the Boss and I heading up to Preston to see a very nice chap selling a few bits and bobs. In exchange for a few pennies, I came away with this little lot:
From the top, an adjustable 2 inch narrowed beam, complete with steering box, urethane bushed, long travel ball joints, a pair of dirty, but very little used calipers, shortened shocks, dual circuit brake reservoir, a pair of 1 7/8 inch urethane bushes and bolts for the gearbox cradle, springplates, beam and calipers.
In total about 7 1/2 hours on the road for a 30 min visit. Worth every minute, especially for the beam.
When we got home I have to say that the front end looked very bare so I had to show it some attention. So after cleaning out the bolt holes the front end looks like this:
Next thing on the list is a set of 2 inch dropped spindles; if anyone out there has a set for sale, let me know.
Re: H-Gs Project 356
With the exception of brakes, I have all the major chassis components now so, as crazy as it seems, I'll be ready to take it all to bits again soon and start preparing everything to go back together properly.
Undecided on whether to powder coat the trailing arms and beam or just go with some chassis paint?
I doubt if anything will happen next weekend as it's most definitely a family weekend; the following weekend we will be off on a tangent as we GTI Echobeaches bus....
Undecided on whether to powder coat the trailing arms and beam or just go with some chassis paint?
I doubt if anything will happen next weekend as it's most definitely a family weekend; the following weekend we will be off on a tangent as we GTI Echobeaches bus....
Re: H-Gs Project 356
Got home tonight and my lovely neighbour presented me with a box that was delivered earlier.
Didn't even take my coat off before ripping it open to reveal:
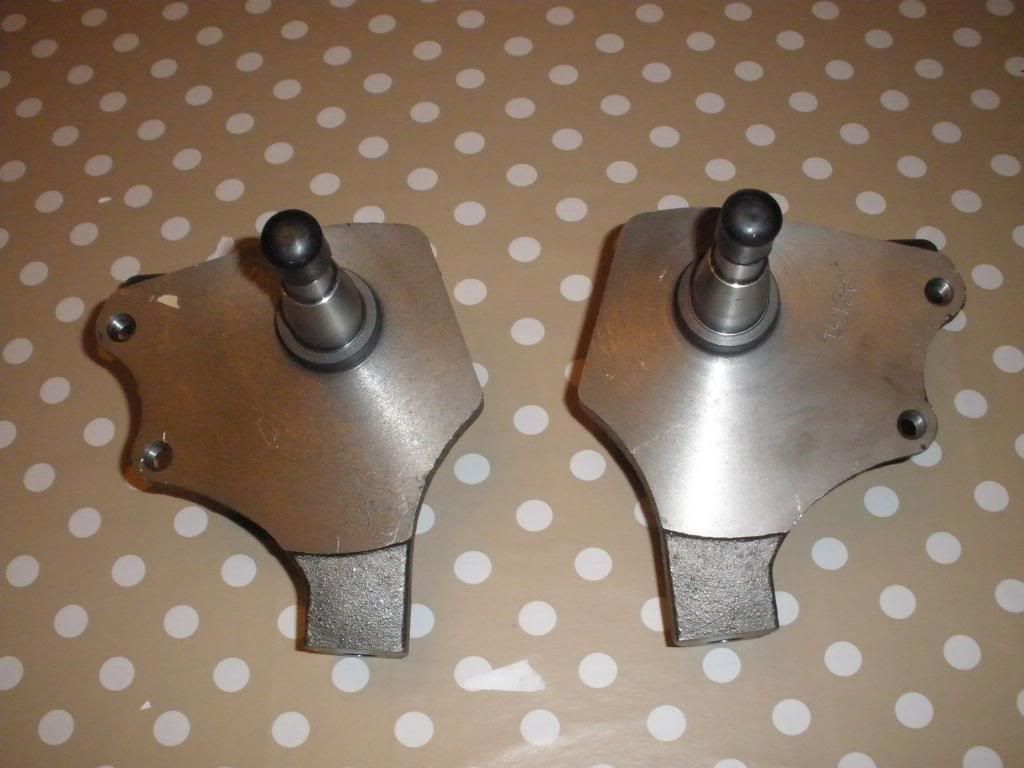
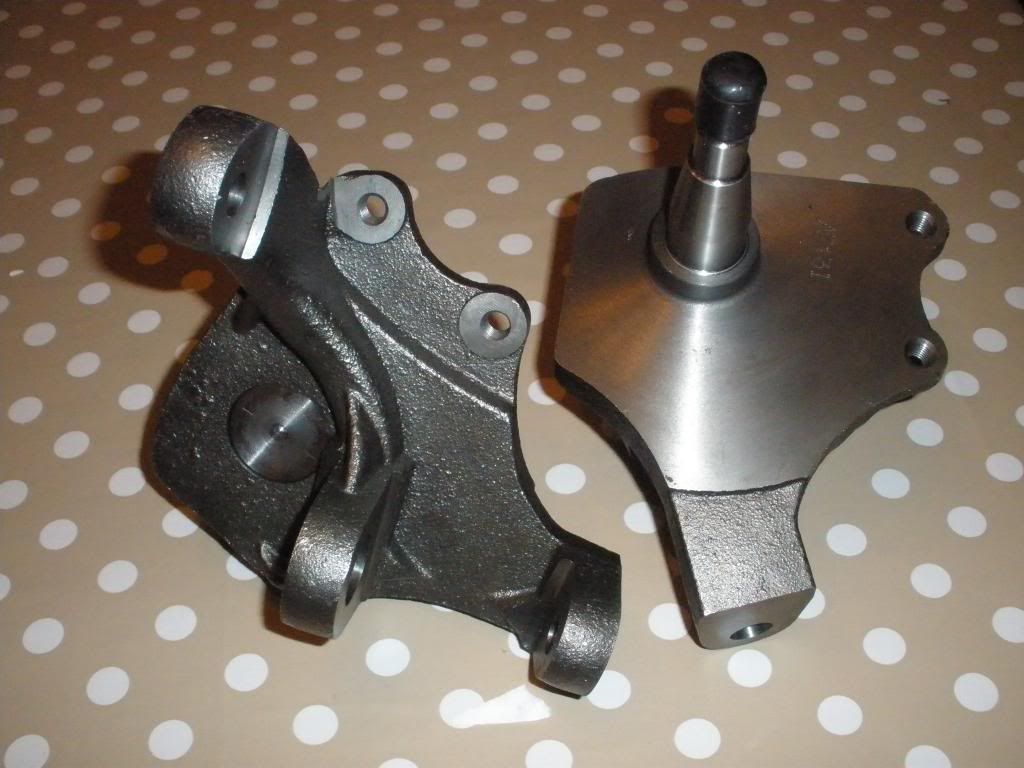
A pair of 2 1/2 inch drop spindles. :D
Didn't even take my coat off before ripping it open to reveal:
A pair of 2 1/2 inch drop spindles. :D
Re: H-Gs Project 356
A busy weekend which started off with popping across to Echo Beaches Mancave to help to provide some more assistance with the T25 GTI. Suffice to say that we finally ran out of reasons to not turn the ignition key, so after initially turning it over with the king lead removed to make sure that nothing was catching, the lead was fitted, the key turned and..... I will let EB tell the rest of the story.
After a few high fives and big grins (have I let the cat out of the bag?) I took a quick trip to rummage through Rusty Dubnuts boxes (and pick up the boss) saw me with a pedal cluster.
Rolling on to Sunday and a visit from Lee with his lowered patina bay to set up his carb and timing. to complete the picture, this followed a Thursday evening session in the Man Cave stripping and bench setting the carb as it would not run at all once it had warmed up. It turned out that the auto-choke had become disconnected from the choke butterfly and was not opening. Once fitted the bus ran well but just need the 009 setting up correctly. A 30 min job on Sunday turned into a couple of hours as we found a few additional challenges left/created by a local garage! With the dissy and inlet manifold properly secure, and the carb stud replaced, everything was set up. A quick run around the block followed by an adjustment to the accelerator pump (to overcome the inherent 009 flatspot) saw a happy camper once more.
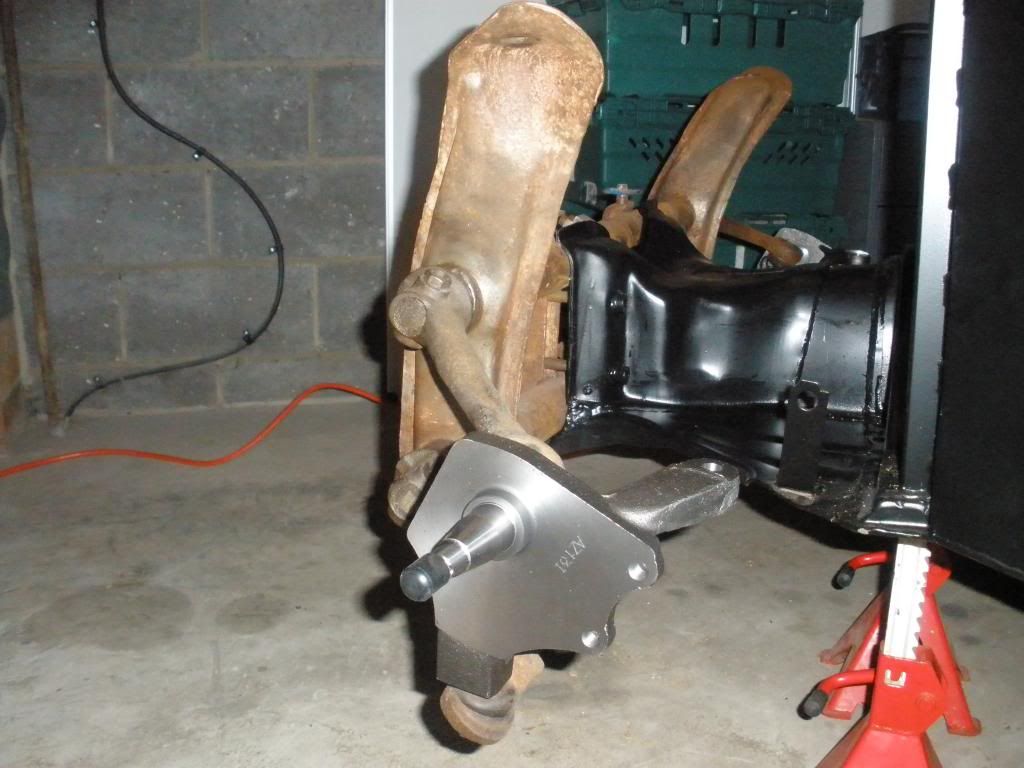
So with a few hours Man Cave time remaining I fitted the dropped spindles to the 356. These are only finger tight at the moment but I can now say I have an axle in each corner.

I then turned to the pedal cluster and after a quick going over with a wire brush offered everything up. In it went and, with a couple of holes drilled into the floor, everything was bolted up.
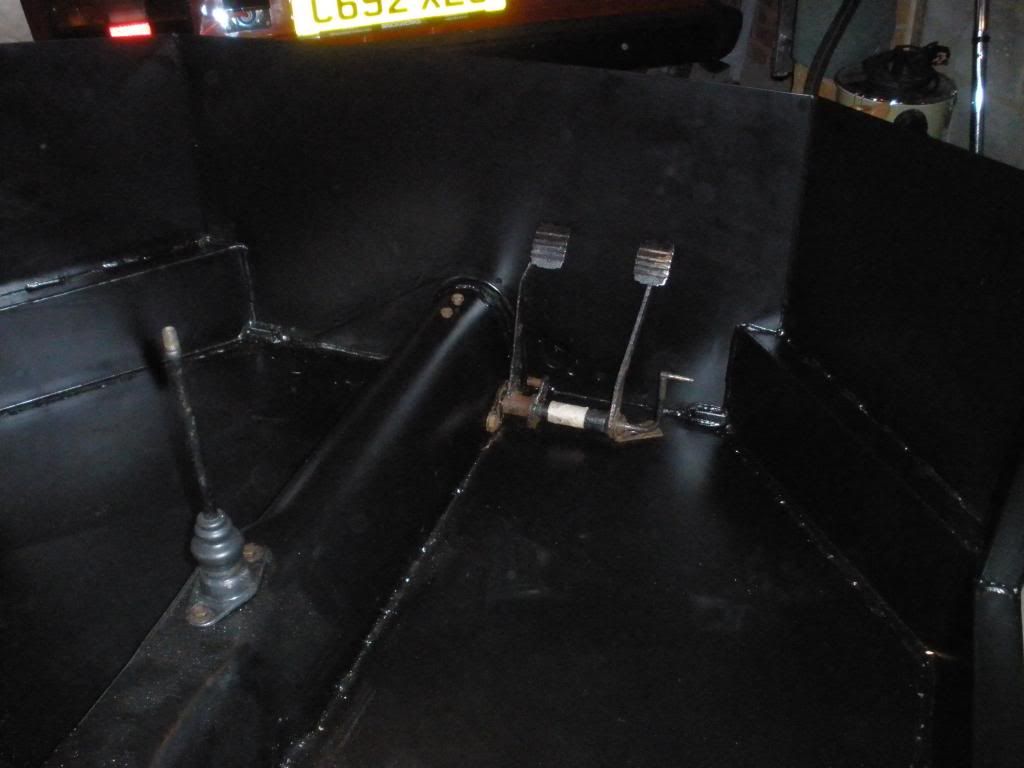
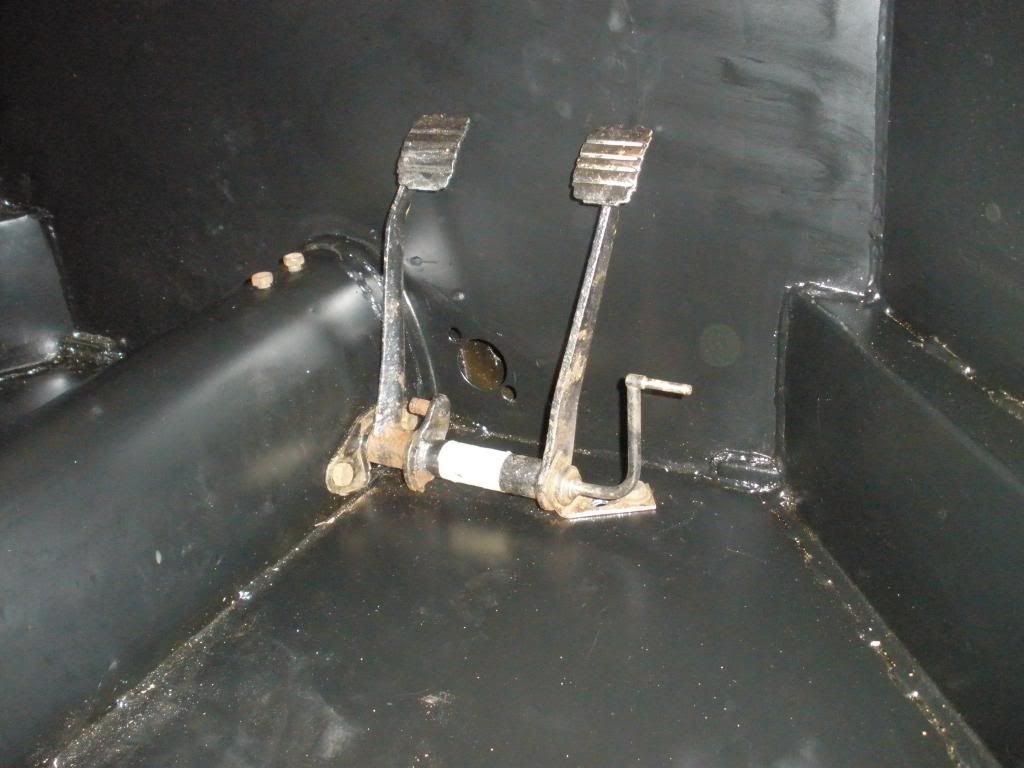
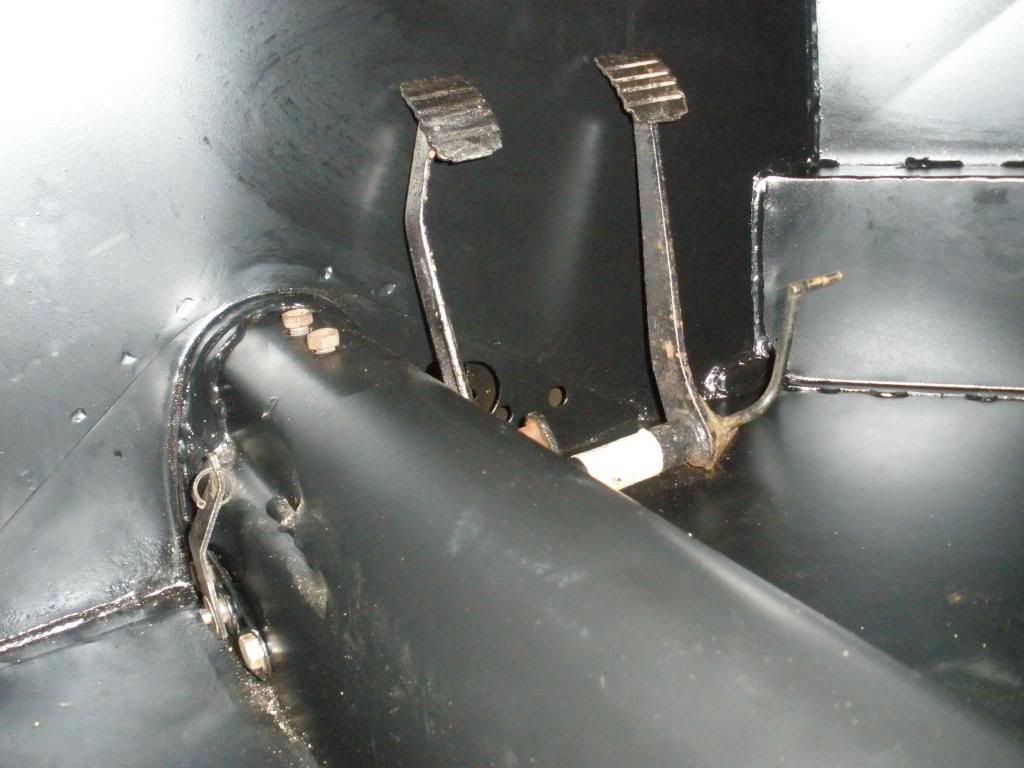
I still need to work out what I need to do about fitting a return stop for the brake and clutch pedals, so that I get the pedal travel set up correctly.
I am thinking that the next thing on the list will have to be the fuel and brake lines - roll on DubFreeze.
After a few high fives and big grins (have I let the cat out of the bag?) I took a quick trip to rummage through Rusty Dubnuts boxes (and pick up the boss) saw me with a pedal cluster.
Rolling on to Sunday and a visit from Lee with his lowered patina bay to set up his carb and timing. to complete the picture, this followed a Thursday evening session in the Man Cave stripping and bench setting the carb as it would not run at all once it had warmed up. It turned out that the auto-choke had become disconnected from the choke butterfly and was not opening. Once fitted the bus ran well but just need the 009 setting up correctly. A 30 min job on Sunday turned into a couple of hours as we found a few additional challenges left/created by a local garage! With the dissy and inlet manifold properly secure, and the carb stud replaced, everything was set up. A quick run around the block followed by an adjustment to the accelerator pump (to overcome the inherent 009 flatspot) saw a happy camper once more.
So with a few hours Man Cave time remaining I fitted the dropped spindles to the 356. These are only finger tight at the moment but I can now say I have an axle in each corner.
I then turned to the pedal cluster and after a quick going over with a wire brush offered everything up. In it went and, with a couple of holes drilled into the floor, everything was bolted up.
I still need to work out what I need to do about fitting a return stop for the brake and clutch pedals, so that I get the pedal travel set up correctly.
I am thinking that the next thing on the list will have to be the fuel and brake lines - roll on DubFreeze.
Re: H-Gs Project 356
A good drive into central London to pick up the wheels today and have a good look around an original 356C Coupe for ideas and inspiration. If anyone wishes to see the coupe pics, then head over and I will put the kettle on as I'm not going to post them up here. As a taster, the chap uses it for rallies and hill climbs; it's fully rally spec'd with a 1680cc engine that revs to over 6k rpm and is pushing iro 120BHP.
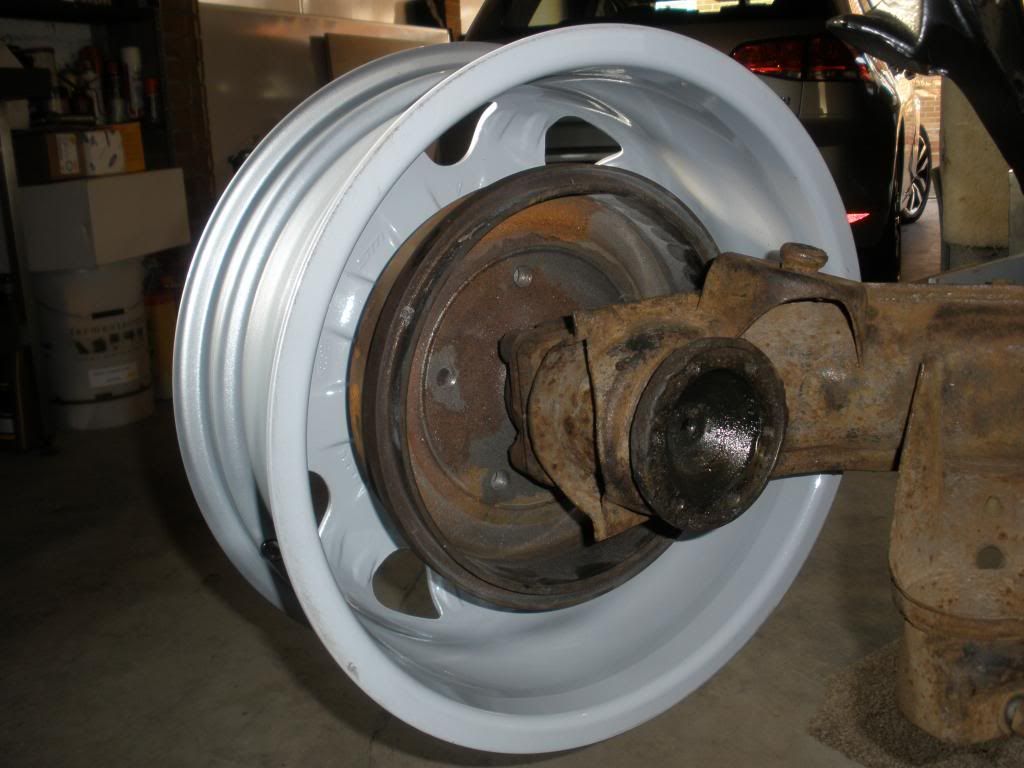
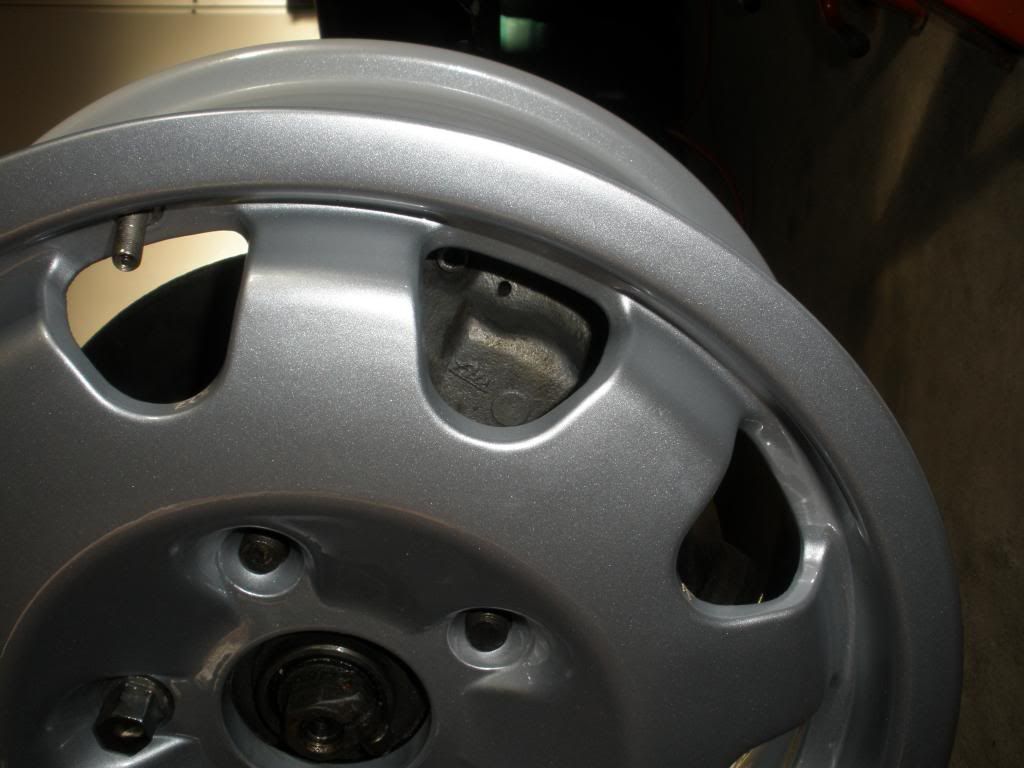
So I will start with a bit of wheel pron, and then go into what I have learnt as a result of a bit of time in the garage this afternoon.
The new wheels:
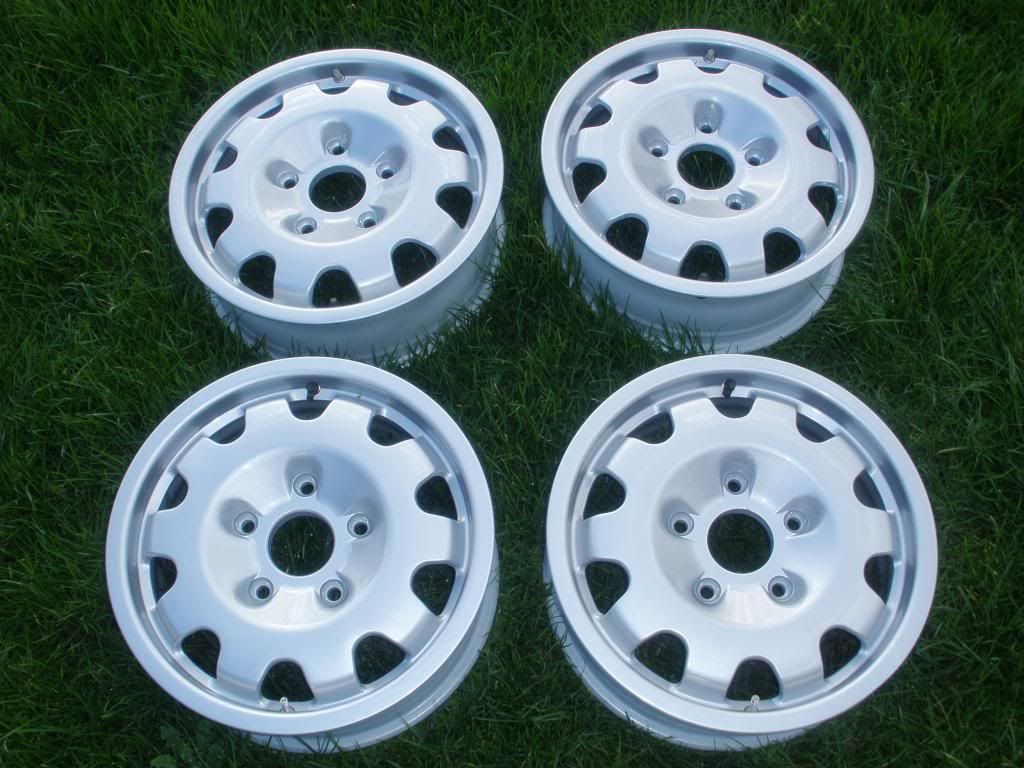
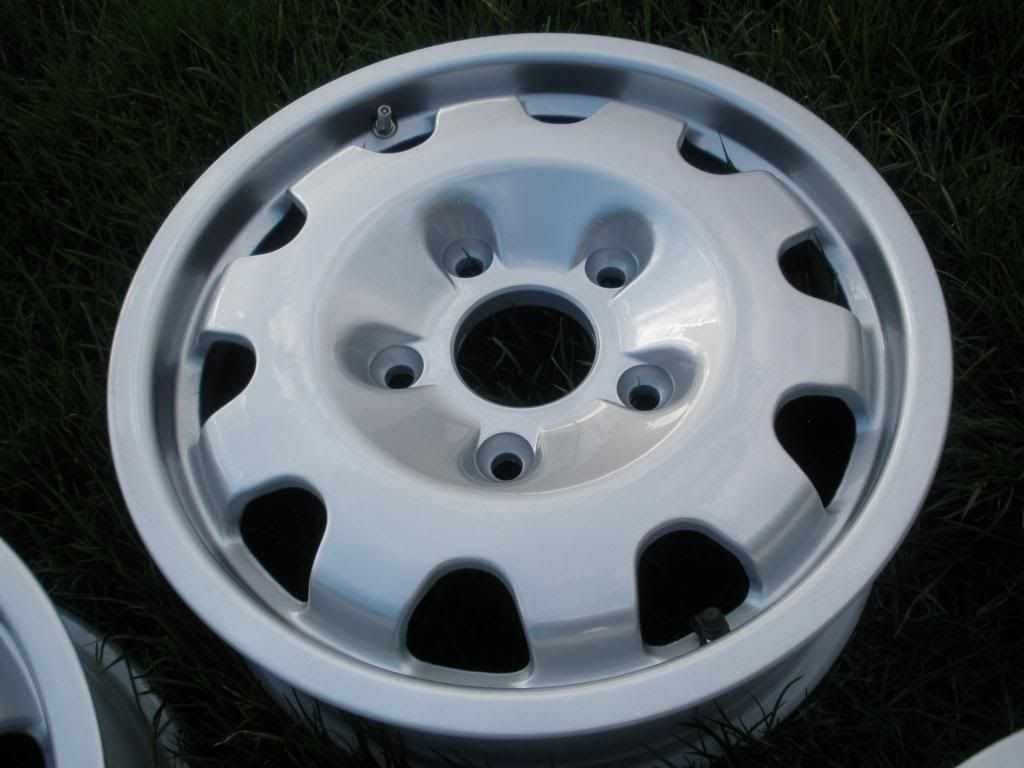
Who can spot the slightly unusual addition?
Oh go on then - here they are very loosely fitted to the chassis:
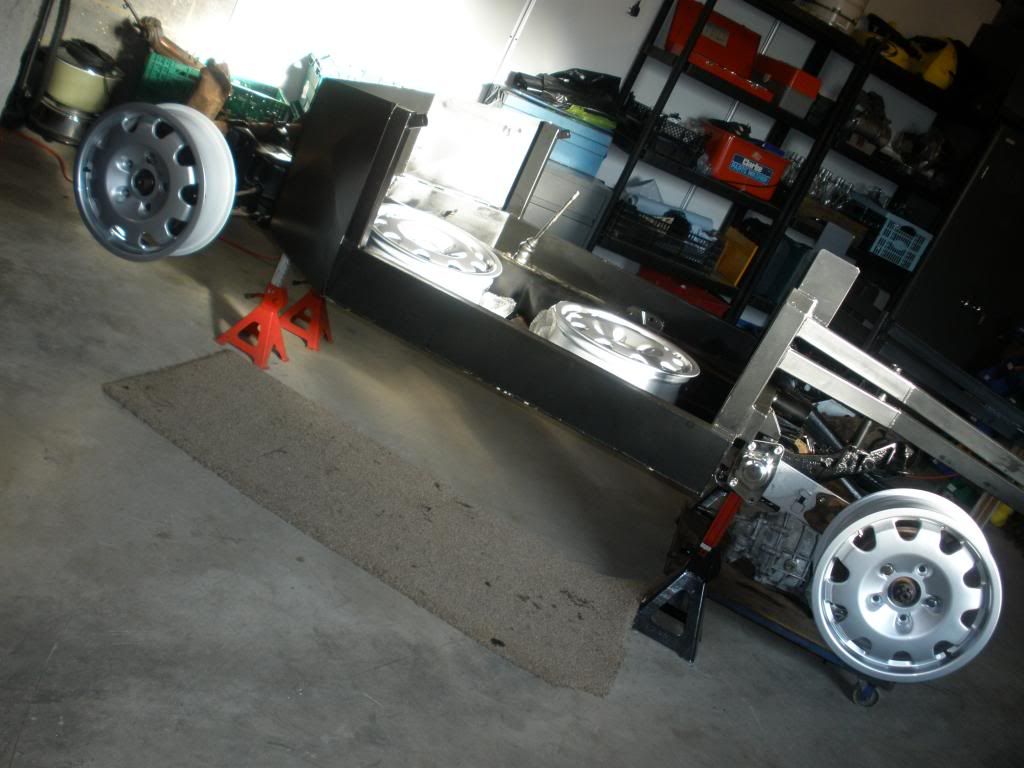
While I have not done any 'serious' spannering, I did spend time checking clearancing and fit of the brake components before I tuck the wheels away for another day. What I found is:
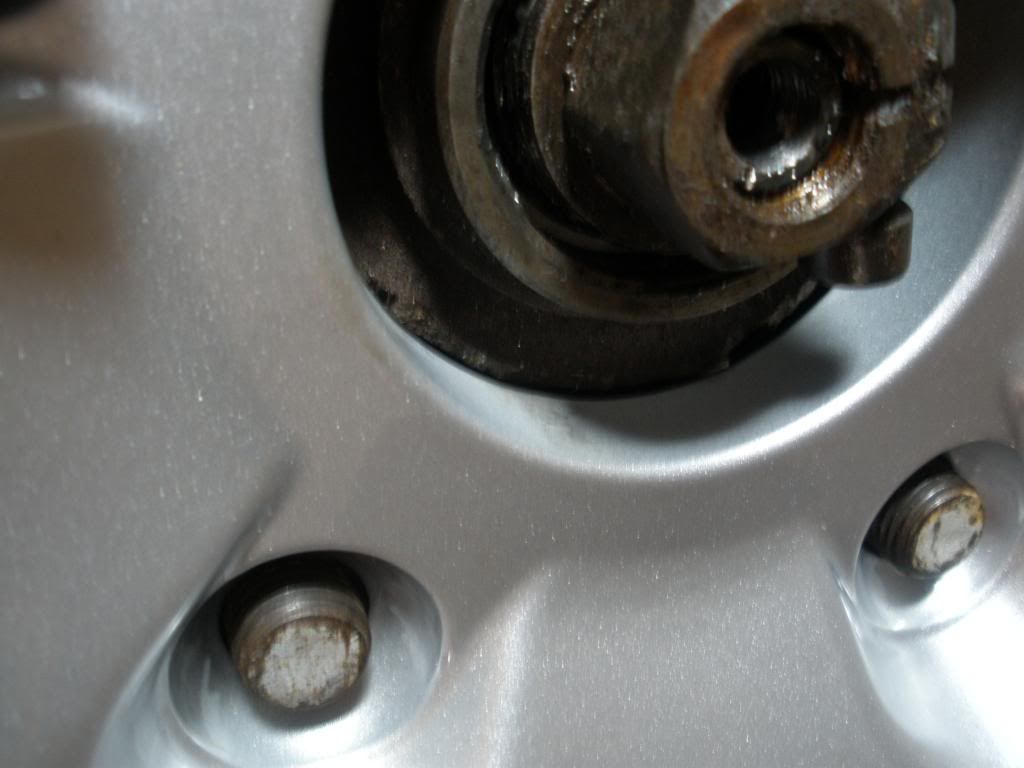
I need to have the hubs and drum centres machined down by approximately 1.5mm so that the wheels fit over the centre.
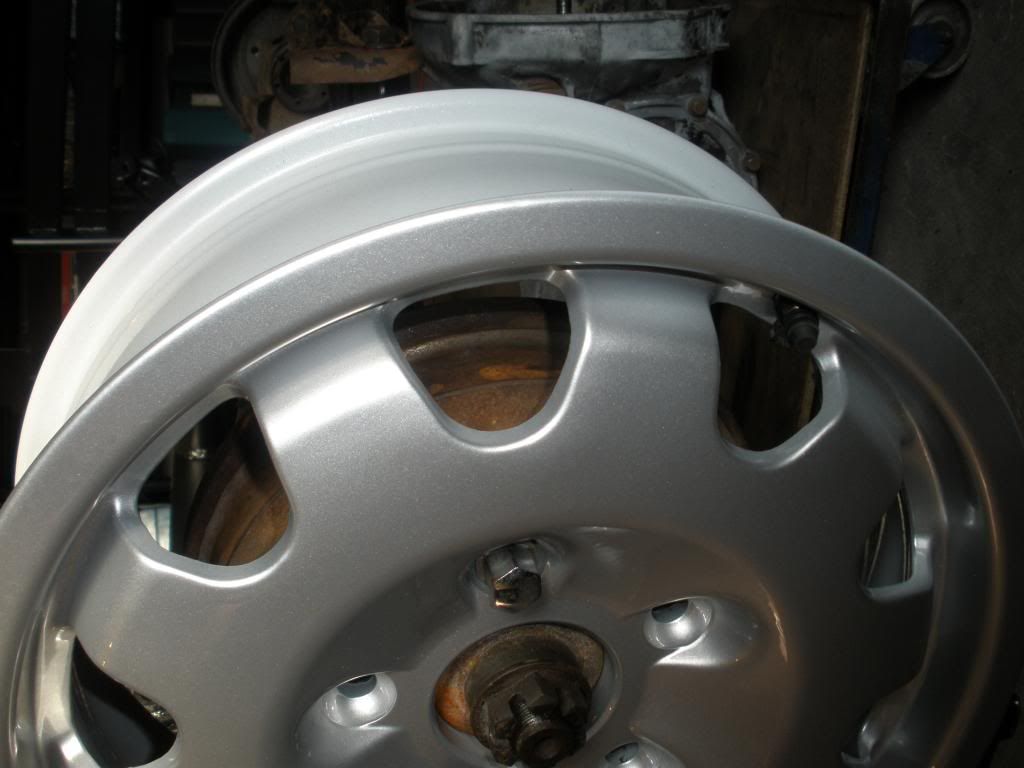
That everything fits very nicely behind the rear wheels.
That the brake components fit nicely behind the front wheels.

That both the drums and calipers will look good when painted and showing through the wheels.
All is not so straight forward at the front end:
The lower trailing arms may catch the wheels when the suspension is fully extended.

I need to work on the caliper offset in relation to the disks.
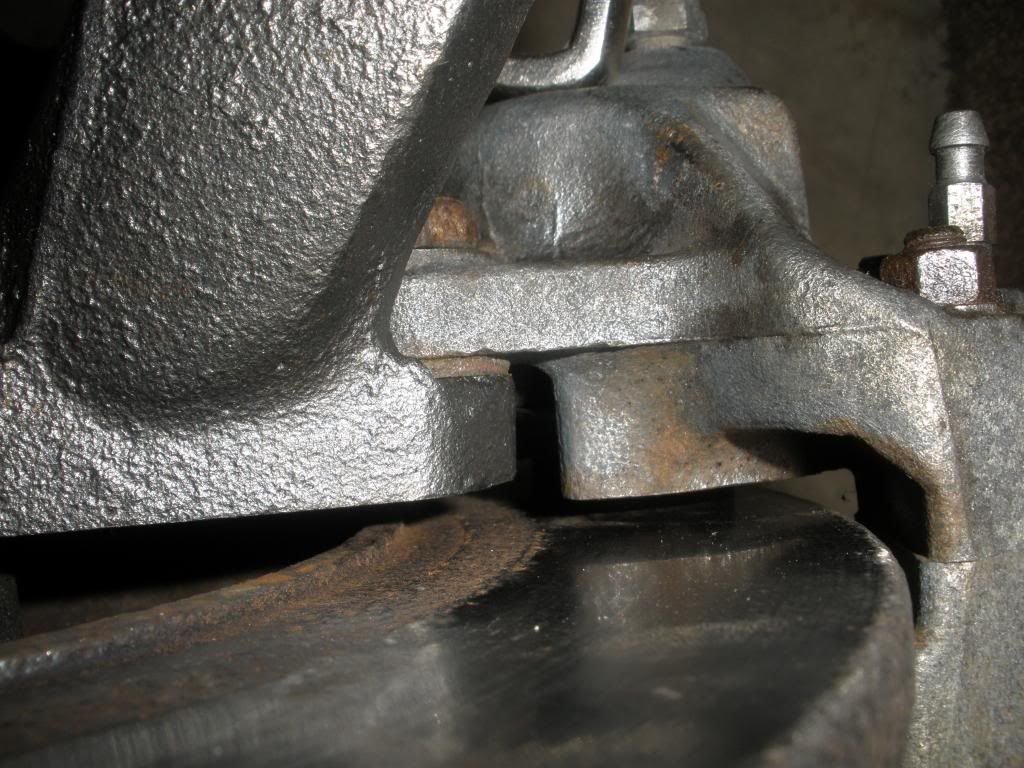

All of these challenges are relatively easy to overcome; I will need to have about 2mm machined off of the inner surfaces of the calipers where they bolt up to the spindle and then see about a bump-stop to restrict the suspension extension. I did try a different disk, and the results are the same, so I think the challenge may be with the spindles rather than the calipers.
So the big decision after all of that is what colour do I paint the calipers and drums?
Before that though, the next job must be to get the brake and fuel lines fitted. Until that's done, I cannot start stripping the chassis to start refurbing, painting and then final fitment of all the parts up to rolling chassis.
So I will start with a bit of wheel pron, and then go into what I have learnt as a result of a bit of time in the garage this afternoon.
The new wheels:
Who can spot the slightly unusual addition?
Oh go on then - here they are very loosely fitted to the chassis:
While I have not done any 'serious' spannering, I did spend time checking clearancing and fit of the brake components before I tuck the wheels away for another day. What I found is:
I need to have the hubs and drum centres machined down by approximately 1.5mm so that the wheels fit over the centre.
That everything fits very nicely behind the rear wheels.
That the brake components fit nicely behind the front wheels.
That both the drums and calipers will look good when painted and showing through the wheels.
All is not so straight forward at the front end:
The lower trailing arms may catch the wheels when the suspension is fully extended.
I need to work on the caliper offset in relation to the disks.
All of these challenges are relatively easy to overcome; I will need to have about 2mm machined off of the inner surfaces of the calipers where they bolt up to the spindle and then see about a bump-stop to restrict the suspension extension. I did try a different disk, and the results are the same, so I think the challenge may be with the spindles rather than the calipers.
So the big decision after all of that is what colour do I paint the calipers and drums?
Before that though, the next job must be to get the brake and fuel lines fitted. Until that's done, I cannot start stripping the chassis to start refurbing, painting and then final fitment of all the parts up to rolling chassis.
Re: H-Gs Project 356
Ok good peoples of Splitterz Land, it's been quite while since I last updated the thread with work carried out on Proj 356; quite a bit has been done so I will look to post a number of updates - here goes:
When I last update I had pretty much got to the point where I was ready to strip everything off the chassis and begin the task of cleaning, paint and refurbishing all of the components.
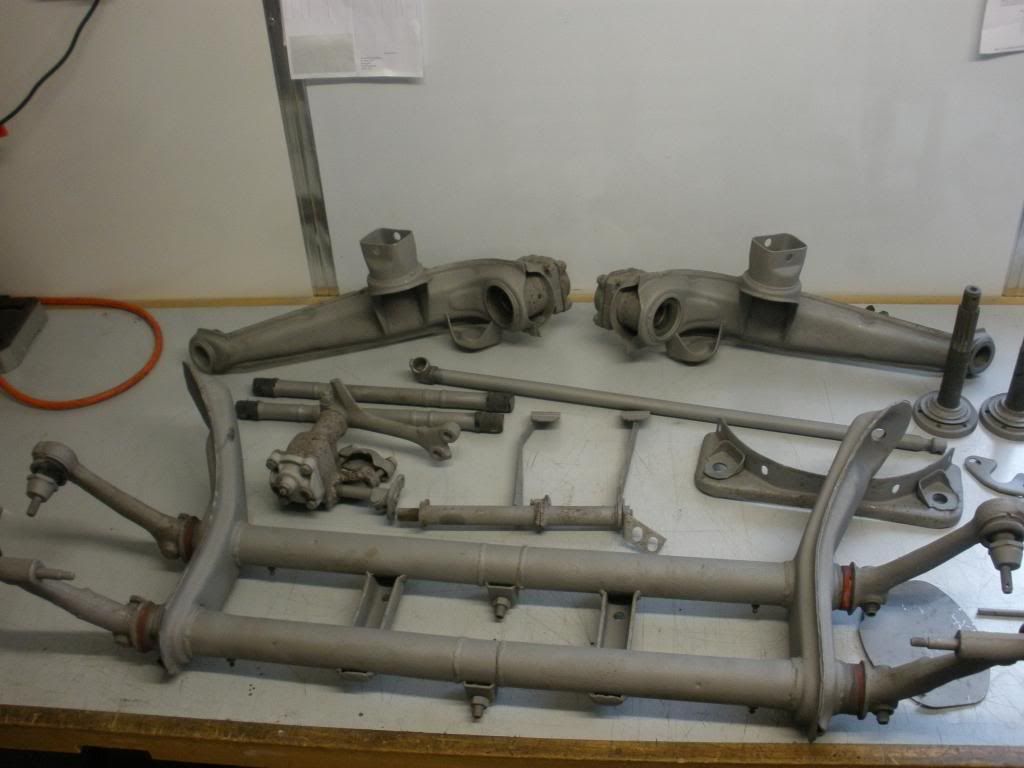
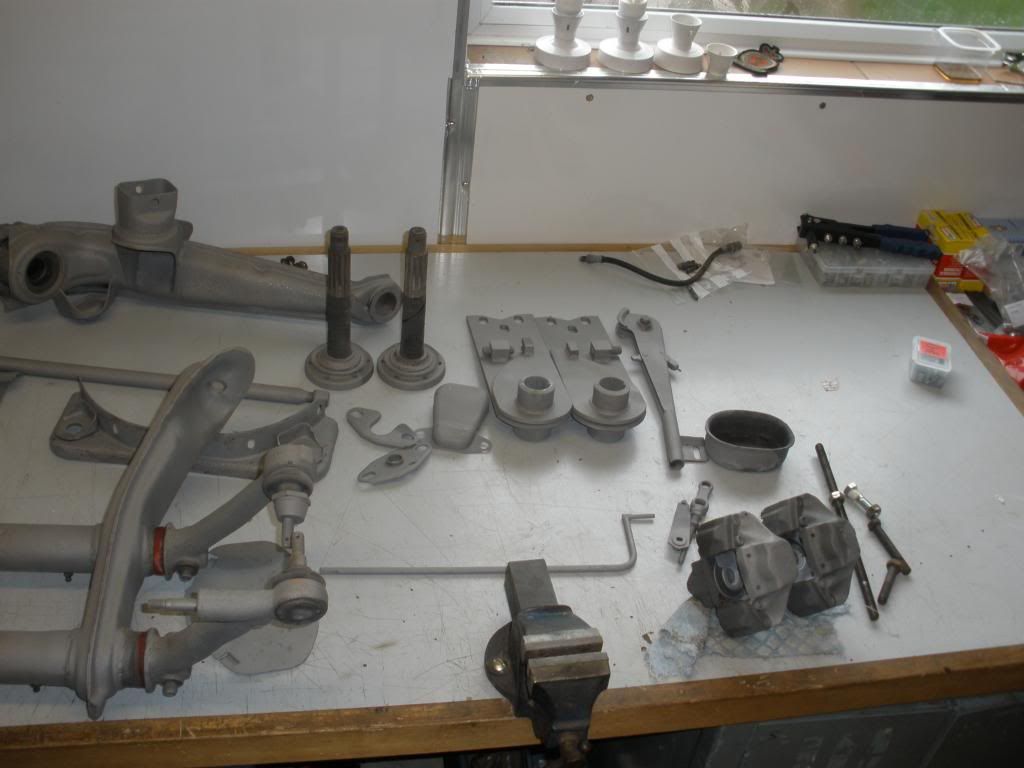
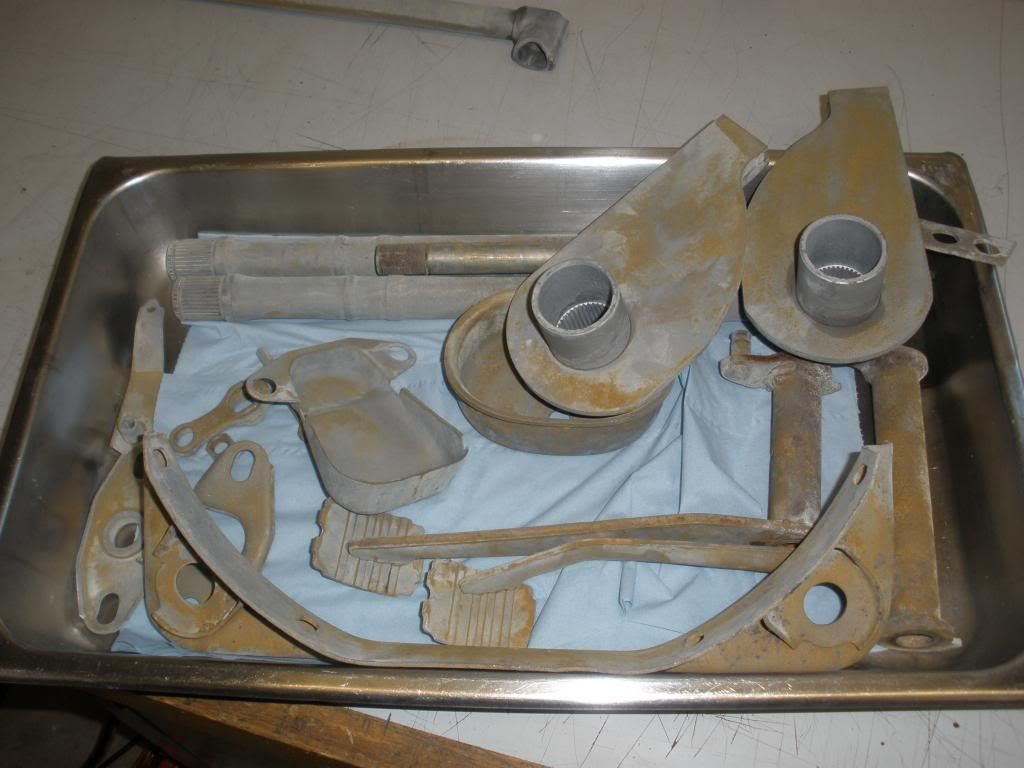
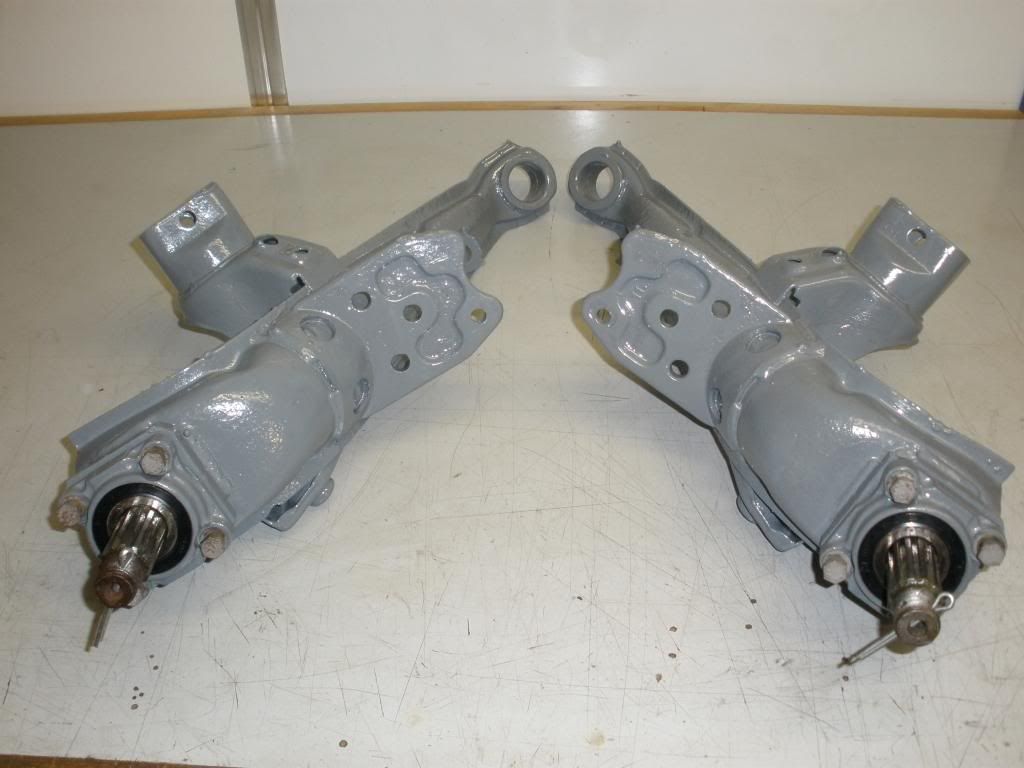
The strip down took all of a few hours, quite literally, which surprised me as it had taken me so long to get the chassis to where it was. all components were further stripped down and the main parts were sent off to be blasted. A week later they all came back pretty much rust free and ready for prep and paint:
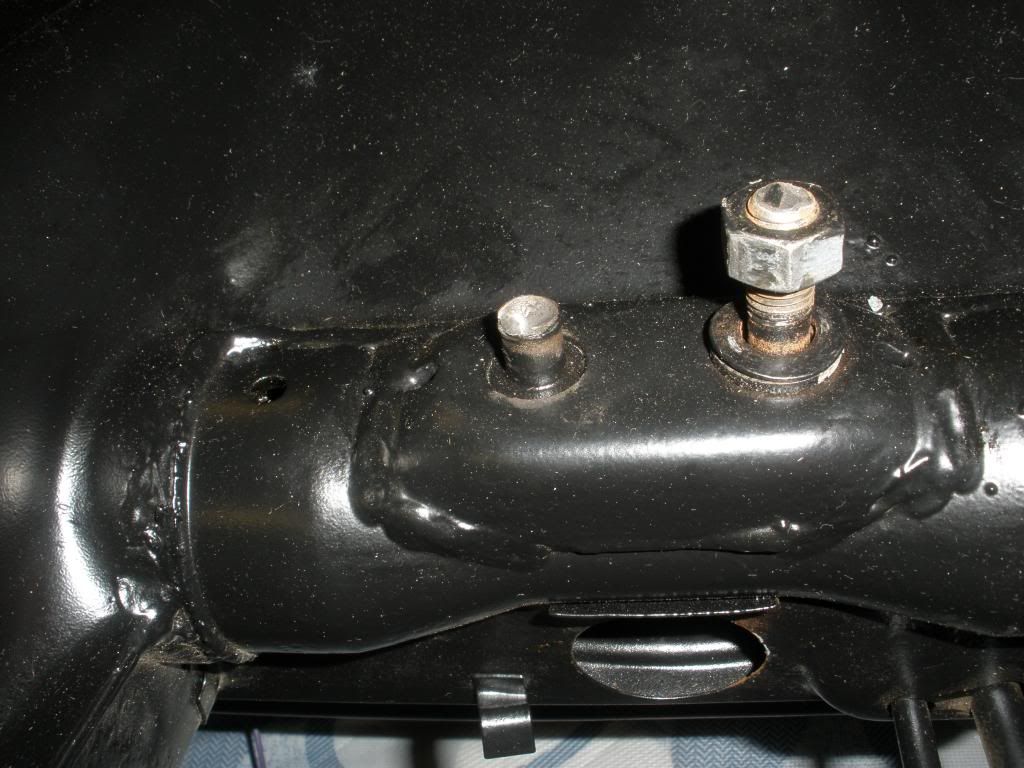
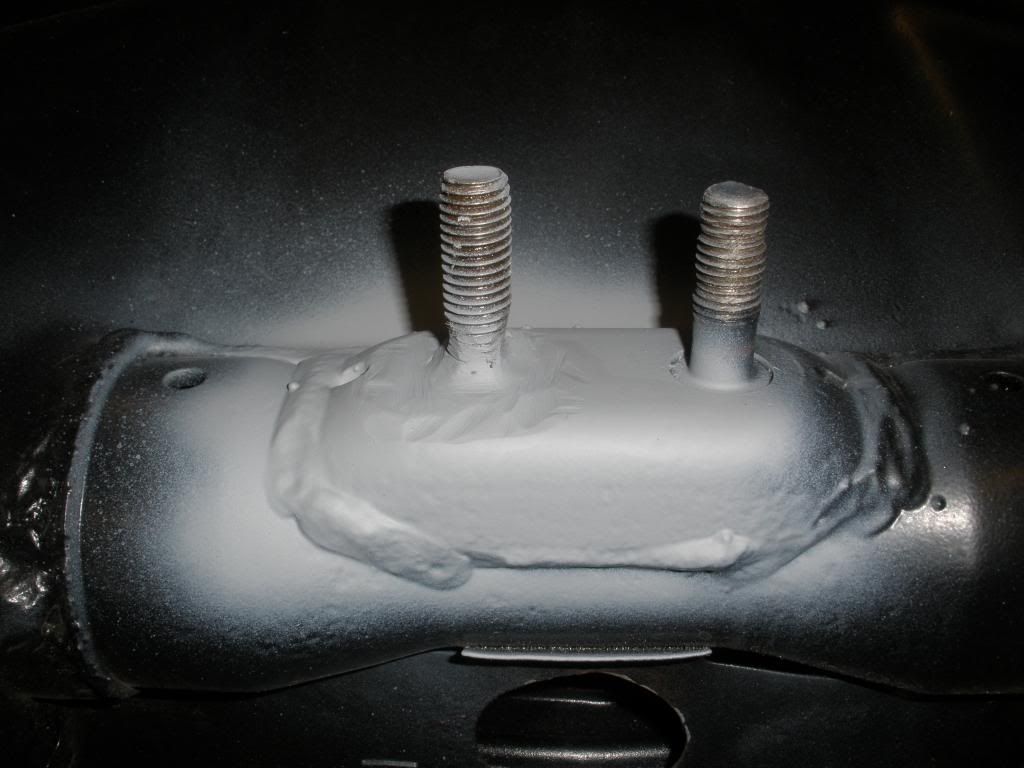
While the parts were away I flipped the chassis and got to work repairing the gearbox mount stud and then going around all of the seams with PU sealant before finishing off with a liberal coat of Frosts own chassis paint; I didn't use the POR15 as the chassis was already powder coated
Next is prep and paint of the blasted parts.....
When I last update I had pretty much got to the point where I was ready to strip everything off the chassis and begin the task of cleaning, paint and refurbishing all of the components.
The strip down took all of a few hours, quite literally, which surprised me as it had taken me so long to get the chassis to where it was. all components were further stripped down and the main parts were sent off to be blasted. A week later they all came back pretty much rust free and ready for prep and paint:
While the parts were away I flipped the chassis and got to work repairing the gearbox mount stud and then going around all of the seams with PU sealant before finishing off with a liberal coat of Frosts own chassis paint; I didn't use the POR15 as the chassis was already powder coated
Next is prep and paint of the blasted parts.....
Re: H-Gs Project 356
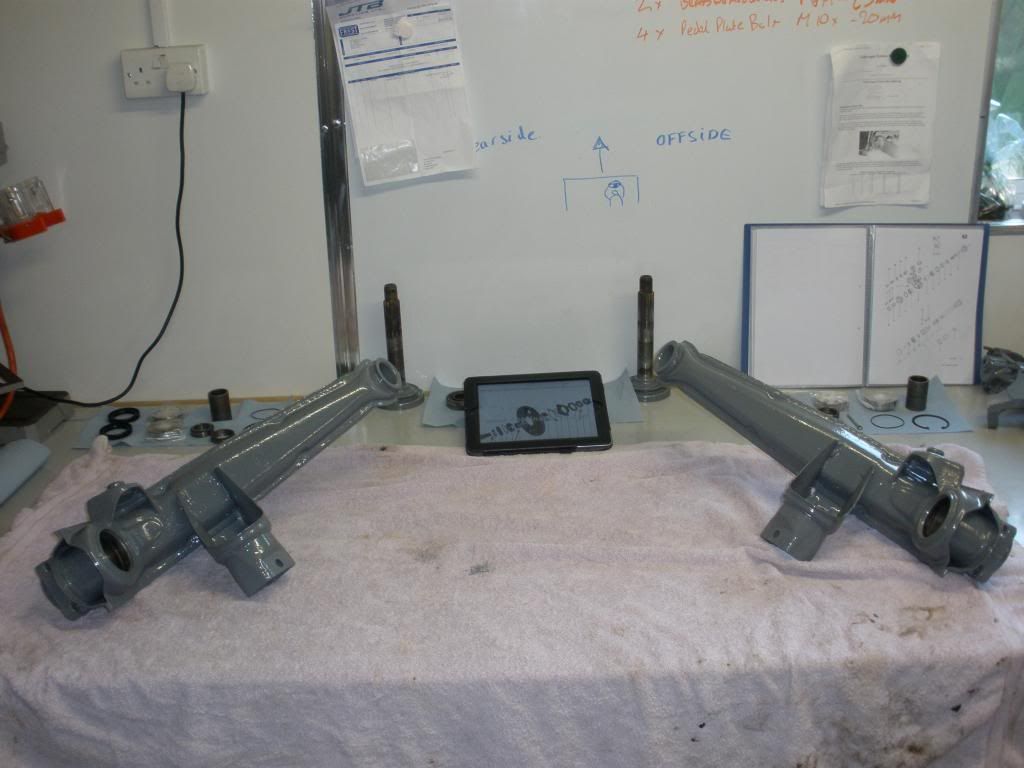
So painting - not much excitement here so I will gloss over it pretty quickly :D
Blasted parts came back looking as they did in the last post. I did a lot while they were away, like ordering all of the rust killing chemicals and paints.
First job was to blow everything over with an airline before a thorough de-greasing using solution - it was so strong that it took all the oil from my skin and I had cracked hands for a few days after the cleaning! After that the parts were coated in the marine prep (basically phosphoric acid) which kills and last traces of rust and etches the surface ready for paint.
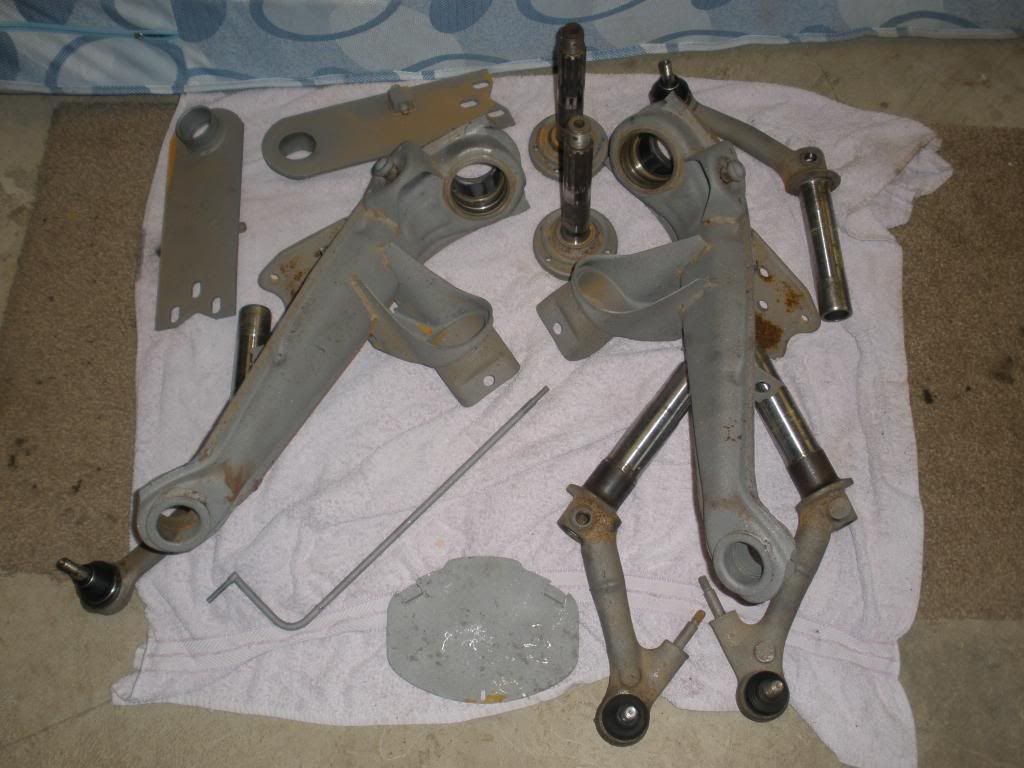
Next the came the paint - POR15. I chose this after reading the many reviews and, while there are other products out there, everything pointed to this being the best product out there for rust killing and prevention. The only thing I did change was to buy Frosts own brand of chassis black rather than the POR15 product. The basic rule that I am applying is that if it moves it will remain grey, if it is solid to the body then it will have a top coat of black.
A few pics of painted car bits -
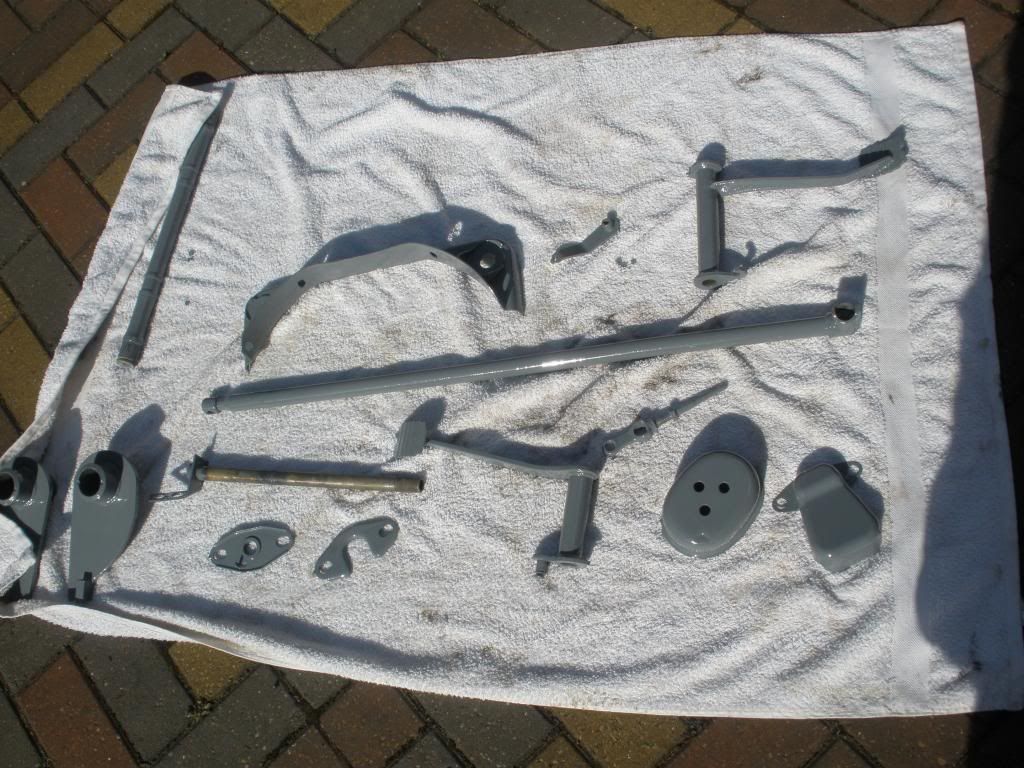
This was left to harden and while this was happening attention turned to pipework...
Blasted parts came back looking as they did in the last post. I did a lot while they were away, like ordering all of the rust killing chemicals and paints.
First job was to blow everything over with an airline before a thorough de-greasing using solution - it was so strong that it took all the oil from my skin and I had cracked hands for a few days after the cleaning! After that the parts were coated in the marine prep (basically phosphoric acid) which kills and last traces of rust and etches the surface ready for paint.
Next the came the paint - POR15. I chose this after reading the many reviews and, while there are other products out there, everything pointed to this being the best product out there for rust killing and prevention. The only thing I did change was to buy Frosts own brand of chassis black rather than the POR15 product. The basic rule that I am applying is that if it moves it will remain grey, if it is solid to the body then it will have a top coat of black.
A few pics of painted car bits -
This was left to harden and while this was happening attention turned to pipework...
Re: H-Gs Project 356
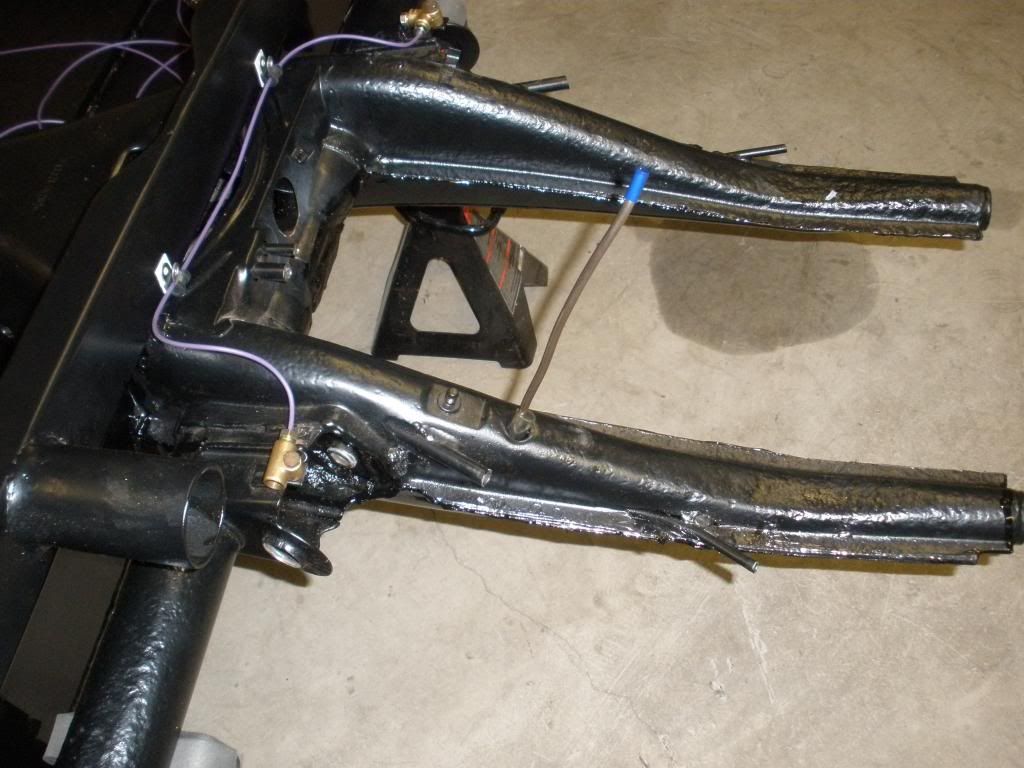
Pipework - let's start with the fuel line:
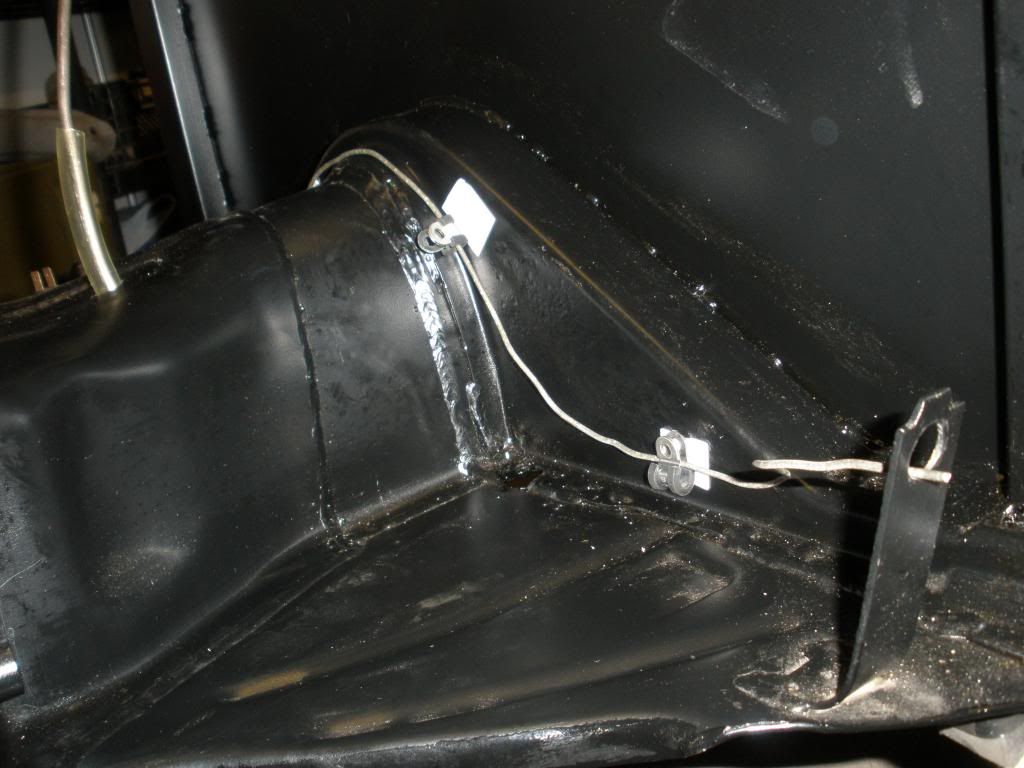
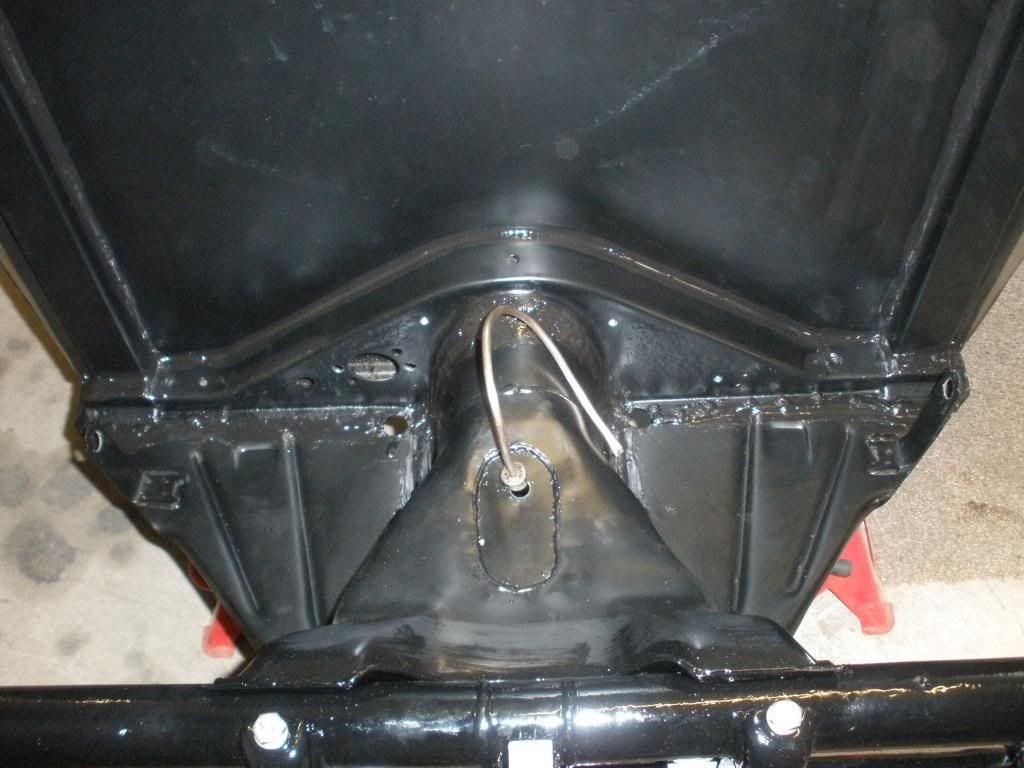
There is a lot of debate about the best place to route a replacement fuel line, however much of this is based on ease of fitting verses whether the body if on or off the chassis. While I think (now know!) the easiest and probably quickest method would be to run the fuel line along the opposite side of the tunnel to the brake line, I wasn't so keen on the idea of sharing the passenger compartment with it so opted to re-route it through the tunnel There is a fair bit out there on the best way to do this with the easiest seeming to be to use a self tapping screw to join the new to the old and then pull the new one into the chassis at the same time as pulling the old one out. Great if you have the old line still fitted!! Plan B - lets just make it up as we go along!
I enlisted the help of one Mr Squashua Murphy (who's help has been instrumental in the speed of the re-build to date) to help me guide the new line through the rear tab just at the start of the nearside frame horn and the front tab just underneath the bracket holding the clutch cable conduit in place. Before fitting, we used a SWAG to agree where to place some heatshrink which would prevent the pipe chaffing where it went through the tabs.
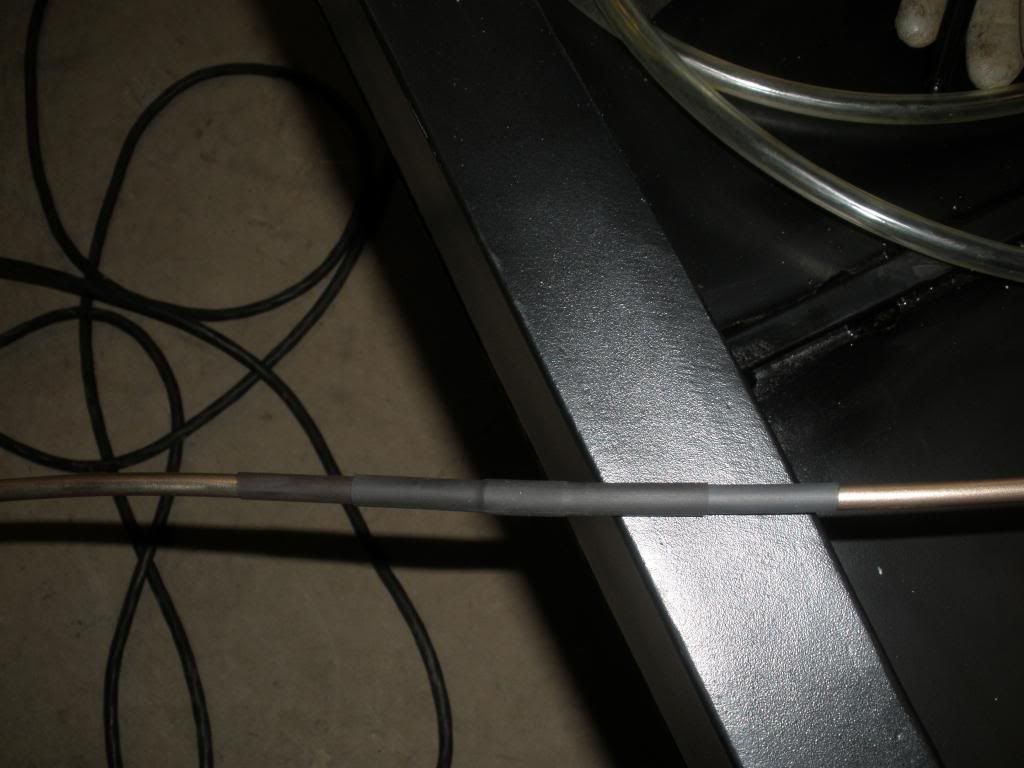
There was no hole at the front end for it to enter/exit the tunnel so one was drilled using a chassis diagram for guidance. The pipe was fed, was fed, was fed, was fed (you get the idea), from the back to the front with a number of home made implements being used to guide it into place. For the length of the tunnel the pipe was fed through a PVC pipe which will prevent any chaffing where it is laying on the floor of the tunnel. What we had hoped would be a relatively straight forward task took about 4 hours of trying and re-trying, but eventually it was in place.
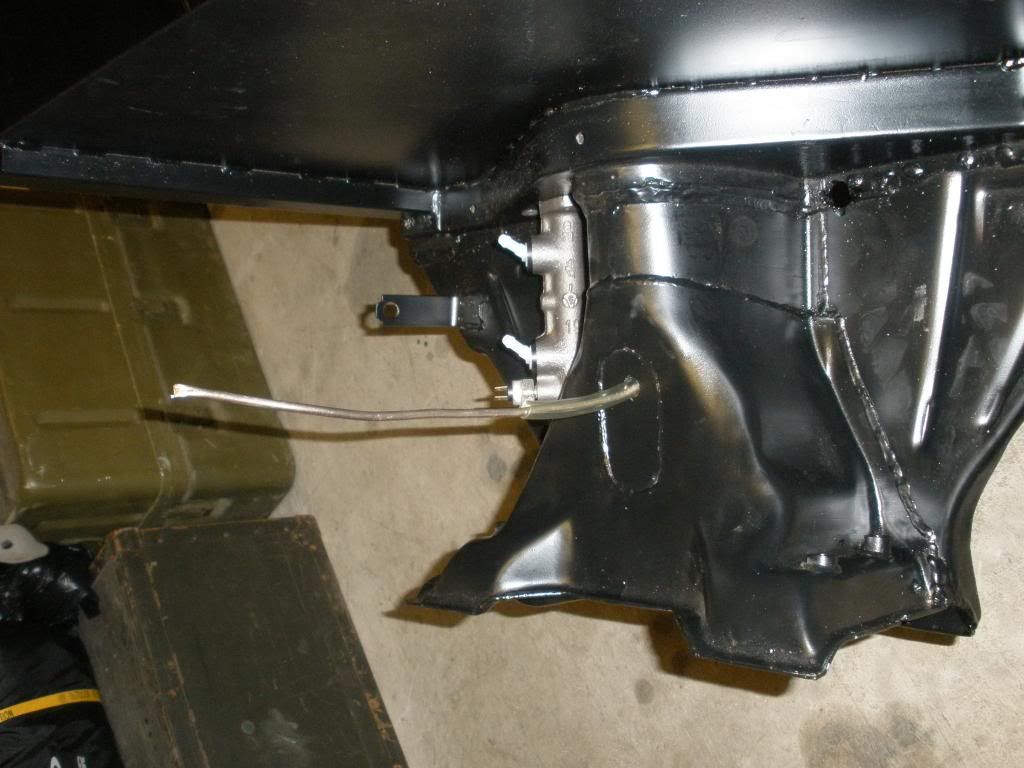
The other pipes that needed to be fitted were arguably the most important on the car - brake pipes. We started by making templates using fencing wire, allowing us to compare routes until I was happy that it wasn't going to snag on anything and was secure. The pipe flaring tool I borrowed from Echo Beach is worth it's weight in gold (it weight a lot!).
The end result being:
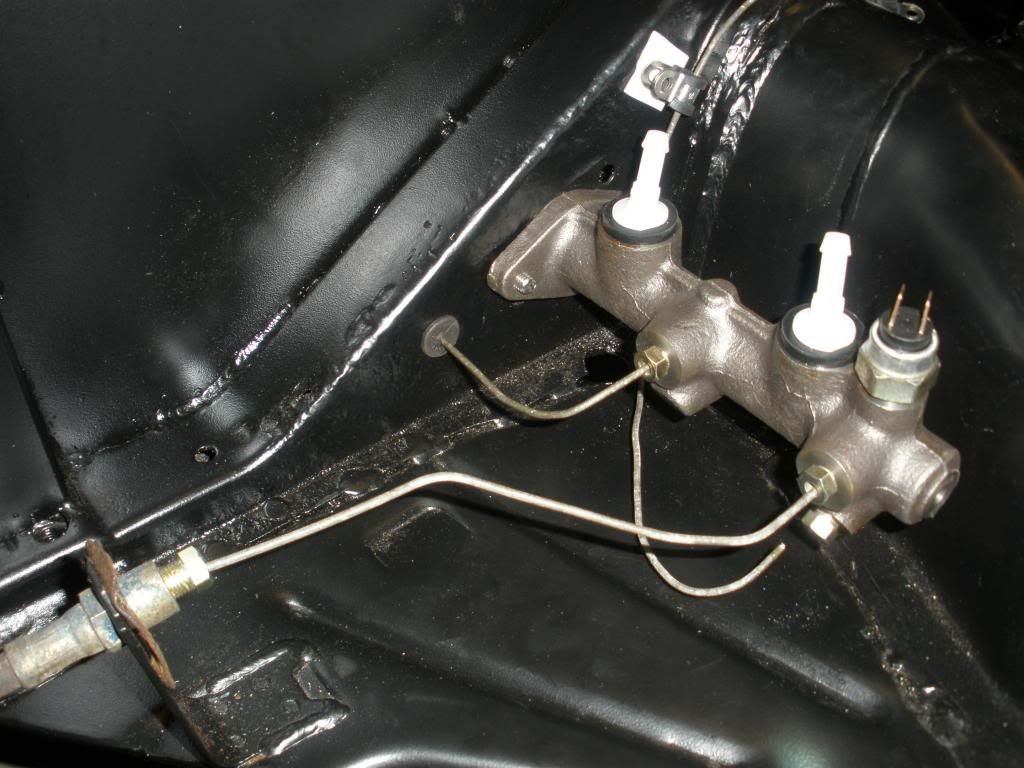
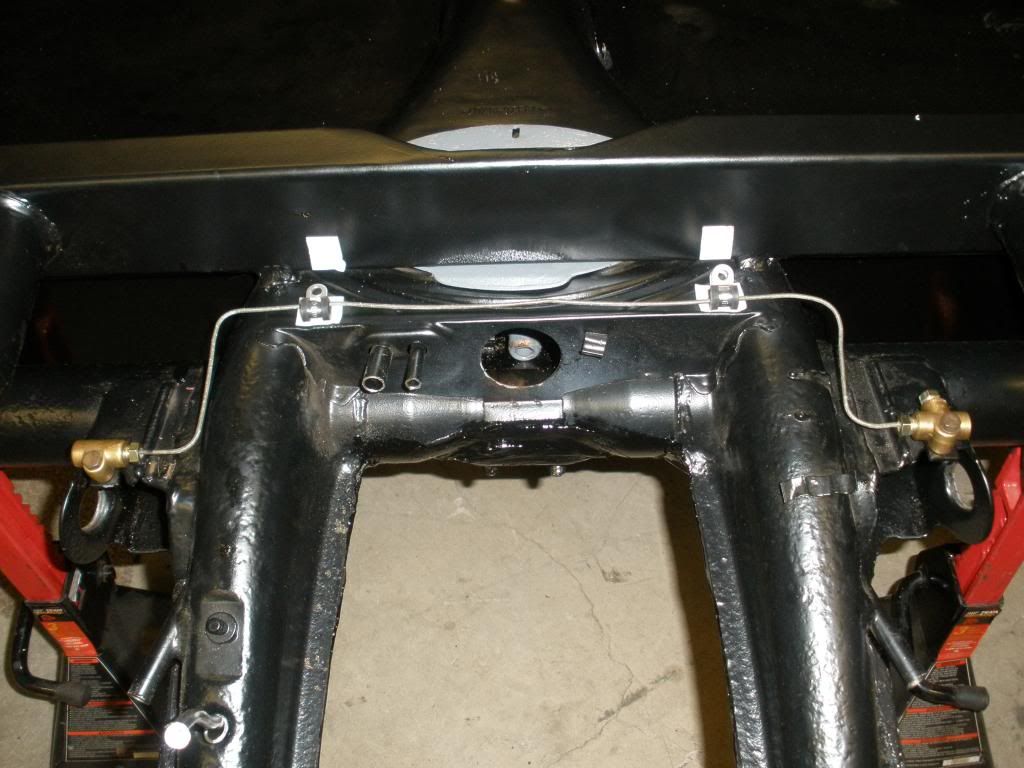
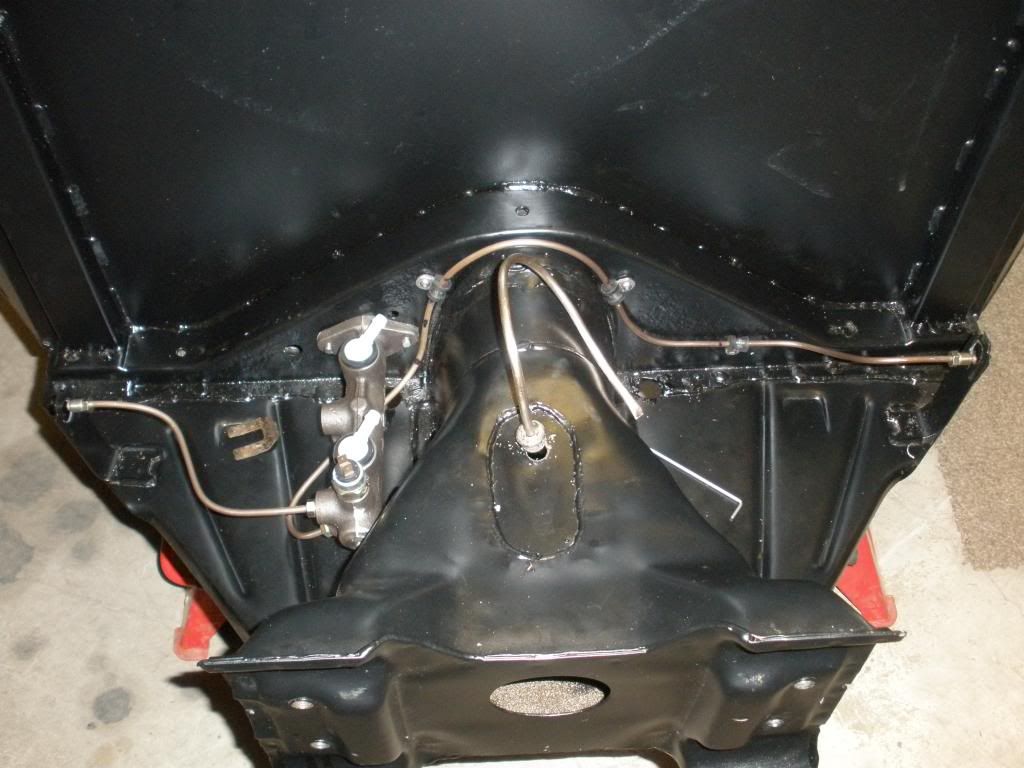
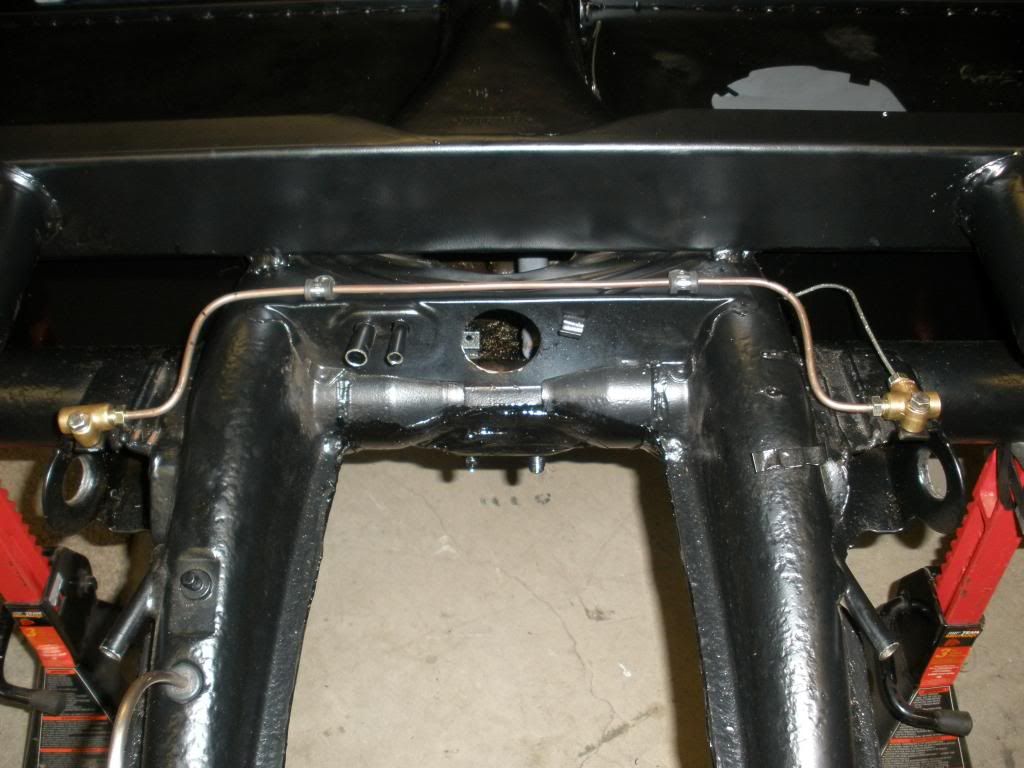
Pipework complete it was time to start putting the recently painted parts back together...
There is a lot of debate about the best place to route a replacement fuel line, however much of this is based on ease of fitting verses whether the body if on or off the chassis. While I think (now know!) the easiest and probably quickest method would be to run the fuel line along the opposite side of the tunnel to the brake line, I wasn't so keen on the idea of sharing the passenger compartment with it so opted to re-route it through the tunnel There is a fair bit out there on the best way to do this with the easiest seeming to be to use a self tapping screw to join the new to the old and then pull the new one into the chassis at the same time as pulling the old one out. Great if you have the old line still fitted!! Plan B - lets just make it up as we go along!
I enlisted the help of one Mr Squashua Murphy (who's help has been instrumental in the speed of the re-build to date) to help me guide the new line through the rear tab just at the start of the nearside frame horn and the front tab just underneath the bracket holding the clutch cable conduit in place. Before fitting, we used a SWAG to agree where to place some heatshrink which would prevent the pipe chaffing where it went through the tabs.
There was no hole at the front end for it to enter/exit the tunnel so one was drilled using a chassis diagram for guidance. The pipe was fed, was fed, was fed, was fed (you get the idea), from the back to the front with a number of home made implements being used to guide it into place. For the length of the tunnel the pipe was fed through a PVC pipe which will prevent any chaffing where it is laying on the floor of the tunnel. What we had hoped would be a relatively straight forward task took about 4 hours of trying and re-trying, but eventually it was in place.
The other pipes that needed to be fitted were arguably the most important on the car - brake pipes. We started by making templates using fencing wire, allowing us to compare routes until I was happy that it wasn't going to snag on anything and was secure. The pipe flaring tool I borrowed from Echo Beach is worth it's weight in gold (it weight a lot!).
The end result being:
Pipework complete it was time to start putting the recently painted parts back together...
Re: H-Gs Project 356
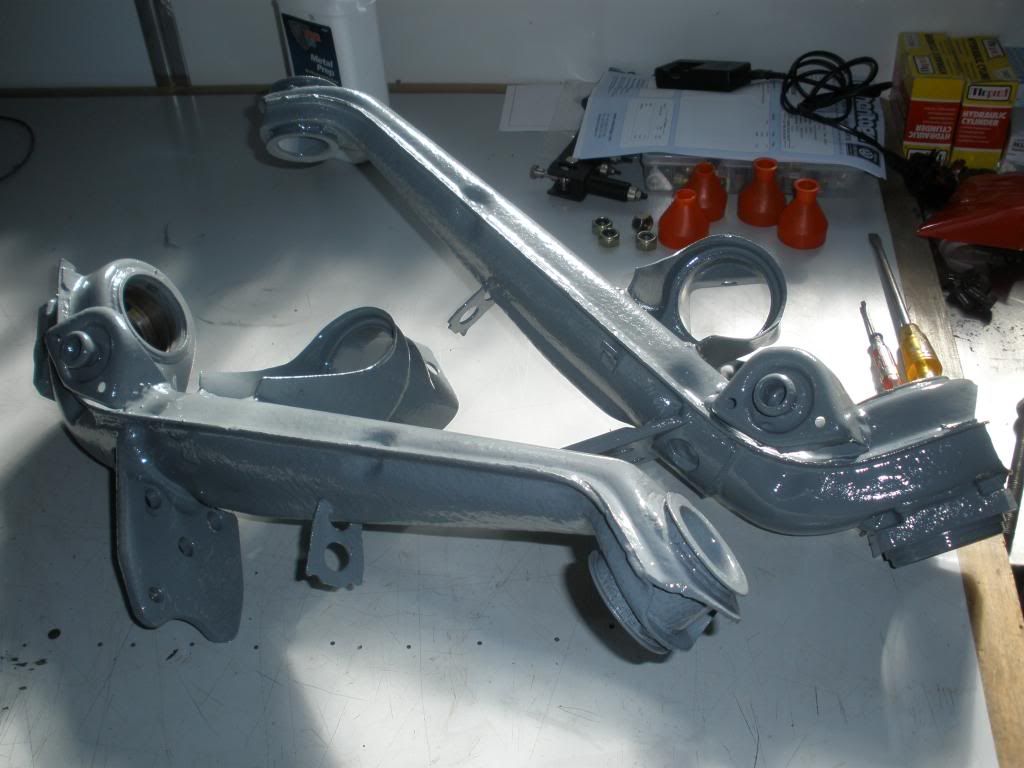
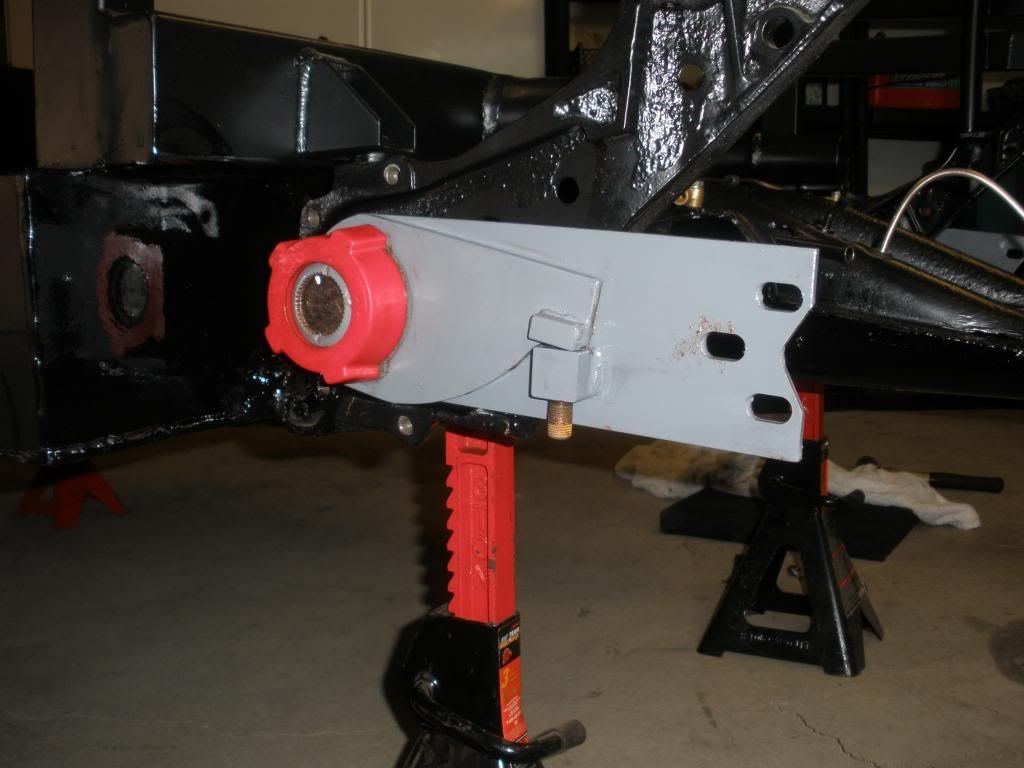
First thing I did was to fit the spring plates and rear torsion bars. I had downloaded a document which gave some guidance on the amount of pre-load required for buggys. Using this I set the spring plates to 10 degrees from horizontal (normally they are at 19 - 21 degrees) with the adjustment bolts showing 10mm of thread. This still required a small amount of effort to lift the spring plate to allow it to sit on the 'ledge' all fitted I wound off the pre-load to make fitting the torsion bar covers easier.
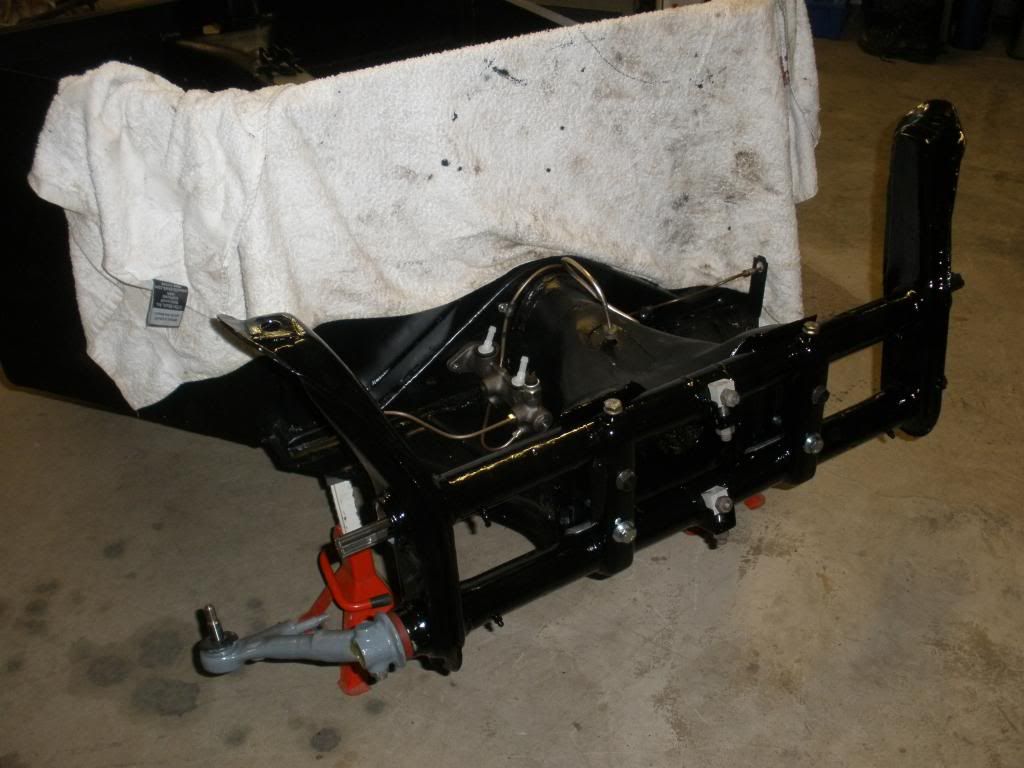
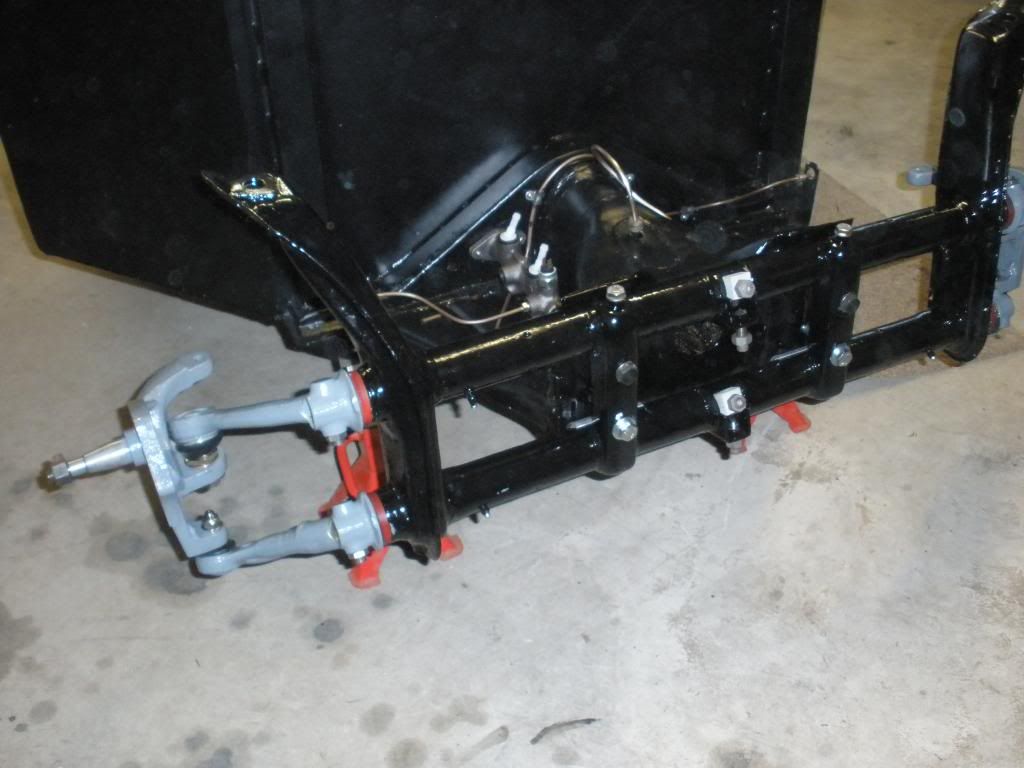
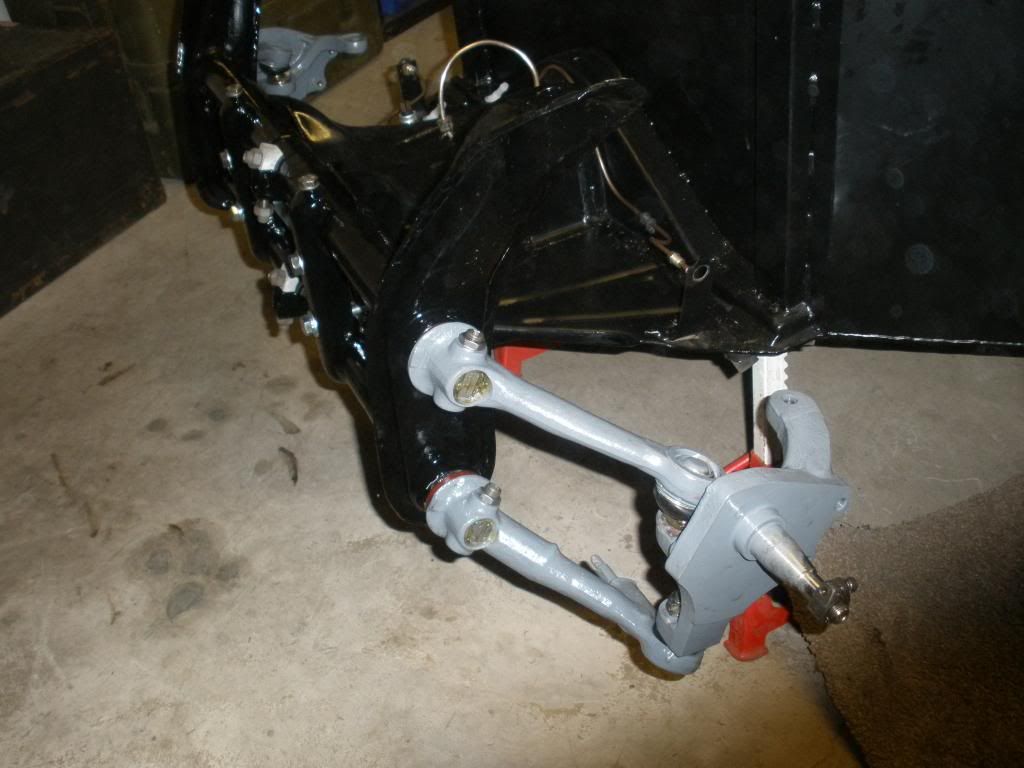
Next came the front beam. I bolted the beam up before fitting anything to it as I made it lighter to lift and more stable for working on. Because I am lowering the car I have fitted caster compensator shims behind the lower torsion tube. Everything was liberally coated in grease before fitting using new nuts and bolts throughout.
I forgot to mention that before painting them, I replaced the ball joints on all of the trailing arms; one had a lot of play in it and rather than find that they needed doing once the car was finished, I would do the job now while everything was in bits. The BJs came out pretty easily using the Wyton Motorclub press.
Once the front trailing arms were fitted, it was a simple excersice (once I had remembered to fit the washers on the top ball joints) to fit the spindles.
The gear selector rod went in without causing any problems - I took pics but apart from begin clean, it looks just like the trial fit pics.
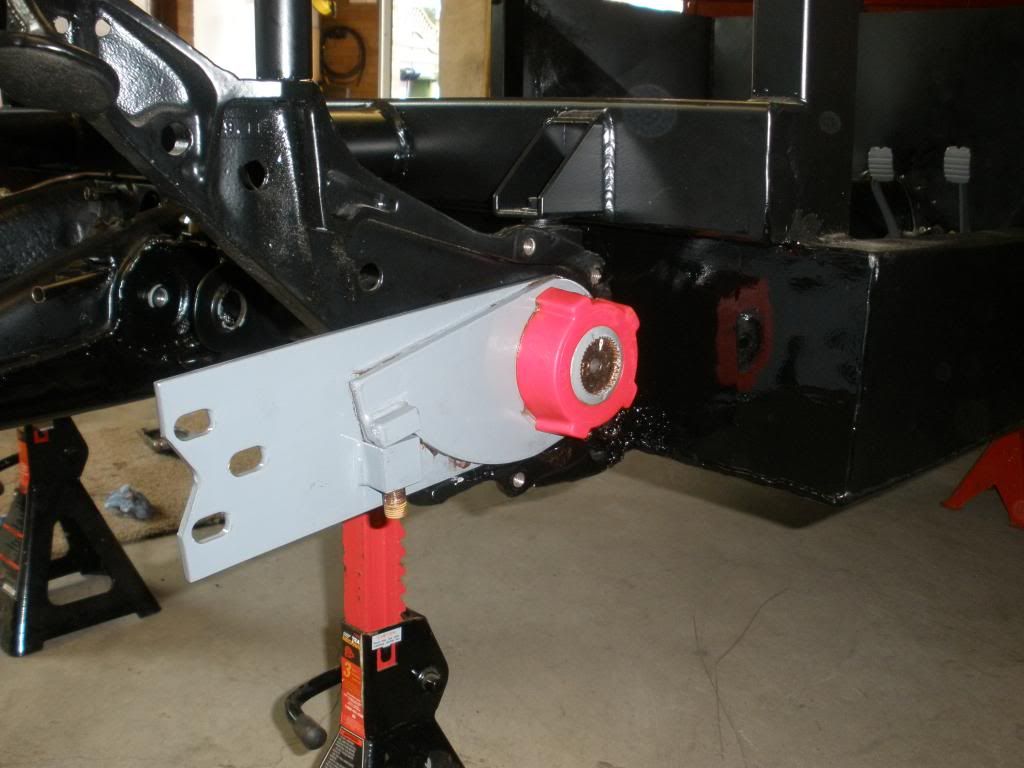
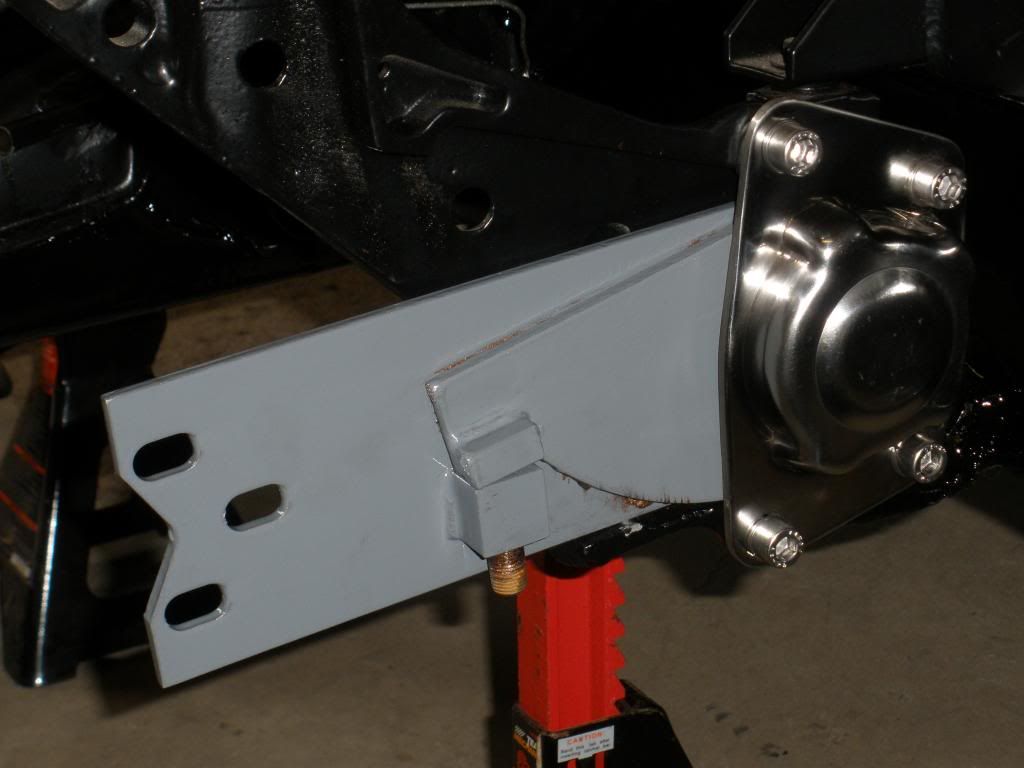
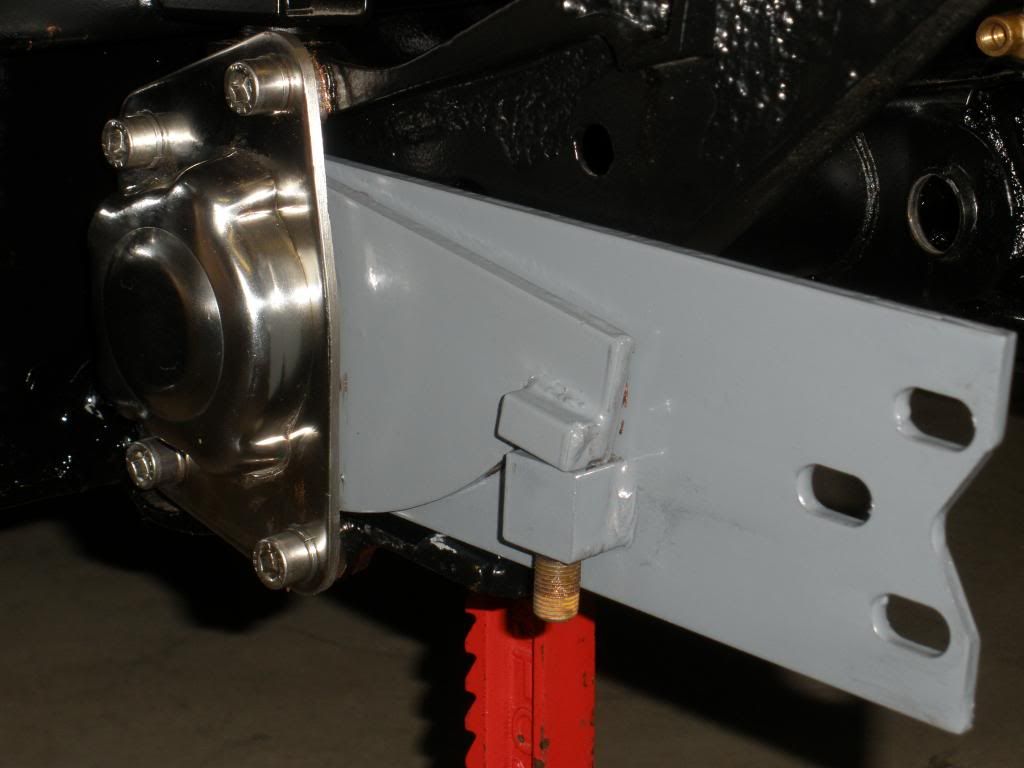
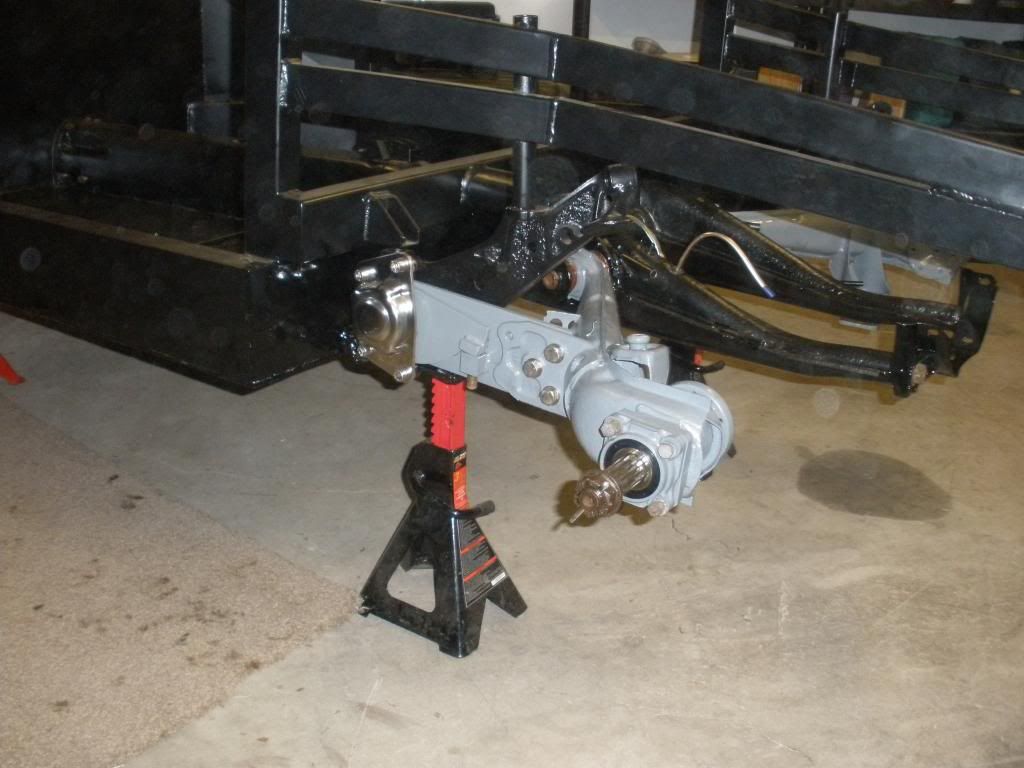
Rear trailing arms were next.
Again, with help from Squashua M, we fitted new bearings to the trailing arms inserted the stub-axles.
These were then offered up and bolts back into the chassis.
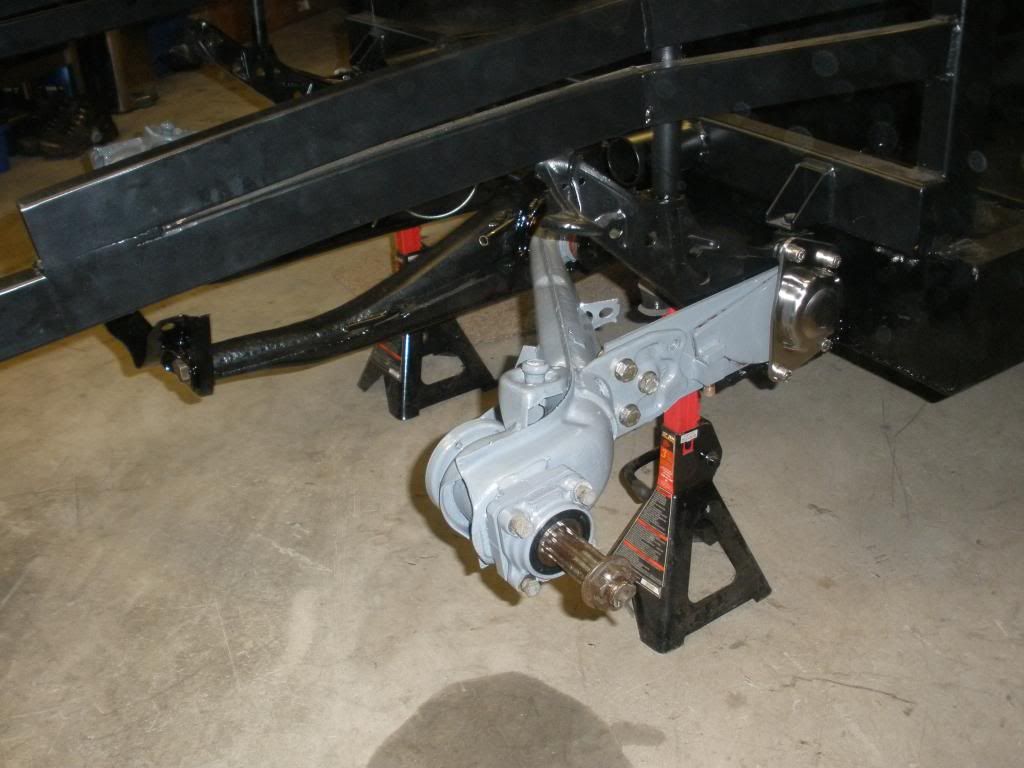

The observant of you will have noticed that the gearbox cradle has also been bolted in.
I have now also sealed areas such as the conduit exit points and weld seams outside of the cockpit area. This is because I am unsure how accessible these areas will be once the body is bonded in place. I will leave these areas for a few days before painting with the chassis black.
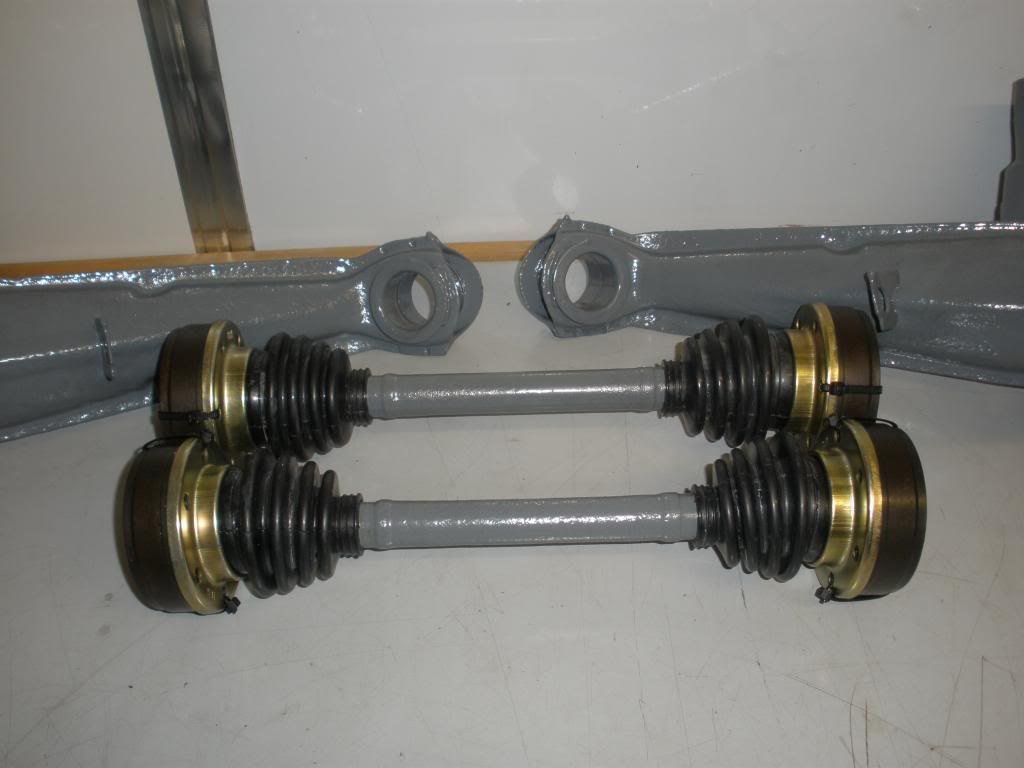
I've also re-built the driveshafts ready for packing with grease and fitting.
I've also cleaned out all of the conduits running through the tunnel and fitted the clutch cable. I have measured out, drilled and fitted various riv-nuts for fitting the pedals and for holding the brake lines in place.
Work has started on fitting the rear brakes, however this is still a 'work-in-progress' so I will update you all once that is finished.
I have a pretty hard target to have this all complete as I have just placed the order for the body. The last email (the day after I placed the order) was to say that the steel work was being bonded into place before the final lay-up and the body should be ready in a couple of weeks. Decisions I have had to make regarding the body is whether I want a single vent, double vent of Carrera Vent set up on the engine lid - going to go for double me thinks. The only other thing is to decide on if I am going to have bumpers or not......
Next came the front beam. I bolted the beam up before fitting anything to it as I made it lighter to lift and more stable for working on. Because I am lowering the car I have fitted caster compensator shims behind the lower torsion tube. Everything was liberally coated in grease before fitting using new nuts and bolts throughout.
I forgot to mention that before painting them, I replaced the ball joints on all of the trailing arms; one had a lot of play in it and rather than find that they needed doing once the car was finished, I would do the job now while everything was in bits. The BJs came out pretty easily using the Wyton Motorclub press.
Once the front trailing arms were fitted, it was a simple excersice (once I had remembered to fit the washers on the top ball joints) to fit the spindles.
The gear selector rod went in without causing any problems - I took pics but apart from begin clean, it looks just like the trial fit pics.
Rear trailing arms were next.
Again, with help from Squashua M, we fitted new bearings to the trailing arms inserted the stub-axles.
These were then offered up and bolts back into the chassis.
The observant of you will have noticed that the gearbox cradle has also been bolted in.
I have now also sealed areas such as the conduit exit points and weld seams outside of the cockpit area. This is because I am unsure how accessible these areas will be once the body is bonded in place. I will leave these areas for a few days before painting with the chassis black.
I've also re-built the driveshafts ready for packing with grease and fitting.
I've also cleaned out all of the conduits running through the tunnel and fitted the clutch cable. I have measured out, drilled and fitted various riv-nuts for fitting the pedals and for holding the brake lines in place.
Work has started on fitting the rear brakes, however this is still a 'work-in-progress' so I will update you all once that is finished.
I have a pretty hard target to have this all complete as I have just placed the order for the body. The last email (the day after I placed the order) was to say that the steel work was being bonded into place before the final lay-up and the body should be ready in a couple of weeks. Decisions I have had to make regarding the body is whether I want a single vent, double vent of Carrera Vent set up on the engine lid - going to go for double me thinks. The only other thing is to decide on if I am going to have bumpers or not......
Re: H-Gs Project 356
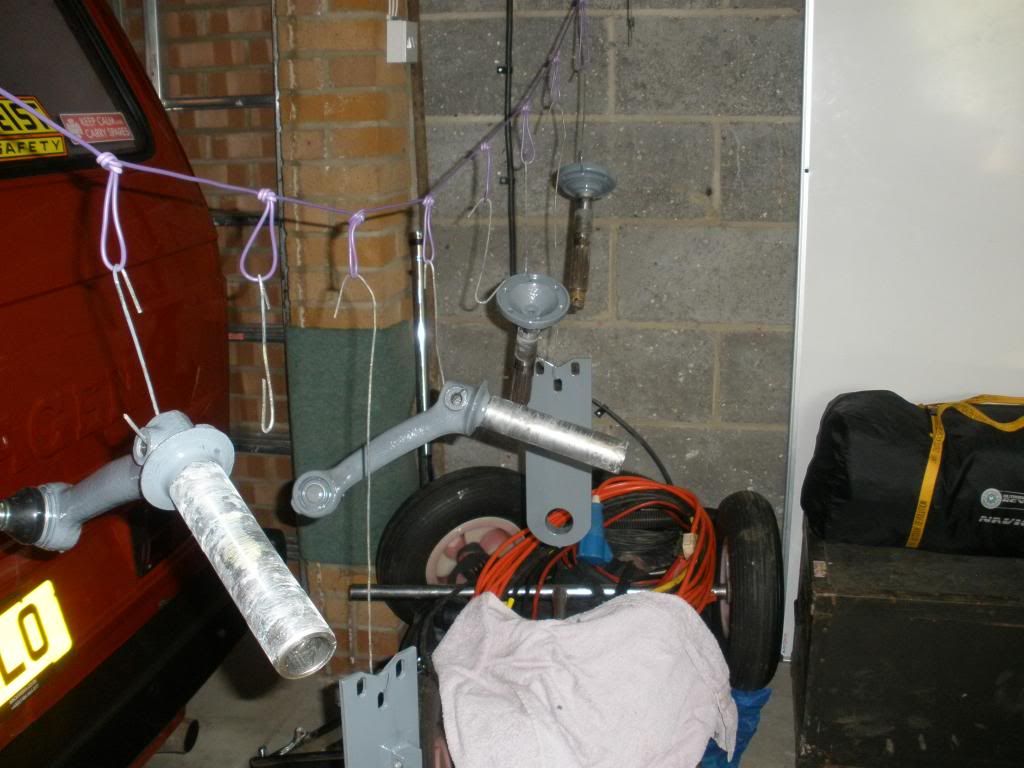
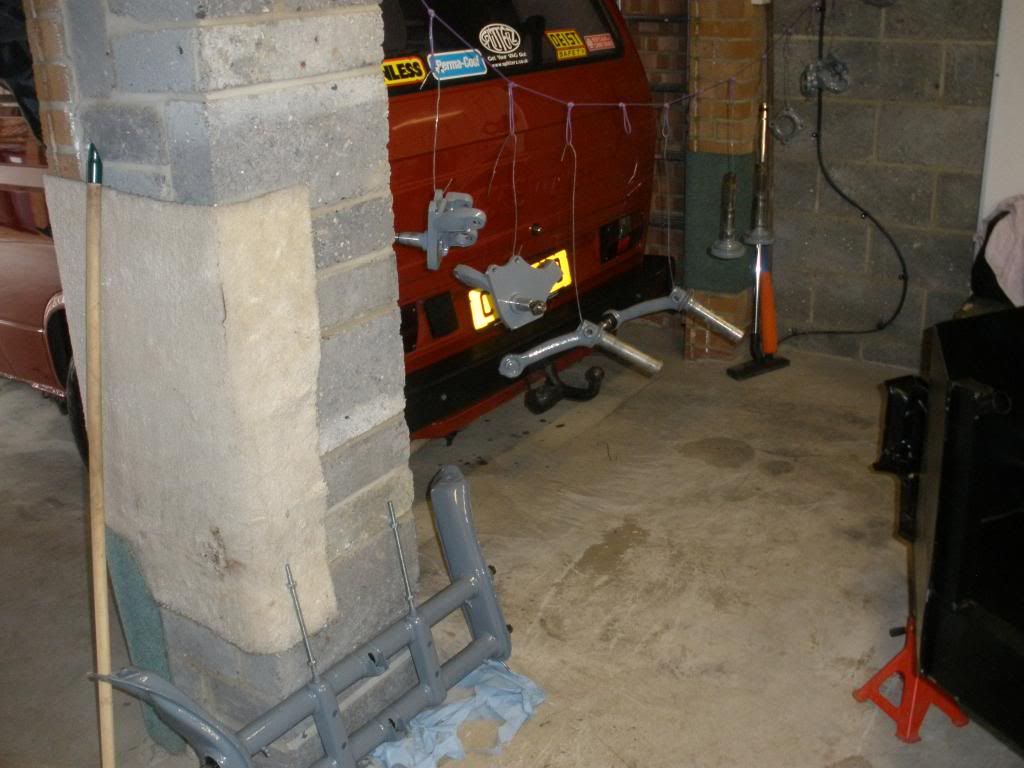
The next few days will be pretty easy on the build as it's mainly putting nice shiney parts back on the chassis - fingers crossed it will be on it's wheels by Wednesday, however that depends on my finding spacers adn scrp tyres to fit to the rims. I will be looking for a bit of assistance when it comes to mocking up the bodywork and installing looms etc.
That said, if you wanted to pop over, then I am likely to be in 'The Cave' most evenings (and all day Wednesday) this week from about 1830. Just text if you're wanting to head over. All work stops From Wed as it's the monthly meet on Thurs and I will be spending Friday gettign things ready for a 'stroll' on Saturday - http://www.pathfindermarch.co.uk/
Oh - I'm still not sure about bumbers although the side-by-side comparison does show that a few 'decorative' bits are needed to emphaisis the curves.