

H-Gs Project 356
Moderator: Bootsy
Re: H-Gs Project 356
Ok, I guess my main concern was whether the indicator stalk needed one of the arrow symbols or not 
1963 Karmann Ghia
1959 356A Coupe Outlaw
1957 3.2 Speedster replica
1959 356A Coupe Outlaw
1957 3.2 Speedster replica
-
mdmax72
- Put a fork in me, I'm done!
- Posts: 1512
- Joined: Thu Sep 28, 2006 8:23 pm
- Location: midlands u.k
Re: H-Gs Project 356
Hi Ian
Early gauges have a single green bulb warning light sharing the right and left indicator and the later gauges have 2 green lights, one for each side. Whichever gauges you use, they will pass the IVA.
Has for the stalk l never had a sticker and mine passed. Luck l don't know but would hurt to take one with you to put on just in case.
Like you reverse light/ fog light idea. Although it would fail unless the lenses is E-Marked as suggested.
Your steering column, l wouldn't get it welded until you know what steering wheel you want to run with after the IVA, to at least fit it for mock up. Reason being the angle of your column is a shallow angle in your picture, were the column goes through the bulkhead it needs to be lower to the floor so it raises the wheel end higher to give you max leg/thigh room to aid getting in and out of the car. You also want to try and angle it enough so the steering wheel is facing you and not offset. A lot of trail and error and a compromise really to keep it in position of the gauges etc. I'd throw out the Steel collapsible and get in touch with the Red9 guys and see if they'll sell you one of there Steering Universal Joints. Thing with there's is its been modified to slide into itself which gives you more scope in length and makes the install easier. I've got pictures on here somewhere.
Rich
DDK Member 0547
Evolving Speedster Build
DDK Member 0547
Evolving Speedster Build
Re: H-Gs Project 356
Thanks for the info Rich.
As you look at it there is probably about an inch that I can go up at the top end - I haven't cut the dash to allow the column go as high as the upper mounting point will allow. Don't forget also that I have the BMW seats in which are about 4 inches higher than the final seat position when the 356 buckets are fitted.
Agree - a steering wheel is needed as this will give me more of an idea and feel for the position.
I here you re the column and still considering it, but looking at the min to get through the IVA - just had a thought re the column which is to use the two later columns and make one that is the correct length. This would give me more adjustment with mounting under the dash as it would have the later mounting points - this would also give me more scope re the steering wheel as the column is fully supported along the entire shaft, rather than the upper bluish being part of the steering wheel. Who knows, it may survive and remain on the car as it will have the high/low beam switch on the stalk rather than a floor mounted one. The other thing is that the later stalk has the indicator arrows on it.
When I speak with Red9 I want it to be to place an order for a front beam, but will look at their UJ and see if this is the easiest way to go.
Fog light will be the ugly box for the IVA.
One day it will all come together.........
-
mdmax72
- Put a fork in me, I'm done!
- Posts: 1512
- Joined: Thu Sep 28, 2006 8:23 pm
- Location: midlands u.k
Re: H-Gs Project 356
Hi Ian,
Here a picture of Red9's UJ.
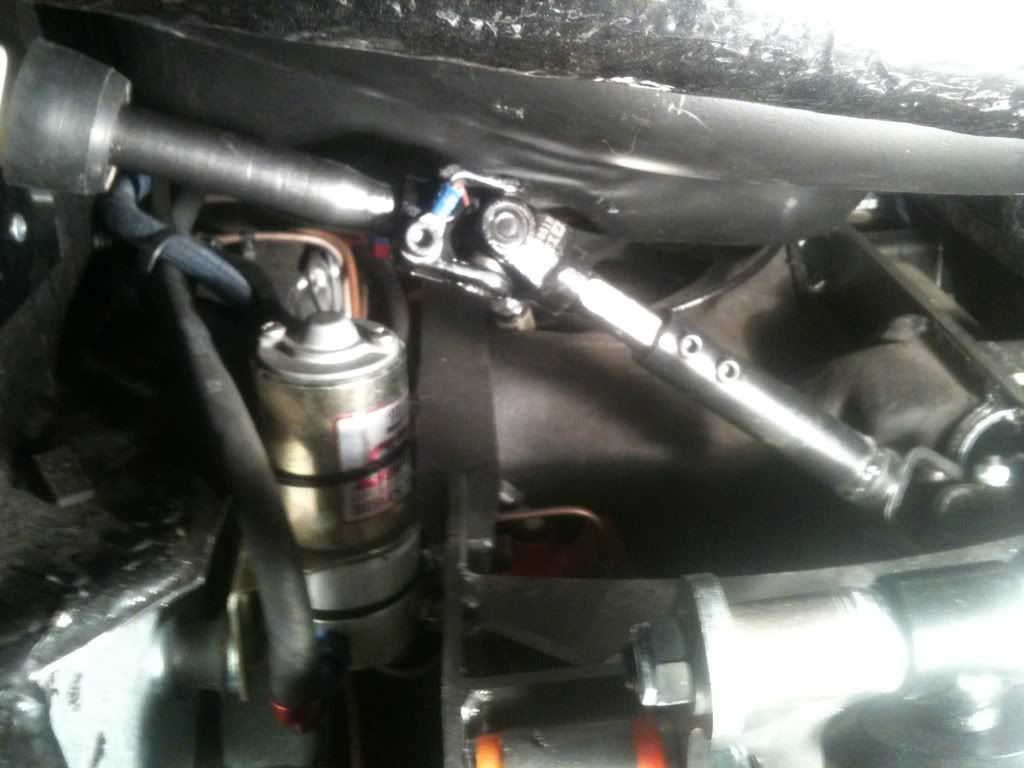
As you see it's been modified to be able to adjust the length. Also IVA compliant. Just give you more scope to move things around to get where you want the steering wheel. The crumple cage dictates you to have it inline with the vw steering box.
Here a picture of Red9's UJ.

As you see it's been modified to be able to adjust the length. Also IVA compliant. Just give you more scope to move things around to get where you want the steering wheel. The crumple cage dictates you to have it inline with the vw steering box.
Rich
DDK Member 0547
Evolving Speedster Build
DDK Member 0547
Evolving Speedster Build
Re: H-Gs Project 356
Hi,
Another adjustable steering link which maybe cheaper http://www.carbuildersolutions.com/uk/c ... olumn-link

Another adjustable steering link which maybe cheaper http://www.carbuildersolutions.com/uk/c ... olumn-link
1963 Karmann Ghia
1959 356A Coupe Outlaw
1957 3.2 Speedster replica
1959 356A Coupe Outlaw
1957 3.2 Speedster replica
Re: H-Gs Project 356
After some time pondering the options, I think that I will go with the collapsible cage option as this is the most straight forward way to get the car to a place ready for IVA. I have the two columns so have all the parts to make the column the correct length and also make use of a modern steering wheel mount which in turn is going to make things easier when it comes to padded steerng wheels.
I like the idea of the two UJs and will go down this route post IVA when I also look to swap out the front suspension for a RED9 unit. I can re-adjust the column in the bulkhead as I will be looking at a way to ensure that it is held rigid as it passes through and will look to add a lower bearing also.
Kind of comes to the point where I need to get the car through IVA and can then make it more of a rolling project.
Columns are cut and a piece of 11mm bar is on order to keep things aligned when it all goes back together.
Re: H-Gs Project 356
It's nice when 'The Boss' orders you out to the garage to get on with the car. Had this week off with Monday in London and then the rest of the week in the cave.
Over the past few days I've been focused on mounting the horns and getting to grips with the steering column; let have a look at the horns.
During a recent visit by a Madmax72 I had a good scoot around under the skin to get a few ideas, including how he mounted the horns. A simple triangular bracket made from 20x20x3mm angle iron seems to have done the trick
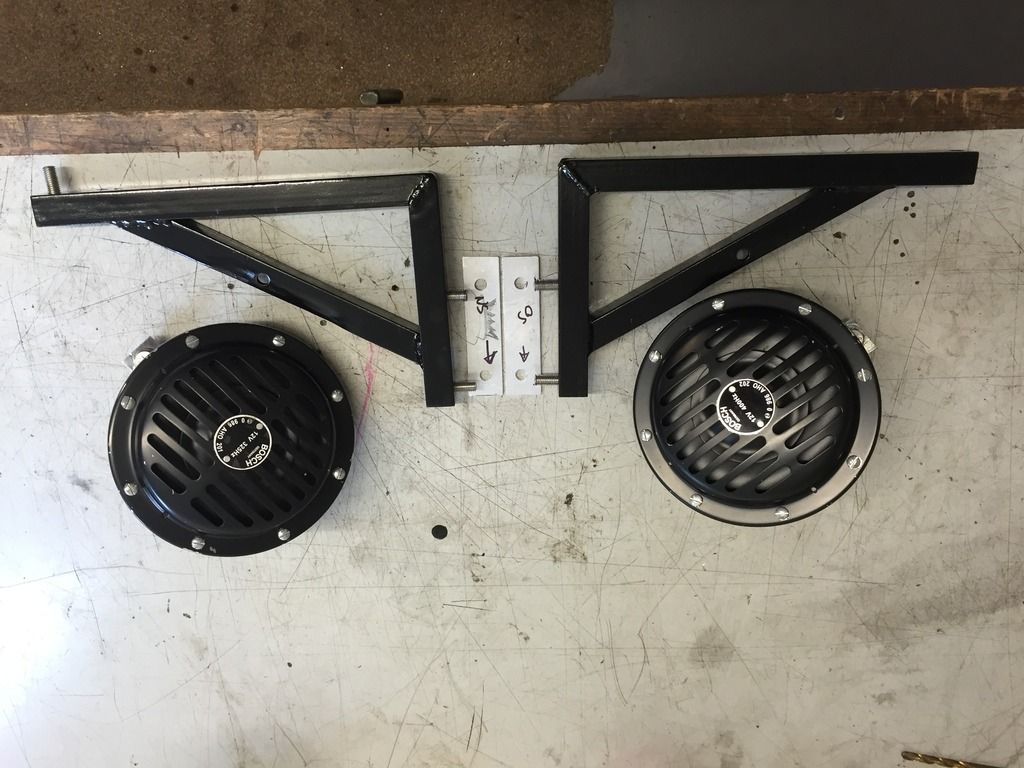
I splash of black smoothrite and all bolted up and the horns fitted into place.

I had to rotate the front covers on the horns so that they are the right way up before fitting the horns, but apart from that this was reasonably straight forward and now ready to have the loom connected.
Over the past few days I've been focused on mounting the horns and getting to grips with the steering column; let have a look at the horns.
During a recent visit by a Madmax72 I had a good scoot around under the skin to get a few ideas, including how he mounted the horns. A simple triangular bracket made from 20x20x3mm angle iron seems to have done the trick
I splash of black smoothrite and all bolted up and the horns fitted into place.
I had to rotate the front covers on the horns so that they are the right way up before fitting the horns, but apart from that this was reasonably straight forward and now ready to have the loom connected.
Re: H-Gs Project 356
So onto the steering and to start off I had to spend a bit of time just thinking. An interesting concept for me, but I think it has paid dividends. While I have got a pre-58 column which will look better in the finished car, I have decided that in order to get the car through the IVA that I will use a late column and switchgear. The first challenge was that the column needs to be 991mm long however the later columns are 935mm long. No challange, I happen to have 2 late columns so a bit of hacksaw action, and chamfer the edges of each sawn end, and I have two pieces ready to weld together. To make sure that I got the column dead straight and ensure that I put the same, or more strength back into the column, I inserted a 150mm length of 16mm bar in to the centre of the column. I then used an off cut of the 20x20mm angle iron and clamped booth parts on to this to ensure that the column was straight. I then drilled through the column tube and just into the bar, 2 times on each side on the lower half and then plug welded these holes. The top section was then slid over the bar and a 1mm gap left between the two pieces. With the top section clamped into place, I then drilled and plug welded the top half so that there would be absolutely no movement while I welded around the column.
After a cup-a, I then got busy with a hand file and a short while later, after a spot of grey primer and then semi mat black and the column was good to go.
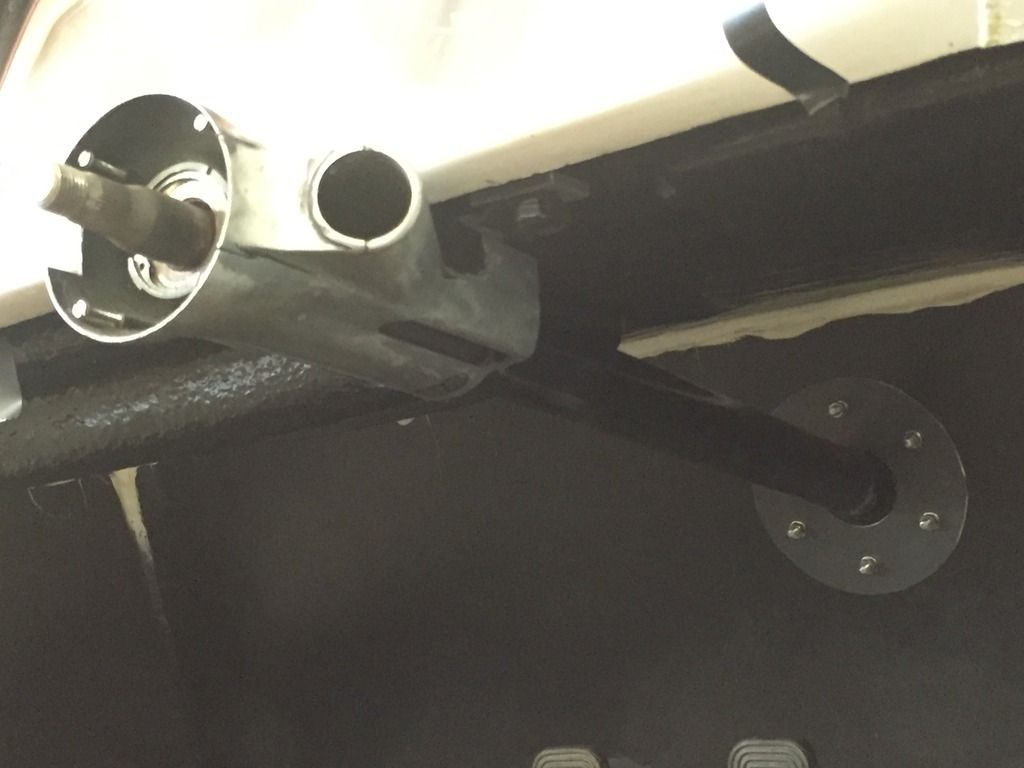
I next looked at the outer column and started by drilling and tapping two holes in the dash cross member and the upper column mount was ready. The tube from the upper column can be moved allowing me to make the outer longer.
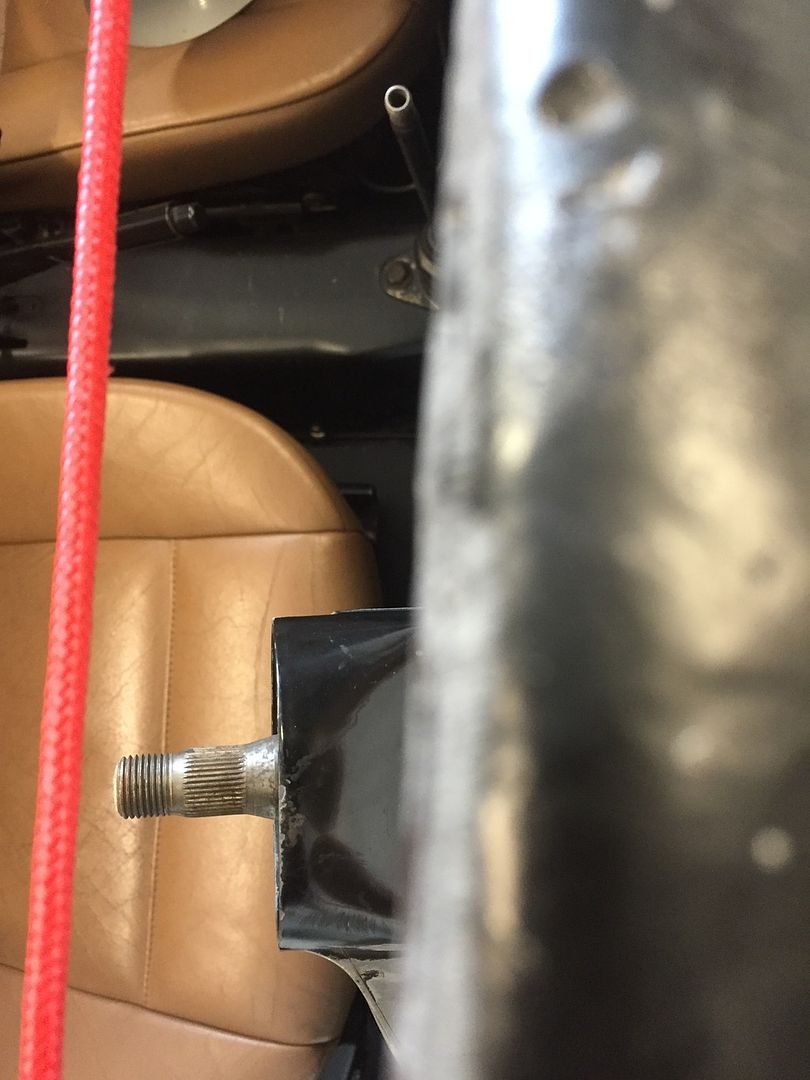
With the outer extende so that it was about 30mm proud of the bulkhead, I made a couple of round plates (thanks Paul). One plate was welded to the outer column; this was to serve two purposes.
1. To securely mount the lower outer column to the chassis rather than the original idea of using a rubber ring to seal the hole.
2. To cover up the second big hole I cut into the bulkhead.
With this in place and 6 M6 holes drilled through the two plates and bulkhead I was ready to put everything back together (with a little help from Mr Squashy)
This is what I finished up with:
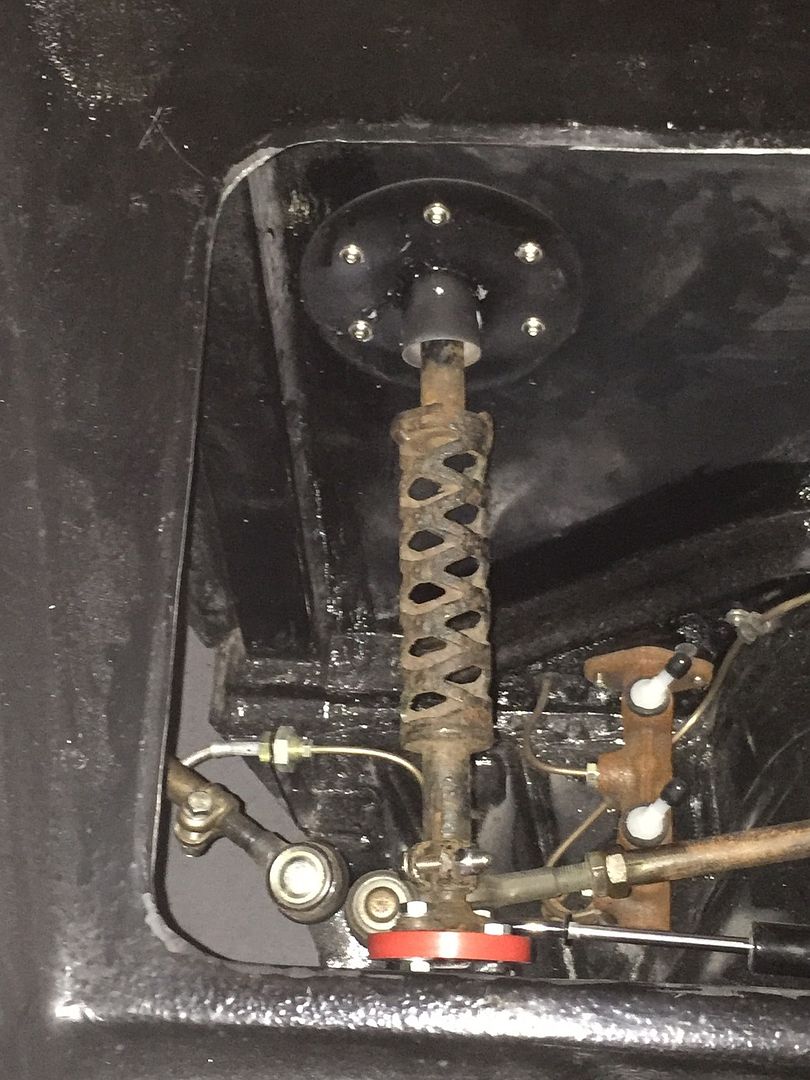
And this is how it all lines up in relation to the dash and instrument eyebrow:
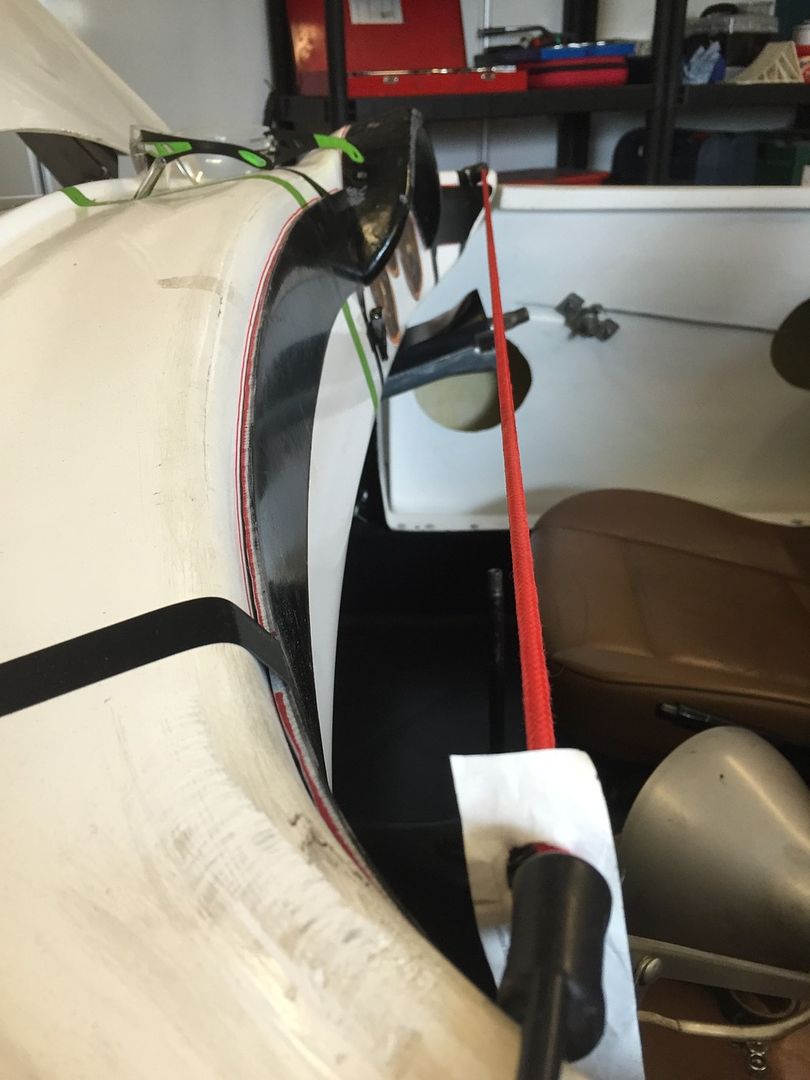
The downside to this approach is that the steering wheel will not be quite parallel with the he dash but when sat in the car it all feels quite natural, especially with the eh pedals being offset to the left.
Post IVA the plan is to fit one of these - http://www.red9design.co.uk/wishbones.htm
When this goes on, I will look to fit a double UJ which will let me straighten up the upper column and make the steering wheel parallel with the dash. In the mean time, we now have an IVA compliant column fitted to Mr 356.
I consider that to be a good weeks work. :D
After a cup-a, I then got busy with a hand file and a short while later, after a spot of grey primer and then semi mat black and the column was good to go.
I next looked at the outer column and started by drilling and tapping two holes in the dash cross member and the upper column mount was ready. The tube from the upper column can be moved allowing me to make the outer longer.
With the outer extende so that it was about 30mm proud of the bulkhead, I made a couple of round plates (thanks Paul). One plate was welded to the outer column; this was to serve two purposes.
1. To securely mount the lower outer column to the chassis rather than the original idea of using a rubber ring to seal the hole.
2. To cover up the second big hole I cut into the bulkhead.
With this in place and 6 M6 holes drilled through the two plates and bulkhead I was ready to put everything back together (with a little help from Mr Squashy)
This is what I finished up with:
And this is how it all lines up in relation to the dash and instrument eyebrow:
The downside to this approach is that the steering wheel will not be quite parallel with the he dash but when sat in the car it all feels quite natural, especially with the eh pedals being offset to the left.
Post IVA the plan is to fit one of these - http://www.red9design.co.uk/wishbones.htm
When this goes on, I will look to fit a double UJ which will let me straighten up the upper column and make the steering wheel parallel with the dash. In the mean time, we now have an IVA compliant column fitted to Mr 356.
I consider that to be a good weeks work. :D
Re: H-Gs Project 356
Morning Ian
I move the steering box over to help line the wheel up
I move the steering box over to help line the wheel up
Re: H-Gs Project 356
Great work, several steps forward
1963 Karmann Ghia
1959 356A Coupe Outlaw
1957 3.2 Speedster replica
1959 356A Coupe Outlaw
1957 3.2 Speedster replica
Re: H-Gs Project 356
I've got a 2 inch narrowed beam fitted and moved the steering box as far as I dare without making the offside steering arm too short.
I think for the IVA we will be fine; just want to get that ticket sorted so that I can notch up a major milestone.
I'll be looking at sorting the windscreen out over the next few days and then on to the loom.
I think for the IVA we will be fine; just want to get that ticket sorted so that I can notch up a major milestone.
I'll be looking at sorting the windscreen out over the next few days and then on to the loom.
-
mdmax72
- Put a fork in me, I'm done!
- Posts: 1512
- Joined: Thu Sep 28, 2006 8:23 pm
- Location: midlands u.k
Re: H-Gs Project 356
Whatever you did for her to let you in the mancave for a week, I'd do it again....
Nice work
Nice work
Rich
DDK Member 0547
Evolving Speedster Build
DDK Member 0547
Evolving Speedster Build
Re: H-Gs Project 356
Evening All,
First things first as it's been nearly a year since I posted - I'm alive and well as is Mr 356 but new job and projects around the house have inevitably taken their toll on progress.
That said, a few improvements in the Man Cave and things are a bit more toasty in there letting me work out there when things are chilly outside.
Not much to report at this time; I've been busy with wiring looms to add brake test switches, headlight upgrade (stops the full amperage going through the light switch), fuel pump, windscreen, courtesy light, DRL and heated seats circuits. I've also sorted the indicators so that they all work properly with LED lamps.
Still more to do to get these completed but we are steadily moving in the right direction.
Mechanically, I've managed to tick a few jobs off;
- front wheel spacers and bolts
- steering stop
- engine bay separation
- brakes all bled and working
So next steps;
- Crack all remaining wiring
- Install fuel tank and finish off the fuel system
- face the demon that is the windscreen.
- put the engine back in
After that I think we wont be far off an IVA test.
Will update more regularly now I'm back on it.
Re: H-Gs Project 356
Managed a couple of hours in the cave today. Got the brake test switch finished and as it is a 6 pole switch I have used the spare side as the fuel pump prime (yet to finish the pump side of the loom) so I can prime the carbs if the car has been sat around for a while.
In addition I have got the head light relays in so the current through the switch is only for side lights and to power the relay solenoids for dim and main beam. The added benefit is that I should get a full 14v to the headlights rather than suffer from the typical voltage drop and dim lights.
Lastly I got part way through the heated windscreen circuit. It all works with a standard relay in place, but the 10 min timed relay doesn't seem to want to play ball at the moment.
Next outing will hopfully see the screen relay sorted along with the fuel pump and then look at the courtesy lightsa and lights on buzzer.
Re: H-Gs Project 356
Manged a few more hours in the cave over the weekend and:
- Heated Windscreen circuit is all up and running. I had originally set it up so that the momentary switch effectively earthed to relay thinking it would work in a similar way to a stock relay, but no - it needs to be on the live side so had to run an additional cable to the drivers side A pillar.
- The brake test switch now effectively tests the circuit; I've also linked the handbrake into the circuit so when applied the brake light in the combination dial comes on, and if the cap is removed from the brake fluid reservoir the light comes on. In addition, the fuel pump prime circuit is now in and working.
- Lastly, I've run the cables to the seats which will allow the seats to be adjusted for the IVA, but will eventually supply power to the heated seats.
Next up:
- Courtessy Lights and Lights-On buzzer
- DRLs
- Prep for the Fog Light / Reversing Light relay
- Engine Start button
- Speedo signal sender (mechanical so it works for the IVA rolling road)
- Instruments
- Remove the loom and re-wrap it
I think another couple of weekends and we will be done and can move onto the engine bay and get he hot/cold seperation finished, engine fitted and you never know - started!!