Page 1 of 32
The Manhattan Project
Posted: Thu Jan 01, 2015 11:47 pm
by AndrewSlater
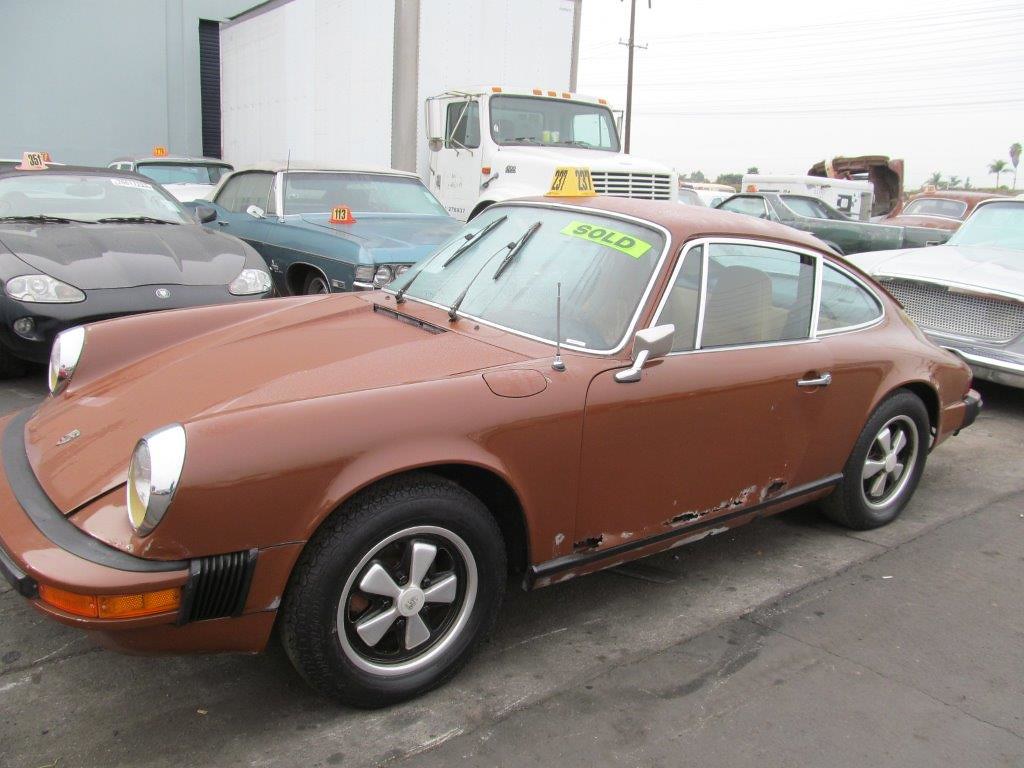
So here is the start of my restoration thread for my 1974 Porsche 911.
I bought the car in late 2013 and imported it to the UK arriving Feb 2014.
Having finally completed a workshop to work on the car, the restoration has just started.
The car was originally delivered to Porsche Audi Manhattan in June 1974 - hence the restoration title.
It currently shows 85k miles on the clock and the maintenance record shows it last serviced in 1985 @ 70k miles.
I'm guessing it was taken off the road in the late 80s so its been off the road for 25+ years.
I bought it as a non runner although the engine turns by hand.
Being a 74 model theres no nonsense like thermal reactors and the fan has the correct number of blades - so theres a small blessing.
Its also Bitter Chocolate or as my wife calls it sh*t by moonlight. - I'm thinking the colour might have to change.
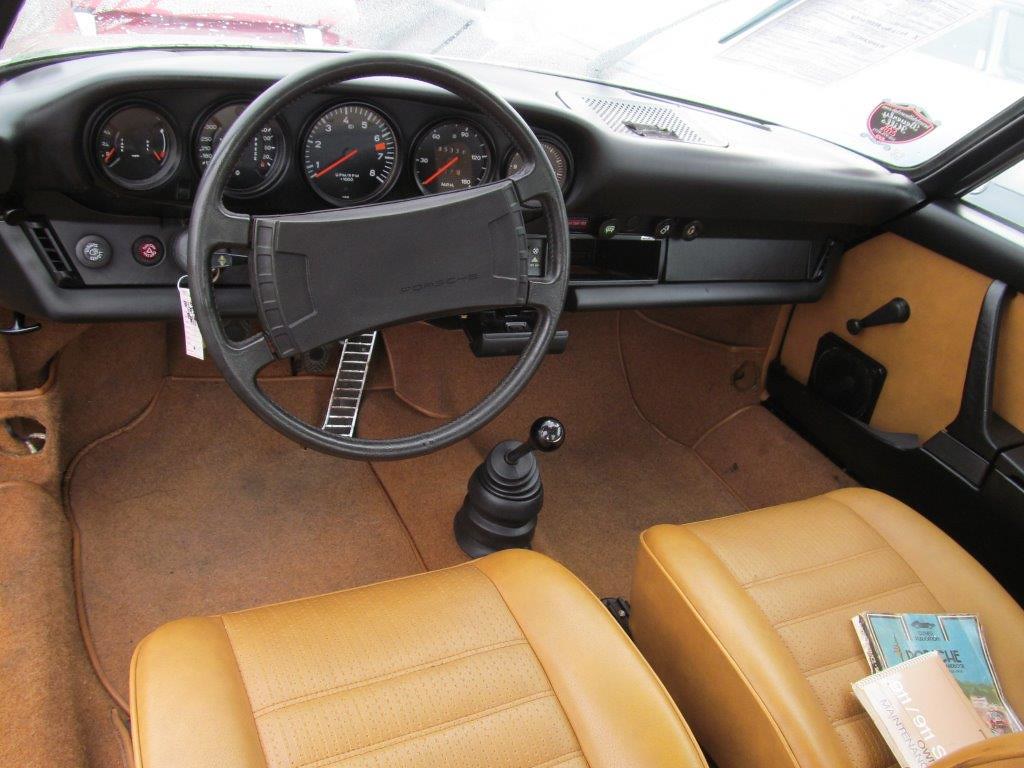
I liked it as it seems very original and not really messed around with, other than the addition of a stereo and non standard horn it all seems very standard.
So at present I'm not sure where I am going with the restoration ( I'm kind of boring and like to keep things pretty original ).
The plan is to try to do whatever I can myself on the restoration. I'm looking forward to the engine build, but less so getting all the rusty bits corrected.
You may have seen my other threads with regard to restarting the engine and inspecting the sills etc.
At present the next step is to strip the car and drop the engine out, with a view to checking out the rust prone areas.
So watch out for some updates.
Regards
Andrew
Re: The Manhattan Project
Posted: Fri Jan 02, 2015 7:22 am
by 911hillclimber
What an interior! I would be keep that after a light clean. Go well with a deep Green paint colour?
It will be good to stare at another restoration, please give us a blow-by-blow account as per DDK rules.

If the engine is coming apart I would be tempted to raise the engine to Euro spec for more driving experience.
Re: The Manhattan Project
Posted: Fri Jan 02, 2015 4:46 pm
by Darren65
Best of luck with your restoration and thanks for sharing.
The initial excitement is a time to savour.
Enjoy
Re: The Manhattan Project
Posted: Fri Jan 02, 2015 6:53 pm
by sladey
What Darren said
"Sh*t by moonlight" made me chuckle
Have you seen ferrymans 74 build/remanufacture - awesome inspiration if you're taking the resto route
Re: The Manhattan Project
Posted: Fri Jan 02, 2015 7:54 pm
by DustyM
Looks like the makings of a nice car. There are plenty of pictures of the sort of repairs you will be doing in the projects section of my website which may be of help (or might just give you a fright!).
Cheers
Jon
Re: The Manhattan Project
Posted: Fri Jan 02, 2015 8:53 pm
by AndrewSlater
Thanks for the encouragement and advice everyone - keep it coming
I spent the day trying to remove the engine.
I was following the Wayne Dempseys instructions from 101 project for your Porsche 911.
This technique is to seperate the engine from the gearbox and to just drop the engine.
I first removed the rear bumper to give a bit more room.
Got most of the engine disconnected from the shell although everything is fighting me along the way, but having problems with the main oil line and also the 'fourth' engine nut ( the one hiding above the starter motor ).
I think I will have to sacrifice the oil line as I can't seperate the seized coupling.
More difficult is trying to access the fourth engine nut.
Anyone got any suggestions as to how best access this and remove it?
I tried removing the lower one on the starter motor as a trial run, but soon found that someone had already rounded the hex cap head, so hopefully the top one isn't the same.
If I can't remove this I'm thinking I need to remove the engine with the transmission ( as I would with the 912 ).
In anticipation I started to remove the drive shaft bolts. Got them all out on one side but can't seem to remove the drive shaft.
Again am I missing something here.
Keep the advice coming - I'm hoping to get some more time on the car over the weekend.
Re: The Manhattan Project
Posted: Fri Jan 02, 2015 8:57 pm
by sladey
I've always removed the two as one unit - It's then much easier to split the two. It's only 4 bolts holding the combined unit onto the car
There's quite a good guide on pelican technical articles
Re: The Manhattan Project
Posted: Fri Jan 02, 2015 9:11 pm
by johnM
Clout the CV joint with a copper mallet, it will be stuck on two dowel pins.
Much better to drop engine and gearbox as a unit.
Re: The Manhattan Project
Posted: Fri Jan 02, 2015 10:11 pm
by 911hillclimber
Sorry if you know, but the top fastener on the upper of the starter motor is.a tube nut, removed using a hex Allen key on a very long extension.
Best remove the lot from the car as one.
You will win the fight on the garage floor!
They all fight us...
Re: The Manhattan Project
Posted: Sat Jan 03, 2015 9:45 am
by haasad
Better to remove it as a complete unit as already said, you will need the car high off the ground but its really far easier.
PS I've turned my garage upside down looking for the CIS bits I had but no luck I'm sorry.
Re: The Manhattan Project
Posted: Sat Jan 03, 2015 7:36 pm
by AndrewSlater
Another day in the workshop, and hoping to do better than yesterday.
I still couldn't get the driveshafts off the gearbox, so decided to try to drop the engine and gearbox with the hope that this might help presuade the driveshafts out.
The first problem was that I couldn't unseize the engine mount bolts, so decide to leave the bar in situ and remove the 4 smaller bolts holding the engine to the bar.
Dropped the engine only to find it was stopped by the driveshafts - uhm plan C then...
Pumped the engine back up and started to clean up the driveshaft joints to try to find the interface so I could use the breaker bar to persuade them off.
Once I realised they seemed to be full of some form of liquid gasket, I scraped this out and finally two hours later got the first driveshaft off.
I repeated the same process on the second and another hour in the second driveshaft was off.
So dropped the engine again only to find the engine mount bar was stopping me in my tracks.
At first I didn't realise so managed to damage the engine shroud and put a gash in it - damn!
Another hour or so later and the engine mount was off.
Dropped the engine again and this time it didn't quite clear the rear.
I decided to change over from using my quad bike lifter ( works great on the 912 ) and moved to my low profile trolley jack to allow the engine to drop lower.
Dropped the engine again and it almost fit through - grrr!!
Final solution was to remove the CIS components off the top of the engine to give enough space.
Finally after another 8 hours today - engine out
As tradition dictates, I photographed my son standing in the engine bay ( as a reward for all his hard work ).

and here is the engine and transmission - time to call it a day.

Re: The Manhattan Project
Posted: Mon Feb 02, 2015 10:12 am
by AndrewSlater
A few weeks have passed as we have been slowly stripping the car down.
One thing that has surprised me is how many more fittings there are compared to my '66 912.
In particular the number of vent and overflow pipes around the front trunk. I think Porsche seem to have become paranoid that any fluid could overflow and had to be drained somewhere just in case.
So as things stand the trunk is mainly stripped and have made a good start on the dash.
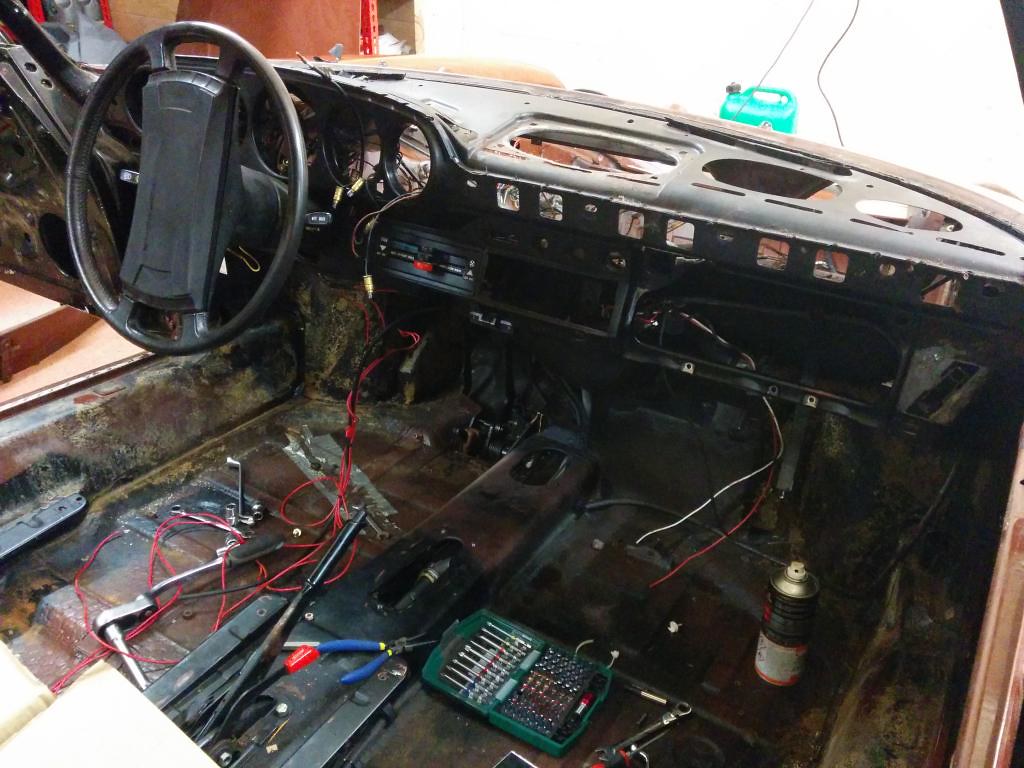
I am looking for some advice on the following
1) How do you remove the horn push trim on the steering wheel without damaging it, to allow me to remove the wheel?
2) Whats the best way of removing the heating controls? I have yet to work out how it is fixed in.
3) Whats the best method of removing the wiring loom from the car?
As always any help much appreciated.
Thanks
Andrew
Re: The Manhattan Project
Posted: Mon Feb 02, 2015 11:29 am
by Nige
The horn push should just pop off, I find children's plastic knives from Ikea works great for levering things like this off. Use a couple on opposing sides and it should pop off.
Re: The Manhattan Project
Posted: Mon Feb 02, 2015 1:21 pm
by cobb911
I am glad I read your thread as I too have engine mount bolts that do not want to budge so may try your work around.
Q2) Assuming it is similar to an early car, I seem to recall I pulled mine out into the cabin area. It won't pull that far with the cables still attached but I can't remember if I detached them from their connections in the luggage area to pull control unit and cables out together or if I was able to detach them from the control unit in situ. Either way you will need to have the tension off to get the cables detached as they have a Z shaped end when located in the control unit so a little awkward to remove.
Q3) The loom will split into smaller parts; it is just a case of following the wires to see where they join sections. The trickiest bit is getting the loom through the tunnel. On a 72 the trick was to take it our front to back but I believe other years is back to front.
Regards
Re: The Manhattan Project
Posted: Mon Feb 02, 2015 9:21 pm
by AndrewSlater
Thanks to Nige I used a soft plastic tool to prise off the horn push. At first it wouldn't budge but spraying some silicon lubricant into the gaps and it soon popped off.
Thanks to cob911 I also eventually found the 'hidden' bolt that was holding the heater controls in so also got that removed tonight.
My next question is how do you remove the speedo reset cable assembly from the dashboard?
Does the ferrule push through from behind the dash and then the whole cable withdraw from the side with the thumbwheel?
It all looks pretty tight so I didn't want to overstress it and break it.
As always feedback much appreciated