Next Project

Replica owners or enthusiasts are very welcome

Moderator: Bootsy

shambly
DDK slapper chatter
Posts: 484
Joined: Fri Nov 28, 2003 1:03 pm
Location: Wiltshire

Re: Next Project

Post by shambly »

mdmax72 wrote: Been putting this bit of for a while, as I'm more of a metal guy and a few of you guys are dabbling in grp. What would you suggest the best way to do the dash. Chesil cut-out for the ignition and indicator body. Why!!! Anyhow it needs filling, what's the best way of doing it. Will all the clocks etc need to come out?? Any ideas welcome...
Firstly, I'm only a amateur fibreglasser, but have made a few of my lower dashboards for folks Chesils in GRP...
You could probably tackle it from either the front or the back, but both is probably best!

Personally, I'd take the clocks out (its going to be a messy job), and use a mix of masking tape and plasticine on the dashboard to form the shape you want for the rear surface of the missing bodywork. Then (after putting release coat on the tape, unless using special tape that resin doesn't adhere to) lay glass fibre over that having taken off the gel coat around the periphery so that you can bond the new glass to old. You can then topcoat that making sure there are no high spots (or use a layer of filler) and sand back smooth.

Then remove the tape and put a reinforcing layer of glass over the interface between old and new on the rear.

PM me if you want to chat on the phone about it.

Simon
mdmax72
Put a fork in me, I'm done!
Posts: 1512
Joined: Thu Sep 28, 2006 8:23 pm
Location: midlands u.k

Re: Next Project

Post by mdmax72 »

Cheers Simon

That's given me an idea and a direction to go with. Seems you have to have a lot if different kit to do a small job like this in fibreglass. Been looking these kits here, which should include everything l need.

http://www.ecfibreglasssupplies.co.uk/c ... -kits.aspx

So much easier working with metal...
Rich

DDK Member 0547

Evolving Speedster Build ;-)
mdmax72
Put a fork in me, I'm done!
Posts: 1512
Joined: Thu Sep 28, 2006 8:23 pm
Location: midlands u.k

Re: Next Project

Post by mdmax72 »

I've shelved fitting the column and glassing the dash until winter. As it needs to be off the road for a while to get this done

So onto the next project. Having windup windows has benefits but also has the drawback of the look of the pillar needed to seal against the windscreen post. As the pillar is needed, thought l could put my mark on it and improve it a little...

Image

My thoughts are to have the pillar removable. So once the top is down the post can be removed to enhance the lines as they should be. Problem is, part of the post needs to remain as it secures the glass in the door. Space is very tight which doesn't help. Also try and improve the sealing arrangement.

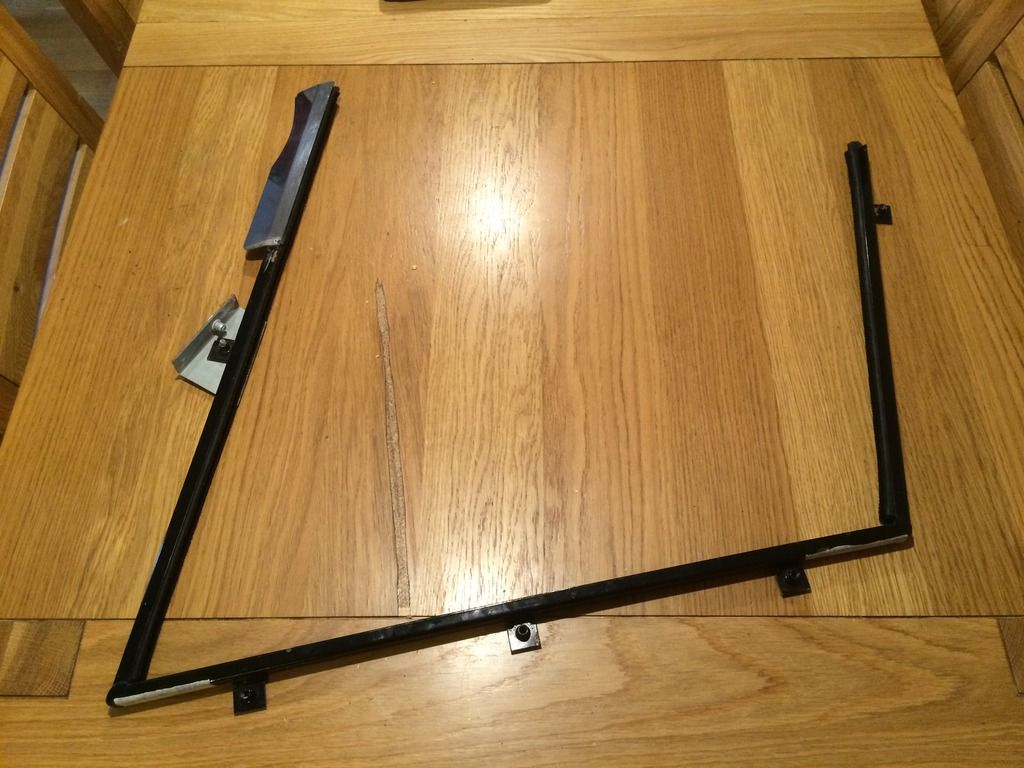
So with the door glass frame removed this is what l have. Not much to it really.

Image

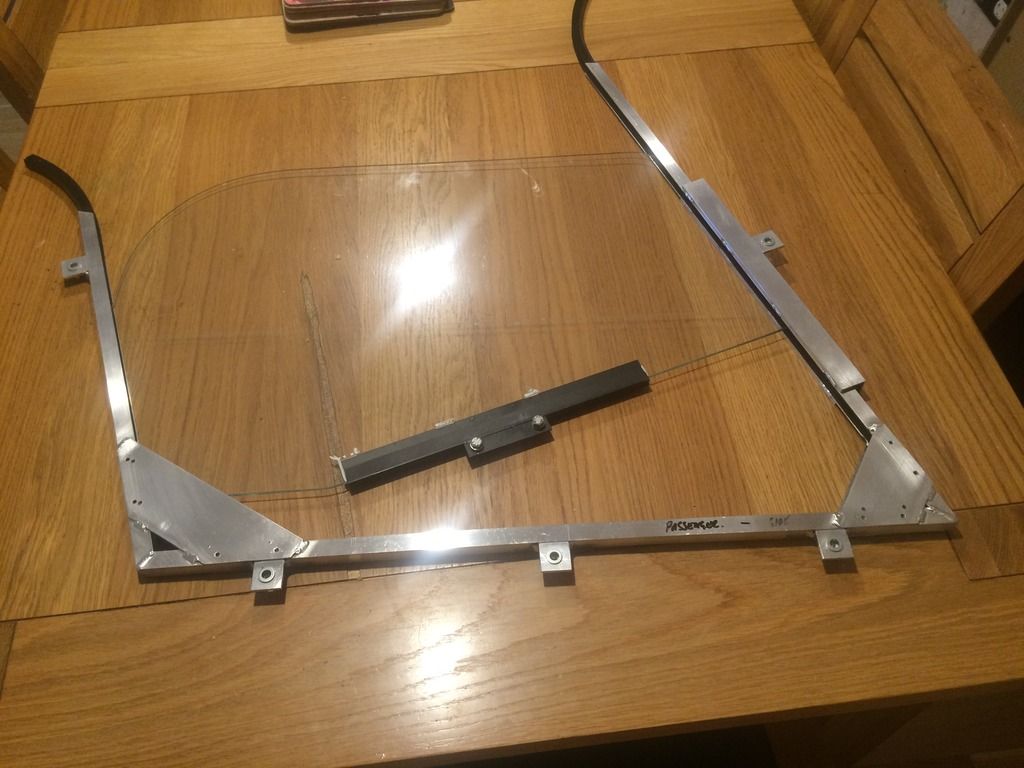
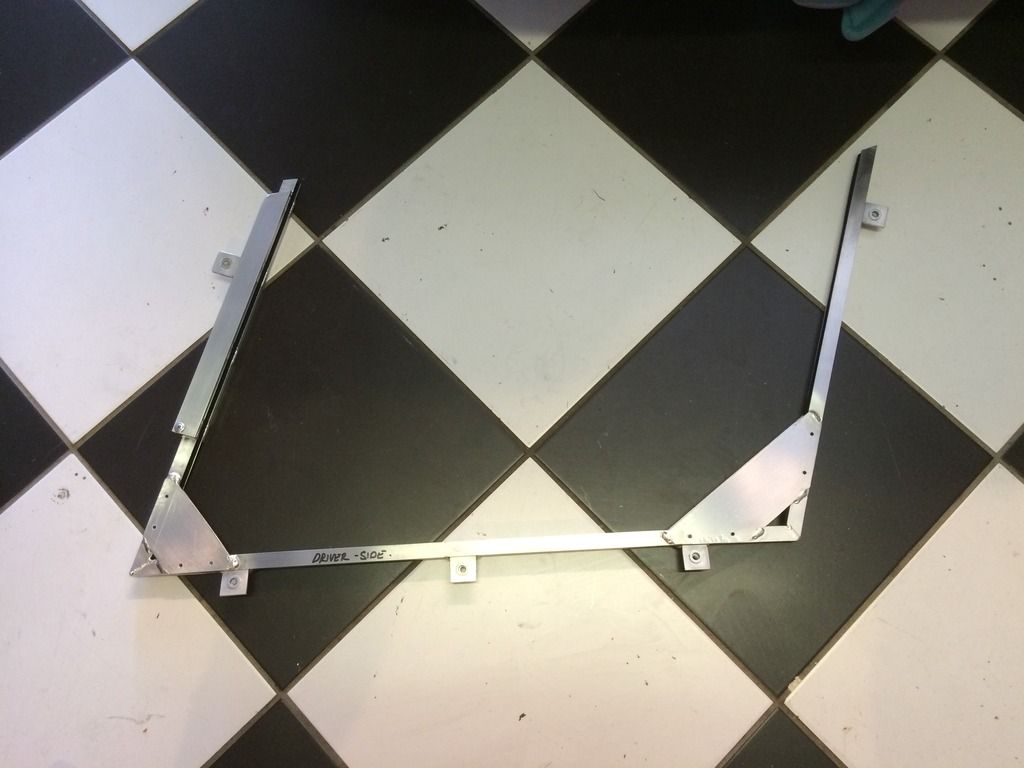
Decided to make it in aluminium. This is what I've made so far. It incorporates a guide to the front the help with the top of the pillar to be removable. Now need to fit it to see how it fits in the door.

Image
Rich

DDK Member 0547

Evolving Speedster Build ;-)
oliver365
DDK slapper chatter
Posts: 463
Joined: Sun Oct 25, 2009 8:25 am
Location: cheshire

Re: Next Project

Post by oliver365 »

Great engineering Rich AGAIN ! :wink: gonna be tricky that removable pillar :? but I bet youll sort it :notworthy: can you get any think that could take a mould off the screen & get a rubber made to fit ?? :roll: av you welded that frame? 8)
greg356a
I luv DDK!
Posts: 861
Joined: Sun Mar 25, 2012 9:16 am
Location: Norwich area
Contact:

Re: Next Project

Post by greg356a »

Hi Rich, again looks impressive.

The three tangs on the bottom of the channel appear to be for fixing, what do they fix to in the door?
1963 Karmann Ghia
1959 356A Coupe Outlaw
1957 3.2 Speedster replica
shambly
DDK slapper chatter
Posts: 484
Joined: Fri Nov 28, 2003 1:03 pm
Location: Wiltshire

Re: Next Project

Post by shambly »

I'll be interested to see your solution for this Rich.

Intermeccanica have the best solution i've seen to date but that involved moving the windscreen back to leave a thin transparent seal to the glass without a visible track so isn't really practical on an already built car..... and makes a whole heap of other problems....

Simon


(Greg - from memory, bolts with large washers on in the inner skin of the door (hidden by the door cars) mount the frame and let you set the vertical angle within the door)
mdmax72
Put a fork in me, I'm done!
Posts: 1512
Joined: Thu Sep 28, 2006 8:23 pm
Location: midlands u.k

Re: Next Project

Post by mdmax72 »

Hi Ollie, can't take the credit for the welding. Local company to me to me did it.

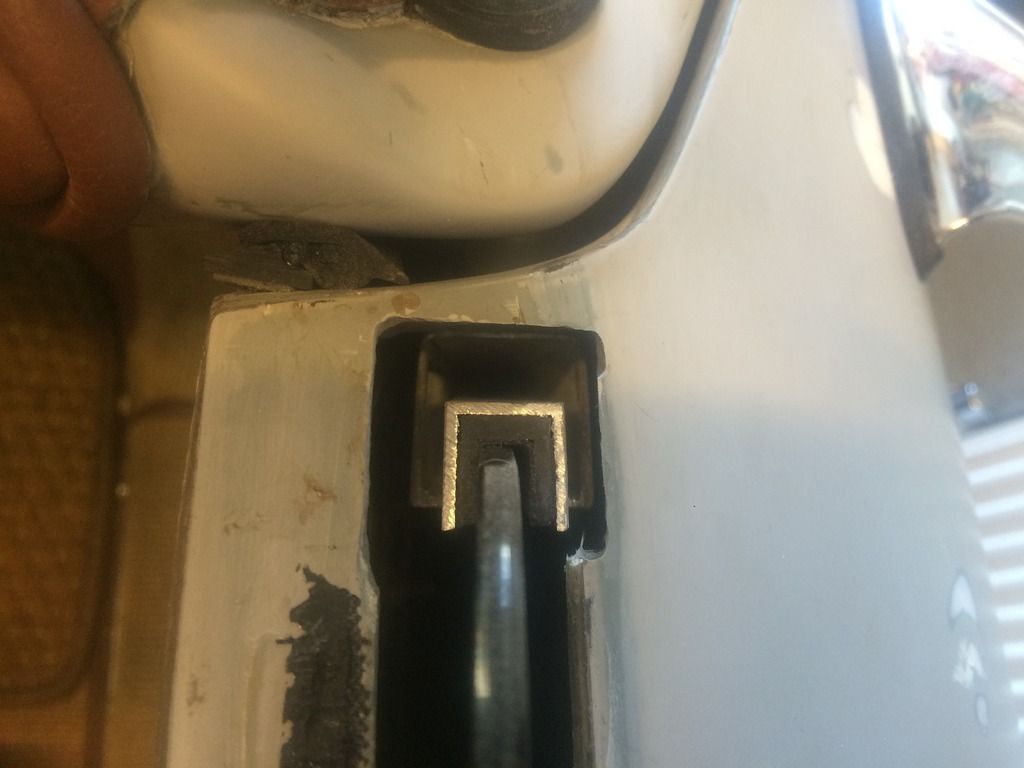
Greg as Simon pointed out the tabs either side fix to the door aswell as the 2 outer ones across the bottom. The bottom middle one is for the window regulator to fix to. Here's a picture, take a close look. You'll just make em out.

Image

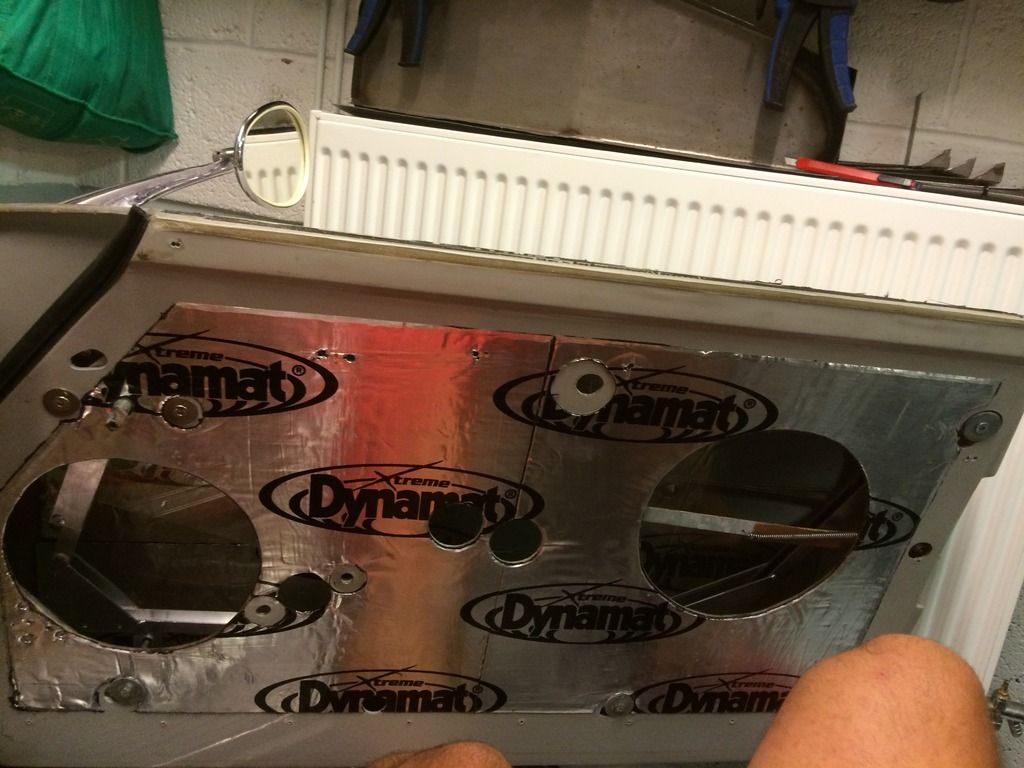
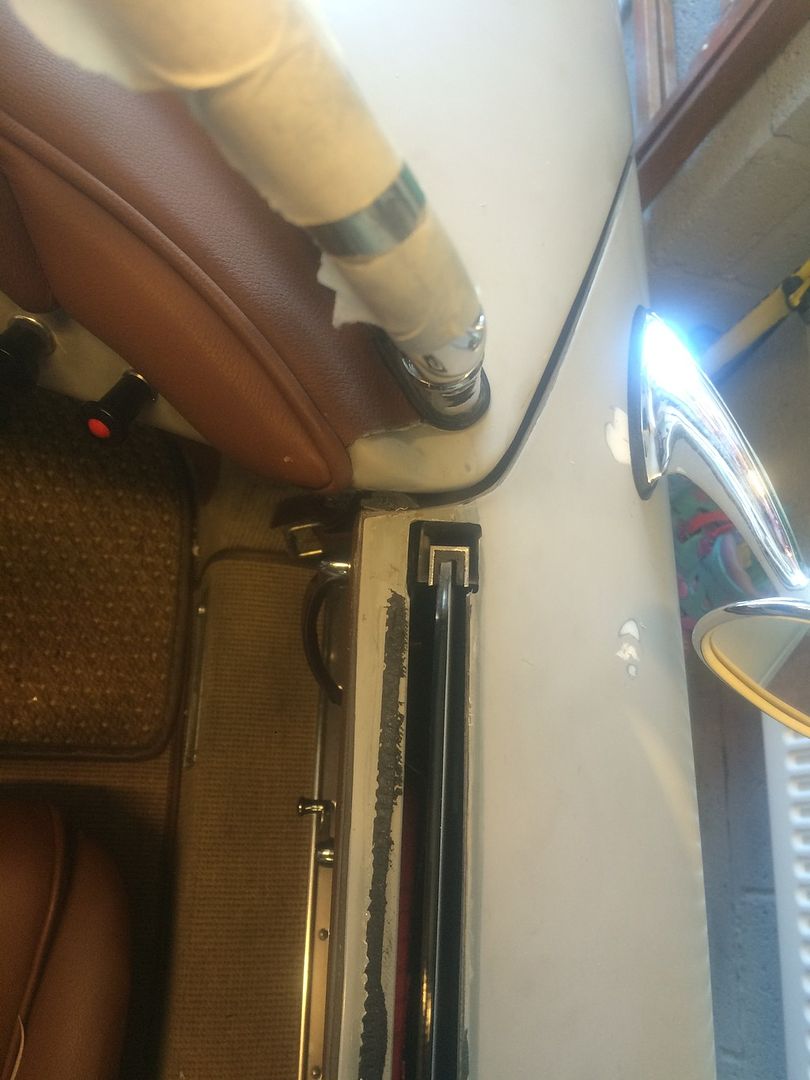
Had a day in the cave today. After many installing and removing, tweaks here and there. Managed to get the frames into the door and mounted all hardware. Really tight fit but all works so far.

Image

Image

Image

Easy bit done now, onto the removable pillar. Ordered some more aluminuim.
Rich

DDK Member 0547

Evolving Speedster Build ;-)
sladey
Nurse, I think I need some assistance
Posts: 8726
Joined: Sat Apr 23, 2005 9:08 pm
Location: Nottingham, UK

Re: Next Project

Post by sladey »

Great stuff Rich
The simple things you see are all complicated
I look pretty young but I'm just backdated yeah
mdmax72
Put a fork in me, I'm done!
Posts: 1512
Joined: Thu Sep 28, 2006 8:23 pm
Location: midlands u.k

Re: Next Project

Post by mdmax72 »

So with the frames in and positioned up as to were they need to be.
Onto the removable post.
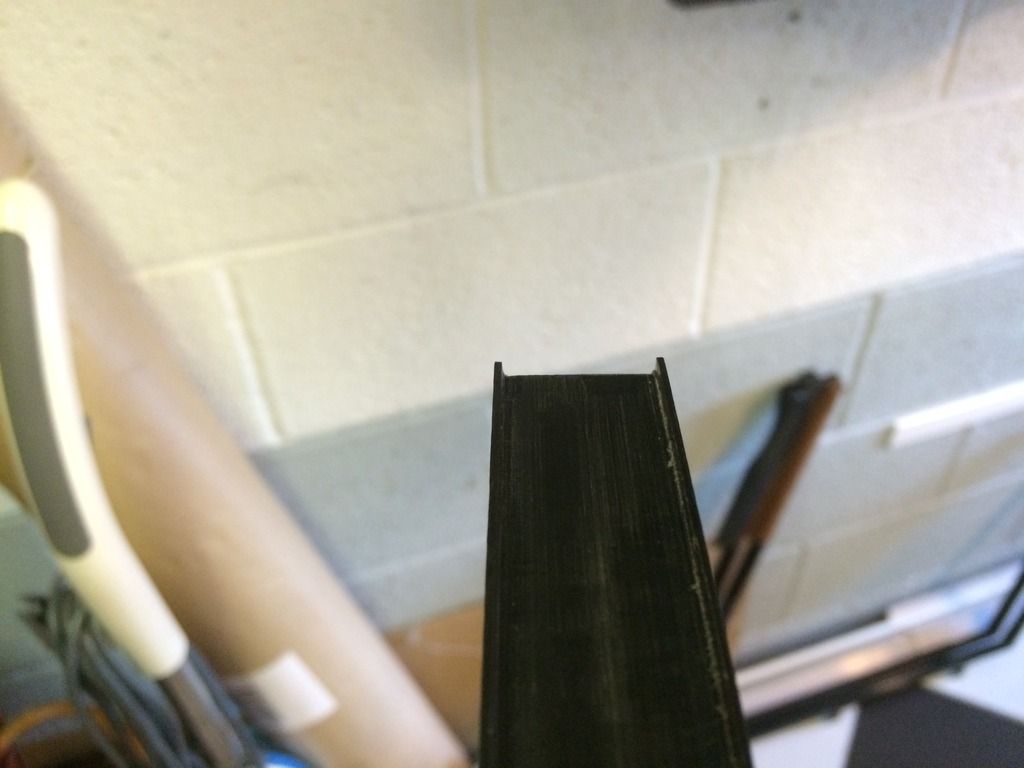
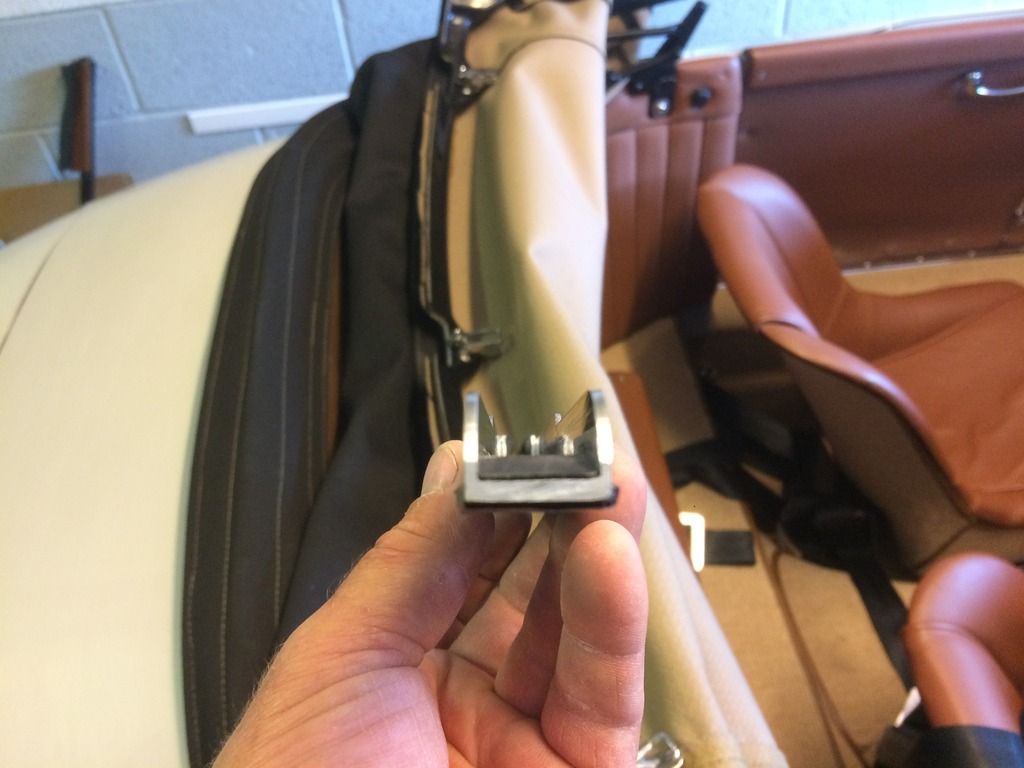
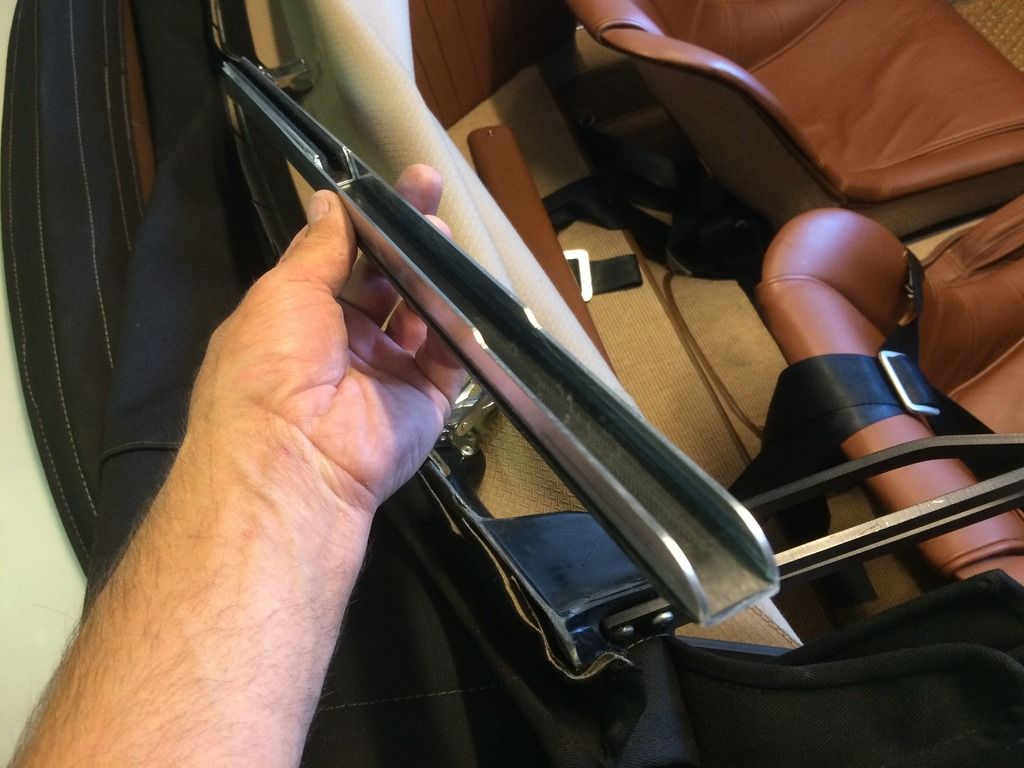
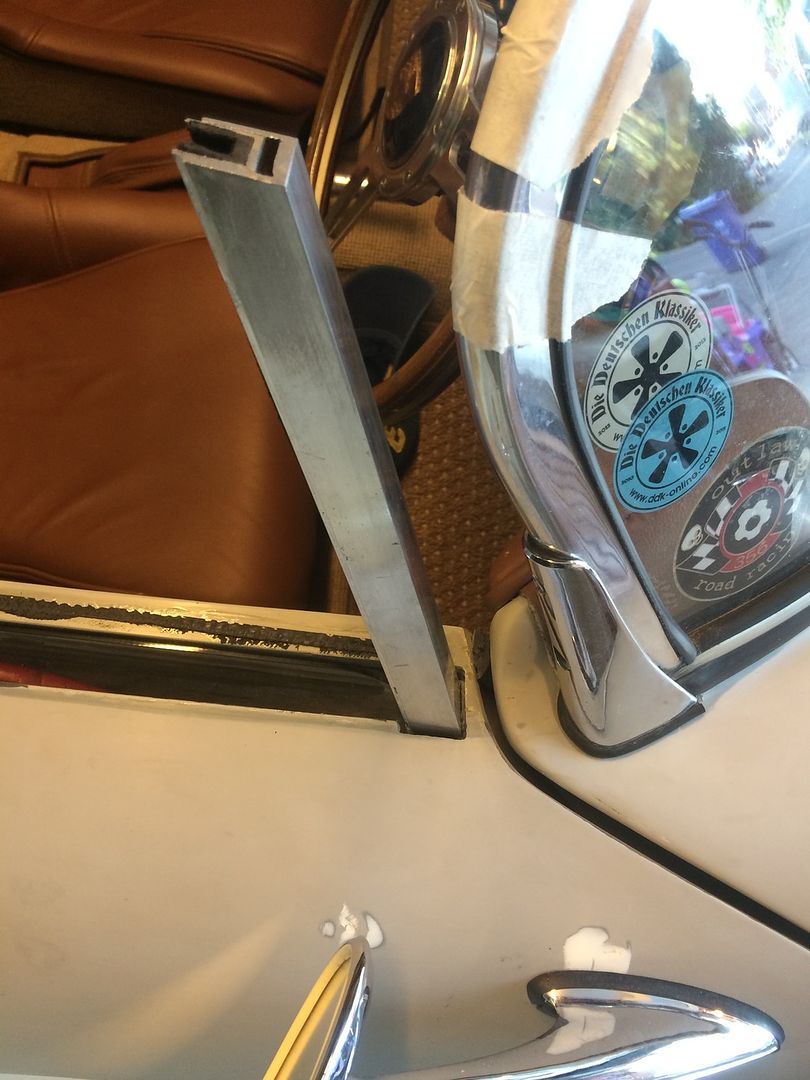
Started out with a 3/4" box section with 3mm walls, as l couldn't source any U shaped channel which was small enough to have 3mm walls. So with one side machined off, started machining the inside of the 3mm walls down to the required thickness. This is needed so it slides in and over the U shaped channel which the glass frame is built from and into the 1" box section over that. I've also machine down some Acetal to help as a guide to reduce metal to metal friction. Here it is.

Image

Machined U shaped channel with Acetal in place.

Image

Image

Click on picture to show a small clip as it drops in place.

Image

Now with the post partly done. Need to come up with something to bridge the gap and incorporate a seal of some sort.

Image
Rich

DDK Member 0547

Evolving Speedster Build ;-)
greg356a
I luv DDK!
Posts: 861
Joined: Sun Mar 25, 2012 9:16 am
Location: Norwich area
Contact:

Re: Next Project

Post by greg356a »

Hi Rich,
Looking really good. The problem with the gap its too small for a side light (ie vw beetle) and too large for a section of rubber, plus the curve at the top where it meets the curve of the windscreen. Confident you will come up with something. My guess is a combination of aluminium and rubber is needed. The post slides in nice, any chance when the window goes up it might slide the post up?
:)
1963 Karmann Ghia
1959 356A Coupe Outlaw
1957 3.2 Speedster replica
mdmax72
Put a fork in me, I'm done!
Posts: 1512
Joined: Thu Sep 28, 2006 8:23 pm
Location: midlands u.k

Re: Next Project

Post by mdmax72 »

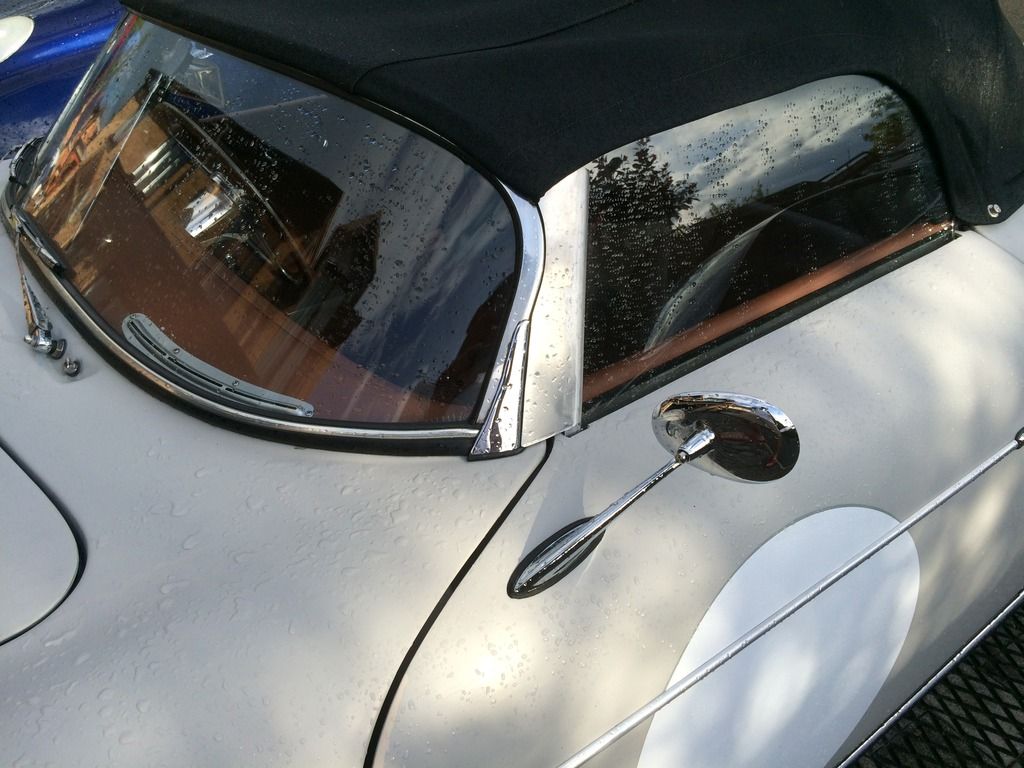
Not finished yet. Still working on the sealing arrangement.

Image
Rich

DDK Member 0547

Evolving Speedster Build ;-)
sladey
Nurse, I think I need some assistance
Posts: 8726
Joined: Sat Apr 23, 2005 9:08 pm
Location: Nottingham, UK

Re: Next Project

Post by sladey »

Looks neat Rich
The simple things you see are all complicated
I look pretty young but I'm just backdated yeah
greg356a
I luv DDK!
Posts: 861
Joined: Sun Mar 25, 2012 9:16 am
Location: Norwich area
Contact:

Re: Next Project

Post by greg356a »

Morning Rich, the post is very subtle and refined compared to the original Chisel screen post. :)
Bet you get some enquiries for a DIY kit :wink:
1963 Karmann Ghia
1959 356A Coupe Outlaw
1957 3.2 Speedster replica
oliver365
DDK slapper chatter
Posts: 463
Joined: Sun Oct 25, 2009 8:25 am
Location: cheshire

Re: Next Project

Post by oliver365 »

Lookin good Rich :wink: like it in the ally 8)
mdmax72
Put a fork in me, I'm done!
Posts: 1512
Joined: Thu Sep 28, 2006 8:23 pm
Location: midlands u.k

Re: Next Project

Post by mdmax72 »

Cheers guys.

Greg was going to put a locking mech in place but to be honest I don't think it needs it?? We'll see how it goes.
Rich

DDK Member 0547

Evolving Speedster Build ;-)
Post Reply