

Under cover Resto
-
Ashley James
- Put a fork in me, I'm done!
- Posts: 1653
- Joined: Tue Jul 12, 2016 3:30 pm
- Location: Near Stroud, Glos. UK
- Contact:
Re: Under cover Resto
Sorry, should have looked back. Check the weight difference and if there’s much difference, careful grind away judiciously.
-
Winston Teague
- Put a fork in me, I'm done!
- Posts: 1816
- Joined: Thu Apr 24, 2008 7:41 pm
- Location: Worcestershire
- Contact:
Re: Under cover Resto
Forged vs cast ..... you will not regret using forged pistons, you could regret opting for cast.....I don't really see why piston slap should be there with the JE pistons....im hoping someone can explain. W
Winston
'61 356 BT5 & a lot of broken chain driven stuff
'61 356 BT5 & a lot of broken chain driven stuff
-
Winston Teague
- Put a fork in me, I'm done!
- Posts: 1816
- Joined: Thu Apr 24, 2008 7:41 pm
- Location: Worcestershire
- Contact:
Re: Under cover Resto
Unless the clearance in the barrels is different on the JE cylinders... if this is that case id still want to know why?
Winston
'61 356 BT5 & a lot of broken chain driven stuff
'61 356 BT5 & a lot of broken chain driven stuff

Re: Under cover Resto
Winston I believe it is because the JE piston have centred gudgeon pin location
and others have offset pin location which keep the pistons in line better.
Karl
and others have offset pin location which keep the pistons in line better.
Karl
Keep the Outlaw Faith
-
neilbardsley
- Nurse, I think I need some assistance
- Posts: 7772
- Joined: Mon Apr 16, 2012 4:31 pm
Re: Under cover Resto
The shorter piston skirt?
“Piston slap is generally caused when the cold running clearance (piston-to-wall clearance) is large enough that when the piston rocks from side to side in the bore it “slaps” the side of the cylinder and causes noise,” explains JE Pistons’ Clayton Stothers. In the case of the LS, the shorter piston skirt meant that the angular shift of the piston in the bore was more pronounced than with a longer piston running the same clearance. To make matters worse, that clearance couldn’t be tightened due to the fact that even with cast-in iron sleeves, the early, aluminum LS block wasn’t as dimensionally stable as an all-iron small block Chevy.
Sent from my M2004J19C using Tapatalk
“A REMINDER. I would be grateful if those members who have borrowed bits from me in emergencies (e.g starter motor, oil cooler, etc) would return them and/or contact me”. – Chris Turner RIP
-
KS

- Nurse, I think I need some assistance
- Posts: 14956
- Joined: Fri May 07, 2004 3:12 pm
- Location: Cornwall
Re: Under cover Resto
OK, so do you want to hear what pistons slap sounds like on a cold engine? This is worst case scenario as the Type 4/914 engines are notoriously noisy due to their aluminium cases (ie, no magnesium content) and mine has aluminium-finned Biral cylinders, which also transmit more noise. Ear plugs at the ready? OK, go!
https://youtube.com/shorts/k8mpR3t0JXY
And, yes, it does quieten down as the engine gets warm and/or as the revs increase.
https://youtube.com/shorts/k8mpR3t0JXY
And, yes, it does quieten down as the engine gets warm and/or as the revs increase.
-
Winston Teague
- Put a fork in me, I'm done!
- Posts: 1816
- Joined: Thu Apr 24, 2008 7:41 pm
- Location: Worcestershire
- Contact:
Re: Under cover Resto
Hi Keith, my T25 sounded just like that, and it went away with revs, and/or load.......t'was a big end.....
Winston
'61 356 BT5 & a lot of broken chain driven stuff
'61 356 BT5 & a lot of broken chain driven stuff
-
KS
- Nurse, I think I need some assistance
- Posts: 14956
- Joined: Fri May 07, 2004 3:12 pm
- Location: Cornwall
Re: Under cover Resto
-
Winston Teague
- Put a fork in me, I'm done!
- Posts: 1816
- Joined: Thu Apr 24, 2008 7:41 pm
- Location: Worcestershire
- Contact:
Re: Under cover Resto
Sadly my T25 has Mahle pistons!!
Winston
'61 356 BT5 & a lot of broken chain driven stuff
'61 356 BT5 & a lot of broken chain driven stuff
Re: Under cover Resto
Thanks for the video Keith.
It's not the same but reminds me of my old Honda NSR 250 SP
that had a dry clutch and would rattle like hell in neutral.
The amount of know it all's that said "that needs looking at" was funny.
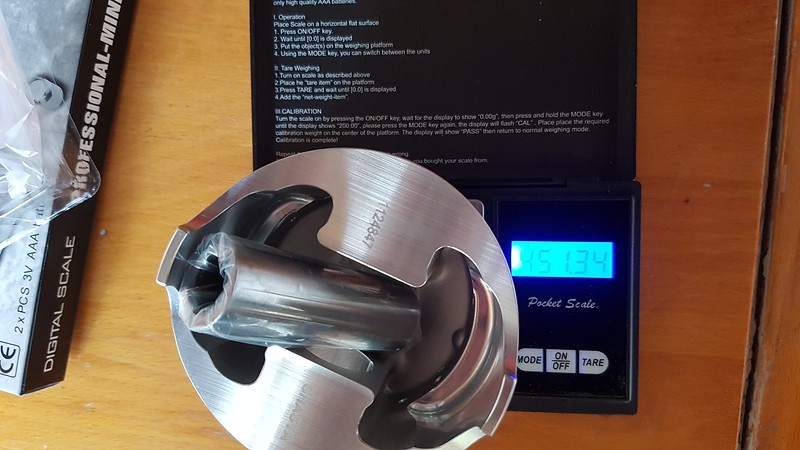
I got a set of digital scales to start balancing things up.
Just a quick look to see the difference between old and new.
Saving the weight of just under half a wrist pin per cylinder....
 20220628_171309 by karlhash, on Flickr
 20220628_171818 by karlhash, on Flickr
Karl
It's not the same but reminds me of my old Honda NSR 250 SP
that had a dry clutch and would rattle like hell in neutral.
The amount of know it all's that said "that needs looking at" was funny.
I got a set of digital scales to start balancing things up.
Just a quick look to see the difference between old and new.
Saving the weight of just under half a wrist pin per cylinder....
20220628_171309 by karlhash, on Flickr20220628_171818 by karlhash, on FlickrKarl
Keep the Outlaw Faith
Re: Under cover Resto
Its been slow going in my garage lately, too many family chores for Porsche progress.
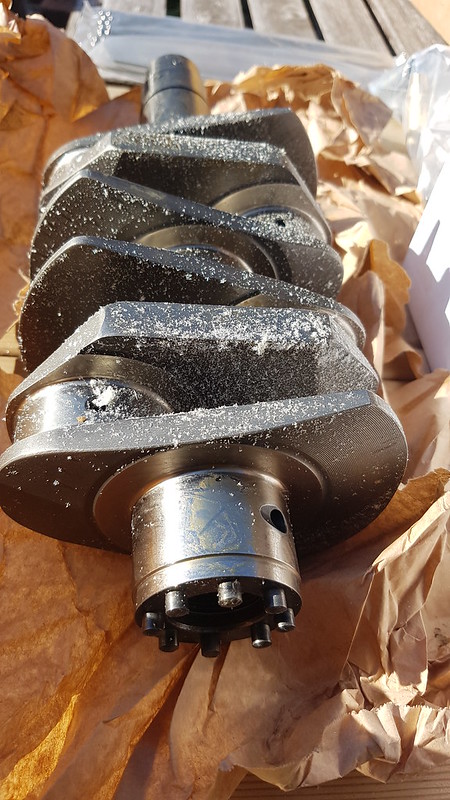
To my surprise whilst hard at work making bedroom furniture for my son, the rest of my parts turned up.
 20220809_173844 by karlhash, on Flickr
I know I could have made much better use of the time waiting for them but I'm in no rush and I don't want to let it become a stressful thing so no deadlines.
First task so far was to take the crank and clean it. The packaging it arrived in had disintegrated leaving it covered in bits of dried crumbled foam.
I took out the grub screws from the cheeks of the crank to clean it internally as ignoring this will lead to contaminated oil and ruin your brand new engine.
I will definitely try to avoid doing that.
 20220809_173856 by karlhash, on Flickr
debris inside crank
 20220829_171046 by karlhash, on Flickr
the black marks in the red tray are what came from just one hole..!
 20220829_175014 by karlhash, on Flickr
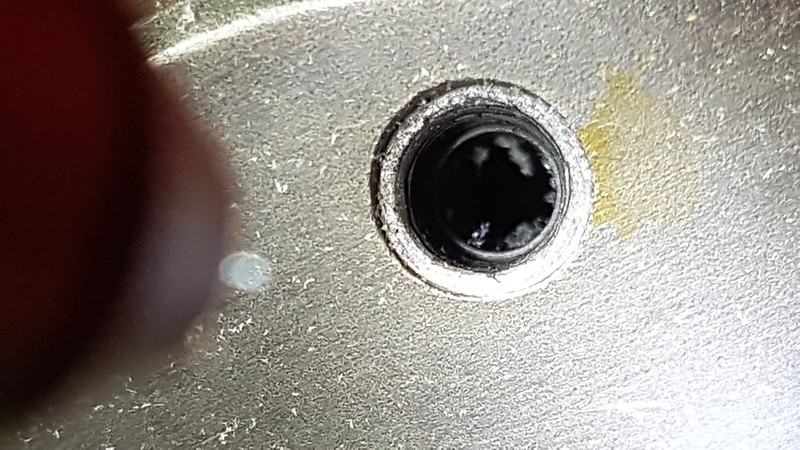
haha, I'm making you check out my clean orifice
 20220829_175052 by karlhash, on Flickr
stage one of crank clean, its far dirtier than I thought, still.
 20220829_183609 by karlhash, on Flickr
Karl
To my surprise whilst hard at work making bedroom furniture for my son, the rest of my parts turned up.
20220809_173844 by karlhash, on FlickrI know I could have made much better use of the time waiting for them but I'm in no rush and I don't want to let it become a stressful thing so no deadlines.
First task so far was to take the crank and clean it. The packaging it arrived in had disintegrated leaving it covered in bits of dried crumbled foam.
I took out the grub screws from the cheeks of the crank to clean it internally as ignoring this will lead to contaminated oil and ruin your brand new engine.
I will definitely try to avoid doing that.
20220809_173856 by karlhash, on Flickrdebris inside crank
20220829_171046 by karlhash, on Flickrthe black marks in the red tray are what came from just one hole..!
20220829_175014 by karlhash, on Flickrhaha, I'm making you check out my clean orifice
20220829_175052 by karlhash, on Flickrstage one of crank clean, its far dirtier than I thought, still.
20220829_183609 by karlhash, on FlickrKarl
Keep the Outlaw Faith
Re: Under cover Resto
A little more progress from me.
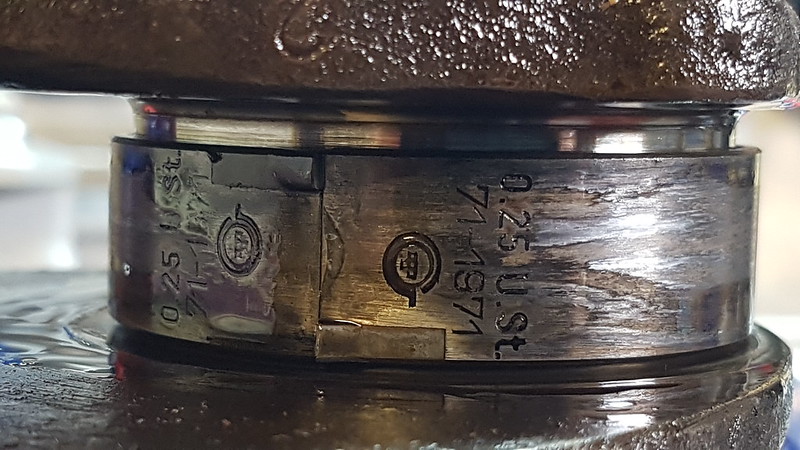
I took the conrods off the old crank.
The bearings look to be about worn out but that's not bad going if the date on them is any indication as to when they were installed.
 20220910_153544 by karlhash, on Flickr
It took precisely 7 mins of heating the timing gear with a torch flame before it would budge, but once warmed up it wasn't too difficult.
 20220918_160850 by karlhash, on Flickr
 20220918_165933 by karlhash, on Flickr
Old non counterweighted crank weight
 20220919_143442 by karlhash, on Flickr
new counterweighted crank weight
 20221001_161054 by karlhash, on Flickr
I was expecting a heavier weight from the new crank as I had read somewhere that it would be 10kgs so I'm quite happy that the engine will spin up in a similar vain to before.
I weighed my con rods end to end and matched them all to within 0,1 of a gram but that was total weight and one of them had a significantly lighter big end so I will have to re do them to satisfy myself.
 20220924_161833 by karlhash, on Flickr
I tried the flywheel fitment to the new crank and because I have been reading every engine build thread on 912 BBS I had prior knowledge of the problem I encountered.
The new dowel pins on the new crank are about 0.2mm bigger than the pin holes in the old flywheel.
I did what the person from 912 bbs did and pulled the flywheel onto the crank with the gland nut which left a burr in the flywheel holes. Cleaned them up with a reamer and job done, nice snug fit.
 20221002_170900 by karlhash, on Flickr
Next I weighed all the pistons, gudgeon pins rings and clips. Putting all the heavy clips and rings with the light pistons and vice versa.
 20221008_151208 by karlhash, on Flickr
Then I checked and filed the ring gaps and side clearances but I didn't have a feeler gauge thin enough for the minimum clearance so I went round measuring paper but even those were too thick.
In the end our cheap kitchen foil was just the right size
 20221015_121452 by karlhash, on Flickr
 20221009_171500 by karlhash, on Flickr
 20221015_131835 by karlhash, on Flickr
Next up is work on the heads. I had a chat with Angus and Sam at Greatworth Classics and Simon Rudge on Sunday at the meet up and they were most helpful. They deduced I needed to find a machine shop so I have asked for some quotes for the valve guide work needed and crank assembly balancing.
I will let you know the outcome.
Karl
I took the conrods off the old crank.
The bearings look to be about worn out but that's not bad going if the date on them is any indication as to when they were installed.
20220910_153544 by karlhash, on FlickrIt took precisely 7 mins of heating the timing gear with a torch flame before it would budge, but once warmed up it wasn't too difficult.
20220918_160850 by karlhash, on Flickr20220918_165933 by karlhash, on FlickrOld non counterweighted crank weight
20220919_143442 by karlhash, on Flickrnew counterweighted crank weight
20221001_161054 by karlhash, on FlickrI was expecting a heavier weight from the new crank as I had read somewhere that it would be 10kgs so I'm quite happy that the engine will spin up in a similar vain to before.
I weighed my con rods end to end and matched them all to within 0,1 of a gram but that was total weight and one of them had a significantly lighter big end so I will have to re do them to satisfy myself.
20220924_161833 by karlhash, on FlickrI tried the flywheel fitment to the new crank and because I have been reading every engine build thread on 912 BBS I had prior knowledge of the problem I encountered.
The new dowel pins on the new crank are about 0.2mm bigger than the pin holes in the old flywheel.
I did what the person from 912 bbs did and pulled the flywheel onto the crank with the gland nut which left a burr in the flywheel holes. Cleaned them up with a reamer and job done, nice snug fit.
20221002_170900 by karlhash, on FlickrNext I weighed all the pistons, gudgeon pins rings and clips. Putting all the heavy clips and rings with the light pistons and vice versa.
20221008_151208 by karlhash, on FlickrThen I checked and filed the ring gaps and side clearances but I didn't have a feeler gauge thin enough for the minimum clearance so I went round measuring paper but even those were too thick.
In the end our cheap kitchen foil was just the right size
20221015_121452 by karlhash, on Flickr20221009_171500 by karlhash, on Flickr20221015_131835 by karlhash, on FlickrNext up is work on the heads. I had a chat with Angus and Sam at Greatworth Classics and Simon Rudge on Sunday at the meet up and they were most helpful. They deduced I needed to find a machine shop so I have asked for some quotes for the valve guide work needed and crank assembly balancing.
I will let you know the outcome.
Karl
Keep the Outlaw Faith
-
sladey
- Nurse, I think I need some assistance
- Posts: 8771
- Joined: Sat Apr 23, 2005 9:08 pm
- Location: Nottingham, UK
Re: Under cover Resto
Nice work Karl
The simple things you see are all complicated
I look pretty young but I'm just backdated yeah
I look pretty young but I'm just backdated yeah
-
roy mawbey
- Put a fork in me, I'm done!
- Posts: 1852
- Joined: Thu Dec 25, 2008 2:28 pm
- Location: sunny sussex
Re: Under cover Resto
Very nice photos as well Karl. I must say those dowel pins clearance issue has me thinking is that correct? The 0.2mm oversize you mentioned seems excessive to allow dowel pins to be forced in. Did you mean to write 0.02mm oversize on the bore size?
Roy
Roy
RHD 356A coupe super 75 106954