

Hi everyone, as requested I have opened a Restoration Thread. If anyone needs background on my Porsche please see my entries in New Members.
There's been some progress over the past days, but need everyones help re Dansk parts.
I have this weekend removed the front bulkhead and cross member. I have ordered Dansk parts to replace these and have also sourced a lot of Restoration Design parts. First impressions are that the Dansk parts are ofan inferior quality compared to RD (weld quality and material thinknesses)
Porsche 912 "Lucy"
Moderator: Bootsy
Porsche 912 "Lucy"
- Attachments
-
- Front end with Dansk cross member
- Front end with Dansk part.jpg (86.76 KiB) Viewed 1597 times
-
- Front end after
- Front end after.jpg (78.23 KiB) Viewed 1597 times
-
- Front end before
- Front end before.jpg (76.6 KiB) Viewed 1597 times
Re: Porsche 912 "Lucy"
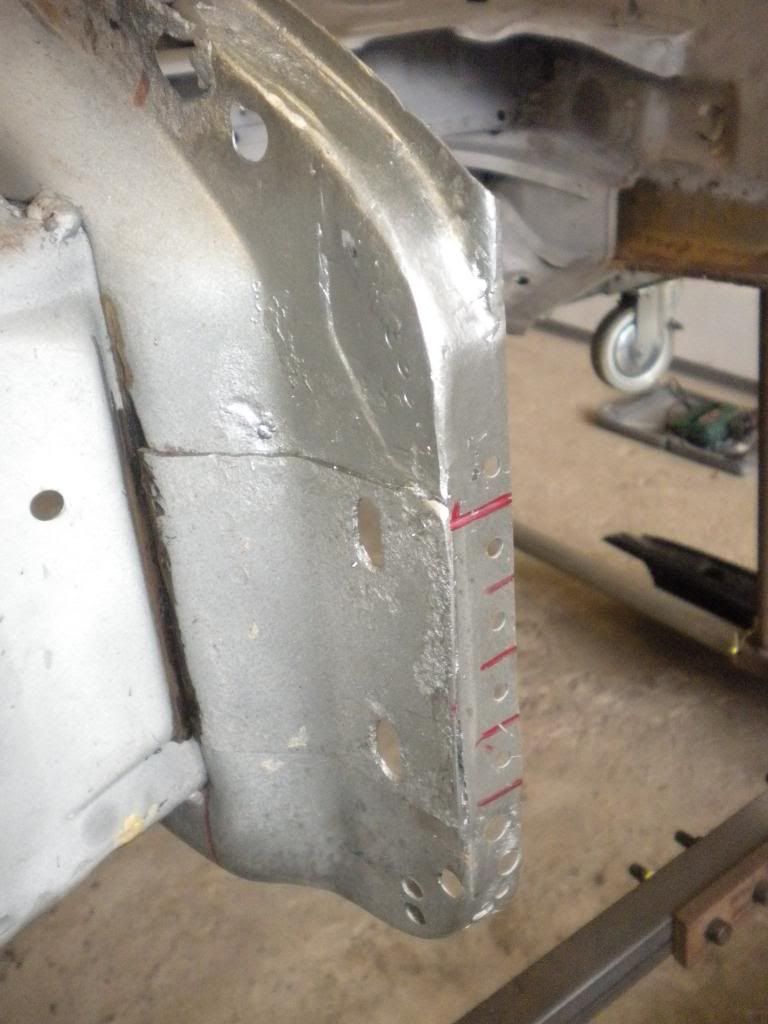
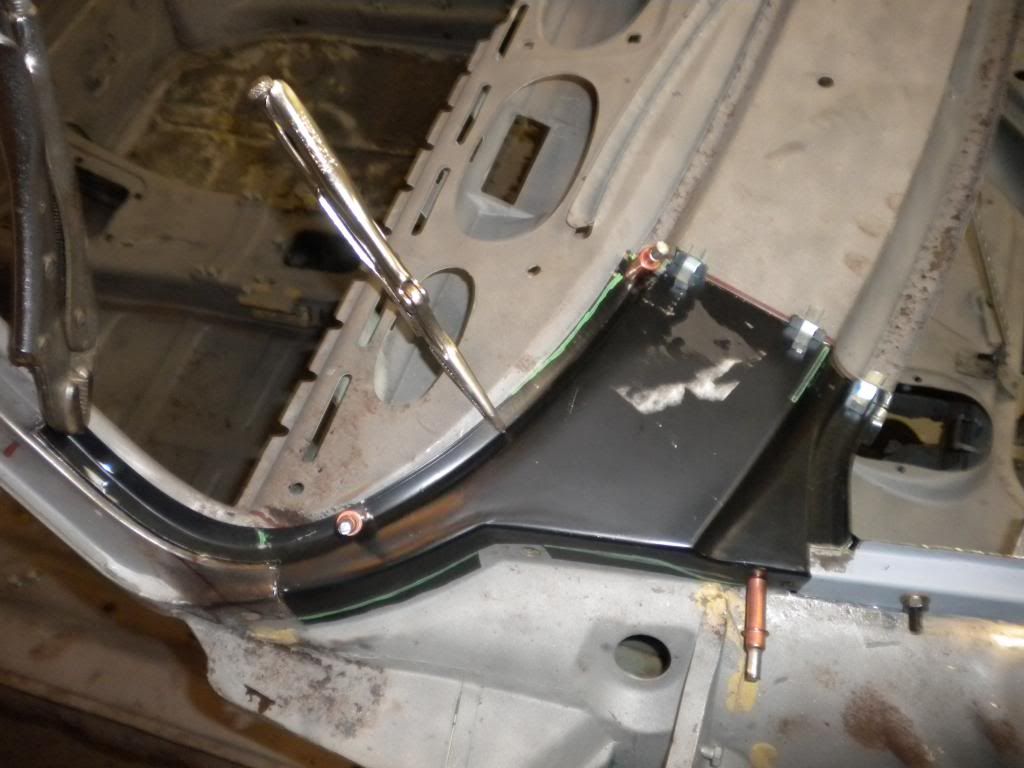
Has anyone had issues with the front cross member being different? The hole spacing for the front torsion bar covers is wrong by +5mm (see pics below) We have made a chassis jig for the front end and the Dansk part is a minimum 1/2 hole away from being correct. I have built race cars in the past so am after some accuracy. I am now contemplating ordering the Restoration Design equivalent as I not about to cut the mounting bosses away from the Dansk part an reposition them......
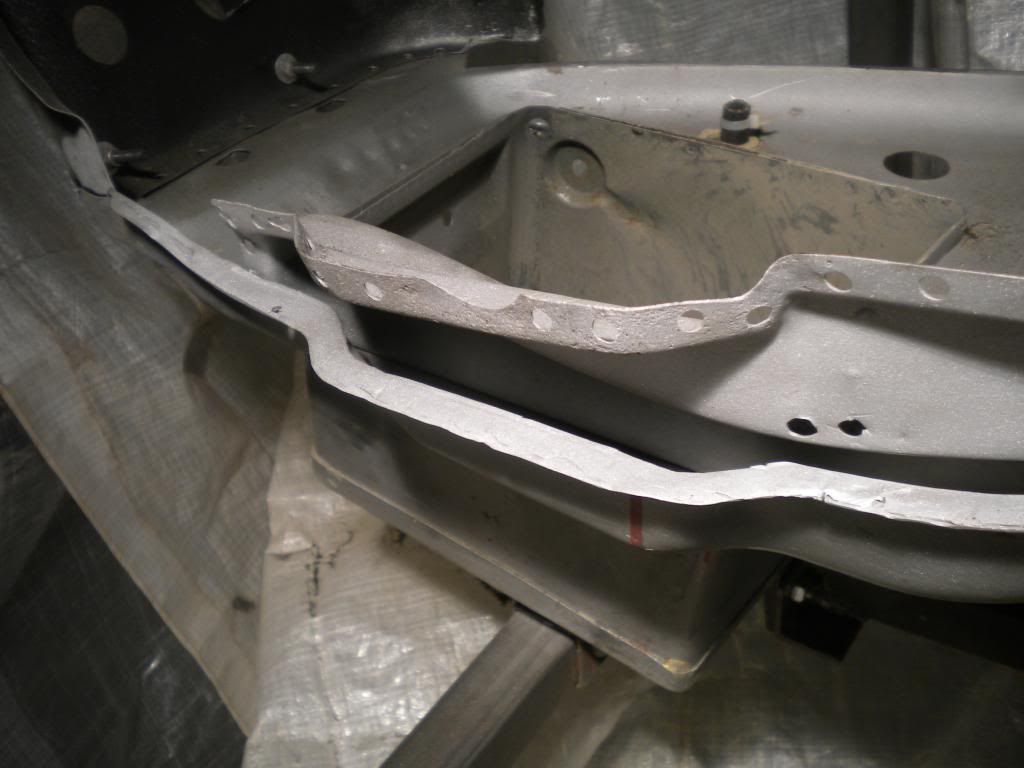
The Torsion bar mount also fits incorrectly. It sits proud of the mounting bosses and if the suspension were mounted, it would never track straight.
Any ideas anyone?
The Torsion bar mount also fits incorrectly. It sits proud of the mounting bosses and if the suspension were mounted, it would never track straight.
Any ideas anyone?
- Attachments
-
- Porsche
- Porsche dimensions.jpg (117.85 KiB) Viewed 1594 times
-
- Dansk (+5mm)
- Dansk dimensions.jpg (82.92 KiB) Viewed 1594 times
-
- Porsche V Dansk
- Porsche V Dansk compare.jpg (99.89 KiB) Viewed 1594 times
-
Alan @ CanfordClassics
- Nurse, I think I need some assistance
- Posts: 4206
- Joined: Fri Nov 14, 2003 3:10 pm
- Location: Bournemouth
- Contact:
Re: Porsche 912 "Lucy"
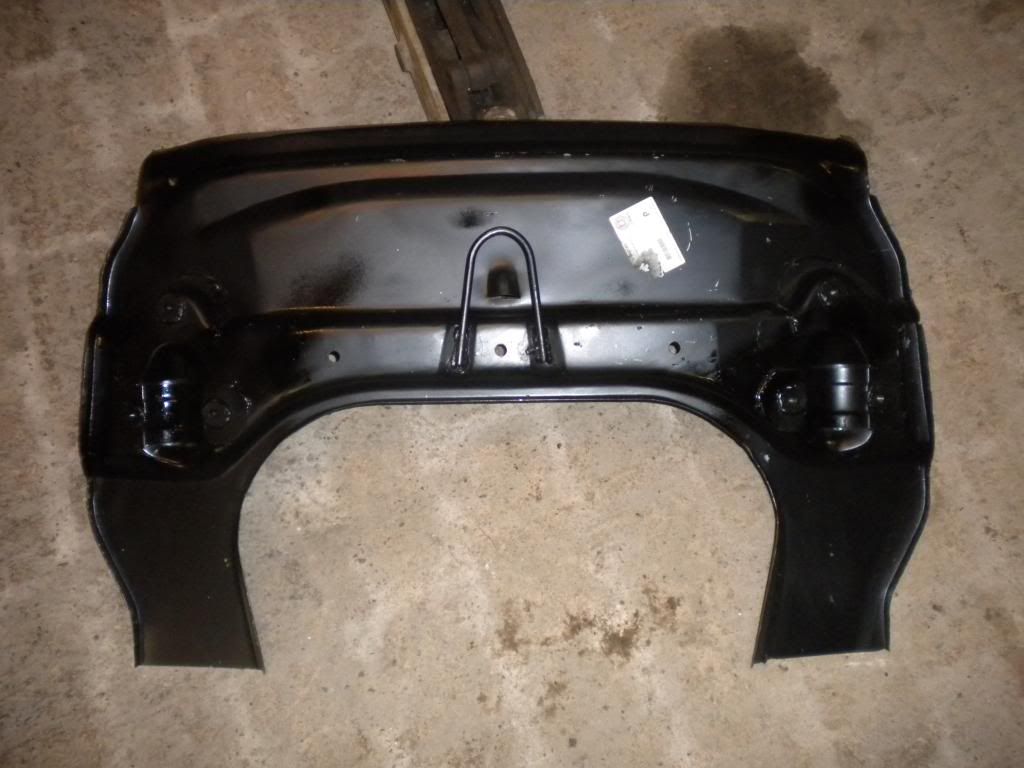
If worried about those you can buy this panel from Porsche. We have fitted many of each type, the Dansk panel is a little off but the results will not be that noticeable. Never had a problem with tracking one, main prob is trying to get neutral camber on the front.
Thanks
Alan
Thanks
Alan
http://www.canfordclassics.co.uk
Porsche Restoration & Sales
Porsche Restoration & Sales
Re: Porsche 912 "Lucy"
Thanks Alan,
Just been out again armed with the torsion bar cover measurements from the Porsche Reperaturleitfaden: Porsche list 105,00mm as the correct dimension, I've measured 97,00mm on the part as fitted to my 912. No idea why there should be a difference.....
The two holes for the torsion bar mounting are correct at 90,00mm, but I can't help thinking the new part isn't "square". The new part in no way matches with the jig that was made to the car and is 1/2 a hole out on one side, i.e way to much to adjust in the sheet metal. Would require the bosses to be removed and re-welded.
I have ben in contact with Restoration Design tonight to get their input. Porsche part may be an option however.
- Attachments
-
- Porsche dimensions 2.JPG (70.29 KiB) Viewed 1526 times
Re: Porsche 912 "Lucy"
Hi everyone, been making some progress and have recieved and test fitted the Restoration Design suspension panel. Its alot lot better than the Dansk part and have some comparison images to post in due course.
This is the first time I have tried to use a photobucket upload, so hope all goes as planned.....
This is the first time I have tried to use a photobucket upload, so hope all goes as planned.....
Re: Porsche 912 "Lucy"
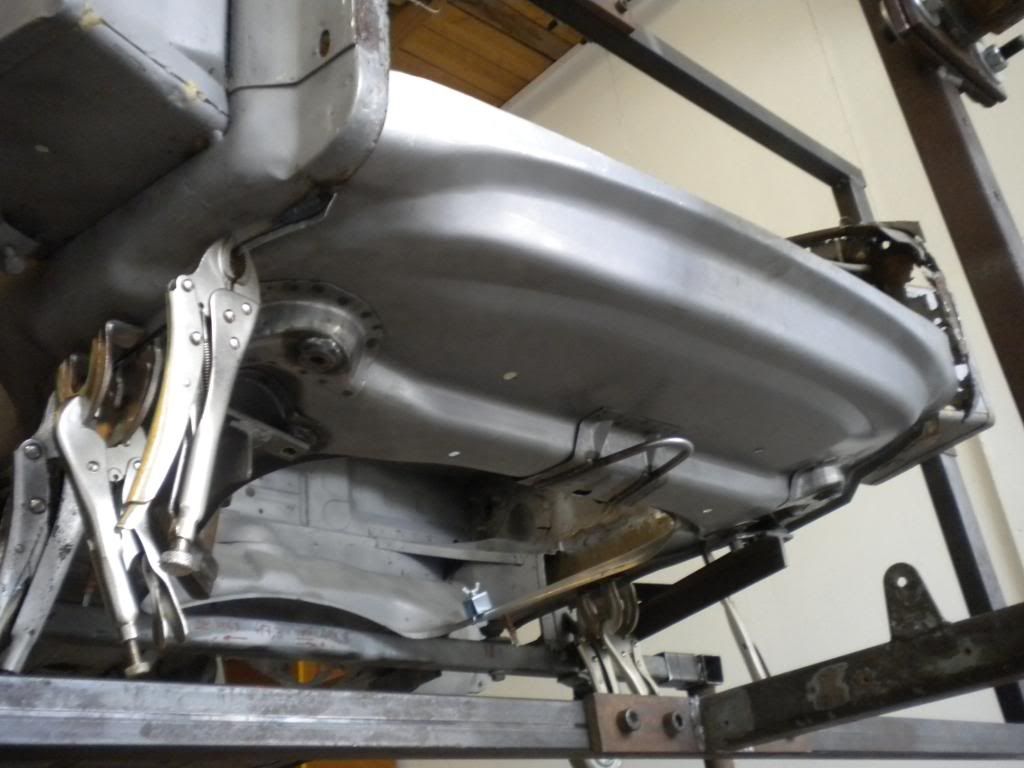
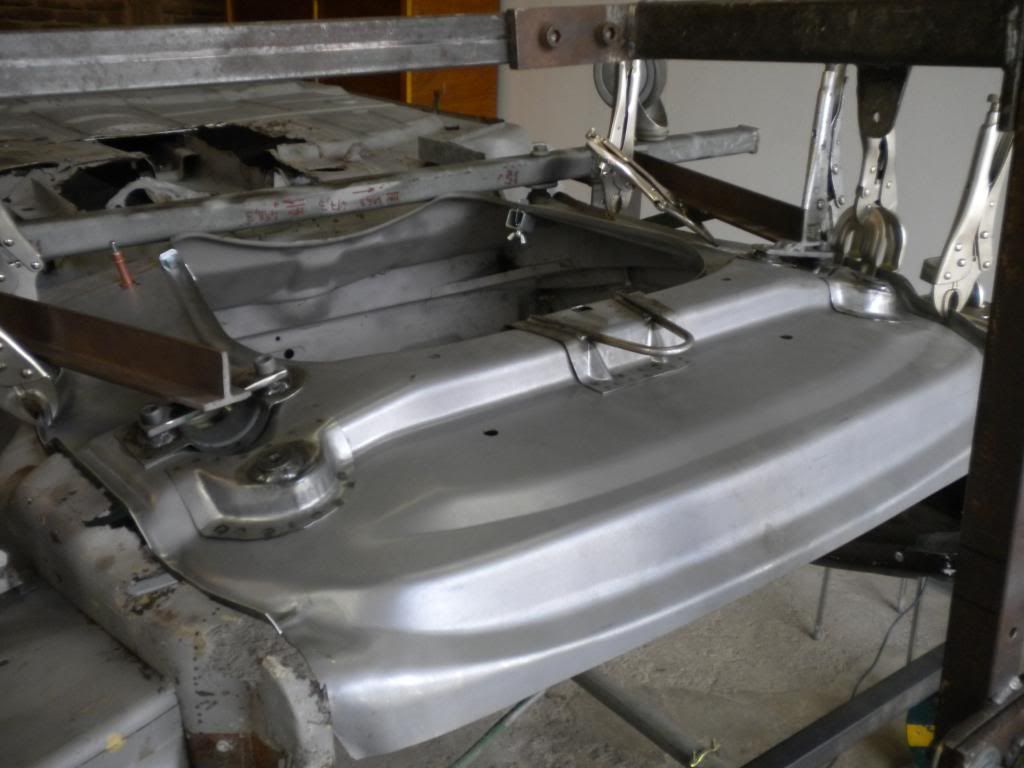
OK, seems to be working.
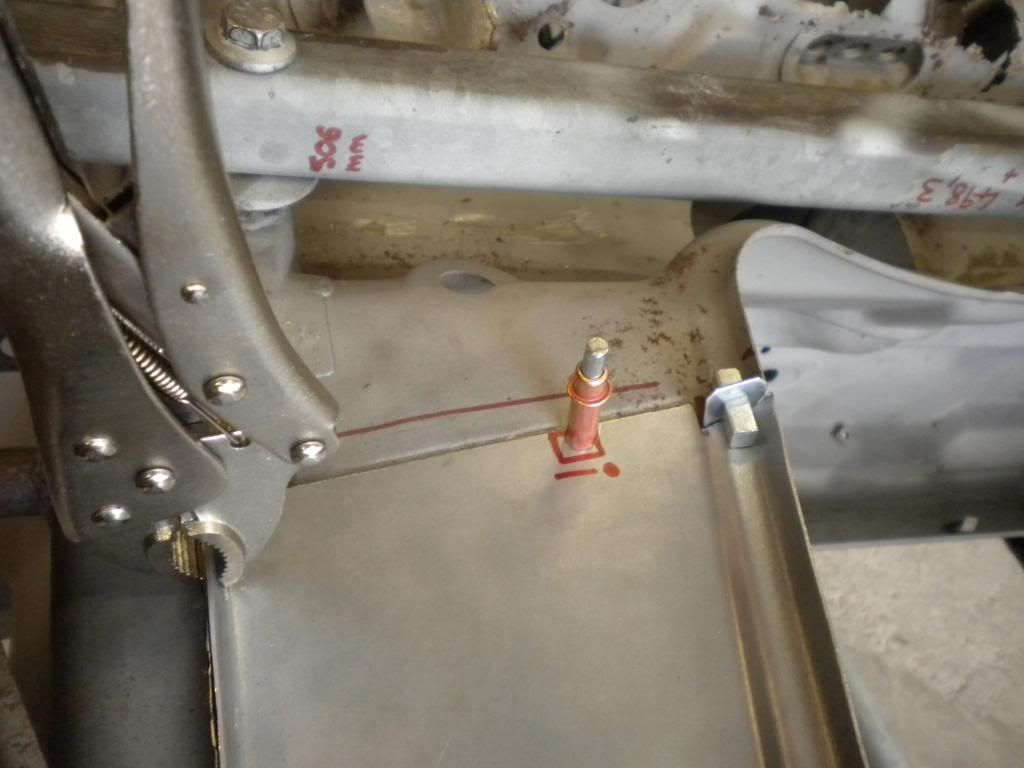
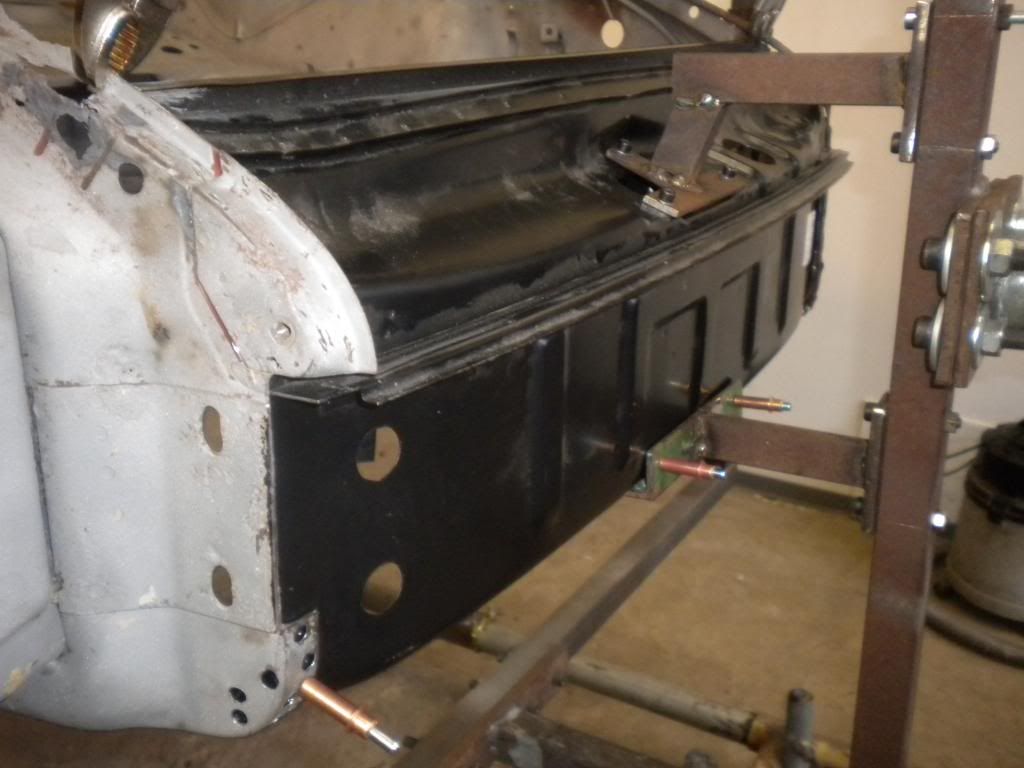
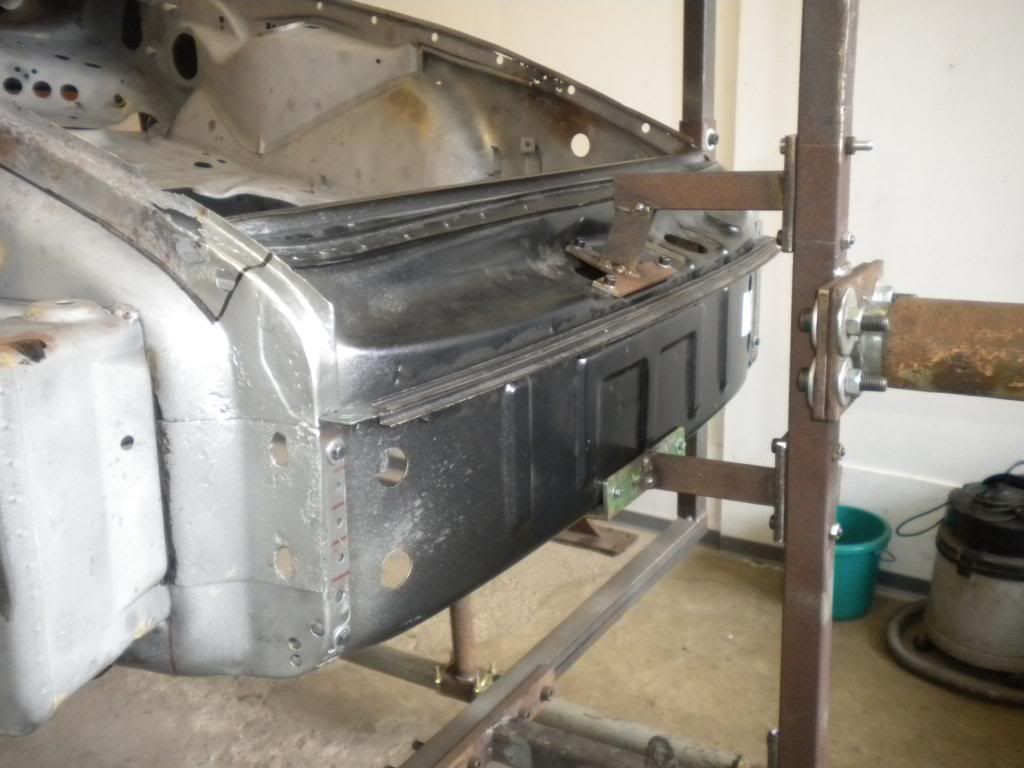
On the jig
 [/URL][/img]
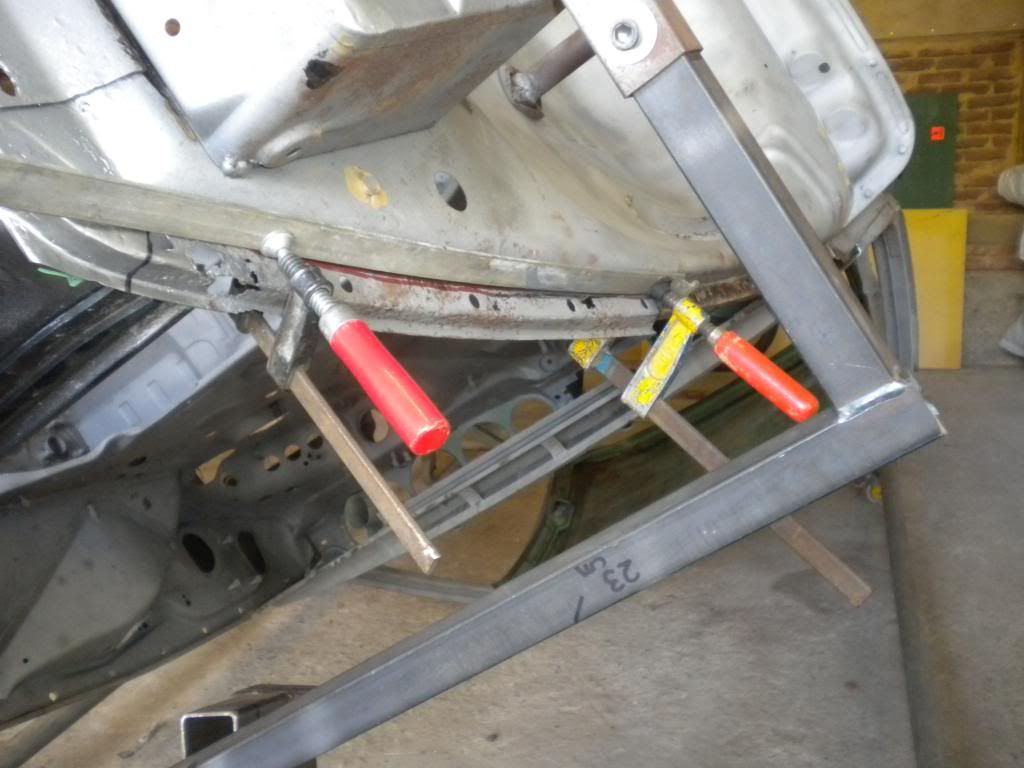
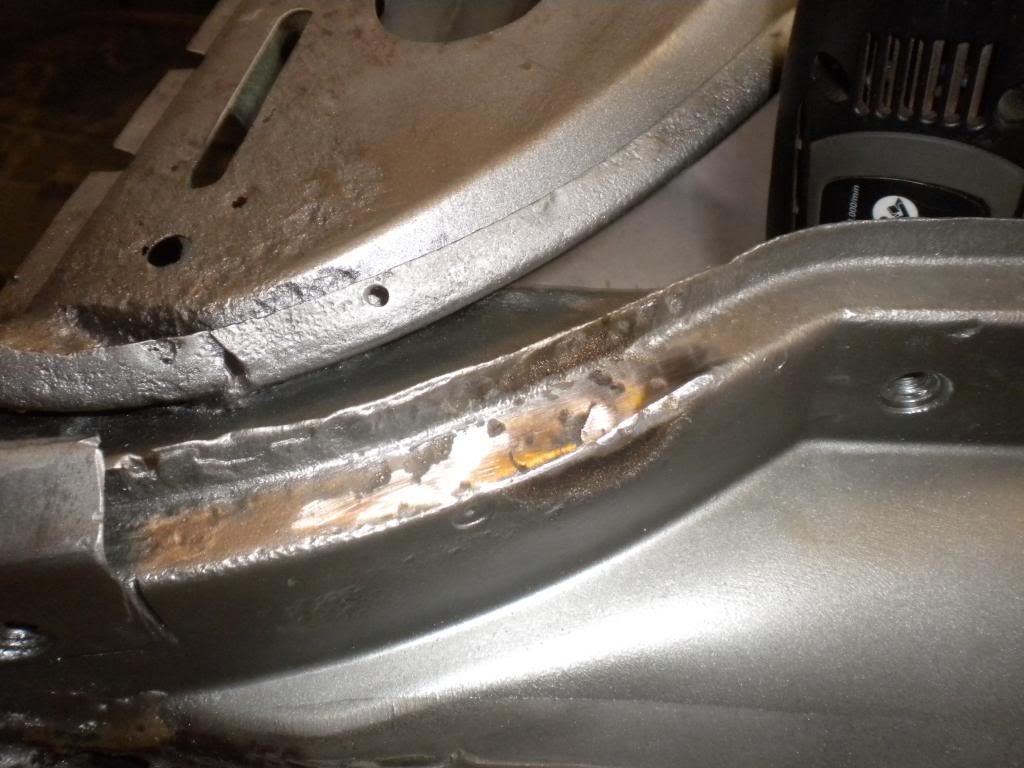
Overlap to the existing chassis. I have "joggled" the metal to create an overlap. Takes longer and is more work but has benefits. Idea is that the joint is stronger and can we welded before being tinned.
 [/URL][/img]
On the jig
[/URL][/img]Overlap to the existing chassis. I have "joggled" the metal to create an overlap. Takes longer and is more work but has benefits. Idea is that the joint is stronger and can we welded before being tinned.
[/URL][/img]Re: Porsche 912 "Lucy"
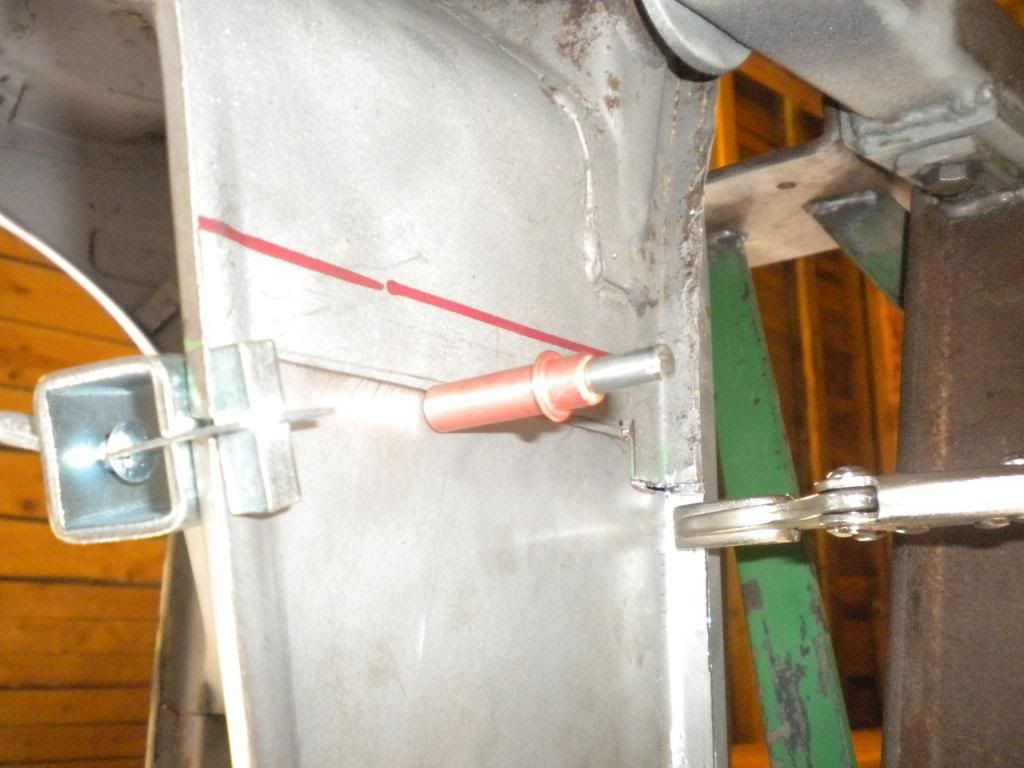
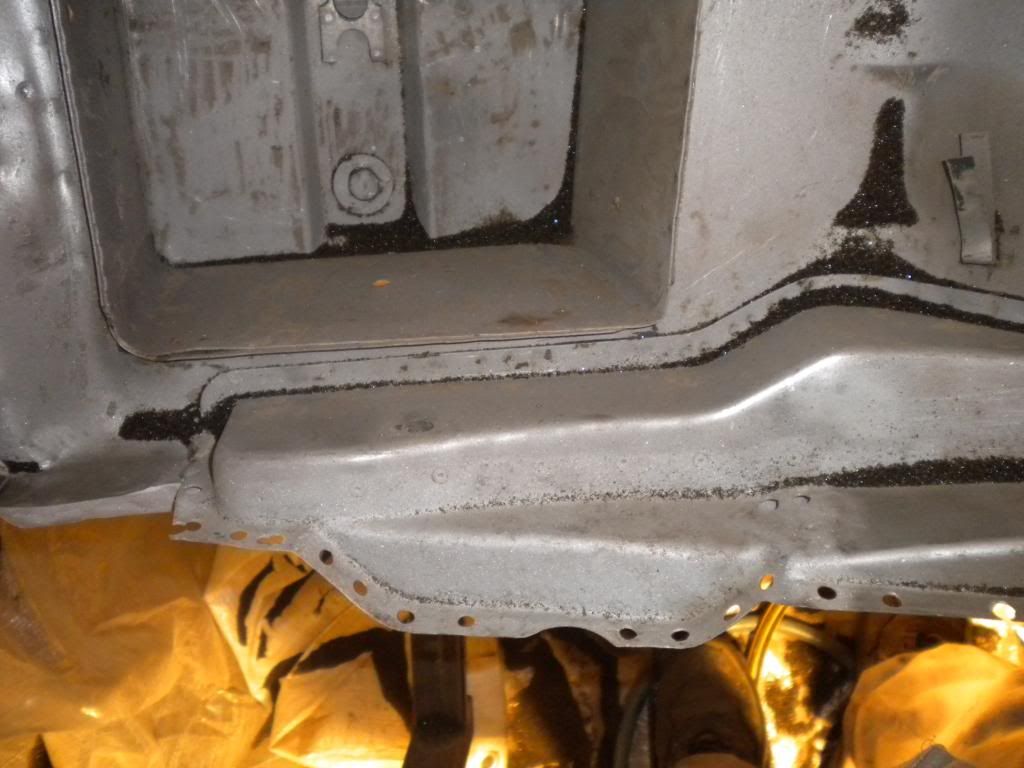
Two more images, inside this time. Have some work to combating the rust, but it is surface only
 [/url][/img]
 [/URL][/img]
[/url][/img][/URL][/img]Re: Porsche 912 "Lucy"
Overlap from the other side
 [/URL][/img]
[/URL][/img]Re: Porsche 912 "Lucy"
Evening all,
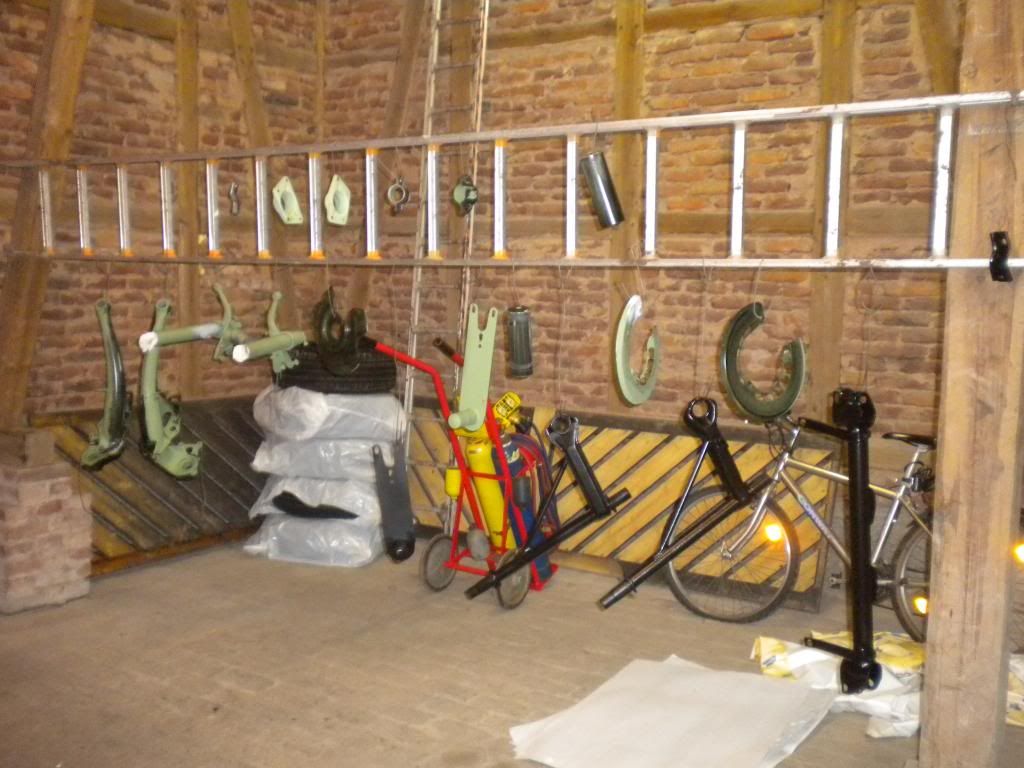
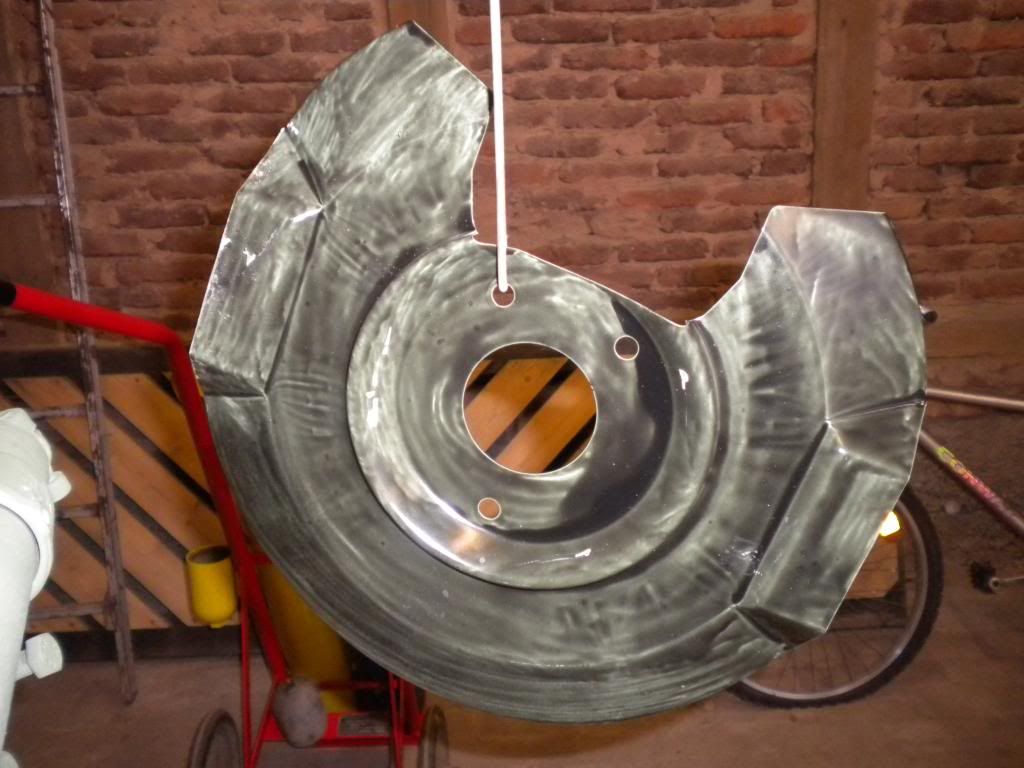
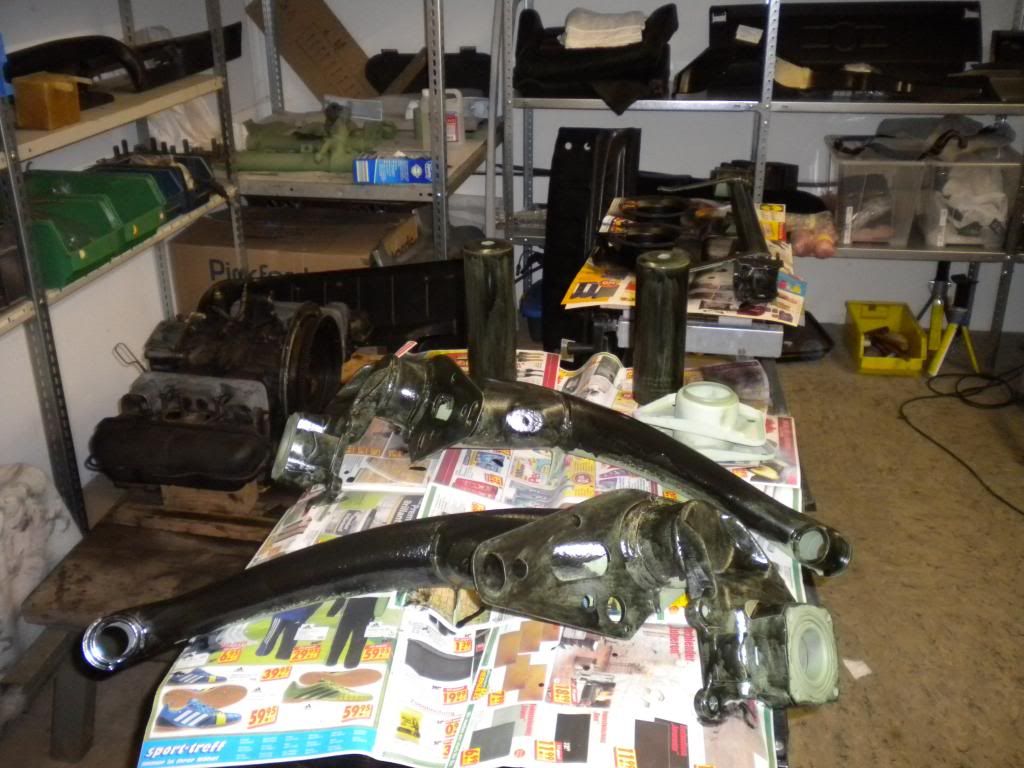
Have been busy with the suspension of late, as this is required in order to check the alignment of the suspension pan. I have had all of the parts sand blasted and coated with anti corrosion paint. I have been using POR chassis paint and at first tried a brush method, with dispointing results. 15 Euro later in Aldi and armed with a spray gun the results have been much more satisfactory.
Hanging
Brush method - not recomended....
Dried opac
15 Euro was worth the investment
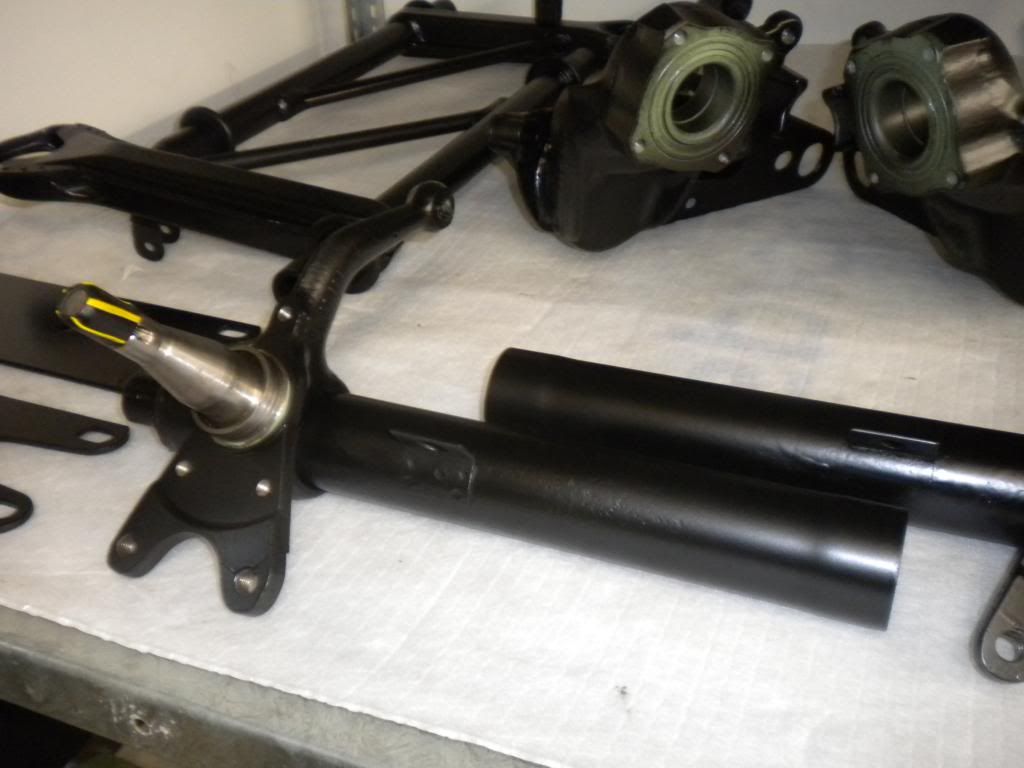
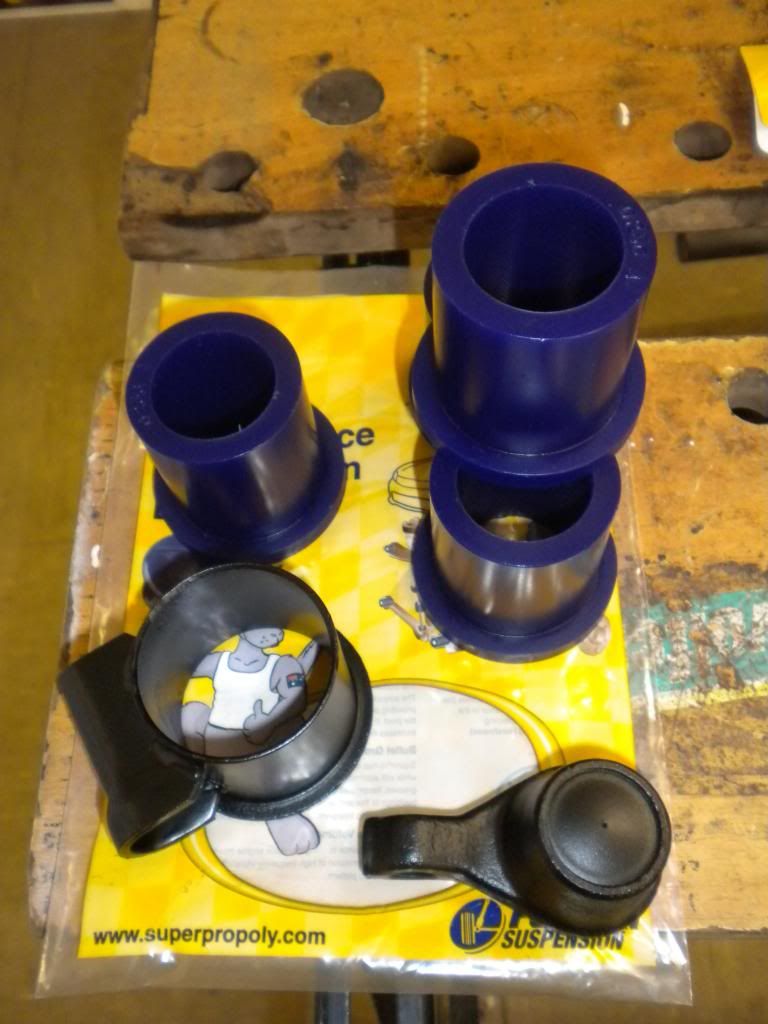
Will be using Super Pro bushes, and am really happy with the test fit and quality of the bushes.
Been busy with a engine stand ahead of the winter engine rebuild. Just requires the engine brackets, currently being machined.
[URL=http://s1319.photobucket.com/user/zeb111/media/Porsche%20912/c2934f3b-e908-4280-b851-c33185ade3f8_zps4a9f6b15.jpg.html]
Have been busy with the suspension of late, as this is required in order to check the alignment of the suspension pan. I have had all of the parts sand blasted and coated with anti corrosion paint. I have been using POR chassis paint and at first tried a brush method, with dispointing results. 15 Euro later in Aldi and armed with a spray gun the results have been much more satisfactory.
Hanging

Brush method - not recomended....

Dried opac

15 Euro was worth the investment

Will be using Super Pro bushes, and am really happy with the test fit and quality of the bushes.

Been busy with a engine stand ahead of the winter engine rebuild. Just requires the engine brackets, currently being machined.
[URL=http://s1319.photobucket.com/user/zeb111/media/Porsche%20912/c2934f3b-e908-4280-b851-c33185ade3f8_zps4a9f6b15.jpg.html]
Re: Porsche 912 "Lucy"
Weekend update. It's been reunification day in Germany so have been able to take advantage of an extra long weekend.
Suspension is fitted and am happy with the suspension pan alignment:
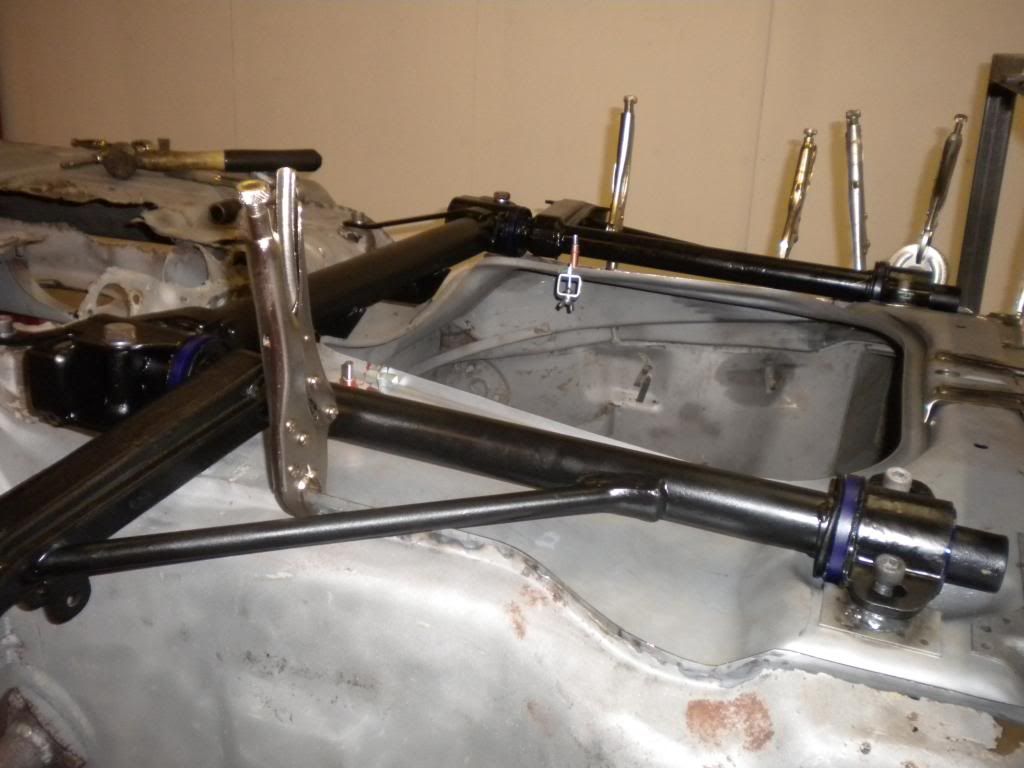
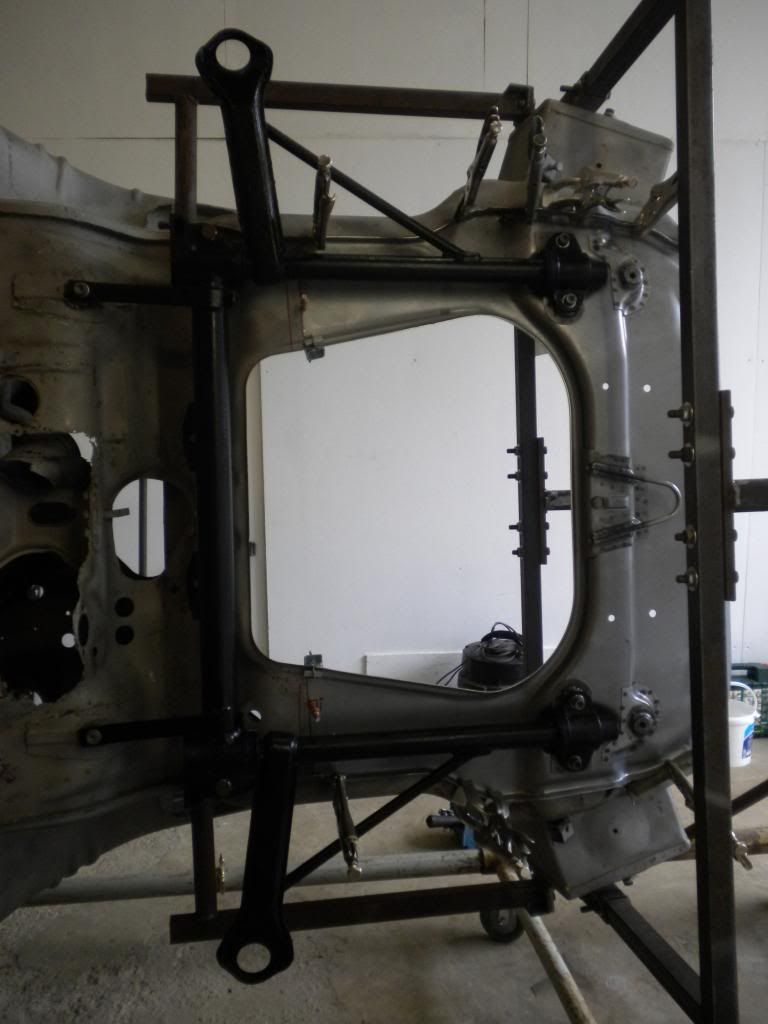
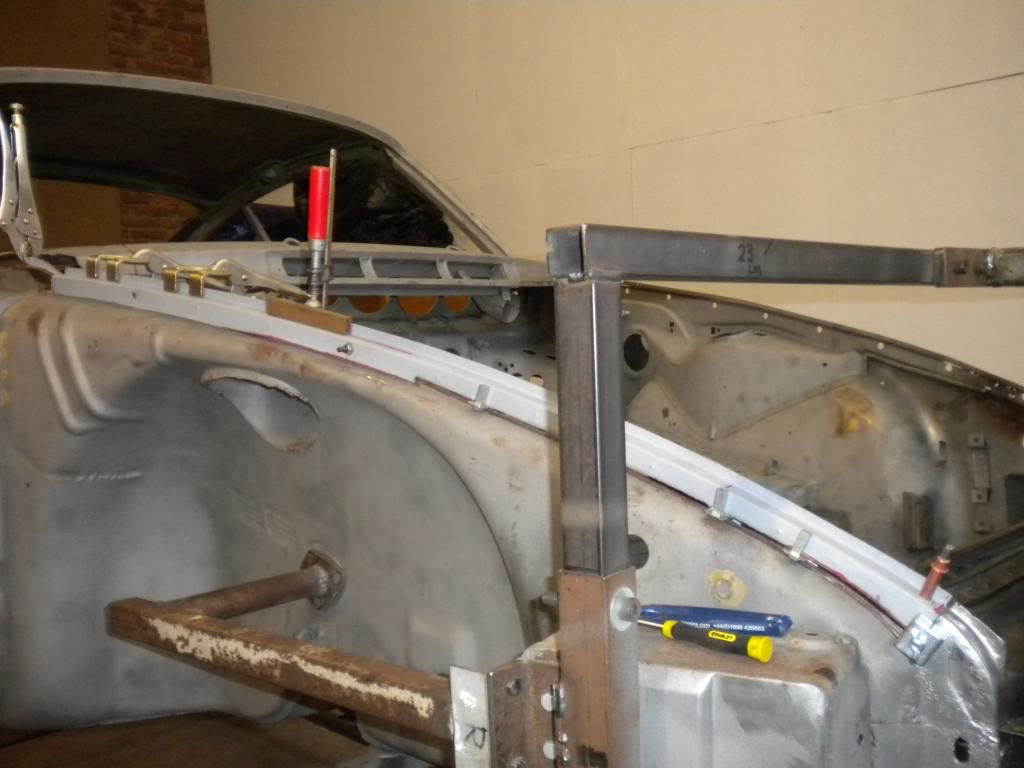
Front bulkhead is also test fitted and checked with the home made jig:
Suspension is fitted and am happy with the suspension pan alignment:


Front bulkhead is also test fitted and checked with the home made jig:

Re: Porsche 912 "Lucy"
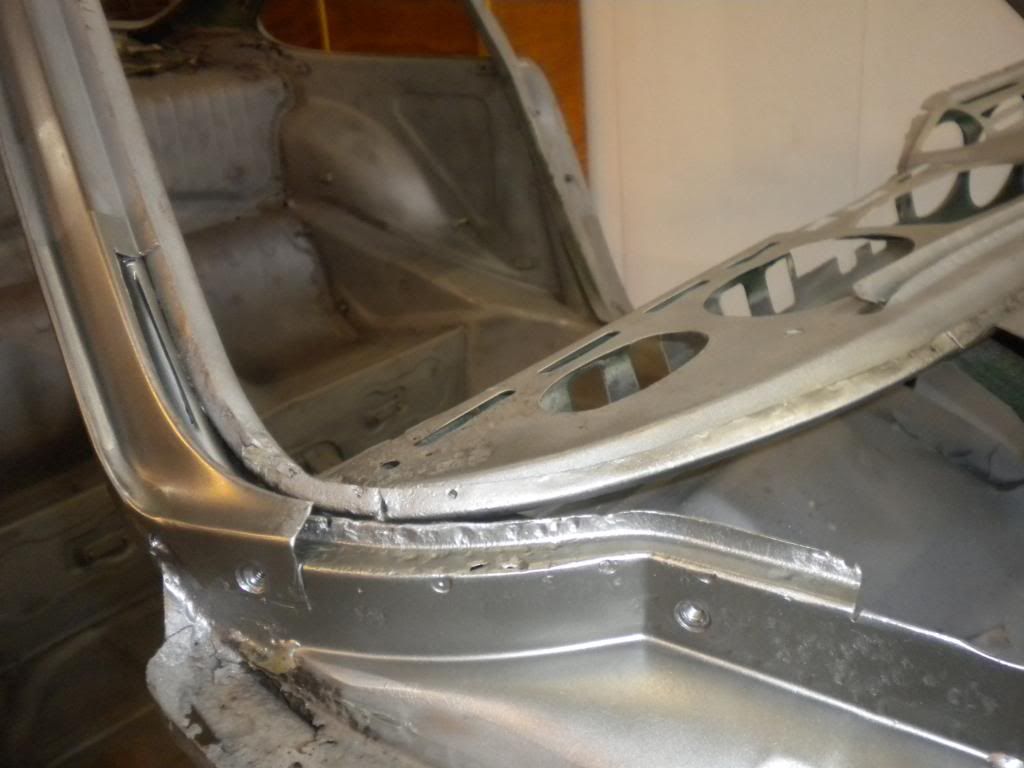
Evening all. Having the week off work, so been able to crack on apace. Experience of my Father in Law has been tremendous.....
Bulkhead is bolted in place.
Both front bulkead mounting sides have been repaired. Before and after, with home made repair piece. Wooden form was used to create the shape.
No idea why photobucket has turned this 90 degress, but you'll get my drift
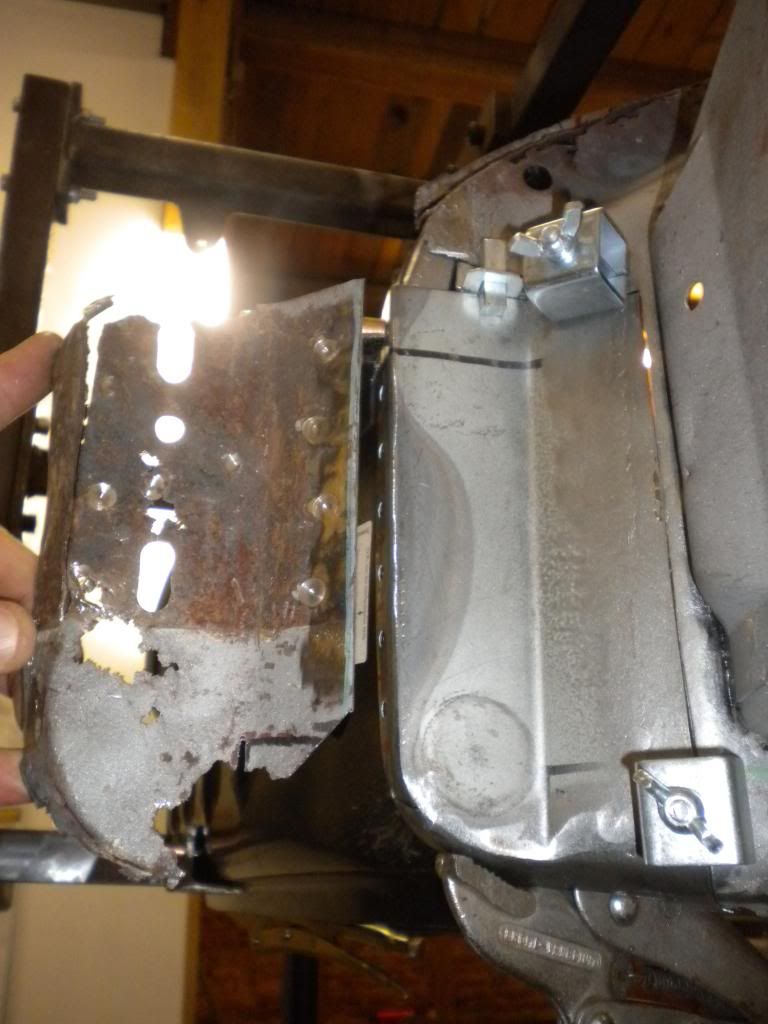
Re-inforcement plate will be replaced.
Top edge has been removed and replaced, part sourced from a local VW Käfer specialist. Lucy is inverted here on the jig.
Although I am a qualified mechanic, am learning all the time with this.....
More to follow. Tomorrow the window edge.
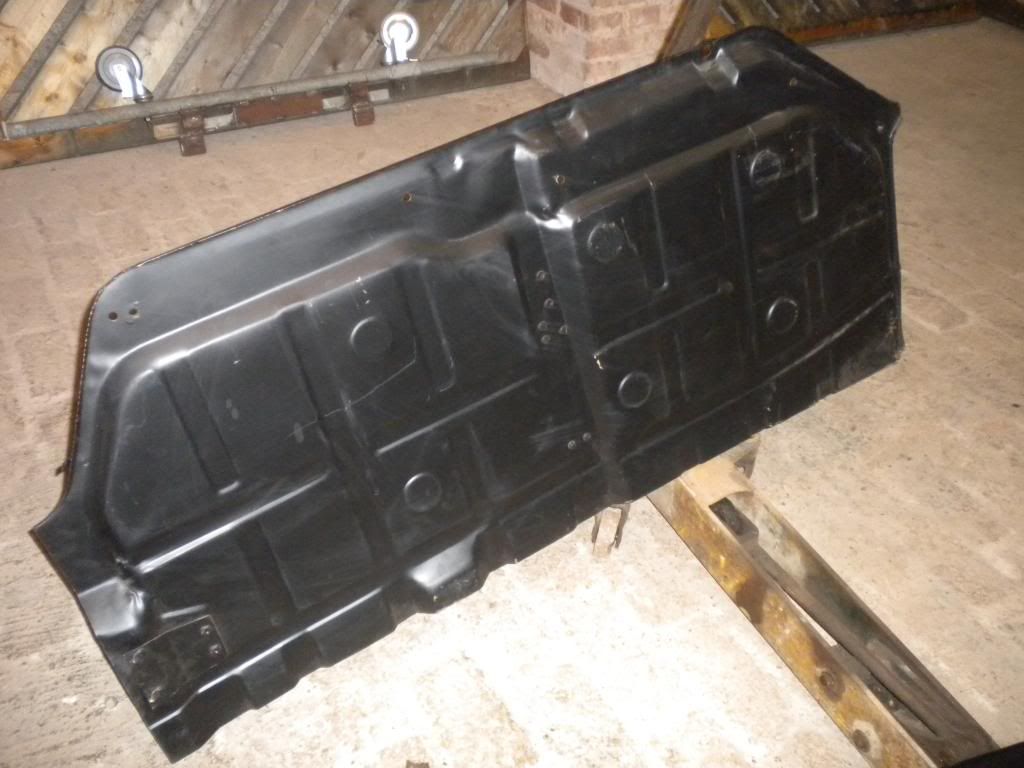
If anyone is interested, I have a Dansk floor half and suspension pan for sale.
Bulkhead is bolted in place.

Both front bulkead mounting sides have been repaired. Before and after, with home made repair piece. Wooden form was used to create the shape.
No idea why photobucket has turned this 90 degress, but you'll get my drift


Re-inforcement plate will be replaced.

Top edge has been removed and replaced, part sourced from a local VW Käfer specialist. Lucy is inverted here on the jig.


Although I am a qualified mechanic, am learning all the time with this.....
More to follow. Tomorrow the window edge.
If anyone is interested, I have a Dansk floor half and suspension pan for sale.


Last edited by Bez1 on Fri Oct 18, 2013 8:33 pm, edited 1 time in total.
-
stretch
- Me and DDK sitting in a tree! KISSING
- Posts: 2685
- Joined: Thu May 21, 2009 2:54 pm
- Location: Kent
Re: Porsche 912 "Lucy"
My kind of thread. Great progress. Well done.
70T barn find...... to ST.
1998 C2 996 Kettle
1998 C2 996 Kettle
-
Gary71
- Nurse, I think I need some assistance
- Posts: 10282
- Joined: Wed Mar 31, 2004 1:27 pm
- Location: Cheshire
- Contact:
Re: Porsche 912 "Lucy"
Looking good. Another quality home resto 
-
911hillclimber
- Nurse, I think I need some assistance
- Posts: 18928
- Joined: Mon Mar 10, 2008 6:26 pm
- Location: West Midlands
Re: Porsche 912 "Lucy"
Indeed, love the garage DIY approach, and this an other threads show it can be done well and for little cost if you have the skills and approach.
Barry rebuilds give us all the help we need, but it can be done at home, including the paint.
Barry rebuilds give us all the help we need, but it can be done at home, including the paint.
73T 911 Coupe, road/hillclimber 3.2L
Lola t 492 / 3.2 hillclimb racer
Boxster 987 Gen II 2.9
Lola t 492 / 3.2 hillclimb racer
Boxster 987 Gen II 2.9
Re: Porsche 912 "Lucy"
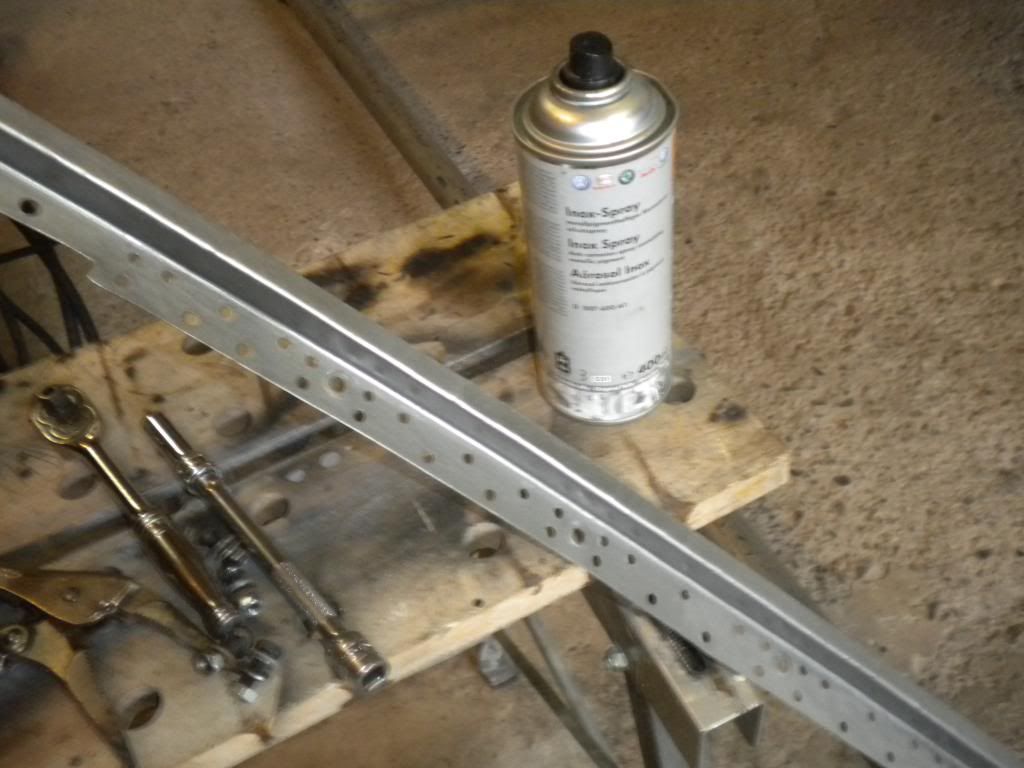
Hi all. Update ahead of this weekends action:
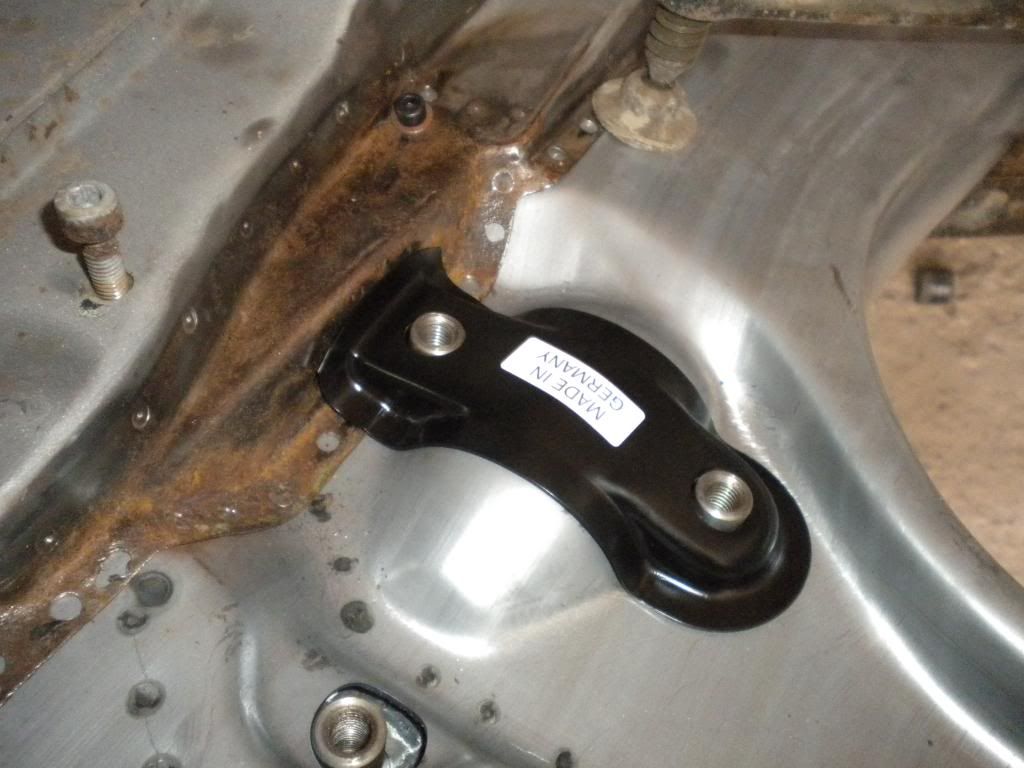
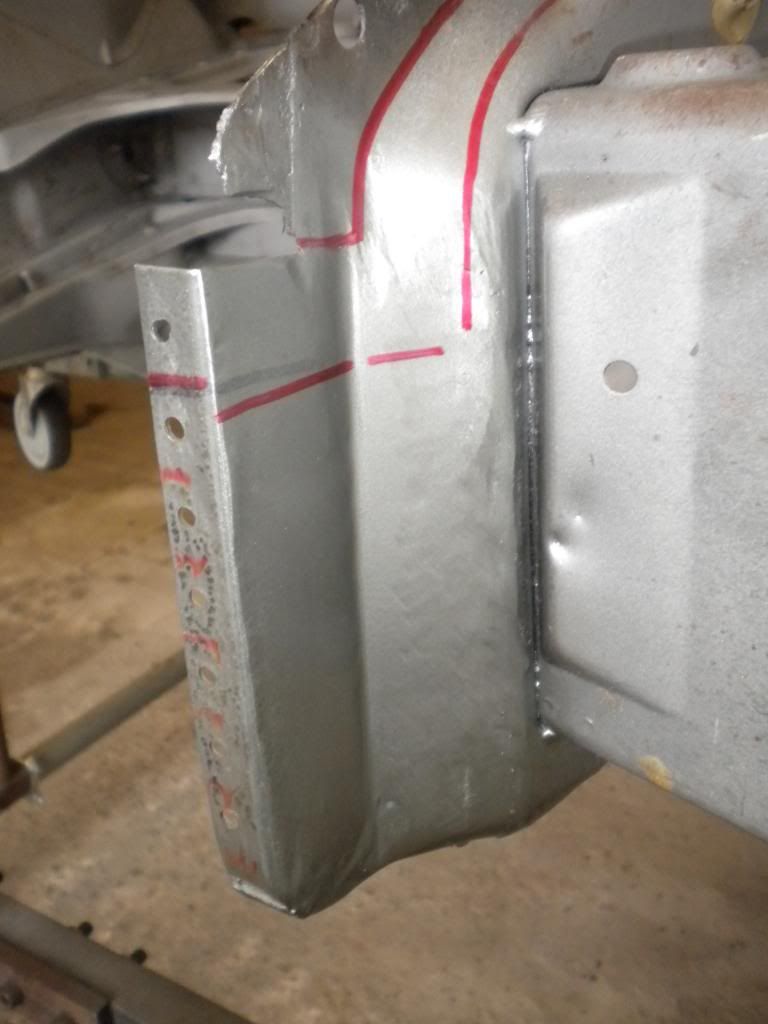
Wing mount has been prepared and part coated with anti-corrosion spray. Using the firms....
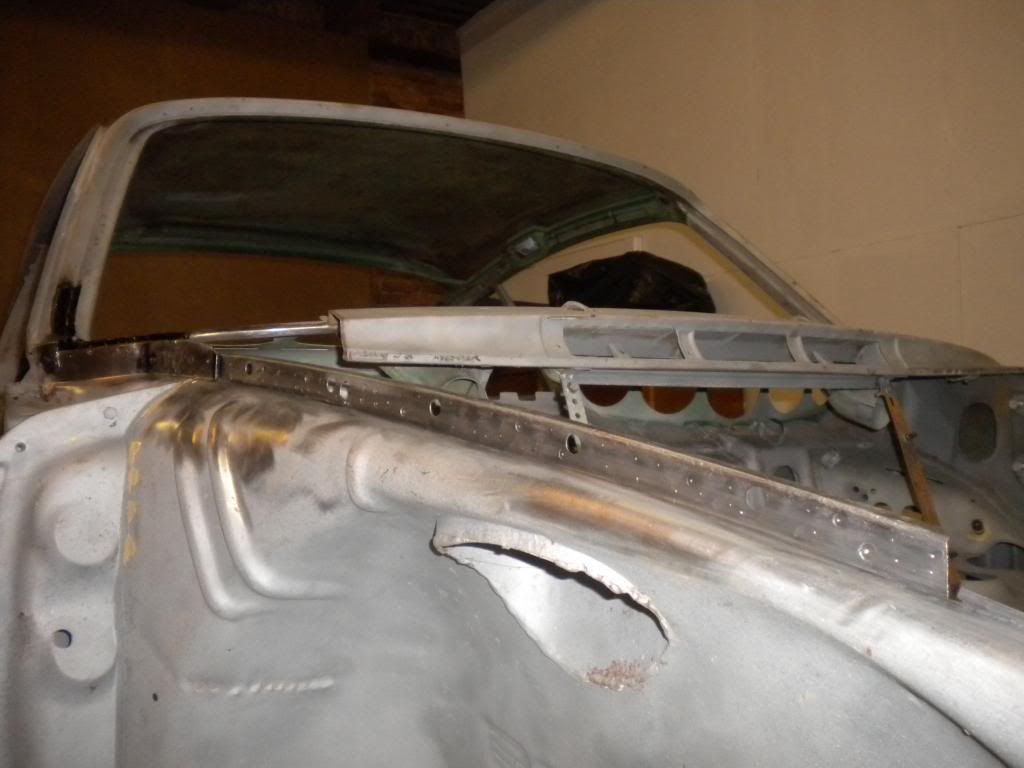
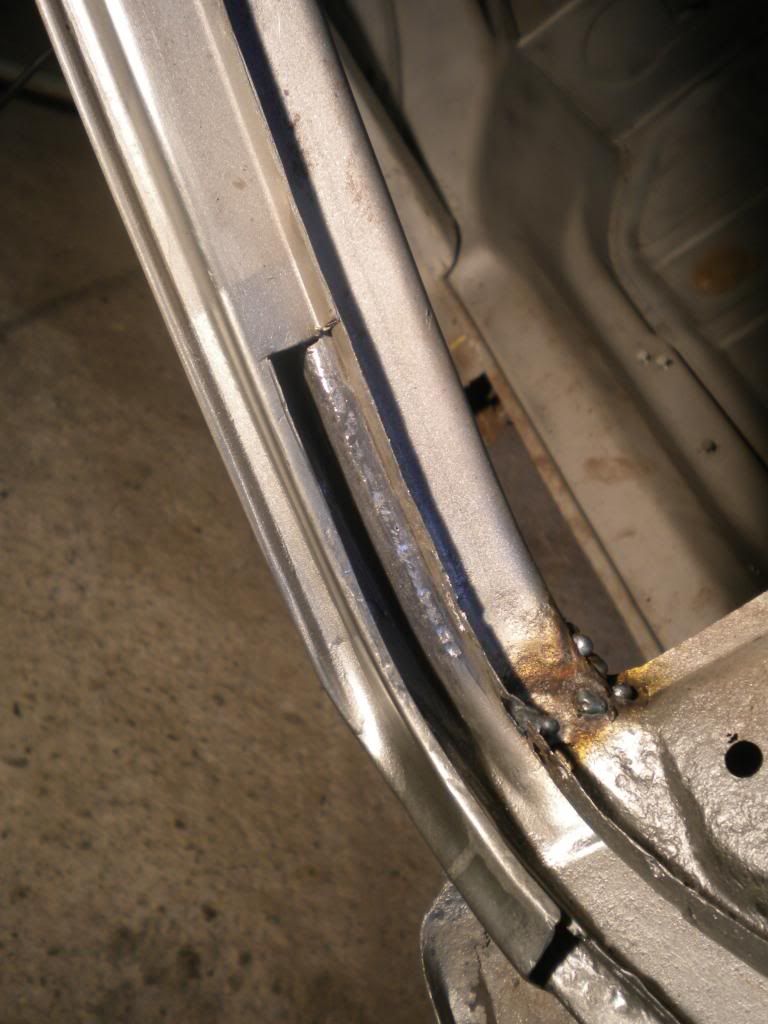
Holes have been welded up in the pillar and ground to original profile.
Before:
After:
Invested in a hand held sand blaster to aid rust removal.
Longitudinals have been blasted and treated with anti rust paint.
Can confirm this is a swine to fit....
More to follow over the weekend
Cheers
Matt
Wing mount has been prepared and part coated with anti-corrosion spray. Using the firms....


Holes have been welded up in the pillar and ground to original profile.
Before:

After:


Invested in a hand held sand blaster to aid rust removal.
Longitudinals have been blasted and treated with anti rust paint.


Can confirm this is a swine to fit....

More to follow over the weekend
Cheers
Matt