

When I set the chassis up I used steel box between the wheel centre so that it gave exactly 2100mm each side. The same measurement as my Coupe and those which Gary at Speedster Clinic gave me. It is incredibly short compared to modern cars. Really that much difference between kits, wow. I know the Speedster Clinic body is wider around the arse giving more room inside. Could have done with a bit more leg room, but hopefully the smiles per mile will overcome.
356 Speedster Flat6 outlaw build
Moderator: Bootsy
Re: 356 Speedster Flat6 outlaw build
Hi,
When I set the chassis up I used steel box between the wheel centre so that it gave exactly 2100mm each side. The same measurement as my Coupe and those which Gary at Speedster Clinic gave me. It is incredibly short compared to modern cars. Really that much difference between kits, wow. I know the Speedster Clinic body is wider around the arse giving more room inside. Could have done with a bit more leg room, but hopefully the smiles per mile will overcome.
When I set the chassis up I used steel box between the wheel centre so that it gave exactly 2100mm each side. The same measurement as my Coupe and those which Gary at Speedster Clinic gave me. It is incredibly short compared to modern cars. Really that much difference between kits, wow. I know the Speedster Clinic body is wider around the arse giving more room inside. Could have done with a bit more leg room, but hopefully the smiles per mile will overcome.
1963 Karmann Ghia
1959 356A Coupe Outlaw
1957 3.2 Speedster replica
1959 356A Coupe Outlaw
1957 3.2 Speedster replica
-
mdmax72
- Put a fork in me, I'm done!
- Posts: 1512
- Joined: Thu Sep 28, 2006 8:23 pm
- Location: midlands u.k
Re: 356 Speedster Flat6 outlaw build
I stand to be corrected. Must have been more brandy than l thought in that slice of Crimbo cake  . I'd measured from the outside to out side of the hubs giving me 2170mm, it actually measure's centre hub to centre hub 2125mm. Phew, got me a little worried myself then for a mo Guy's.
Anyway has that Seat Belt mount plate got a nut on the back or front??
Anyway has that Seat Belt mount plate got a nut on the back or front??
Rich
DDK Member 0547
Evolving Speedster Build
DDK Member 0547
Evolving Speedster Build
Re: 356 Speedster Flat6 outlaw build
Hi Rich,
About to join you with the alcohol. Nuts on the back
Had a good day on the chassis today almost ready for powder coating, will get some pics posted very soon
About to join you with the alcohol. Nuts on the back
Had a good day on the chassis today almost ready for powder coating, will get some pics posted very soon
1963 Karmann Ghia
1959 356A Coupe Outlaw
1957 3.2 Speedster replica
1959 356A Coupe Outlaw
1957 3.2 Speedster replica
Re: 356 Speedster Flat6 outlaw build
Hi Folks, Managed to get some pics of yesterdays work, finally got back on schedule to my list.
Latest updates;
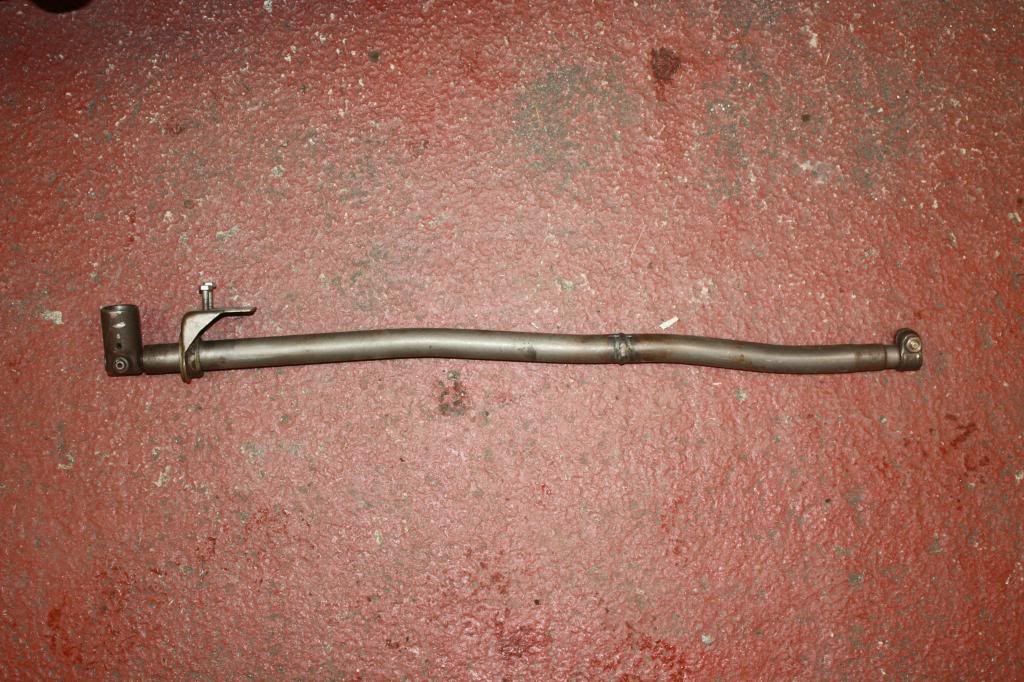
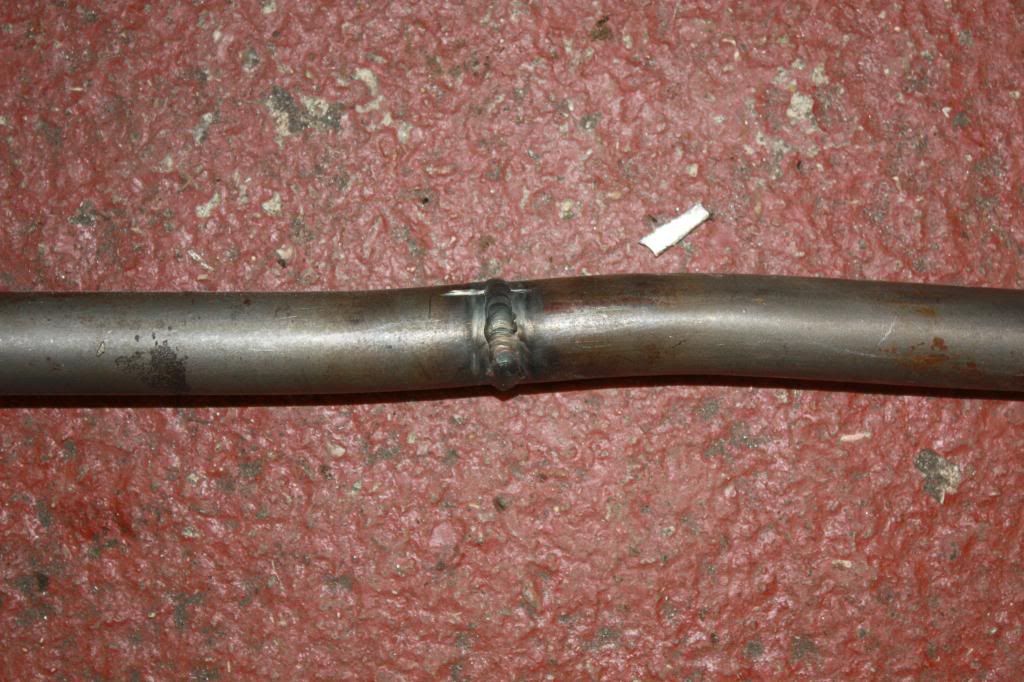
The gear shift rod was cut to length and a tube fitted inside and welded together for a concentric fit.
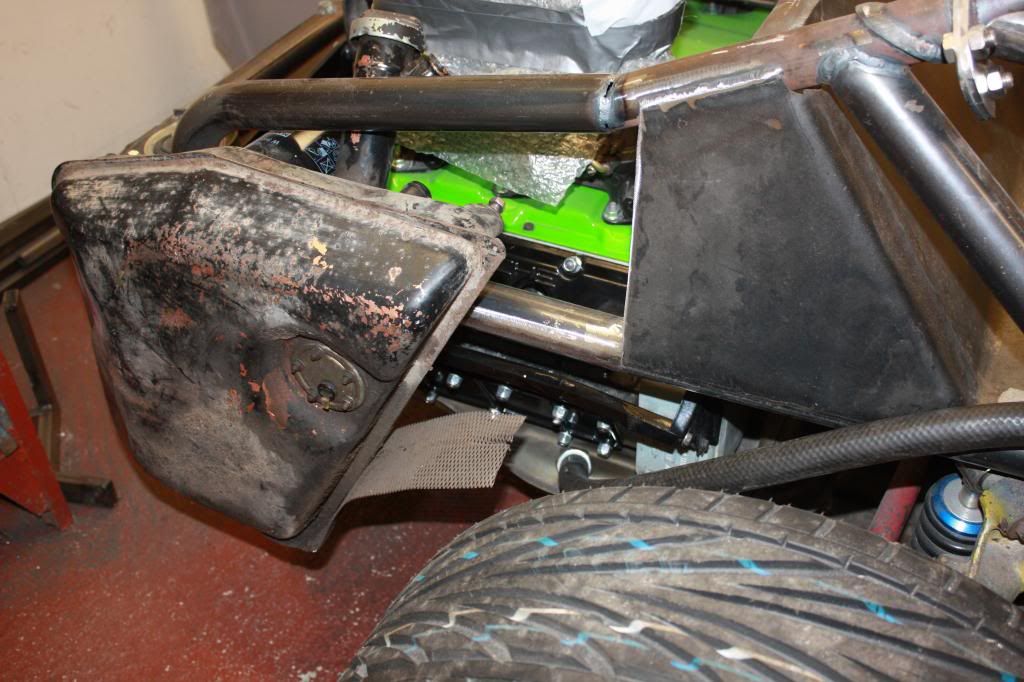
This is about the third location for all the oil pipes, which is actually were I started. Would have like to have passed these thruogh the tunnel but just to cramped with fuel pipes, hand brake cables, accelerator cable, gear shift rod etc
We had to completely re-weld the left hand support to allow the oil tank to fit correctly. The final welds will be completed when the engine is removed. Also added a gusset to add strength and for the inner oil tank support. Will cut a plate to size with a hole for the oil tank gasket to fit into like the original.

Just need to organise the final position and drill the hole in the gusset
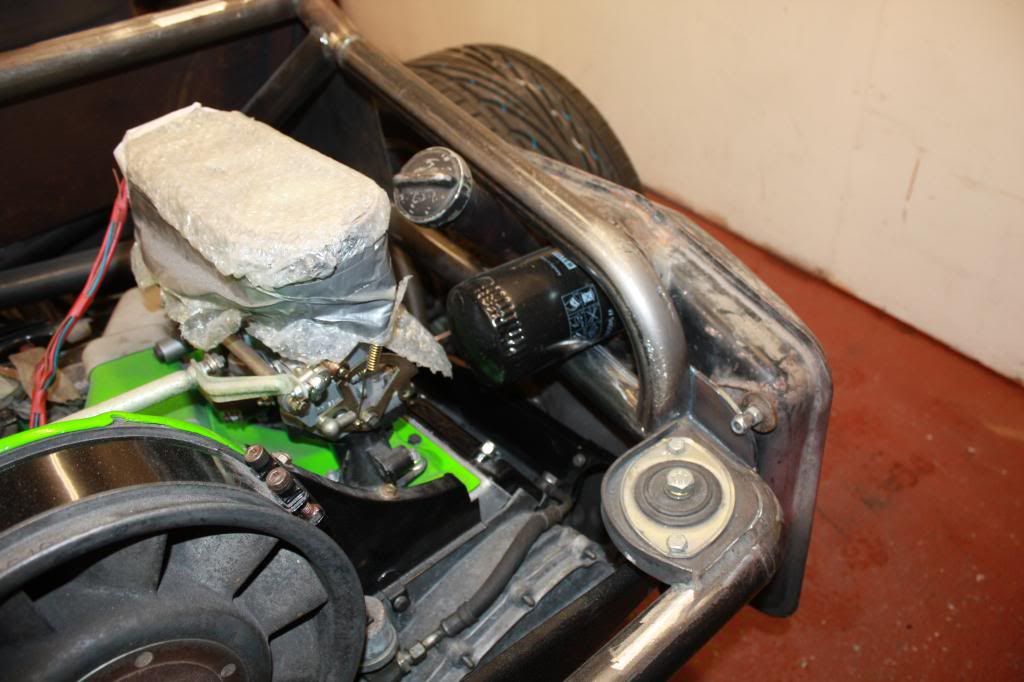
Left my mate alone for five minutes with the welding torch and he made a fantastic bracket for the oil stat
Ideal protection for the oil lines. At the top and bottom the cage joins into body

I will have to cut away some of the GRP body for the oil pipes but nothing major
Next task is to change the top seat belt position then remove everything, bag and tag. Then get happy with the linishing wheel on the welds and and rough areas. Finally off for media blasting, zinc coat and final powder coat. I guess it will end up black, but considering silver or gunmetal grey. What do you think?
Latest updates;
The gear shift rod was cut to length and a tube fitted inside and welded together for a concentric fit.


This is about the third location for all the oil pipes, which is actually were I started. Would have like to have passed these thruogh the tunnel but just to cramped with fuel pipes, hand brake cables, accelerator cable, gear shift rod etc
We had to completely re-weld the left hand support to allow the oil tank to fit correctly. The final welds will be completed when the engine is removed. Also added a gusset to add strength and for the inner oil tank support. Will cut a plate to size with a hole for the oil tank gasket to fit into like the original.


Just need to organise the final position and drill the hole in the gusset

Left my mate alone for five minutes with the welding torch and he made a fantastic bracket for the oil stat

Ideal protection for the oil lines. At the top and bottom the cage joins into body

I will have to cut away some of the GRP body for the oil pipes but nothing major

Next task is to change the top seat belt position then remove everything, bag and tag. Then get happy with the linishing wheel on the welds and and rough areas. Finally off for media blasting, zinc coat and final powder coat. I guess it will end up black, but considering silver or gunmetal grey. What do you think?
1963 Karmann Ghia
1959 356A Coupe Outlaw
1957 3.2 Speedster replica
1959 356A Coupe Outlaw
1957 3.2 Speedster replica
-
mdmax72
- Put a fork in me, I'm done!
- Posts: 1512
- Joined: Thu Sep 28, 2006 8:23 pm
- Location: midlands u.k
Re: 356 Speedster Flat6 outlaw build
Greg ,
before your mate packs up his welder have you thought about how your going to demist the windscreen?? As its a IVA requirement if fitting the windshield.
before your mate packs up his welder have you thought about how your going to demist the windscreen?? As its a IVA requirement if fitting the windshield.
Rich
DDK Member 0547
Evolving Speedster Build
DDK Member 0547
Evolving Speedster Build
Re: 356 Speedster Flat6 outlaw build
Hi Rich,
Yea good point, been thinking about that a lot. I have fitted the heat exchangers as per later Porsche 911. Car Builder solutions sell flange connectors and one Y with a on/ off valve to use into the cockpit at the rear and forward. Then 63mm silicone hose to the front under each of the sills and through an in-line 12v fan to curved vents in the dash. Obviously limited by the efficiency of the original heat exchanger system. I believe you are able to warm the engine prior to the test. Although may not fit the windscreen because I don't think its e-marked. Is that allowed? What have you used in the past? I understand the little electric heated fans are poor?
Cheers
Greg
1963 Karmann Ghia
1959 356A Coupe Outlaw
1957 3.2 Speedster replica
1959 356A Coupe Outlaw
1957 3.2 Speedster replica
-
mdmax72
- Put a fork in me, I'm done!
- Posts: 1512
- Joined: Thu Sep 28, 2006 8:23 pm
- Location: midlands u.k
Re: 356 Speedster Flat6 outlaw build
Greg are you going to be using any of Gary's sub chassis??
Rich
DDK Member 0547
Evolving Speedster Build
DDK Member 0547
Evolving Speedster Build
Re: 356 Speedster Flat6 outlaw build
Hi, I used the front steel bulk head the rest is designed to suit the Speedster Clinic body with as much reinforcement and roll cage as I could get around or underneath. Should pass the jack up one corner test OK.
1963 Karmann Ghia
1959 356A Coupe Outlaw
1957 3.2 Speedster replica
1959 356A Coupe Outlaw
1957 3.2 Speedster replica
-
mdmax72
- Put a fork in me, I'm done!
- Posts: 1512
- Joined: Thu Sep 28, 2006 8:23 pm
- Location: midlands u.k
Re: 356 Speedster Flat6 outlaw build
That's fine was just asking so to understand what you have got to work with with regards to getting heat up front. Just going of the subject alittle, what are you doing with regards to A and B posts?? Meaning what are you hanging your doors from and mounting your door catch to??
Have you thought of using what you have and modifying it a little to get heat from the back to the front??
Have you thought of using what you have and modifying it a little to get heat from the back to the front??

Rich
DDK Member 0547
Evolving Speedster Build
DDK Member 0547
Evolving Speedster Build
Re: 356 Speedster Flat6 outlaw build
Hi Rich,
Looking at the A and B pillars first, The hoop at the front will be welded to a steel section bonded to the body by Gary. This substantial bonded steel section run across the scuttle and down each door hinge where the nuts are captivated for the hinge. Normally just sufficient to use the bonded in section. At the rear Gary is confident that nothing extra is needed to reinforce the lock keep.
I had originally thought about using the tubes as you show for heat to the front. It just came down to not wanting to pipe warm & wet air down steel and looked to fiddly to line with plastic. Realistically I could run the electrical cables down the route you show.
I did also look at using a small compact water heater but running oil through it instead, manufacturer confirmed it should work but not sure if it would give too much oil cooling. It would be easy to fit and efficient.
Cheers
1963 Karmann Ghia
1959 356A Coupe Outlaw
1957 3.2 Speedster replica
1959 356A Coupe Outlaw
1957 3.2 Speedster replica
Re: 356 Speedster Flat6 outlaw build
Hi all,
Found an hour this afternoon to draw the panel and oil tank cut out. Made the paper board template to check final alignment and fit. Everything looked good so sent autocad drawing off to local steel merchant for laser cutting in 2mm mild steel.
Found an hour this afternoon to draw the panel and oil tank cut out. Made the paper board template to check final alignment and fit. Everything looked good so sent autocad drawing off to local steel merchant for laser cutting in 2mm mild steel.

1963 Karmann Ghia
1959 356A Coupe Outlaw
1957 3.2 Speedster replica
1959 356A Coupe Outlaw
1957 3.2 Speedster replica
-
mdmax72
- Put a fork in me, I'm done!
- Posts: 1512
- Joined: Thu Sep 28, 2006 8:23 pm
- Location: midlands u.k
Re: 356 Speedster Flat6 outlaw build
Hi Greg,
I agree with Gary, think you'll be fine without the B post to mount the door catch receiver. Which ones are you using out of interest?
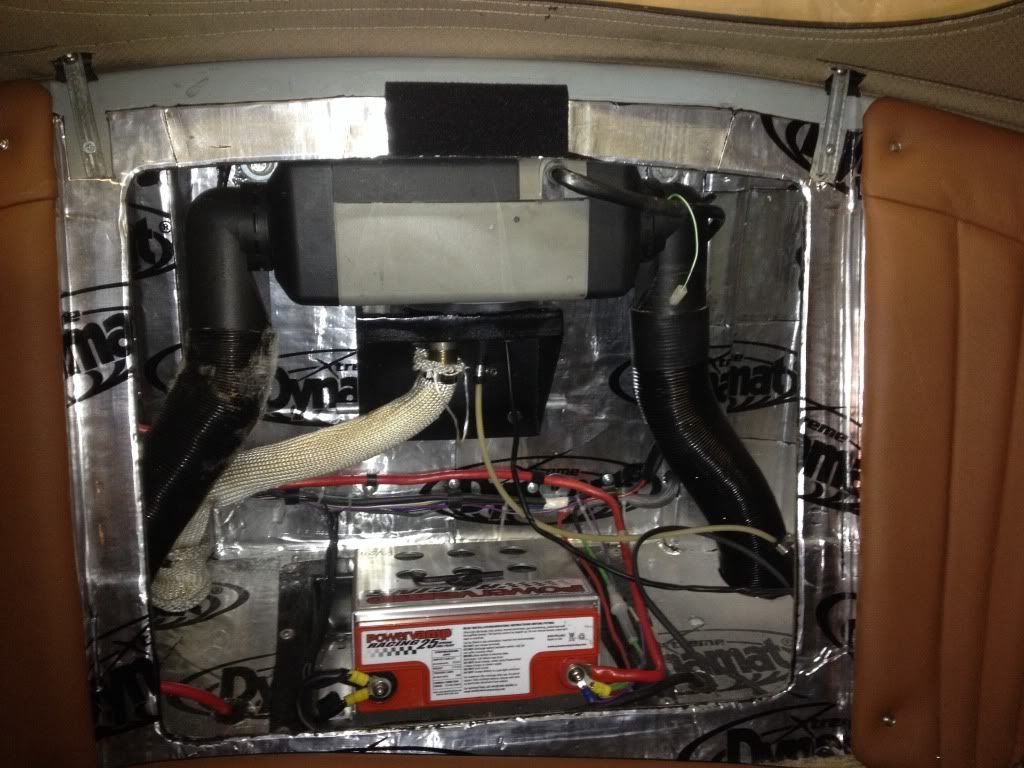
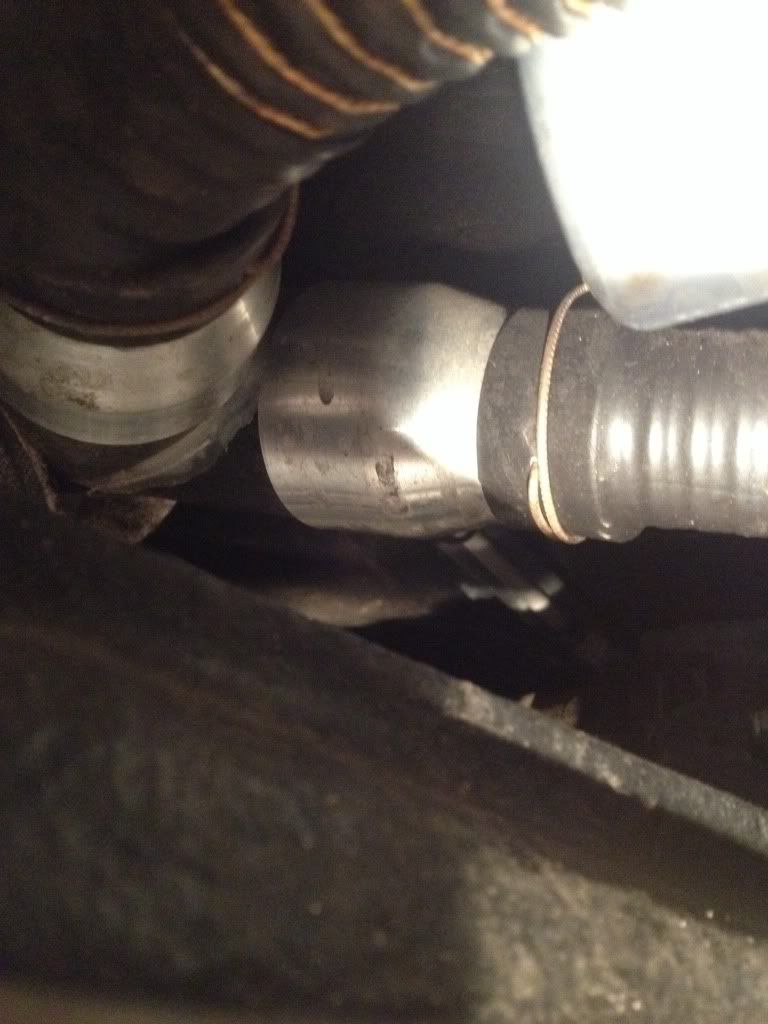
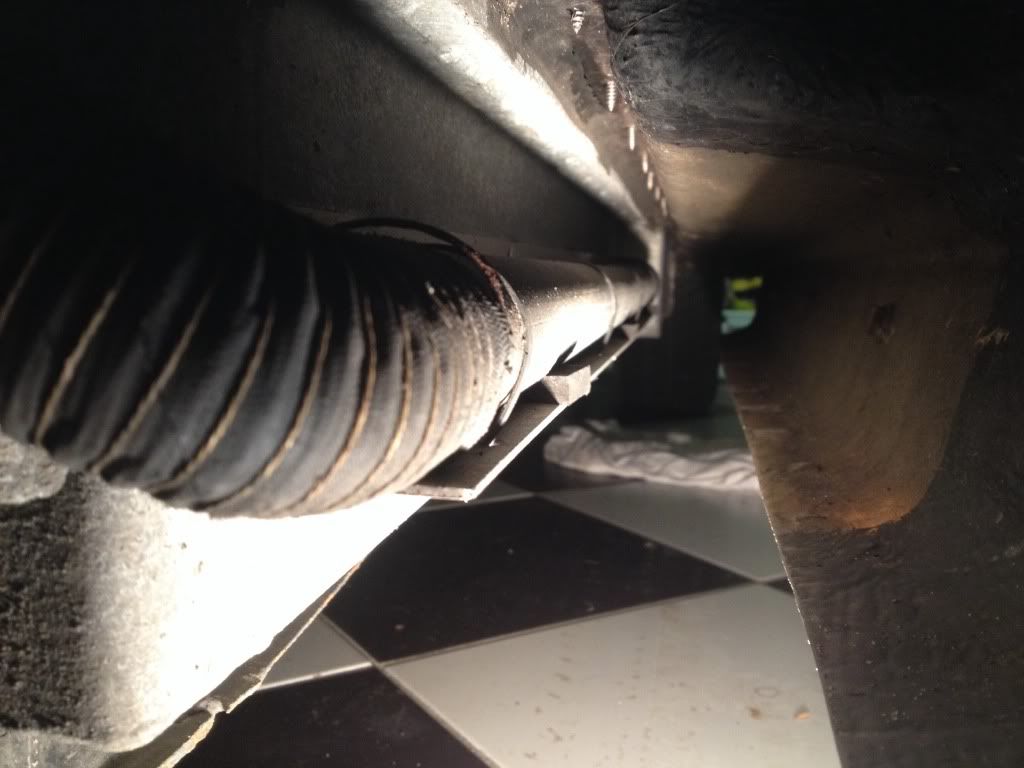
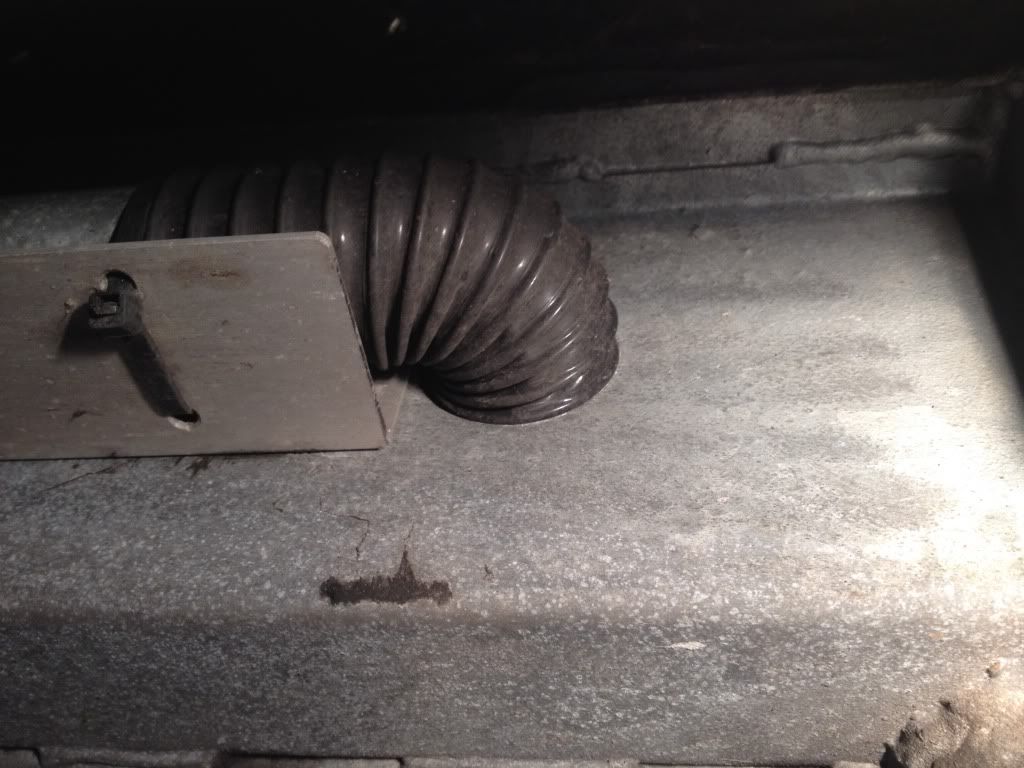
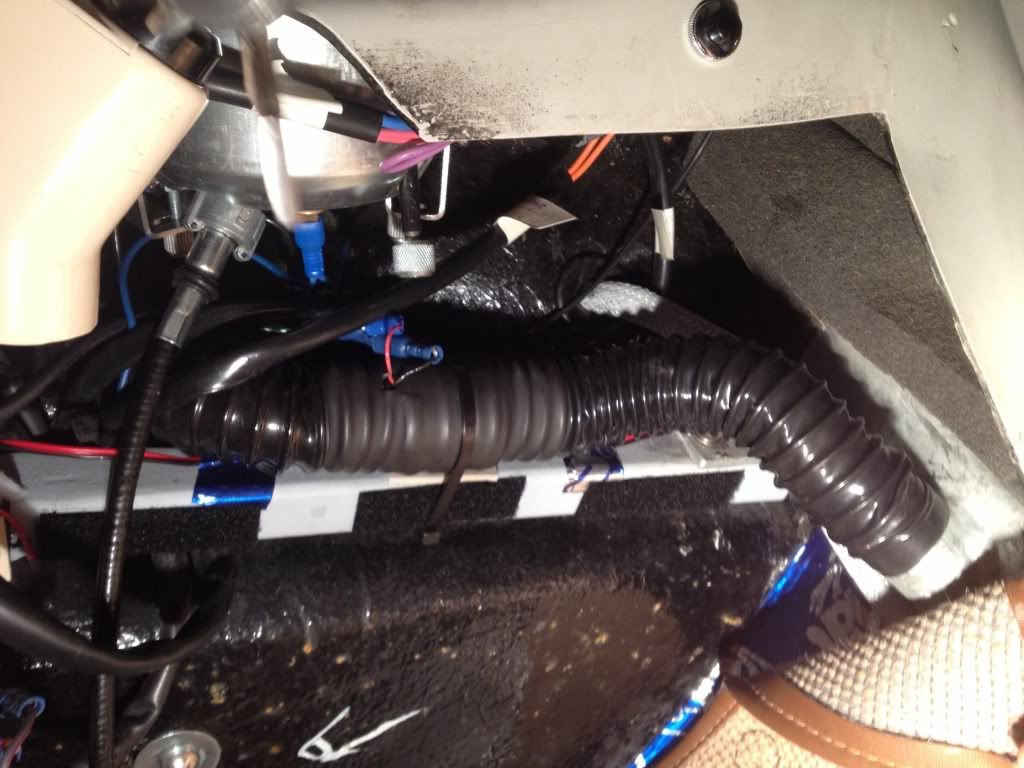
I got around the heat/de-mister by installing a Webasto petrol heater as I've got an aftermarket exhaust with no heat exchangers. Mounted it in the back. As l wanted to keep as much under bonnet space a possible for a larger fuel tank. It uses 1 x 63mm outlet going down to a splitter which reduces down further to 2 x 38mm outlets. I then ran 38mm Galv tube down each side of the sills to the point were the Sill heater slider is situated. Drilled through the sills to come out the back of the heater slides, then reduced further to 30mm which runs inside the A-post to the outlet under the dash. Fitted 2 inline fans under the dash for extra draw if needed which work well.
Can tell your posh, you get all your sheet metal CMC cut out. I just make do with a jigsaw and grinder


Here's a few pic's as we all like them.

I agree with Gary, think you'll be fine without the B post to mount the door catch receiver. Which ones are you using out of interest?
I got around the heat/de-mister by installing a Webasto petrol heater as I've got an aftermarket exhaust with no heat exchangers. Mounted it in the back. As l wanted to keep as much under bonnet space a possible for a larger fuel tank. It uses 1 x 63mm outlet going down to a splitter which reduces down further to 2 x 38mm outlets. I then ran 38mm Galv tube down each side of the sills to the point were the Sill heater slider is situated. Drilled through the sills to come out the back of the heater slides, then reduced further to 30mm which runs inside the A-post to the outlet under the dash. Fitted 2 inline fans under the dash for extra draw if needed which work well.
Can tell your posh, you get all your sheet metal CMC cut out. I just make do with a jigsaw and grinder
Here's a few pic's as we all like them.
Rich
DDK Member 0547
Evolving Speedster Build
DDK Member 0547
Evolving Speedster Build
Re: 356 Speedster Flat6 outlaw build
Very good engineering skills Rich  no skimping on the al Dynamat
  ! great job
Re: 356 Speedster Flat6 outlaw build
Hi, looks like a well planned and executed system, very impressed. Yea posh, my mate does it on the cheap Usually then re-cut because my measurements were wrong.
1963 Karmann Ghia
1959 356A Coupe Outlaw
1957 3.2 Speedster replica
1959 356A Coupe Outlaw
1957 3.2 Speedster replica
Re: 356 Speedster Flat6 outlaw build
Hi Rich ....
Is your speedster a Chesil ?
I thought Chesil had a heater duct built in the chassis ...
Is your speedster a Chesil ?
I thought Chesil had a heater duct built in the chassis ...