

"Le Belgique" ST build.
Moderator: Bootsy
-
Mike
- Nurse, I think I need some assistance
- Posts: 5115
- Joined: Wed May 25, 2005 12:39 pm
- Location: Hampshire
Re: "Le Belgique" ST build.
interesting stuff Dave, thanks for that. How about twin plugging, how did that figure in the various engine configurations?
cheers, Mike.
previously..
1994 968 Club Sport Riviera Blue
1994 993 C2 Carrera Riviera Blue
1972 911S to Martini RSR Prototype Spec
1973 911E to RS Lightweight Specification
1981 924 Carrera GT ex Mexborough car
3.2 Carrera Sport x2
previously..
1994 968 Club Sport Riviera Blue
1994 993 C2 Carrera Riviera Blue
1972 911S to Martini RSR Prototype Spec
1973 911E to RS Lightweight Specification
1981 924 Carrera GT ex Mexborough car
3.2 Carrera Sport x2
-
stretch
- Me and DDK sitting in a tree! KISSING
- Posts: 2686
- Joined: Thu May 21, 2009 2:54 pm
- Location: Kent
Re: "Le Belgique" ST build.
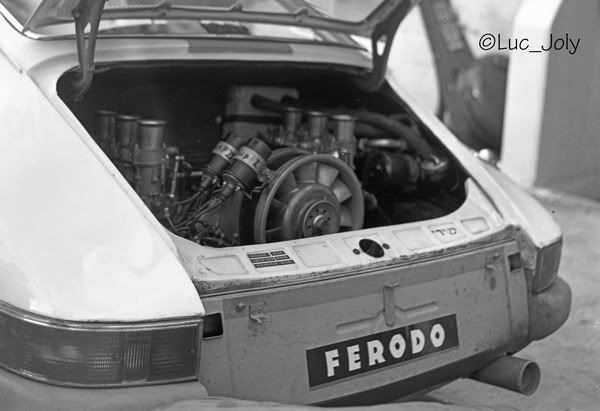
With the high lift 906 cam, perfect for all that top end speed in endurance racing. Twin plug would be the norm with the high compression 10.3.1. motor. I think single plug would have been the exception.
Touroul- Anselme: 46 weber IDA twin plug motor. 1971 Le Mans.
Touroul- Anselme: 46 weber IDA twin plug motor. 1971 Le Mans.

70T barn find...... to ST.
1998 C2 996 Kettle
1998 C2 996 Kettle
-
Mike
- Nurse, I think I need some assistance
- Posts: 5115
- Joined: Wed May 25, 2005 12:39 pm
- Location: Hampshire
Re: "Le Belgique" ST build.
thanks again Dave, interesting the earlier coil placement as opposed to on top of the cross member for the RSR.
cheers, Mike.
previously..
1994 968 Club Sport Riviera Blue
1994 993 C2 Carrera Riviera Blue
1972 911S to Martini RSR Prototype Spec
1973 911E to RS Lightweight Specification
1981 924 Carrera GT ex Mexborough car
3.2 Carrera Sport x2
previously..
1994 968 Club Sport Riviera Blue
1994 993 C2 Carrera Riviera Blue
1972 911S to Martini RSR Prototype Spec
1973 911E to RS Lightweight Specification
1981 924 Carrera GT ex Mexborough car
3.2 Carrera Sport x2
Re: "Le Belgique" ST build.
never mind all that - do you fit in the seat yet Dave?
-
stretch
- Me and DDK sitting in a tree! KISSING
- Posts: 2686
- Joined: Thu May 21, 2009 2:54 pm
- Location: Kent
Re: "Le Belgique" ST build.
Don't be silly Will.  The scheel diet is underway.! It looked so roomy before the restoration !


70T barn find...... to ST.
1998 C2 996 Kettle
1998 C2 996 Kettle
Re: "Le Belgique" ST build.
good stuff Dave - sadly I'm going the other way! Have got hold of some recaro ST shells which i'll have to get recovered in ultra thin leather. Got my own padding!
Hope all is well!
cheers
Will
Hope all is well!
cheers
Will
-
Darren65

- Nurse, I think I need some assistance
- Posts: 7873
- Joined: Mon Dec 13, 2010 10:55 pm
- Location: North Wiltshire
- Contact:
Re: "Le Belgique" ST build.
There's something about the early R, GTS and ST cars that is so damn sexy and intoxicating!  …..
…..
….surely the era that 'made' the 911 reputation!
Really looking forward to hearing this car finished!
….surely the era that 'made' the 911 reputation!
Really looking forward to hearing this car finished!
Darren
72T 2.5... http://ddk-online.com/phpBB2/viewtopic.php?f=10&t=56183
73 2.4E ... http://ddk-online.com/phpBB2/viewtopic.php?f=10&t=44242
77 Carrera 3.0...to 74 3.0RS ... http://ddk-online.com/phpBB2/viewtopic.php?f=28&t=63389
72T 2.5... http://ddk-online.com/phpBB2/viewtopic.php?f=10&t=56183
73 2.4E ... http://ddk-online.com/phpBB2/viewtopic.php?f=10&t=44242
77 Carrera 3.0...to 74 3.0RS ... http://ddk-online.com/phpBB2/viewtopic.php?f=28&t=63389
-
sladey
- Nurse, I think I need some assistance
- Posts: 8771
- Joined: Sat Apr 23, 2005 9:08 pm
- Location: Nottingham, UK
Re: "Le Belgique" ST build.
Thanks Dave, yes it's massively rewarding. I started rolling my sleeves up because I've got tastes beyond my means and DIY is the only way to get what you want (what you really really want), but after a while it does become addictive. And fun!stretch wrote:
Sladey, I have been admiring you rolling up your sleeves and jumping right in there with your metalwork and welding on your car. Well done ! It is pretty addictive if you have always wanted to learn this stuff isn't it !
Dave
I'm proud of my own man-shed but your cave is a thing of beauty. Also been casting envious eyes over your hammers.
The simple things you see are all complicated
I look pretty young but I'm just backdated yeah
I look pretty young but I'm just backdated yeah
-
stretch
- Me and DDK sitting in a tree! KISSING
- Posts: 2686
- Joined: Thu May 21, 2009 2:54 pm
- Location: Kent
Re: "Le Belgique" ST build.
Hammers ? I am sure you have the Dave Gardiner CD Sladey !
He recommends the picard hammers.http://www.picard-hammer.de/en/siteservice/sitemap.html
Blimey, I need to get out more !
He recommends the picard hammers.http://www.picard-hammer.de/en/siteservice/sitemap.html
Blimey, I need to get out more !
70T barn find...... to ST.
1998 C2 996 Kettle
1998 C2 996 Kettle
-
sladey
- Nurse, I think I need some assistance
- Posts: 8771
- Joined: Sat Apr 23, 2005 9:08 pm
- Location: Nottingham, UK
Re: "Le Belgique" ST build.
Mmmmm, hammers
The simple things you see are all complicated
I look pretty young but I'm just backdated yeah
I look pretty young but I'm just backdated yeah
-
stretch
- Me and DDK sitting in a tree! KISSING
- Posts: 2686
- Joined: Thu May 21, 2009 2:54 pm
- Location: Kent
Re: "Le Belgique" ST build.
A bit of an update before CLM.  I have started to tackle all the small tedious repairs prior to the big stuff that will be carried out on the Celette jig. I decided to start at the front of the car as this was where most of the rust was. It also allowed me to work on several areas at the same time.
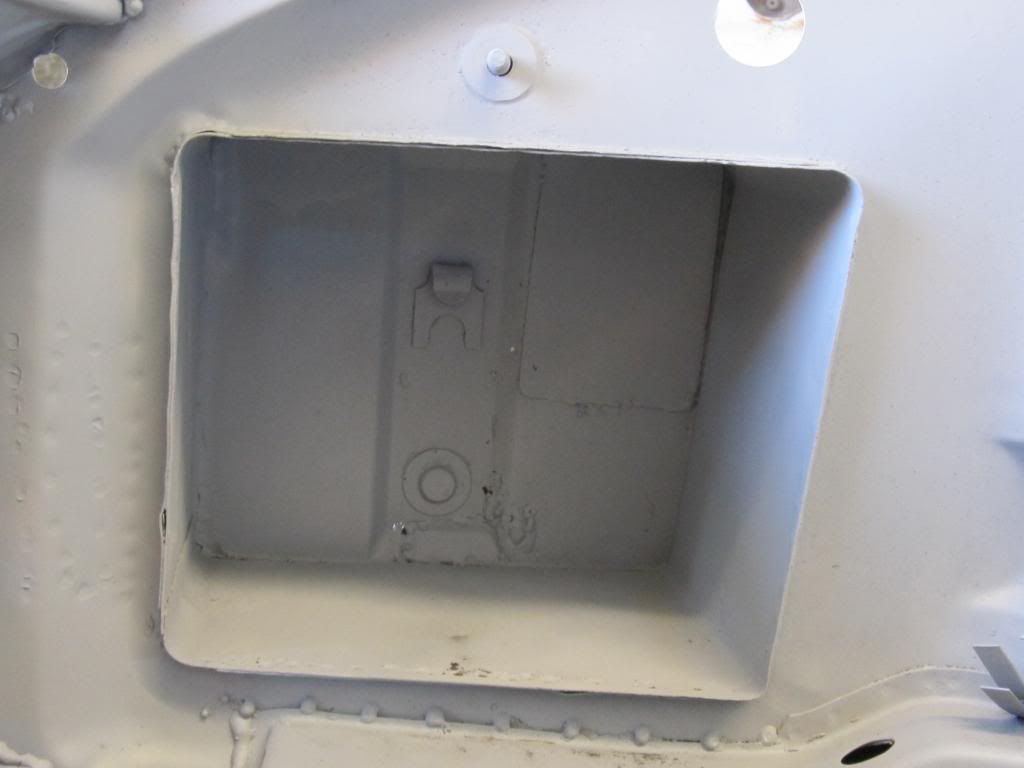
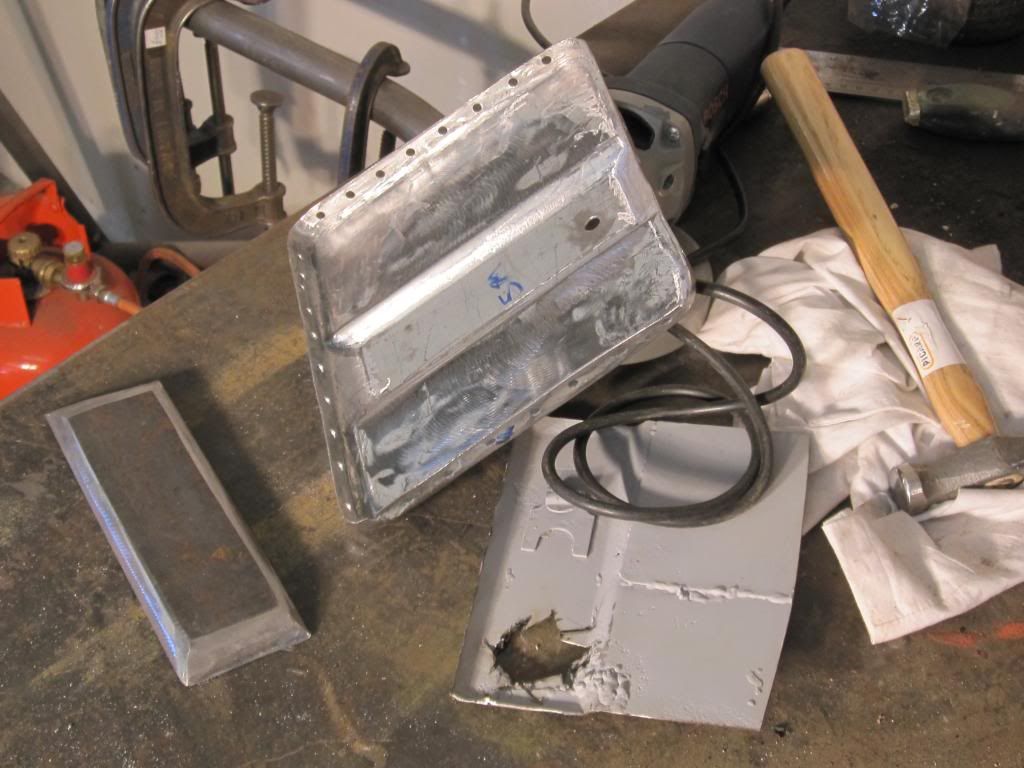
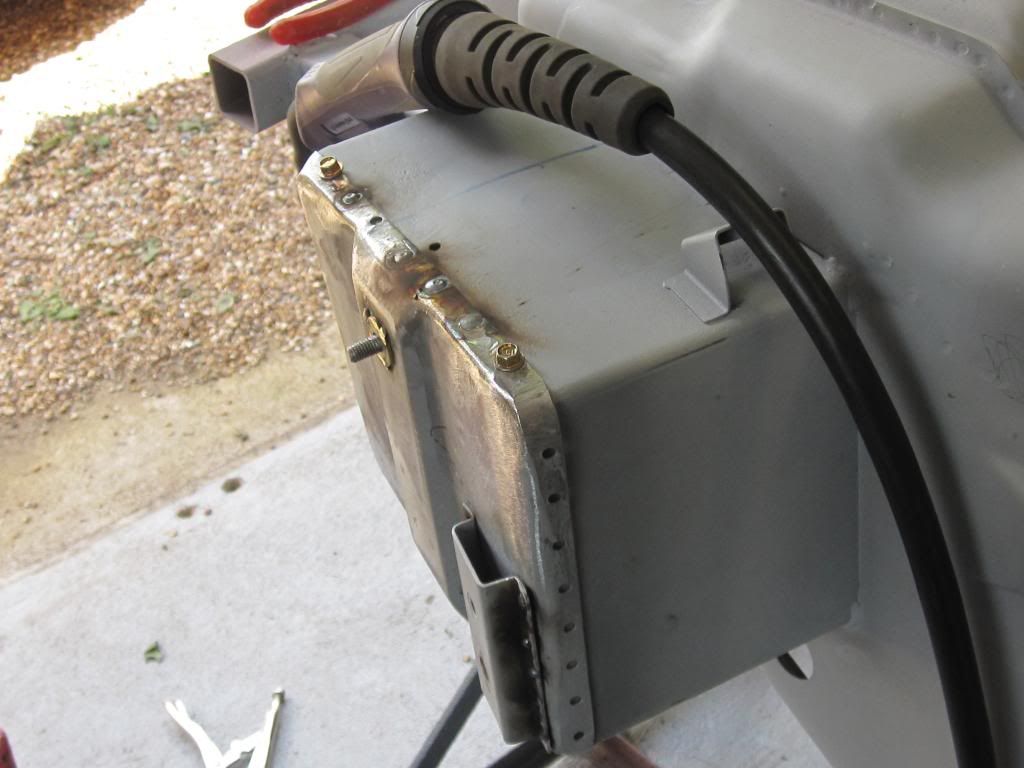
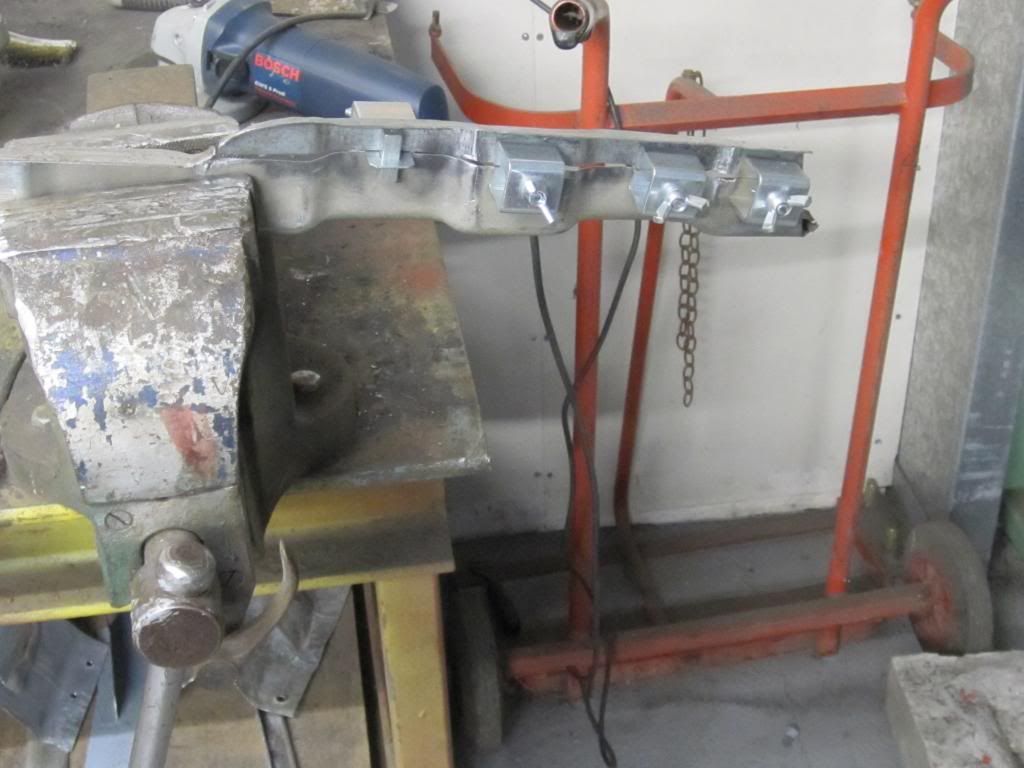
First up was the battery boxes. My aim was to try and save as much as the original factory metal as possible. The nearside box only required a small local repair.
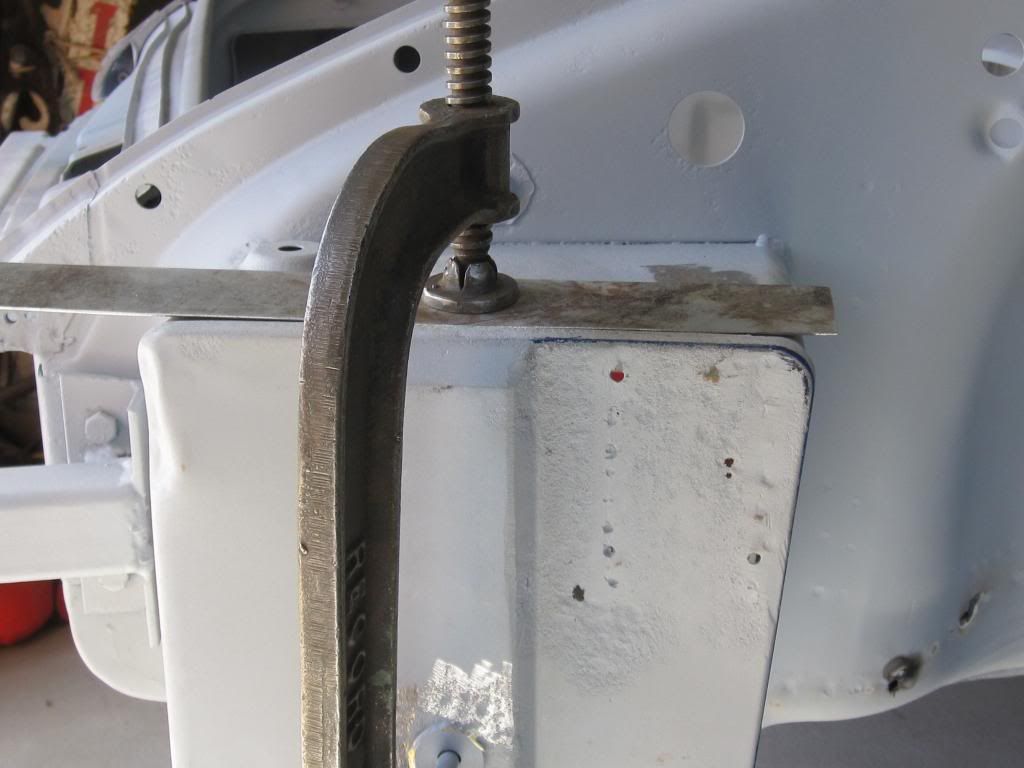
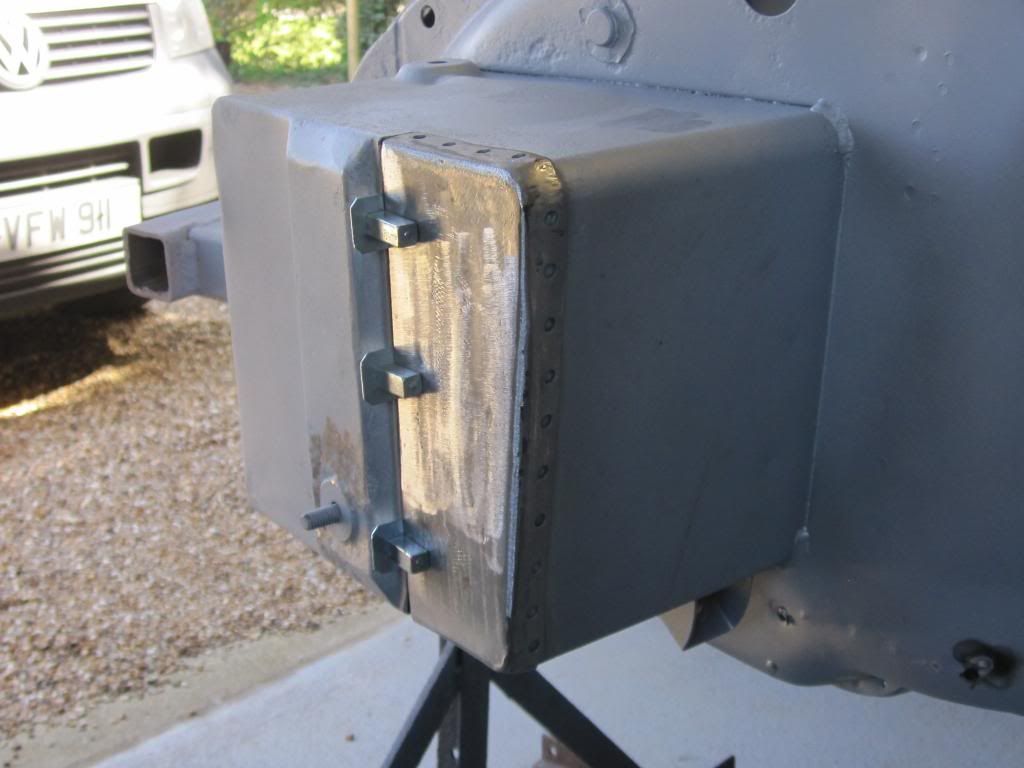
The previous owner had started to do a few repairs to the shell prior to my purchase. His attempt to the offside battery box was not up to scratch. I made up a small tool to press out the indentation after cutting of the front face of the offending battery box.
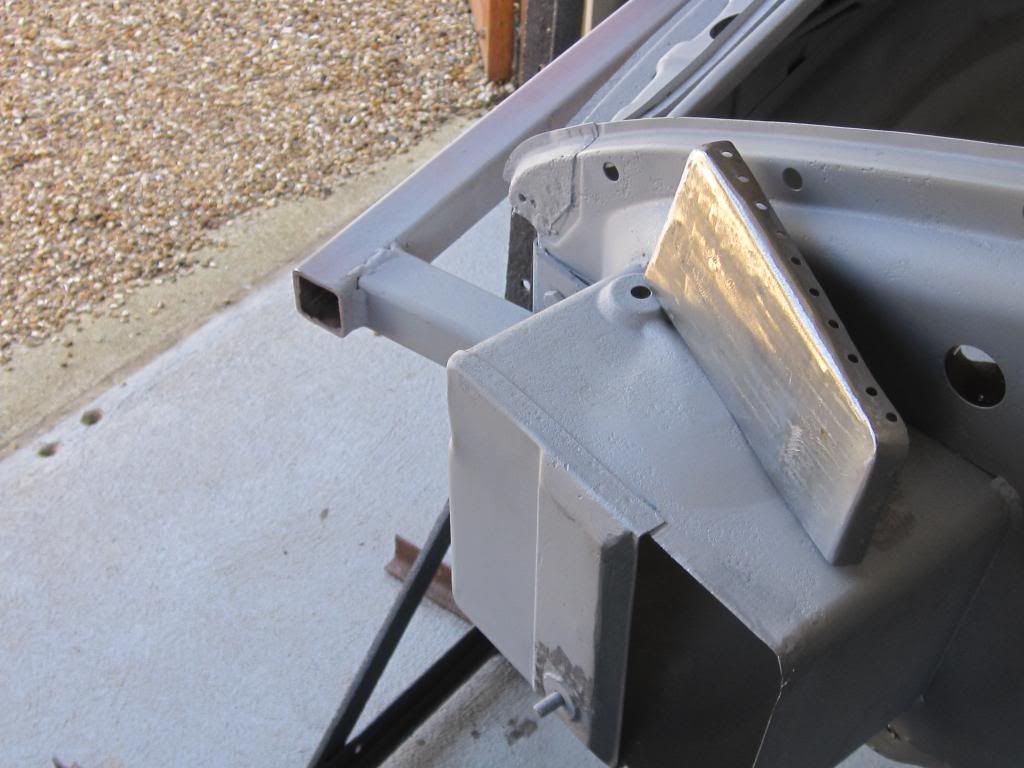
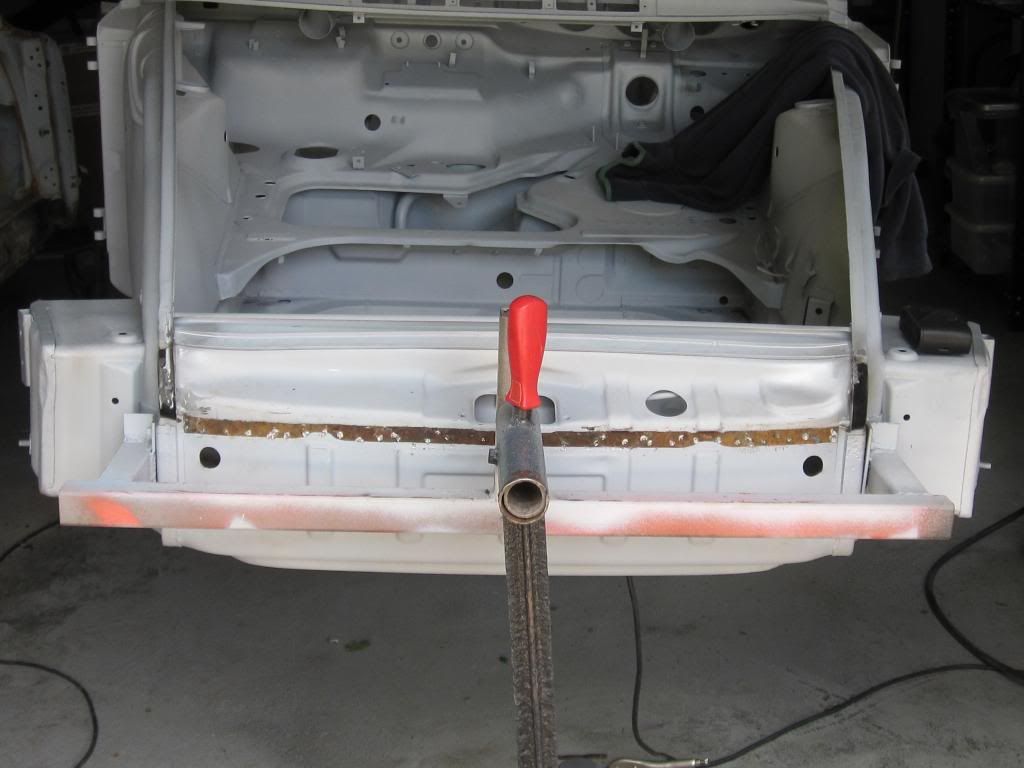
Replacement of the front lower slam panel lip, inner wing reinforcement plates, and a small flange repair to the slam panel completed the small repairs up front.

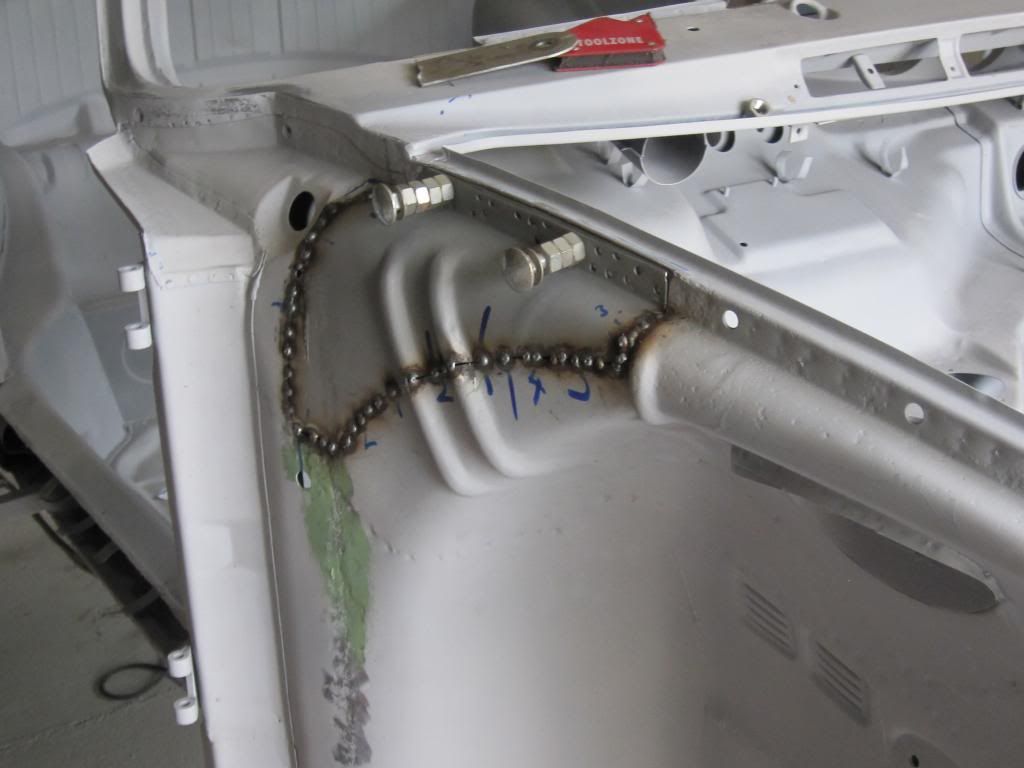
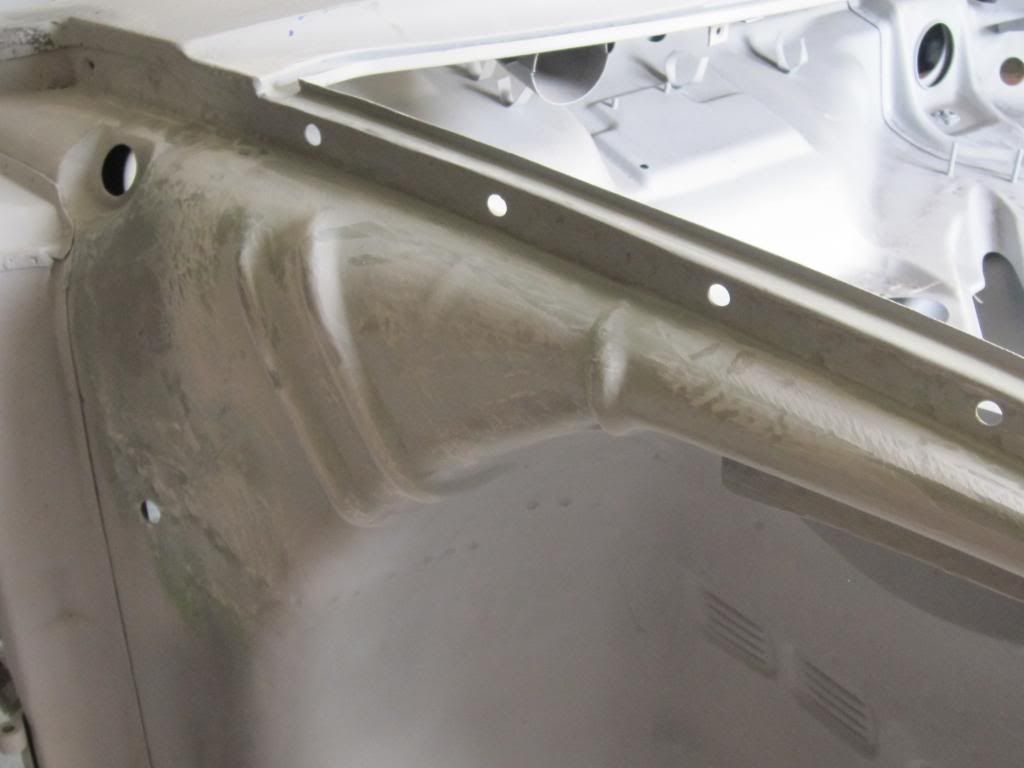
Moving towards the rear, the dreaded tinworm had a good munch on the top of the inner wing sections. Fortunately I had a couple of very nice sections that I had on a doner shell in the "Davecave " Cut, weld, 1st coat of epoxy mastic keyed for later.
[img]http:/
[url=http://s653.photobucket.com/user/centpres911/media/needlefeltSTRESTO001_zps44066159.jpg.html]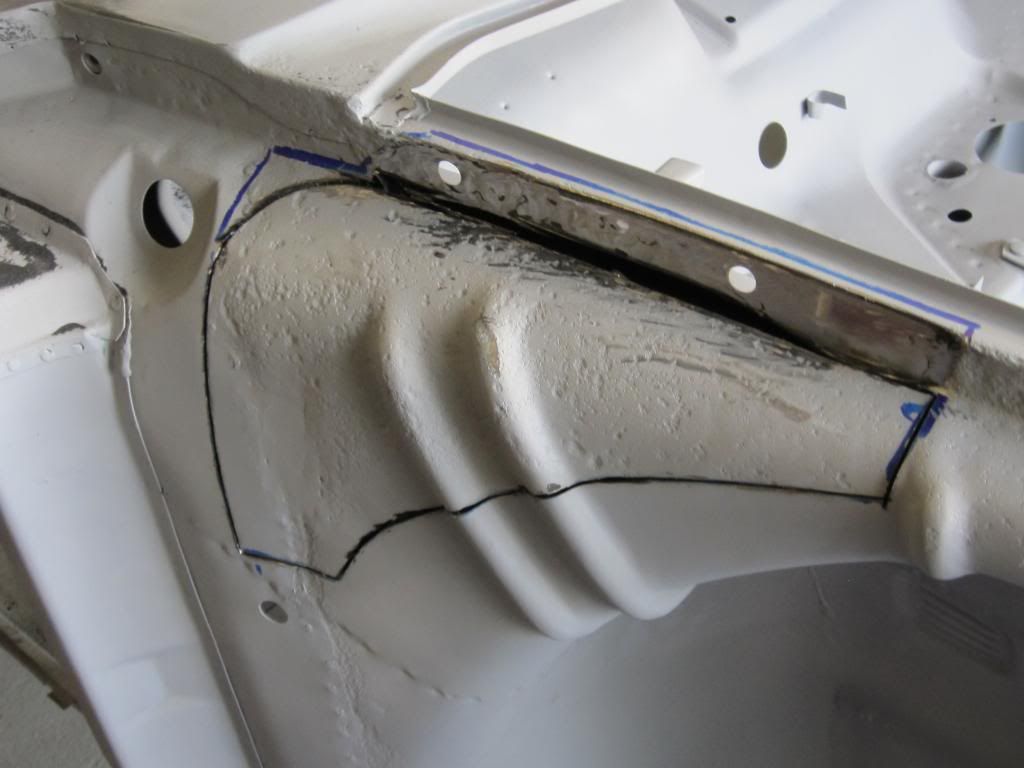
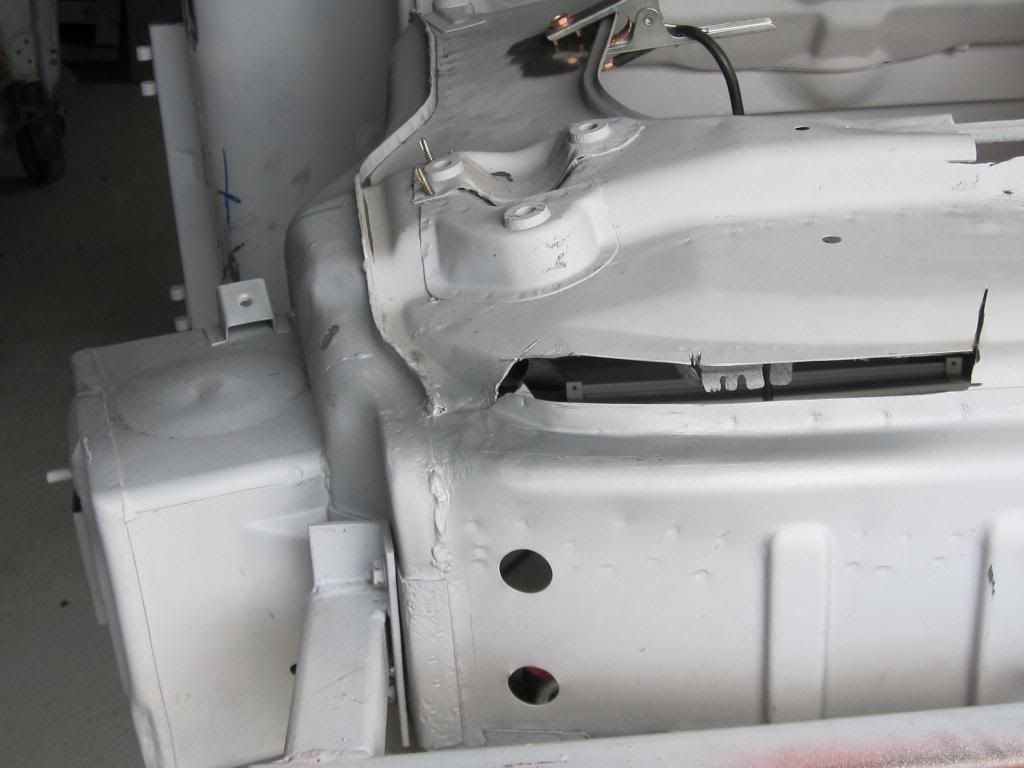
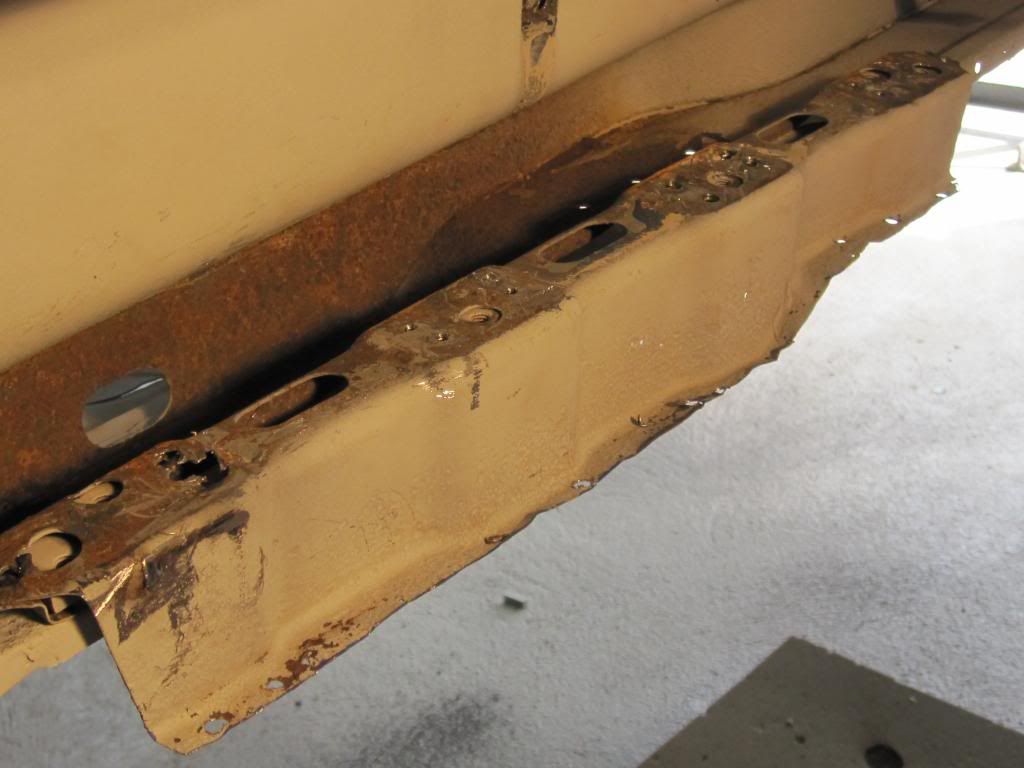
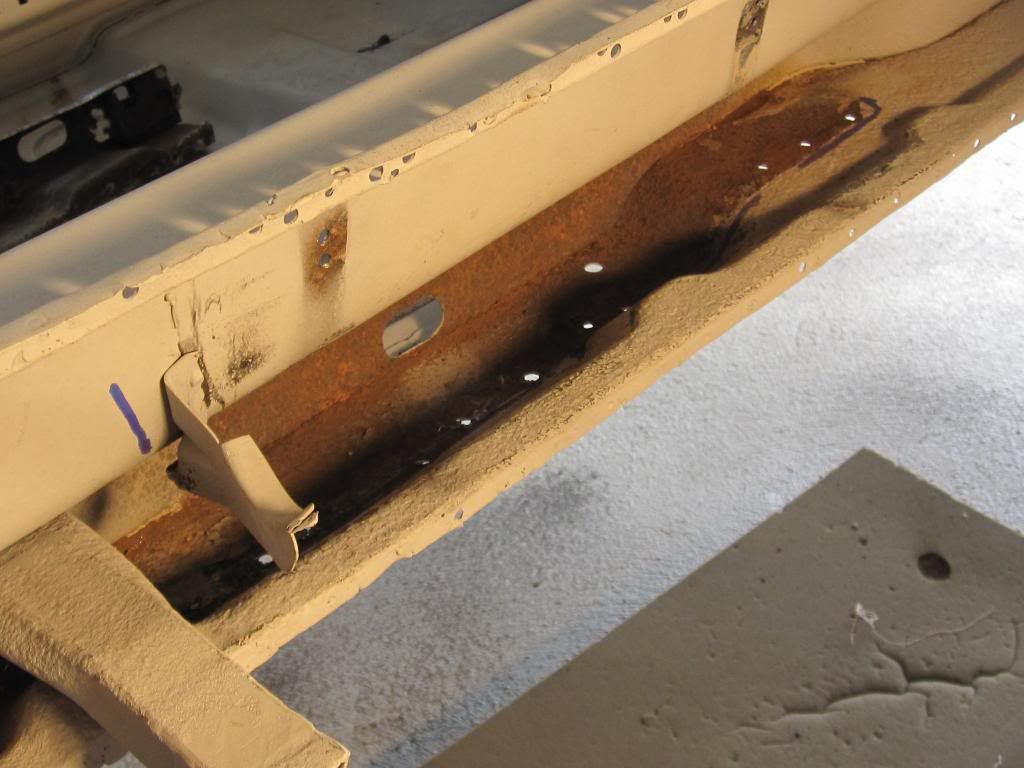
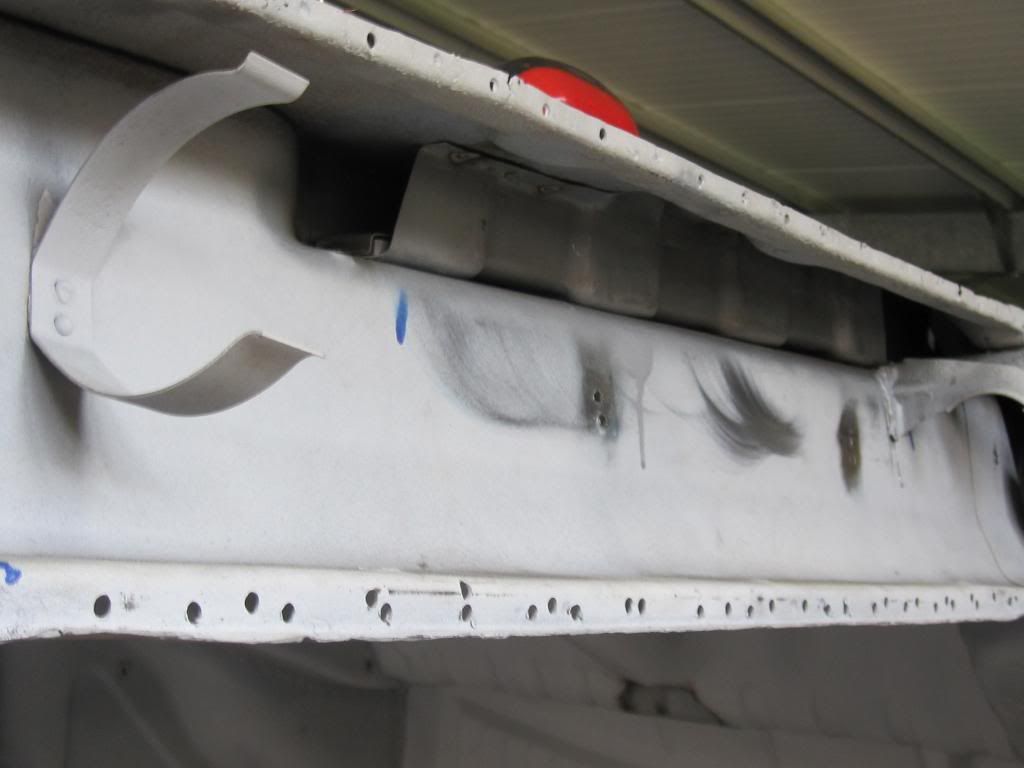
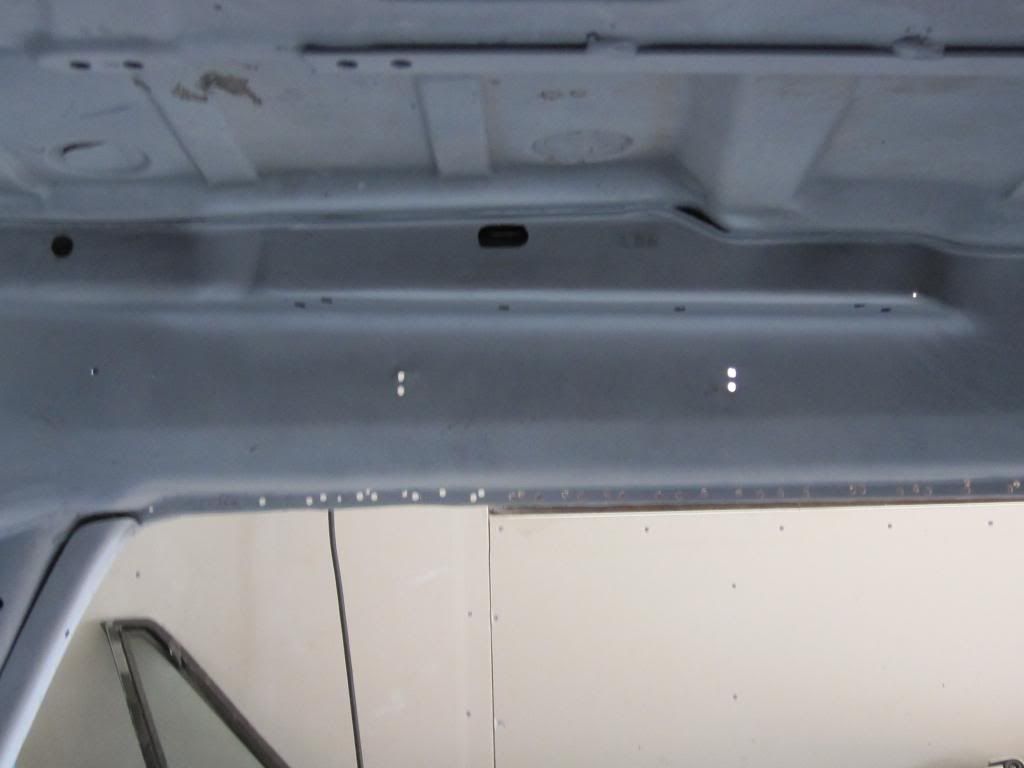
Next up was the seat supports within the inner sill structure. There's only one way to tackle these properly, take them out.! These tend to rot at there base as they are soaking in a pool of water within the trough that is the outer floor. A small fabricated section and this side was reinstated.
The inner support that has the oblong plastic plug was also removed and replaced.
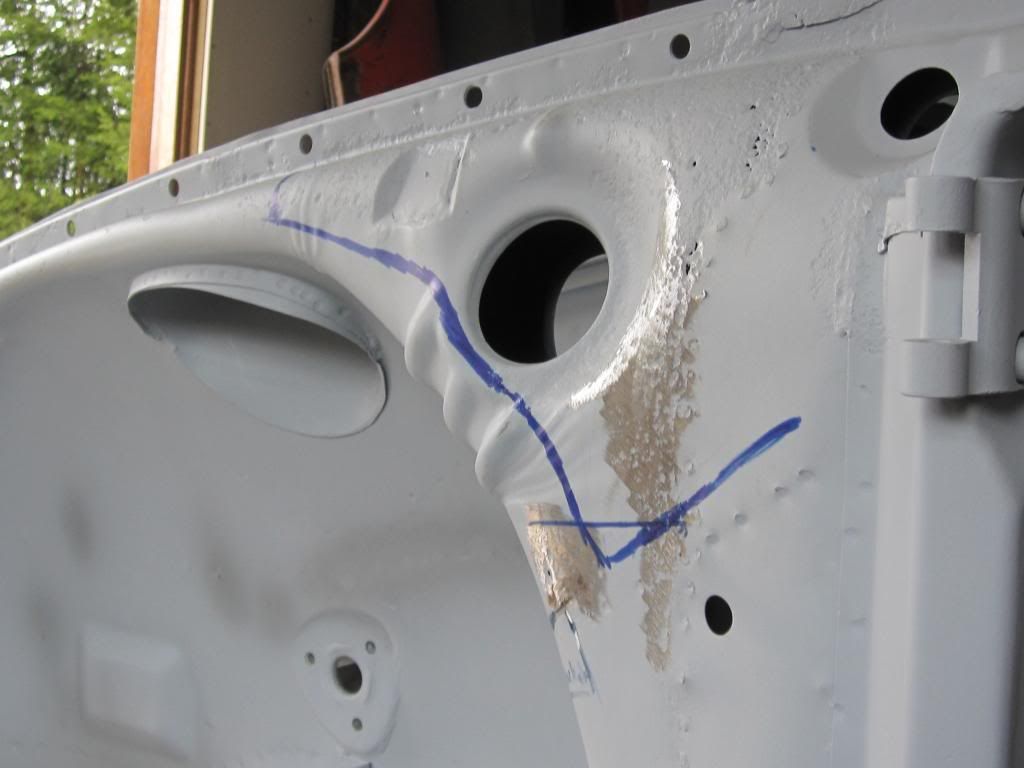
Next up was the previous owners repair to the base of the A-post. Although it looked ok on the surface, I had to replace his homemade section as the base that has the S oil lines is a different profile. I purchased the required A post bases from a company in Germany. The trial fit, price and quality of these parts are very good.
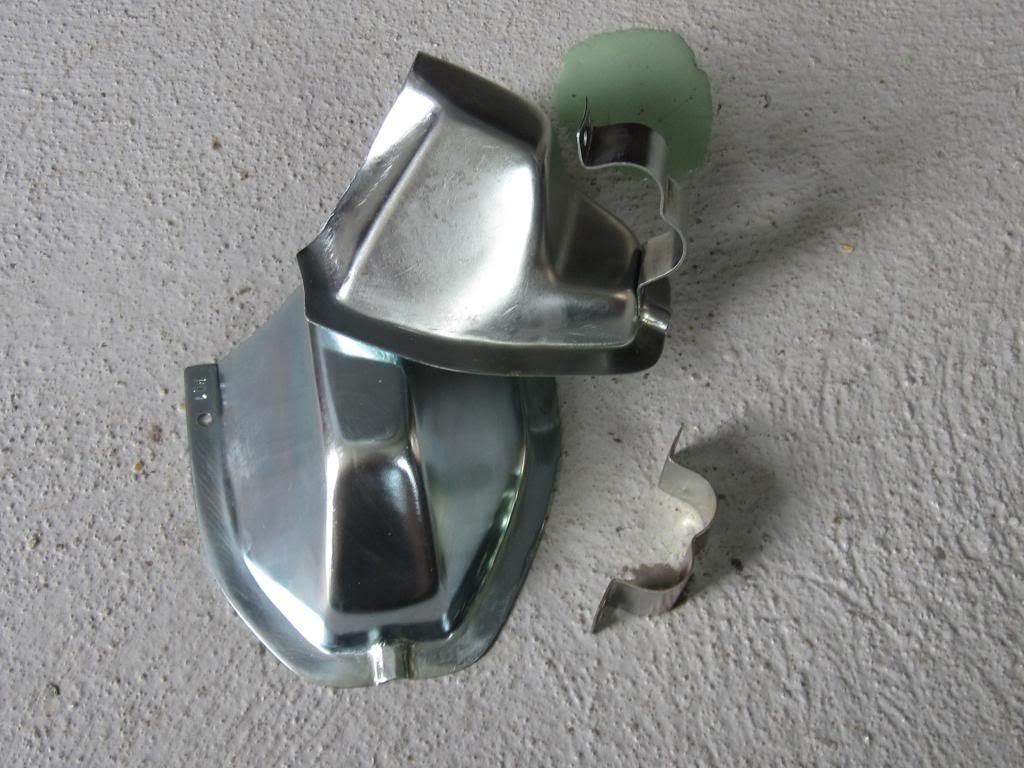
After seeing the rot the previous owner had left within the inner sill section I was keen to dig in to see what I would find. And a good job I did too ! As you can see in the pictures, he had tucked a new piece of metal behind a rotten section as he did not want to remove the A post.
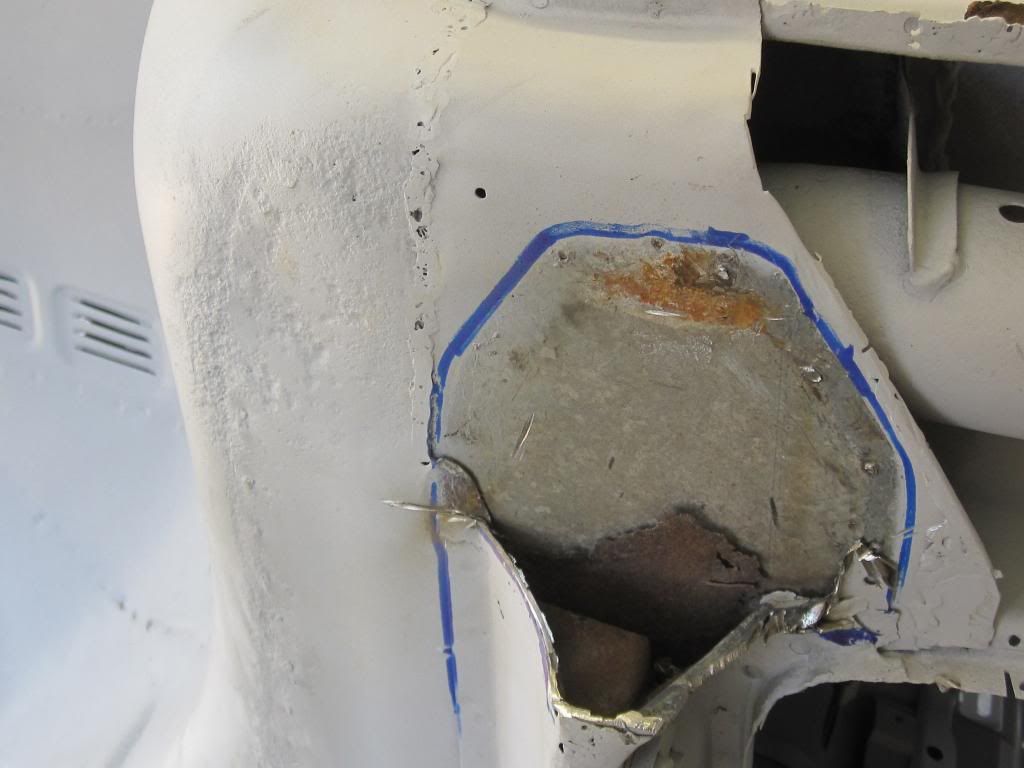
So off with a section of the post. There is about a 40mm section that you are able to cut on the post without buggering up the hinge or check strap reinforcement plates. Fortunately the scrap shell I have led me to the correct location. I also has a small section of tin-worm to the base of the inner wing adjacent to the post.
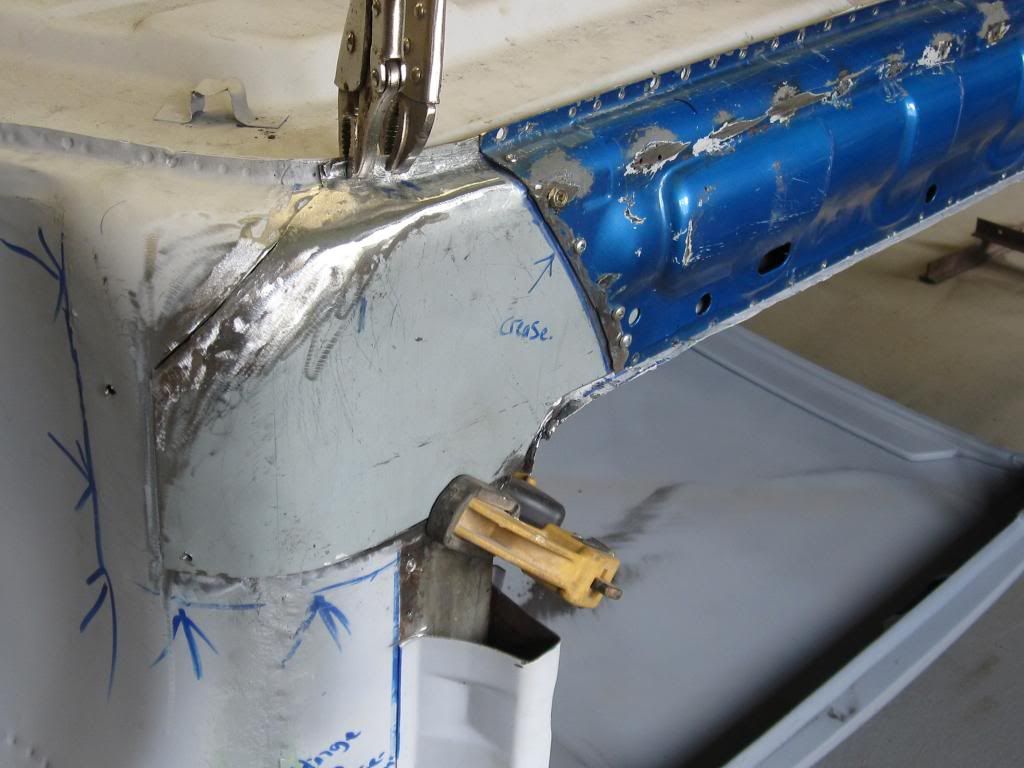
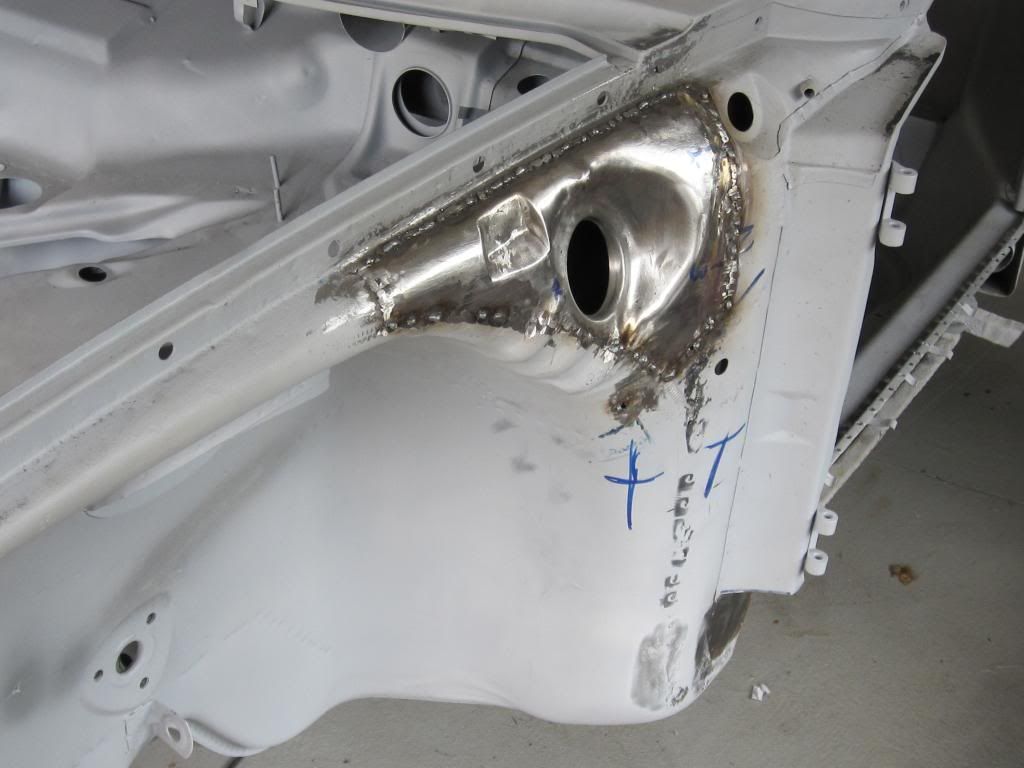
The trial fit in the last picture just about brings me up to date. I will get this A-post welded up and the inner sill coated with epoxy mastic prior to the big event next weekend. Same on the offside mid July then on to the Celette for the critical areas.
I must say I am enjoying it big time.! The last few months have also yielded the final missing parts of the project. Aluminium decklid. correct Needlefelt carpet, and the hard to find Scheel GT sliders. Now where can I find some nice German plexiglass. !
What of the original car ? I still have no further information if this car was a private or factory ST.
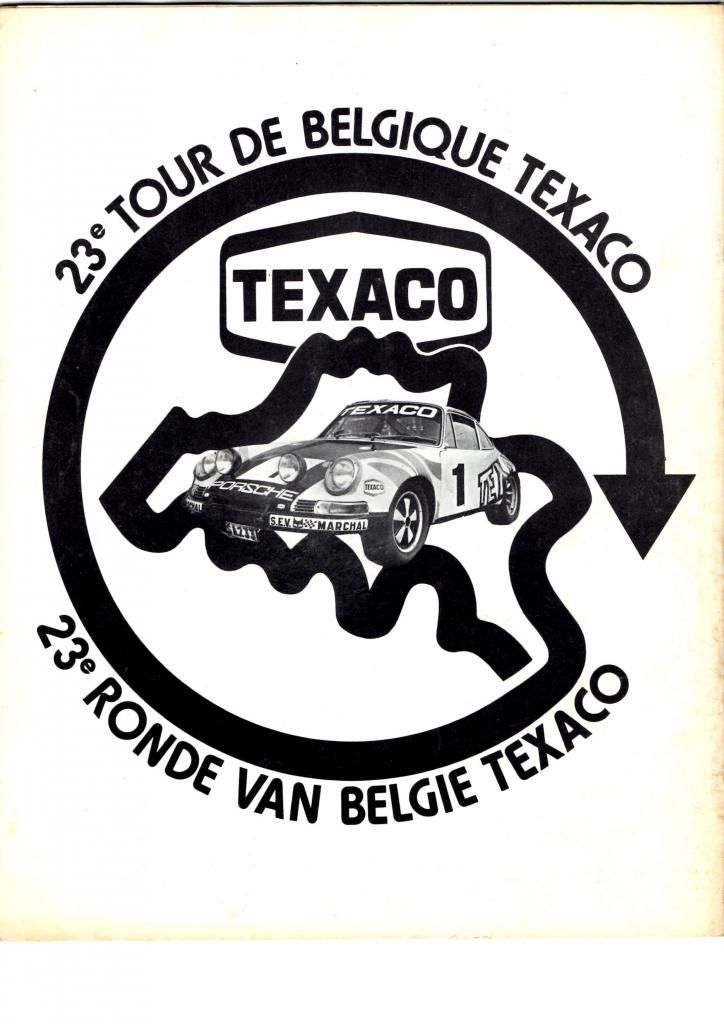
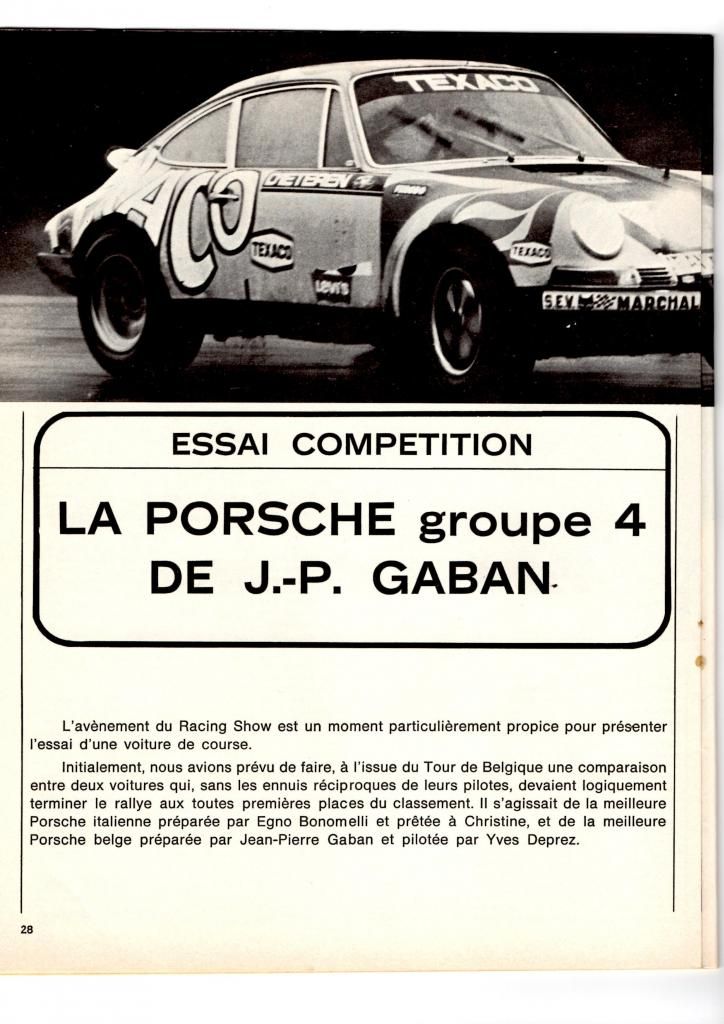
But I have found an interview with JP Gaban in a little known Belgium motor sport magazine that has given me more information on the car regarding it's construction. Plus a few options on the livery that can go on the car. Very eye catching !
Although we are "poshing it" not camping, hope to catch up with old and new friends at CLM next weekend at the DDK camp site. Can't wait.
Bon Voyage !
Dave
First up was the battery boxes. My aim was to try and save as much as the original factory metal as possible. The nearside box only required a small local repair.


The previous owner had started to do a few repairs to the shell prior to my purchase. His attempt to the offside battery box was not up to scratch.


Replacement of the front lower slam panel lip, inner wing reinforcement plates, and a small flange repair to the slam panel completed the small repairs up front.


Moving towards the rear, the dreaded tinworm had a good munch on the top of the inner wing sections. Fortunately I had a couple of very nice sections that I had on a doner shell in the "Davecave " Cut, weld, 1st coat of epoxy mastic keyed for later.
[img]http:/
[url=http://s653.photobucket.com/user/centpres911/media/needlefeltSTRESTO001_zps44066159.jpg.html]


Next up was the seat supports within the inner sill structure. There's only one way to tackle these properly, take them out.! These tend to rot at there base as they are soaking in a pool of water within the trough that is the outer floor. A small fabricated section and this side was reinstated.
The inner support that has the oblong plastic plug was also removed and replaced.


Next up was the previous owners repair to the base of the A-post. Although it looked ok on the surface, I had to replace his homemade section as the base that has the S oil lines is a different profile. I purchased the required A post bases from a company in Germany. The trial fit, price and quality of these parts are very good.

After seeing the rot the previous owner had left within the inner sill section I was keen to dig in to see what I would find. And a good job I did too ! As you can see in the pictures, he had tucked a new piece of metal behind a rotten section as he did not want to remove the A post.

So off with a section of the post. There is about a 40mm section that you are able to cut on the post without buggering up the hinge or check strap reinforcement plates. Fortunately the scrap shell I have led me to the correct location. I also has a small section of tin-worm to the base of the inner wing adjacent to the post.

The trial fit in the last picture just about brings me up to date. I will get this A-post welded up and the inner sill coated with epoxy mastic prior to the big event next weekend.
I must say I am enjoying it big time.! The last few months have also yielded the final missing parts of the project. Aluminium decklid. correct Needlefelt carpet, and the hard to find Scheel GT sliders. Now where can I find some nice German plexiglass. !
What of the original car ? I still have no further information if this car was a private or factory ST.
But I have found an interview with JP Gaban in a little known Belgium motor sport magazine that has given me more information on the car regarding it's construction. Plus a few options on the livery that can go on the car. Very eye catching !


Although we are "poshing it" not camping, hope to catch up with old and new friends at CLM next weekend at the DDK camp site. Can't wait.
Bon Voyage !
Dave
70T barn find...... to ST.
1998 C2 996 Kettle
1998 C2 996 Kettle
-
DustyM
- I need to get out more!
- Posts: 3109
- Joined: Tue Apr 21, 2009 4:12 pm
- Location: Killaloe, Ireland
- Contact:
Re: "Le Belgique" ST build.
Some very nice work there Dave, satisfying when it comes out well isn't it.
-
Bootsy

- Site admin and the Boss
- Posts: 23946
- Joined: Sat Nov 08, 2003 6:09 pm
- Location: Norwich
- Contact:
Re: "Le Belgique" ST build.
Great update and some lovely metal work there. Really like the Texaco livery - cool
Hopefully see you at CLM
Hopefully see you at CLM
1972 911T | 1994 993 Carrera | 1999 986 Boxster | 1990 T25 Camper
Vintage Heuer, Omega, Zenith and other vintage watches - http://www.heuerheritage.co.uk
Vintage Heuer, Omega, Zenith and other vintage watches - http://www.heuerheritage.co.uk
Re: "Le Belgique" ST build.
I've followed Dave's fabrication skills in detail over the past few months, and would say his attention to detail is very impressive.
No hidden agenda there Dave, promise
No hidden agenda there Dave, promise
-
Darren65
- Nurse, I think I need some assistance
- Posts: 7873
- Joined: Mon Dec 13, 2010 10:55 pm
- Location: North Wiltshire
- Contact:
Re: "Le Belgique" ST build.
Very impressive skills and great update …
…and there I was thinking you'd be building it wood!
Look forward to catching up next weekend.
…and there I was thinking you'd be building it wood!
Look forward to catching up next weekend.
Darren
72T 2.5... http://ddk-online.com/phpBB2/viewtopic.php?f=10&t=56183
73 2.4E ... http://ddk-online.com/phpBB2/viewtopic.php?f=10&t=44242
77 Carrera 3.0...to 74 3.0RS ... http://ddk-online.com/phpBB2/viewtopic.php?f=28&t=63389
72T 2.5... http://ddk-online.com/phpBB2/viewtopic.php?f=10&t=56183
73 2.4E ... http://ddk-online.com/phpBB2/viewtopic.php?f=10&t=44242
77 Carrera 3.0...to 74 3.0RS ... http://ddk-online.com/phpBB2/viewtopic.php?f=28&t=63389